
Articles
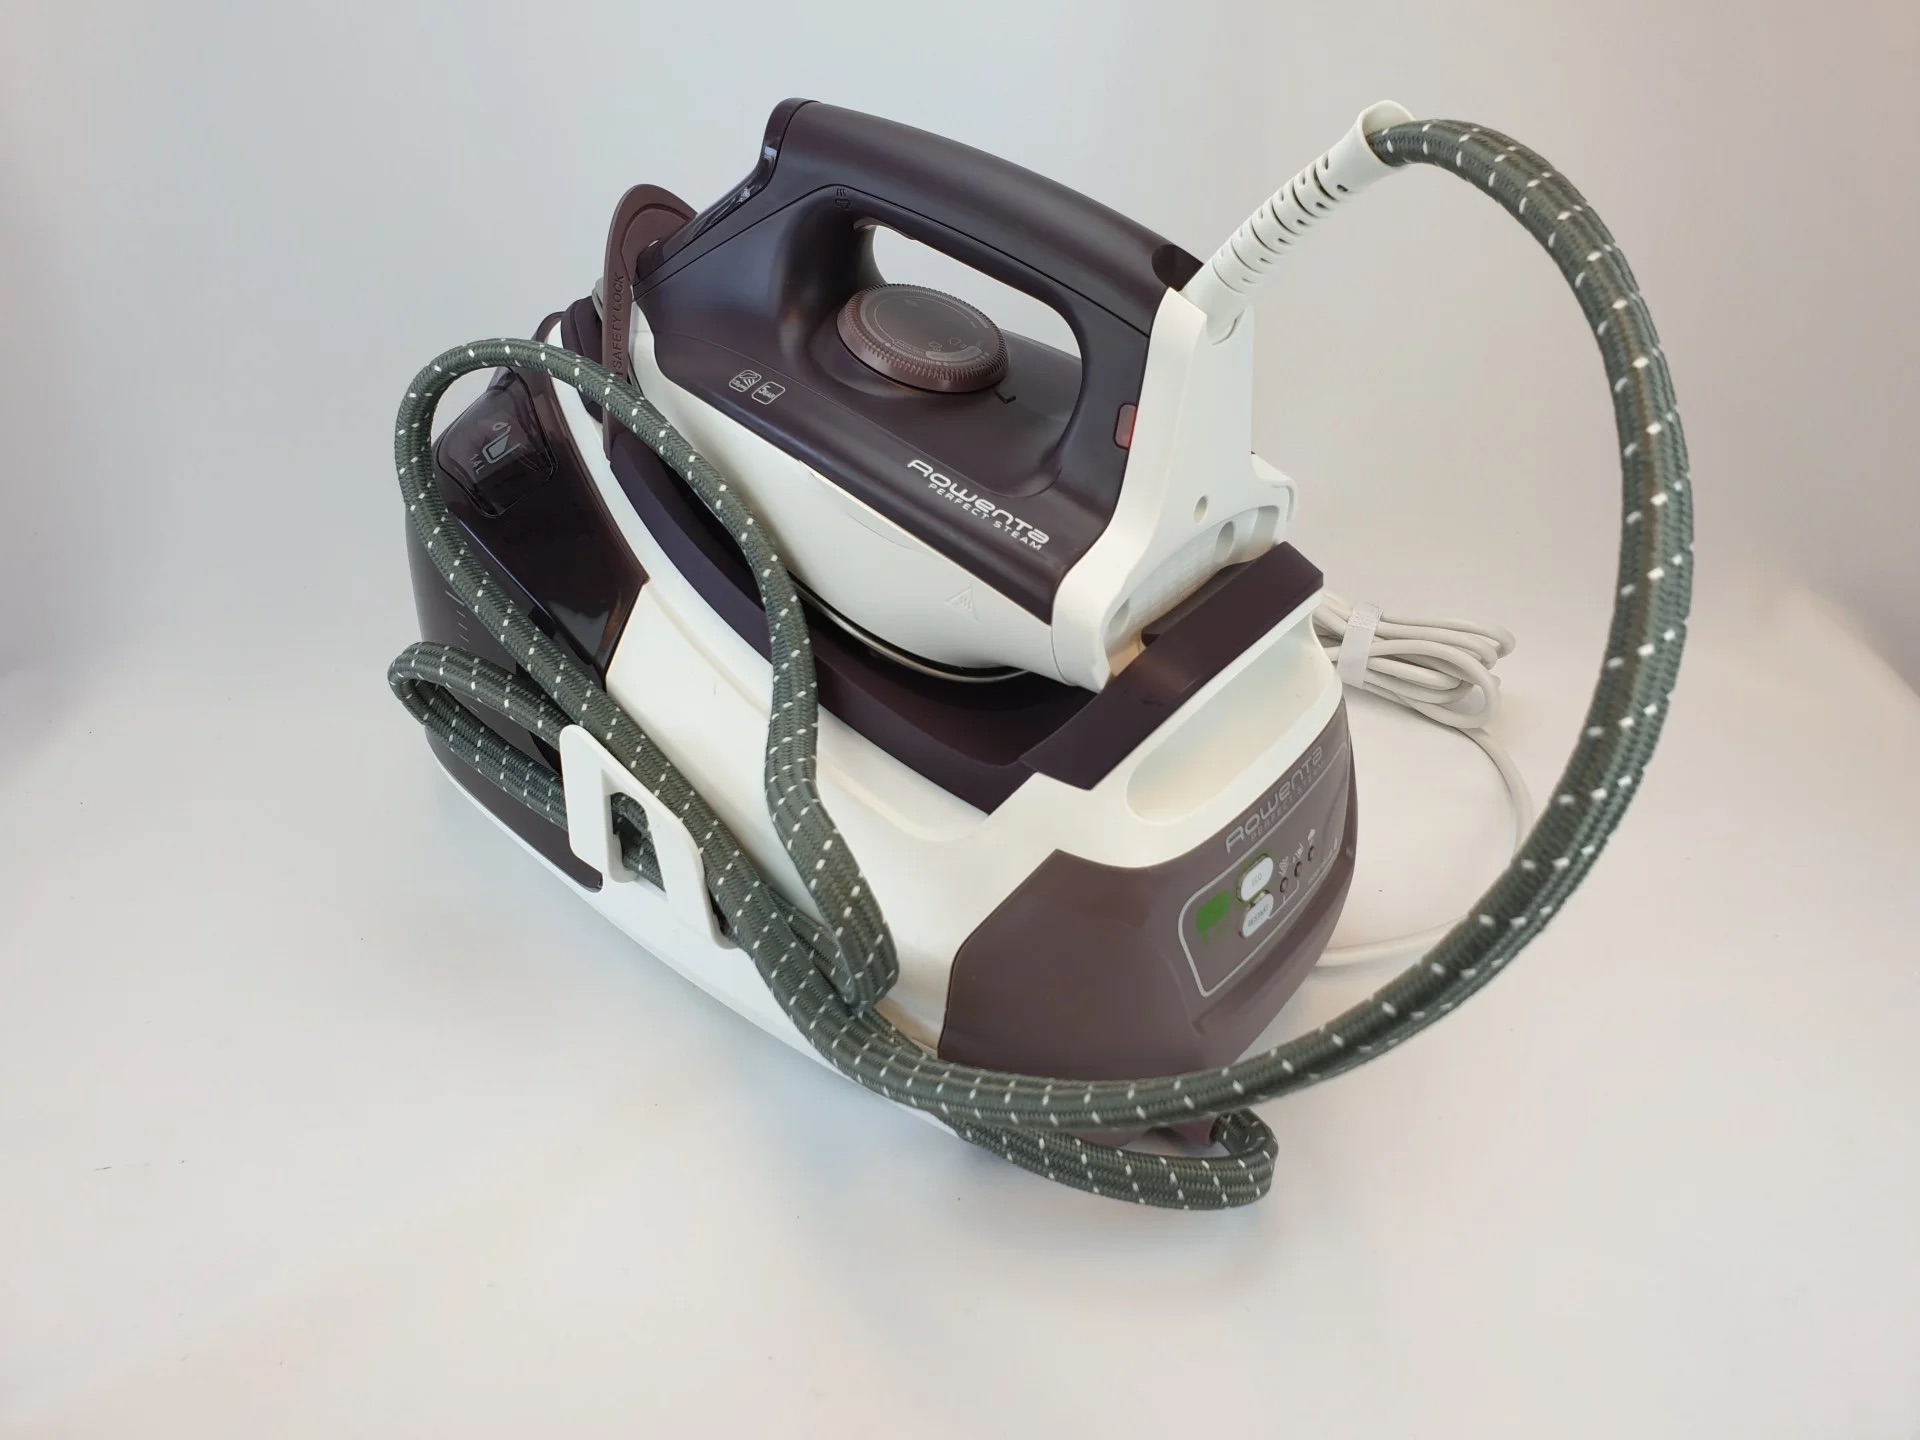
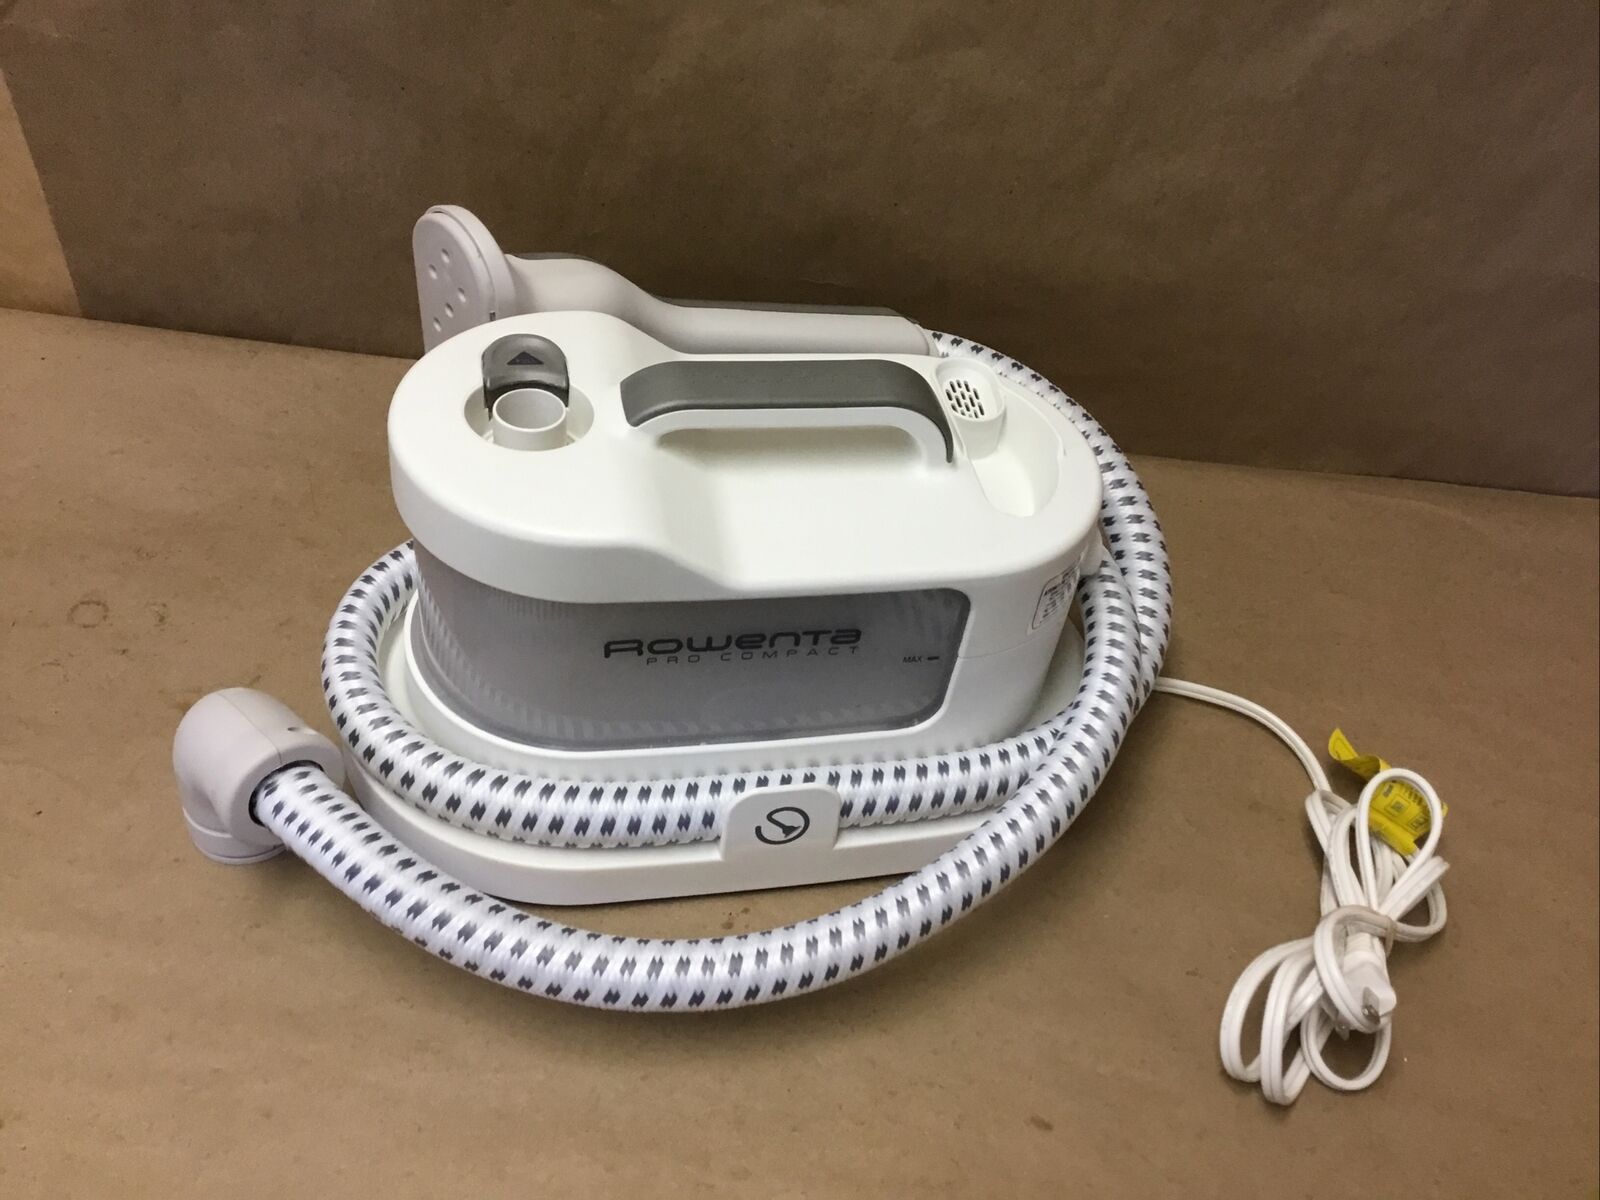
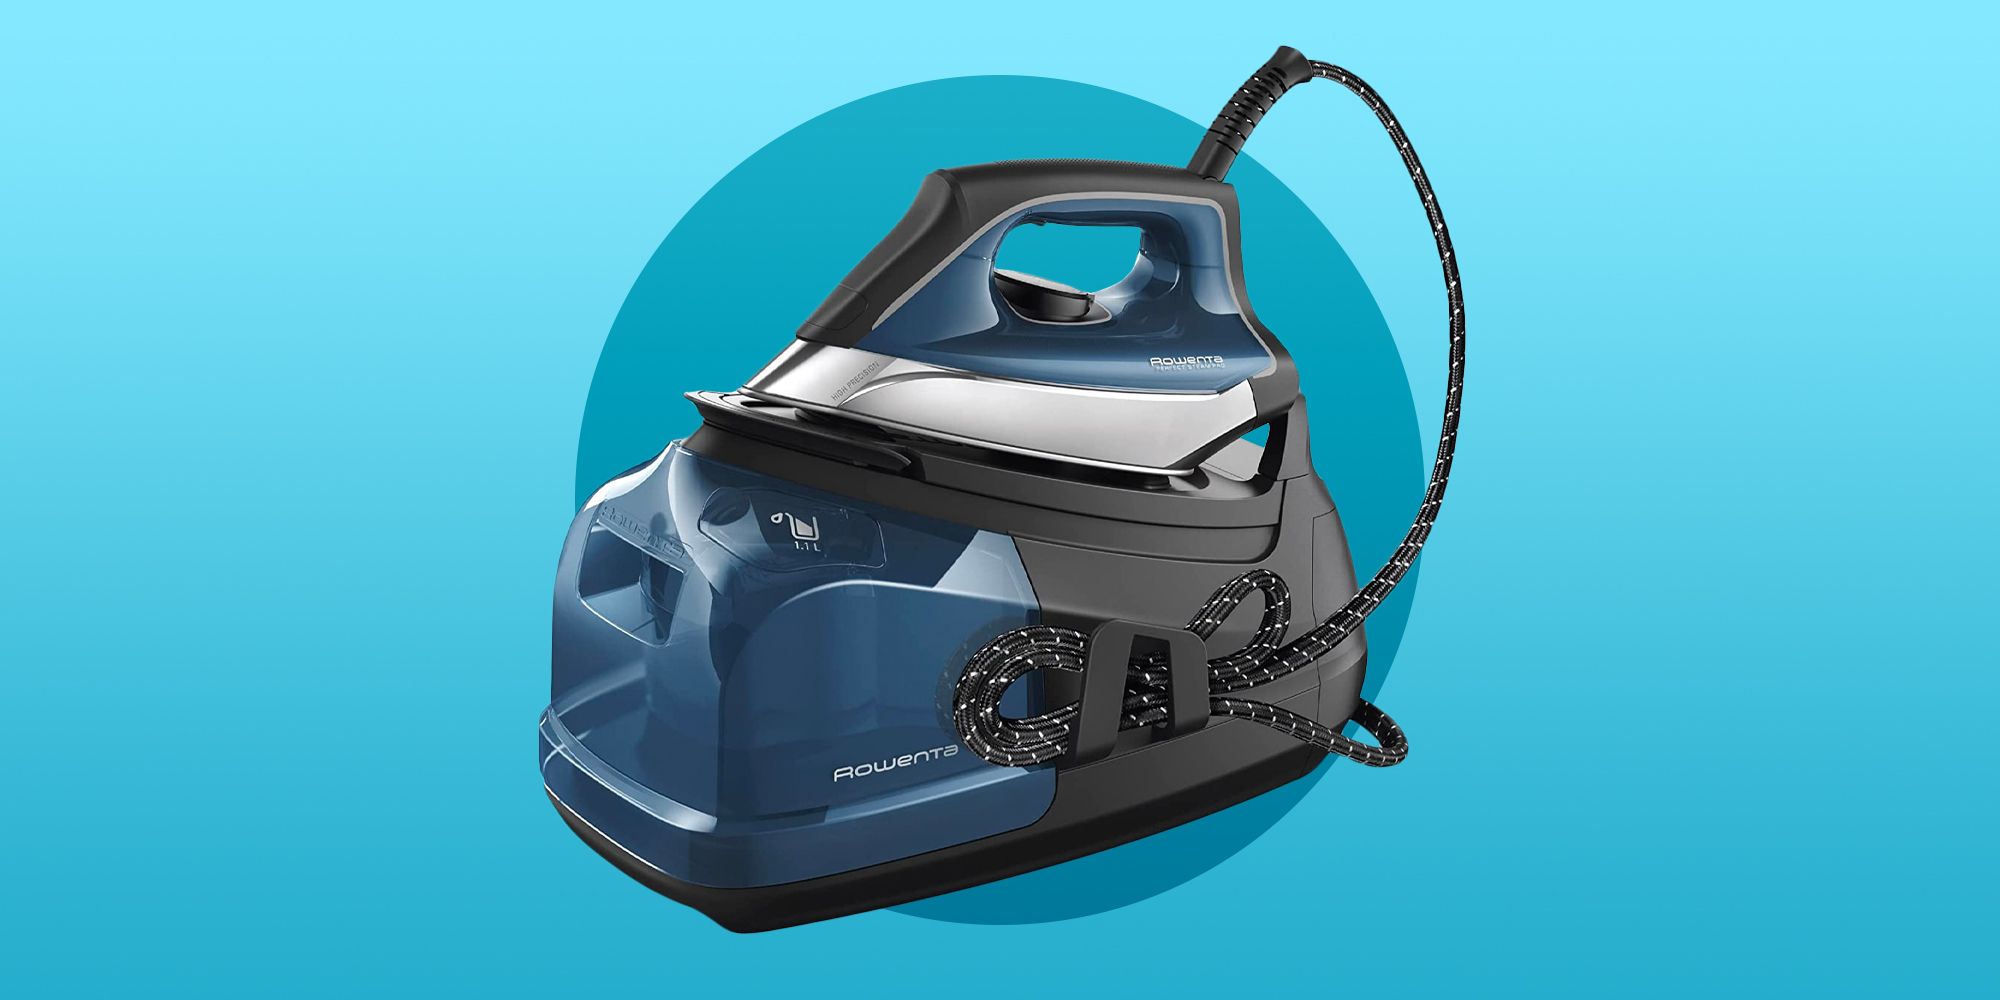
How To Clean Rowenta Pro Compact Steamer
Modified: February 28, 2024
Discover the best articles on how to clean your Rowenta Pro Compact Steamer. Get expert tips and advice for maintaining the perfect steaming experience.
(Many of the links in this article redirect to a specific reviewed product. Your purchase of these products through affiliate links helps to generate commission for Storables.com, at no extra cost. Learn more)
Introduction
Welcome to this comprehensive guide on how to clean your Rowenta Pro Compact Steamer. If you own a Rowenta Pro Compact Steamer, you know how convenient and efficient it is for removing wrinkles from your clothes and fabrics. However, over time, steamers can become clogged with mineral deposits and debris, affecting their performance. Regular maintenance and cleaning are crucial to keep your steamer in optimal condition.
In this article, we will walk you through a step-by-step process to effectively clean your Rowenta Pro Compact Steamer. Following these instructions will not only prolong the lifespan of your steamer but also ensure that it continues to deliver excellent steam performance.
Before we dive into the cleaning process, it’s important to familiarize yourself with some safety precautions to ensure your well-being and the proper handling of the steamer.
Key Takeaways:
- Regularly cleaning and maintaining your Rowenta Pro Compact Steamer is crucial for ensuring its longevity and optimal performance, allowing you to enjoy wrinkle-free clothes and fabrics with ease.
- By following the step-by-step cleaning process, incorporating safety precautions, and using the recommended materials, you can keep your steamer in excellent working condition and prolong its lifespan.
Read more: How To Clean A Rowenta Steamer
Safety Precautions
Before starting the cleaning process, it’s essential to prioritize your safety. Follow these safety precautions to avoid any accidents or damage:
- Unplug the steamer: Always make sure the steamer is unplugged from the power source before performing any cleaning tasks. This will prevent electric shocks and potential accidents.
- Allow the steamer to cool down: Give the steamer some time to cool down after use before you begin cleaning it. Hot surfaces can cause burns and injuries.
- Avoid contact with hot surfaces: When handling the steamer during or after use, be cautious of any hot surfaces, especially the steam nozzle. It’s crucial to let the steamer cool down completely before touching it.
- Read the user manual: Familiarize yourself with the manufacturer’s instructions and guidelines provided in the user manual. This will ensure that you follow the correct cleaning and maintenance procedures specific to your Rowenta Pro Compact Steamer model.
- Use the steamer in a well-ventilated area: Steamers produce steam and heat, and it’s important to use them in a well-ventilated area to prevent the accumulation of humidity. Adequate ventilation will also help dissipate any cleaning agents you may use during the cleaning process.
- Wear protective gloves: To protect your hands from any cleaning agents or potential hot surfaces, it’s advisable to wear rubber or latex gloves during the cleaning process.
- Keep children and pets away: Ensure that children and pets are kept at a safe distance from the steamer while cleaning. This will prevent any accidents or injuries.
- Do not immerse the steamer in water: Never submerge the entire steamer in water or any other liquid. Rowenta Pro Compact Steamers are not designed to be waterproof, and immersing them in water can cause damage.
By adhering to these safety precautions, you can safeguard yourself and ensure a smooth and risk-free cleaning process for your Rowenta Pro Compact Steamer.
Materials Needed
Before you begin cleaning your Rowenta Pro Compact Steamer, gather the following materials:
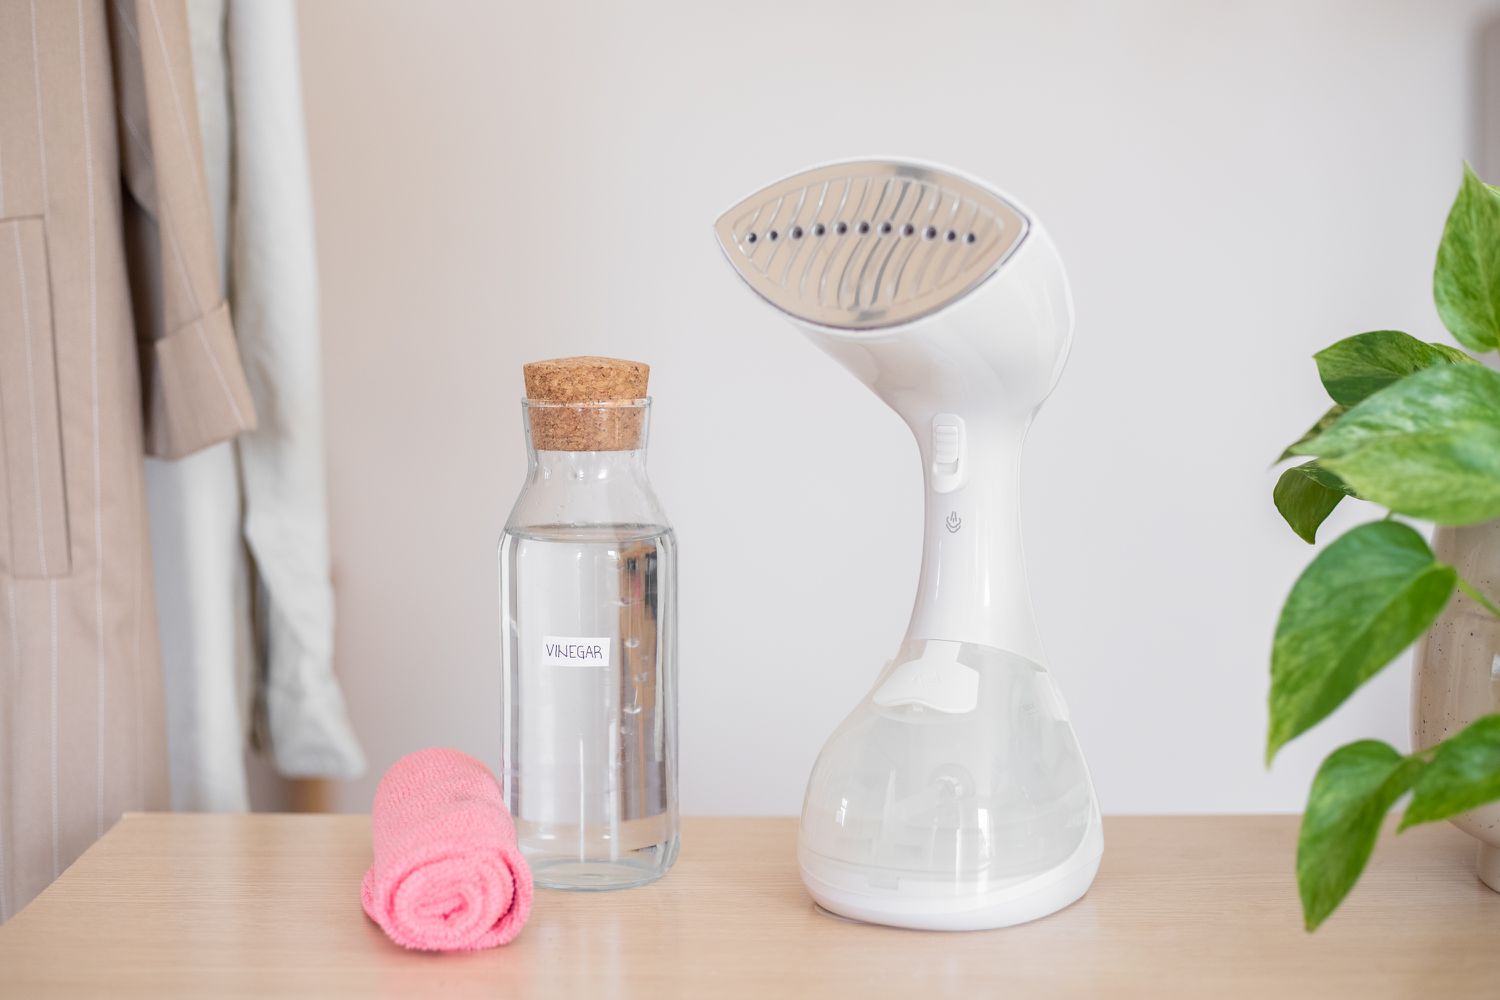
- Distilled water: It’s recommended to use distilled water for filling the water tank of your steamer. Distilled water contains fewer impurities and minerals, reducing the chances of mineral buildup in your steamer.
- Vinegar or citric acid: Vinegar or citric acid can be used as a natural cleaning agent to remove mineral deposits and build-up. Both are readily available and effective in descaling your steamer.
- Clean cloth or towel: You will need a clean and absorbent cloth or towel to wipe down and dry the surfaces of the steamer.
- Cotton swabs: Cotton swabs are useful for cleaning hard-to-reach areas and crevices of the steamer.
- Mild detergent: If necessary, a mild detergent can be used to clean the exterior surfaces of the steamer, especially if they are stained or soiled.
- Soft-bristle brush: A soft-bristle brush can be helpful for gently scrubbing away any stubborn stains or residues on the steamer’s housing or nozzle.
These materials will ensure a thorough and effective cleaning process for your Rowenta Pro Compact Steamer. Now that you have all the necessary materials, let’s move on to the step-by-step cleaning instructions.
Step 1: Prepare the Steamer
Before you start cleaning your Rowenta Pro Compact Steamer, it’s essential to prepare it properly:
- Ensure the steamer is unplugged: Make sure the steamer is disconnected from the power source to avoid any electrical accidents.
- Allow the steamer to cool down: Give the steamer enough time to cool down after use to prevent any burns or injuries.
- Remove any attachments: If your steamer has any removable attachments, such as brush heads or lint brushes, detach them from the steamer.
- Empty the water tank: Ensure that there is no water left in the water tank. If there’s any leftover water, carefully empty it into a sink or drain.
- Inspect the steamer: Take a close look at the steamer to identify any visible dirt, debris, or mineral deposits on its surfaces.
By following these preparation steps, you will ensure a safe and effective cleaning process for your Rowenta Pro Compact Steamer. Once you have prepared the steamer, you can move on to the next step, which is filling the water tank.
Step 2: Fill the Water Tank
Now that you have prepared your Rowenta Pro Compact Steamer, it’s time to fill the water tank. Follow these steps:
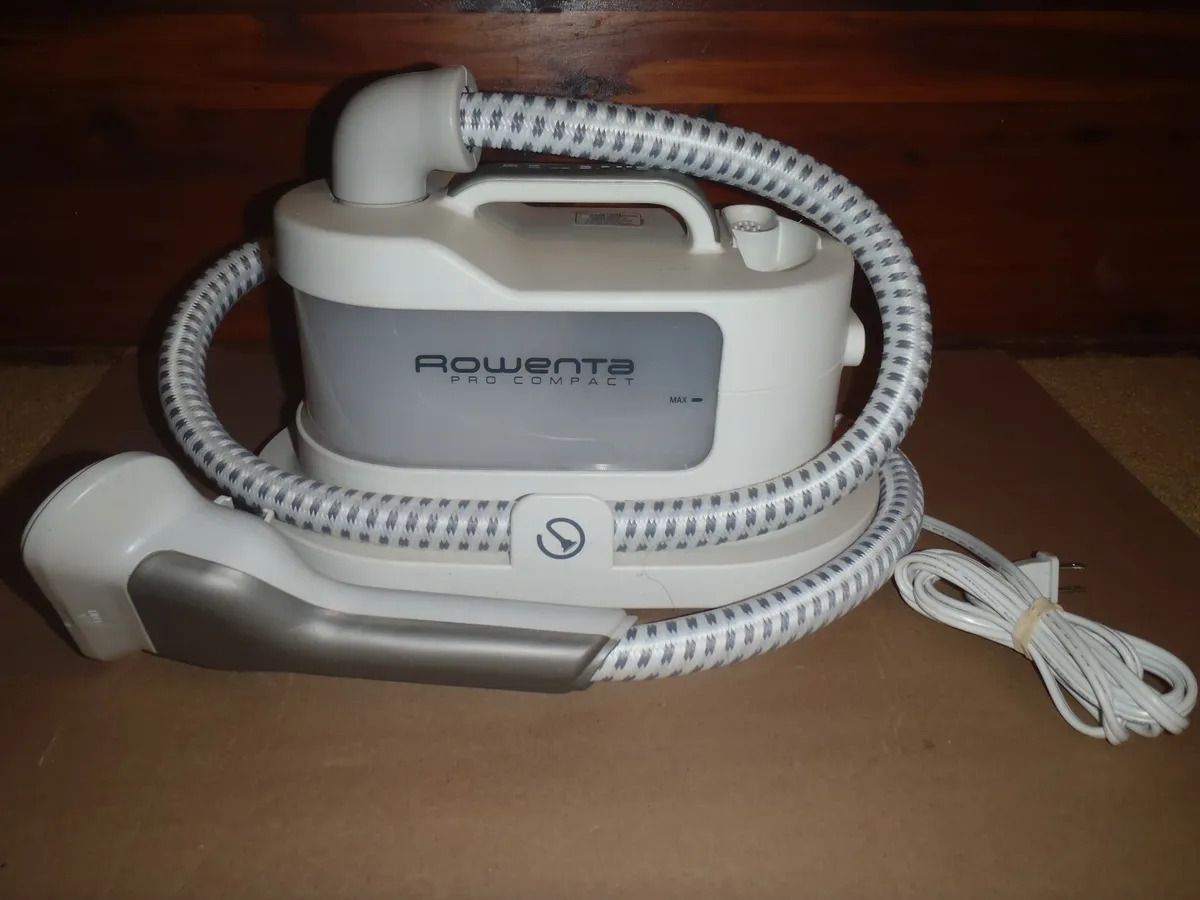
- Locate the water tank: The water tank of the steamer is typically located at the base or back of the unit. Refer to the user manual for specific instructions.
- Open the water tank cap: Remove the water tank cap by twisting it counterclockwise. This will reveal the opening where you will pour in the water.
- Use distilled water: It is recommended to use distilled water to fill the water tank. Distilled water has fewer impurities and minerals, reducing the chances of mineral buildup in your steamer.
- Pour the water into the tank: Slowly pour the distilled water into the water tank, taking care not to overfill it. Leave some space at the top to prevent water from overflowing when the steamer is in use.
- Securely close the water tank cap: Once the water tank is filled to the desired level, firmly twist the water tank cap clockwise to secure it in place.
Remember, it’s important to use distilled water to minimize mineral buildup within the steamer. Using tap water or hard water can lead to clogged nozzles and decreased steam performance over time. Once the water tank is filled, you can proceed to the next step, which is powering on the steamer.
Read more: How To Use Rowenta Steamer
Step 3: Power On the Steamer
After filling the water tank of your Rowenta Pro Compact Steamer, you’re ready to power it on. Follow these steps:
- Ensure the steamer is still unplugged from the power source.
- Locate the power switch: The power switch is usually located on the front or side of the steamer. Refer to the user manual for the exact location on your model.
- Plug in the steamer: Connect the steamer to a power outlet and make sure it is securely plugged in.
- Switch on the steamer: Press the power switch to turn on the steamer. You may need to wait a few moments for it to heat up and generate steam.
- Check the indicator light: Many steamers have an indicator light that will illuminate when the steamer is powered on and heating up.
- Wait for the ready signal: Depending on the model, your steamer may have a ready signal, such as a beep or a light, to indicate when it is ready for use.
Ensure that you follow the specific instructions provided in your user manual for powering on the steamer. Once the steamer is powered on and ready, you can proceed to the next step, which is steaming your clothes.
To clean a Rowenta Pro Compact Steamer, mix equal parts of water and white vinegar, then fill the steamer’s water tank and let it sit for an hour. Afterward, empty the tank, rinse it with clean water, and wipe the exterior with a damp cloth.
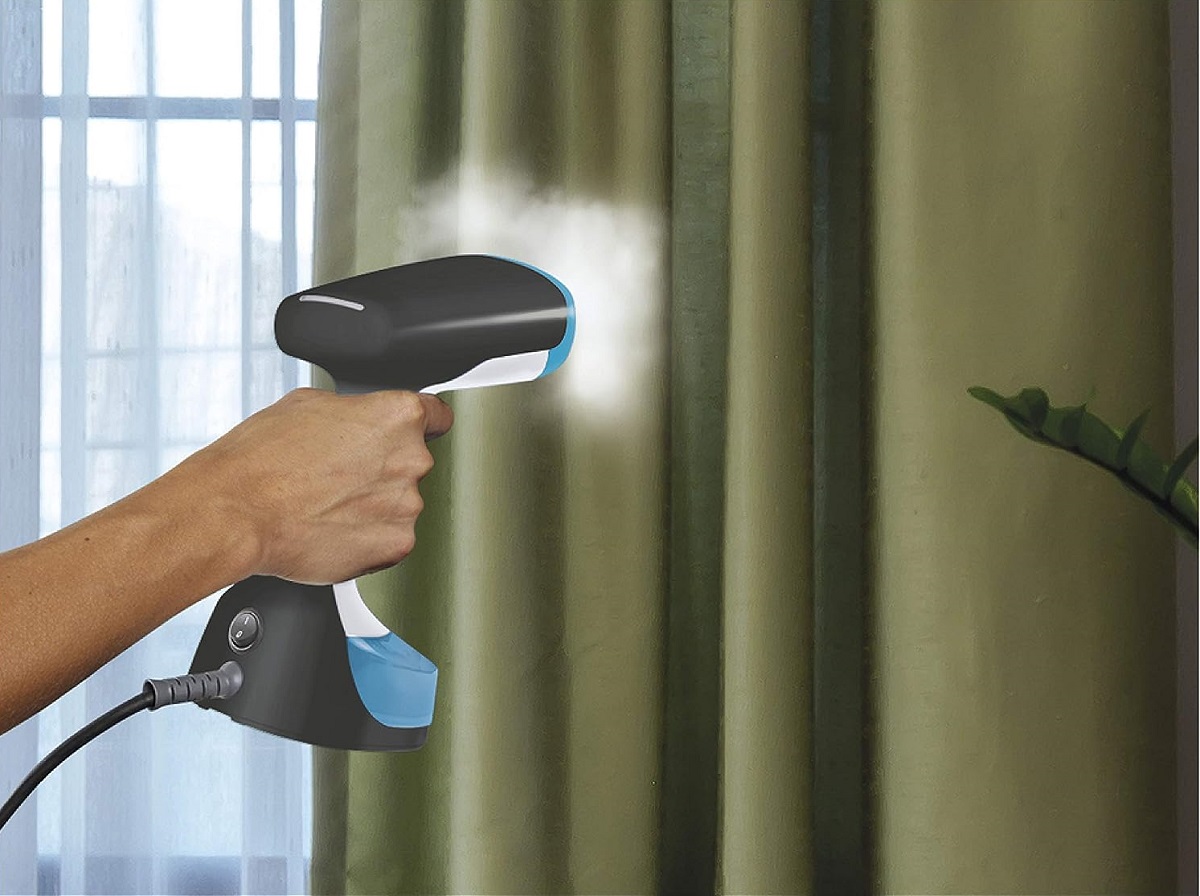
Step 4: Steam Your Clothes
Now that your Rowenta Pro Compact Steamer is powered on and ready, it’s time to start steaming your clothes. Follow these steps:
- Choose the appropriate attachment: Depending on your garment and the desired steaming technique, select the appropriate attachment for your steamer. Common attachments include fabric brush heads, crease attachments, and lint brushes.
- Hang your clothes: Find a suitable hanging rod or garment rack where you can hang the clothes you want to steam. Make sure there is enough space around the garment for steam to circulate.
- Hold the steamer properly: Hold the steamer firmly but gently, making sure your hand is not blocking the steam nozzle.
- Start steaming: Slowly move the steamer over the fabric, allowing the steam to penetrate and relax the wrinkles. Hold the steamer about 1-2 inches away from the garment surface for the best results.
- Steam in a downward motion: Move the steamer in a downward motion to help smooth out the wrinkles. For stubborn wrinkles, you can hold the steamer in one spot for a few seconds to target them directly.
- Repeat as necessary: Continue steaming your clothes, section by section, until all the wrinkles are eliminated, and the fabric looks refreshed.
- Hang the steamed clothes: Once a section of clothing is steamed, hang it up immediately to prevent the wrinkles from reappearing.
Remember to exercise caution while steaming your clothes, as the steam can be hot. Avoid direct contact between the steamer and your skin to prevent burns. Additionally, check the manufacturer’s guidelines for any specific recommendations on steaming different types of fabrics.
Now that you’ve steamed your clothes, it’s time to move on to the next step, which involves emptying the water tank.
Step 5: Empty the Water Tank
After you’ve finished steaming your clothes with your Rowenta Pro Compact Steamer, it’s important to empty the water tank to prevent any stagnant water or mineral buildup. Follow these steps to empty the water tank:
- Make sure the steamer is unplugged from the power source to ensure your safety.
- Allow the steamer to cool down for a few minutes before proceeding.
- Locate the water tank of the steamer, usually located at the base or back of the unit.
- Remove the water tank cap by twisting it counterclockwise to access the opening.
- Hold the steamer over a sink or a suitable draining area to avoid any water spillage.
- Gently tilt the steamer to pour out the remaining water from the tank.
- Once the water is emptied, inspect the tank for any mineral deposits or debris.
- If you notice any buildup, rinse the tank with clean distilled water to remove any residue.
- Dry the water tank thoroughly with a clean cloth or towel before reattaching the tank cap.
By regularly emptying the water tank, you can prevent mineral buildup and ensure optimal performance from your Rowenta Pro Compact Steamer. Now that the water tank is empty, let’s move on to the next step, which involves cleaning the steamer nozzle.
Step 6: Clean the Steamer Nozzle
The steamer nozzle plays a vital role in delivering powerful steam to remove wrinkles from your clothes. Cleaning the steamer nozzle is crucial to maintain its efficiency and prevent clogging. Follow these steps to clean the steamer nozzle of your Rowenta Pro Compact Steamer:
- Make sure the steamer is unplugged and has cooled down completely.
- Locate the nozzle of the steamer, which is the part that emits steam.
- Using a cotton swab dipped in vinegar or citric acid, gently clean the nozzle area.
- Carefully remove any residue or mineral buildup that may have accumulated on the nozzle.
- For stubborn deposits, you can lightly scrub the nozzle with a soft-bristle brush.
- Once you have cleaned the nozzle, wipe it down with a clean cloth or towel to remove any remaining vinegar or citric acid.
By regularly cleaning the steamer nozzle, you can ensure a steady flow of steam and maintain the performance of your Rowenta Pro Compact Steamer. Now that the nozzle is clean, let’s move on to the next step, which involves cleaning the steamer housing.
Read more: How To Put Water In Rowenta Steamer
Step 7: Clean the Steamer Housing
To keep your Rowenta Pro Compact Steamer in top condition, it’s important to clean the exterior surfaces and housing. Follow these steps to effectively clean the steamer housing:
- Ensure the steamer is still unplugged from the power source and has cooled down.
- Dampen a soft cloth or sponge with water and mild detergent.
- Gently wipe down the exterior surfaces of the steamer, paying attention to any stains or dirt buildup.
- For stubborn stains, you can use a soft-bristle brush and a mild detergent to scrub the affected area.
- If there are areas that are difficult to reach, use a cotton swab or a toothbrush to clean the crevices and tight spots.
- Rinse the cloth or sponge thoroughly to remove any detergent residue.
- Wipe down the steamer housing once again with a clean, damp cloth to remove any remaining detergent.
- Dry the steamer housing thoroughly with a clean cloth or towel.
By regularly cleaning the steamer housing, you can maintain the appearance and cleanliness of your Rowenta Pro Compact Steamer. Now that the steamer housing is clean, let’s move on to the final step, which involves proper storage of the steamer.
Step 8: Store the Steamer Properly
Proper storage of your Rowenta Pro Compact Steamer is essential to protect it from damage and ensure its longevity. Follow these steps to store your steamer properly:
- Make sure the steamer is completely dry before storing it. Wipe down all surfaces with a clean, dry cloth to remove any moisture.
- Unplug the steamer from the power source and detach any attachments that may be connected.
- Coil the power cord neatly and secure it with a rubber band or cord wrap. This will prevent tangles and damage to the cord.
- Find a cool, dry, and well-ventilated storage area for the steamer. Avoid storing it in humid or damp environments as this can promote the growth of mold or mildew.
- If possible, store the steamer in its original packaging or a storage bag specifically designed for steamers. This will provide an extra layer of protection against dust and debris.
- Avoid placing heavy objects on top of the stored steamer, as this can cause damage to the housing or internal components.
- Store the steamer in an upright position, if possible, to prevent any potential leakage or damage to the water tank.
- Periodically check on the stored steamer to ensure that it remains in good condition and free from any dust or dirt buildup.
By following these guidelines, you can ensure that your Rowenta Pro Compact Steamer is stored safely and remains in optimal condition for future use. Regular maintenance and proper storage practices will help extend the lifespan of your steamer and maintain its performance.
Congratulations! You have successfully completed all the steps necessary to clean and maintain your Rowenta Pro Compact Steamer. By regularly following these cleaning and maintenance instructions, you can continue enjoying wrinkle-free clothes and fabrics with the efficiency and convenience of your steamer.
Now that you’re familiar with the cleaning process, make it a part of your routine to keep your Rowenta Pro Compact Steamer in excellent working condition.
Conclusion
Cleaning and maintaining your Rowenta Pro Compact Steamer is essential for ensuring its longevity and optimal performance. With regular cleaning and proper maintenance, you can enjoy wrinkle-free clothes and fabrics with ease.
In this comprehensive guide, we’ve walked you through the step-by-step process of cleaning your steamer, from preparing the steamer to properly storing it. We’ve covered the importance of safety precautions, the materials needed for cleaning, and detailed instructions for each cleaning step.
Remember to follow safety precautions, such as unplugging the steamer and allowing it to cool down before cleaning. Use distilled water to fill the water tank and clean the nozzle to prevent mineral buildup. Take care in cleaning the steamer housing and store it properly to protect it from damage.
By incorporating these cleaning and maintenance practices into your routine, you can ensure that your Rowenta Pro Compact Steamer continues to deliver powerful steam performance, effectively removing wrinkles and refreshing your clothes and fabrics.
Thank you for reading this guide, and we hope it has been helpful in guiding you through the process of cleaning your Rowenta Pro Compact Steamer. Enjoy the convenience and efficiency of your steamer, knowing that it is well-maintained and ready to tackle any wrinkle that comes its way!
Frequently Asked Questions about How To Clean Rowenta Pro Compact Steamer
Was this page helpful?
At Storables.com, we guarantee accurate and reliable information. Our content, validated by Expert Board Contributors, is crafted following stringent Editorial Policies. We're committed to providing you with well-researched, expert-backed insights for all your informational needs.

0 thoughts on “How To Clean Rowenta Pro Compact Steamer”