Articles
How To Clean Steamer Heating Element
Modified: August 16, 2024
Learn effective techniques and tips on how to clean steamer heating element with our comprehensive articles. Discover the best methods for maintaining and prolonging the lifespan of your steamer.
(Many of the links in this article redirect to a specific reviewed product. Your purchase of these products through affiliate links helps to generate commission for Storables.com, at no extra cost. Learn more)
Introduction
Welcome to our guide on how to clean a steamer heating element. Steamer heating elements are an essential component of a steamer, responsible for generating the heat necessary to produce steam. Over time, these heating elements can accumulate mineral deposits and residue from the steaming process, resulting in reduced performance and potentially even damage to the steamer.
Cleaning the heating element is a crucial maintenance task that helps prolong the lifespan of your steamer and ensures optimal performance. In this article, we will provide you with a step-by-step guide on how to clean a steamer heating element effectively.
Before we dive into the cleaning process, it’s important to understand the importance of safety precautions when working with electrical appliances. Always make sure to disconnect the steamer from the power source and allow it to cool down before attempting any cleaning. Additionally, wear protective gloves and goggles to prevent potential injuries.
Now, let’s gather the necessary tools and materials before we begin the cleaning process.
Key Takeaways:
- Regularly cleaning the steamer heating element with vinegar or descaling solution, and gentle scrubbing, ensures optimal performance, prevents mineral buildup, and extends the steamer’s lifespan.
- Prioritize safety by disconnecting the steamer, wearing protective gear, and working in a well-ventilated area when cleaning the heating element to prevent accidents and injuries.
Read more: How To Replace A Dishwasher Heating Element
Understanding the Steamer Heating Element
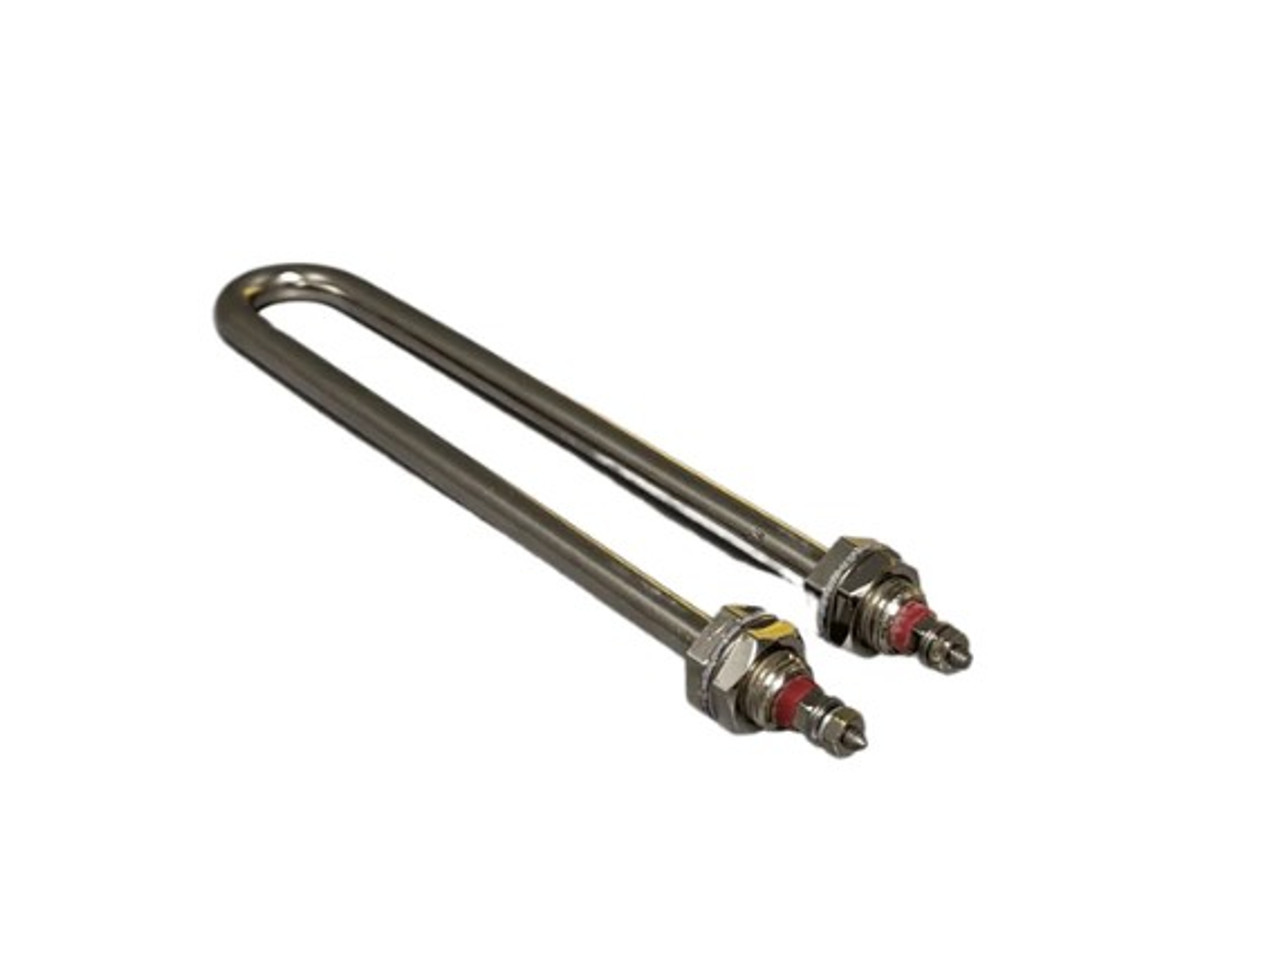
The steamer heating element is a key component in any steaming appliance. It is responsible for providing the heat necessary to convert water into steam. The heating element typically consists of a coiled wire or a heating rod that heats up when an electric current passes through it. This heat is then transferred to the water, resulting in the production of steam.
Over time, mineral deposits and residue from the water can build up on the heating element. These deposits can interfere with the heating process and reduce the efficiency of the steamer. If left unattended, the buildup can eventually cause the heating element to overheat, resulting in damage to the steamer or even a complete malfunction.
Cleaning the steamer heating element is necessary to remove these deposits and ensure proper functioning of the steamer. Regular maintenance will not only extend the lifespan of the steamer but also enhance its performance and efficiency.
Now that we have a basic understanding of the steamer heating element, let’s move on to the important safety precautions that need to be followed before beginning the cleaning process.
Safety Precautions
Before you start cleaning the steamer heating element, it is crucial to prioritize safety to avoid any accidents or injuries. Follow these safety precautions to ensure a safe cleaning process:
- Disconnect the steamer: Before starting any maintenance or cleaning task, make sure to disconnect the steamer from the power source. This will prevent any electrical shocks or accidents while working with the heating element.
- Allow the steamer to cool down: Steamers generate a significant amount of heat during operation. To avoid burns or injuries, allow sufficient time for the steamer to cool down before attempting to clean the heating element.
- Wear protective gear: Always wear protective gloves and goggles while cleaning the heating element. This will protect your hands from hot surfaces and prevent any debris or cleaning agents from getting into your eyes.
- Read the manufacturer’s instructions: Familiarize yourself with the steamer’s manual and follow any specific safety guidelines provided by the manufacturer. This will help you understand the steamer’s specific requirements and precautions for cleaning the heating element.
- Work in a well-ventilated area: Ensure that you clean the steamer heating element in a well-ventilated area to prevent inhaling any fumes from cleaning agents. Open windows or use a fan to ensure proper air circulation.
- Avoid using excessive force: When cleaning the heating element, avoid using excessive force or sharp objects that could damage the element or other parts of the steamer. Use gentle pressure and suitable cleaning tools for effective and safe cleaning.
By following these safety precautions, you can minimize the risk of accidents or injuries while cleaning the steamer heating element. Now that we have taken the necessary precautions, let’s gather the tools and materials required for the cleaning process.
Tools and Materials Needed
Before you can start cleaning the steamer heating element, it’s important to have the right tools and materials on hand. Here is a list of items you will need for the cleaning process:
- Soft cloth or sponge: You will need a soft cloth or sponge to wipe down the heating element and remove any residue or buildup. Make sure the cloth or sponge is clean and free of any abrasive materials that can scratch or damage the heating element.
- Vinegar or descaling solution: Vinegar is an effective natural cleaning agent that can help dissolve mineral deposits on the heating element. If you prefer, you can also use a descaling solution specifically designed for steaming appliances. Dilute the vinegar or descaling solution according to the instructions provided.
- Water: You will need water to rinse off the heating element after cleaning. Make sure the water is clean and preferably filtered to avoid introducing any impurities or minerals that can contribute to buildup.
- Q-tips or small brush: Q-tips or a small brush will be useful for reaching tight spots and crevices on the heating element that may be difficult to clean with a cloth. These tools will allow you to effectively remove any stubborn residue.
- Container or bowl: Prepare a container or bowl large enough to soak the removable parts of the steamer, such as the water tank or drip tray. This will make it easier to clean and remove any buildup on these components.
- Soft bristle brush: A soft bristle brush can be used to gently scrub the heating element and remove any stubborn residue. Make sure the brush is clean and appropriate for the surface of the heating element.
- Towel or drying rack: Once you have finished cleaning the heating element, you will need a towel or drying rack to allow it to air dry before reassembling the steamer.
With these tools and materials ready, you are now well-prepared to begin the process of cleaning the steamer heating element. In the next steps, we will walk you through the procedure, starting with disconnecting the steamer from the power source.
Step 1: Disconnecting the Steamer
Before you begin cleaning the steamer heating element, it is crucial to disconnect the steamer from the power source. This step is necessary to prevent electrical shocks and ensure your safety throughout the cleaning process.
Follow these steps to disconnect the steamer:
- Unplug the steamer: Locate the power cord of the steamer and unplug it from the electrical outlet. Make sure the steamer is completely disconnected from any power source.
- Allow the steamer to cool down: Steamers generate heat during operation, so it’s important to let the steamer cool down before you start cleaning. This will help prevent burns or injuries while handling the heating element.
- Check for residual heat: To ensure the steamer has cooled down, touch the heating element with caution. If it feels hot, wait for a few more minutes for it to cool completely.
- Turn off any control switches: If your steamer has any control switches or buttons, make sure they are turned off. This will further ensure that no electricity is flowing to the heating element.
By following these simple steps, you can safely disconnect the steamer from the power source and ensure that there is no electricity flowing to the heating element. Once you have disconnected the steamer, you can move on to the next step, which involves removing the heating element cover.
To clean a steamer heating element, mix equal parts of water and white vinegar and run the steamer until the mixture is used up. Then, wipe the heating element with a damp cloth to remove any residue.
Read more: How To Test A Dryer Heating Element
Step 2: Removing the Heating Element Cover
Now that the steamer is safely disconnected, you can proceed to remove the heating element cover. The heating element cover protects the heating element and is usually located on the top or the side of the steamer, depending on the model.
Follow these steps to remove the heating element cover:
- Refer to the steamer’s manual: Before you begin, it’s important to consult the steamer’s manual to locate and understand how to remove the heating element cover. Each steamer model may have a different method for accessing the heating element.
- Remove any screws or fasteners: Using a screwdriver or the appropriate tool, carefully remove any screws or fasteners that are holding the heating element cover in place. Keep the screws or fasteners in a safe place to prevent them from getting lost.
- Gently lift or slide off the cover: Once the screws or fasteners are removed, gently lift or slide off the heating element cover. Be cautious not to force it or apply excessive pressure, as this can damage the cover or other components of the steamer.
- Set aside the cover: Place the heating element cover in a safe and clean location. You may want to wipe it down with a soft cloth to remove any dust or debris before setting it aside.
With the heating element cover removed, you now have access to the heating element itself. This is where the cleaning process begins. In the next step, we will guide you through the process of cleaning the heating element.
Step 3: Cleaning the Heating Element
Now that you have removed the heating element cover, it’s time to clean the heating element itself. The cleaning process will help remove any mineral deposits or residue that has accumulated on the surface of the heating element.
Follow these steps to clean the heating element effectively:
- Inspect the heating element: Take a close look at the heating element to identify any visible buildup or deposits. Look for areas that may require extra attention during the cleaning process.
- Prepare the cleaning solution: Depending on your preference, you can use either vinegar or a descaling solution to clean the heating element. Dilute the vinegar or follow the instructions on the descaling solution packaging to create an appropriate cleaning solution.
- Apply the cleaning solution: Using a soft cloth or sponge, apply the cleaning solution onto the heating element. Ensure that the cloth or sponge is damp but not saturated with the cleaning solution.
- Gently scrub the surface: With the cleaning solution applied, gently scrub the surface of the heating element. Use small circular motions to dislodge any stubborn buildup or residue. Be careful not to apply excessive force or use abrasive materials that could damage the heating element.
- Pay attention to crevices and tight spots: Use a Q-tip or a small brush to clean any hard-to-reach areas or crevices on the heating element. These areas may require extra attention and careful cleaning.
- Rinse with clean water: Once you are satisfied with the cleaning, rinse the heating element with clean water to remove any cleaning solution or residue. Ensure that all traces of the cleaning solution are thoroughly rinsed off.
- Dry the heating element: Use a soft cloth or allow the heating element to air dry completely before proceeding to the next step. Make sure there is no moisture left on the heating element before reassembling the steamer.
By following these steps, you can effectively clean the heating element of your steamer. Cleaning the heating element at regular intervals will prevent mineral buildup and maintain its efficiency. In the next step, we will guide you through the process of reassembling the steamer.
Step 4: Reassembling the Steamer
Now that you have successfully cleaned the heating element, it’s time to reassemble the steamer. Reassembling the steamer is important to ensure that all components are properly aligned and secured for safe and effective operation.
Follow these steps to reassemble the steamer:
- Retrieve the heating element cover: Take the heating element cover that you set aside during the cleaning process and make sure it is clean and free of any debris.
- Position the heating element cover: Carefully place the heating element cover back into position, aligning it with the corresponding slots or mounting points. Ensure that the cover is secure and fits snugly.
- Reattach any screws or fasteners: If you had removed any screws or fasteners to access the heating element, reattach them to secure the heating element cover in place. Tighten the screws or fasteners, but be cautious not to overtighten them.
- Double-check the connections: Before proceeding, double-check the connections of the heating element and ensure that they are secure. Ensure that all wires are properly connected and there are no loose or exposed wires.
- Inspect the surrounding area: Take a moment to inspect the surrounding area and make sure there are no loose parts or debris that may interfere with the functioning of the steamer.
- Ensure everything is in place: Check that all other components, such as the water tank, drip tray, and control switches, are properly positioned and securely in place.
Once you have reassembled the steamer and ensured that all components are properly aligned and secure, you are ready to move on to the final step: testing the steamer.
In the next step, we will guide you through the process of testing the steamer to ensure that the cleaning process was successful and that the heating element is functioning properly.
Step 5: Testing the Steamer
After cleaning and reassembling the steamer, it’s important to test it to ensure that the heating element is functioning properly and that the steamer is ready to use. This step will give you confidence that the cleaning process was successful.
Follow these steps to test the steamer:
- Connect the steamer to the power source: Plug the steamer back into the electrical outlet and ensure that it is securely connected.
- Fill the water tank: Fill the water tank with clean water, following the manufacturer’s instructions. Be sure not to overfill the tank.
- Turn on the steamer: Switch on the steamer using the appropriate control switch or button. Allow the steamer to heat up and create steam.
- Check for steam: Once the steamer has heated up, check for the production of steam from the nozzle or designated steam outlet. Ensure that the steam is being generated consistently and at the desired intensity.
- Observe for any unusual sounds or smells: While the steamer is operational, listen for any unusual sounds or smells that may indicate a problem. Unusual sounds or smells should be addressed immediately by consulting the steamer’s manual or contacting the manufacturer.
- Test the steamer’s performance: Use the steamer as you normally would, such as steaming clothes or other items. Assess its performance and make sure that it is working as expected. Observe the flow and power of the steam and check for any leaks or malfunctions.
If the steamer passes all these tests and operates effectively without any issues, then congratulations! You have successfully cleaned the steamer heating element and restored it to fully functional condition. Enjoy using your refreshed steamer!
However, if you encounter any problems during the testing phase, it may indicate that further cleaning or maintenance is required. Consult the steamer’s manual for troubleshooting guidance or consider reaching out to the manufacturer for assistance.
With the testing process completed, you have now successfully completed the step-by-step guide on how to clean a steamer heating element. Regular maintenance and cleaning of the heating element will ensure that your steamer operates optimally and lasts for a long time to come.
Happy steaming!
Read more: How To Fix Dryer Heating Element
Conclusion
Cleaning the steamer heating element is an essential maintenance task that helps to ensure the longevity and optimal performance of your steamer. By following the step-by-step guide outlined in this article, you can effectively clean the heating element and remove any mineral deposits or residue that may have accumulated over time.
Throughout the cleaning process, it is important to prioritize safety by disconnecting the steamer from the power source, allowing it to cool down, and wearing protective gear. Adhering to these safety precautions will help prevent accidents and injuries while cleaning the heating element.
By gathering the necessary tools and materials, such as a soft cloth or sponge, vinegar or descaling solution, and Q-tips or a small brush, you can effectively clean the heating element and remove any buildup or residue. Remember to be gentle in your cleaning approach, paying attention to crevices and tight spots.
After cleaning the heating element, it is crucial to properly reassemble the steamer, ensuring that all components are aligned and securely in place. Testing the steamer afterwards is essential to confirm that the cleaning process was successful and that the heating element is functioning properly.
Regularly cleaning the steamer heating element will help prevent mineral buildup, preserve the performance of the steamer, and extend its lifespan. Remember to consult the steamer’s manual for any specific cleaning instructions or recommendations provided by the manufacturer.
By incorporating these cleaning practices into your routine maintenance, you can enjoy the benefits of a clean and efficient steamer for years to come. So, go ahead and give your steamer the care it deserves by cleaning the heating element and ensuring its optimal performance.
Frequently Asked Questions about How To Clean Steamer Heating Element
Was this page helpful?
At Storables.com, we guarantee accurate and reliable information. Our content, validated by Expert Board Contributors, is crafted following stringent Editorial Policies. We're committed to providing you with well-researched, expert-backed insights for all your informational needs.

0 thoughts on “How To Clean Steamer Heating Element”