Articles
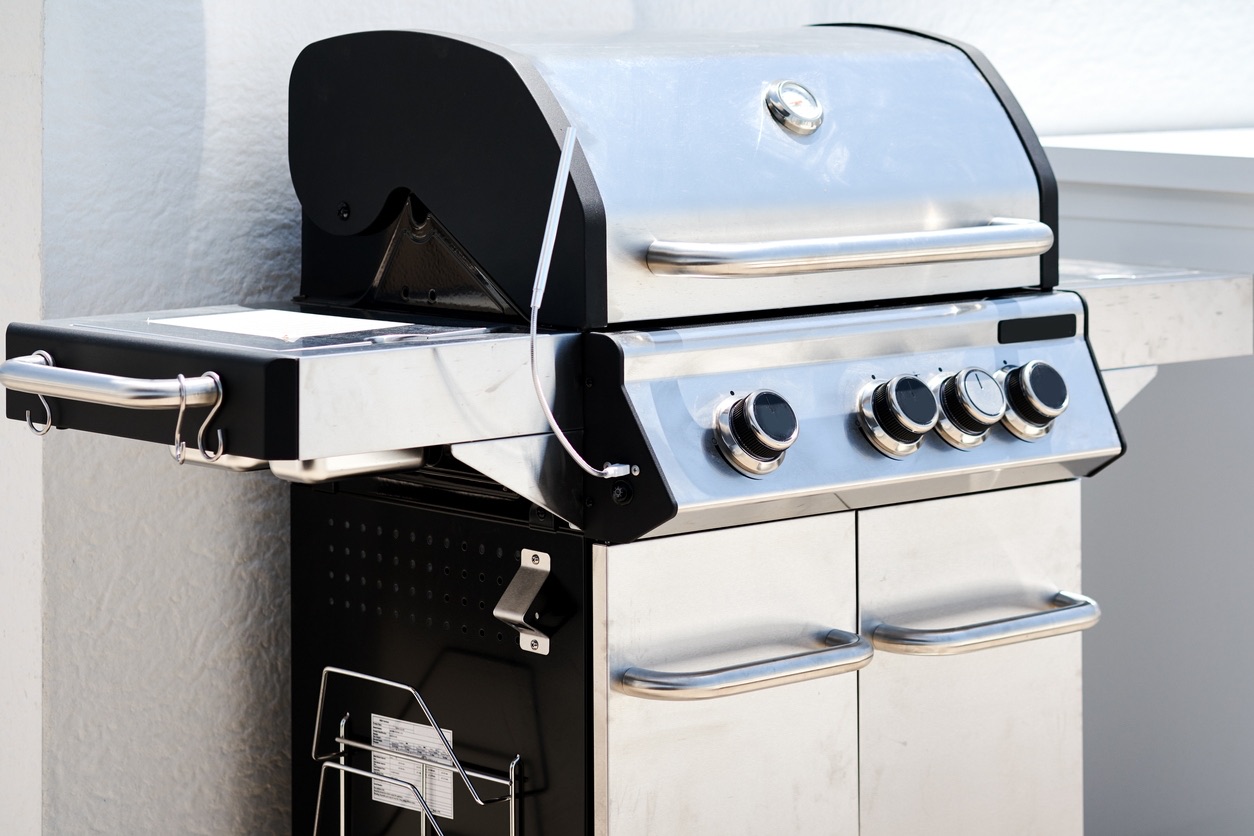
How To Clean Stainless Steel Grill
Modified: January 19, 2024
Learn effective stainless steel grill cleaning techniques with this informative article. Discover the best tips and tricks to keep your grill looking and performing its best.
(Many of the links in this article redirect to a specific reviewed product. Your purchase of these products through affiliate links helps to generate commission for Storables.com, at no extra cost. Learn more)
Introduction
Having a stainless steel grill can be a great addition to any outdoor space. It not only adds a touch of elegance, but it’s also durable and easy to maintain. However, over time, your stainless steel grill can accumulate grease, grime, and even rust, which can affect its appearance and possibly its performance.
Cleaning your stainless steel grill regularly is essential to keep it in top shape and ensure it lasts for years to come. But where do you begin? Don’t worry – in this article, we’ll guide you through the step-by-step process of how to clean a stainless steel grill effectively.
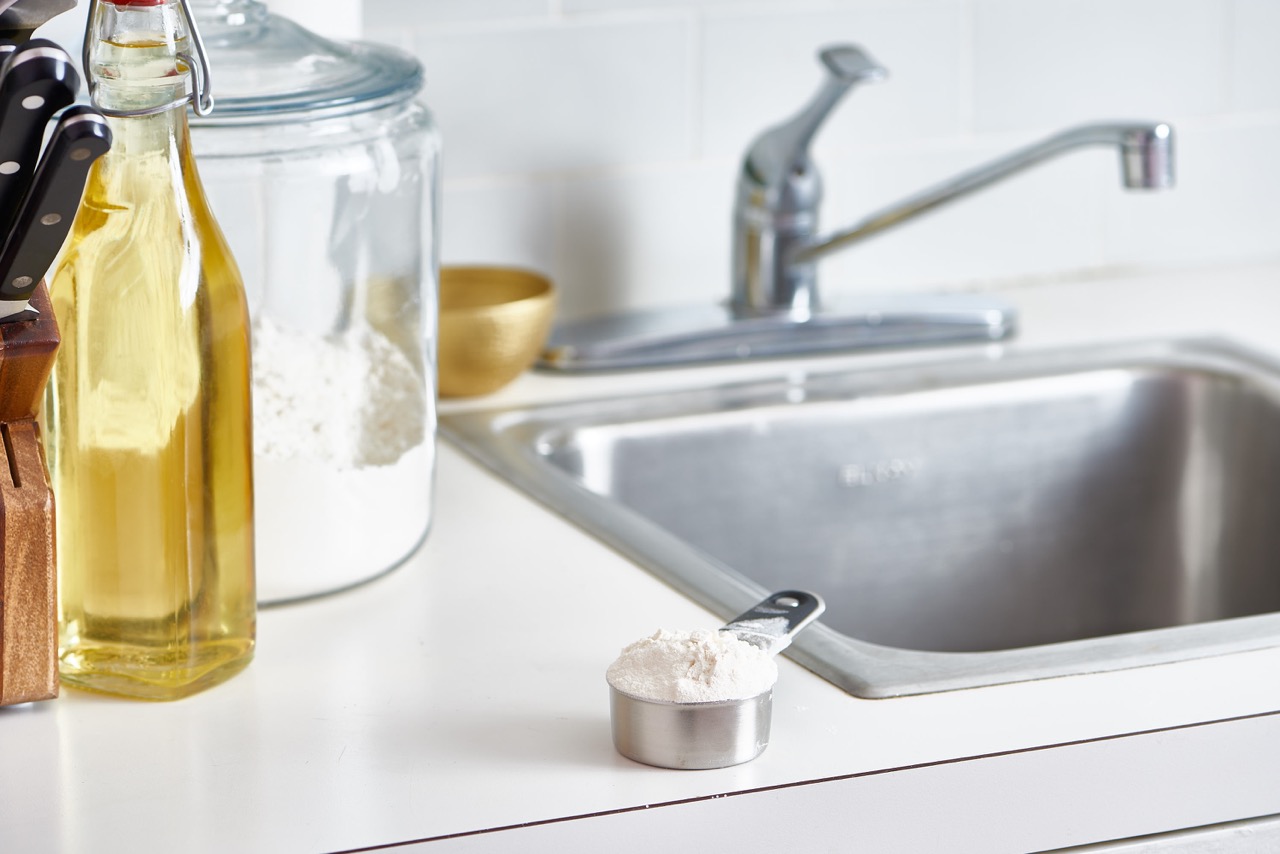
Before we dive into the cleaning process, it’s important to gather the necessary supplies. You’ll need a few basic items to ensure a thorough and efficient cleaning session. These include:
- Mild dish soap
- Vinegar
- Baking soda
- A bucket or basin
- Sponge or soft cloth
- Stainless steel cleaner or polish
- Microfiber cloth
Once you have all the supplies ready, it’s time to prepare your grill for cleaning. Start by removing any leftover food debris from the grates and emptying the drip tray. You can use a stiff brush or scraper to remove stubborn bits of food. Then, turn off the gas supply and disconnect the propane tank if you have one.
Now, let’s move on to the actual cleaning process. In the next few steps, we’ll cover how to clean the exterior of the grill, clean the grill grates, remove rust, polish the stainless steel, and finally, reassemble the grill.
By following these steps and incorporating them into your regular grill maintenance routine, you can keep your stainless steel grill looking shiny and pristine, ready to serve up delicious meals for you and your loved ones.
So let’s get started with step one – gathering the necessary supplies!
Key Takeaways:
- Regularly cleaning and maintaining your stainless steel grill is essential to keep it looking great and functioning optimally. By following the step-by-step process outlined in this article, you can effectively clean your grill, remove rust, and polish the stainless steel for a shiny finish.
- By gathering the necessary supplies, preparing the grill, cleaning the exterior and grates, removing rust, polishing the stainless steel, and reassembling the grill, you can ensure that your stainless steel grill remains in top condition, ready to serve up delicious meals for years to come.
Read more: How To Clean Stainless Steel Outdoor Grill
Step 1: Gather the necessary supplies
Before you begin the cleaning process, it’s important to gather all the necessary supplies. Having the right tools and products will make the cleaning process easier and more effective. Here are the items you’ll need:
- Mild dish soap: Look for a gentle dish soap that is suitable for removing grease and grime.
- Vinegar: Vinegar is a natural and effective cleaner that can help remove tough stains and build-up on stainless steel surfaces.
- Baking soda: Baking soda is another versatile cleaning agent that can be used to remove stubborn stains, eliminate odors, and act as a gentle abrasive.
- A bucket or basin: You’ll need a container to mix your cleaning solution and hold water for rinsing.
- Sponge or soft cloth: Choose a non-abrasive sponge or soft cloth that won’t scratch the surface of your stainless steel grill.
- Stainless steel cleaner or polish: To give your grill a shiny finish and protect it from future stains, invest in a high-quality stainless steel cleaner or polish.
- Microfiber cloth: Use a microfiber cloth to dry and polish the stainless steel surfaces for a streak-free shine.
Having these supplies on hand will ensure that you have everything you need to effectively clean your stainless steel grill. You can find most of these items at your local supermarket or home improvement store. Once you have everything you need, you’re ready to move on to the next step: preparing your grill for cleaning.
By gathering these supplies before you start cleaning, you’ll be able to complete the process smoothly and efficiently. So, make sure you have everything on the list, and let’s move on to the next step!
Step 2: Preparing the grill
Now that you have gathered all the necessary supplies, it’s time to prepare your stainless steel grill for cleaning. This step is crucial as it ensures that the cleaning process goes smoothly and effectively. Here’s how to prepare your grill:
1. Turn off the gas supply: Safety should always be a priority. Before you begin cleaning, make sure to turn off the gas supply to your grill. This will prevent any accidents or leaks while you are working on the grill.
2. Remove the cooking grates: Most stainless steel grills have removable cooking grates. Take them out and set them aside. This will allow you to clean the grates more thoroughly and access the other parts of the grill easily.
3. Empty the drip tray: The drip tray collects grease and other drippings from your grill. Remove the drip tray and empty any contents. You can use a spoon or spatula to scoop out the excess grease, making it easier to clean later.
4. Protect the burners and ignition: If your grill has burners and an ignition system, it’s important to protect them from water and cleaning solutions. Cover them with aluminum foil or plastic wrap to prevent any damage or corrosion.
5. Pre-soak the grates (optional): If your grates have stubborn stains or grease buildup, you can pre-soak them for better cleaning results. Fill a bucket or basin with warm water and add a few drops of dish soap or vinegar. Place the grates in the soapy water and let them soak for about 15-30 minutes. This will loosen any stuck-on debris, making it easier to remove later.
By following these steps to prepare your grill, you are setting the stage for a successful cleaning session. Taking the time to properly prepare the grill will make the cleaning process more efficient and help you achieve the best results. Once you have completed these steps, you’re ready to move on to the next step: cleaning the exterior of the grill.
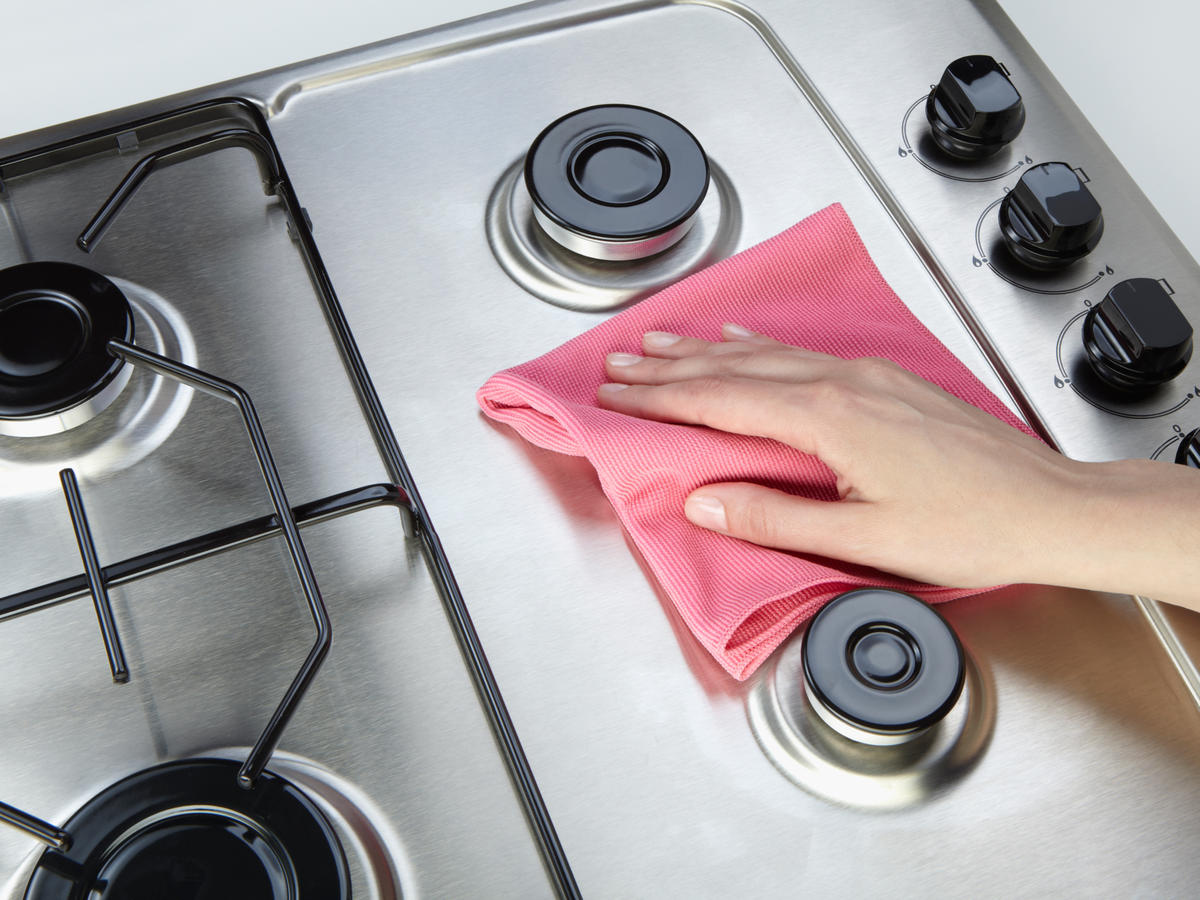
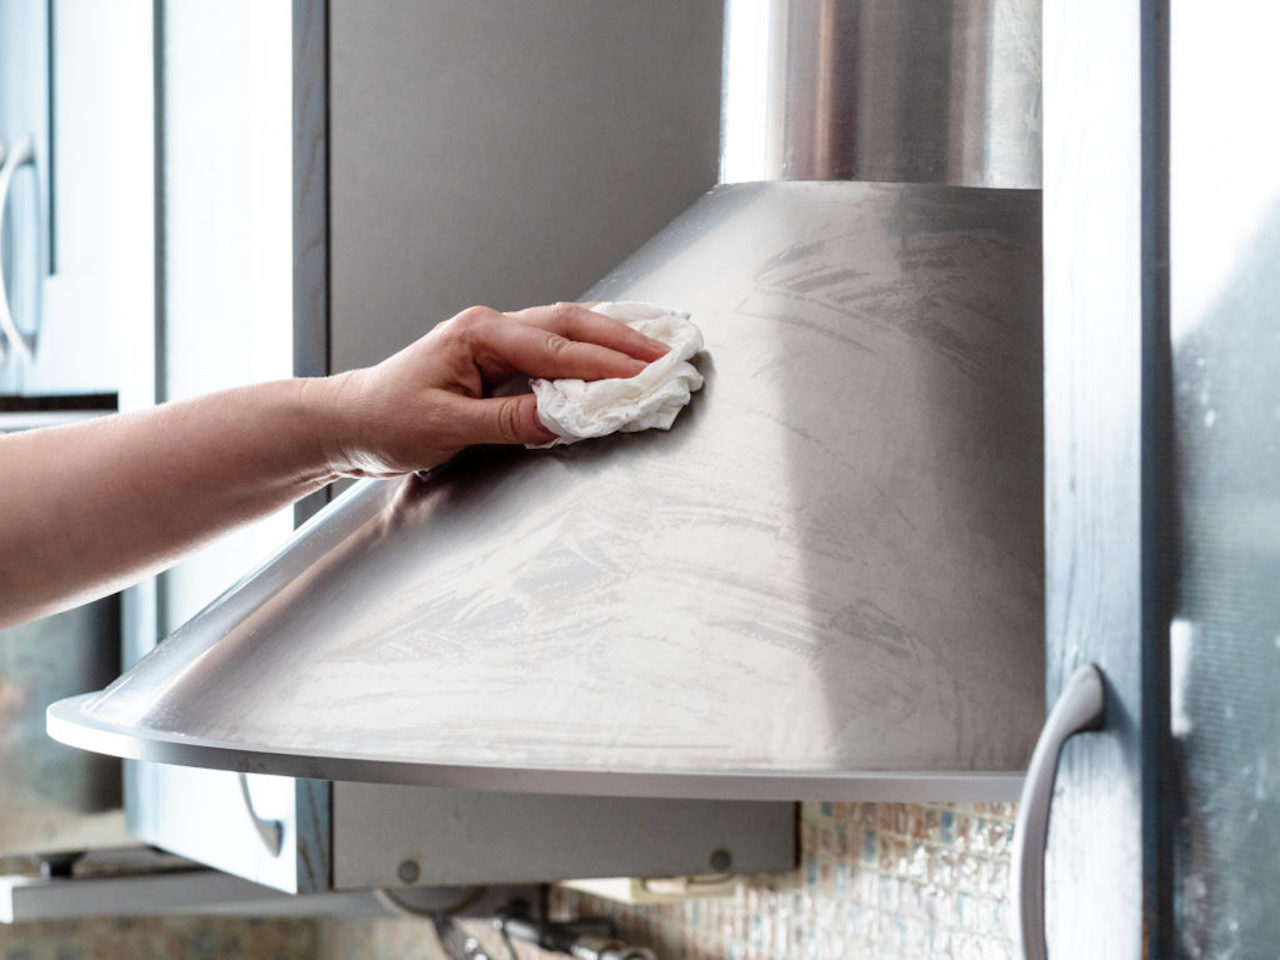
Step 3: Cleaning the exterior of the grill
Now that you have prepared your grill, it’s time to tackle the exterior cleaning. The exterior of your stainless steel grill can accumulate dirt, grease, and grime over time, diminishing its appearance. Here’s how you can clean the exterior:
1. Create a cleaning solution: In a bucket or basin, mix warm water with a few drops of mild dish soap. This gentle solution will help remove dirt and grease without damaging the stainless steel surface.
2. Dip a sponge or soft cloth into the cleaning solution: Soak a sponge or cloth in the soapy water. Make sure it is damp but not dripping. It’s important to avoid using abrasive materials, as they can scratch the surface of your grill.
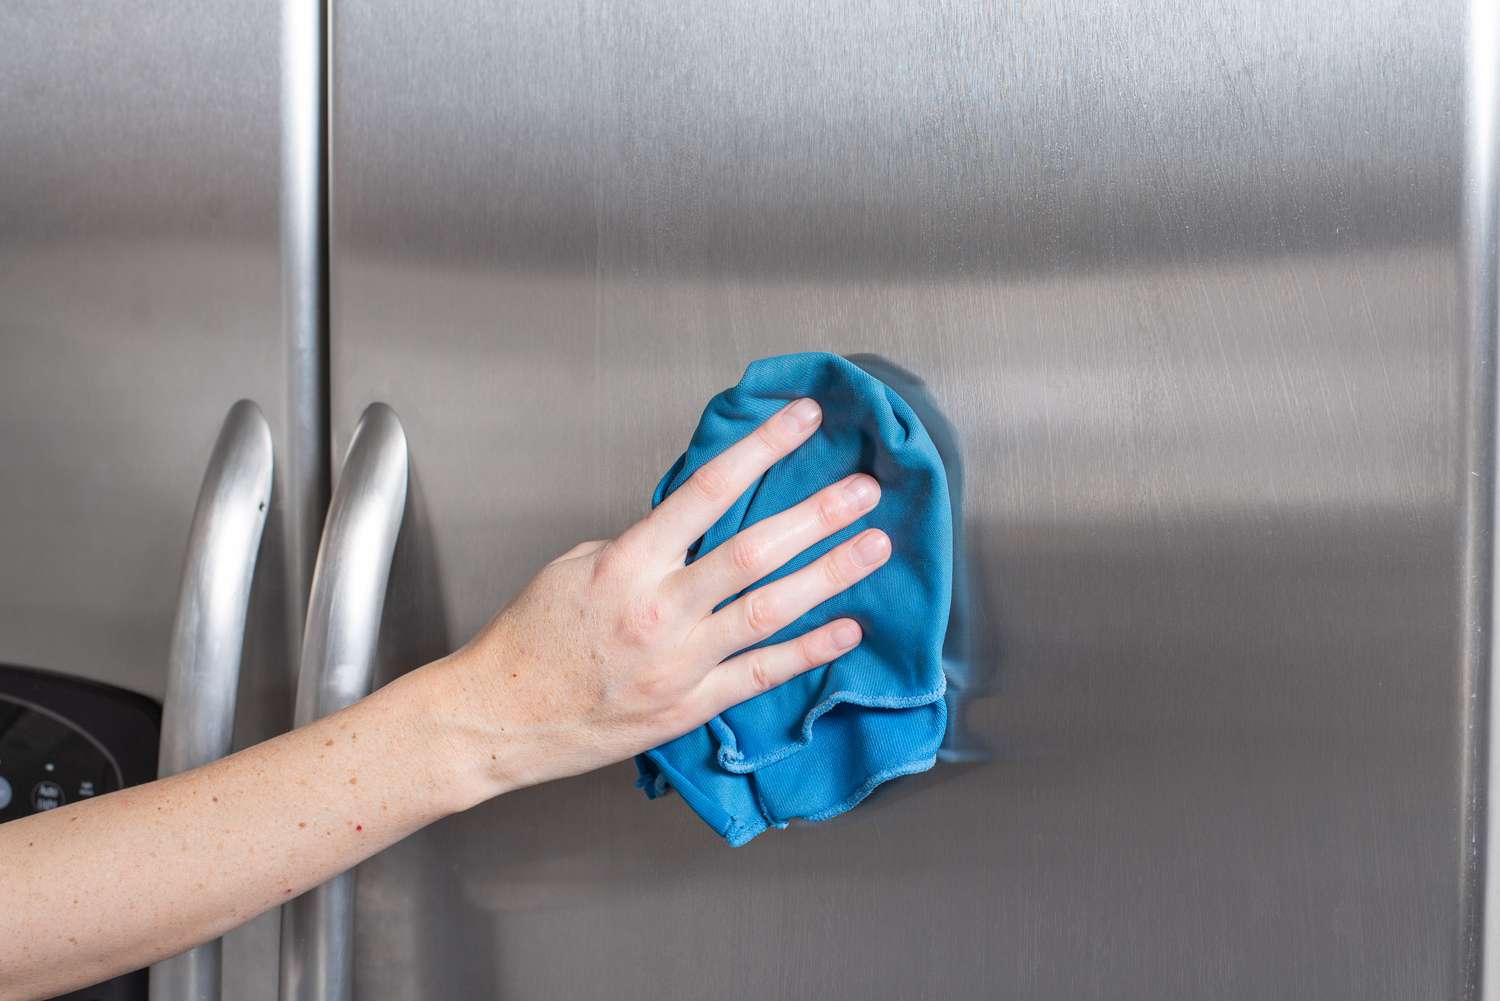
3. Wipe down the exterior: Start by wiping down the entire exterior of the grill with the damp sponge or cloth. Pay special attention to areas that are visibly dirty or greasy. Scrub gently in a circular motion to lift off any grime. For stubborn stains, you can apply a bit more pressure, but be cautious not to damage the stainless steel surface.
4. Rinse with clean water: After scrubbing, rinse the exterior of the grill with clean water. This will remove any remaining soap residue and leave the surface clean and ready for the next step.
5. Dry with a microfiber cloth: To prevent water spots and streaks, use a soft microfiber cloth to dry the exterior of the grill. Gently wipe the surface in a circular motion, ensuring you cover all areas. This will give your stainless steel grill a polished and shiny appearance.
If there are any persistent stains or spots on the exterior of your grill, you can use a stainless steel cleaner or polish. Follow the instructions on the product label and apply it to the affected areas. Remember to choose a cleaner specifically designed for stainless steel surfaces to prevent any damage.
By following these steps, you can restore the exterior of your stainless steel grill to its original shine. With a clean and polished exterior, your grill will not only look more appealing, but it will also be protected from corrosion and prolong its lifespan. Once you have finished cleaning the exterior, it’s time to move on to the next step: cleaning the grill grates.
Step 4: Cleaning the grill grates
One of the most important parts of your stainless steel grill to clean is the grill grates. These grates are responsible for holding and cooking your food, but they can easily accumulate grease, food particles, and residue. Follow these steps to effectively clean your grill grates:
1. Remove the grates: If you haven’t already done so, remove the grill grates from the grill. This will allow you to clean them more thoroughly and access the other parts of the grill.
2. Scrape off food debris: Use a grill brush or scraper to remove any stuck-on food debris from the grates. Start by brushing the grates in one direction to dislodge the large pieces of food. Then, scrape across the grates to remove any stubborn residue. Be thorough and ensure that you remove as much debris as possible.
3. Soak the grates: Prepare a mixture of warm water and mild dish soap or vinegar in a bucket or basin. Place the grates in the soapy water and let them soak for 15-30 minutes. This will help to loosen any grease and charred residue, making it easier to clean.
4. Scrub the grates: After soaking, use a scrub brush or a sponge to scrub the grates. Focus on any areas with remaining residue or stains. Apply firm but controlled pressure to effectively remove the dirt. If needed, you can use baking soda as a natural abrasive to enhance the cleaning power. Rinse the grates with clean water to remove any soap or baking soda residue.
5. Dry the grates: Once you have cleaned the grates, make sure to dry them thoroughly. Use a clean towel or allow them to air dry completely before placing them back on the grill. This will prevent any moisture from causing rust or other damage to the grates.
If your grill grates have excessive rust buildup, you can use a wire brush or steel wool to remove it. Scrub gently in a circular motion to scrape off the rust. Afterward, clean and dry the grates to prevent further rusting.
By following these steps, your grill grates will be clean, free of residue, and ready to cook your favorite foods. A well-maintained and clean grill grate not only enhances the flavor of your meals but also ensures even heat distribution for better cooking results. Now that your grates are clean, let’s move on to the next step: removing rust from your stainless steel grill.
After grilling, use a grill brush to remove any food residue from the stainless steel grill. Then, wipe it down with a damp cloth and mild dish soap. Finally, dry it thoroughly to prevent water spots.
Read more: How To Clean Stainless Steel Silverware
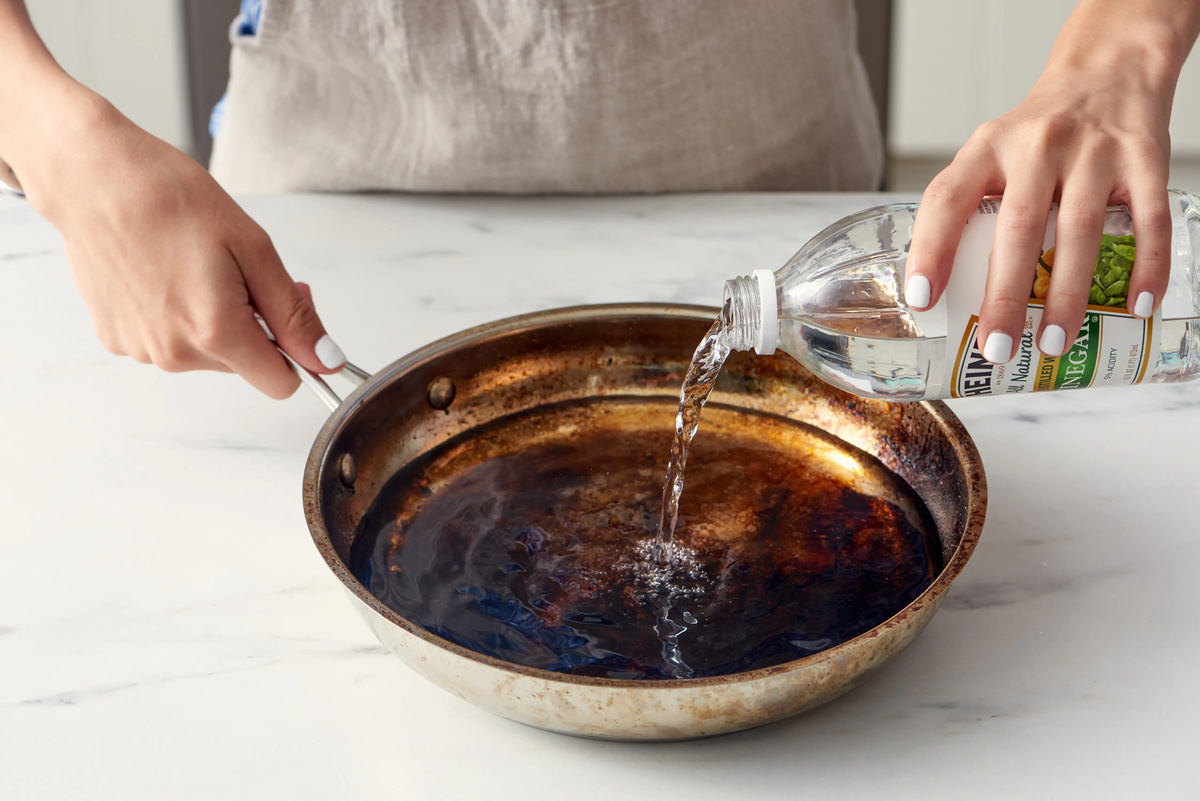
Step 5: Removing rust from stainless steel grill
Over time, stainless steel grills can develop rust, especially in areas exposed to moisture or harsh weather conditions. Rust not only diminishes the appearance of your grill but can also weaken its structure. Follow these steps to effectively remove rust from your stainless steel grill:
1. Safety first: Before you begin removing rust, make sure to wear protective gloves and safety goggles to shield yourself from any chemicals or debris.
2. Assess the rust: Examine the extent of rust on your grill. If it’s only surface-level rust, you can easily remove it using non-abrasive methods. However, if the rust is severe and has caused pitting or damage to the stainless steel, you may need to consider replacing those parts or seeking professional help.
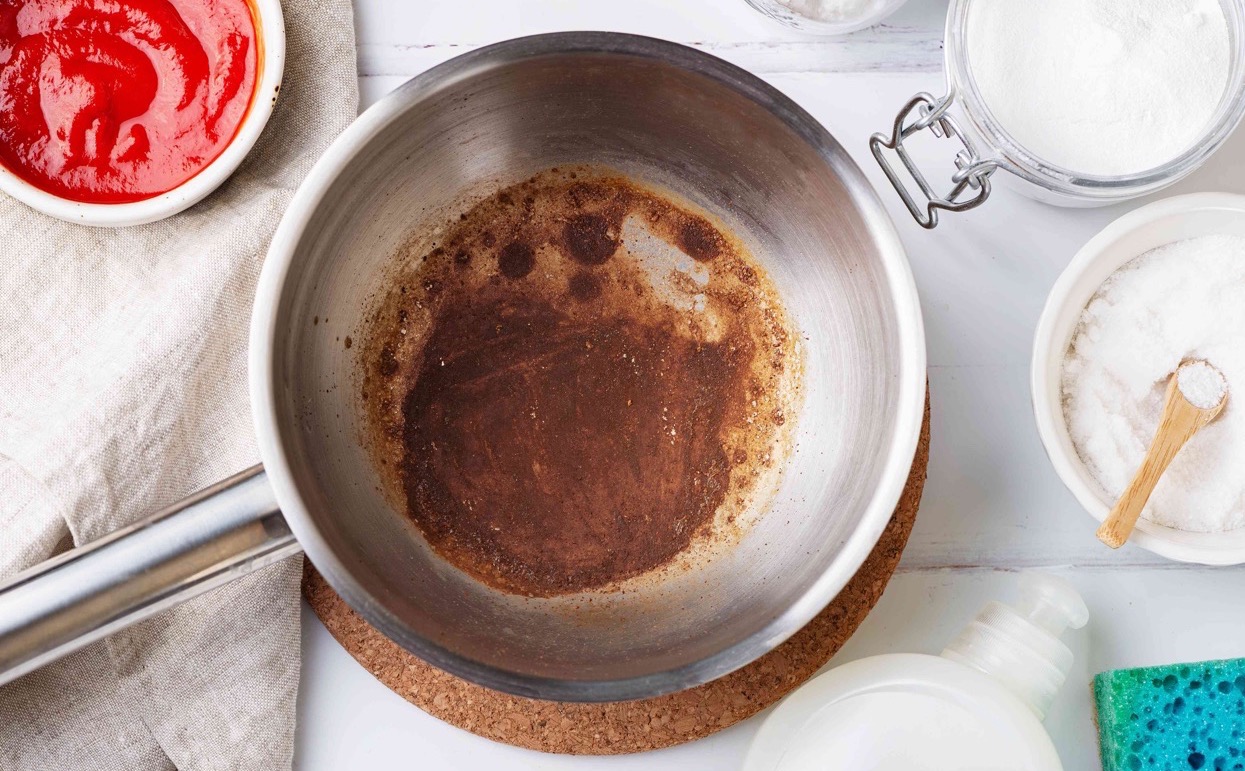
3. Create a rust removal solution: In a bowl, mix equal parts of vinegar and baking soda to create a paste. The mild acid in the vinegar will help dissolve the rust, while the baking soda acts as an abrasive to aid in the cleaning process.
4. Apply the paste: Using a cloth or sponge, apply the vinegar and baking soda paste to the rusted areas of your grill. Ensure you cover the rust completely and let the paste sit for 15-20 minutes. This allows the mixture to penetrate the rust and start breaking it down.
5. Scrub the rusted areas: After the paste has had time to work, use a non-abrasive brush or sponge to scrub the rusted areas. Apply gentle pressure and scrub in small circular motions, focusing on the rust spots. Be careful not to apply too much pressure to prevent scratching the stainless steel surface.
6. Rinse with clean water: Once you have scrubbed the rusted areas, rinse your grill thoroughly with clean water. This will remove any residue from the vinegar and baking soda mixture. It’s important to ensure no residue is left behind, as it can cause further damage or discoloration.
7. Apply rust-resistant coating (optional): To prevent future rusting, you may consider applying a rust-resistant coating specifically designed for stainless steel. Follow the instructions on the product label to ensure proper application and protection.
By following these steps, you can effectively remove rust from your stainless steel grill and restore its appearance. Regular maintenance and cleaning will help prevent future rusting and prolong the lifespan of your grill. With the rust removed, your grill is now ready for the next step: polishing the stainless steel.
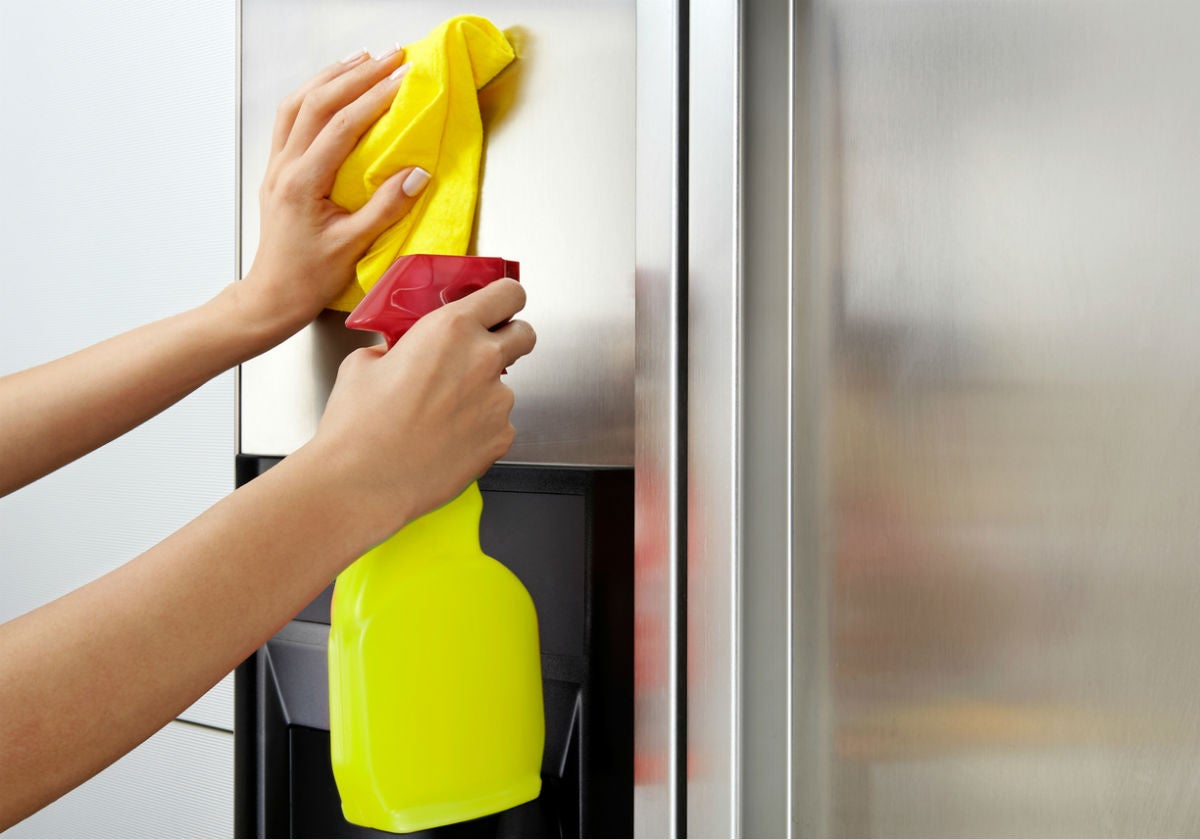
Step 6: Polishing the stainless steel
After cleaning and removing any rust from your stainless steel grill, it’s time to give it a polished finish. Polishing not only enhances the appearance of the stainless steel but also helps to protect it against future stains and corrosion. Here’s how to polish your stainless steel grill:
1. Choose a stainless steel cleaner or polish: Select a high-quality stainless steel cleaner or polish specifically formulated for stainless steel surfaces. Read the instructions on the product label to ensure proper use and application.
2. Apply the cleaner or polish: Start by applying a small amount of the cleaner or polish onto a soft, clean cloth. Gently rub it onto the stainless steel surface in circular motions. Make sure to cover all areas of the grill, including the exterior and the grates.
3. Polish in the direction of the grain: When polishing stainless steel, it’s important to follow the direction of the grain. The grain refers to the faint lines that are visible on the stainless steel surface. Rubbing against the grain may result in scratches or a less polished finish. So, ensure you polish in the same direction as the lines on your grill.
4. Pay attention to stubborn stains: If there are any stubborn stains or residue that are not easily removed, you can apply a bit more pressure or use a gentle scrub brush specifically designed for stainless steel surfaces. However, be cautious not to scratch the surface.
5. Wipe and buff: Once you have applied the cleaner or polish and thoroughly rubbed it into the stainless steel, use a clean, dry microfiber cloth to wipe away any excess product. Continue to buff the surface of the grill using gentle, circular motions. This will give your grill a brilliant shine.
6. Prevent future stains: To keep your stainless steel grill looking polished and shiny for longer, you can apply a thin coat of stainless steel protector or use a food-grade mineral oil. This will provide an additional layer of protection against stains and fingerprints.
By following these steps, you can achieve a polished and gleaming stainless steel grill. Regularly polishing your grill will not only make it look great, but it will also help maintain its longevity and resistance to stains and corrosion. With the stainless steel polished, you’re almost done. Let’s move on to the final step: reassembling the grill.
Step 7: Reassembling the grill
Now that you’ve thoroughly cleaned, removed rust, and polished your stainless steel grill, it’s time to put everything back together. Reassembling the grill is an essential step to ensure it functions properly and is ready for your next cooking session. Here’s how to reassemble your grill:
1. Replace the grill grates: Begin by placing the clean and dry grill grates back into their original position on the grill. Ensure that they are aligned properly and securely seated.
2. Reattach the drip tray: Put the clean drip tray back in place, making sure it is properly positioned to catch any grease or drippings during cooking. Double-check that it is securely attached and won’t move or tip over during use.
3. Connect the propane tank (if applicable): If you have a propane grill, reconnect the propane tank to the grill. Ensure that all connections are tight and secure. Check for any gas leaks by applying a mixture of soapy water to the connections. If you see bubbles forming, there could be a leak, and you should promptly address it before igniting the grill.
4. Inspect and clean the burners: Take a moment to inspect and clean the burners of your grill. Remove any debris or clogs that may affect the performance of the grill. Use a brush or soft cloth to wipe down the burners gently.
5. Test the grill: Before firing up the grill for your next cooking session, conduct a quick test to ensure everything is in working order. Turn on the gas supply and ignite the burners. Check for any irregularities such as uneven heat distribution or unusual flames. If you notice any issues, address them before using the grill for cooking.
6. Store your cleaning supplies: Once you’ve finished reassembling the grill, properly store your cleaning supplies in a safe and accessible location. This will make it easier and more convenient to clean your grill in the future.
By following these steps, you’ve successfully reassembled your stainless steel grill and prepared it for your next outdoor cooking adventure. Regular cleaning and maintenance, along with proper assembly, will ensure that your grill performs optimally and stays in great condition for years to come.
Congratulations! You’ve completed the process of cleaning and maintaining your stainless steel grill. By following these step-by-step instructions, you can keep your grill looking pristine, remove rust, and enjoy delicious meals with friends and family. Happy grilling!
Conclusion
Cleaning and maintaining your stainless steel grill is essential to keep it looking great and functioning optimally. By following the step-by-step process outlined in this article, you can effectively clean your grill, remove rust, and polish the stainless steel for a shiny finish. Let’s recap the key points:
First, gather the necessary supplies, including mild dish soap, vinegar, baking soda, a bucket or basin, a sponge or soft cloth, stainless steel cleaner or polish, and a microfiber cloth. With these tools in hand, you’re ready to start the cleaning process.
Prepare the grill by turning off the gas supply, removing the cooking grates, emptying the drip tray, and protecting the burners and ignition. These steps ensure a safe and efficient cleaning session.
Clean the exterior of the grill by creating a cleaning solution with warm water and dish soap, wiping down the surface with a sponge or cloth, rinsing with clean water, and drying with a microfiber cloth. Give special attention to stubborn stains or invest in a stainless steel cleaner or polish for better results.
Clean the grill grates by removing food debris, soaking them in soapy water, scrubbing with a brush or sponge, rinsing with clean water, and drying thoroughly. For stubborn rust, use a wire brush or steel wool to remove it before cleaning and drying the grates.
If there is rust on the grill, create a rust removal paste with vinegar and baking soda, apply it to the rusted areas, scrub gently, rinse, and dry the grill. Consider using a rust-resistant coating to prevent future rusting.
Polish the stainless steel by applying a stainless steel cleaner or polish with a soft cloth, polishing in the direction of the grain, wiping away excess product, and buffing the surface for a brilliant shine. Apply a rust-resistant coating or food-grade mineral oil to protect against future stains.
Finally, reassemble the grill by placing the grill grates back in position, reattaching the drip tray, connecting the propane tank (if applicable), inspecting and cleaning the burners, testing the grill, and storing your cleaning supplies for future use.
By following these steps regularly, you can ensure that your stainless steel grill remains in top condition, ready to serve up delicious meals for years to come. Keep in mind that maintenance is key, so schedule regular cleaning sessions and address any issues promptly to maintain the longevity of your grill.
Now that you’re armed with the knowledge of how to clean a stainless steel grill effectively, it’s time to put it into action. So, gather your supplies, get to work, and enjoy the benefits of a clean and well-maintained grill. Happy grilling!
Frequently Asked Questions about How To Clean Stainless Steel Grill
Was this page helpful?
At Storables.com, we guarantee accurate and reliable information. Our content, validated by Expert Board Contributors, is crafted following stringent Editorial Policies. We're committed to providing you with well-researched, expert-backed insights for all your informational needs.

0 thoughts on “How To Clean Stainless Steel Grill”