Home>Gardening & Outdoor>Outdoor Entertaining>How To Build A Fire Pit On A Sloped Yard
Outdoor Entertaining
How To Build A Fire Pit On A Sloped Yard
Modified: August 27, 2024
Learn how to build a fire pit on a sloped yard for your outdoor entertaining needs. Get expert tips and step-by-step instructions for a stunning and functional addition to your outdoor space.
(Many of the links in this article redirect to a specific reviewed product. Your purchase of these products through affiliate links helps to generate commission for Storables.com, at no extra cost. Learn more)
Introduction
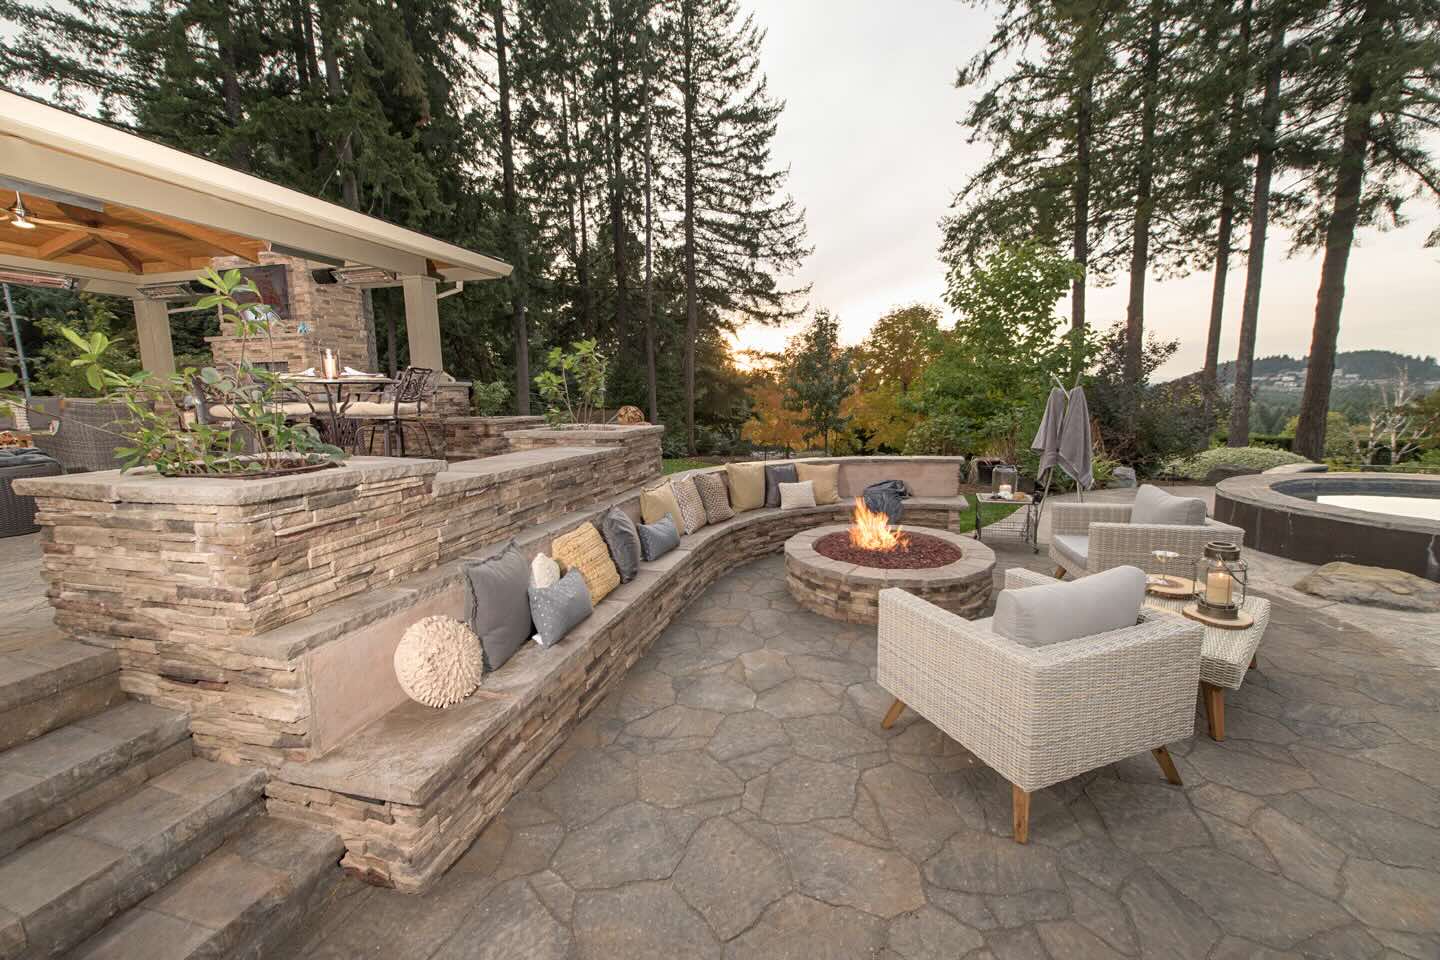
Welcome to the world of outdoor entertaining! If you have a sloped yard and have been dreaming of adding a cozy and inviting space for gatherings, then building a fire pit could be the perfect solution. Picture this: the sun setting in the distance, casting a warm glow over your backyard, friends and family gathered around the crackling flames, sharing stories and toasting marshmallows. With the right guidance and a touch of creativity, you can transform your sloped yard into a captivating and functional outdoor oasis.
In this comprehensive guide, we will explore the step-by-step process of building a fire pit on a sloped yard. From assessing the unique challenges posed by the terrain to selecting the ideal location, gathering the necessary materials and tools, and finally, constructing the fire pit, we will cover everything you need to know to bring your vision to life. Whether you're a seasoned DIY enthusiast or a newcomer to outdoor projects, this guide is designed to provide you with the knowledge and inspiration to tackle this rewarding endeavor.
Building a fire pit on a sloped yard presents its own set of considerations and opportunities. The natural contours of the land can add character and charm to your outdoor space, but they also require thoughtful planning and careful execution. By understanding the nuances of working with a sloped yard, you can leverage its unique features to create a fire pit that not only enhances the functionality of your outdoor area but also complements the natural beauty of the landscape.
So, roll up your sleeves, unleash your creativity, and get ready to embark on a journey to transform your sloped yard into a captivating and inviting space for outdoor gatherings. Whether you're seeking a serene retreat for quiet evenings or a lively hub for socializing and entertaining, a well-designed fire pit can become the centerpiece of your outdoor lifestyle. Let's dive in and discover how to bring this vision to life, step by step.
Key Takeaways:
- Embrace the natural beauty of your sloped yard when building a fire pit. Consider the slope, drainage, and existing landscaping to create a captivating outdoor oasis that harmonizes with the landscape.
- Prepare the fire pit site meticulously by clearing, leveling, and installing base materials. This sets the stage for a seamless and structurally sound construction, ensuring a durable and visually captivating fire pit.
Read more: How To Build An Outdoor Fire Pit
Assessing the Sloped Yard
Before breaking ground on your fire pit project, it’s essential to thoroughly assess the unique characteristics of your sloped yard. Understanding the topography, drainage patterns, and existing landscaping features will lay the foundation for a successful and harmonious integration of the fire pit into the space.
Begin by surveying the slope of your yard. Note the degree of incline and any variations in elevation across the area where you envision building the fire pit. Understanding the slope will help you determine the most suitable location for the fire pit and anticipate any challenges related to leveling the ground or creating a stable foundation.
Next, consider the drainage patterns on your sloped yard. Identify how water flows during rain or snowmelt, as well as any areas prone to erosion. Proper drainage is crucial for the longevity of your fire pit, as excess moisture can compromise its structural integrity. By understanding the natural water movement on your slope, you can implement measures to mitigate potential issues and ensure the fire pit’s resilience against the elements.
Take note of existing vegetation, trees, and other landscaping elements that contribute to the beauty of your sloped yard. These features can influence the placement of the fire pit, as well as the overall design aesthetic. By preserving and incorporating these natural elements into your fire pit project, you can create a seamless integration with the surrounding landscape, enhancing the visual appeal and cohesiveness of the outdoor space.
Furthermore, assess the accessibility of the sloped yard. Consider pathways, entrances, and any potential obstacles that may impact the transportation of materials and the construction process. Accessibility is not only important during the building phase but also for the future enjoyment and maintenance of the fire pit. Ensuring convenient access to the fire pit area will contribute to its functionality and long-term usability.
By thoroughly assessing the slope, drainage, existing landscaping, and accessibility of your yard, you will gain valuable insights that will inform the subsequent steps of the fire pit construction process. Understanding the intricacies of your sloped yard will empower you to make informed decisions and tailor the fire pit design to harmonize with the natural features of the landscape.
Selecting the Fire Pit Location
Choosing the right location for your fire pit is a pivotal decision that will significantly influence the ambiance and functionality of your outdoor space. When working with a sloped yard, the location of the fire pit plays an even more crucial role in ensuring safety, stability, and visual appeal. Here are key considerations to guide you in selecting the optimal spot for your fire pit:
- Level Ground: While it may be challenging to find perfectly level ground on a sloped yard, aim to identify a relatively flat area for the fire pit. This will facilitate easier construction and enhance the stability of the fire pit structure. If necessary, minor grading or leveling can be undertaken to create a more suitable foundation.
- Distance from Flammable Materials: Take into account the proximity of trees, shrubs, and other flammable vegetation when choosing the fire pit location. It’s essential to place the fire pit at a safe distance from any combustible materials to minimize the risk of accidental fires and ensure the safety of your outdoor environment.
- Wind Patterns: Consider prevailing wind patterns in your yard when determining the fire pit location. Positioning the fire pit in a sheltered area or incorporating windbreaks into the design can help create a more comfortable and enjoyable environment for gatherings, preventing excessive smoke and enhancing the overall experience.
- Views and Accessibility: Capitalize on the natural beauty of your sloped yard by choosing a location that offers scenic views and easy accessibility. Whether it’s overlooking a picturesque landscape or providing a cozy nook nestled within the terrain, the fire pit location should maximize the visual appeal and create a welcoming atmosphere for relaxation and socializing.
- Integration with the Landscape: Embrace the natural contours and features of the sloped yard when selecting the fire pit location. By harmonizing the design with the landscape, you can create a seamless and organic transition, ensuring that the fire pit becomes an integral part of the outdoor environment rather than an isolated structure.
Furthermore, consider the orientation of the fire pit in relation to the sun’s path during different times of the day. Maximizing sunlight or providing shade as desired can enhance the comfort and versatility of the fire pit area, allowing for enjoyable gatherings throughout the day and evening.
By carefully evaluating these factors and conducting a thorough assessment of your sloped yard, you can identify the ideal location for your fire pit that optimizes safety, aesthetics, and functionality. The chosen location will serve as the focal point of your outdoor space, inviting warmth, relaxation, and memorable moments for years to come.
Gathering Materials and Tools
As you prepare to embark on the construction of a fire pit in your sloped yard, it’s essential to gather the necessary materials and tools to ensure a smooth and efficient building process. From foundational components to finishing touches, here’s a comprehensive list of items you’ll need to bring your fire pit vision to life:
Materials
- Fire Pit Kit or Individual Components: Depending on your preferred design and construction method, you may choose to purchase a fire pit kit that includes essential components such as a metal insert, retaining wall blocks, or pavers. Alternatively, you can opt to source individual materials to customize the fire pit to your specific preferences.
- Gravel or Sand: For creating a stable base and ensuring proper drainage, gravel or sand will be essential for the foundation of the fire pit. These materials provide a level surface and aid in preventing shifting or settling over time.
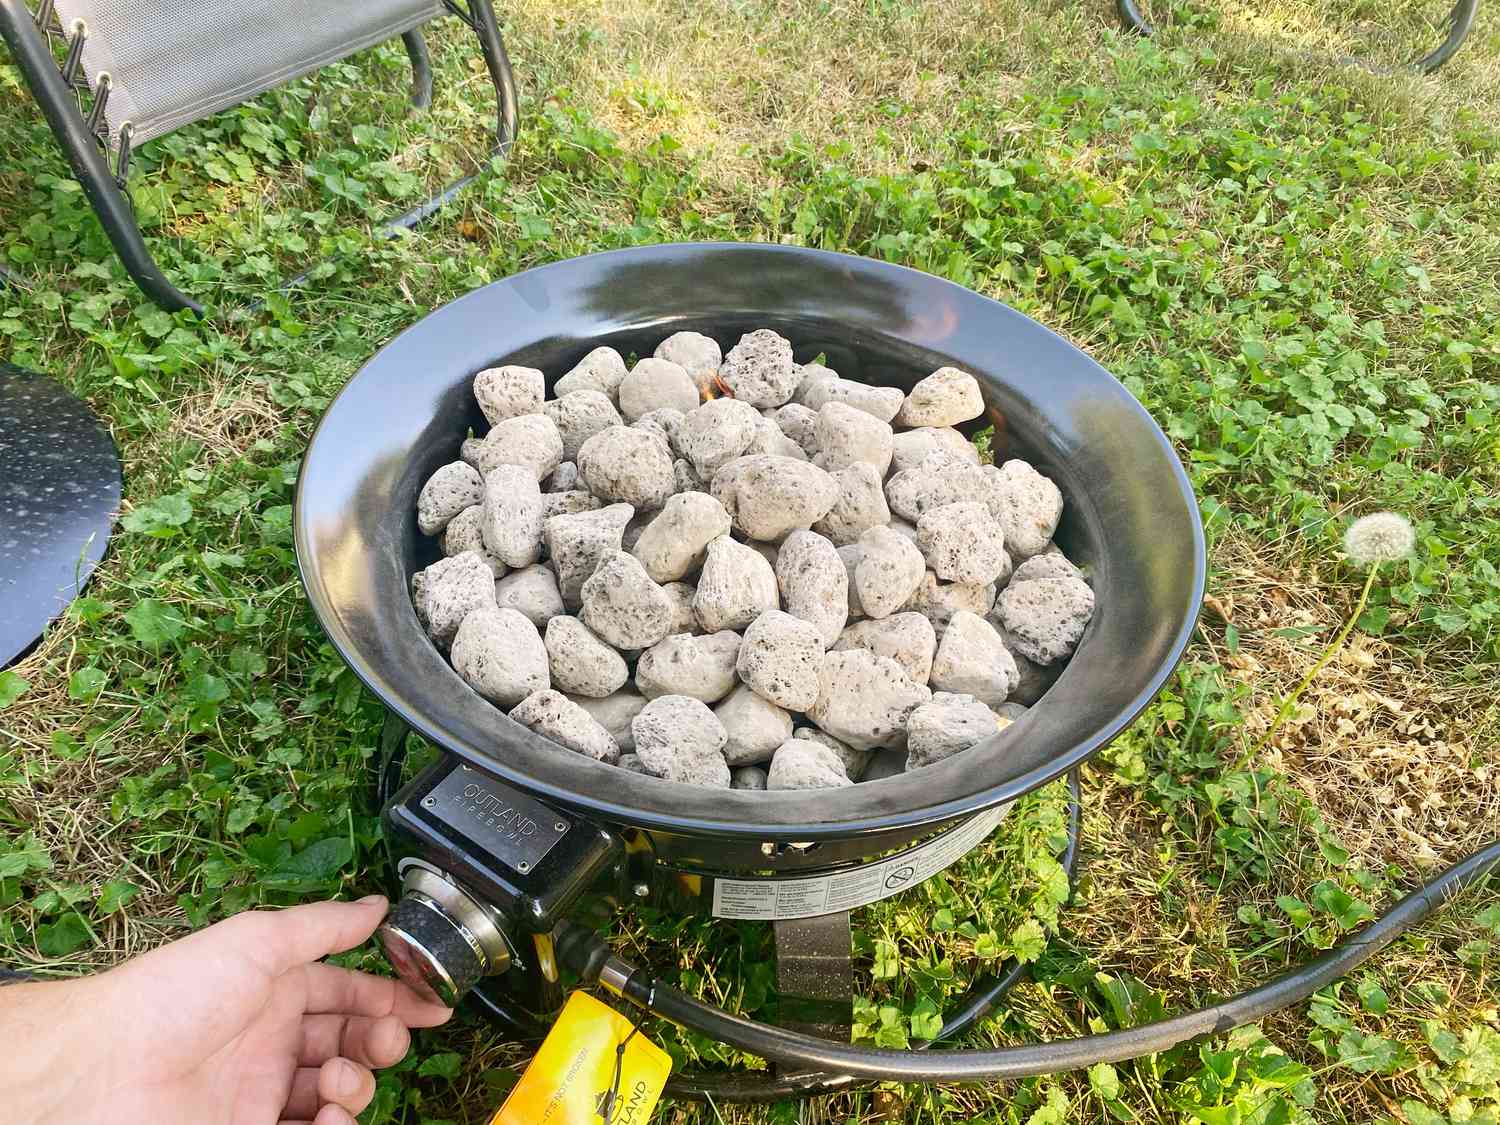
- Heat-Resistant Fire Pit Ring or Insert: If not included in a pre-packaged fire pit kit, a heat-resistant metal ring or insert will serve as the inner core of the fire pit, containing the flames and providing a durable and safe burning area.
- Landscape Fabric: To inhibit weed growth and maintain the integrity of the fire pit foundation, landscape fabric can be used as a barrier between the ground and the base materials.
- Decorative Stones or Pavers: Select decorative stones, pavers, or retaining wall blocks to construct the outer layer of the fire pit, adding visual appeal and structural support to the design.
- High-Heat Resistant Mortar or Adhesive: If using individual stones or blocks for the fire pit construction, high-heat resistant mortar or adhesive will be necessary to secure the components and ensure a durable and stable structure.
- Fire Pit Screen or Grate: Consider including a fire pit screen or grate to contain embers and enhance safety during use. These accessories also facilitate airflow and contribute to efficient burning.
Read more: How To Build A Good Fire In A Fire Pit
Tools
- Shovel and Rake: Essential for excavation, leveling, and spreading base materials, a sturdy shovel and rake will be indispensable throughout the construction process.
- Tape Measure and Level: Accurate measurements and precise leveling are crucial for ensuring the stability and symmetry of the fire pit. A tape measure and level will aid in achieving the desired dimensions and alignment.
- Rubber Mallet: Utilized for tapping and adjusting stones or pavers into place, a rubber mallet is a valuable tool for fine-tuning the positioning of fire pit components.
- Masonry Saw or Chisel: If customization or cutting of stones or pavers is required, a masonry saw or chisel will facilitate the necessary adjustments to achieve a tailored fit for the fire pit construction.
- Work Gloves and Safety Glasses: Prioritize safety by equipping yourself with work gloves and safety glasses to protect your hands and eyes during the handling of materials and tools.
By assembling the right materials and tools for the job, you’ll be well-prepared to tackle the construction of your fire pit on the sloped yard with confidence and efficiency. With careful planning and attention to detail, the process of gathering these essentials sets the stage for a successful and rewarding outdoor project.
Preparing the Site
Before commencing the construction of your fire pit on the sloped yard, thorough site preparation is essential to establish a stable and well-suited foundation for the structure. By following these key steps, you can ensure that the site is primed for the successful installation of the fire pit:
Clearing and Marking the Area
Begin by clearing the designated fire pit area of any vegetation, debris, or obstructions. This includes removing grass, roots, rocks, and other impediments that could interfere with the construction process. Once the area is cleared, use marking paint or stakes to outline the shape and dimensions of the fire pit, allowing for an accurate and visually guided excavation process.
Excavation and Leveling
With the area marked, proceed to excavate the site to the desired depth, taking into account the necessary clearance for the fire pit ring or insert, as well as the base materials. Use a shovel and rake to carefully remove soil and create a level surface for the fire pit foundation. It’s important to periodically check the depth and ensure uniformity throughout the excavation process.
Read more: How To Build A Brick Fire Pit
Installing Base Materials
Once the site is excavated and leveled, introduce a layer of gravel or sand to establish a stable and well-draining base for the fire pit. Spread the base materials evenly and compact them to create a solid foundation that will support the weight of the fire pit components and promote proper drainage to prevent water accumulation.
Applying Landscape Fabric
To inhibit weed growth and maintain the integrity of the base materials, lay down landscape fabric over the prepared foundation. Trim the fabric to fit the dimensions of the fire pit area, ensuring that it provides effective coverage and acts as a barrier between the ground and the base materials.
Positioning the Fire Pit Components
With the base materials and landscape fabric in place, carefully position the fire pit ring or insert at the center of the prepared site, ensuring that it sits securely on the base and aligns with the marked dimensions. If using a fire pit kit or individual components, follow the manufacturer’s instructions for proper placement and orientation.
Verifying Alignment and Levelness
Before proceeding to the construction phase, verify that the fire pit ring or insert is aligned and level within the site. Use a tape measure and level to confirm the accuracy of the positioning, making any necessary adjustments to ensure a precise and stable foundation for the upcoming construction of the fire pit walls.
By meticulously preparing the site through clearing, excavation, installation of base materials, and verification of alignment, you can set the stage for a seamless and structurally sound construction of the fire pit on your sloped yard. This diligent preparation paves the way for the realization of your outdoor oasis, where memorable gatherings and cozy evenings await around the enchanting glow of the fire pit.
Read more: How To Build A Fire Pit With Stone
Building the Fire Pit
With the site meticulously prepared, you are now ready to embark on the construction phase of your fire pit project. Building a fire pit on a sloped yard requires careful attention to detail and a methodical approach to ensure stability and aesthetic appeal. Follow these step-by-step guidelines to construct a durable and visually captivating fire pit:
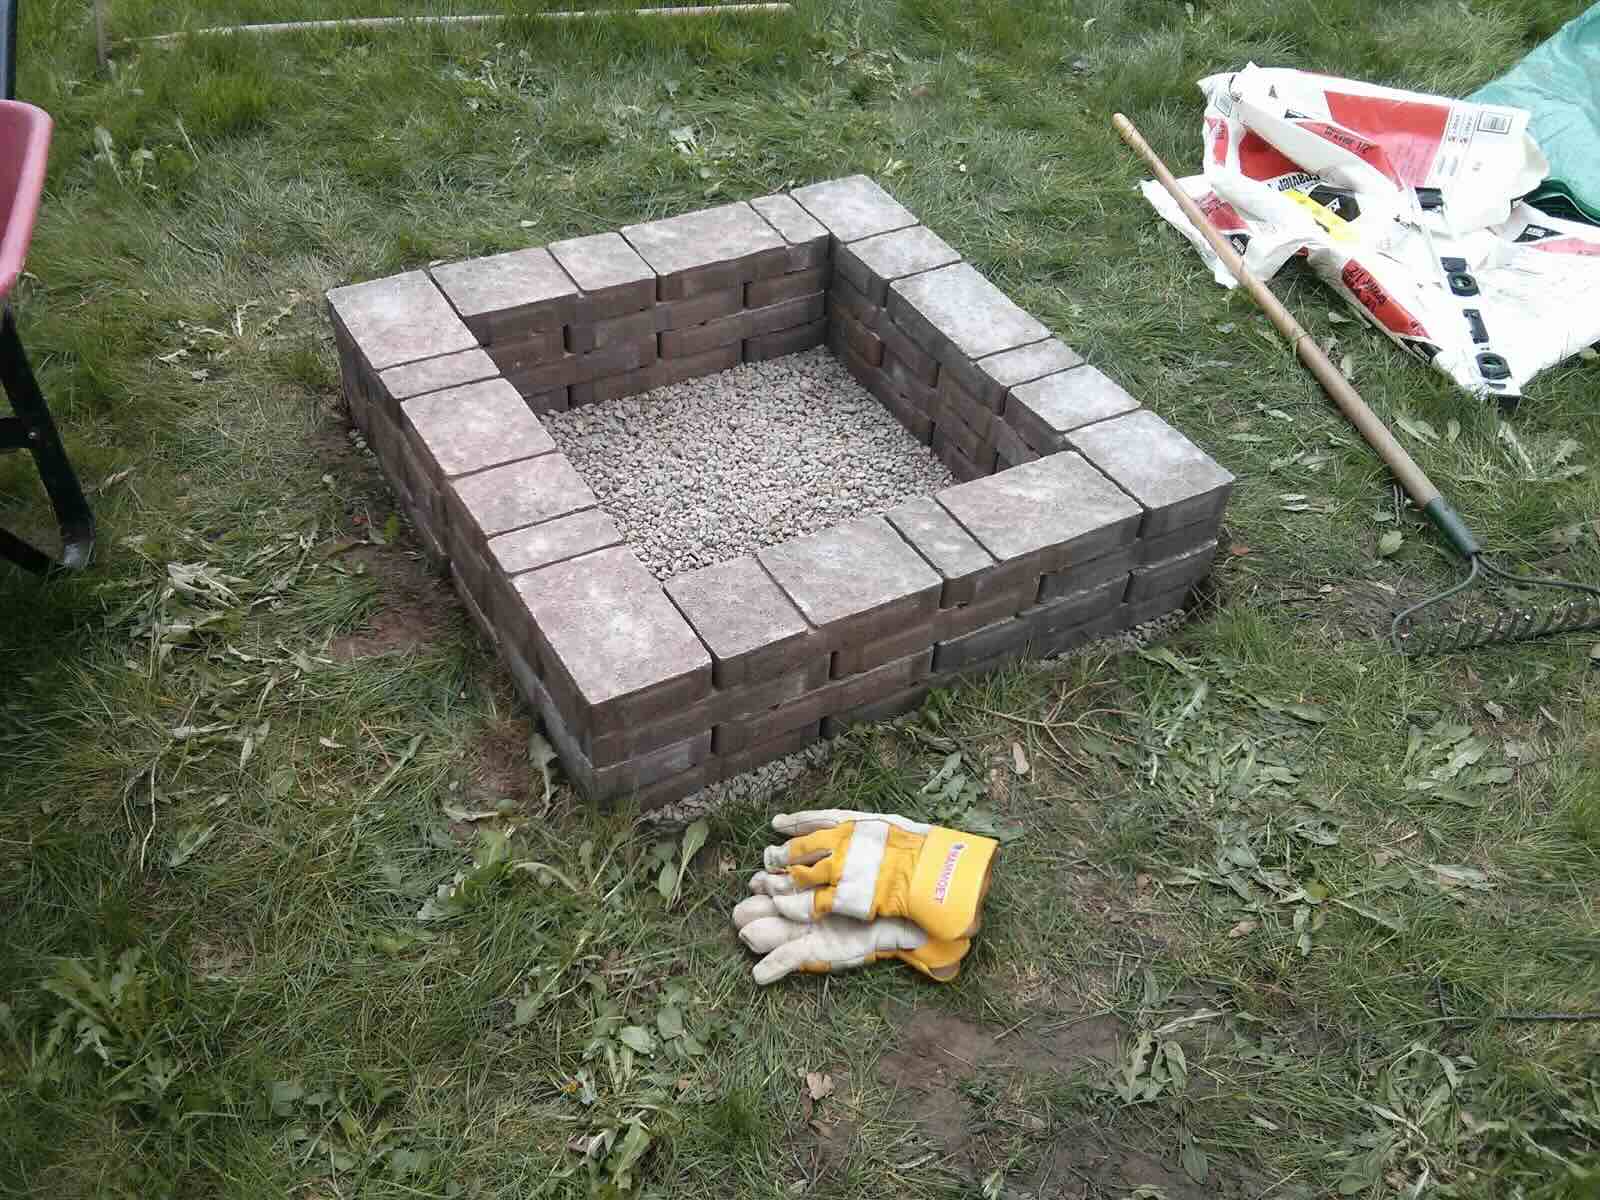
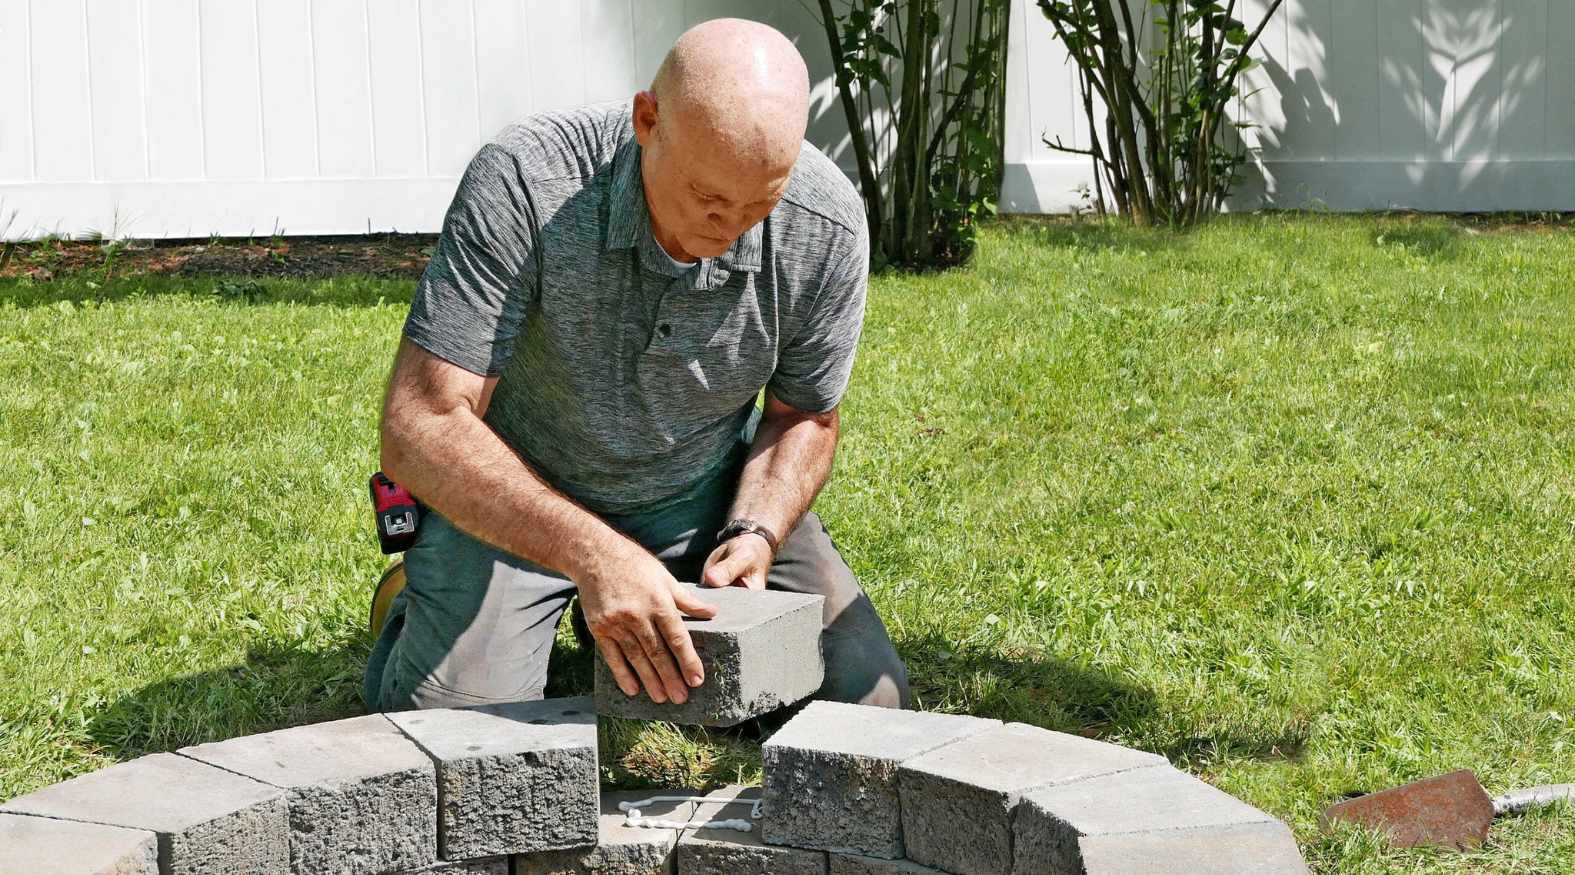
Stacking the Retaining Wall Blocks or Pavers
Commence the construction by stacking the retaining wall blocks or arranging the pavers around the perimeter of the fire pit ring or insert. Ensure a snug fit and level alignment as you build the walls, utilizing a rubber mallet to adjust the positioning of the blocks or pavers as needed. The height of the walls can be customized to suit your preferences, providing adequate containment for the fire while complementing the overall design of the fire pit.
Applying High-Heat Resistant Mortar or Adhesive
If using individual stones or blocks for the fire pit construction, apply high-heat resistant mortar or adhesive between the joints to secure the components and enhance the structural integrity of the walls. Work methodically, layer by layer, ensuring that each course is level and securely bonded to the underlying layers. Pay careful attention to the vertical and horizontal alignment of the components to achieve a professional and cohesive appearance.
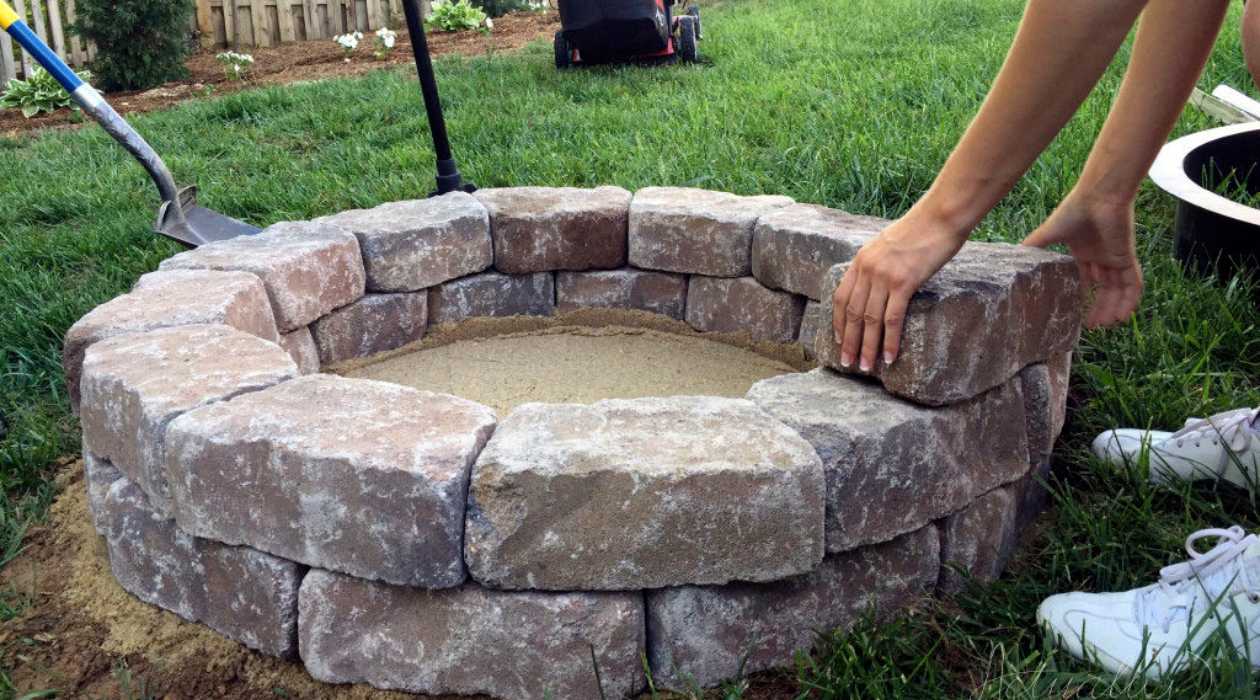
Creating a Decorative Top Layer
Once the walls are constructed to the desired height, consider incorporating a decorative top layer of stones, coping, or pavers to provide a finishing touch to the fire pit. This layer not only adds visual interest but also serves as a functional surface for seating or placing items near the fire pit. Ensure that the top layer is securely affixed and complements the overall aesthetic of the fire pit design.
Read more: How To Build A Fire Pit In The Ground
Installing a Fire Pit Screen or Grate
To contain embers and enhance safety during use, consider installing a fire pit screen or grate over the burning area. This accessory facilitates airflow, prevents sparks from escaping, and adds a layer of protection for both the fire pit and its surroundings. Choose a screen or grate that fits securely within the fire pit and aligns with the overall design scheme.
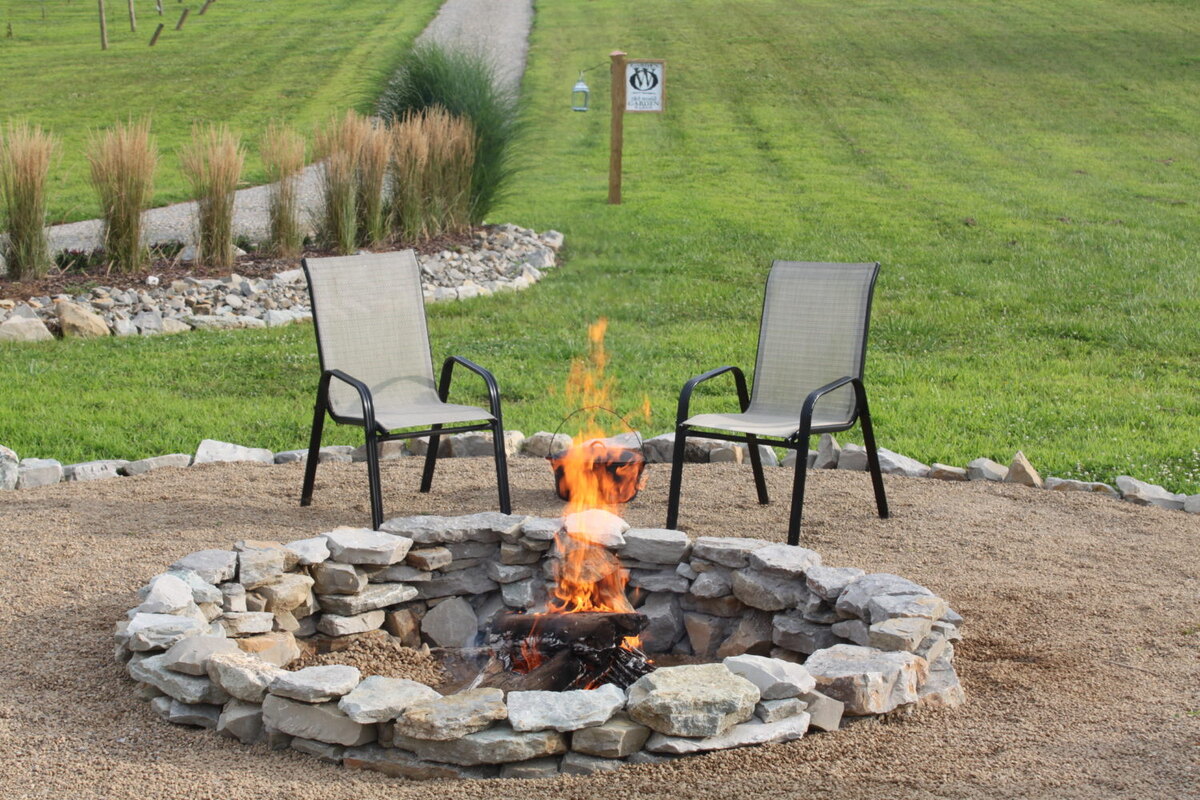
Finalizing the Surrounding Area
As the construction of the fire pit nears completion, take the opportunity to finalize the surrounding area by adding seating, landscaping, or additional features that complement the fire pit. Consider incorporating natural elements such as boulders, mulch, or plantings to seamlessly integrate the fire pit into the sloped yard, creating a cohesive and inviting outdoor environment.
By diligently following these construction steps and paying attention to detail throughout the process, you can bring your vision of a stunning and functional fire pit to fruition on your sloped yard. The resulting structure will not only serve as a focal point for outdoor gatherings but also stand as a testament to your craftsmanship and creativity, inviting warmth and camarader around its captivating flames.
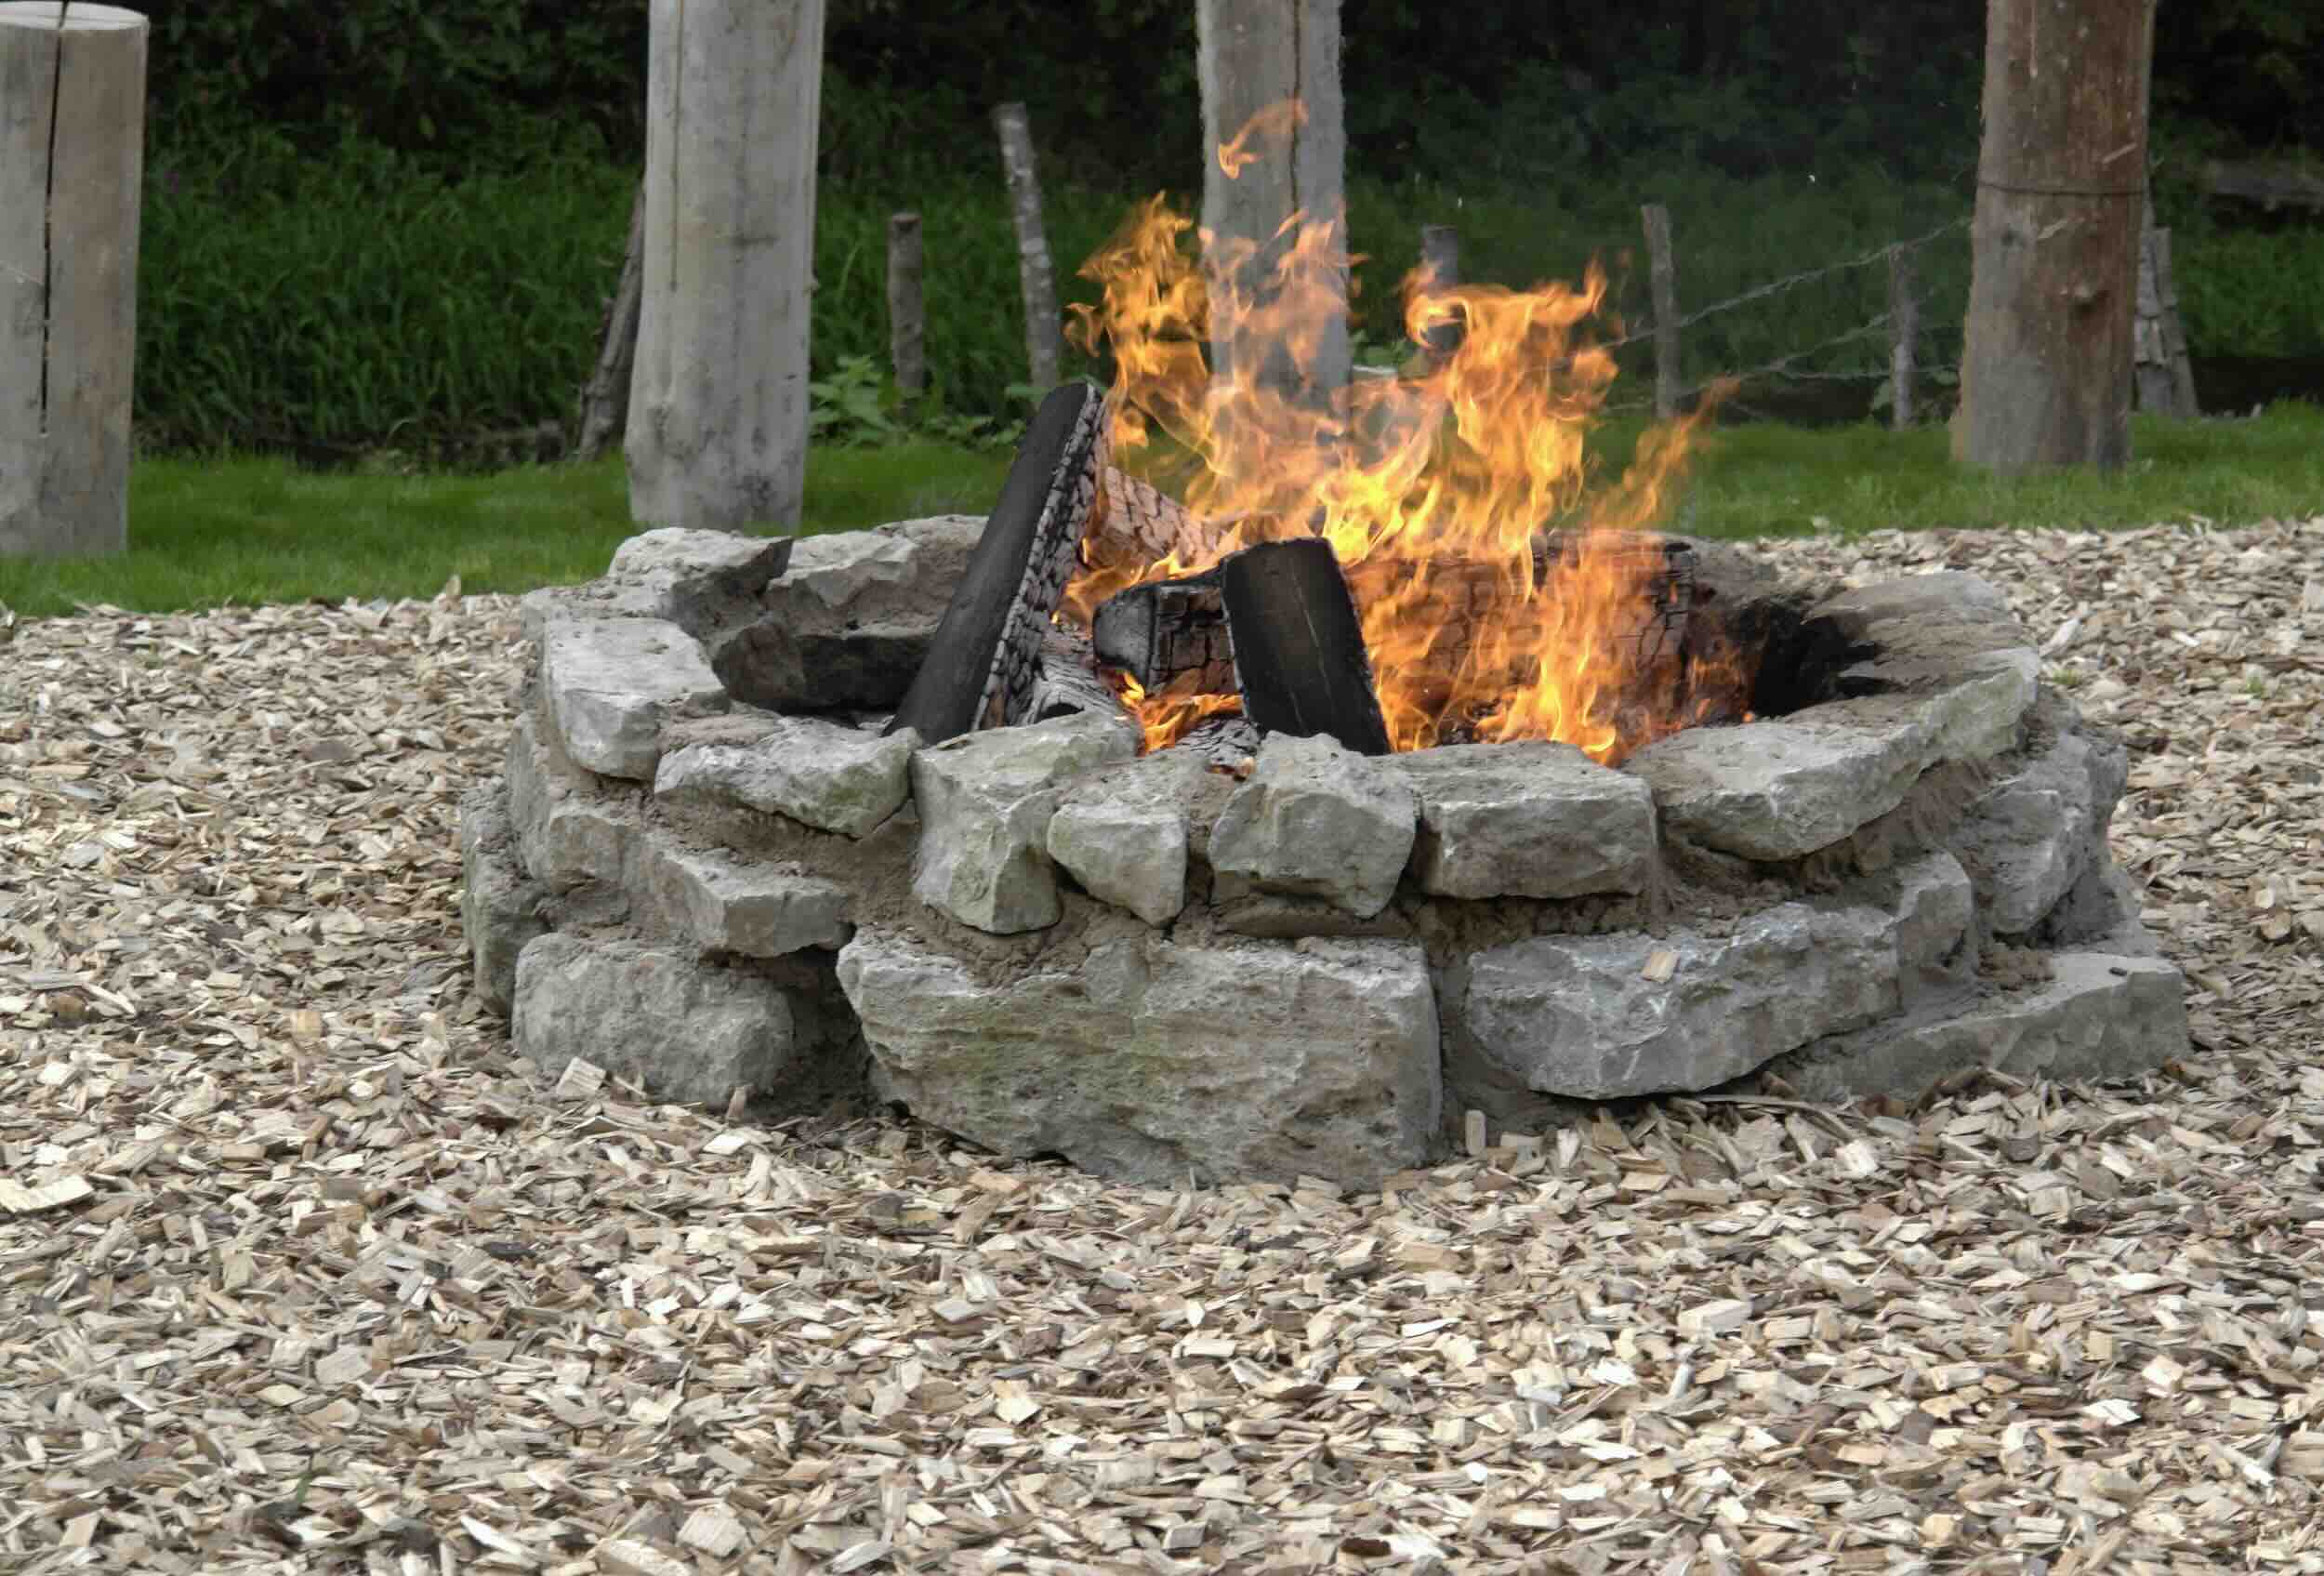
Enjoying the Finished Fire Pit
Congratulations, you’ve successfully transformed your sloped yard into a captivating outdoor haven with the addition of a stunning fire pit. As the final touches are put in place and the flames dance within the carefully constructed enclosure, it’s time to embrace the warmth, ambiance, and endless possibilities that your finished fire pit brings to your outdoor space.
Creating Inviting Gathering Spaces
With the fire pit as the centerpiece, consider arranging seating areas around it to encourage intimate conversations, storytelling, and relaxation. Whether it’s comfortable chairs, rustic benches, or built-in stone seating, creating inviting gathering spaces around the fire pit will foster memorable moments and forge lasting connections with family and friends.
Read more: How To Build A Fire Pit For Burning Leaves
Enhancing the Ambiance
Explore ways to enhance the ambiance of the fire pit area, such as incorporating soft outdoor lighting, lanterns, or string lights to extend the enjoyment into the evening hours. The gentle glow of strategically placed lighting not only adds a magical touch to the surroundings but also ensures safety and visibility for all who gather around the fire pit.
Celebrating with Outdoor Activities
Beyond its warming glow, the fire pit opens up a world of outdoor activities and culinary delights. From roasting marshmallows and cooking campfire meals to engaging in sing-alongs or stargazing, the fire pit becomes the focal point for a myriad of outdoor experiences. Embrace the versatility of your fire pit and infuse your outdoor gatherings with creativity and joy.
Maintaining and Caring for the Fire Pit
To preserve the beauty and functionality of your fire pit, it’s important to incorporate regular maintenance into your outdoor routine. Clear away debris, ash, and any combustible materials from the fire pit after each use, and consider covering it when not in use to protect it from the elements. Additionally, inspect the structure periodically to ensure that it remains in optimal condition for safe and enjoyable use.
Embracing Year-Round Enjoyment
As the seasons change, your fire pit continues to be a source of comfort and delight. Whether it’s providing warmth on cool evenings, serving as a gathering place for holiday celebrations, or simply offering a serene spot for reflection, the fire pit extends its allure throughout the year, becoming an indispensable part of your outdoor lifestyle.
By savoring the finished fire pit and infusing it with your personal touch, you can create an outdoor sanctuary that beckons you to unwind, connect, and revel in the simple pleasures of life. As the flames flicker and the laughter fills the air, your fire pit stands as a testament to the transformative power of outdoor living, where cherished memories are kindled and shared amidst the enchanting embrace of its radiant warmth.
Frequently Asked Questions about How To Build A Fire Pit On A Sloped Yard
Was this page helpful?
At Storables.com, we guarantee accurate and reliable information. Our content, validated by Expert Board Contributors, is crafted following stringent Editorial Policies. We're committed to providing you with well-researched, expert-backed insights for all your informational needs.


0 thoughts on “How To Build A Fire Pit On A Sloped Yard”