Articles
How To Clear HVAC Drain Line
Modified: September 2, 2024
Learn how to clear your HVAC drain line with these helpful articles. Prevent clogs and keep your system running smoothly.
(Many of the links in this article redirect to a specific reviewed product. Your purchase of these products through affiliate links helps to generate commission for Storables.com, at no extra cost. Learn more)
Introduction
Welcome to our comprehensive guide on how to clear your HVAC drain line. If you’re experiencing issues with your heating, ventilation, and air conditioning (HVAC) system, a clogged drain line could be the culprit. This can cause a range of problems, from reduced cooling and heating efficiency to water damage and mold growth. Fortunately, by following a few simple steps, you can easily clear the drain line and restore your HVAC system’s proper function.
Understanding how your HVAC drain line works is essential for successfully clearing any blockages. During the cooling process, your HVAC system removes moisture from the air, which then collects in the drain pan. The drain line is responsible for carrying this excess water away from the unit and out of your home. Over time, however, algae, mold, debris, and other substances can accumulate in the drain line, leading to blockages and restricted water flow.
By learning how to identify the signs of a clogged drain line, gathering the necessary tools and materials, and following the steps outlined in this guide, you’ll be able to clear your HVAC drain line quickly and effectively.
Before we dive into the step-by-step process, let’s take a closer look at the common signs that indicate you have a clogged HVAC drain line.
Key Takeaways:
- Regular maintenance and cleaning of your HVAC drain line is crucial to prevent clogs, water damage, and reduced system efficiency. By following the step-by-step guide, you can ensure the optimal performance of your HVAC system.
- Recognizing the signs of a clogged drain line, gathering the necessary tools, and taking safety precautions are essential for successfully clearing your HVAC drain line. Stay proactive and enjoy a more efficient and reliable HVAC system.
Read more: How To Clear Air Conditioning Drain Line
Understanding the HVAC Drain Line
The HVAC drain line plays a critical role in ensuring the efficient operation of your HVAC system. It is responsible for removing excess water that accumulates in the drain pan and carrying it away from the unit. Understanding how the drain line functions can help you identify and address any issues that may arise.
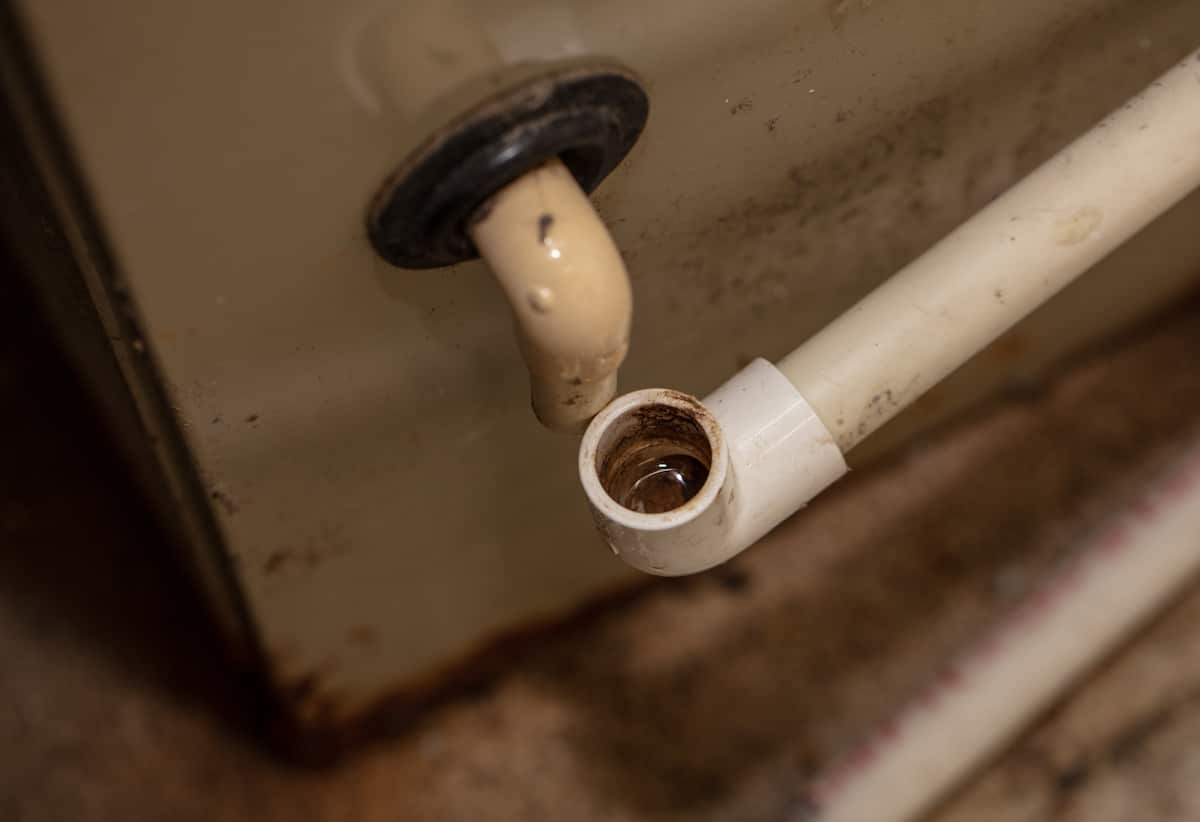
The drain line is typically made of PVC or a similar material and is connected to the drain pan, which is located beneath the evaporator coil inside your HVAC unit. As air is cooled by the evaporator coil, moisture condenses and collects in the drain pan. This is a natural byproduct of the cooling process.
From the drain pan, the water is carried by gravity through the drain line and out of your home. The drain line usually exits either through an exterior wall or into a drain located in your basement or crawl space.
Over time, the drain line can become clogged and obstructed by various substances, including algae, mold, dirt, and debris. This can prevent the water from flowing freely and lead to backups and leaks, which can cause damage to your HVAC system and property.
Regular maintenance and cleaning of the HVAC drain line are crucial to prevent clogs and ensure proper drainage. By keeping the drain line clean and free from blockages, you can help maintain the efficiency and longevity of your HVAC system.
In the next section, we will explore the signs that indicate a clogged HVAC drain line, so you can take appropriate action to address the issue.
Signs of a Clogged HVAC Drain Line
A clogged HVAC drain line can lead to a range of issues, from reduced cooling and heating efficiency to potential water damage in your home. It is important to recognize the signs of a clogged drain line so you can take prompt action and prevent further complications. Here are some common signs to look out for:
- Water leaks around the HVAC unit: One of the most noticeable signs of a clogged drain line is water leaking around the HVAC unit. This can occur near the indoor unit, in the basement, or near the exterior condenser unit. If you notice water pooling or dripping where it shouldn’t be, it’s likely a sign of a clog in the drain line.
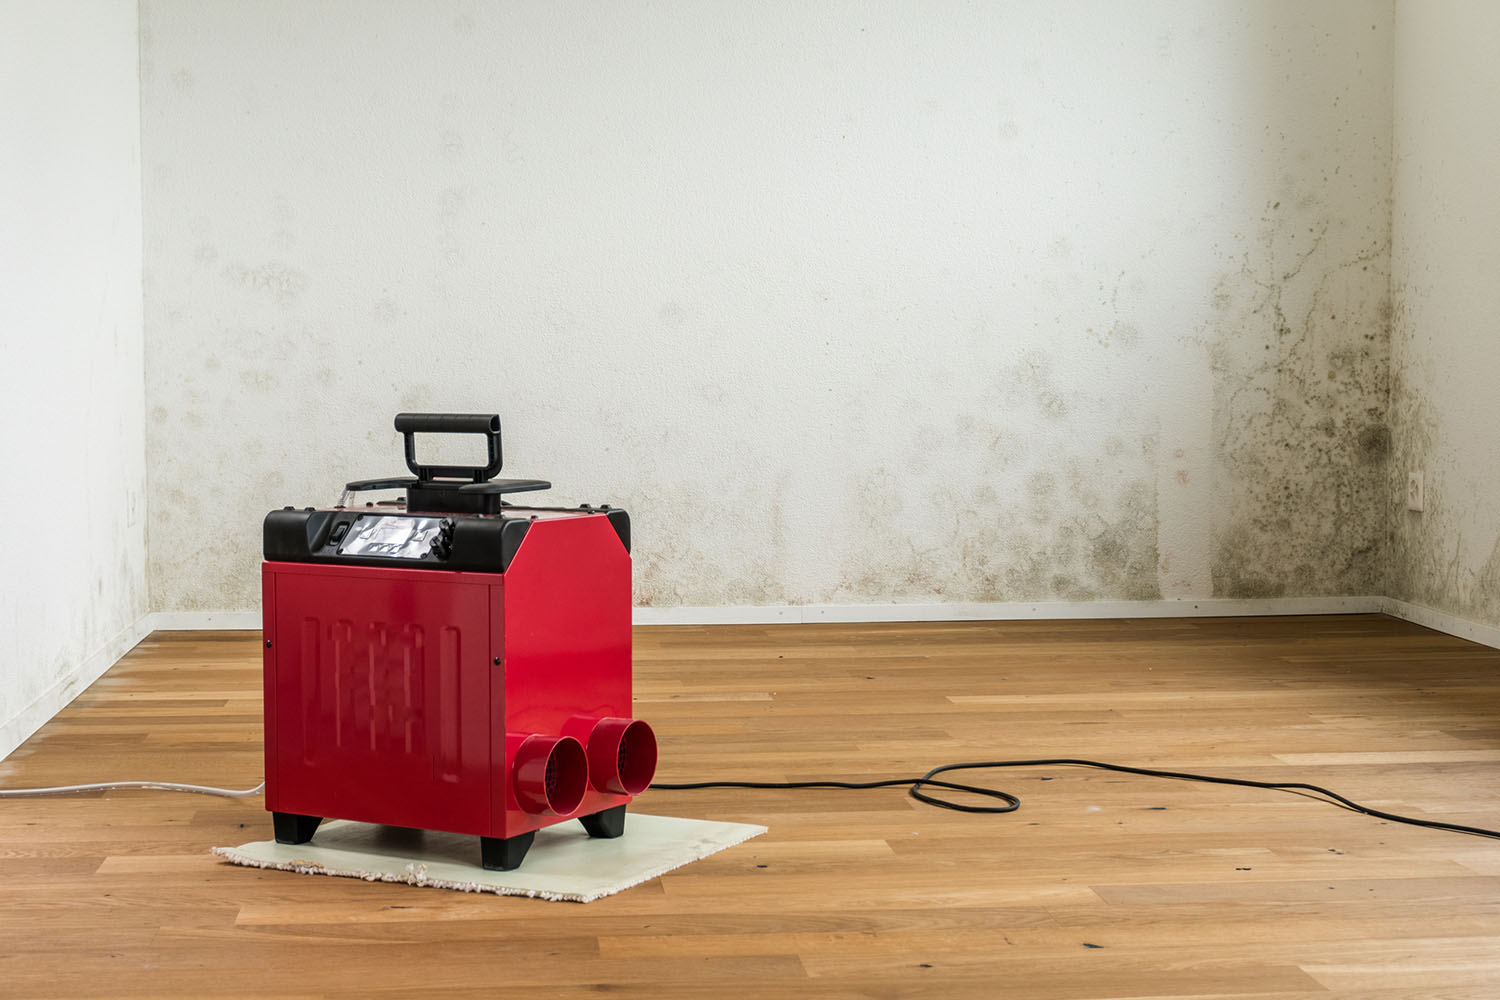
- Visible mold or mildew: A clogged drain line can create a damp environment that promotes the growth of mold and mildew. If you notice black or greenish growth around the HVAC unit or a musty odor, it could indicate a clogged drain line.
- Reduced cooling or heating performance: A clog in the drain line can impact the overall performance of your HVAC system. If you notice that your home is not cooling or heating as effectively as it should, a clogged drain line could be to blame. Restricted water flow can lead to reduced system efficiency and compromised temperature control.
- Excessive moisture or humidity: The purpose of the drain line is to remove excess moisture from the air. If the line is clogged, it can result in increased moisture levels inside your home, causing a rise in humidity. This can make your living space feel uncomfortable and contribute to mold growth.
- Gurgling or bubbling sounds: When the drain line is clogged, air bubbles may form as the water tries to escape. This can result in gurgling or bubbling sounds coming from the HVAC unit. If you notice unusual noises during the operation of your HVAC system, it’s worth investigating the drain line for potential blockages.
If you experience any of these signs, it’s important to address the issue promptly to prevent further damage and ensure the optimal functioning of your HVAC system. In the next section, we will discuss the tools and materials you will need to clear a clogged HVAC drain line.
Tools and Materials Needed
Before you begin clearing your HVAC drain line, it’s important to gather the necessary tools and materials to successfully complete the task. Having these items on hand will make the process smoother and more efficient. Here are the tools and materials you will need:
- Screwdriver: You will need a screwdriver to remove the access panel or cap from your HVAC unit. This will allow you to access the drain line.
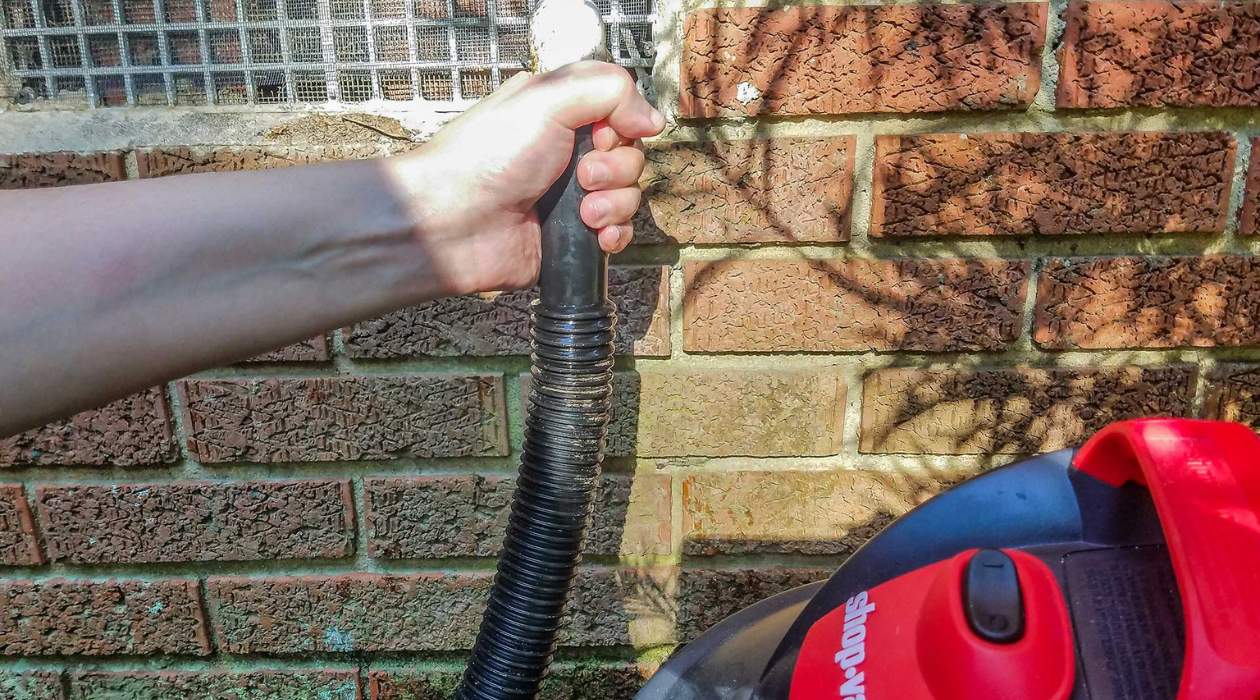
- Wet/dry vacuum: A wet/dry vacuum is essential for removing any standing water or debris that may be present in the drain line. It will help clear the clog and restore proper drainage.
- Algaecide or vinegar: Algae and mold are common culprits behind clogged drain lines. Using an algaecide or vinegar solution can help eliminate these growths and prevent future clogs.
- Plumbing brush or pipe cleaner: A plumbing brush or pipe cleaner is useful for manually removing any obstructions or buildup within the drain line. This will aid in restoring proper water flow.
- Bucket or towels: It’s important to have a bucket or towels on hand to catch any water that may overflow during the cleaning process. This will help prevent damage to your floors or surrounding areas.
- Rubber gloves and protective eyewear: To protect yourself from any potential contaminants or cleaning agents, it’s recommended to wear rubber gloves and protective eyewear during the cleaning process.
By gathering these tools and materials before you begin, you’ll be well-prepared to clear your HVAC drain line effectively. In the next section, we will walk you through the step-by-step process of clearing the clog.
Step 1: Turn Off the Power
Before you start working on your HVAC drain line, it is crucial to ensure your safety by turning off the power to your HVAC system. This will prevent any accidental electrical shocks or damage to the system components.
To turn off the power, locate the electrical panel or breaker box in your home or the area where your HVAC unit is installed. Look for the breaker that corresponds to your HVAC system and flip it to the “off” position. This will disconnect the power supply to your HVAC unit and eliminate any potential electrical hazards.
It is essential to double-check that the power is indeed off by testing the HVAC system to ensure it does not turn on. To be extra cautious, you may want to use a non-contact voltage tester to verify that there is no electrical current present before proceeding with the next steps.
Remember, safety should always be the top priority when working with any electrical components. By turning off the power to your HVAC system, you minimize the risk of injury and can proceed confidently with clearing the drain line.
In the next step, we will guide you on how to locate the HVAC drain line within your system.
Read more: How To Clean HVAC Drain Line
Step 2: Locate the HVAC Drain Line
After ensuring that the power is turned off, the next step is to locate the HVAC drain line within your system. The drain line is typically connected to the drain pan, which is located beneath the evaporator coil inside your HVAC unit.
Start by finding your HVAC unit. Depending on the design and setup of your system, it could be located in your basement, crawl space, attic, or even outside. Look for the access panel or cap on the unit. This is where the drain line is usually connected.
Once you’ve located the access panel or cap, use a screwdriver to remove it. This will allow you to access the drain line and perform the necessary cleaning and clearing procedures.
It’s important to note that the exact location and appearance of the drain line may vary depending on the specific design of your HVAC system. In some cases, the drain line may have a dedicated pipe that protrudes from the unit and goes directly outside. In other instances, the drain line may be connected to a nearby plumbing fixture or drain in your home.
If you’re having trouble locating the drain line or aren’t sure if you’ve found the correct access point, consult your HVAC system’s manual or consider reaching out to a professional for assistance. Properly identifying the drain line is crucial for successful clearing and maintenance.
Once you have located the access point and identified the drain line, you can proceed to the next step, which involves removing the cap or access point to gain access to the drain line itself.
Step 3: Remove the Cap or Access Point
With the power turned off and the location of the HVAC drain line identified, the next step is to remove the cap or access point to gain access to the drain line itself. This will allow you to inspect the line for any blockages and begin the process of clearing the clog.
Using a screwdriver, carefully remove the cap or access point that covers the drain line. This cap is typically located near the drain pan and may be secured with screws or simply twisted off. Be sure to set aside the cap in a safe place where it won’t get lost or damaged.
Once the cap is removed, you will have a clear view of the drain line. Take a moment to inspect the line for any visible signs of blockage, such as algae, mold, or debris. This initial inspection will help you determine the severity of the clog and guide your subsequent actions.
If you notice any significant buildup or obstruction, proceed to the next step where we will discuss how to inspect and clear the drain line. If the drain line appears clean and free of blockages, it may be necessary to check for other potential issues with your HVAC system that are contributing to the problem.
Remember to handle the cap or access point with care, as it will need to be reinstalled once the cleaning and clearing process is complete. By removing the cap or access point, you have successfully prepared the drain line for inspection and clearing. In the next step, we will discuss how to inspect the drain line for any clogs or blockages.
Pour a mixture of 1 cup of vinegar and 1 cup of hot water down the HVAC drain line to help clear any clogs and prevent future blockages. Repeat every few months for maintenance.
Step 4: Inspect the Drain Line
Now that you have removed the cap or access point, it’s time to inspect the drain line for any signs of clogs or blockages. This step will help you determine the extent of the issue and identify the best course of action to clear the drain line.
Begin by visually examining the inside of the drain line. Look for any visible signs of buildup, such as algae, mold, or debris. These can be indicators of a clogged drain line. If you notice any significant blockage, it’s important to proceed with the cleaning process to restore proper water flow.
In addition to visual inspection, you can also use a flashlight to shine into the drain line and check for any obstructions that may not be immediately visible. Pay close attention to the entire length of the pipe, as clogs can occur at various points along the line.
If the drain line appears to be clear and free of visible blockages, it’s possible that the clog may be located deeper within the system. In such cases, it may be necessary to seek professional assistance to further diagnose and address the issue.
However, if you discover any buildup or blockage during the inspection process, you can proceed to the next step, which focuses on clearing the clog and restoring proper drainage in your HVAC system.
Remember, regular inspection and cleaning of the drain line are essential to prevent future clogs and ensure the optimal performance of your HVAC system. In the next step, we will guide you on how to clear the blockage in the drain line.
Step 5: Clear the Blockage
After inspecting the drain line and identifying any blockages, it’s time to clear the clog to restore proper water flow and prevent further issues with your HVAC system. Clearing the blockage can be done using various methods, depending on the severity of the clog and the materials causing the obstruction.
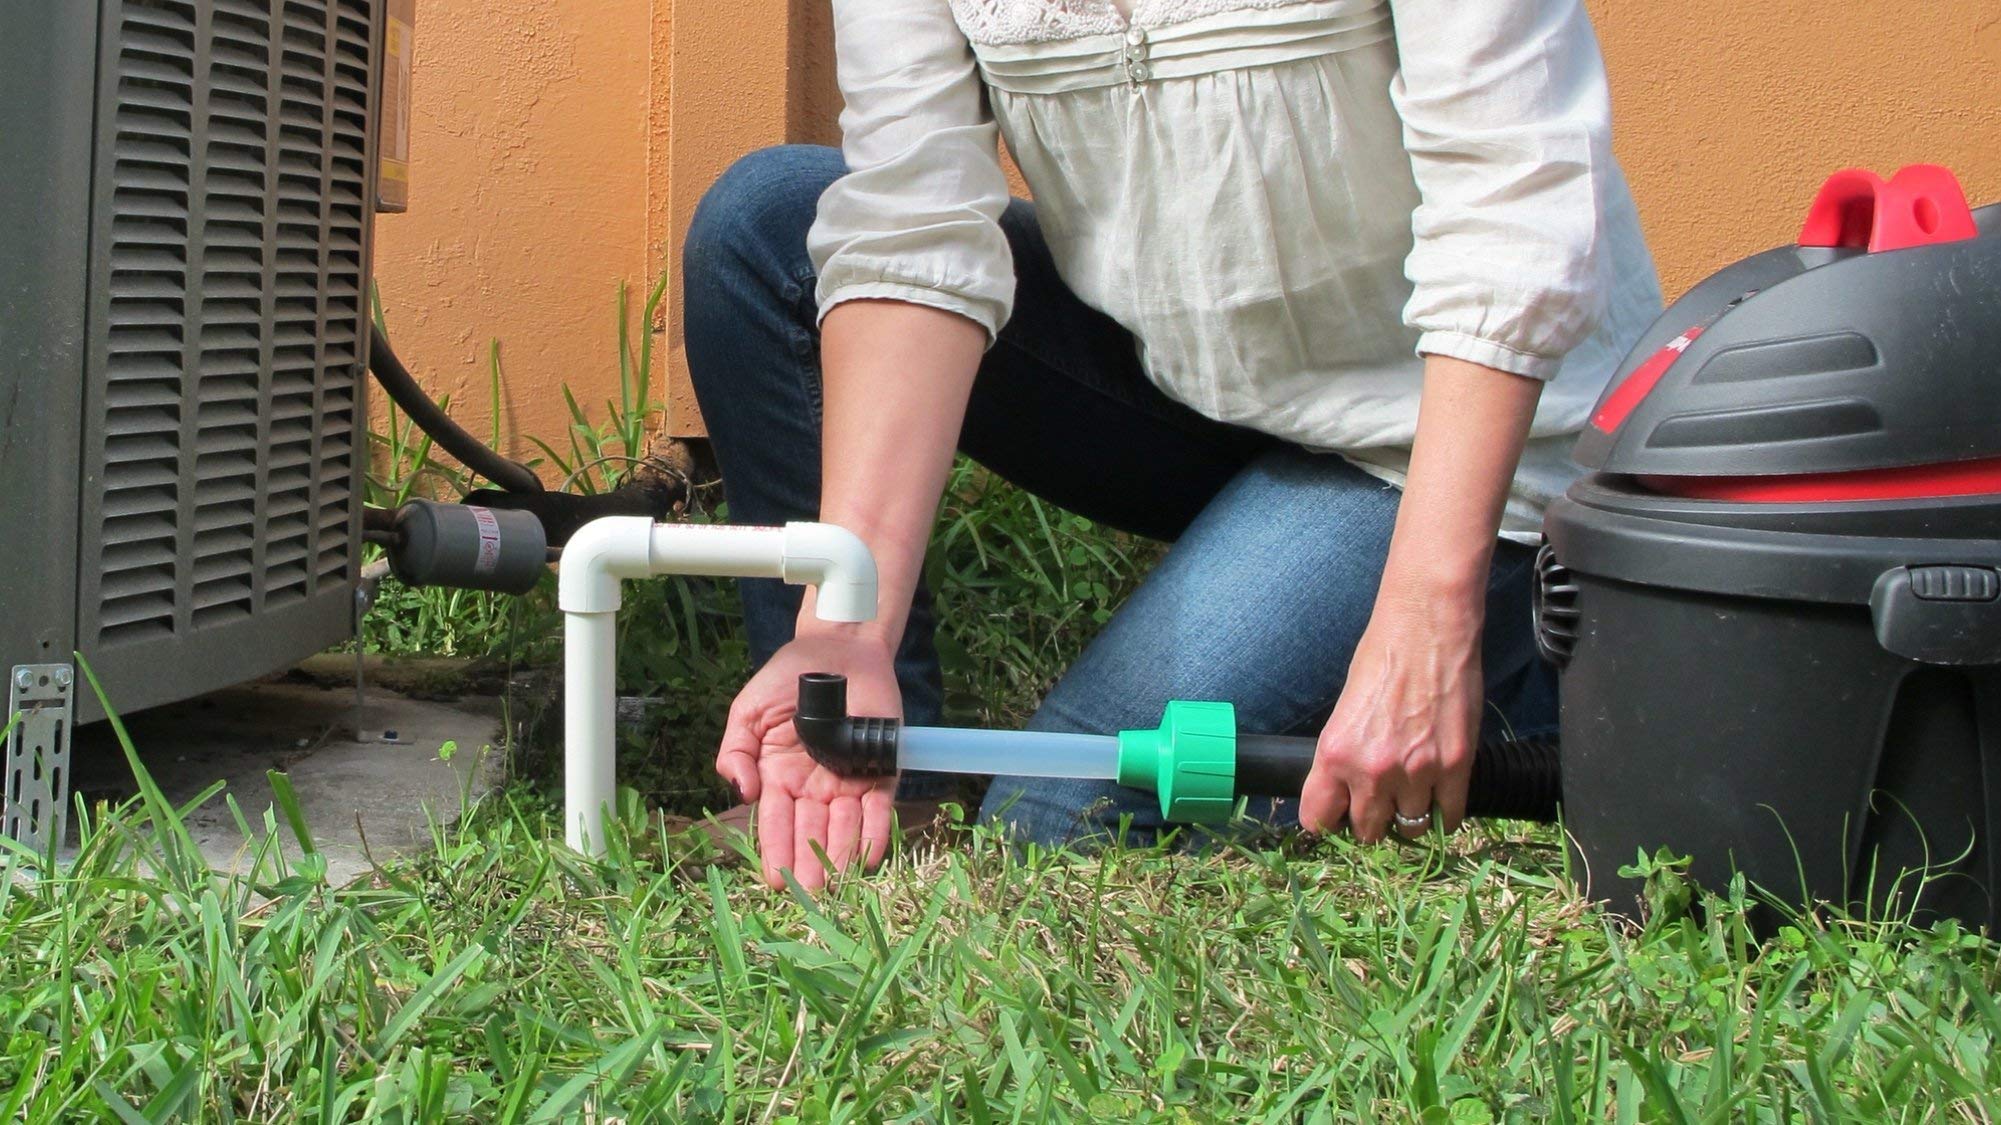
One effective method to clear minor blockages is to use a wet/dry vacuum. Attach the vacuum to the end of the drain line and create a tight seal. Turn on the vacuum’s suction and allow it to draw out the clog. This method can effectively remove smaller blockages like debris or dirt.
If the clog is more stubborn or composed of organic material like algae or mold, you can use a plumbing brush or a pipe cleaner to manually dislodge and remove the blockage. Gently insert the brush or cleaner into the drain line and scrub back and forth to break up the clog. Be careful not to use excessive force, as this could damage the pipe.
For heavily clogged drain lines, you may need to resort to more aggressive measures. One option is to use an algaecide or a vinegar solution. Mix the solution according to the manufacturer’s instructions and pour it down the drain line. The solution will help dissolve algae and inhibit further growth, facilitating the clearance of the blockage.
In some cases, particularly with persistent and stubborn clogs, it may be necessary to use a pressurized flush to forcefully remove the obstruction. This can be achieved by attaching a hose to the drain line and applying water pressure to dislodge the blockage. However, exercise caution when using high-pressure methods to avoid damaging the drain line.
As you clear the blockage, periodically check for any signs of progress. You may notice water starting to flow through the line again or hear the gurgling sound of air being released. Continue the clearing process until the drain line is completely free of obstruction and water flows smoothly.
It is important to note that if you encounter any significant difficulties or encounter a persistent clog that you are unable to clear, it is advisable to seek professional assistance. HVAC professionals have the expertise and equipment to effectively handle complex clogs and ensure the integrity of your HVAC system.
Once the blockage is successfully cleared, you can proceed to the next step, which involves flushing the drain line to remove any remaining debris and ensure thorough cleaning.
Read more: How To Clear An Outdoor Drain Pipe
Step 6: Flush the Drain Line
After successfully clearing the blockage from your HVAC drain line, the next step is to flush the line to remove any remaining debris, residue, or cleaning solutions. Flushing the drain line ensures thorough cleaning and helps prevent future clogs from forming.
To flush the drain line, you will need a steady source of water. You can use a garden hose connected to an outdoor faucet, a bucket filled with water, or a small container with a spout. Make sure the water source is clean and free from any contaminants.
Start by carefully pouring water into the drain line, ensuring a gradual and steady flow. The water should be poured in a controlled manner to prevent splashing or overloading the drain line. It’s important to use enough water to thoroughly flush the line, but be mindful not to overwhelm the system.
As you pour water into the drain line, you should also be observing the other end of the line. If the line is functioning properly, you should see water flowing out of the drain pipe or drain outlet. This indicates that the line is clear and water is flowing freely.
Continue pouring water until you are confident that the drain line has been effectively flushed. This will help remove any remaining debris or cleaning solutions, ensuring the line is clean and ready for efficient drainage.
During the flushing process, it’s a good idea to keep an eye out for any signs of leaks or other issues with the drain line or its connections. If you notice any leaks, make sure to address them promptly to prevent water damage or further complications.
Once you have completed the flushing process and are satisfied that the drain line is clean and free from obstructions, you can proceed to the next step, which involves testing the drainage to ensure everything is functioning correctly.
Remember, regular maintenance and periodic flushing of the drain line can help prevent future clogs and ensure the optimal performance of your HVAC system.
Step 7: Test the Drainage
After flushing the drain line and completing the cleaning process, it’s important to test the drainage to ensure that everything is functioning properly. Testing the drainage will help confirm that the clog has been successfully cleared and that water is flowing freely through the drain line.
To test the drainage, turn the power back on to your HVAC system. This will allow the unit to run and the condensation to collect in the drain pan, simulating normal operating conditions.
Observe the drain line and look for any signs of leaks, standing water, or water overflow. Pay close attention to the area around the drain pan and the connection points of the drain line. If water is pooling or leaking, it may indicate that there is still a blockage or a problem with the drainage system.
Additionally, check for the proper flow of water through the drain line. Look for a consistent stream of water exiting the drain pipe or drain outlet. This indicates that the drain line is functioning correctly, and water is being effectively drained away from the HVAC system.
If you notice any issues during the drainage testing, such as leaks, insufficient water flow, or water backup, it may indicate that there is still a partial clog or a problem with the drain line. In such cases, it is recommended to reinspect the drain line, address any remaining blockages, or seek professional assistance to resolve the issue.
On the other hand, if the drainage test is successful, and water is flowing freely without any leaks or backups, it means that you have effectively cleared the blockage and restored proper drainage in your HVAC system.
Regularly testing the drainage is essential to ensure the ongoing functionality and efficiency of your HVAC system. Proper drainage helps prevent future clogs and reduces the risk of water damage or other related issues.
Once you have confirmed that the drainage is working as expected, you can proceed to the final step, which involves replacing the cap or access point to secure the drain line and complete the cleaning process.
Step 8: Replace the Cap or Access Point
After successfully clearing the blockage and testing the drainage, the final step is to replace the cap or access point on the drain line. This will secure the line, protect it from debris, and complete the cleaning process of your HVAC system’s drain line.
Retrieve the cap or access point that you removed earlier in the process. Carefully align it with the opening of the drain line and gently place it back into position. Ensure that it fits securely and snugly to prevent any leaks or unwanted entry of debris.
For caps secured with screws, use a screwdriver to reinstall and tighten the screws. Be careful not to over-tighten them, as it could damage the cap or the surrounding components.
Once the cap is securely in place, double-check that it is properly sealed and aligned. This will ensure the integrity of the drain line and prevent any potential issues in the future.
With the cap or access point replaced, you have completed the cleaning and maintenance process for your HVAC drain line. The line should now be clear of any blockages and ready to efficiently drain excess water from the system.
Remember to follow a regular maintenance schedule to prevent future clogs and ensure the optimal performance of your HVAC system. This includes periodic inspections, cleaning, and flushing of the drain line as needed.
If you encounter any difficulties during the process or if the drain line continues to exhibit issues even after clearing the blockage, it is advisable to seek professional assistance. HVAC professionals have the knowledge and expertise to address complex drainage issues and ensure the proper functioning of your system.
By following this step-by-step guide and taking the necessary precautions, you can maintain a properly functioning HVAC drain line and enjoy the benefits of an efficient and reliable HVAC system.
That concludes our comprehensive guide on how to clear your HVAC drain line. We hope you found this information helpful, and we wish you success in maintaining a healthy and efficient HVAC system in your home.
Conclusion
Clearing your HVAC drain line is an essential step in maintaining the efficiency and functionality of your heating, ventilation, and air conditioning system. By following the steps outlined in this guide, you can effectively clear any blockages and prevent issues such as reduced cooling and heating performance, water leaks, and mold growth.
Remember to always prioritize safety by turning off the power to your HVAC system before starting any maintenance work. Gather the necessary tools and materials, including a screwdriver, wet/dry vacuum, algaecide or vinegar, plumbing brush or pipe cleaner, bucket or towels, and protective gear.
Throughout the process, pay close attention to the signs of a clogged drain line, such as water leaks around the HVAC unit, visible mold or mildew, reduced cooling or heating performance, excessive moisture or humidity, and gurgling or bubbling sounds. These indicators will help you identify the problem and take appropriate action.
Inspect the drain line for any visible blockages, using a flashlight if necessary, and proceed to clear the blockage using methods such as wet/dry vacuuming, manual brushing, or using algaecide or vinegar solutions. If the clog persists or you encounter significant difficulties, it is best to seek professional assistance.
After clearing the blockage, flush the drain line with water to remove any remaining debris or cleaning solutions. Test the drainage by turning on the power to your HVAC system and observing the flow of water. If the drainage is not functioning as expected, reinspect the line for any issues or consult a professional.
Finally, replace the cap or access point on the drain line to secure it and complete the cleaning process. Regular maintenance, including periodic inspections, cleaning, and flushing of the drain line, will help prevent future clogs and ensure the optimal performance of your HVAC system.
Remember, if you are unsure or uncomfortable performing these steps yourself, it is always best to consult with a qualified HVAC technician. They have the expertise and experience to address any issues and ensure the proper functioning of your HVAC system.
By taking the time to clear your HVAC drain line, you can enjoy a more efficient and reliable HVAC system, improved indoor air quality, and peace of mind knowing that your home is protected from water damage and potential mold growth. Regular maintenance is key to keeping your HVAC system in top shape and ensuring your comfort year-round.
We hope this guide has been helpful and that you can use this knowledge to maintain a healthy and efficient HVAC system. Stay proactive, and your HVAC system will continue to serve you well for years to come.
Frequently Asked Questions about How To Clear HVAC Drain Line
Was this page helpful?
At Storables.com, we guarantee accurate and reliable information. Our content, validated by Expert Board Contributors, is crafted following stringent Editorial Policies. We're committed to providing you with well-researched, expert-backed insights for all your informational needs.

0 thoughts on “How To Clear HVAC Drain Line”