Articles
How To Clean HVAC Ducts
Modified: October 27, 2024
Learn effective tips and techniques for cleaning HVAC ducts in our informative articles. Improve air quality and ensure efficient system performance with our expert advice.
(Many of the links in this article redirect to a specific reviewed product. Your purchase of these products through affiliate links helps to generate commission for Storables.com, at no extra cost. Learn more)
Introduction
Welcome to our comprehensive guide on how to clean HVAC ducts. Your HVAC (Heating, Ventilation, and Air Conditioning) system plays a crucial role in providing comfortable and healthy indoor air quality. Over time, dust, debris, allergens, and other pollutants can accumulate in the HVAC ducts, reducing the system’s efficiency and compromising the air you breathe.
Regular cleaning and maintenance of HVAC ducts are essential to ensure optimal performance and to create a healthy living environment. In this article, we will take you through a step-by-step process on how to clean your HVAC ducts effectively, along with the necessary tools and materials.
By following these guidelines, you can improve indoor air quality, reduce energy consumption, and extend the lifespan of your HVAC system. So, let’s dive in and learn how to give your HVAC ducts the attention they deserve!
Key Takeaways:
- Regularly cleaning HVAC ducts is essential for improved indoor air quality, energy efficiency, and extended equipment lifespan. Follow the step-by-step guide for effective duct cleaning.
- Preventive maintenance, including changing air filters, sealing duct leaks, and scheduling professional inspections, is crucial for keeping HVAC ducts clean and well-maintained. Regular maintenance ensures optimal system performance.
Read more: How To Close Off A HVAC Duct
Importance of Cleaning HVAC Ducts
Regularly cleaning your HVAC ducts is vital for several reasons. Here are the key benefits and reasons why cleaning your HVAC ducts should be a priority:
- Improved Indoor Air Quality: The air circulating through your HVAC system passes through the ducts multiple times a day. If the ducts are dirty, they can harbor dust, pollen, mold spores, bacteria, and other airborne allergens. These pollutants can aggravate respiratory conditions, cause allergies, and contribute to poor indoor air quality. Regular duct cleaning helps to remove these contaminants, ensuring cleaner and healthier air for you and your family.
- Energy Efficiency: When dust and debris build up in the HVAC ducts, it restricts airflow and forces the system to work harder. This increased workload leads to higher energy consumption and utility bills. By keeping the ducts clean, air can flow freely, allowing your HVAC system to operate more efficiently and reduce energy waste.
- Extended Equipment Lifespan: A clean HVAC system experiences less strain and requires fewer repairs. By removing debris and contaminants from the ducts, you reduce the risk of clogging the system, which can lead to overheating and premature wear and tear. Regular duct cleaning can help extend the lifespan of your HVAC equipment and save you money on costly repairs or replacements.
- Elimination of Odors: Over time, dust, allergens, and even the presence of pests can create unpleasant odors in your ductwork. These odors can linger and spread throughout your home whenever the HVAC system is running. By cleaning the ducts, you can effectively eliminate these odors and improve the overall freshness of your indoor air.
- Promotes System Efficiency: A well-maintained HVAC system that includes clean ductwork can distribute air evenly throughout your home. This ensures consistent temperatures in each room and reduces the need to constantly adjust thermostat settings. By promoting system efficiency, clean HVAC ducts contribute to a comfortable and energy-efficient living environment.
Now that you understand the importance of cleaning HVAC ducts, let’s explore the signs that indicate it’s time to clean your ductwork.
Signs That Your HVAC Ducts Need Cleaning
Knowing when to clean your HVAC ducts is crucial for maintaining optimal indoor air quality and system performance. Here are some signs that indicate it’s time to clean your ductwork:
- Visible Dust and Debris: If you notice a buildup of dust and debris around the vents or on the surfaces of your furniture, it’s a clear sign that your HVAC ducts might be due for cleaning. This visible accumulation is an indication that air is carrying these particles throughout your home.
- Allergies or Respiratory Issues: If you or your family members suffer from frequent allergies or respiratory issues, such as coughing, sneezing, or congestion, it could be a sign that the ductwork is contaminated with allergens. Dust, pollen, pet dander, and mold spores can circulate through the ducts and worsen these symptoms.
- Musty or Strange Odors: Unpleasant odors coming from the vents can indicate the presence of mold, mildew, or other contaminants in the ducts. These odors can be musty, stale, or even a hint of a burning smell. Cleaning the ducts can eliminate these odors and improve the overall freshness of your indoor air.
- Inconsistent Airflow: If you notice that some rooms are getting less airflow than others or that certain vents have weak airflow, it could be a sign of blockage or obstruction in the ductwork. Dust and debris can accumulate over time, restricting the airflow and causing uneven distribution of conditioned air.
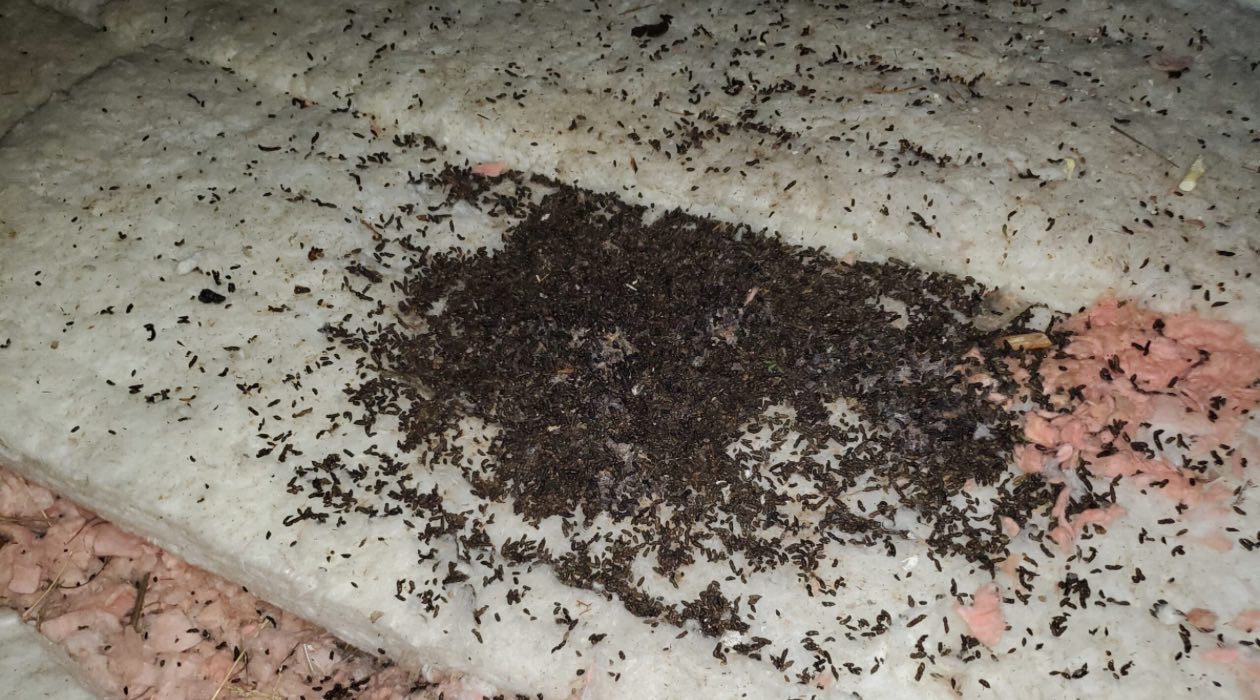
- Pest Infestation: Pests such as rodents, insects, or birds can find their way into your ductwork and leave droppings, nests, or other debris behind. If you notice signs of pest activity, it’s essential to get your ducts cleaned to eliminate these contaminants and prevent further infestation.
By paying attention to these signs, you can determine when it’s time to clean your HVAC ducts. In the next section, we will guide you through the preparations required before cleaning the ductwork.
Preparing for Duct Cleaning
Before you begin cleaning your HVAC ducts, it’s essential to take some necessary steps to ensure a smooth process. Here are some preparations you should make:
- Turn Off the HVAC System: Start by turning off your HVAC system to prevent it from circulating dust and debris while you’re cleaning the ducts. This will also reduce the risk of injury and ensure your safety throughout the process.
- Cover Supply Vents: Cover the supply vents throughout your home with plastic or paper to prevent dust and debris from being pushed into the rooms during the cleaning process. You can use tape or sealant to secure the covers in place.
- Open Access Panels: Locate the access panels for your HVAC system and remove them to gain access to the ductwork. These panels are usually located near the air handler unit or in the basement or crawlspace of your home.
- Ensure Adequate Lighting: Cleaning the ducts requires visibility, so make sure you have enough lighting in the area. Use a flashlight or work lamp to ensure you can see inside the ducts clearly.
- Gather Necessary Tools and Materials: Before you start cleaning, gather all the tools and materials you’ll need for the job. This may include a vacuum cleaner with an extended hose, soft brushes or dusters, screwdrivers for removing vent covers, and cleaning solutions or disinfectants.
- Protect Yourself: It’s important to protect yourself during the cleaning process. Wear gloves, safety glasses or goggles, and a dust mask or respirator to prevent inhalation of dust and exposure to harmful particles.
- Read the Manufacturer’s Guidelines: Take some time to review the manufacturer’s guidelines or instruction manual for your HVAC system. This will give you specific information on cleaning procedures, filter replacement, and any precautions you should take to avoid damaging the equipment.
By following these preparations, you will be ready to proceed with cleaning your HVAC ducts effectively. In the next section, we will discuss the tools and materials you will need for the task.
Tools and Materials Needed
Having the right tools and materials is essential for a successful HVAC duct cleaning. Here are the items you will need:
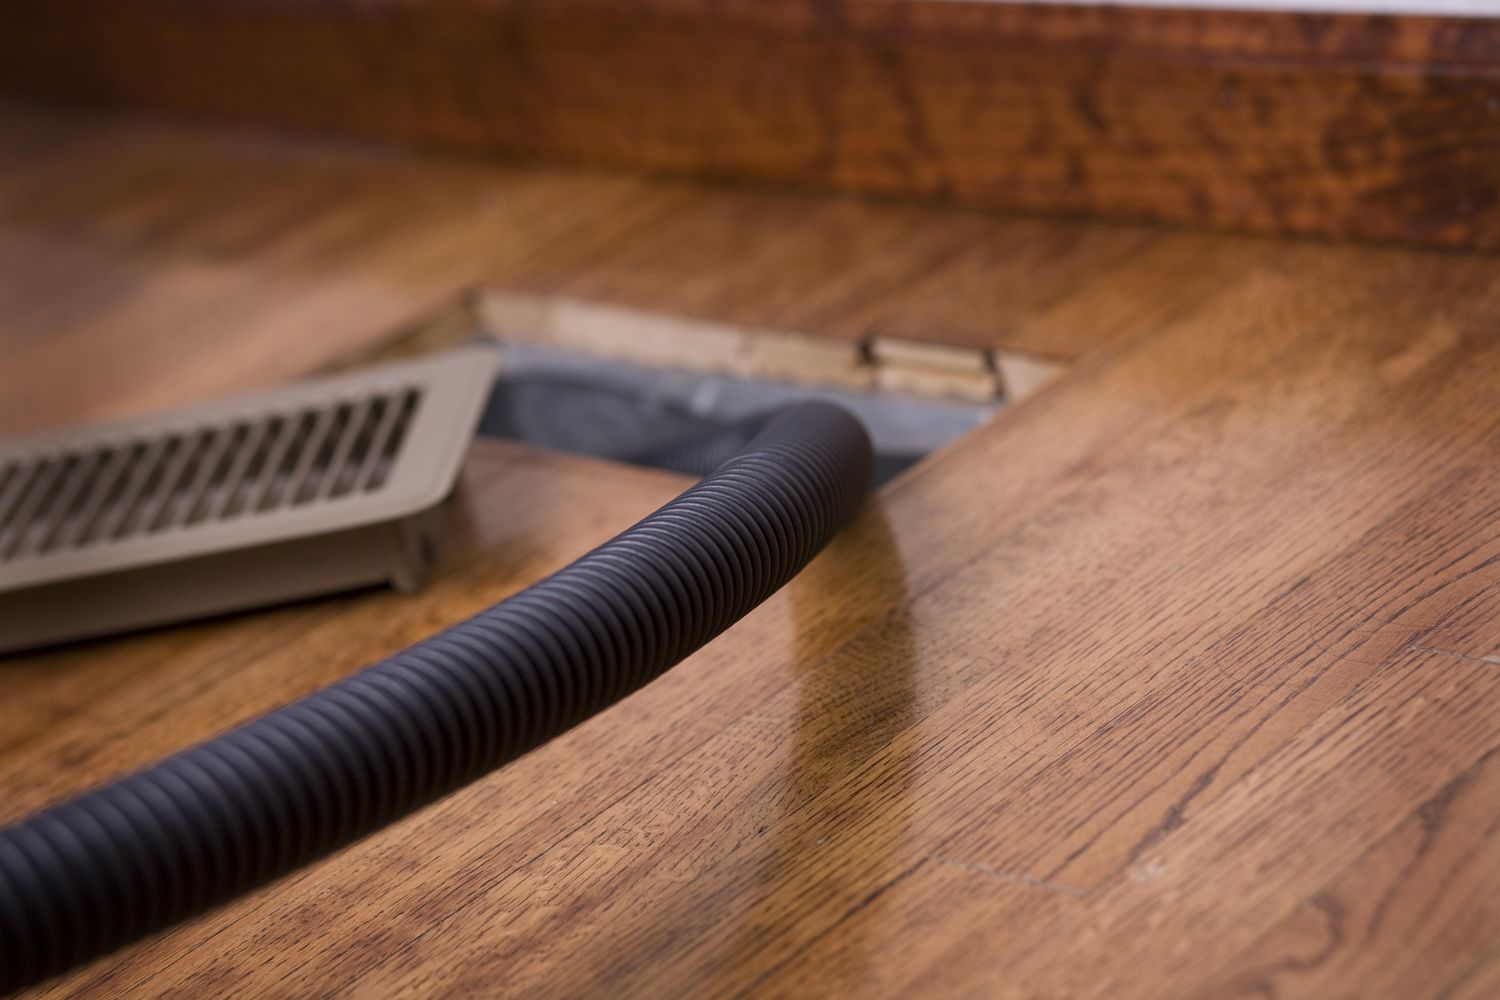
- Vacuum Cleaner with Extended Hose: A vacuum cleaner equipped with an extended hose and brush attachment is ideal for removing dust and debris from inside the ducts. Make sure the vacuum cleaner has strong suction power to effectively clean the ductwork.
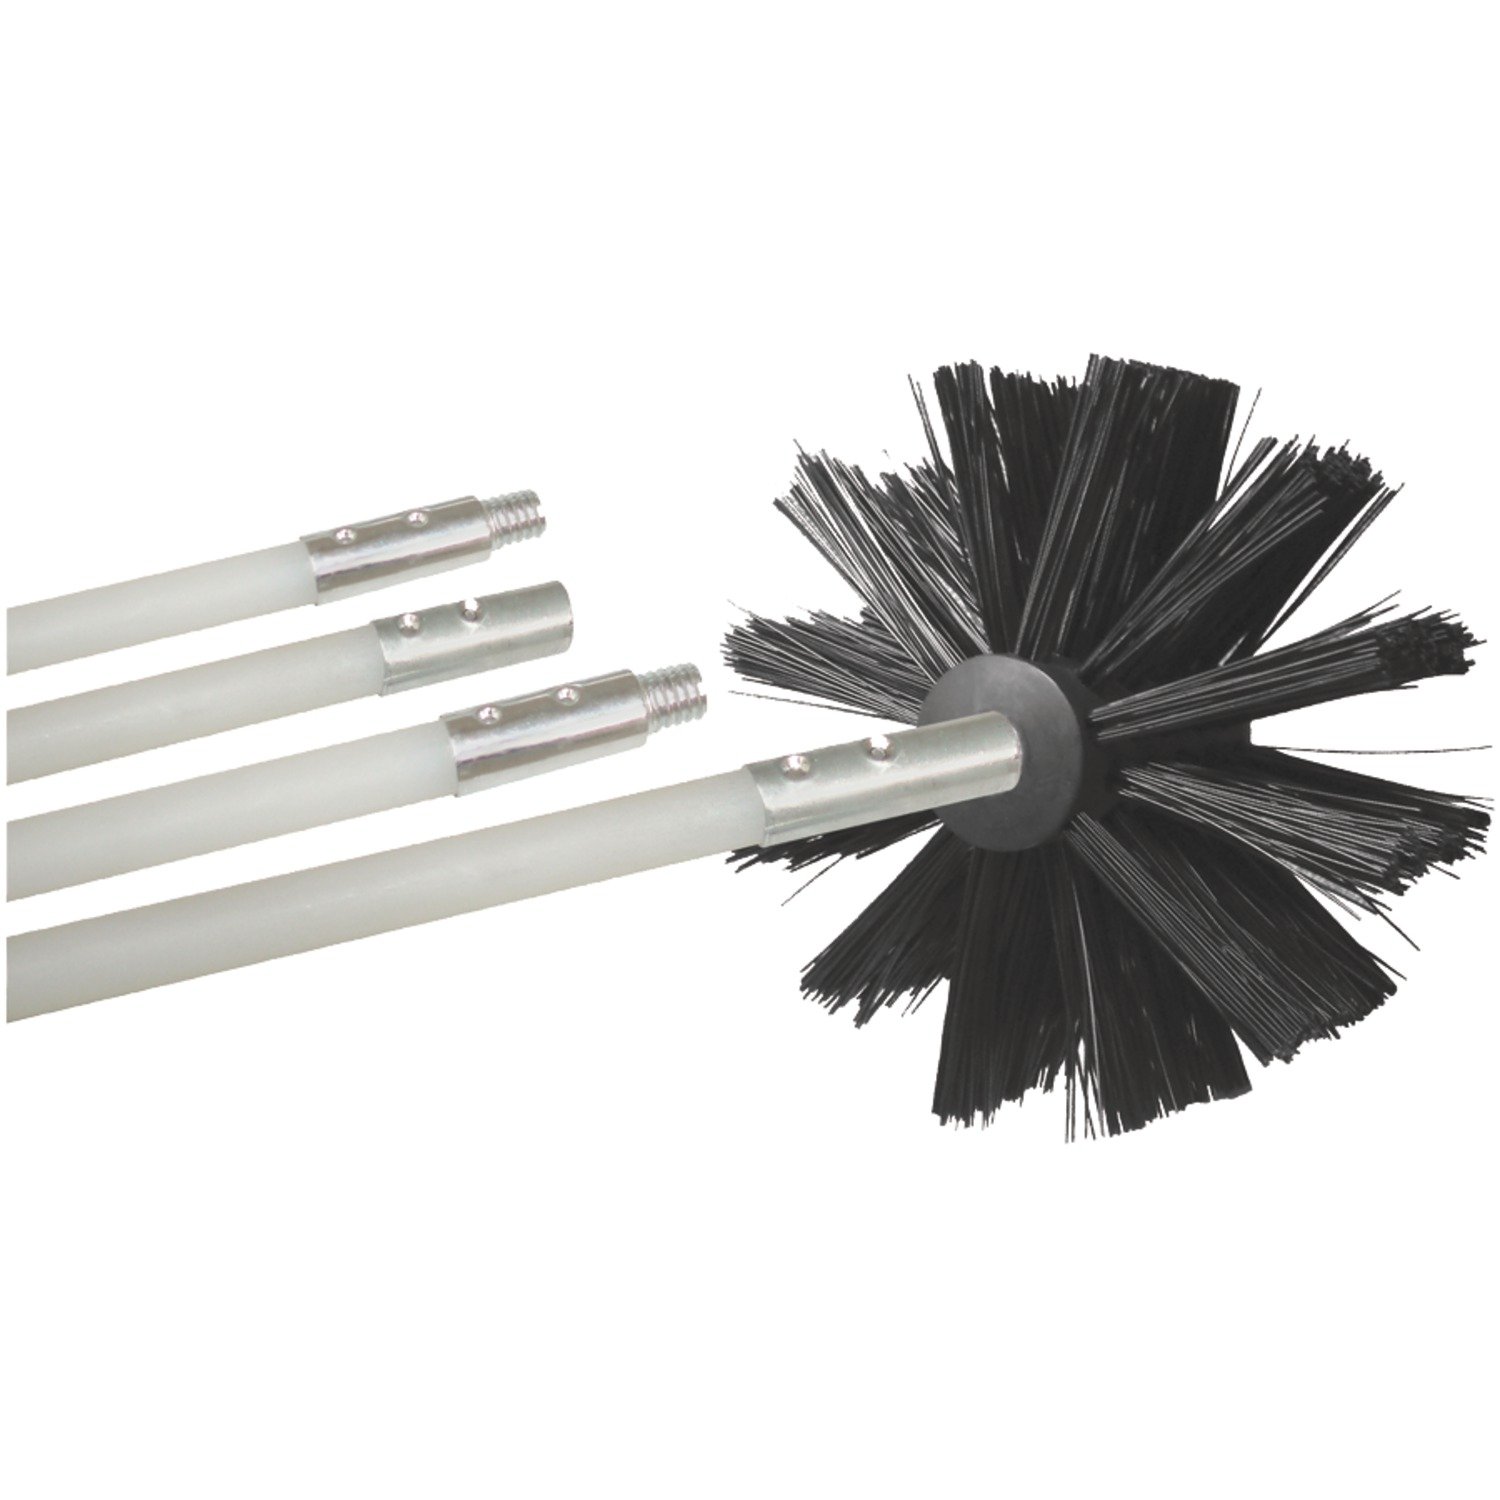
- Soft Brushes or Dusters: Use soft-bristle brushes or dusters to loosen and remove dust and debris from the duct surfaces. Avoid using stiff brushes that could damage the ductwork.
- Screwdrivers: Keep a set of screwdrivers handy to remove vent covers and access panels. The screwdriver sizes may vary depending on the types of screws used in your HVAC system.
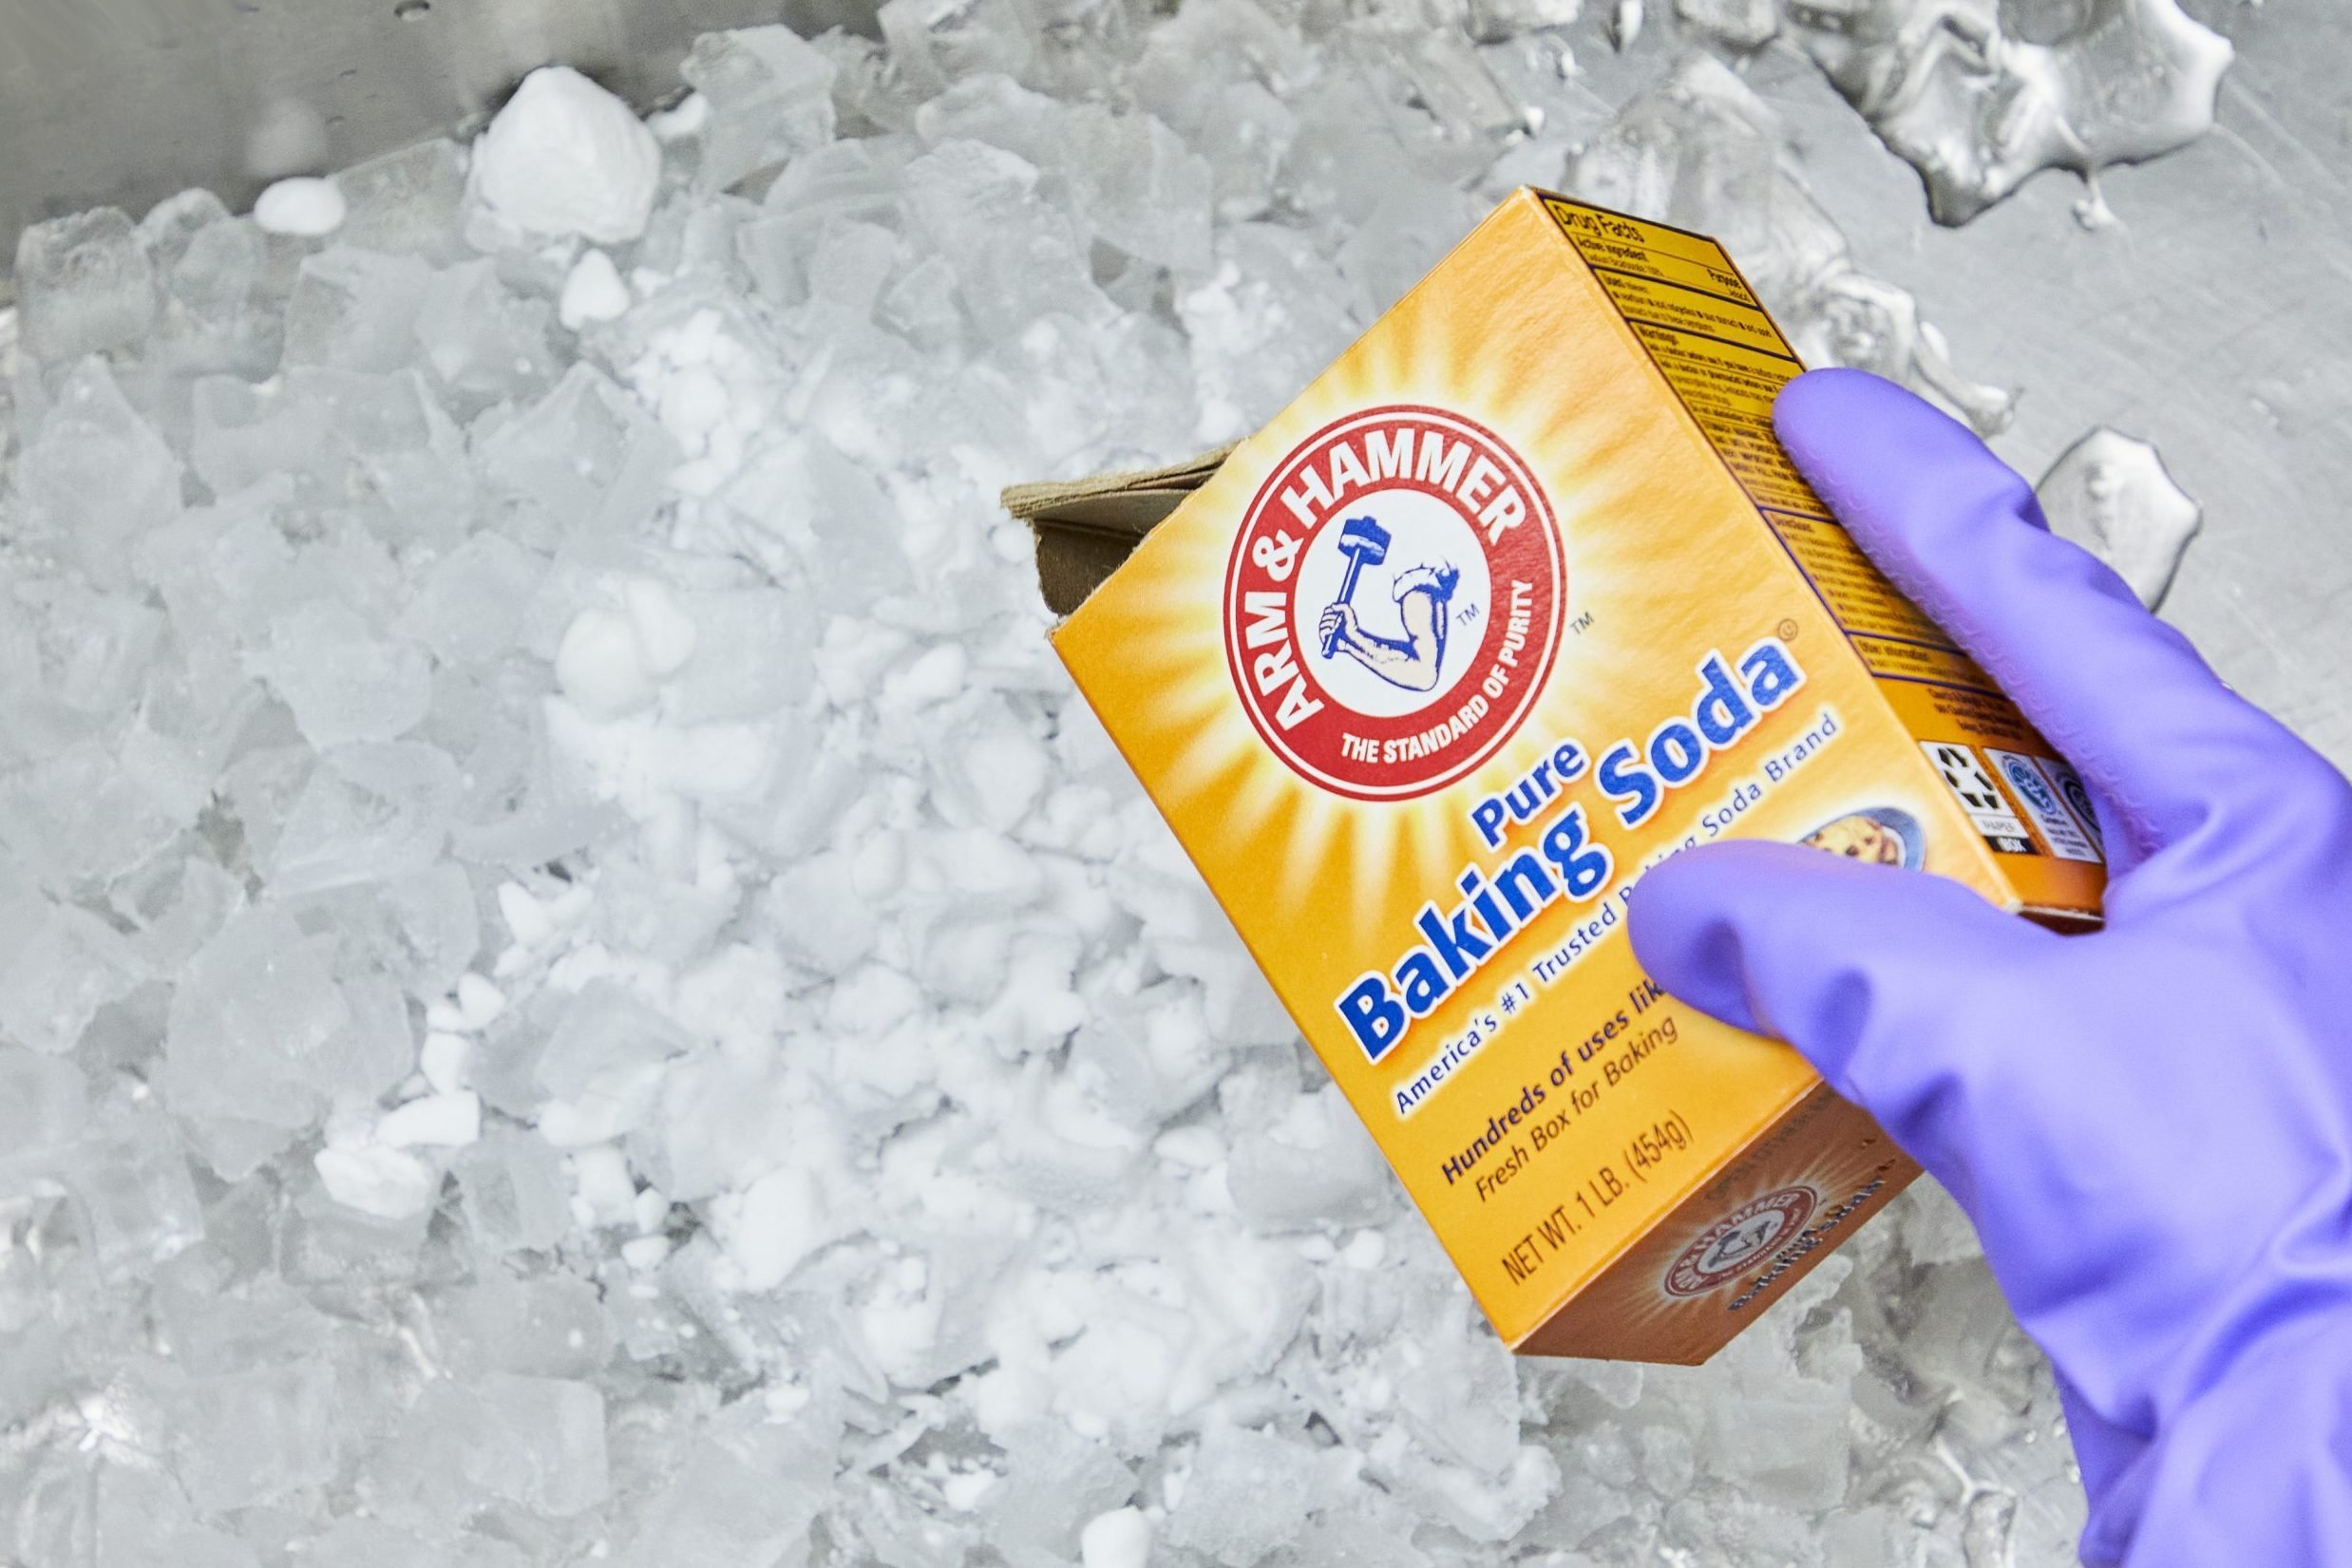
- Cleaning Solutions or Disinfectants: Depending on the condition of your ducts, you may need cleaning solutions or disinfectants to remove mold, mildew, or other contaminants. Choose products specifically designed for HVAC systems and follow the instructions on the label.
- Duct Sealant or Tape: Use duct sealant or tape to seal any gaps or leaks in the ductwork after cleaning. This will help ensure that air flows smoothly through the ducts without any leaks.
- Protective Gear: It’s important to protect yourself during the cleaning process. Wear gloves to protect your hands, safety glasses or goggles to shield your eyes, and a dust mask or respirator to prevent inhaling dust or harmful particles.
- Plastic or Paper Covers: Cover supply vents throughout your home with plastic or paper to prevent dust and debris from being pushed into the rooms during the cleaning process. Use tape or sealant to secure the covers in place.
Make sure you have all these tools and materials ready before you begin cleaning your HVAC ducts. Now that you’re prepared, let’s move on to the step-by-step guide on how to clean your HVAC ducts effectively.
Read more: How To Hide HVAC Ducts In Basement
Step-by-Step Guide to Cleaning HVAC Ducts
Now that you have all the necessary tools and materials ready, let’s dive into the step-by-step process of cleaning your HVAC ducts:
- Start with the Supply Vents: Begin by removing the covers of the supply vents using a screwdriver. Use a soft brush or duster to gently dislodge and remove any dust or debris. For stubborn dirt, you can use a vacuum cleaner with an extended hose to suck up the particles.
- Clean the Return Vents: Move on to the return vents and repeat the same process of removing the vent covers and cleaning them. Make sure to thoroughly clean the vent covers and the surrounding area. Use a vacuum cleaner or brush to remove any buildup of dust or debris.
- Inspect and Clean the Main Ducts: Once you have cleaned the supply and return vents, it’s time to focus on the main ducts. Use your vacuum cleaner’s extended hose or a brush to reach inside the ducts carefully. Remove any visible dust or debris that is within reach. For stubborn dirt or deeper cleaning, consider hiring a professional duct cleaning service.
- Clean the Registers: Clean the registers using a soft brush or duster. Give them a wipe-down with a damp cloth to remove any remaining dust or grime. Ensure that the registers are completely dry before reattaching them.
- Clean the Air Handler Unit: Go to the air handler unit and remove the access panels. Use a vacuum cleaner with a brush attachment to clean the blower compartment and other components. Check the air filter and replace it if necessary. Cleaning the air handler unit helps maintain the cleanliness of the entire HVAC system.
- Disinfect the HVAC Ducts: If you suspect mold or mildew growth in your ducts, it may be necessary to use a disinfectant. Follow the instructions on the disinfectant product and apply it to the duct surfaces. Allow the disinfectant to sit for the recommended time before wiping or rinsing it off.
- Seal any Gaps or Leaks: Inspect the ductwork for any gaps or leaks and seal them using duct sealant or tape. This will prevent air leakage and ensure that your HVAC system operates efficiently.
Remember to take breaks as needed and work at a pace that is comfortable for you. If you encounter any difficulties during the cleaning process or require professional assistance, don’t hesitate to reach out to HVAC experts for guidance.
Now that you have successfully cleaned your HVAC ducts, let’s move on to the next section, where we will discuss cleaning the registers.
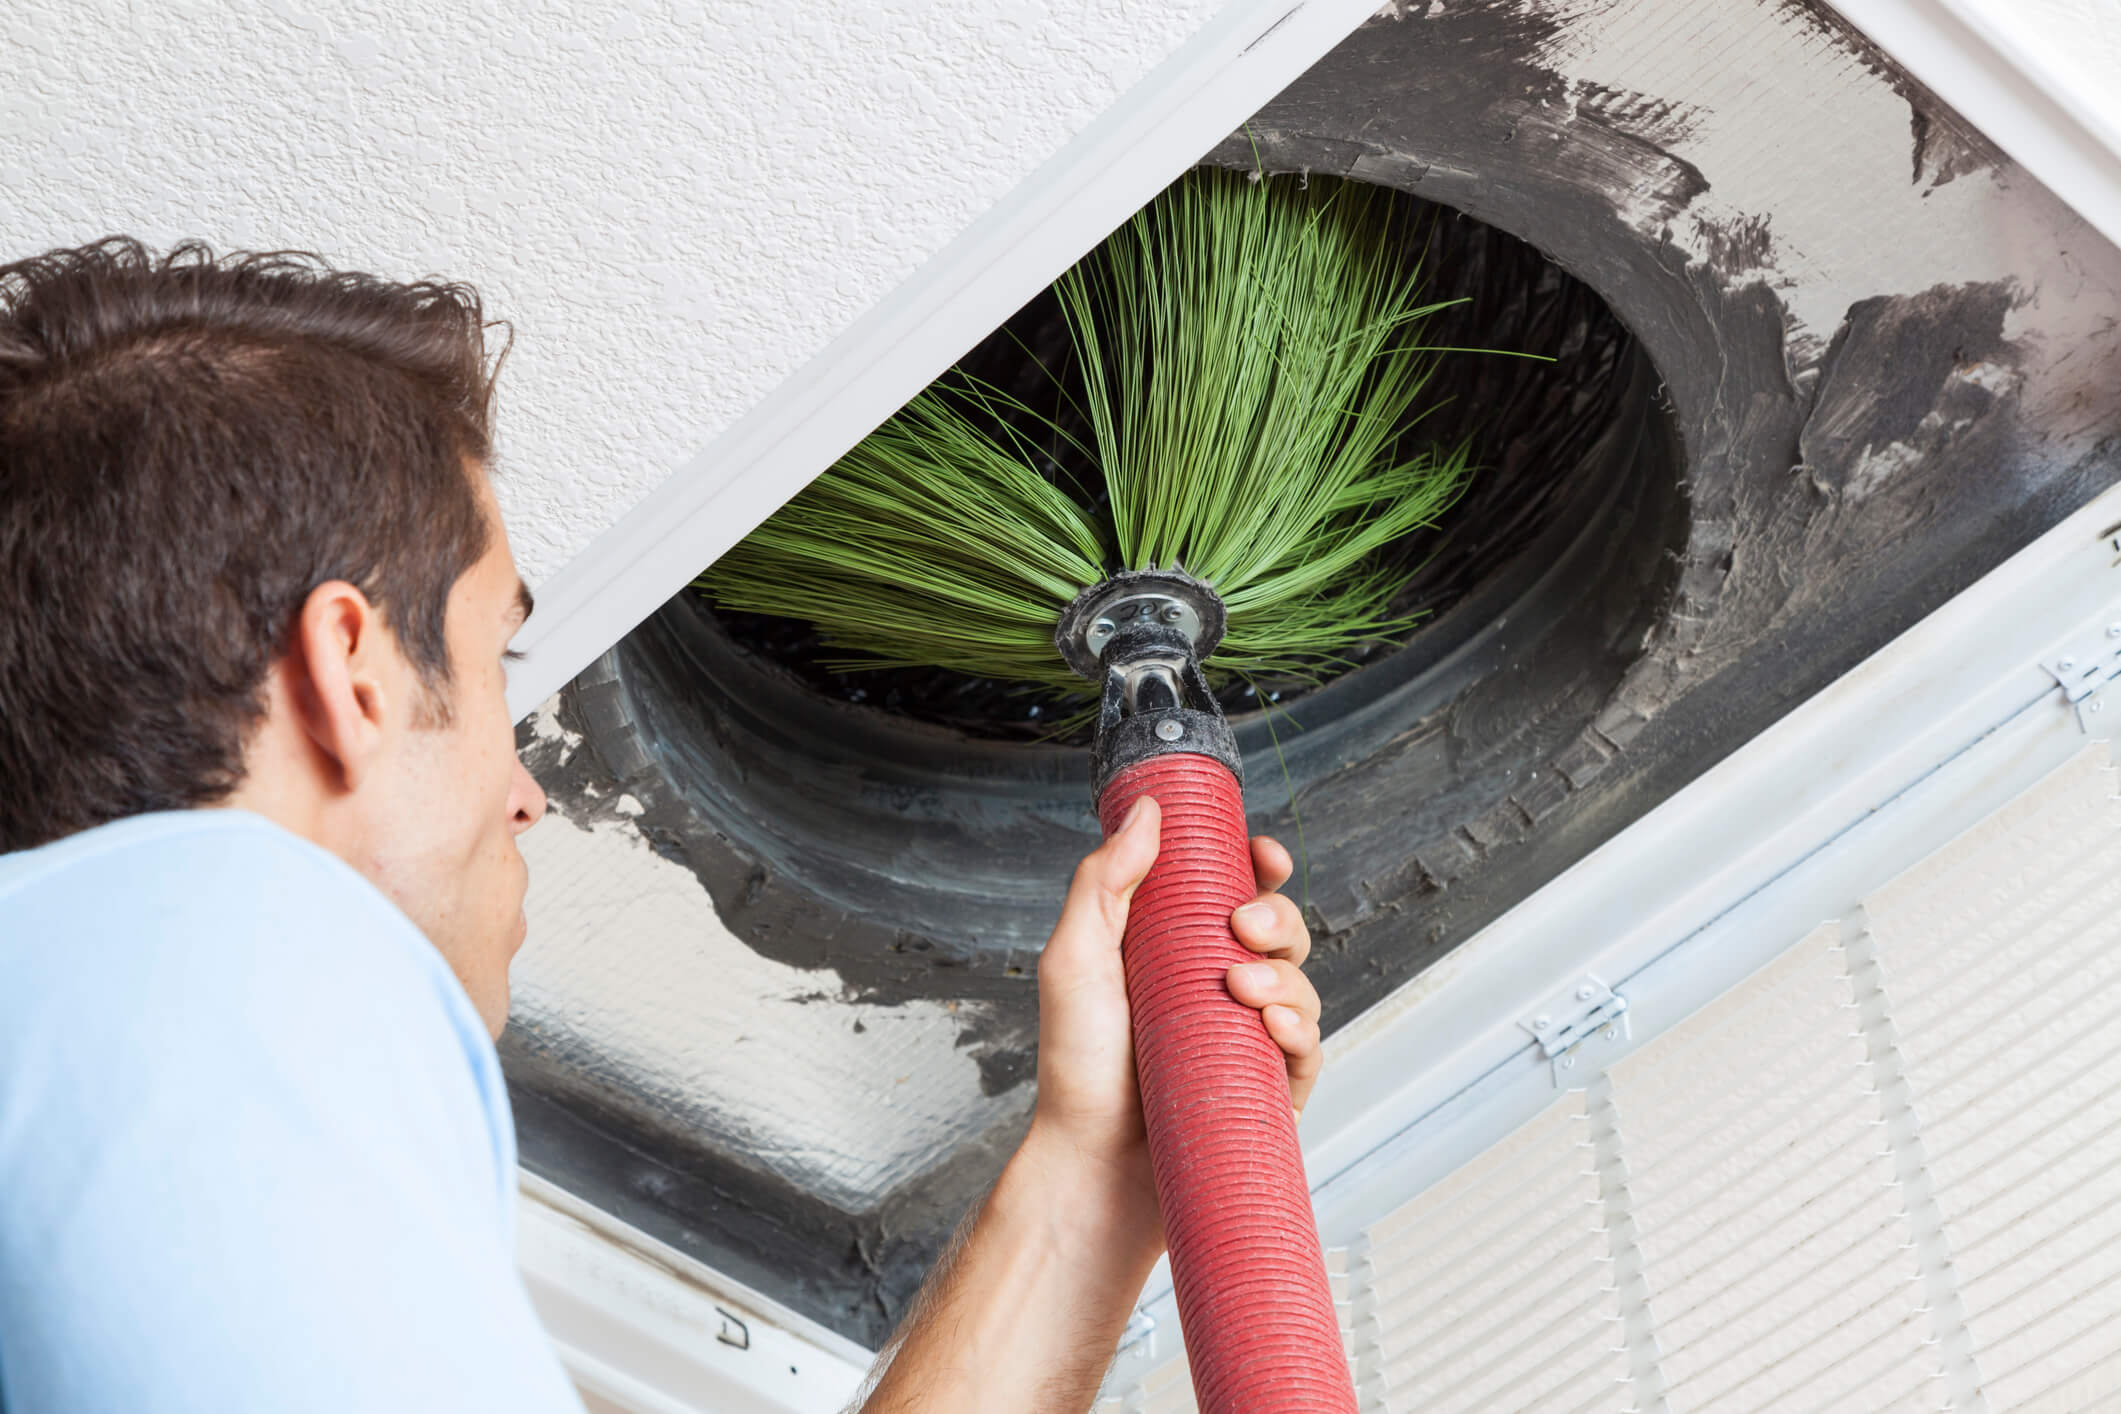
Cleaning the Supply Vents
When it comes to cleaning the HVAC ducts, starting with the supply vents is a good idea. Here’s a step-by-step guide to help you effectively clean the supply vents:
- Gather Your Tools: Before you begin, ensure that you have the necessary tools and materials, including a screwdriver, vacuum cleaner with a brush attachment, and a soft brush or duster.
- Turn Off the HVAC System: Start by turning off your HVAC system to prevent air circulation while you’re cleaning. This will minimize the spread of dust and debris throughout your home.
- Remove the Vent Covers: Use a screwdriver to carefully remove the vent covers from each supply vent. Place them aside for cleaning.
- Clean the Vent Covers: Take the vent covers outdoors or to a well-ventilated area. Use a soft brush or duster to remove any loose dust or debris from the covers. You can also wash them with mild detergent and water if necessary. Allow the covers to dry completely before reinstalling them.
- Clean Inside the Vents: Attach a brush attachment to your vacuum cleaner’s hose and gently insert it into the supply vents. Use a circular motion to dislodge and remove any dust or debris that may have accumulated. Work your way throughout the duct length, paying extra attention to areas with visible buildup.
- Vacuum the Vents: After brushing, use your vacuum cleaner’s brush attachment to carefully vacuum the inside of each supply vent. This will help remove any remaining dust and ensure a thorough clean.
- Replace the Vent Covers: Once the supply vents and vent covers are clean, securely reattach the vent covers to their respective vents using the screwdriver.
Remember to work carefully and gently to avoid causing any damage to the vent covers or the ductwork. If you encounter any stubborn dirt or if your vents require a more thorough clean, consider hiring a professional duct cleaning service for assistance.
Now that you’ve successfully cleaned the supply vents, let’s move on to the next section where we will discuss cleaning the return vents.
Regularly changing the air filters in your HVAC system can help prevent dust and debris from accumulating in the ducts, reducing the need for frequent professional cleaning.
Cleaning the Return Vents
Next on your HVAC duct cleaning journey is cleaning the return vents. These vents play a crucial role in pulling in air from your space and circulating it back into the HVAC system. Follow these steps to effectively clean the return vents:
- Gather Your Tools: Before you begin, make sure you have the necessary tools and materials, including a screwdriver, vacuum cleaner with a brush attachment, and a soft brush or duster.
- Turn Off the HVAC System: Start by turning off your HVAC system to prevent air circulation during the cleaning process. This will minimize the spread of dust and debris within your home.
- Locate the Return Vents: Identify the return vents in your home. These vents are usually larger than supply vents and are commonly found on walls or ceilings.
- Remove the Vent Covers: Use a screwdriver to carefully remove the vent covers from each return vent. Place them aside for cleaning.
- Clean the Vent Covers: Take the vent covers outdoors or to a well-ventilated area. Use a soft brush or duster to remove any loose dust or debris from the covers. If needed, you can wash them with mild detergent and water. Ensure the covers are completely dry before reinstalling them.
- Clean Inside the Return Vents: Attach a brush attachment to your vacuum cleaner’s hose and gently insert it into each return vent. Use a circular motion to dislodge and remove any dust or debris that may have accumulated. Pay extra attention to areas with visible buildup and make sure to clean as far back as possible.
- Vacuum the Vents: After brushing, use your vacuum cleaner’s brush attachment to thoroughly vacuum inside each return vent. This will help remove any remaining dust or debris, ensuring a thorough clean.
- Replace the Vent Covers: Once the return vents and vent covers are clean, securely reattach the vent covers to their respective vents using the screwdriver.
Remember to handle the vent covers and ductwork with care to avoid causing any damage. If you encounter stubborn dirt or if your return vents require professional attention, consider contacting a duct cleaning service for assistance.
Now that you’ve successfully cleaned the return vents, let’s move on to the next section where we will discuss cleaning the main ducts.
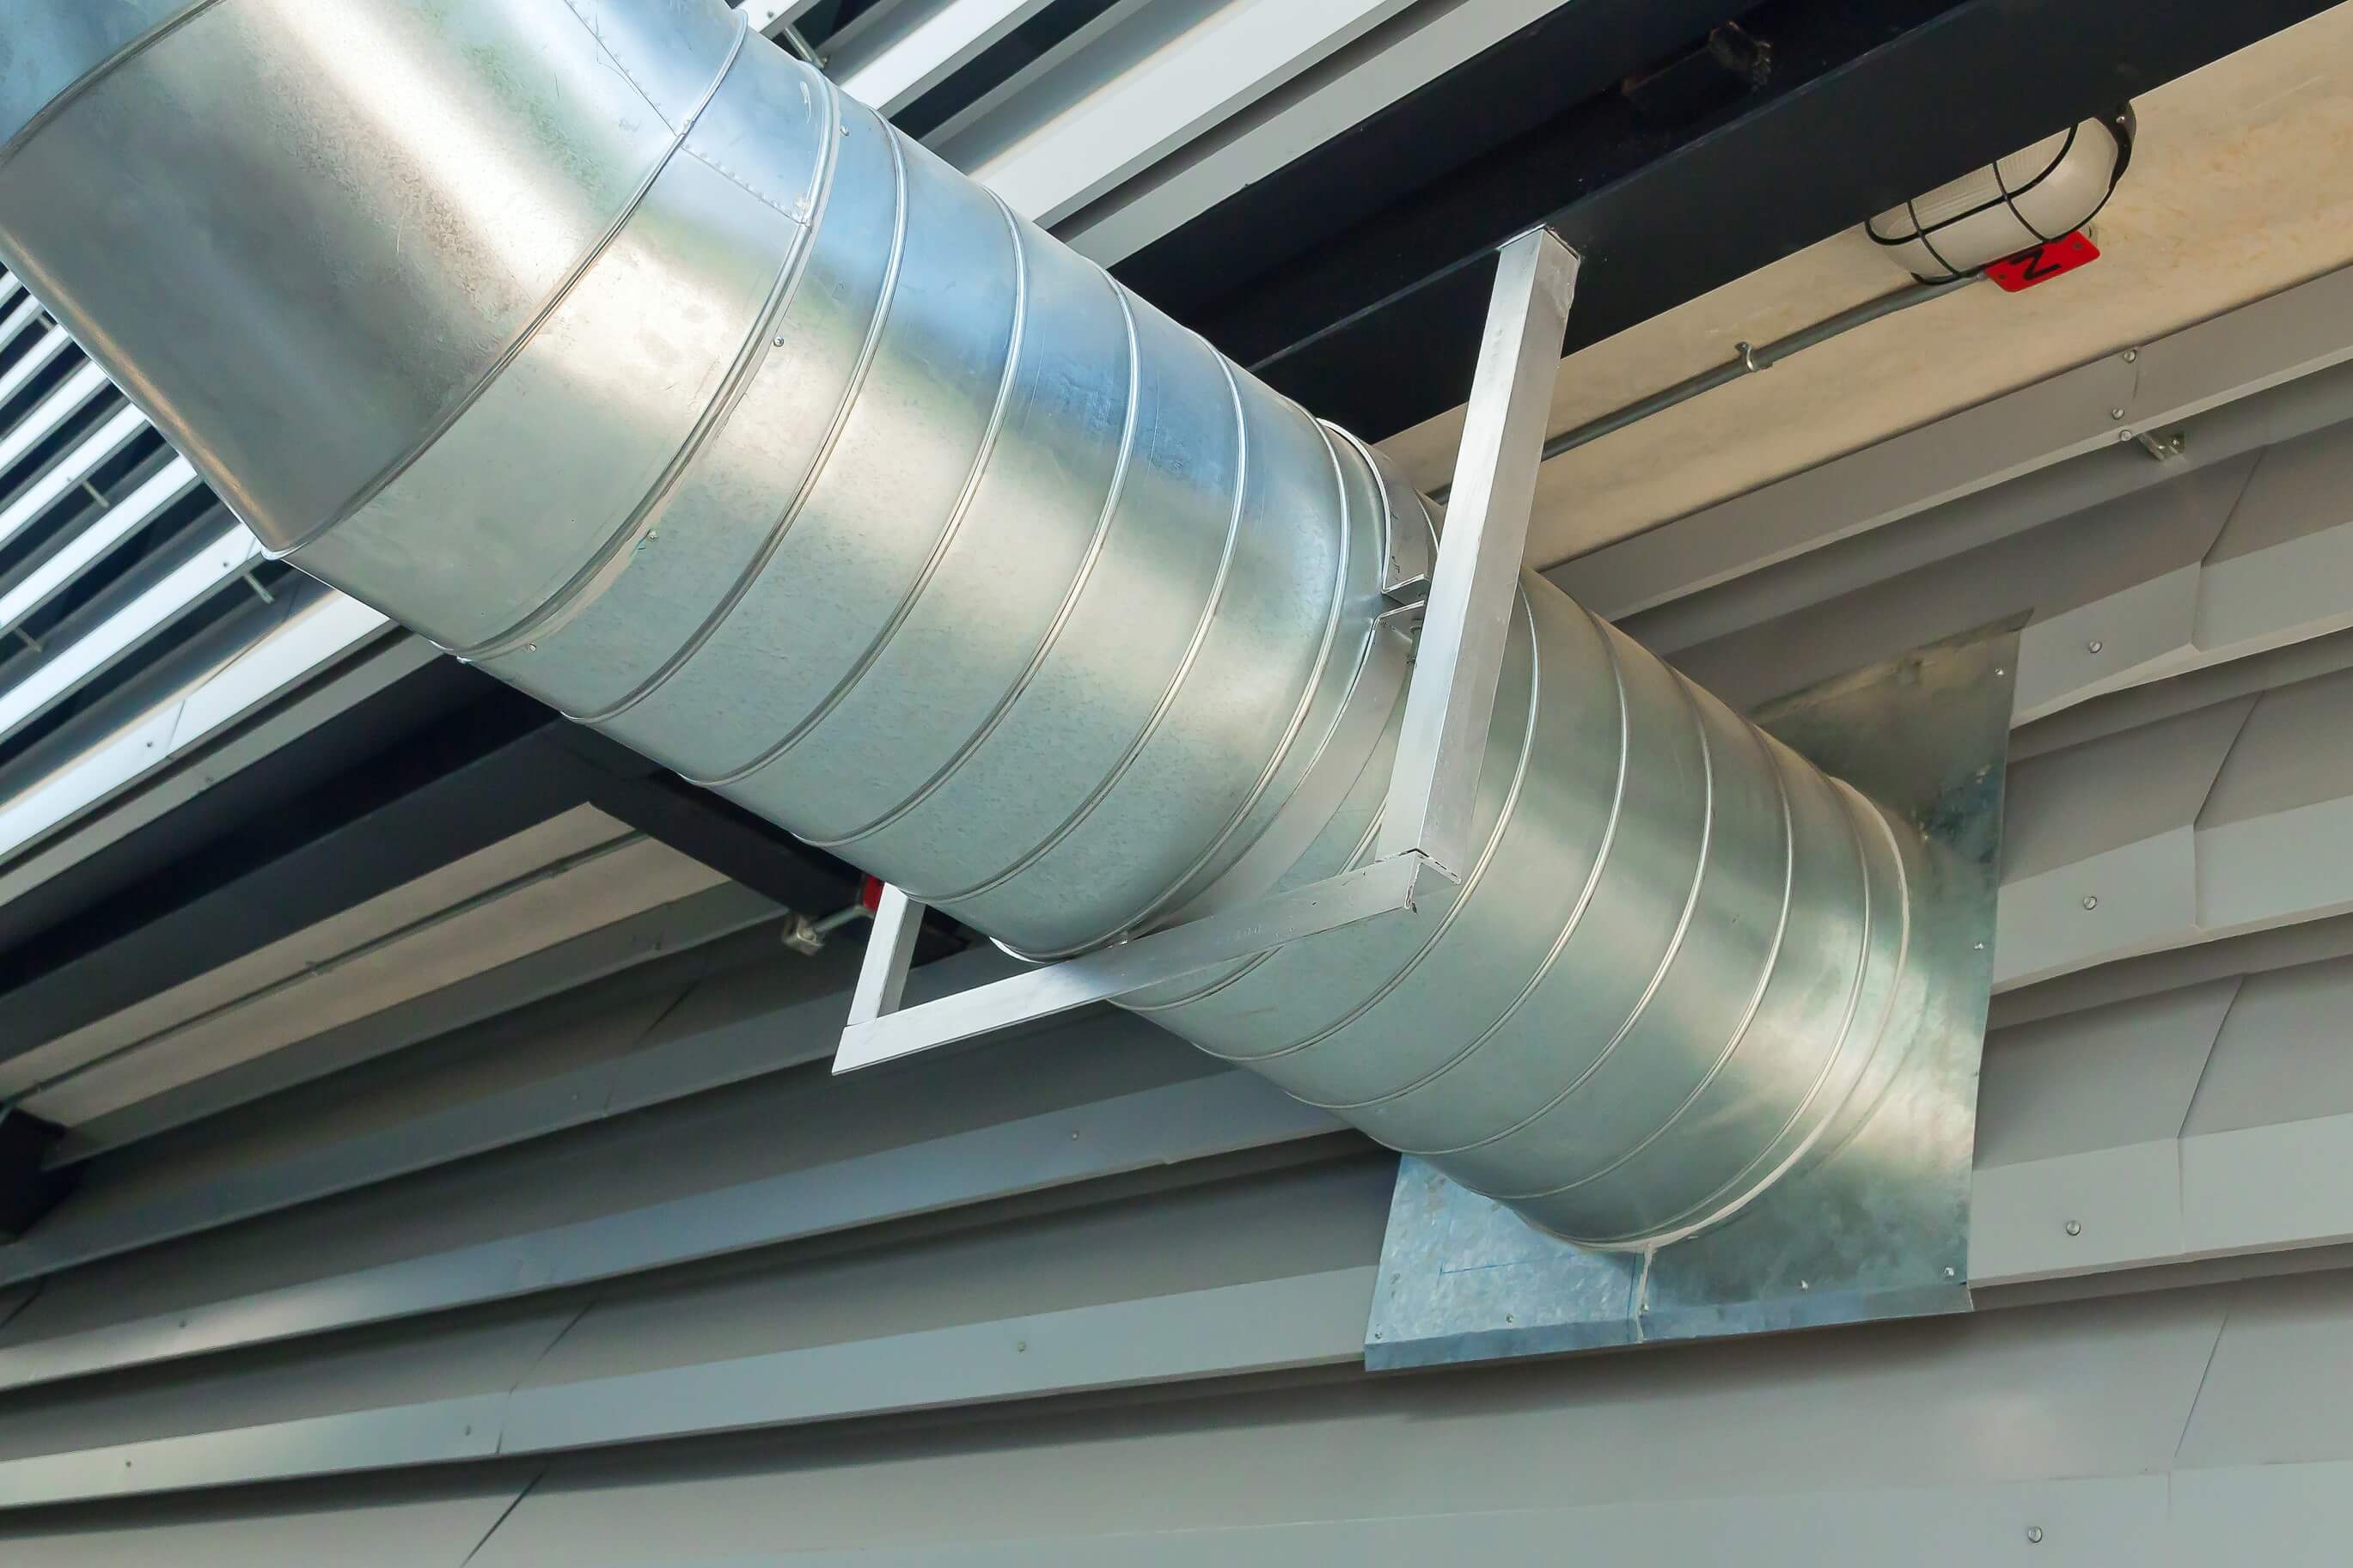
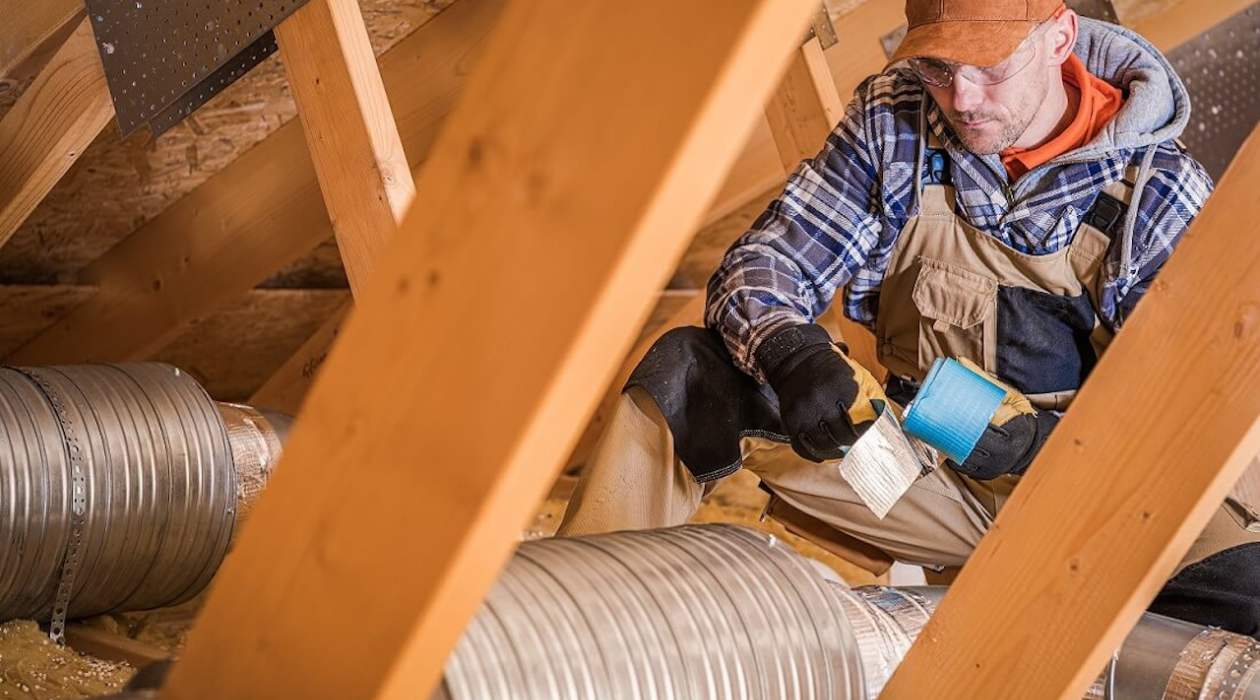
Cleaning the Main Ducts
Now it’s time to tackle the main ducts, which are the larger pathways that distribute airflow throughout your HVAC system. Cleaning the main ducts requires a bit more effort, but it’s crucial for maintaining optimal airflow and air quality. Follow these steps to effectively clean the main ducts:
- Gather Your Tools: Before you begin, ensure you have the necessary tools and materials, including a vacuum cleaner with a long hose and brush attachment, soft brushes or dusters, and a flashlight.
- Turn Off the HVAC System: Start by turning off your HVAC system to prevent air circulation during the cleaning process. This will reduce the risk of dust and debris spreading throughout your home.
- Access the Main Ducts: Locate the access panels that provide entry to the main ducts. These panels are typically located near the air handler unit or in the basement/crawlspace of your home.
- Inspect the Ductwork: Use a flashlight to inspect the main ducts for any visible buildup of dust, debris, or mold. Take note of areas that require extra attention during the cleaning process.
- Loosen Dust and Debris: Use a soft brush or duster to gently dislodge any loose dust or debris from the duct surfaces. Work your way through the main ducts, paying close attention to areas with visible buildup or obstructions.
- Vacuum the Ducts: Attach the brush attachment to your vacuum cleaner’s long hose. Insert the hose into the main ducts, reaching as far as possible. Move the hose in a swirling motion to cover all areas. Vacuum up the dislodged dust and debris as thoroughly as possible.
- Address Persistent Buildup: If you encounter stubborn buildup that cannot be easily removed with a brush or vacuum, consider hiring a professional duct cleaning service. They have specialized tools and equipment to tackle more challenging cleaning tasks.
- Close and Seal the Access Panels: Once you’ve completed the cleaning process, securely close and seal the access panels using appropriate screws or sealing materials. This will ensure the ductwork remains properly sealed and airtight.
Remember to work carefully and gently to avoid damaging the ductwork or compromising its integrity. Cleaning the main ducts may require some effort, but it’s essential for maintaining a healthy and efficient HVAC system.
Now that you’ve successfully cleaned the main ducts, let’s move on to the next section where we will discuss cleaning the registers.
Read more: How To Repair A Hole In HVAC Duct
Cleaning the Registers
Now that you’ve cleaned the supply vents, return vents, and main ducts, it’s time to focus on cleaning the registers. These are the visible grilles or covers that attach to the duct openings in your walls, floors, or ceilings. Follow these steps to effectively clean the registers:
- Gather Your Tools: Before you begin, gather the necessary tools and materials, including a screwdriver, vacuum cleaner with a brush attachment, soft brush or duster, and a damp cloth.
- Turn Off the HVAC System: Start by turning off your HVAC system to prevent air circulation during the cleaning process. This will minimize the spread of dust and debris within your home.
- Remove the Register Covers: Use a screwdriver to carefully remove the register covers from each vent. Place them aside for cleaning.
- Clean the Register Covers: Take the register covers outdoors or to a well-ventilated area. Use a soft brush or duster to remove any loose dust or debris from the covers. If necessary, wash them with mild detergent and water, ensuring they are completely dry before reinstallation.
- Clean Inside the Registers: Use a vacuum cleaner with a brush attachment to clean inside the registers. Gently insert the brush attachment into each register and vacuum out any dust or debris that may have accumulated. Pay extra attention to any visible buildup or obstructions.
- Wipe Down the Registers: Take a damp cloth and wipe down both the inside and outside surfaces of the registers. This will help remove any remaining dust or grime and leave them looking clean and refreshed.
- Allow the Registers to Dry: After wiping them down, allow the registers to air dry completely before reattaching them. This will prevent any moisture build-up that could lead to mold or mildew growth.
- Reinstall the Register Covers: Once the registers and register covers are dry, securely reattach the register covers to their respective vents using the screwdriver. Make sure they are fastened tightly for a snug fit.
By following these steps, you can effectively clean the registers and ensure proper airflow throughout your home. Clean registers not only enhance the appearance of your vents but also contribute to better indoor air quality.
Now that you’ve successfully cleaned the registers, let’s move on to the next section where we will discuss cleaning the air handler unit.
Cleaning the Air Handler Unit
The air handler unit is a crucial component of your HVAC system responsible for circulating conditioned air throughout your home. Cleaning the air handler unit is an essential step in maintaining its efficiency and ensuring clean airflow. Follow these steps to effectively clean the air handler unit:
- Gather Your Tools: Before you begin, gather the necessary tools and materials, including a screwdriver, vacuum cleaner with a brush attachment, soft brush or duster, and a damp cloth.
- Turn Off the HVAC System: Start by turning off your HVAC system to prevent any mishaps or accidents during the cleaning process. This will ensure your safety and allow for a more thorough clean.
- Locate the Air Handler Unit: Identify the location of the air handler unit. It is typically found in the basement, attic, closet, or garage. Refer to the manufacturer’s guidelines or user manual if you need assistance in locating it.
- Remove the Access Panels: Use a screwdriver to carefully remove the access panels from the air handler unit. Set them aside for cleaning.
- Inspect the Components: Use a flashlight to inspect the components of the air handler unit for any visible dust or debris buildup. Check the blower compartment, coils, fan blades, and filters.
- Vacuum the Components: Use a vacuum cleaner with a brush attachment to carefully vacuum away any dust or debris from the components. Pay close attention to the blower compartment, coils, and fan blades. Be gentle to avoid damaging any delicate parts.
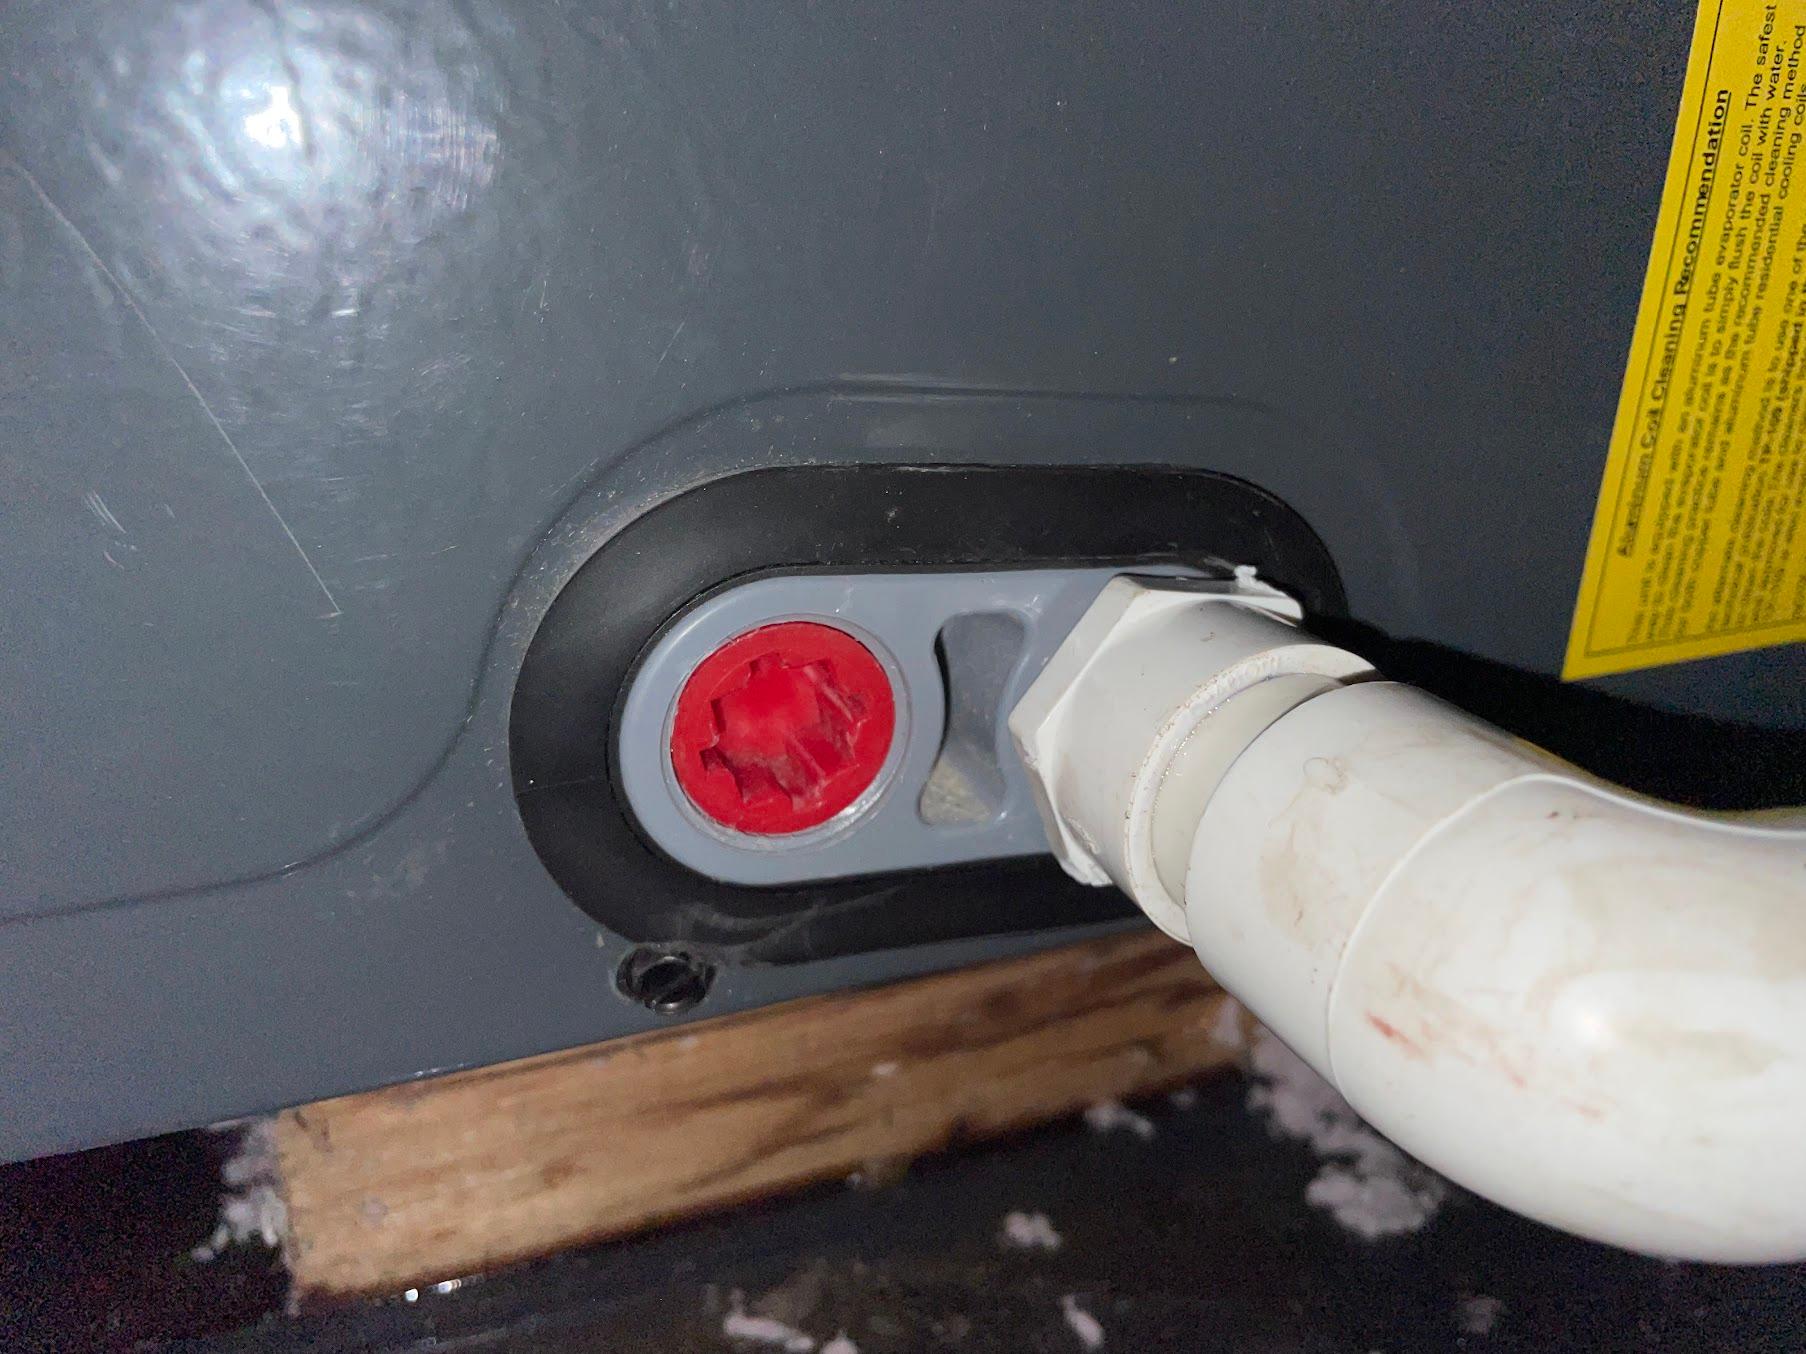
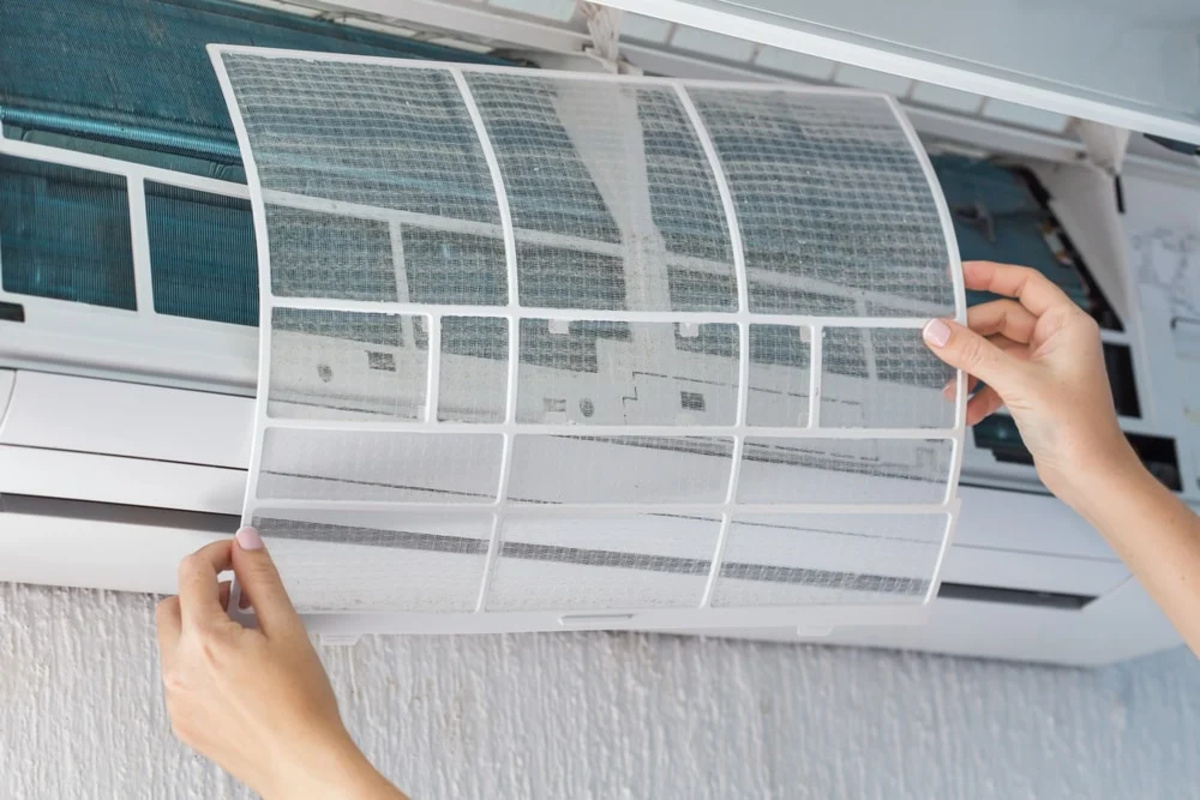
- Clean the Filter: Remove the air filter and inspect its condition. If it is dirty or clogged, replace it with a new filter. If it is reusable, clean it according to the manufacturer’s instructions before putting it back in place.
- Wipe Down Surfaces: Use a damp cloth to wipe down the surfaces of the air handler unit, including the interior walls and other accessible areas. This will help remove any remaining dust or grime.
- Replace the Access Panels: Once you’ve completed the cleaning process, securely reattach the access panels to the air handler unit using the screwdriver. Make sure they are tightly fastened to ensure proper functioning.
Regularly cleaning the air handler unit will help maintain its efficiency and prolong its lifespan. It will also contribute to cleaner airflow and better indoor air quality.
Now that you’ve successfully cleaned the air handler unit, let’s move on to the next section where we will discuss disinfecting the HVAC ducts.
Disinfecting the HVAC Ducts
In addition to cleaning your HVAC ducts, it’s also important to disinfect them to eliminate any bacteria, mold, or other contaminants that may be present. Here’s a step-by-step guide to help you effectively disinfect your HVAC ducts:
- Choose the Right Disinfectant: Select a disinfectant that is specifically designed for use in HVAC systems. Look for a product that is effective against a broad range of bacteria, viruses, and fungi. Read the instructions on the product label carefully.
- Prepare the Disinfectant Solution: Follow the instructions on the disinfectant product to prepare the solution. Mix it with water according to the recommended dilution ratio specified on the label. Prepare enough solution to cover the surface area of your ductwork.
- Protect Yourself: Before you start the disinfection process, ensure you are wearing protective gear such as gloves, safety glasses or goggles, and a dust mask or respirator. This will help protect you from the disinfectant and any airborne particles.
- Apply the Disinfectant: Use a spray bottle or fogging machine to apply the disinfectant solution evenly along the interior duct surfaces. Make sure to cover all areas, including bends and corners, to ensure thorough disinfection.
- Allow the Disinfectant to Sit: Allow the disinfectant solution to sit for the recommended contact time specified on the product label. This contact time ensures that the disinfectant effectively kills any bacteria, mold, or other contaminants present in the ductwork.
- Wipe Down Surfaces: After the designated contact time, use a soft cloth or sponge to wipe down the interior duct surfaces. This step helps remove any loosened contaminants and residues left behind by the disinfectant.
- Let the Ducts Dry: Allow the ducts to air dry completely before turning on your HVAC system. This helps ensure that any moisture from the disinfection process evaporates and prevents potential mold growth.
- Replace Air Filters: After disinfecting the ducts, replace your air filters with new ones. This step helps maintain clean and efficient airflow throughout your HVAC system.
Disinfecting your HVAC ducts is an important step in promoting a healthy living environment. It eliminates harmful pathogens and contributes to better indoor air quality for you and your family.
Now that you’ve successfully disinfected your HVAC ducts, let’s move on to the next section where we will discuss preventive maintenance tips to keep your ducts clean and well-maintained.
Preventive Maintenance Tips
Taking proactive measures to maintain the cleanliness and efficiency of your HVAC ducts can help ensure optimal performance and improve indoor air quality. Here are some preventive maintenance tips to keep your ducts clean and well-maintained:
- Change Air Filters Regularly: Regularly replace your air filters according to the manufacturer’s recommendations. This prevents dust and debris from accumulating in the ducts and ensures clean airflow throughout your HVAC system.
- Keep Vents Clean: Regularly dust and clean the supply and return vents to prevent dust and debris from entering the ducts. Use a soft brush or duster to remove any buildup on the vent covers and keep them free from obstruction.
- Maintain Proper Moisture Levels: High humidity levels can contribute to mold and mildew growth in your ducts. Use dehumidifiers or proper ventilation to maintain optimal indoor moisture levels and prevent excess moisture buildup.
- Seal Duct Leaks: Inspect your ductwork for any leaks or gaps and seal them using duct sealant or foil tape. This prevents air leakage and ensures that conditioned air is properly distributed throughout your home.
- Clean Surrounding Areas: Keep the areas around your HVAC system clean and free from debris. Dust and vacuum regularly to prevent dirt and dust from entering the air handler unit and ductwork.
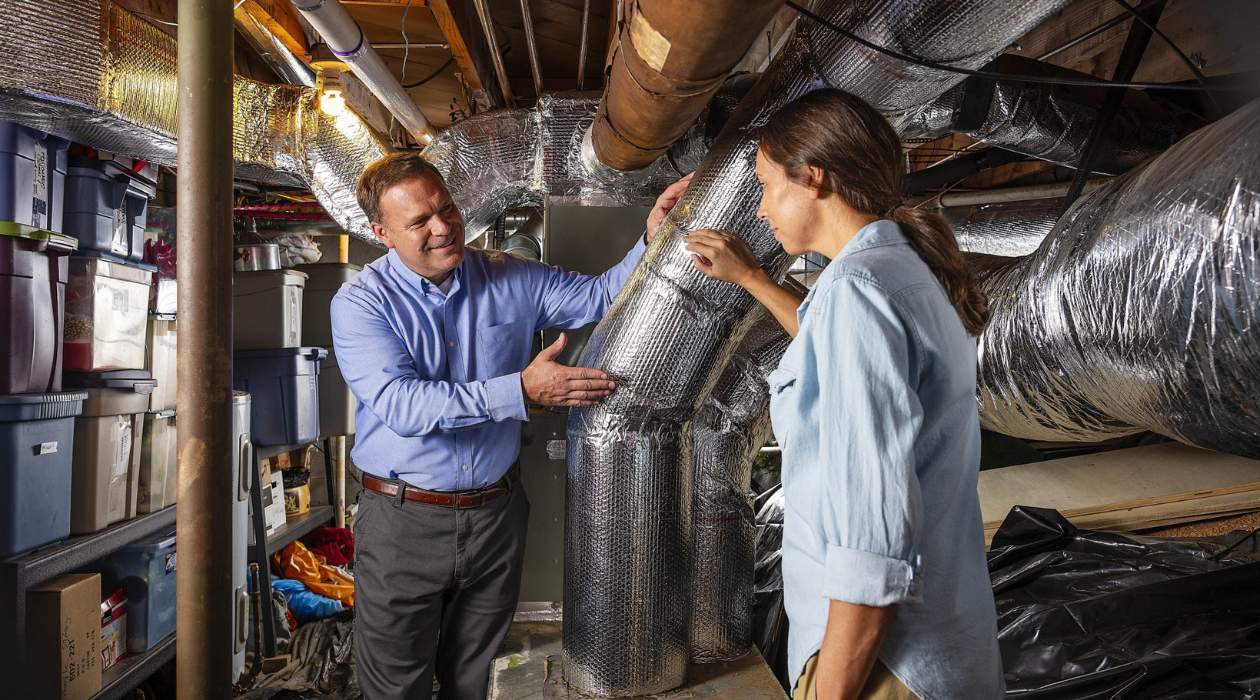
- Schedule Professional Inspections and Maintenance: Consider hiring a professional HVAC technician to inspect and maintain your HVAC system regularly. They can identify any potential issues, clean the ducts thoroughly, and ensure optimal system performance.
- Limit Indoor Pollutants: Minimize the introduction of indoor pollutants by avoiding smoking indoors, using proper ventilation when cooking or using chemicals, and regularly cleaning or replacing items that can release pollutants, such as carpets and upholstery.
- Monitor Your Indoor Air Quality: Regularly monitor the indoor air quality in your home using air quality monitors. This can help you identify any fluctuations or issues that may require further attention or HVAC duct cleaning.
- Stay Mindful of Pests: Keep an eye out for any signs of pests near your HVAC system or ductwork. Address pest infestations promptly to prevent them from causing damage or spreading contaminants in the ducts.
By following these preventive maintenance tips, you can keep your HVAC ducts in optimal condition and ensure a healthier living environment. Regular maintenance and attention to cleanliness will help your HVAC system perform efficiently, maintain good indoor air quality, and extend its lifespan.
Now that you’re equipped with these tips, you have the knowledge to keep your HVAC ducts clean and well-maintained. Remember to establish a regular maintenance routine to reap the benefits of a well-functioning and clean HVAC system.
If you have any specific concerns or questions, it’s always a good idea to consult with a professional HVAC technician for personalized advice and guidance.
Good luck with your HVAC duct maintenance journey!
Read more: How To Calculate Duct Size For HVAC
Conclusion
Cleaning and maintaining your HVAC ducts is a crucial aspect of ensuring optimal system performance and improving indoor air quality. By following the steps outlined in this comprehensive guide, you can effectively clean your HVAC ducts and create a healthier living environment for you and your family.
We started by highlighting the importance of cleaning HVAC ducts, emphasizing how it contributes to improved indoor air quality, energy efficiency, and an extended equipment lifespan. We then discussed the signs that indicate your HVAC ducts may need cleaning, helping you identify when it’s time to take action.
Proper preparation is essential, and we provided a list of tools and materials you’ll need for the cleaning process. We then took you through a step-by-step guide on how to clean each component, including the supply vents, return vents, main ducts, registers, and air handler unit. Additionally, we covered the crucial step of disinfecting the HVAC ducts to eliminate any bacteria, mold, or contaminants.
We also shared preventive maintenance tips to help you keep your HVAC ducts clean and well-maintained. By regularly changing air filters, keeping vents clean, addressing duct leaks, and scheduling professional inspections, you can ensure the long-term efficiency and performance of your HVAC system.
Remember, maintaining clean and well-functioning HVAC ducts not only promotes better air quality but also contributes to energy savings and extends the life of your system. By implementing these practices, you can enjoy a healthier home environment while maximizing the benefits of your HVAC system.
Should you encounter any challenges or require professional assistance, it’s always a good idea to consult with a knowledgeable HVAC technician who can provide expert advice and guidance tailored to your specific needs.
With a commitment to regular cleaning and maintenance, you can enjoy the comfort, cleanliness, and efficiency of your HVAC system for years to come.
Thank you for taking the time to read our comprehensive guide on how to clean HVAC ducts. We hope you find this information helpful and that it empowers you to take action towards maintaining a clean and healthy home environment.
Frequently Asked Questions about How To Clean HVAC Ducts
Was this page helpful?
At Storables.com, we guarantee accurate and reliable information. Our content, validated by Expert Board Contributors, is crafted following stringent Editorial Policies. We're committed to providing you with well-researched, expert-backed insights for all your informational needs.

0 thoughts on “How To Clean HVAC Ducts”