Articles
How To Clean HVAC Drain Line
Modified: August 28, 2024
Learn the best techniques and methods to clean your HVAC drain pipe in this informative article. Keep your system running smoothly and prevent costly repairs.
(Many of the links in this article redirect to a specific reviewed product. Your purchase of these products through affiliate links helps to generate commission for Storables.com, at no extra cost. Learn more)
Introduction
Welcome to our comprehensive guide on how to clean your HVAC drain pipe. If you’ve noticed water pooling around your air conditioner or a musty smell coming from your vents, it could be a sign that your HVAC drain pipe is clogged. Regular maintenance and cleaning of your HVAC system’s drain pipe can help prevent costly repairs and maintain the efficiency of your heating and cooling system.
The HVAC drain pipe, also known as the condensate drain pipe, plays a crucial role in removing excess moisture that is produced during the cooling process. As warm air passes over the evaporator coil in your air conditioner, it cools down and condenses, producing water droplets. This water is then collected in the drain pan and drained out through the drain pipe, preventing it from causing water damage to your system and your home.
Over time, the drain pipe can become clogged with dirt, algae, mold, and other debris, obstructing the flow of water and leading to potential problems. A clogged drain pipe can cause water to accumulate in the drain pan, leading to overflow, water damage, and even mold growth if left untreated. By learning how to clean your HVAC drain pipe, you can prevent these issues and keep your system running smoothly.
In this guide, we will walk you through the process of cleaning your HVAC drain pipe, step by step. We will also discuss the signs of a clogged drain pipe and the supplies you will need to effectively clean it. So let’s dive in and get your HVAC drain pipe cleaned and functioning optimally!
Key Takeaways:
- Regular cleaning of your HVAC drain pipe is crucial to prevent water damage, mold growth, and reduced efficiency. By following the step-by-step process, you can maintain a healthy and efficient heating and cooling system.
- Signs of a clogged drain pipe include water leakage, musty odors, and reduced cooling efficiency. Gathering the necessary supplies and following the cleaning process will help you keep your HVAC system running smoothly.
Read more: How To Clear HVAC Drain Line
Understanding the HVAC Drain Pipe
Before diving into the cleaning process, it’s important to have a clear understanding of how the HVAC drain pipe works and why it is crucial for the overall functionality of your heating and cooling system.
The HVAC drain pipe is responsible for removing excess moisture from the air conditioning system. As your air conditioner cools the air, it also removes humidity from the indoor environment. This moisture condenses on the evaporator coil and collects in the drain pan located below it. The drain pan is connected to the drain pipe, which carries the water away from the system and out of your home.
Most HVAC drain pipes are made of PVC (polyvinyl chloride) and are typically one to two inches in diameter. They are designed to efficiently transport the water away from the system, preventing any leakage or water accumulation. The drain pipe is usually located near the indoor unit of the HVAC system and may run vertically or horizontally to reach an appropriate drain point, such as a floor drain or an exterior location.
In addition to removing excess moisture, the HVAC drain pipe also helps prevent the growth of mold and mildew. When the drain pipe becomes clogged, stagnant water can accumulate in the drain pan, providing the perfect environment for mold and mildew to thrive. This can not only affect the efficiency of your system but also pose health risks to you and your family.
Regular maintenance and cleaning of the HVAC drain pipe are essential to ensure that it remains clear of any obstructions and functions properly. By keeping the drain pipe clean, you can prevent water damage, mold growth, and the need for costly repairs, ensuring the longevity and efficiency of your HVAC system.
Now that you have a solid understanding of the HVAC drain pipe and its importance, let’s move on to recognizing the signs of a clogged drain pipe.
Signs of a Clogged HVAC Drain Pipe
A clogged HVAC drain pipe can cause a range of problems and issues within your heating and cooling system. It is important to be aware of the signs that indicate a potential clog so that you can address it promptly. Here are some common signs of a clogged HVAC drain pipe:
- Water leakage: One of the most obvious signs of a clogged drain pipe is water leakage around your air conditioner or near the indoor unit. You may notice water pooling around the unit or even see water dripping from the ceiling or walls. This is a clear indication that the drain pipe is not effectively removing the water from the system.
- Musty or unpleasant odors: If you detect a musty or unpleasant odor coming from your vents, it could be a sign that mold or mildew is growing in the drain pipe due to stagnant water. These odors can permeate your home and affect the indoor air quality, potentially leading to respiratory issues for you and your family.
- Reduced cooling efficiency: A clogged drain pipe can impact the overall efficiency of your air conditioning system. When the drain pipe is blocked, water may accumulate in the drain pan, causing the system to work harder to cool your home. As a result, you may experience reduced cooling performance, longer cooling cycles, and higher energy bills.
- Noise or gurgling sounds: If you hear unusual noises, such as gurgling or bubbling sounds, coming from your HVAC system, it may be an indication of a clogged drain pipe. The trapped air and water inside the pipe can create these sounds, signaling that the water is not flowing freely as it should.
- Visible mold or algae growth: In some cases, you may be able to visually spot mold or algae growth near the drain pipe or inside the drain pan. These growths thrive in moist environments, and a clogged drain pipe provides the perfect condition for their development. If you notice any signs of mold or algae, it is essential to take action to clean and clear the drain pipe as soon as possible.
If you notice any of these signs, it is important to address the issue promptly to prevent further damage to your HVAC system or your home. Cleaning the HVAC drain pipe will help resolve these problems and keep your system running smoothly. In the next section, we will discuss the supplies you will need for cleaning the drain pipe.
Supplies Needed for Cleaning
Before you begin the process of cleaning your HVAC drain pipe, it is important to gather the necessary supplies. Having the right tools and materials on hand will ensure that you can effectively remove any clogs and restore proper drainage. Here are the supplies you will need:
- Vacuum cleaner with a hose attachment: A vacuum cleaner with a hose attachment will help you remove any debris or blockages that may be present in the drain pipe. Make sure the vacuum is in good working condition and has enough suction power to effectively clear the pipe.
- Compressed air can or air compressor: Using compressed air is another method to dislodge any stubborn clogs in the drain pipe. You can either use a compressed air can, which is readily available at most hardware stores, or an air compressor if you have one at your disposal.
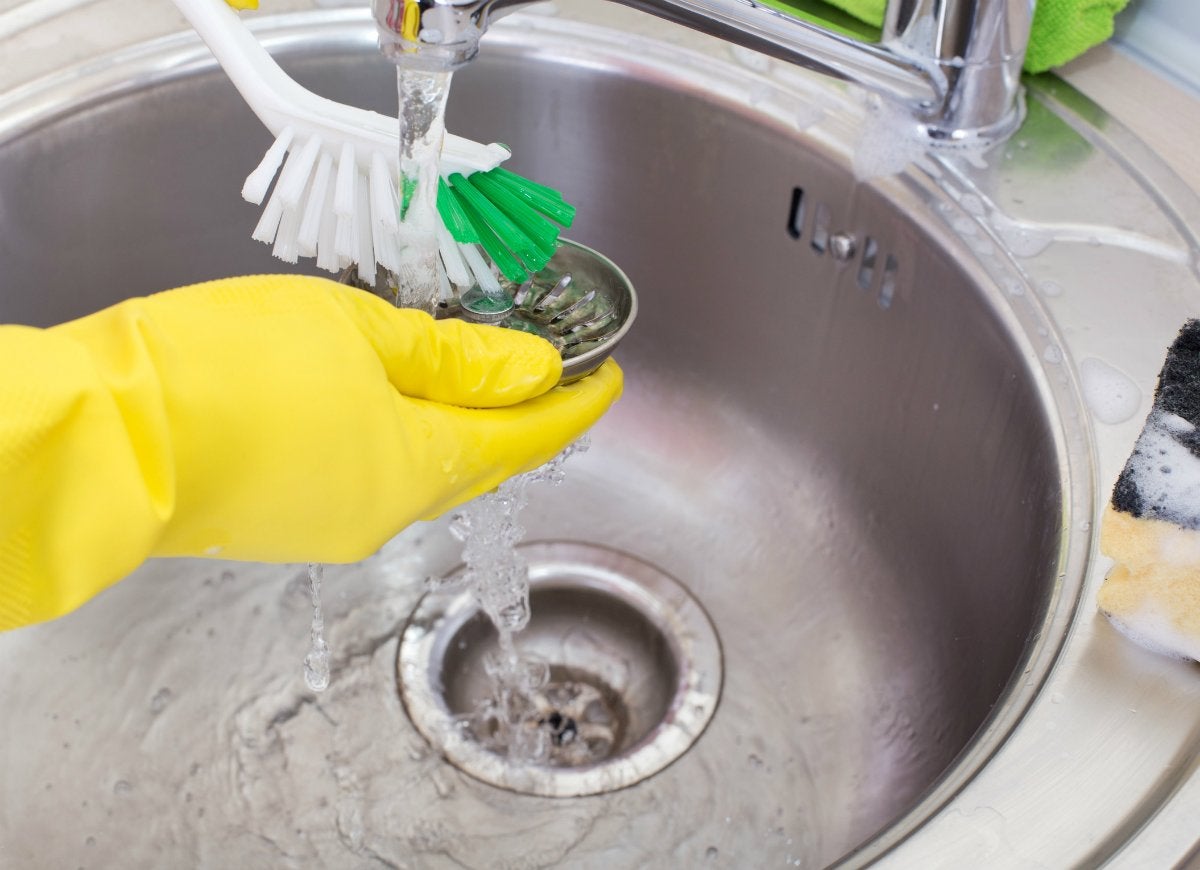
- Pipe brush or small wire brush: A pipe brush or small wire brush will come in handy for scrubbing the inside of the drain pipe and removing any buildup or residue. Make sure the brush is sized appropriately to fit inside the pipe and reach any obstructions.
- Plastic funnel or container: To flush the drain pipe with water, you will need a plastic funnel or container to pour water into the pipe. This will help ensure a controlled flow of water through the pipe, allowing it to rinse away any remaining debris.
- Vinegar or bleach: Vinegar or bleach can be used as a cleaning solution for the drain pipe. These substances help to kill any mold or algae growth and disinfect the inside of the pipe. Choose either vinegar or bleach, and make sure to dilute it properly before using it as a cleaning solution.
- Gloves and protective eyewear: When working with cleaning solutions or using compressed air, it is important to protect yourself with gloves and protective eyewear. This will prevent any accidental contact with chemicals or debris and ensure your safety during the cleaning process.
Having these supplies readily available before you start cleaning your HVAC drain pipe will save you time and ensure a smooth and efficient cleaning process. Once you have gathered all the necessary tools and materials, you are ready to start following the step-by-step instructions. In the upcoming sections, we will guide you through the process of cleaning your HVAC drain pipe, helping you restore proper drainage and prevent any potential issues.
Step 1: Turn off the HVAC System
Before you begin cleaning your HVAC drain pipe, it is crucial to turn off the system to ensure your safety and prevent any potential damage. Here are the steps to follow:
- Locate the thermostat: Find the thermostat that controls your heating and cooling system. It is usually located on a wall in a central area of your home.
- Turn off the system: Set the thermostat to the “off” position to deactivate the HVAC system. This will prevent the system from running while you are working on cleaning the drain pipe.
- Shut off the power: In some cases, simply turning off the thermostat may not completely cut off power to the HVAC system. For added safety, locate the circuit breaker panel in your home and turn off the power supply specific to the HVAC unit. Refer to the circuit breaker labeled for the HVAC system or consult the user manual if needed.
By turning off the HVAC system, you eliminate the risk of any moving parts operating during the cleaning process. This will minimize the potential for accidents and ensure that you can work on the drain pipe safely and effectively.
Once you have successfully turned off the HVAC system, it is time to move on to the next step: locating the drain pipe. In the following section, we will guide you through the process of finding the drain pipe in your system.
Read more: How Much Vinegar To Clean AC Drain Line
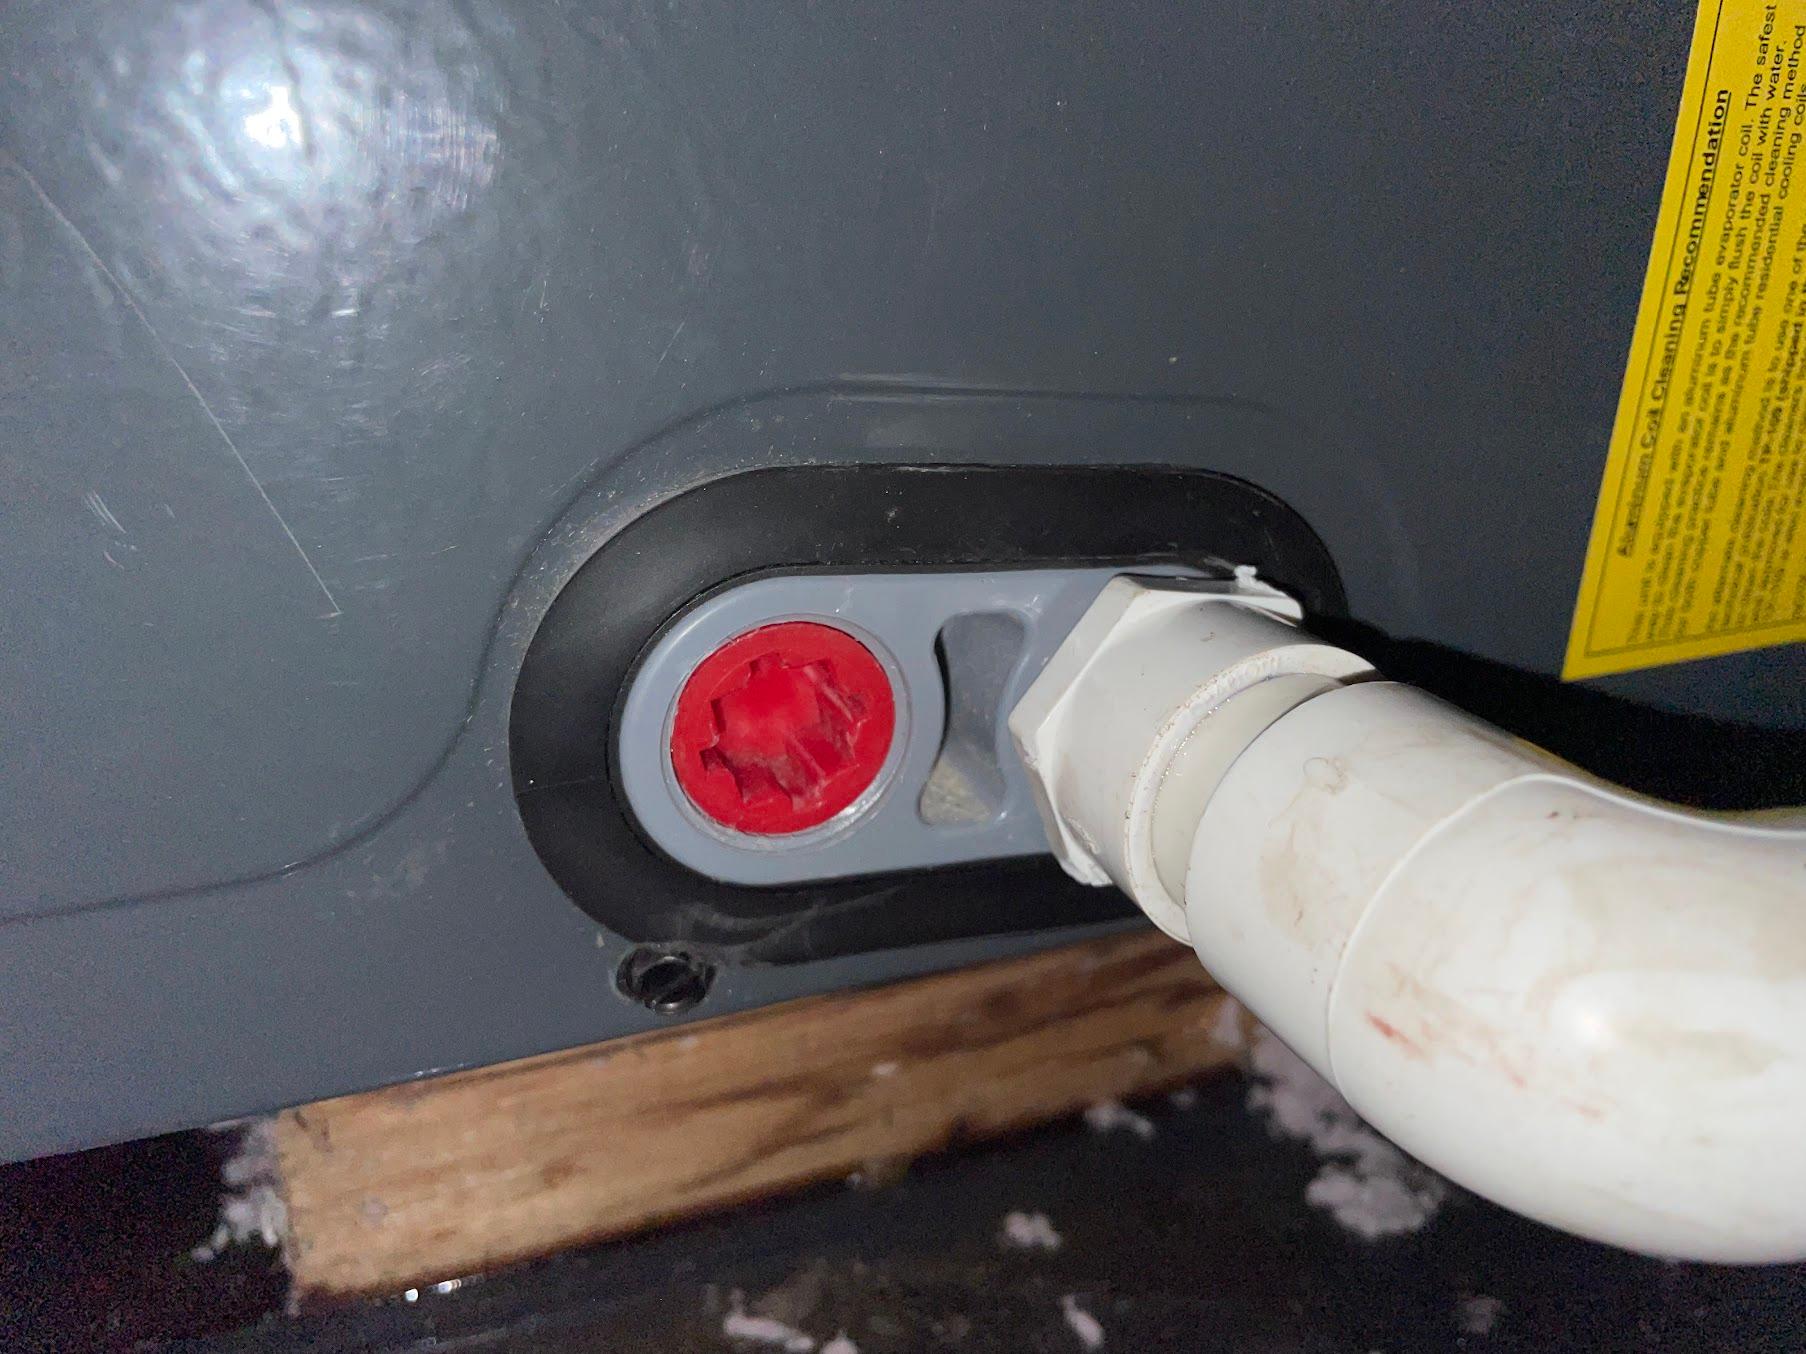
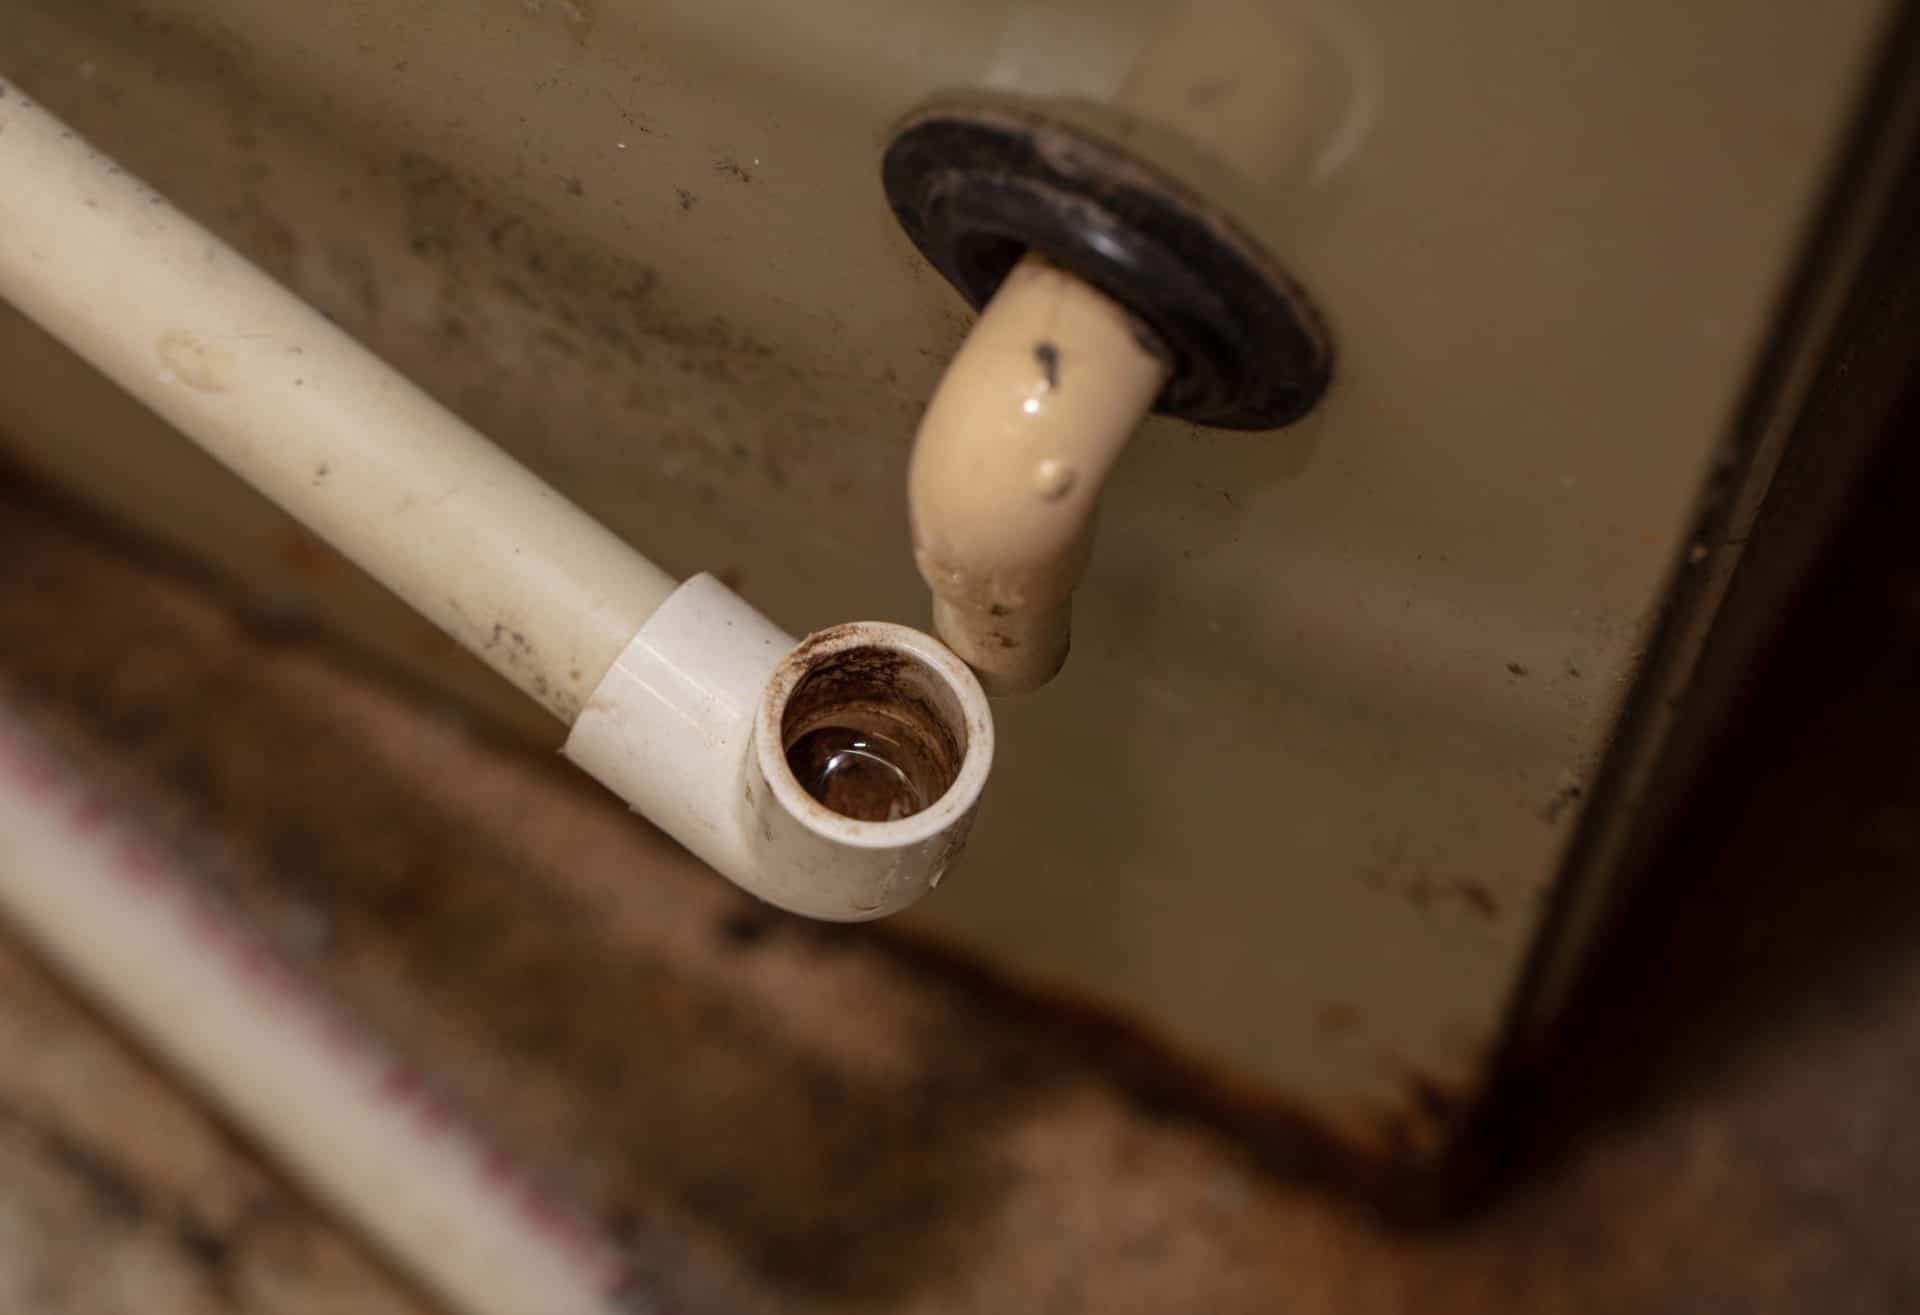
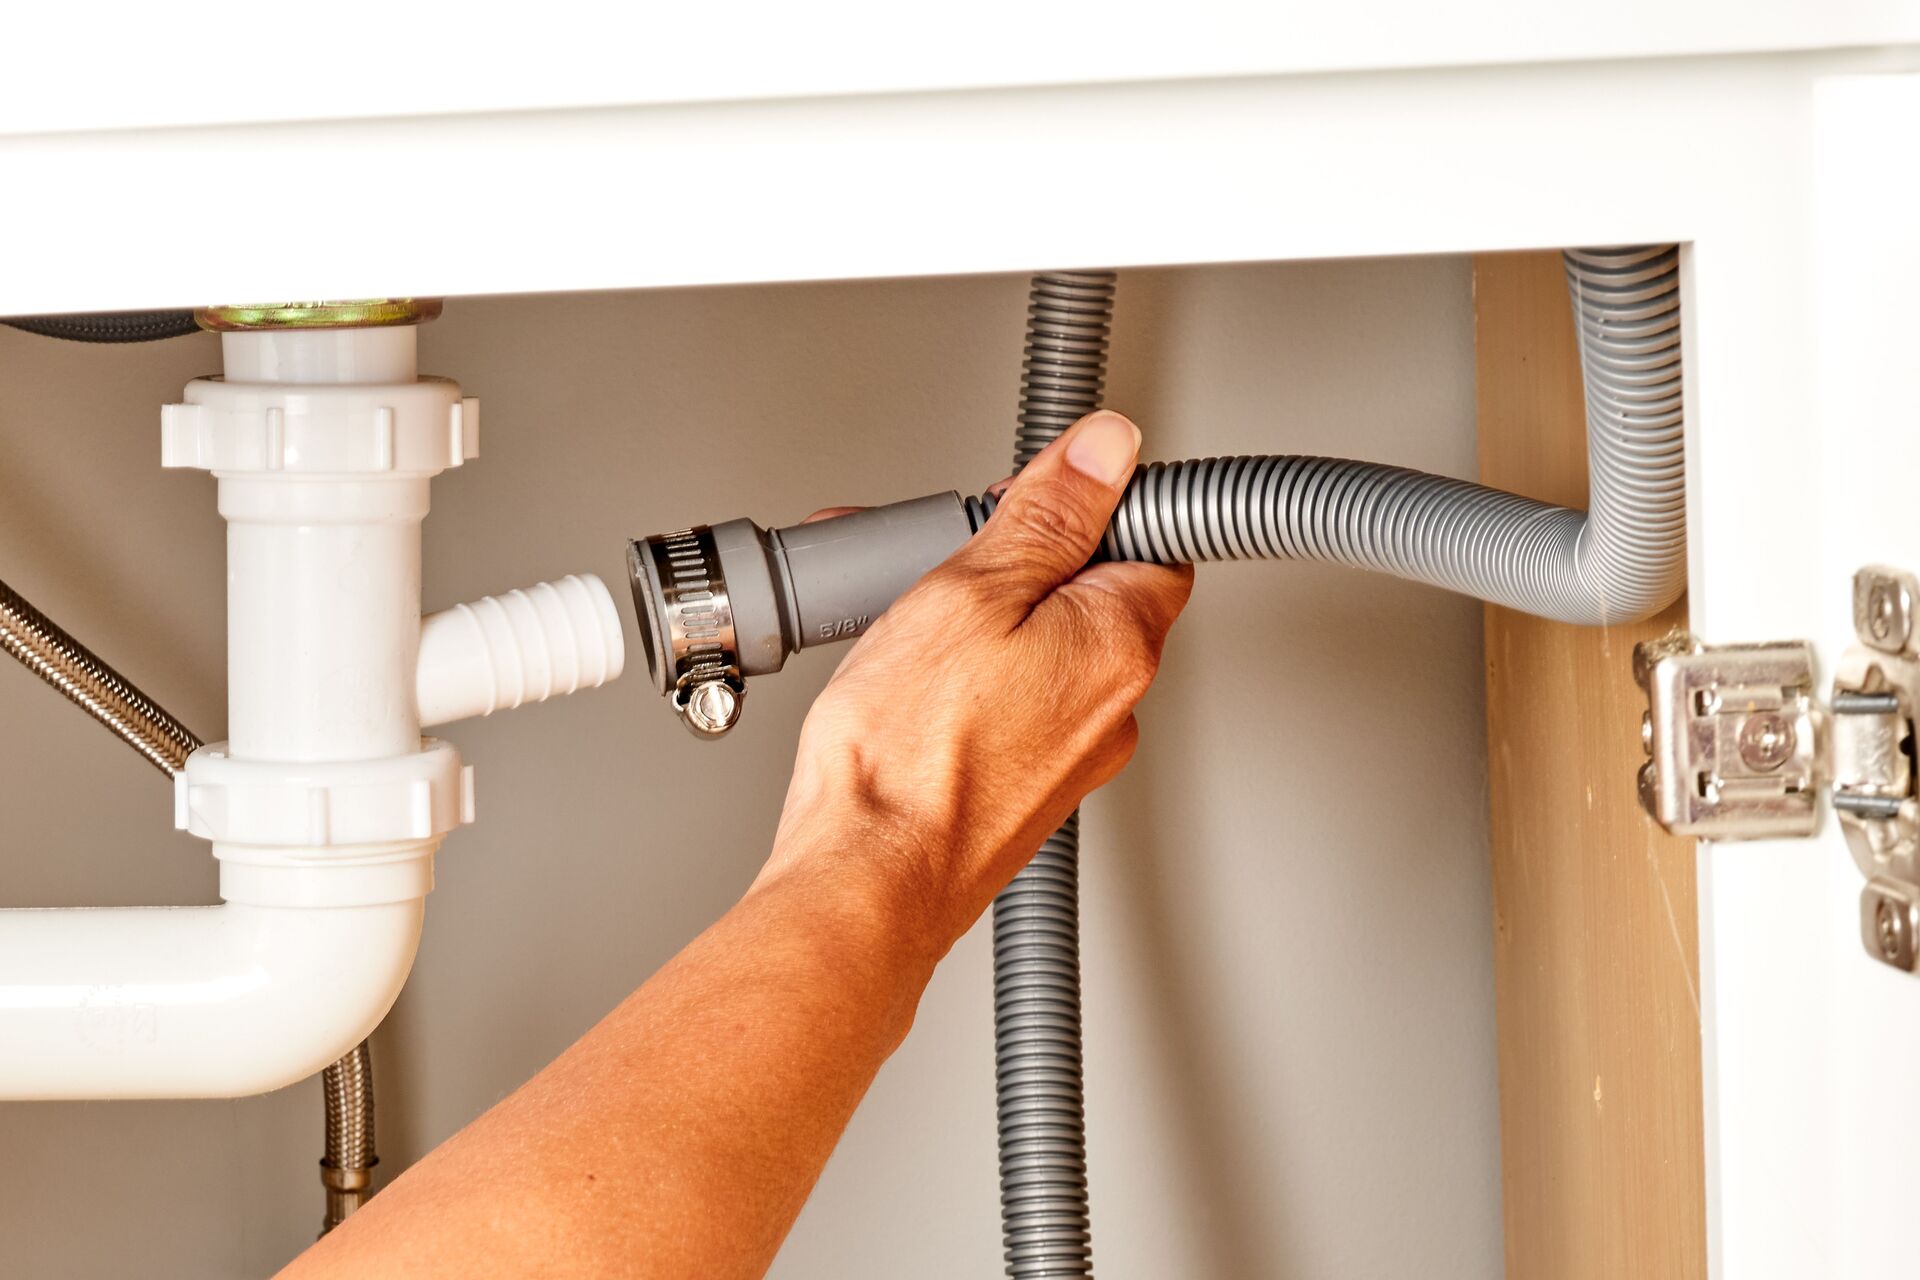
Step 2: Locate the Drain Pipe
Locating the drain pipe in your HVAC system is essential for accessing and cleaning it effectively. The drain pipe is typically connected to the indoor unit or air handler of your system and runs either horizontally or vertically. Here are the steps to help you find the drain pipe:
- Find the indoor unit: Depending on your HVAC system, the indoor unit or air handler is usually located in an attic, basement, closet, or utility room.
- Look for the condensate drain pan: The drain pipe connects to the condensate drain pan, which collects the water that has condensed on the evaporator coil. Locate the drain pan – it is typically located underneath the unit, at the bottom of the air handler.
- Inspect the drain line: Follow the drain pan outlet or tube to locate the drain pipe. It may be a PVC pipe, typically white, and about one to two inches in diameter. The drain pipe may be connected to the drain pan through a joint or fitting.
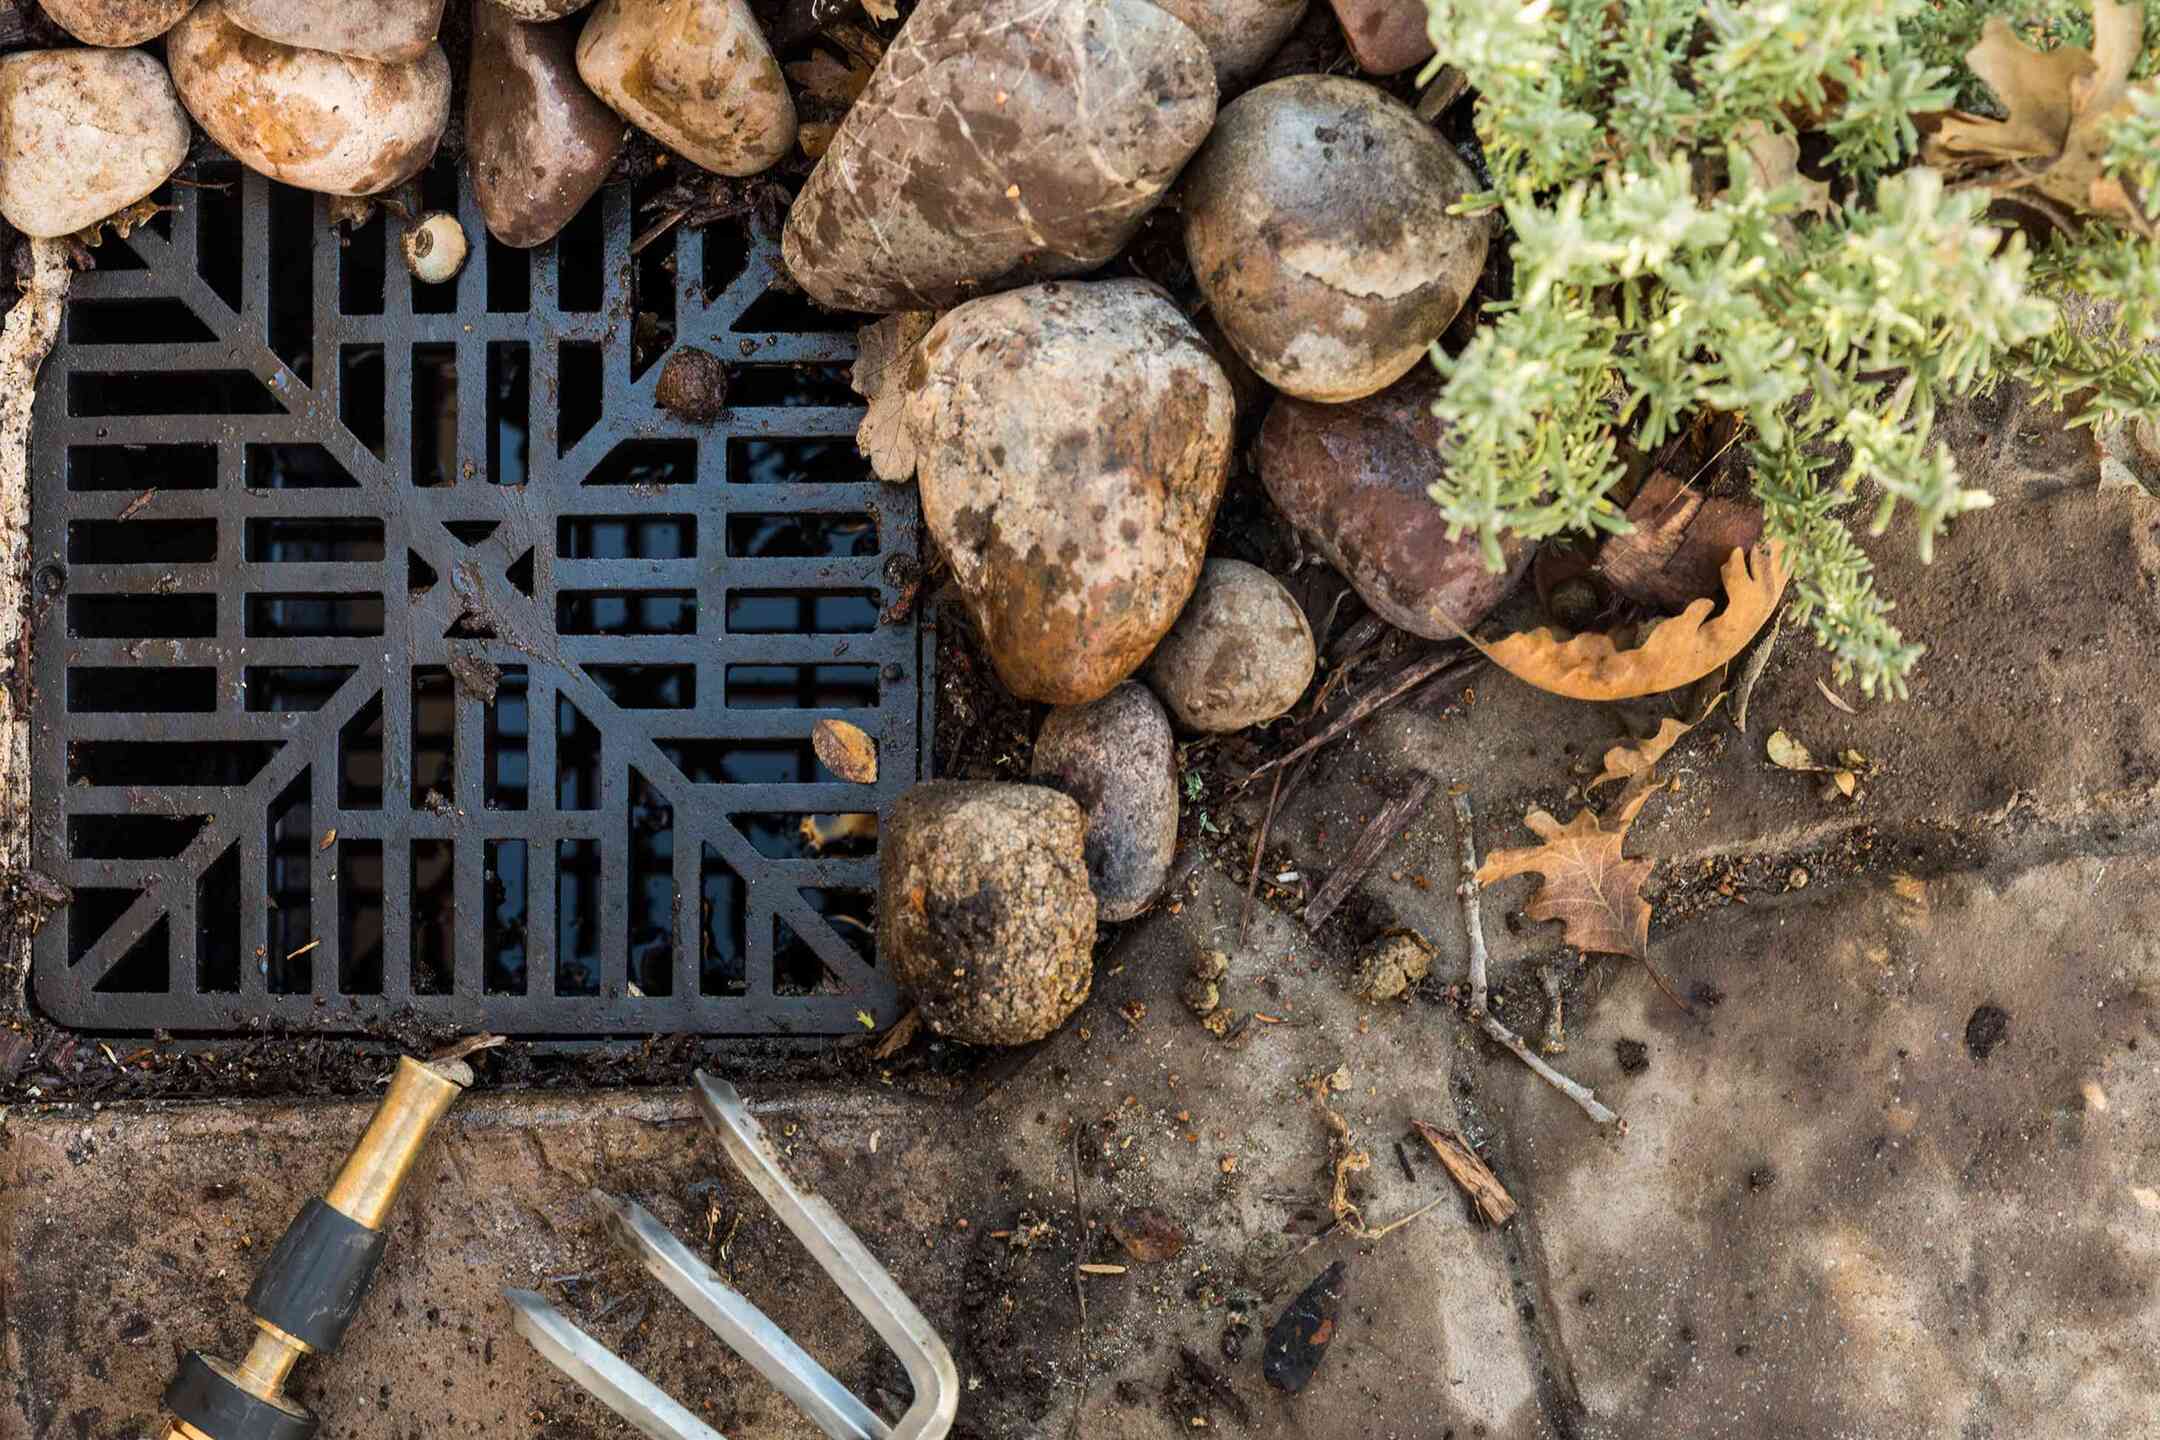
- Identify the drain pipe’s exit point: Depending on your HVAC system’s configuration, the drain pipe may exit your home through an exterior wall or drain to a floor drain or another appropriate drainage point.
It is important to note that the location of the drain pipe may vary depending on the setup of your HVAC system. If you are having trouble finding the drain pipe, consult your system’s user manual or consider seeking the assistance of an HVAC professional.
Once you have successfully located the drain pipe, you are ready to proceed to the next step: removing the access panel or cap. This will allow you to access the interior of the drain pipe and begin the cleaning process. Keep reading to learn more in the following section.
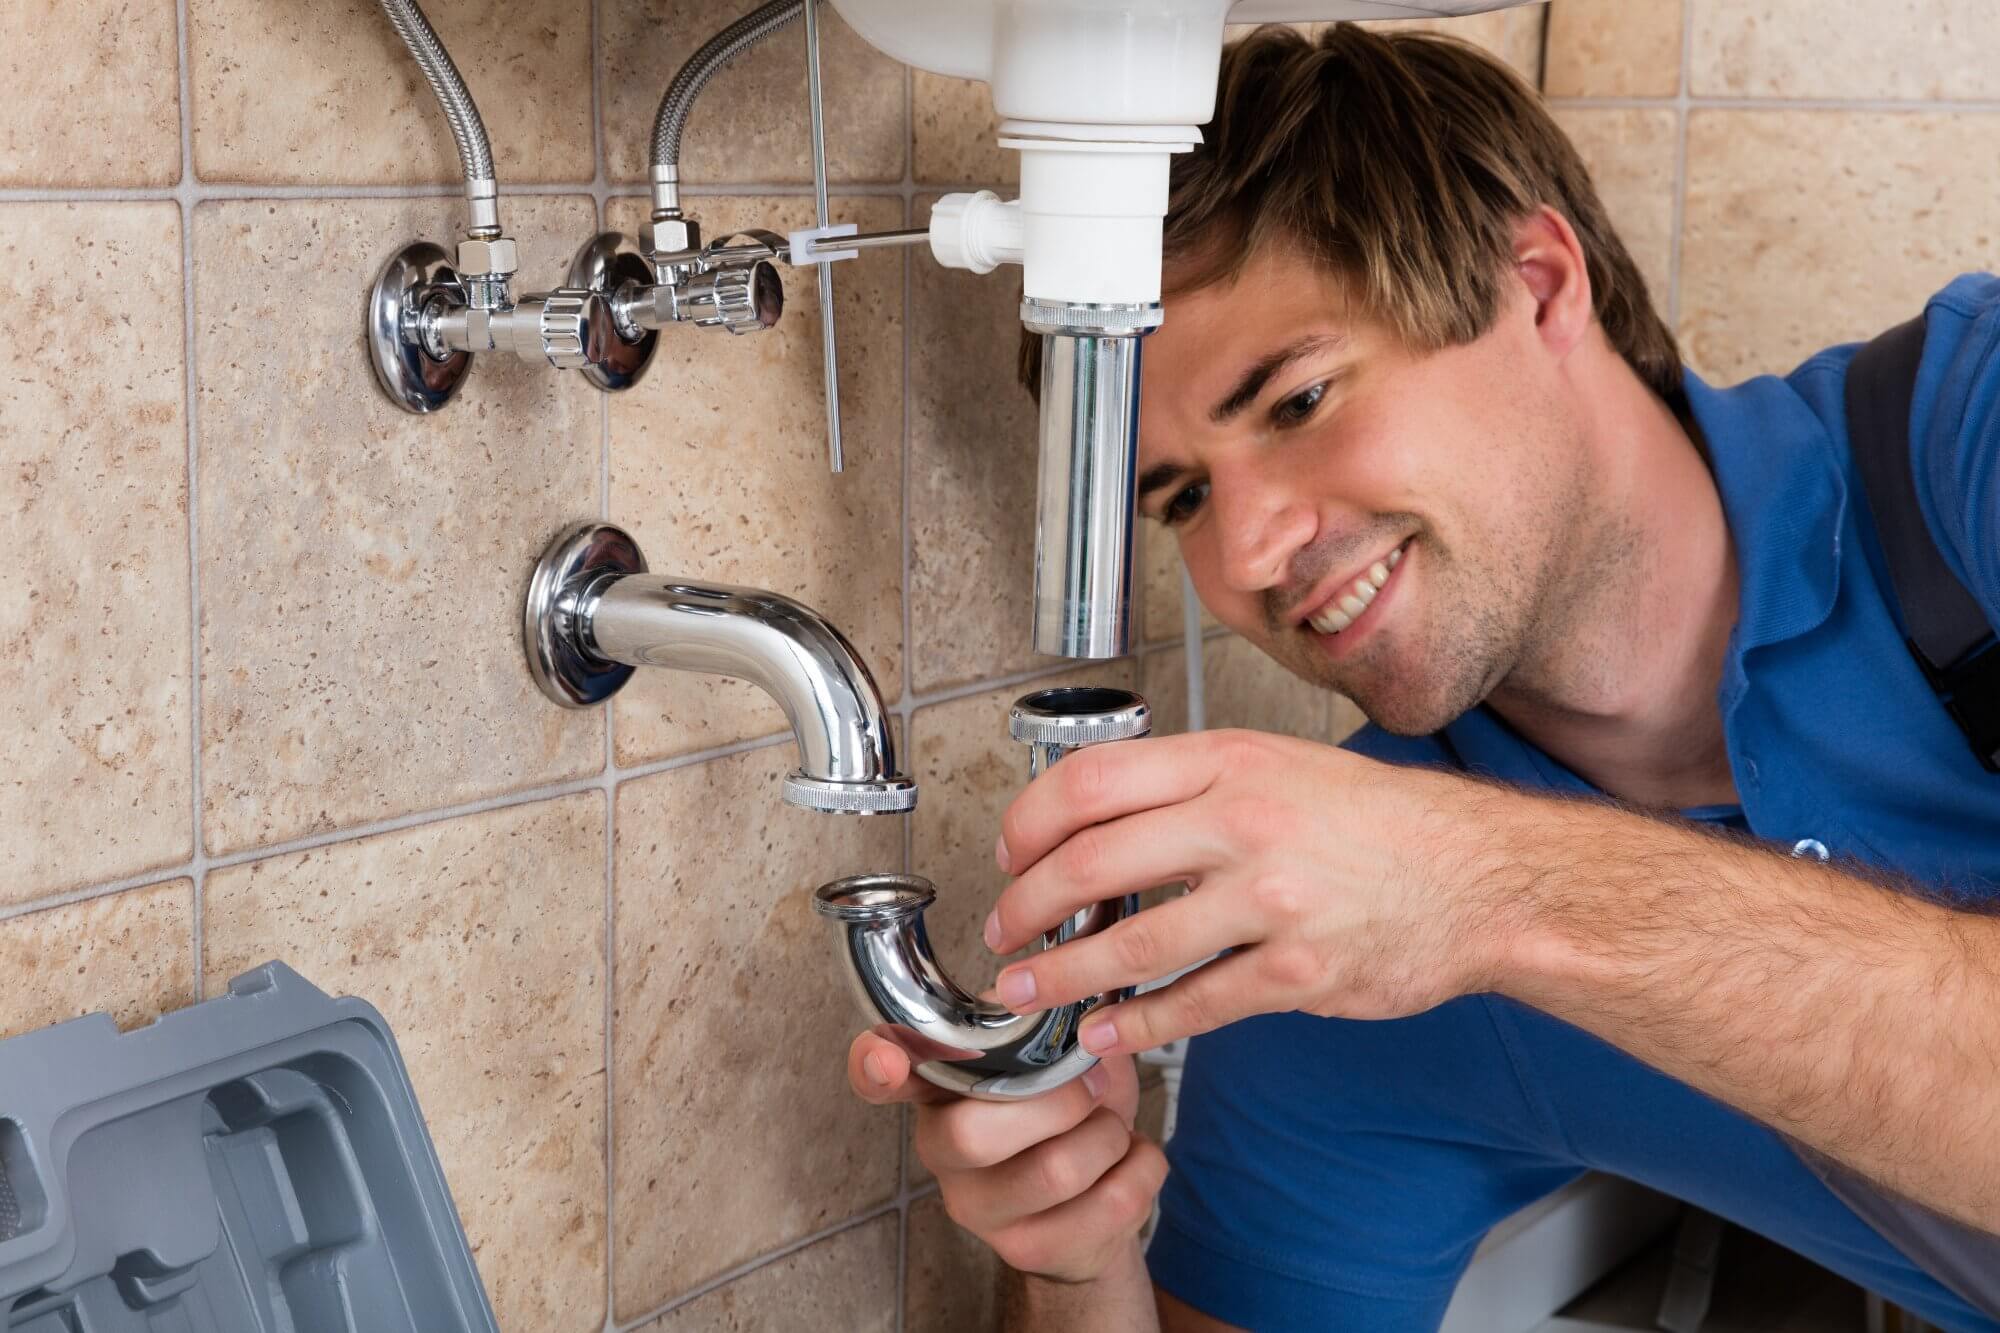
Step 3: Remove the Access Panel or Cap
Now that you have located the drain pipe in your HVAC system, it’s time to remove the access panel or cap to gain access to the interior. Removing the access panel will allow you to visually inspect the drain pipe and assess the extent of any blockages or buildup. Here’s how to go about it:
- Inspect the access panel or cap: Take a close look at the access panel or cap. It is typically located near the connection point of the drain pipe to the condensate drain pan. The type of access panel or cap may vary depending on your HVAC system, so it’s essential to understand how it is secured in place.
- Detach the access panel or cap: Depending on the setup, the access panel or cap may be secured with screws, clips, or latches. Use the appropriate tools, such as a screwdriver or pliers, to remove any fastenings and detach the panel or cap.
- Set the panel or cap aside: Once the access panel or cap is removed, set it aside in a safe place. You may need to reattach it later after the cleaning process is complete.
Removing the access panel or cap will provide you with a clear view of the interior of the drain pipe, allowing you to identify any obstructions or buildup that may be causing the clog. It is important to be cautious while handling the access panel or cap to avoid damage and to maintain the integrity of your HVAC system.
With the access panel or cap removed, you are ready to move on to the next step: inspecting the drain pipe for any signs of blockage or debris. We will discuss this in detail in the following section.
Step 4: Inspect the Drain Pipe
Now that you have removed the access panel or cap, it’s time to visually inspect the drain pipe to assess its condition and identify any blockages or debris. This step is crucial in determining the extent of the clog and planning your cleaning approach. Follow these steps to inspect the drain pipe:
- Use a flashlight: Illuminate the interior of the drain pipe using a flashlight. This will help you get a clear view of the pipe’s condition and any potential obstructions.
- Look for signs of blockage: Carefully examine the interior of the drain pipe for any signs of clogs, such as debris, dirt, algae growth, or mold. Pay close attention to areas where the pipe bends or narrows, as these are common places for blockages to occur.
- Check for any damage: While inspecting the drain pipe, also look for any signs of damage, such as cracks, breaks, or leaks. Damaged sections of the pipe may need to be repaired or replaced to ensure proper drainage.
- Assess the overall cleanliness: Take note of the overall cleanliness of the drain pipe. Even if there isn’t a visible blockage, there may still be a buildup of residue or sediment that could impede water flow.
By thoroughly inspecting the drain pipe, you can gather valuable information about the condition of the pipe and the nature of the clog. This will help you determine the most appropriate cleaning method and ensure the best results.
Once you have completed the inspection, it’s time to move on to the next step: using a vacuum or compressed air to remove debris from the drain pipe. We will cover this step in detail in the upcoming section.
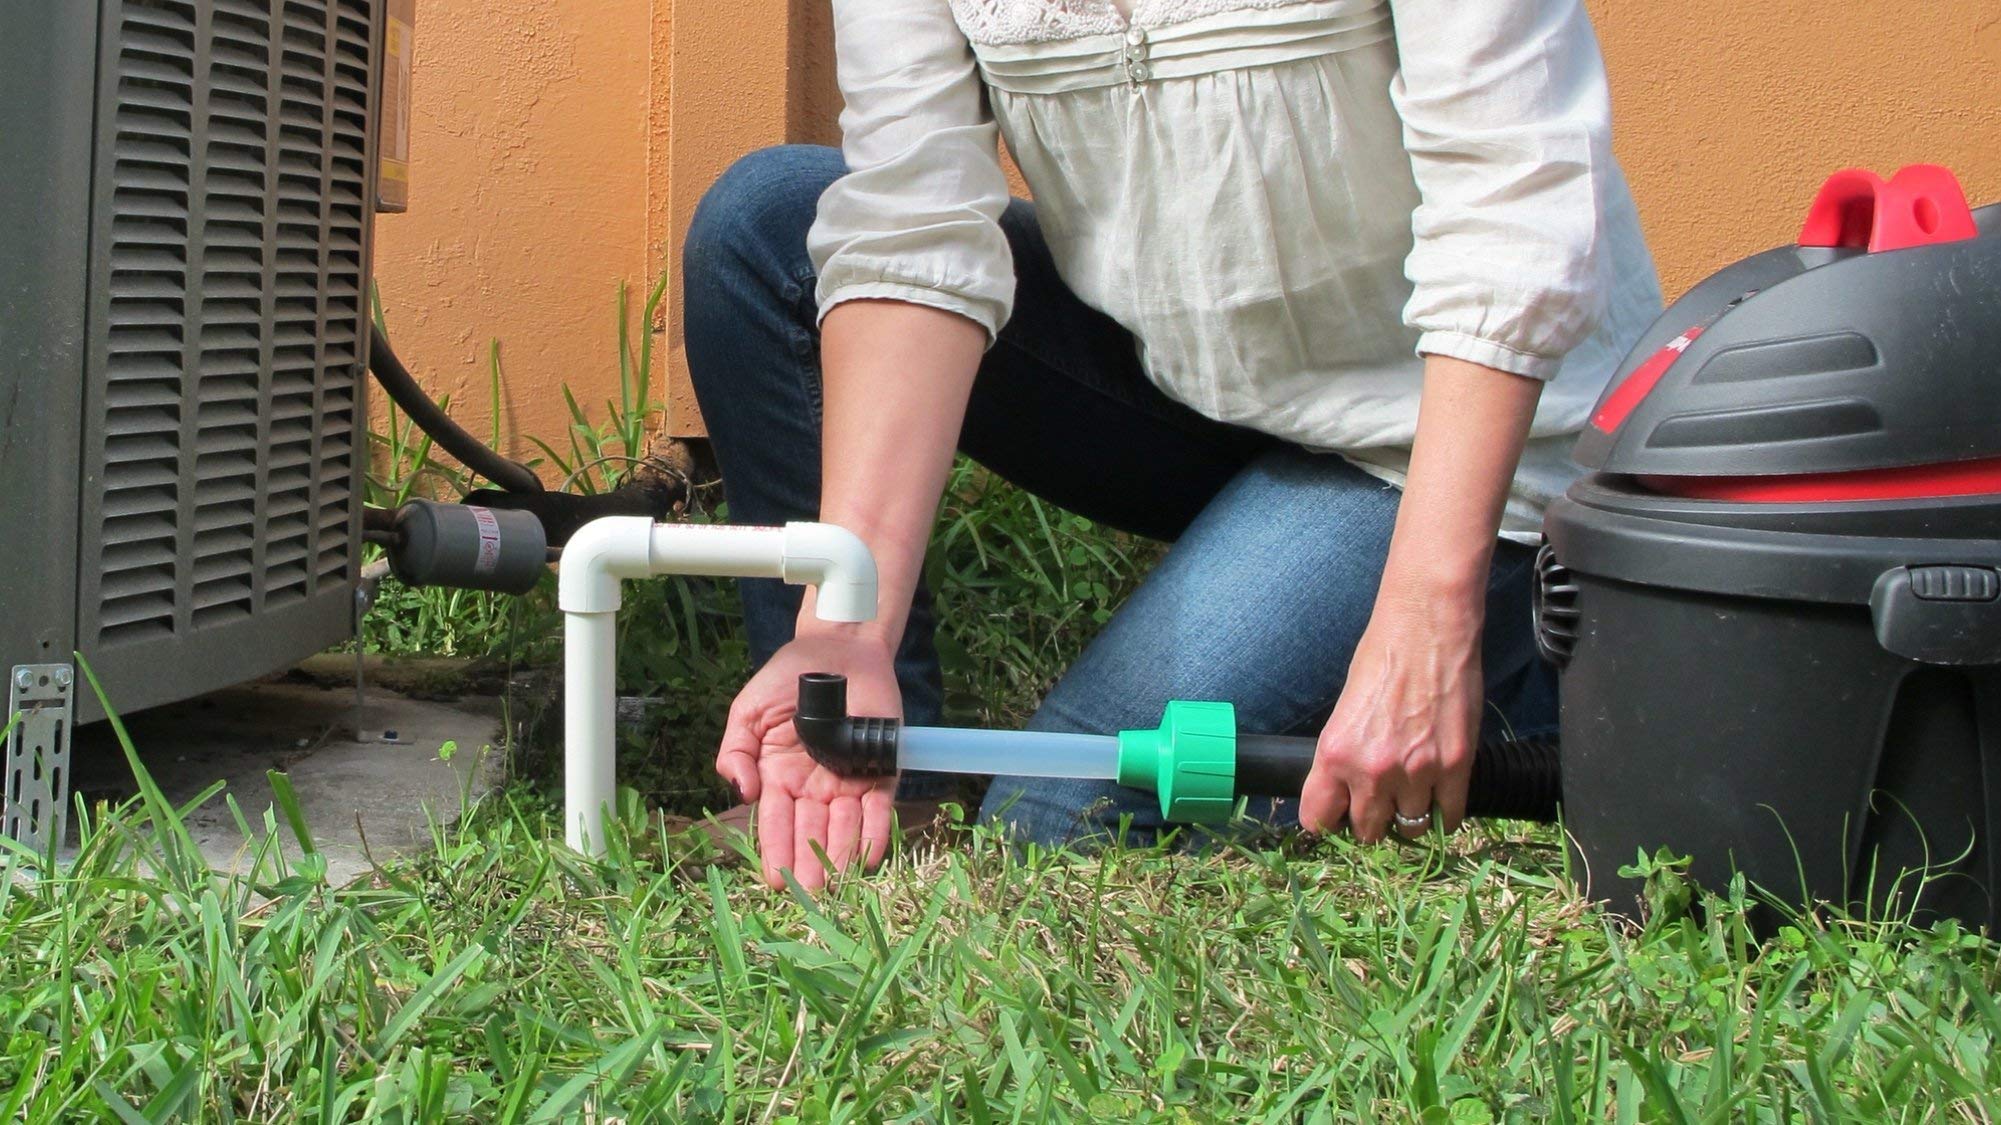
Step 5: Use a Vacuum or Compressed Air to Remove Debris
Now that you have inspected the drain pipe, it’s time to remove any debris or blockages that may be causing the clog. Two effective methods for this are using a vacuum cleaner with a hose attachment or utilizing compressed air. Here’s how to proceed with both options:
Read more: What Is A Line Set In HVAC
Using a Vacuum Cleaner:
- Attach the hose: Connect the hose attachment to your vacuum cleaner. Ensure that it is securely attached and that the vacuum is in good working condition.
- Insert the hose into the drain pipe: Carefully insert the hose attachment into the drain pipe, reaching as far as possible to clear out any debris. Be cautious not to damage or dislodge any components while doing so.
- Turn on the vacuum cleaner: Turn on the vacuum cleaner and set it to the appropriate suction power. Slowly move the hose back and forth within the drain pipe, allowing the vacuum to pull out any debris or obstructions.
- Repeat the process if necessary: Depending on the level of blockage, you may need to repeat the vacuuming process multiple times to ensure that the drain pipe is thoroughly cleared.
Using Compressed Air:
- Prepare the compressed air can or air compressor: If using a compressed air can, make sure you are following the manufacturer’s instructions for proper usage. If using an air compressor, ensure that it is set to an appropriate pressure level.
- Insert the nozzle into the drain pipe: Insert the nozzle of the compressed air can or the air compressor hose into the drain pipe, making sure it is securely in place.
- Release short bursts of air: Gently squeeze the trigger or valve to release short bursts of compressed air into the drain pipe. The air pressure should help dislodge any clogs or debris within the pipe.
- Repeat the process if necessary: Depending on the severity of the clog, you may need to make several passes with the compressed air to fully remove any remaining debris.
Both the vacuum cleaner and compressed air methods can effectively remove debris from the drain pipe. Choose the method that is most convenient for you and matches the tools available to you.
Now that you have successfully removed debris from the drain pipe, it’s time to proceed to the next step: cleaning the drain pipe using a pipe brush or a vinegar solution. We will explore this step in detail in the following section.
Regularly pour a mixture of vinegar and hot water down the HVAC drain pipe to prevent clogs and keep it clean. This will help maintain proper drainage and prevent water damage.
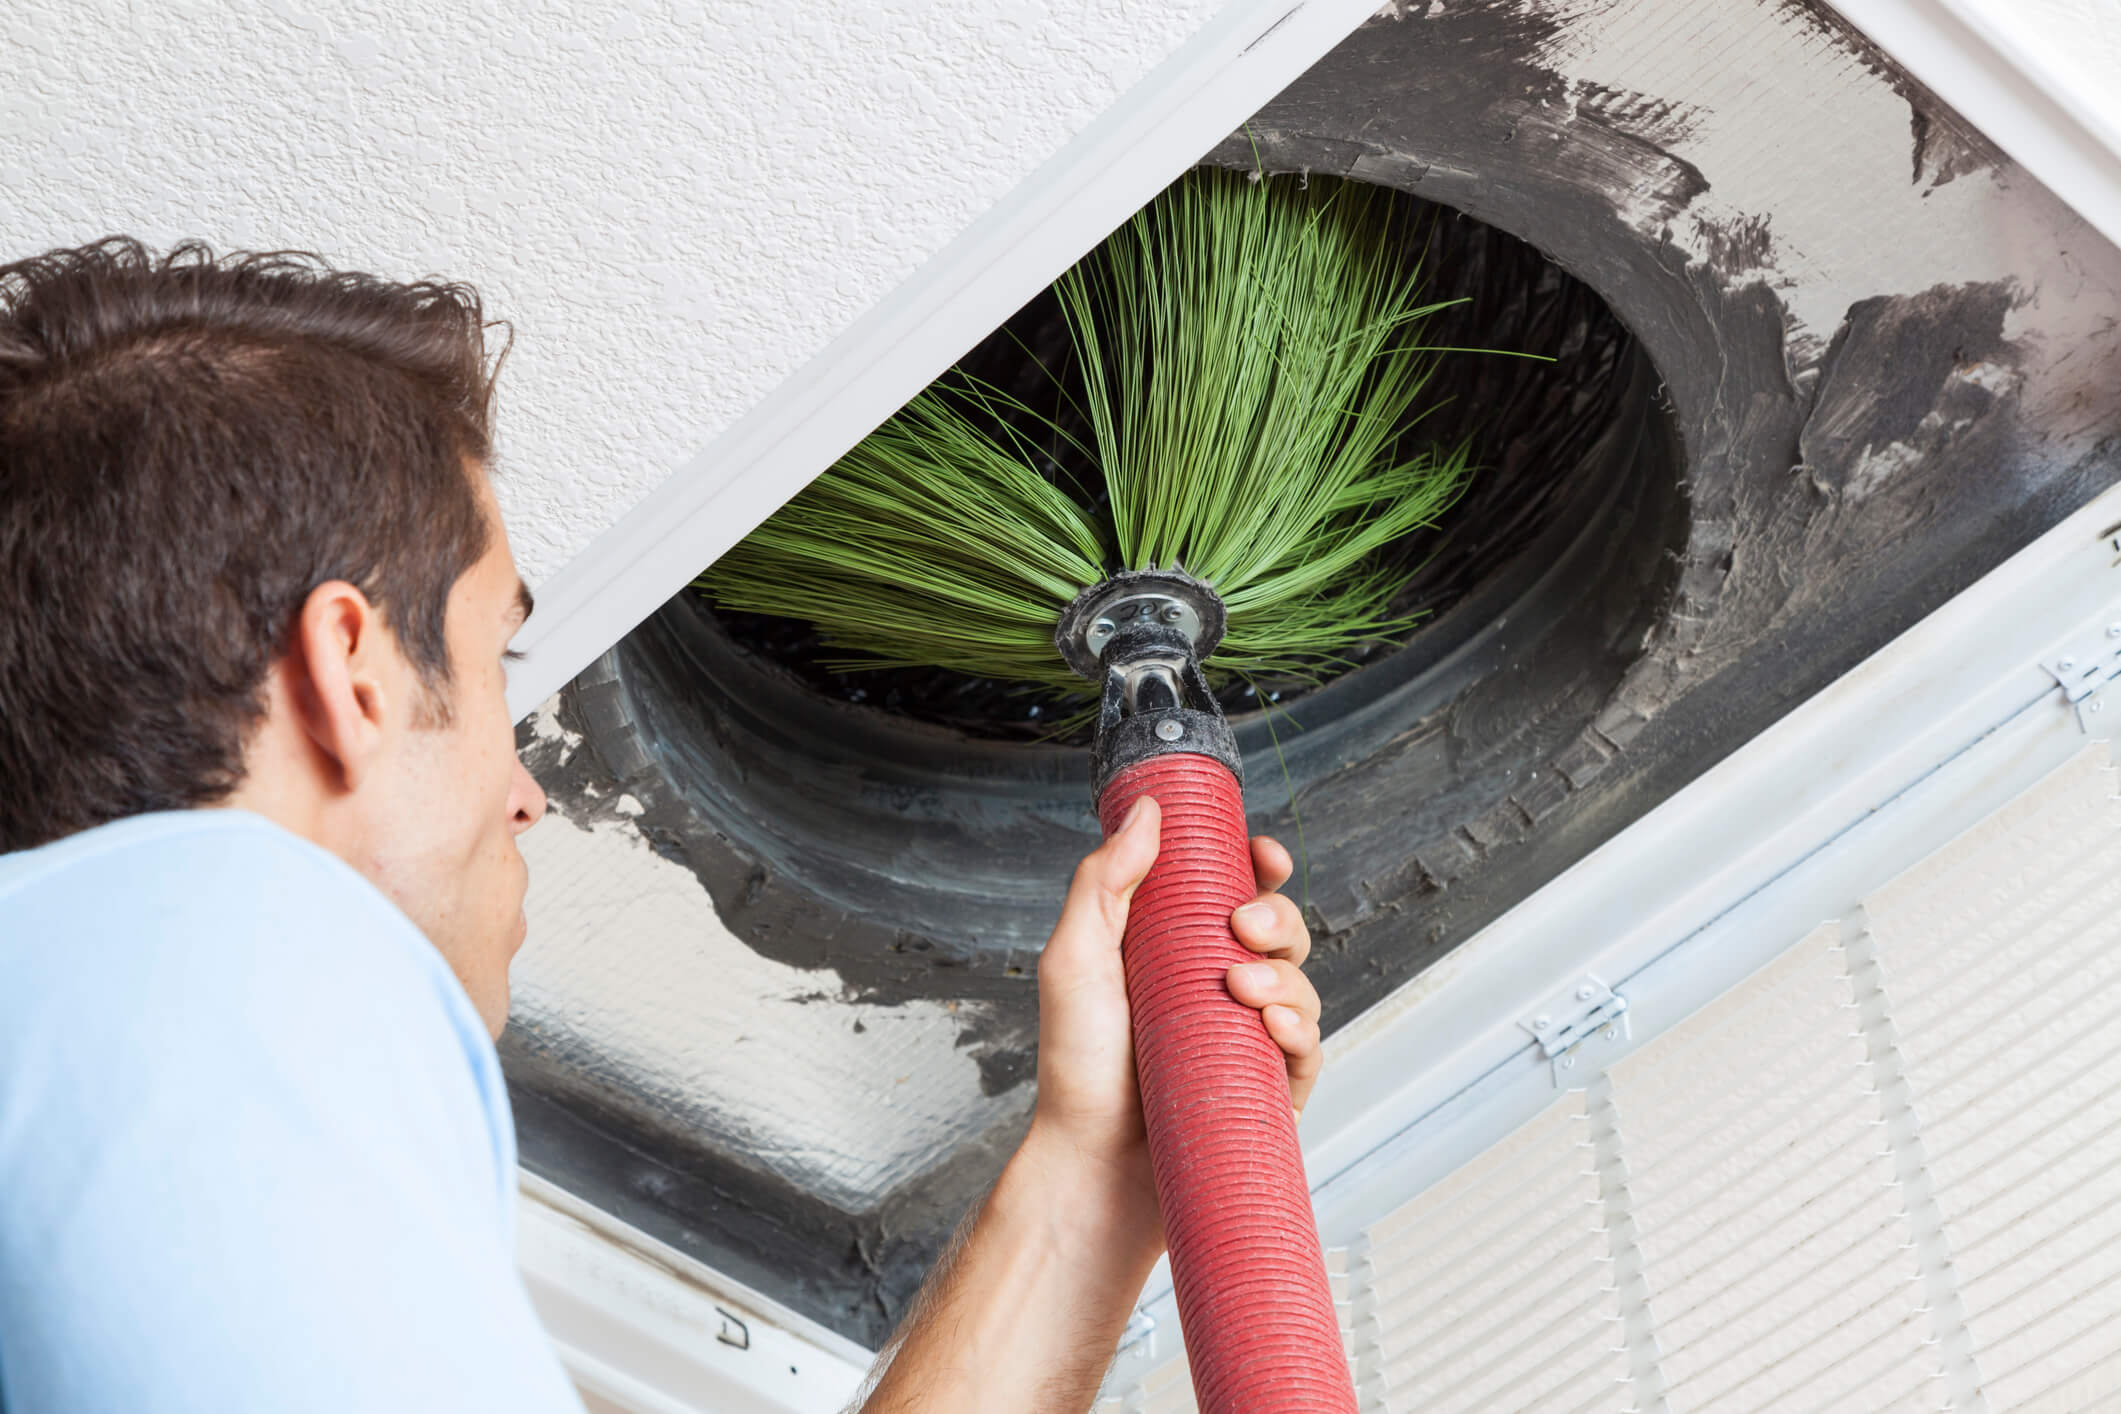
Step 6: Clean the Drain Pipe with a Pipe Brush or Vinegar Solution
After removing debris from the drain pipe, it’s time to clean the interior of the pipe to remove any residue, mold, or algae that may be present. Two effective methods for cleaning the drain pipe are using a pipe brush or a vinegar solution. Here’s how to proceed with both options:
Using a Pipe Brush:
- Prepare a pipe brush: Select a pipe brush that is appropriately sized to fit inside the drain pipe. The bristles should be firm but not abrasive to prevent any damage to the pipe. Ensure the brush is clean before use.
- Insert the brush into the drain pipe: Gently insert the pipe brush into the drain pipe, reaching as far as possible. Use a twisting or scrubbing motion to dislodge any remaining residue or buildup within the pipe.
- Scrub the interior: Slowly move the pipe brush back and forth inside the drain pipe, paying attention to any areas that may require extra cleaning. Continue scrubbing until you no longer feel resistance or encounter any blockages.
- Remove the brush and debris: Carefully remove the pipe brush from the drain pipe, ensuring any loosened debris is also extracted. You can use a vacuum cleaner with a hose attachment to help remove any debris that may be left behind.
Read more: How To Clear Air Conditioning Drain Line
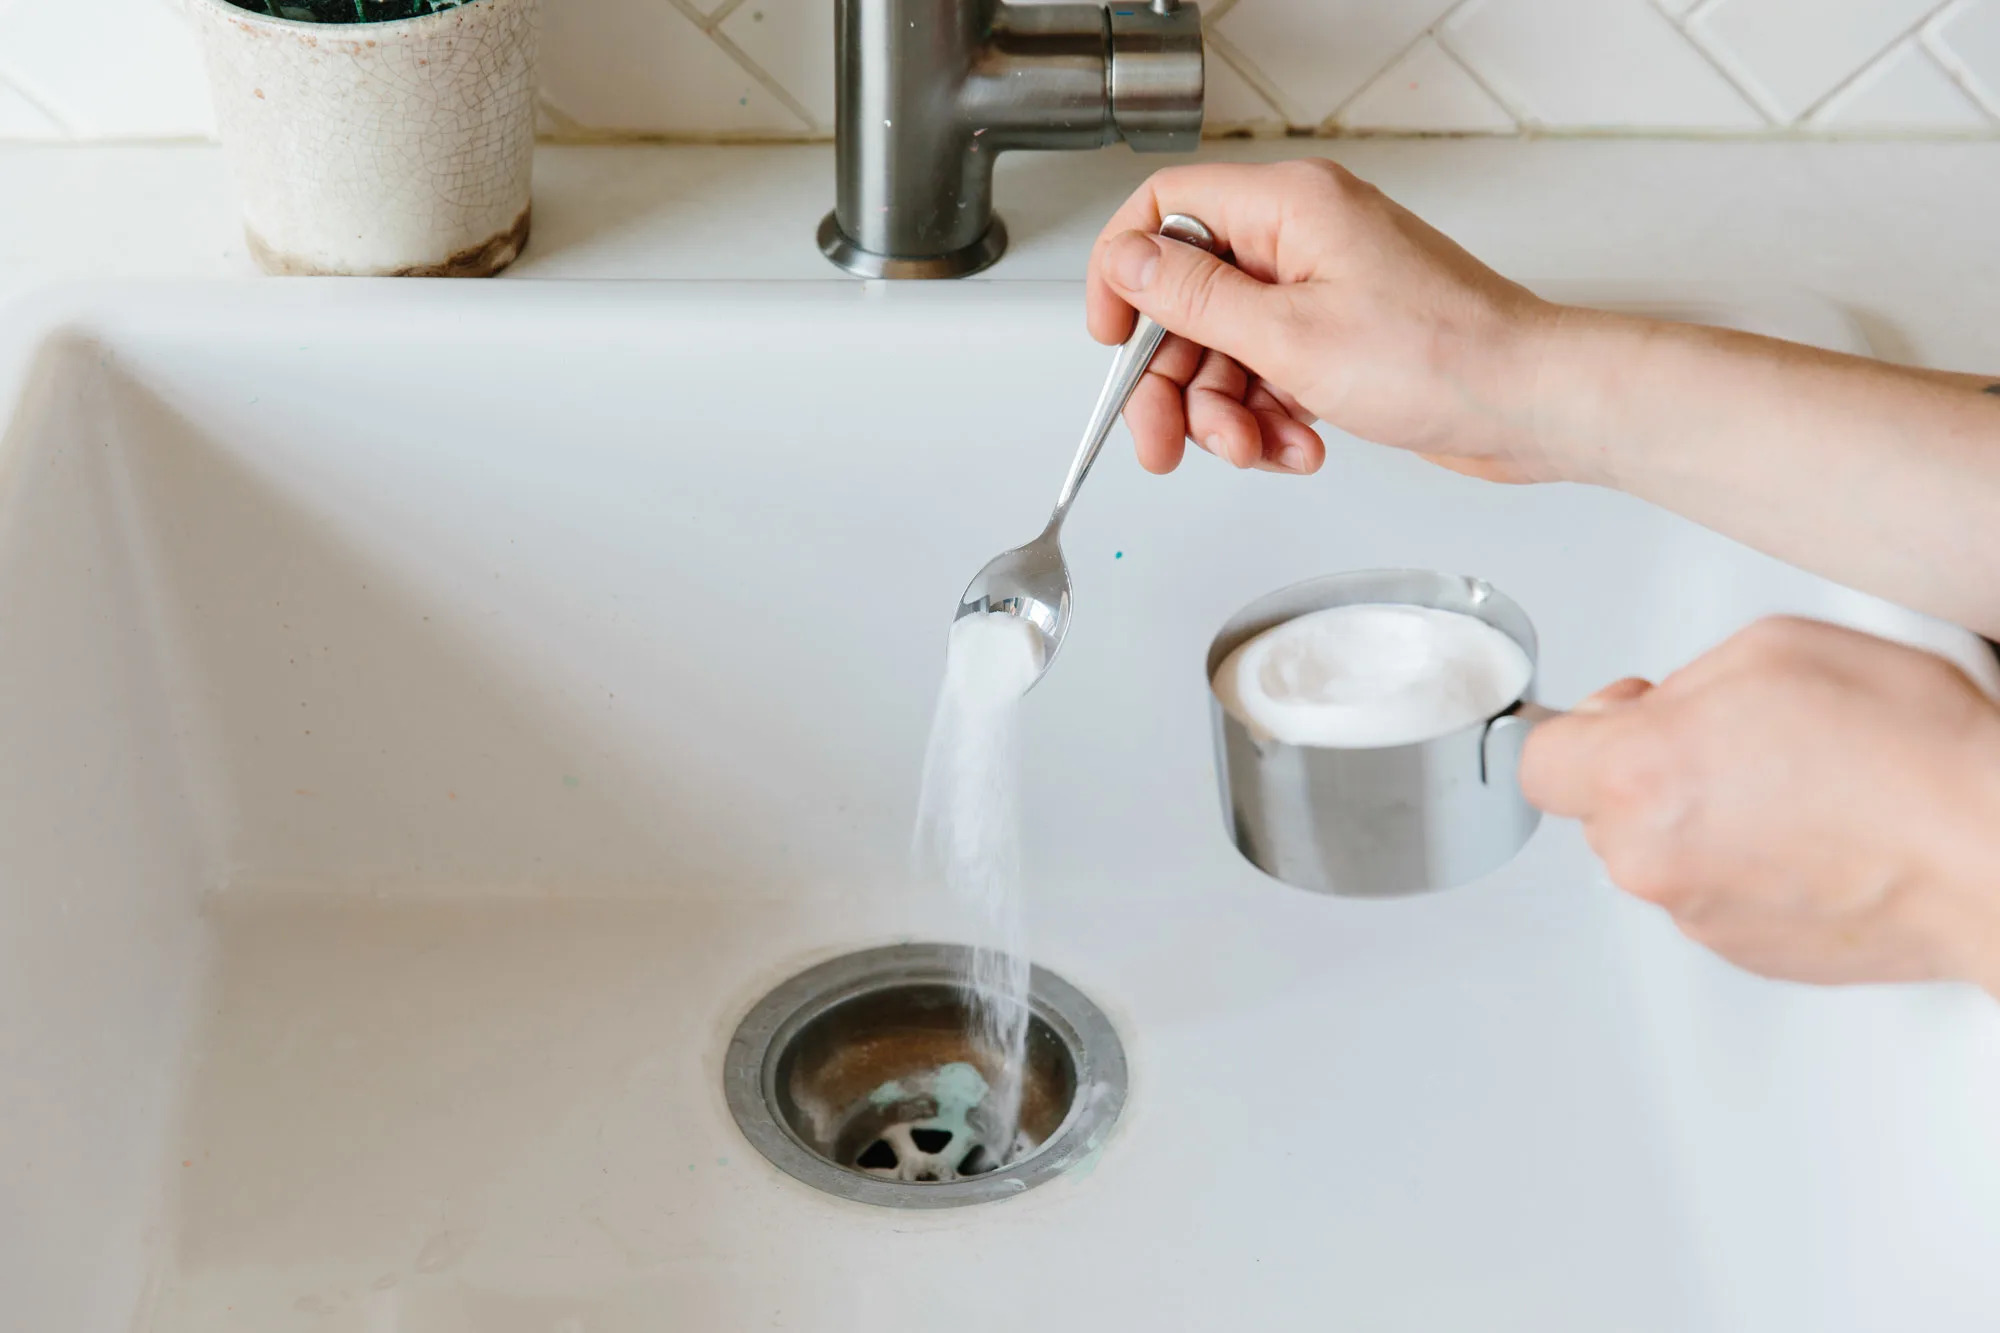
Using a Vinegar Solution:
- Prepare a vinegar solution: In a container, mix equal parts white vinegar and water to create a cleaning solution. Stir the mixture well to ensure the vinegar is thoroughly diluted.
- Pour the vinegar solution into the drain pipe: Use a plastic funnel or container to carefully pour the vinegar solution into the drain pipe. Make sure the solution flows through the pipe and covers the interior surfaces.
- Let the solution sit: Allow the vinegar solution to sit in the drain pipe for approximately 30 minutes. This will help break down any remaining residue, mold, or algae within the pipe.
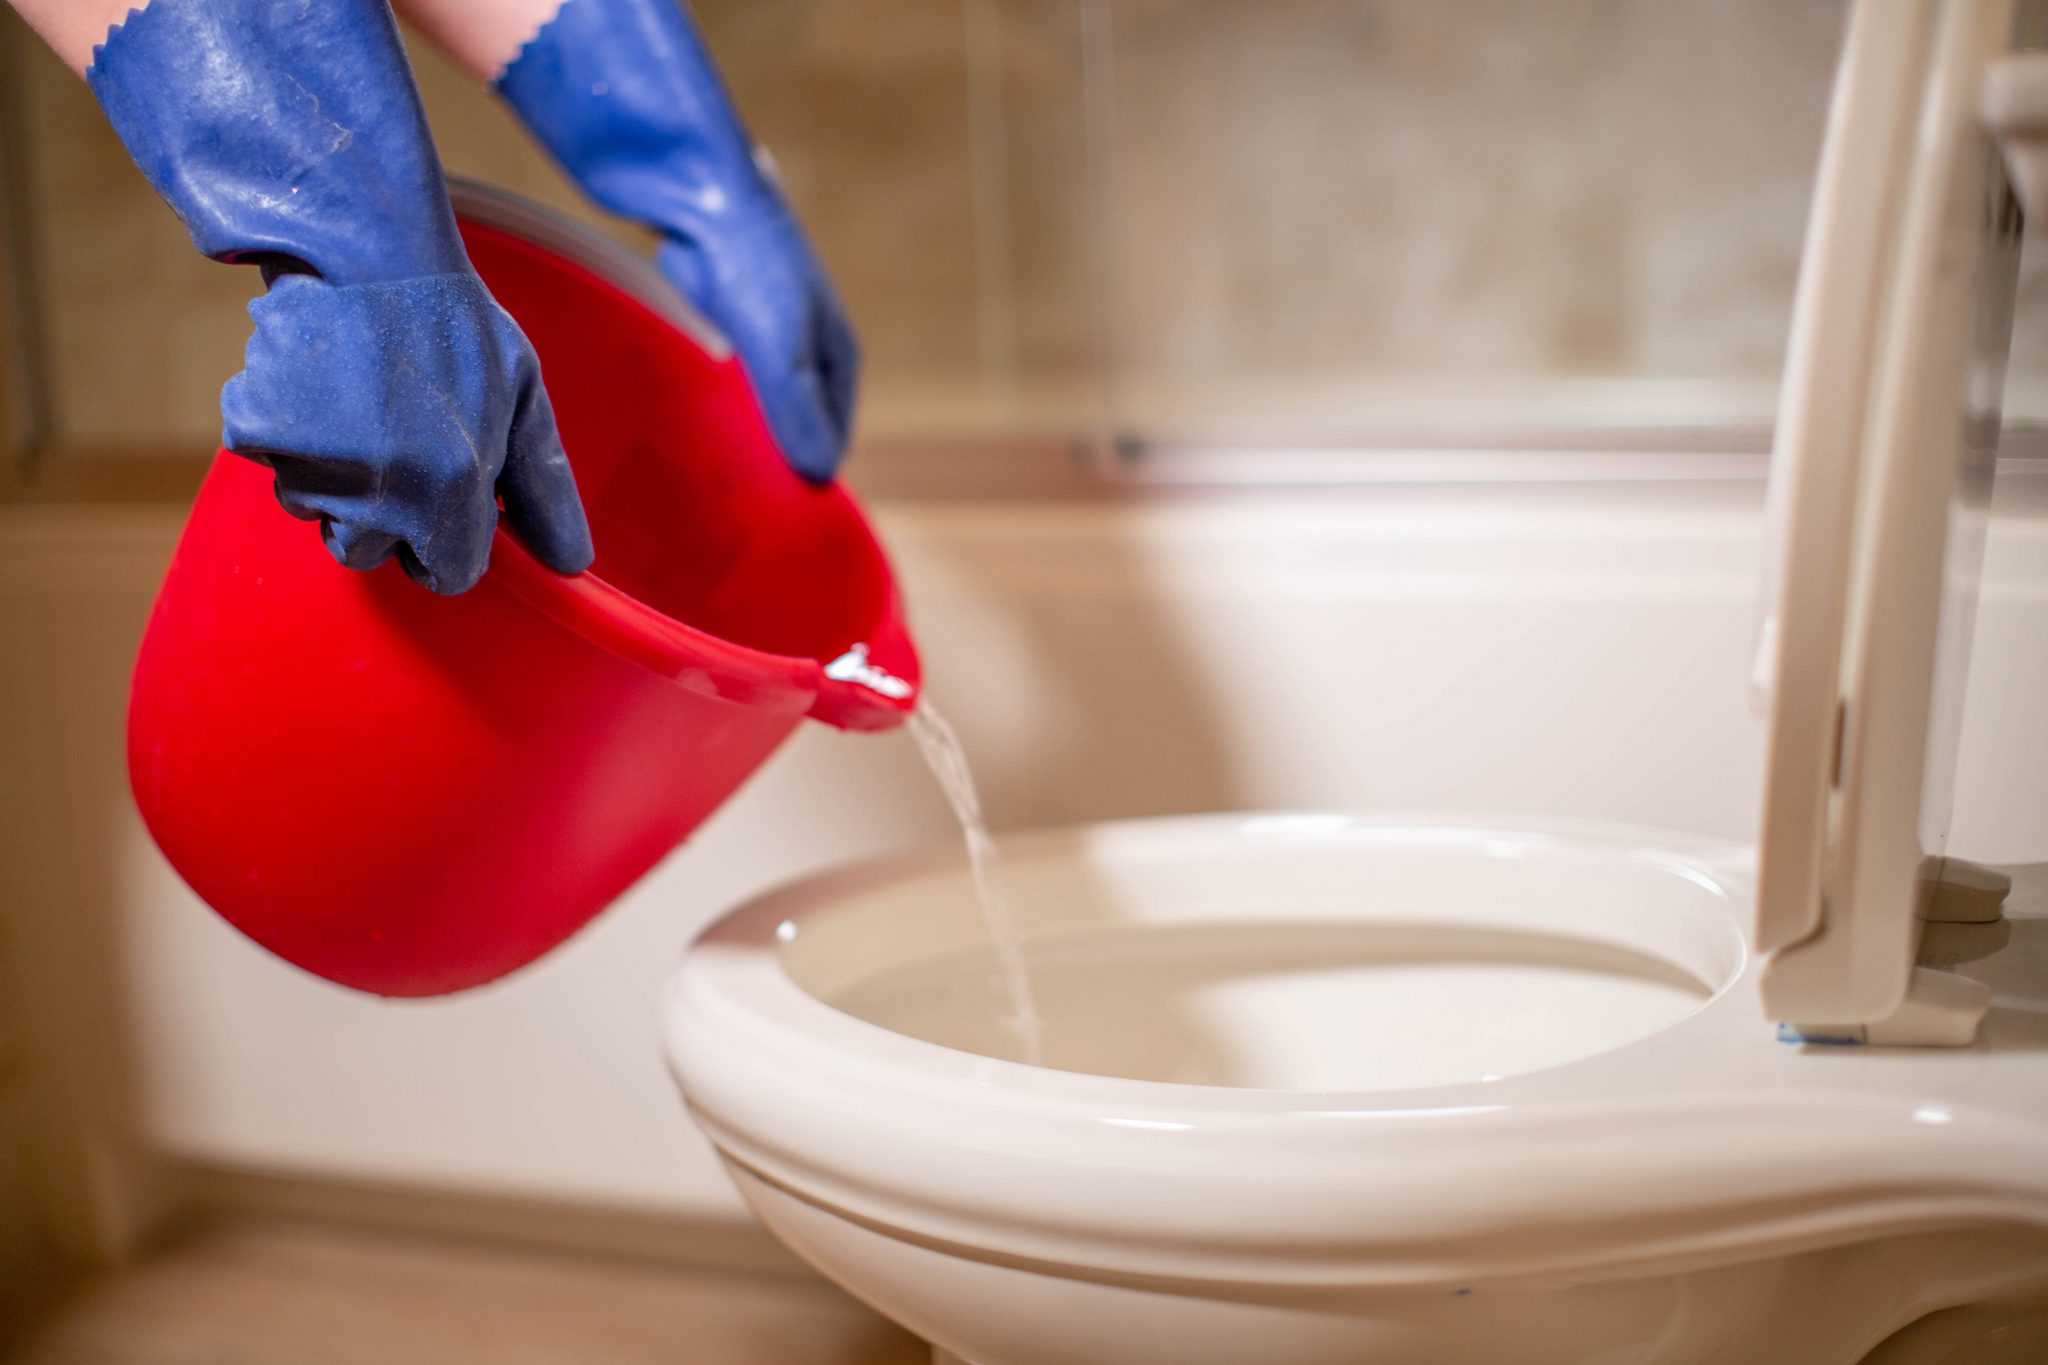
- Flush the pipe with water: After the solution has had enough time to work, flush the drain pipe with water. You can use a hose, a bucket of water, or run water from a nearby tap to rinse the pipe thoroughly.
Both methods are effective in cleaning the drain pipe, so choose the one that works best for you based on the materials you have available. Cleaning the drain pipe will help remove any remaining contaminants and ensure proper water flow within the system.
Now that you have cleaned the drain pipe, it’s time to move on to the next step: flushing the drain pipe with water. We will cover this step in detail in the following section.
Step 7: Flush the Drain Pipe with Water
After cleaning the drain pipe with a pipe brush or vinegar solution, it’s important to flush the pipe with water to ensure that any remaining debris or cleaning solution is completely removed. Flushing the drain pipe will help restore proper water flow and prevent any potential blockages. Follow these steps to flush the drain pipe with water:
- Prepare a water source: Identify a water source that you can use to flush the drain pipe. This can be a nearby tap, a garden hose, or a bucket of water.
- Create a controlled flow: To create a controlled flow of water, you can use a plastic funnel or container to pour the water into the drain pipe. This will help direct the water and prevent any splashing or overflow.
- Pour water into the drain pipe: Start pouring water into the drain pipe, allowing it to flow through the pipe and rinse away any remaining debris or cleaning solution. Continue pouring the water until it runs clear, indicating that the pipe is thoroughly flushed.
- Observe the drainage: As you pour water into the drain pipe, observe the drainage. Ensure that the water is flowing smoothly and without any backup or leakage. If you notice any issues, you may need to repeat the cleaning and flushing process or seek professional assistance.
Flushing the drain pipe with water is an essential step to remove any residue or cleaning solution that may still be present. This step helps ensure that the drain pipe is clear and functioning optimally.
With the drain pipe properly flushed, it’s time to move on to the final step: reassembling the HVAC system and testing its functionality. We will delve into this step in detail in the following section.
Step 8: Reassemble and Test the HVAC System
Now that you have completed the cleaning and flushing process of your HVAC drain pipe, it’s time to reassemble the system and ensure that it is functioning properly. Follow these steps to reassemble and test your HVAC system:
- Replace the access panel or cap: Carefully place the access panel or cap back into its original position. Ensure that it is securely fastened to prevent any air or water leakage.
- Turn on the HVAC system: Once the access panel or cap is in place, move to the thermostat or circuit breaker panel to turn the HVAC system back on.
- Set the thermostat to the desired temperature: Adjust the thermostat to your preferred temperature setting. Listen for any unusual sounds or observe any abnormal behaviors from the HVAC system as it starts up.
- Monitor the system for proper drainage: Pay attention to the drain pipe and the drain pan during the initial operation of the HVAC system. Check for any signs of water leakage or overflow. If everything appears to be functioning correctly, you have successfully reassembled the system.
- Monitor the system for a few days: Keep an eye on your HVAC system over the next few days to ensure that it continues to function properly. Check for any signs of water leakage, unusual odors, or reduced cooling efficiency. If you notice any issues, it may require further inspection or professional assistance.
By reassembling and testing your HVAC system, you can ensure that the cleaning process has been successful and that the drain pipe is functioning optimally. Regularly monitoring the system after cleaning will help detect any potential issues early on and prevent further damage.
Congratulations! You have successfully completed the process of cleaning your HVAC drain pipe and have taken an important step towards maintaining the efficiency and performance of your heating and cooling system.
Remember, regular maintenance and cleaning of the HVAC drain pipe are essential to prevent clogs, water damage, and mold growth. As a result, you can enjoy a comfortable and healthy home environment while extending the lifespan of your HVAC system.
If you encounter any persistent issues or are unsure about any step in the process, it is recommended to consult with an HVAC professional for expert guidance and assistance.
Conclusion
Cleaning your HVAC drain pipe is an important maintenance task that ensures the proper functioning of your heating and cooling system. By following the step-by-step process outlined in this guide, you can effectively remove blockages, debris, and mold, preventing water damage, foul odors, and reduced efficiency.
Throughout this guide, we discussed the significance of the HVAC drain pipe and its role in removing excess moisture from the system. We also covered the signs of a clogged drain pipe, such as water leakage, unpleasant odors, and reduced cooling efficiency, which can indicate the need for cleaning.
Before embarking on the cleaning process, it is crucial to gather the necessary supplies, including a vacuum cleaner with a hose attachment, compressed air, pipe brush, vinegar, and protective gear. These tools will assist you in effectively cleaning the drain pipe.
The step-by-step process covered each stage in detail, from turning off the HVAC system and locating the drain pipe to removing the access panel or cap, inspecting the pipe, and using a vacuum or compressed air to remove debris. We then described the process of cleaning the drain pipe with a pipe brush or vinegar solution, followed by flushing the pipe with water to ensure thorough cleaning.
Lastly, we discussed the final step of reassembling the HVAC system and testing its functionality to ensure proper drainage and operation. By monitoring the system for a few days after cleaning, you can identify any potential issues and take proactive measures.
Remember, regular maintenance, including cleaning the HVAC drain pipe, is crucial for the longevity and efficiency of your system. By keeping the drain pipe clear and free from obstructions, you can prevent water damage, mold growth, and costly repairs.
If you are unsure or encounter any persistent issues during the cleaning process, it is wise to seek the assistance of an HVAC professional. They can provide expert guidance and ensure that your HVAC system is in optimal condition.
We hope this comprehensive guide has been helpful in guiding you through the process of cleaning your HVAC drain pipe. By taking proactive steps to maintain your heating and cooling system, you can enjoy a comfortable and healthy living environment for years to come.
Frequently Asked Questions about How To Clean HVAC Drain Line
Was this page helpful?
At Storables.com, we guarantee accurate and reliable information. Our content, validated by Expert Board Contributors, is crafted following stringent Editorial Policies. We're committed to providing you with well-researched, expert-backed insights for all your informational needs.
0 thoughts on “How To Clean HVAC Drain Line”