Home>Articles>How To Cook Foil Packets Using An Electric Skillet
Articles
How To Cook Foil Packets Using An Electric Skillet
Modified: August 19, 2024
Learn how to cook delicious foil packets using an electric skillet with our informative articles. Discover easy and tasty recipes for all your cooking needs.
(Many of the links in this article redirect to a specific reviewed product. Your purchase of these products through affiliate links helps to generate commission for Storables.com, at no extra cost. Learn more)
Introduction
Foil packet cooking has become increasingly popular in recent years, and for good reason. This convenient and versatile cooking method involves sealing ingredients in aluminum foil and cooking them to perfection. One innovative tool that can be used for foil packet cooking is an electric skillet.
An electric skillet offers precise temperature control and even heat distribution, making it an ideal choice for cooking foil packets. Whether you’re at home or on a camping trip, using an electric skillet for foil packet cooking is a great way to create delicious and hassle-free meals.
In this article, we will explore the benefits of using foil packets, discuss how to choose the right foil, guide you through the process of preparing ingredients, demonstrate how to create foil packets, explain the importance of preheating the electric skillet, provide tips on cooking the foil packets, guide you on how to check for doneness, and finally, offer tips on serving and cleaning up. By the end, you’ll be well-equipped to cook foil packets using an electric skillet like a pro!
Key Takeaways:
- Foil packet cooking with an electric skillet offers easy cleanup, enhanced flavors, and endless customization options, making it a versatile and convenient method for creating delicious meals with minimal effort.
- Properly cleaning and maintaining your electric skillet after foil packet cooking ensures its longevity and optimal performance, allowing you to enjoy many more delicious meals cooked with ease and convenience.
Read more: How To Bake Using An Electric Skillet
Benefits of Using Foil Packets
Using foil packets for cooking comes with several unique advantages that make it a popular method among home cooks and campers alike. Here are some of the key benefits:
1. Easy Cleanup: One of the biggest benefits of cooking with foil packets is the easy cleanup. By sealing the ingredients in foil, you minimize the mess and eliminate the need for scrubbing pans or grills. Simply discard the foil after cooking, and you’re left with a clean skillet or grill. 2. Enhanced Flavors: Cooking in foil packets allows the ingredients to cook in their own juices, resulting in enhanced flavors. The juices stay trapped inside the packet, infusing the food with incredible taste and moisture. This method is especially great for grilling meats and vegetables as it helps to keep them juicy and tender. 3. Customizable and Versatile: Foil packets offer endless possibilities for customization. You can mix and match ingredients, seasonings, and sauces to create a variety of flavors and cuisines. Whether you’re cooking seafood, chicken, vegetables, or even desserts, foil packets can accommodate a wide range of recipes. 4. Healthier Cooking: Foil packets promote healthier cooking since you don’t need to add excessive amounts of oil or cooking fat. The food cooks using its natural juices, reducing the need for added fats. Plus, you can control the portions and ingredient choices to ensure a balanced meal. 5. Portability: Foil packet cooking is perfect for camping or outdoor gatherings. The sealed packets keep the food protected and make transportation easy. You can prep the packets ahead of time, allowing for stress-free meals on the go. 6. Uniform Cooking: Foil packets help to distribute heat evenly, resulting in uniform cooking. This ensures that all the ingredients are cooked to perfection at the same time. The result is a well-balanced meal with each component cooked just right. 7. Minimal Equipment Required: Cooking with foil packets requires minimal equipment, making it accessible to everyone. All you need is some aluminum foil and a heat source, such as an electric skillet or a grill.
Overall, cooking with foil packets offers convenience, enhanced flavors, and endless customization options. Whether you’re a novice cook or an experienced grill master, using foil packets is a great way to elevate your cooking game and enjoy delicious meals with minimal effort.
Choosing the Right Foil
When it comes to cooking with foil packets, choosing the right type of foil is crucial. Here are some factors to consider when selecting the ideal foil:
1. Heavy-duty foil: Opt for heavy-duty aluminum foil for foil packet cooking. It is thicker and more durable, ensuring that the packets won’t tear or puncture easily. Heavy-duty foil is also better at retaining heat, resulting in more even cooking. 2. Size: Consider the size of the foil sheets you’ll need for your foil packets. Standard foil rolls are usually 12 inches wide, making them suitable for most recipes. However, if you plan on cooking larger portions or ingredients, you might want to consider wider or longer foil sheets. 3. Non-stick: Non-stick foil can be a game-changer when it comes to foil packet cooking. It has a special coating that prevents food from sticking to the foil and makes for easier cleanup. If you prefer a hassle-free cooking experience, opt for non-stick foil. 4. Reynolds Wrap: Reynolds Wrap is a popular and reliable brand known for its quality foil products. Consider using Reynolds Wrap or other trusted brands to ensure that the foil is sturdy and reliable for cooking. 5. Puncture-resistant: Look for foil that is puncture-resistant to avoid any leaks or spills during cooking. This is especially important when cooking ingredients with sharp edges or bones, as they can easily puncture the foil if it is not durable enough. 6. Safe for cooking: Ensure that the foil you choose is safe for cooking. Some foil brands may contain chemicals or coatings that are not suitable for food preparation. Look for foil that is specifically labeled as food-grade and safe for cooking at high temperatures.
Remember, using the right foil is essential to the success of your foil packet cooking. It ensures that the packets hold up well during cooking and that the ingredients are cooked evenly. Take the time to choose a high-quality, heavy-duty, and food-safe foil to elevate your cooking experience.
Preparing Ingredients
Properly preparing the ingredients is key to making delicious and successful foil packets. Here are some steps to follow when preparing your ingredients:
1. Wash and dry: Start by washing and drying all fruits, vegetables, and proteins that you’ll be using in your foil packets. This helps to remove any dirt, bacteria, or excess moisture that may affect the cooking process. Patting them dry with a clean cloth or paper towel ensures that the ingredients cook evenly and don’t become soggy. 2. Cut into even pieces: To ensure even cooking, cut your ingredients into similar-sized pieces. This allows them to cook at the same rate, preventing some pieces from being undercooked while others are overcooked. Consider the cooking time and adjust the size of the ingredients accordingly. 3. Marinating: If you want to infuse your ingredients with additional flavor, consider marinating them before assembling the foil packets. This step is particularly beneficial for proteins such as chicken, fish, or shrimp. Allow the ingredients to marinate for at least 30 minutes (or as specified in the recipe) to maximize the flavor. 4. Seasoning: Season your ingredients with salt, pepper, and any other desired herbs, spices, or marinades. This step is crucial for adding flavor to the dish and ensuring that it is well-seasoned throughout. Take into account your personal preferences and the flavor profile you want to achieve. 5. Add complementary ingredients: Get creative and add complementary ingredients that will enhance the flavors of the dish. For example, you can include sliced onions, minced garlic, diced tomatoes, herbs, or a splash of citrus juice to brighten up the taste. Consider the overall combination of flavors and choose ingredients that complement and enhance each other. 6. Divide ingredients equally: When assembling the foil packets, divide the ingredients equally among each packet. This ensures that each portion will have an equal amount of ingredients and will cook evenly. Be mindful of the size and shape of the ingredients to ensure they will fit comfortably inside the packets. 7. Labeling: If you’re preparing multiple foil packets with different ingredients, consider labeling them. This will help you keep track of the contents and cooking time of each packet, ensuring that everything is cooked to perfection and no ingredients are mixed up.
By following these steps, you’ll be able to prepare your ingredients properly and set the stage for a delicious foil packet meal. Take the time to prepare and season your ingredients, and you’ll be rewarded with a flavorful and satisfying culinary experience.
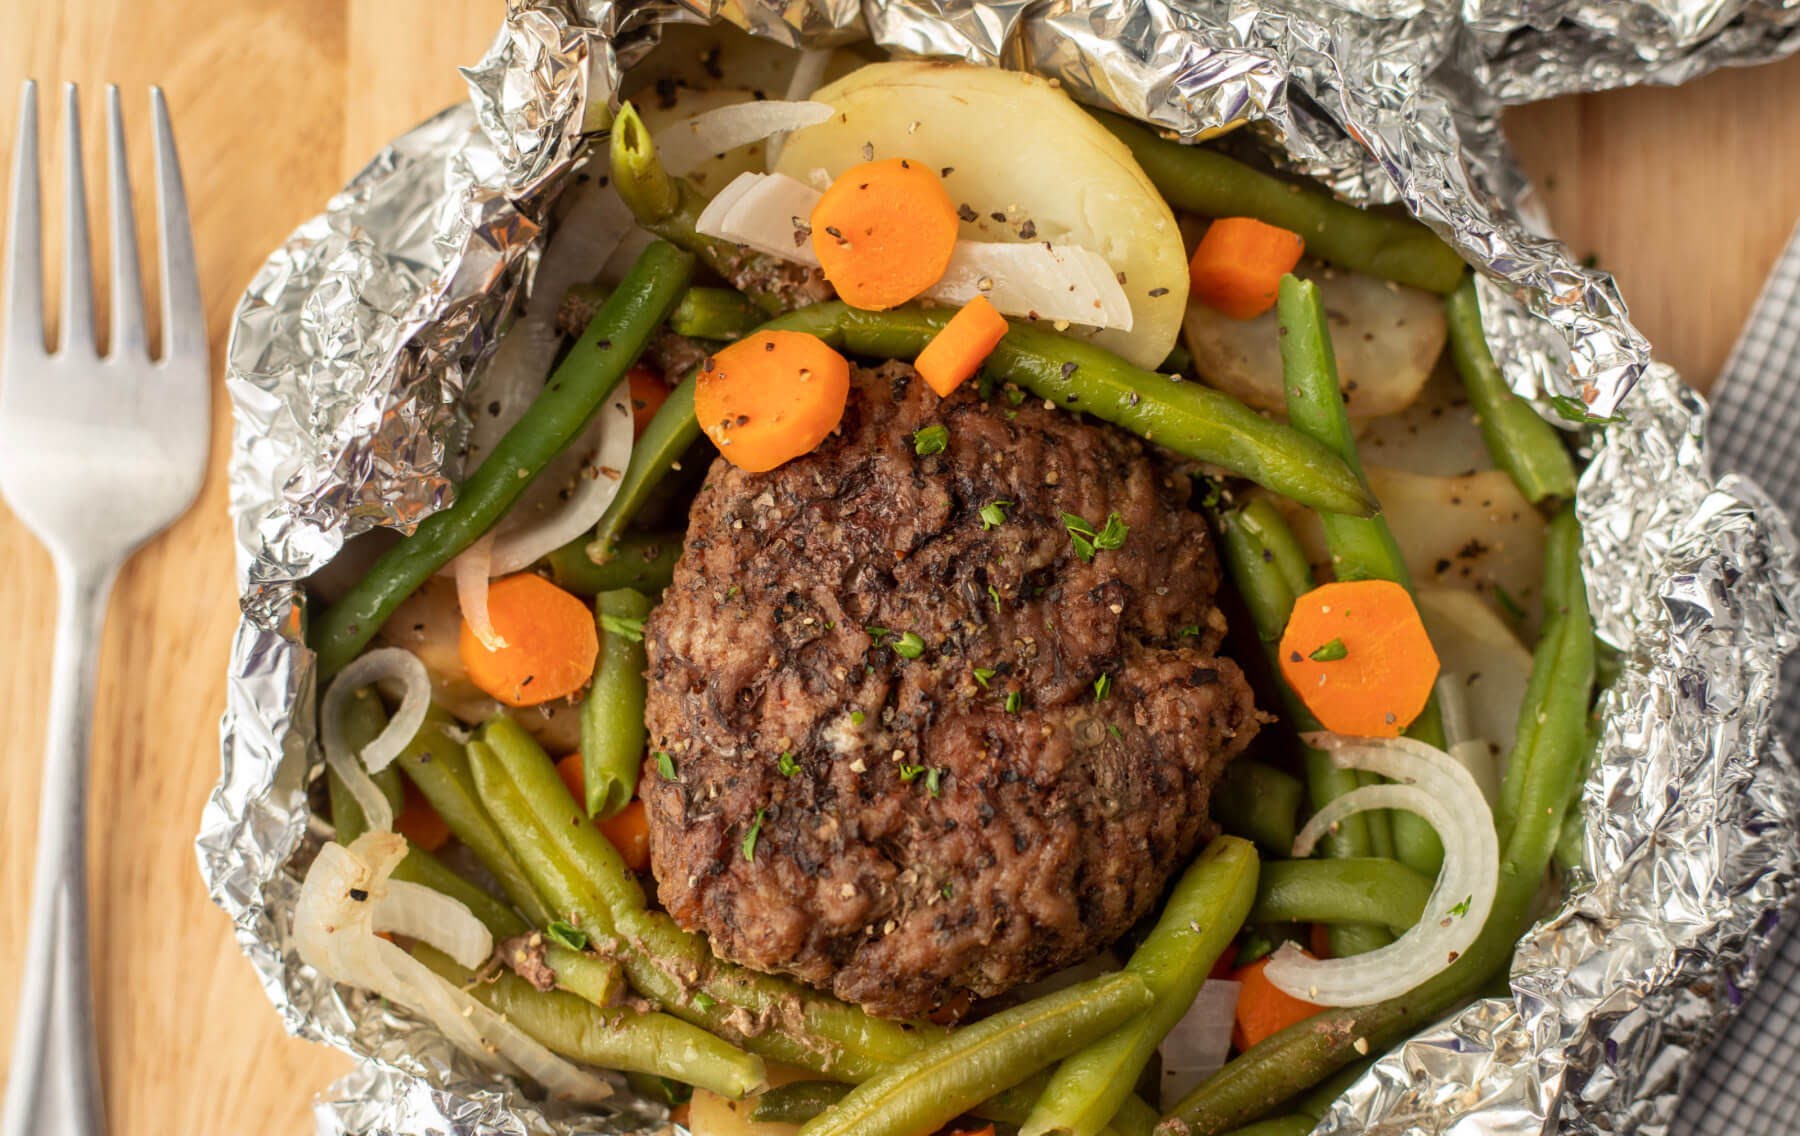
Creating Foil Packets
Creating foil packets is a simple and straightforward process that ensures your ingredients cook to perfection. Follow these steps to create your foil packets:
1. Tear off the foil: Tear off a sheet of heavy-duty aluminum foil, ensuring that it’s large enough to enclose all the ingredients comfortably. As a general guideline, a 12×12-inch piece of foil works well for individual serving-sized packets. 2. Place ingredients in the center: In the center of the foil, place a portion of the prepared ingredients. Be careful not to overfill the packet, as you’ll need space to fold and seal it. Leave a border of at least 2-3 inches on all sides to ensure a secure closure. 3. Fold in half: Bring the two opposite sides of the foil together, folding them in half so that the edges meet. This creates a seam down the center of the packet. 4. Start sealing: Starting at one end of the open side, fold the foil edge over twice to create a tight seal. Repeat this process along the open side, folding the foil over twice at regular intervals. This helps to ensure that the packet is properly sealed and that no juices or steam will escape during cooking. 5. Seal the edges: Once the open side is sealed, fold and crimp the two ends of the packet to seal them tightly. This helps to prevent any leakage and ensures that the ingredients cook evenly. 6. Double-check the seal: Before placing the foil packet in the electric skillet, carefully double-check the seal to ensure it is secure. Give the packet a gentle squeeze to make sure it’s tightly sealed. 7. Repeat for multiple packets: If you’re cooking multiple foil packets, repeat the process for each one. Remember to label them if necessary to keep track of different ingredients or cooking times.
Creating foil packets is a simple and efficient way to cook your ingredients. Just a few folds and crimps is all it takes to seal in all the flavors and juices, resulting in perfectly cooked meals.
Read more: How To Cook On Electric Skillet
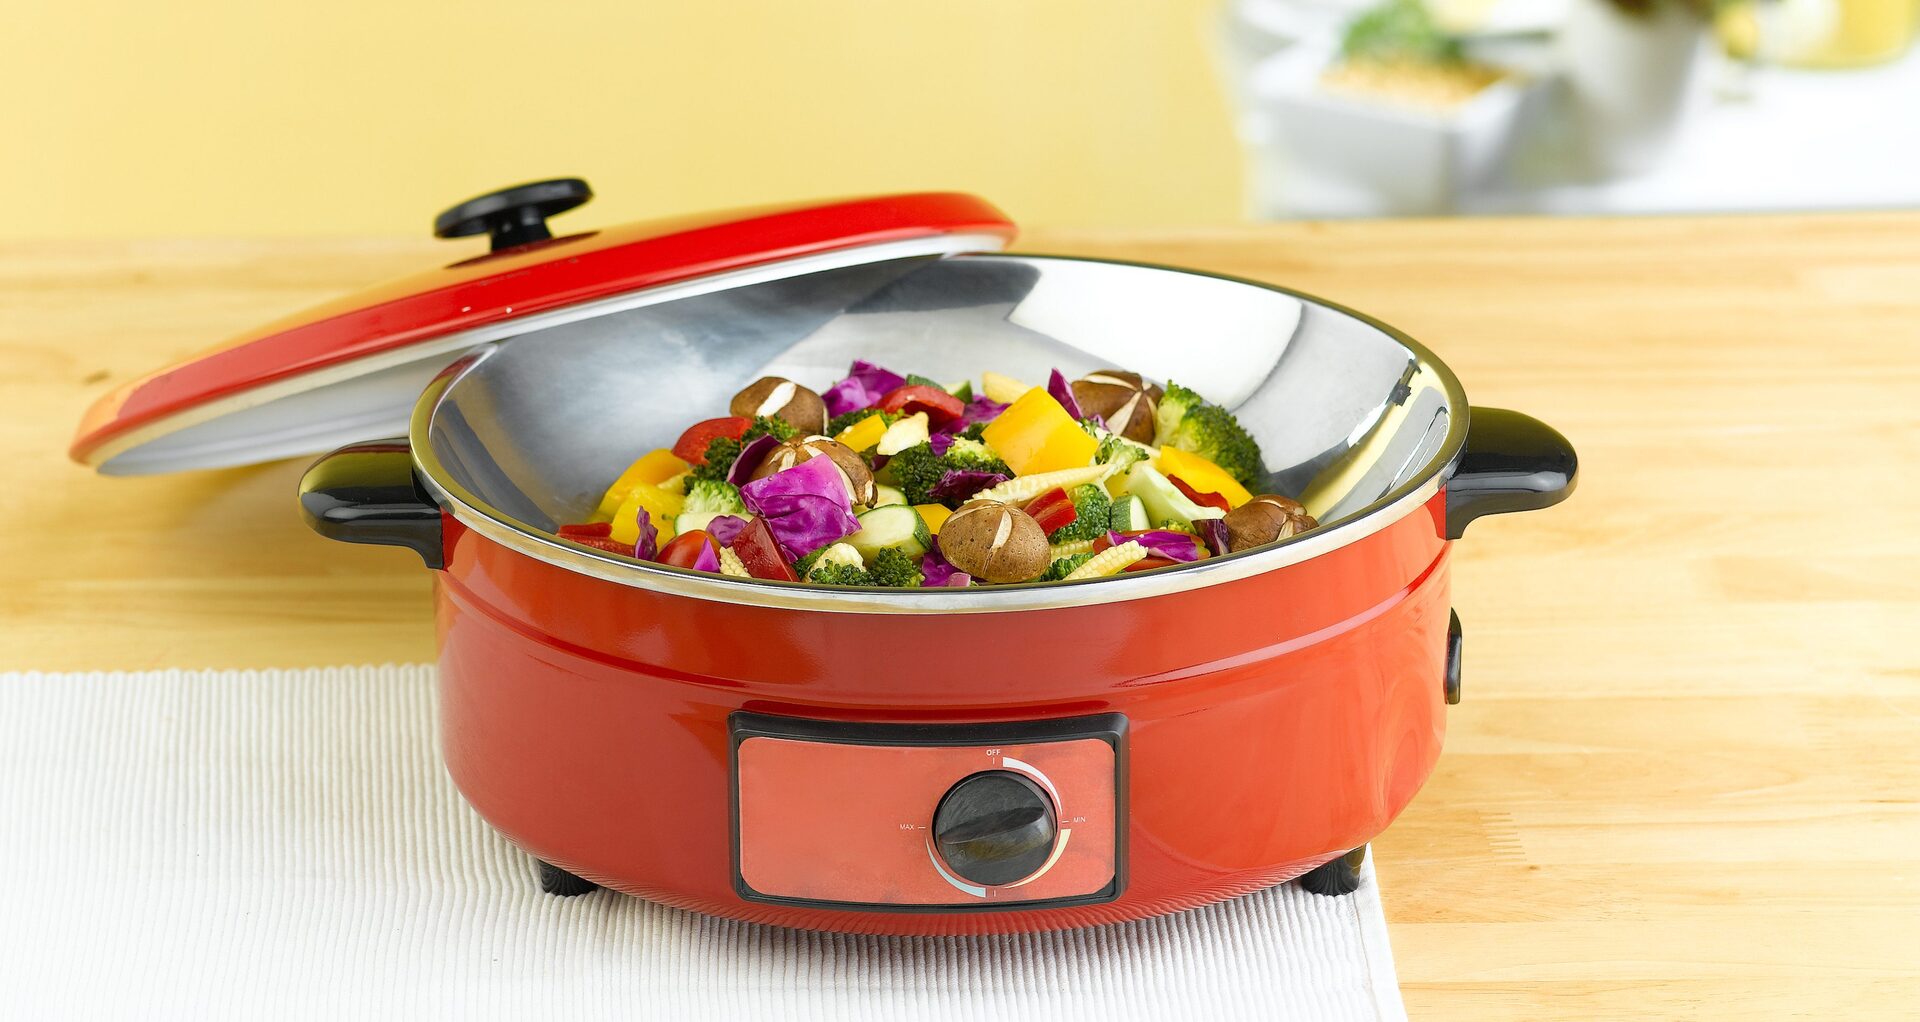
Preheating the Electric Skillet
Preheating the electric skillet is an essential step in ensuring even cooking and preventing the food from sticking to the surface. Here’s how to preheat your electric skillet before cooking foil packets:
1. Plug in the electric skillet: Start by plugging in the electric skillet and placing it on a heat-safe surface. Make sure it’s in an area with proper ventilation and away from any flammable objects. 2. Select the temperature: Depending on the recipe and ingredients, choose the appropriate temperature setting on the electric skillet. Most electric skillets have adjustable temperature controls, allowing you to set it to the desired heat level. 3. Preheat for a few minutes: Allow the electric skillet to preheat for a few minutes, typically around 5 minutes. This helps to evenly distribute the heat across the skillet’s surface, ensuring consistent cooking results. 4. Add a small amount of oil: If the recipe calls for it, add a small amount of oil to the preheated skillet. This helps to prevent the ingredients from sticking and provides a flavorful base for cooking. 5. Spread the oil: Use a spatula or a folded piece of paper towel to spread the oil evenly across the surface of the skillet. This ensures that all areas are coated and helps to create a non-stick surface. 6. Wait for the oil to heat: Allow the oil to heat up for a minute or two before adding the foil packets. This ensures that the skillet and oil are at the proper temperature for cooking. 7. Check the temperature: If your electric skillet has a built-in temperature gauge, double-check the temperature before adding the foil packets. Adjust if necessary to maintain the desired cooking temperature.
By preheating the electric skillet, you create an optimal cooking environment for your foil packets. The preheating process helps to ensure that the heat is evenly distributed and that the food cooks efficiently, resulting in delicious and perfectly cooked meals.
When cooking foil packets in an electric skillet, make sure to preheat the skillet before placing the packets in. This will ensure even cooking and prevent sticking.
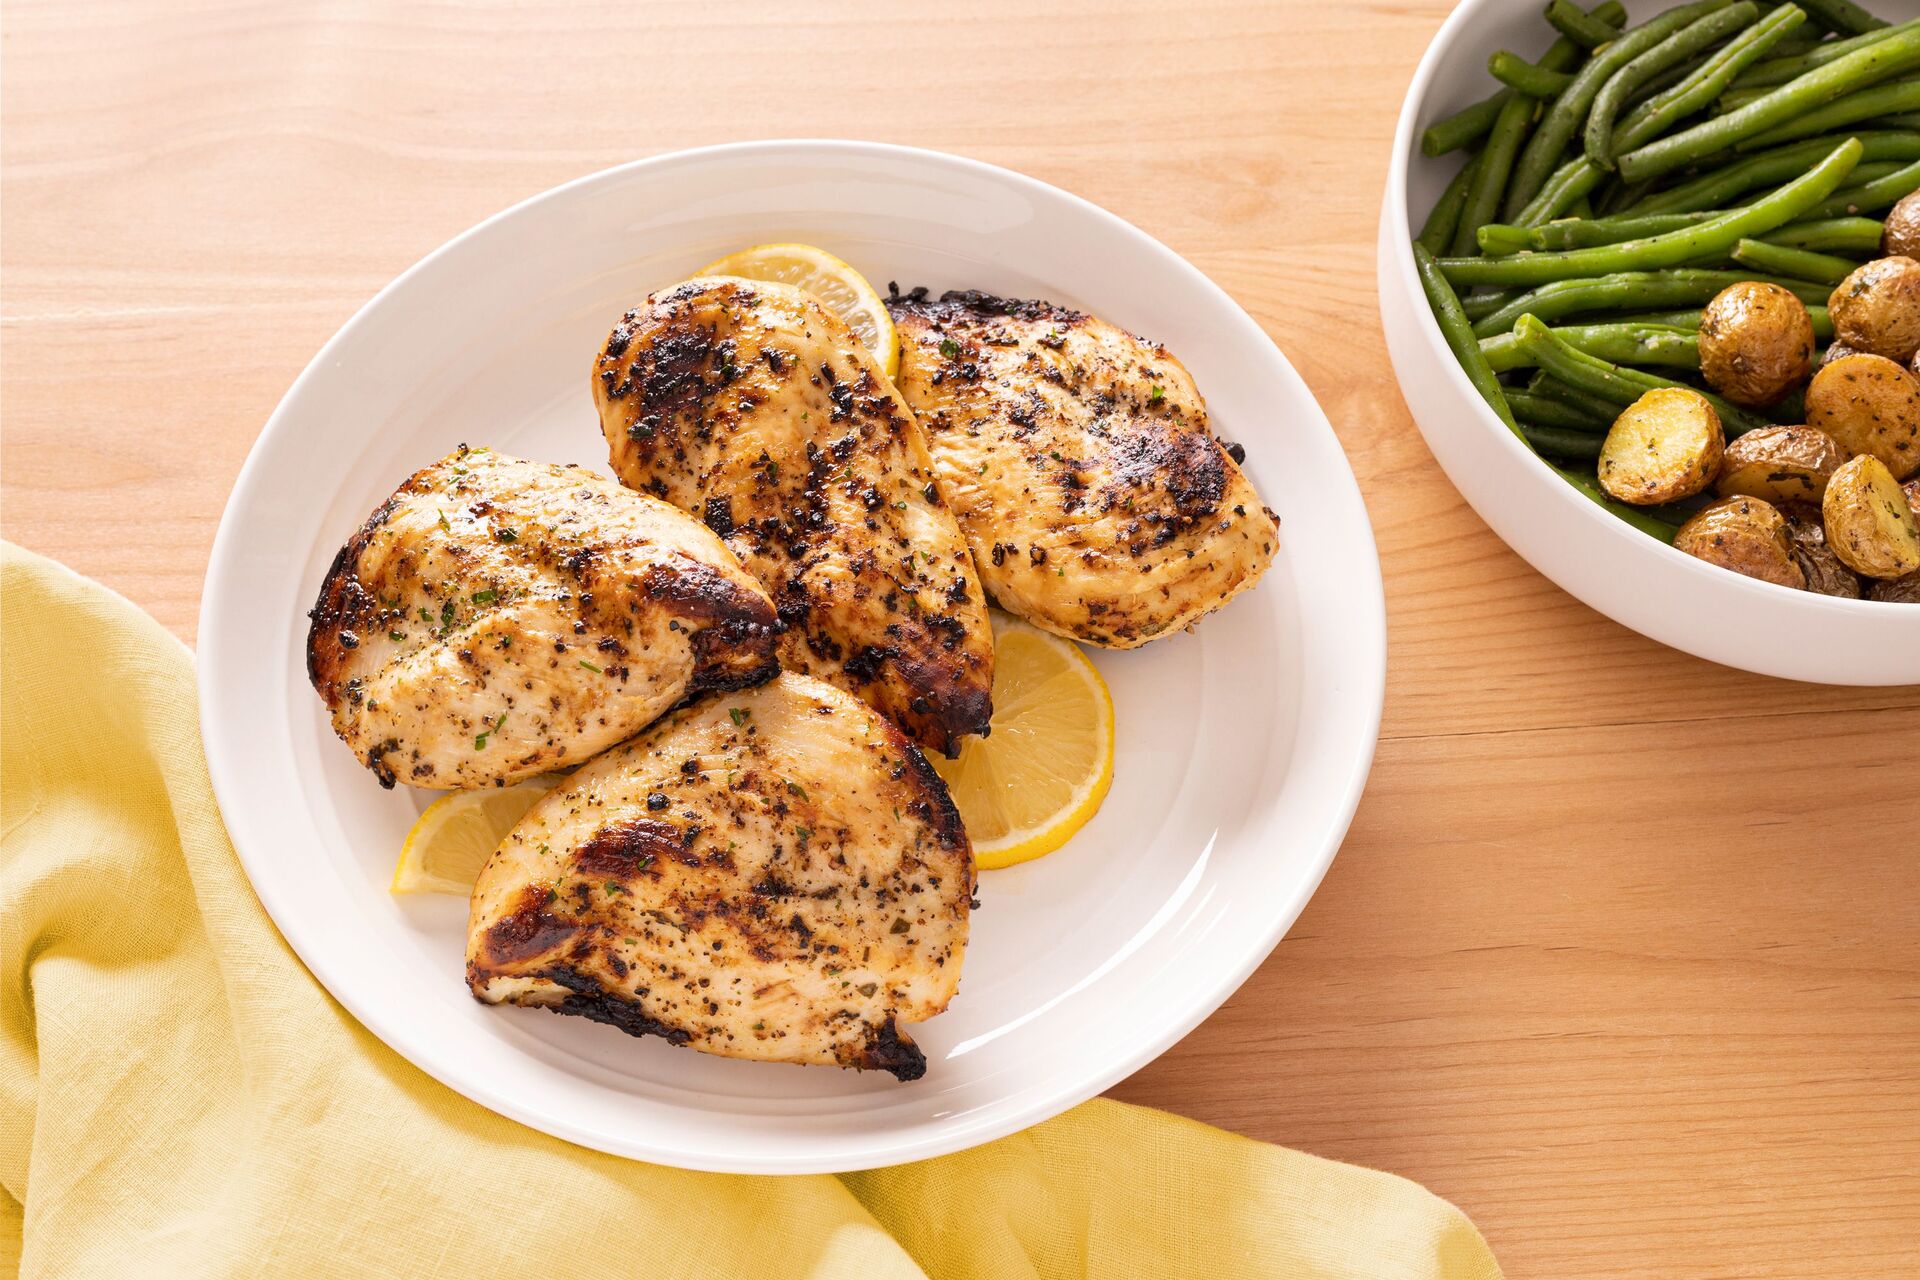
Cooking the Foil Packets
Now that your foil packets are prepared and your electric skillet is preheated, it’s time to start cooking! Follow these steps to cook your foil packets using an electric skillet:
1. Place the foil packets: Carefully place the prepared foil packets into the preheated electric skillet. Ensure that there is enough space between the packets for air circulation and even cooking. 2. Cover the skillet: Cover the electric skillet with a lid or aluminum foil to trap the heat inside. This helps to create a steamy environment for the ingredients to cook. 3. Adjust the temperature: Depending on the recipe and cooking method, adjust the temperature on the electric skillet. Follow the recipe instructions for the recommended temperature or use your discretion based on the ingredients being cooked. 4. Cooking time: Cook the foil packets for the specified amount of time indicated in the recipe. Factors such as the size and thickness of the ingredients will affect the cooking time. It is important to avoid opening the lid frequently during cooking to maintain consistent heat and cooking time. 5. Flip or rotate: If necessary, carefully flip or rotate the foil packets halfway through the cooking process. This ensures even cooking and helps to prevent any hot spots. 6. Monitor cooking progress: Keep an eye on the foil packets as they cook. Watch for any signs of burning or excessive steam buildup. Adjust the heat if needed to maintain the desired cooking temperature. 7. Using a thermometer: For recipes involving proteins like chicken or fish, you may want to use a meat thermometer to check for doneness. Insert the thermometer into the thickest part of the protein to ensure it reaches the safe internal temperature. 8. Remove from heat: Once the foil packets are cooked to your desired doneness, carefully remove them from the electric skillet. Always use oven mitts or heat-resistant gloves to protect your hands from the hot skillet and contents.
By following these steps, you can ensure that your foil packets are cooked to perfection using an electric skillet. The even heat distribution and precise temperature control of the skillet ensure that your ingredients are cooked thoroughly and evenly, resulting in delicious and flavorful meals.
Checking for Doneness
Checking for doneness is an important step in cooking foil packets to ensure that the ingredients are cooked to perfection. Here are a few methods to check if your foil packets are done:
1. Visual cues: One of the easiest ways to check for doneness is by visually inspecting the ingredients in the foil packet. Meat should be cooked to the desired level of doneness, with no signs of pinkness or rawness. Vegetables should be tender and cooked through. Use a fork or a knife to poke and gently test the tenderness of the ingredients. 2. Temperature: If you’re cooking proteins like chicken, fish, or steak, using a meat thermometer is an accurate method to check for doneness. Insert the thermometer into the thickest part of the protein, avoiding any bones or fat. Refer to a cooking temperature chart to ensure that the meat reaches the recommended safe internal temperature. 3. Bulging packets: Foil packets may start to bulge as they cook due to the steam buildup inside. This is an indication that the ingredients are cooking and the steam is creating pressure inside the packet. However, it’s important to exercise caution when handling bulging packets, as they can release hot steam when opened. 4. Texture and tenderness: The texture and tenderness of the ingredients can also provide clues about their doneness. Meat should be juicy and tender, while vegetables should be cooked through but not mushy. Taste a small portion to check if the flavors have melded and the ingredients are cooked to your liking. 5. Recipe guidelines: Follow the cooking time guidelines provided in the recipe you’re using as a general reference. Recipes often provide estimates for cooking times, but factors such as variations in ingredient sizes and skillet temperatures may affect the actual cooking time. Use your judgment and adjust as needed. 6. Resting time: After removing the foil packets from the electric skillet, allow them to rest for a few minutes before opening. This resting time allows the juices to redistribute and the ingredients to reach their final doneness.
Each recipe and ingredient may require slightly different methods for checking doneness. It’s important to understand the specifics of your recipe and use a combination of visual cues, temperature testing, and personal preference to determine if your foil packets are cooked to perfection.
Serving and Enjoying the Foil Packets
Now that your foil packets are cooked to perfection, it’s time to serve and savor the delicious flavors. Here are some tips for serving and enjoying your foil packets:
1. Opening the foil packets: Carefully open the foil packets, being cautious of hot steam that may escape. Use tongs or a fork to hold the packet while opening to avoid burns. 2. Plating: Gently transfer the cooked ingredients from the foil packet onto individual plates or serving platters. Be careful not to tear or crush the ingredients as you transfer them. 3. Garnishing: Consider adding a final touch to your foil packet creation by garnishing it. Fresh herbs, a sprinkle of grated cheese, or a drizzle of sauce can enhance the presentation and flavors. 4. Accompaniments: Serve the foil packets with complementary side dishes, such as a garden salad, steamed rice, or crusty bread. These additions can help round out the meal and create a satisfying dining experience. 5. Family-style serving: If you prefer a more interactive dining experience, you can present the foil packets directly on the table. Let your guests or family members open their own packets, encouraging them to savor the aroma and enjoy the anticipation. 6. Sharing: Foil packets are a great option for sharing meals with friends and family. Arrange the opened foil packets in the center of a table and let everyone serve themselves. It creates a casual and communal atmosphere, perfect for casual gatherings or picnics. 7. Enjoying the flavors: Take the time to savor and enjoy the flavors of the ingredients cooked inside the foil packets. Appreciate the tenderness of the proteins, the vibrant colors of the vegetables, and the delicious juices that have infused the dish. 8. Clean-up: After enjoying your foil packet meal, proper clean-up is important. Dispose of the used foil responsibly and wash any utensils or plates used for serving. If there are any leftovers, store them in airtight containers and refrigerate promptly.
Serving and enjoying the foil packets is an exciting part of the cooking process. Whether you’re serving them individually plated or family-style, the foil packets offer a delightful and flavorful dining experience for all to enjoy.
Read more: How To Cook Pasta In Electric Skillet
Cleaning Up the Electric Skillet
After a delicious meal cooked in foil packets using your electric skillet, it’s important to properly clean and maintain the skillet to ensure its longevity and continued performance. Here are some steps to follow when cleaning up the electric skillet:
1. Cooling down: Allow the electric skillet to cool down completely before cleaning. Do not attempt to clean the skillet while it’s still hot, as it can cause burns and damage to the cleaning tools. 2. Emptying excess grease: If there is excess grease or oil in the skillet, carefully pour it into a heat-resistant container. Avoid disposing of grease down the drain, as it can cause clogs. 3. Wiping off excess residue: Use a paper towel or soft cloth to wipe off any remaining food residue or debris from the surface of the electric skillet. Be gentle to avoid scratching the non-stick coating. 4. Removing baked-on food: For any stubborn or baked-on food particles, fill the electric skillet with warm water and a few drops of dish soap. Let it soak for a while to loosen the residue. Then, use a sponge or non-abrasive brush to gently scrub the surface until clean. 5. Drying: Once the electric skillet is clean, rinse it thoroughly with warm water to remove any soap residue. Wipe the skillet dry with a clean towel or allow it to air dry. Ensure that the skillet is completely dry before storing it to prevent rust or corrosion. 6. Cleaning the lid: If your electric skillet has a removable lid, wash it separately with warm, soapy water. Use a sponge or cloth to clean both the inside and outside of the lid. Rinse it well and dry it before storing. 7. Storage: Store the electric skillet in a cool, dry place away from direct heat or sunlight. Make sure to protect the non-stick surface from any scratches or damage caused by other kitchen utensils or appliances. 8. Regular maintenance: To keep your electric skillet in top condition, periodically check the power cord for any signs of wear or damage. If you notice any issues, have it repaired or replaced by a qualified professional. Additionally, refer to the manufacturer’s instructions for any specific cleaning or maintenance recommendations.
Properly cleaning and maintaining your electric skillet ensures its longevity and optimal performance. By following these cleaning steps after each use, you’ll be able to enjoy many more delicious meals cooked in your electric skillet!
Conclusion
Foil packet cooking using an electric skillet is a versatile and convenient method that offers a plethora of benefits. From easy cleanup to enhanced flavors, foil packets allow you to create delicious meals with minimal effort. By choosing the right foil, properly preparing the ingredients, and creating well-sealed packets, you set the stage for successful foil packet cooking.
Preheating the electric skillet ensures even cooking, while monitoring the cooking process helps you achieve the desired level of doneness. Whether you’re grilling chicken, roasting vegetables, or even baking desserts, foil packets cooked in an electric skillet provide endless possibilities for creating flavorful and healthy meals.
Remember to serve and enjoy your foil packets with creativity and flair. Whether you plate them individually or opt for a family-style sharing experience, the foil packets add a touch of excitement to the dining table. And once the meal is complete, cleaning up the electric skillet properly ensures its longevity and continued performance.
So, harness the power of foil packet cooking using an electric skillet to elevate your culinary skills and delight your taste buds. Experiment with different ingredients, flavors, and cooking techniques to discover your favorite foil packet creations. With a little practice, you’ll become a master at creating delicious meals using this convenient and enjoyable cooking method.
Embrace the art of foil packet cooking, and let your electric skillet bring out the flavors and textures that will leave you and your guests craving more. Happy cooking!
Frequently Asked Questions about How To Cook Foil Packets Using An Electric Skillet
Was this page helpful?
At Storables.com, we guarantee accurate and reliable information. Our content, validated by Expert Board Contributors, is crafted following stringent Editorial Policies. We're committed to providing you with well-researched, expert-backed insights for all your informational needs.


0 thoughts on “How To Cook Foil Packets Using An Electric Skillet”