
Articles
How To Cook Okra On Stove Top
Modified: February 27, 2024
Learn how to cook okra on the stove top with these easy and delicious articles. Discover new recipes and tips for perfectly cooked okra every time.
(Many of the links in this article redirect to a specific reviewed product. Your purchase of these products through affiliate links helps to generate commission for Storables.com, at no extra cost. Learn more)
Introduction
Okra is a versatile and nutritious vegetable that is loved by many for its unique flavor and texture. Whether you want to incorporate more vegetables into your diet or you’re simply looking for a delicious side dish, learning how to cook okra on the stove top is a valuable skill to have.
Stove top cooking offers a quick and convenient way to prepare okra, allowing you to enjoy its vibrant green color and delicate taste. With the right techniques and seasonings, you can elevate this humble vegetable into a mouthwatering dish that will leave your taste buds wanting more.
In this article, we will guide you through the step-by-step process of cooking okra on the stove top. From choosing the right okra to adding the perfect blend of seasonings, you’ll learn all the tricks and tips to create a flavorful and satisfying dish.
So, put on your apron, grab your favorite cooking utensils, and let’s delve into the world of stove top cooking with okra!
Key Takeaways:
- Master the art of stove top cooking with okra by choosing, preparing, and seasoning the pods to perfection. Elevate this nutritious vegetable into a mouthwatering dish with simple yet essential techniques.
- Enjoy the delightful flavors and textures of stove top-cooked okra by following the step-by-step process. From washing and drying to seasoning and serving, savor the satisfaction of creating a delicious and versatile dish.
Read more: How To Bake On The Stove Top
Step 1: Choosing and Preparing Fresh Okra
The first step to cooking delicious okra on the stove top is to select fresh and high-quality okra pods. Look for okra that is firm, brightly colored, and free from any blemishes or spots. The pods should also feel tender and not too hard.
When choosing okra, it’s important to consider the size of the pods. Smaller pods are usually more tender and have a milder flavor, while larger pods can be slightly tougher and have a stronger taste. Depending on your preference, you can opt for either small or large okra pods.
Once you have selected the right okra, it’s time to prepare them for cooking. Begin by rinsing the pods under cool running water to remove any dirt or debris. Gently pat them dry with a clean kitchen towel or paper towel.
Next, using a sharp knife, trim the stem end of each okra pod. This helps remove any tough or woody parts, ensuring that you are left with the tender part of the vegetable.
Some people prefer to additionally remove the tip of the okra pod, as it can sometimes be slightly tough. This is optional and depends on your personal preference. If you choose to remove the tips, make a diagonal cut about ¼ inch from the end of each okra pod.
Once you have trimmed the okra, you are now ready to move on to the next step of the cooking process.
Step 2: Washing and Drying the Okra
After selecting and preparing the fresh okra, it’s important to give them a thorough wash to remove any remaining dirt or residue. This step ensures that your okra is clean and safe for consumption.
To wash the okra, fill a basin or a sink with cold water. Place the trimmed okra pods in the water and gently swirl them around to dislodge any dirt or debris. You can also use your hands to rub the surface of the pods to ensure a thorough cleaning.
Once you have washed the okra, drain the water and give them a final rinse under running water to remove any soapy residue. This step is essential if you have used any produce wash or detergent to clean the okra.
After washing the okra, it’s crucial to dry them properly before cooking. Excess moisture can prevent proper browning and may result in a less desirable texture. To dry the okra, gently pat them dry with a clean kitchen towel or paper towel.
Another method to dry the okra is to let them air dry for a few minutes. Simply lay the washed okra on a clean kitchen towel or a wire rack and allow them to dry naturally. This ensures that the okra is completely dry before cooking.
Once the okra is thoroughly dried, it’s time to move on to the next step and start heating the stove top for cooking.
Step 3: Cutting and Trimming the Okra
Now that you have washed and dried the okra, it’s time to cut and trim them before cooking. This step helps to enhance the flavor and texture of the okra, ensuring a delicious end result.
Start by placing the washed and dried okra pods on a clean cutting board. Take a sharp knife and make a diagonal cut about ¼ inch from the top end of each okra pod. This helps to remove any tough or fibrous parts of the okra.
Once you have made the diagonal cut, you can also choose to trim the tip of the okra pod. This is optional and depends on your personal preference. If you decide to do so, make another diagonal cut about ¼ inch from the bottom end of each okra pod.
Trimming the okra in this way not only removes any potential toughness, but it also gives the okra a more uniform and appealing shape. Plus, it helps the okra cook more evenly, resulting in a better overall texture.
As you trim the okra, place the cut pieces in a clean bowl or plate. It’s important to handle the okra gently to avoid bruising or damaging the delicate pods.
Once you have finished cutting and trimming the okra, you are now ready to move on to the next step of the cooking process. It’s time to heat the stove top and prepare for cooking the okra.
Step 4: Heating the Stove Top
Before you start cooking the okra, it’s essential to properly heat the stove top. Heating the stove top ensures even cooking and allows the okra to develop a nice char and crispness.
Begin by selecting a large skillet or frying pan that can comfortably accommodate all the okra pods in a single layer. Place the skillet or pan on the stove top over medium heat.
Allow the skillet or pan to preheat for a few minutes until it becomes hot. You can test the temperature by holding your hand a few inches above the surface – if you can feel the heat, it’s ready for cooking.
While preheating the stove top, it’s important to keep an eye on the heat level. Adjust the heat as needed to maintain a steady medium heat. Too high of a heat can cause the okra to burn quickly, while too low of a heat may result in soggy or undercooked okra.
Once the stove top is adequately heated, it’s time to move on to the next step and add oil or butter to the pan.
Note: The exact cooking time and heat level may vary depending on your stove and pan. It’s important to monitor the heat and adjust as needed throughout the cooking process to ensure perfectly cooked okra.
Read more: How To Cook Kabobs On Stove Top
Step 5: Adding Oil or Butter to the Pan
Now that the stove top is properly heated, it’s time to add oil or butter to the pan. This step not only prevents the okra from sticking to the pan but also adds a delicious flavor and helps with the cooking process.
You have a choice of using either oil or butter, depending on your preference and dietary restrictions. Both options can yield delicious results, so feel free to use whichever you prefer.
If using oil, select a cooking oil with a high smoke point, such as vegetable oil, canola oil, or avocado oil. Avoid using oils with low smoke points, like olive oil, as they may burn and impart a bitter taste to the okra.
If using butter, opt for unsalted butter to have better control over the seasoning of the dish. You can also use clarified butter (ghee) for a rich and nutty flavor.
To add the oil or butter to the pan, simply pour a sufficient amount into the heated skillet or pan. You want enough oil or butter to evenly coat the bottom of the pan but not so much that it pools excessively.
Allow the oil or butter to heat up for a few moments until it starts to shimmer or melt, indicating that it is ready for cooking. Gently swirl the pan so that the oil or melted butter spreads evenly across the surface.
With the oil or butter in the pan, you are now prepared to begin cooking the okra on the stove top. It’s time to move on to the next step and start the cooking process!
When cooking okra on the stove top, make sure to dry the okra thoroughly before slicing to prevent it from becoming slimy. Sauté it in a hot pan with oil and seasonings for a delicious and crispy result.
Step 6: Cooking the Okra on the Stove Top
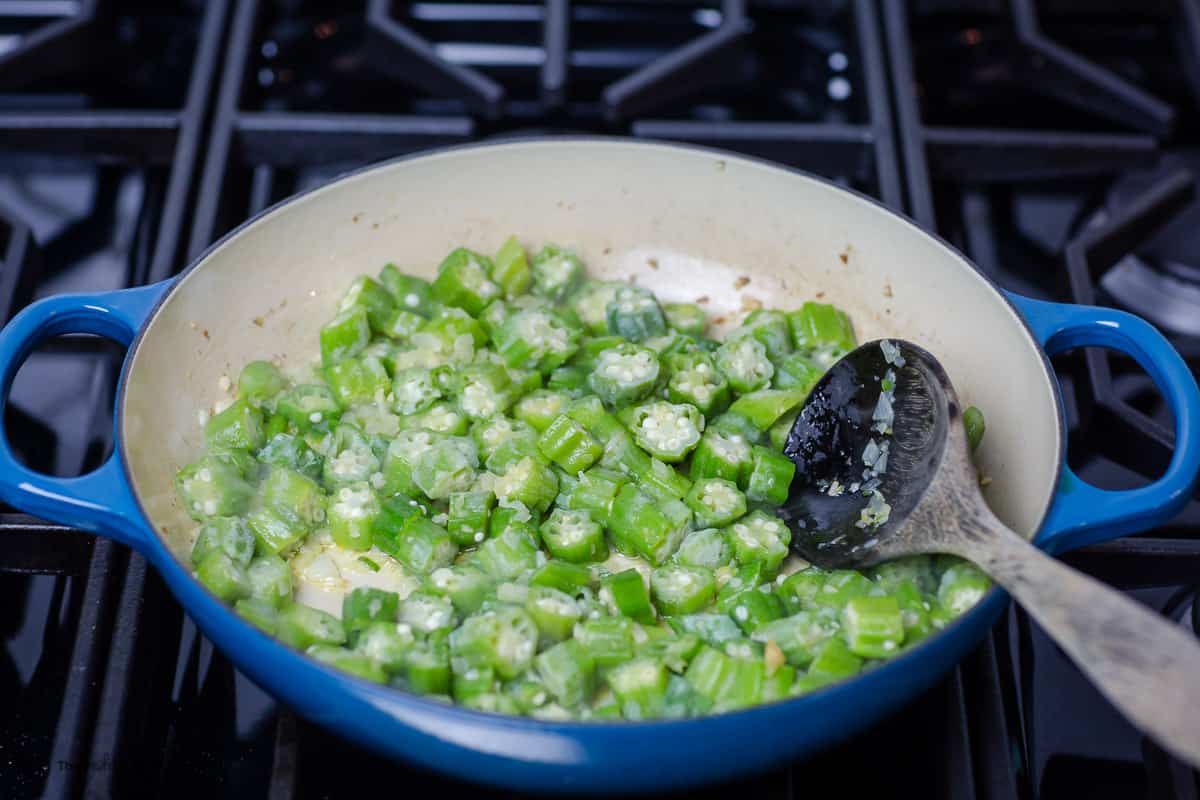
With the oil or butter heated in the pan, it’s time to cook the okra on the stove top. This step involves sautéing or frying the okra to achieve a deliciously crispy and flavorful result.
Carefully add the trimmed okra to the heated pan, making sure to arrange them in a single layer. This allows the okra to cook evenly and ensures that each piece gets the desired texture.
As you add the okra to the pan, you may hear a sizzling sound, which is a good indication that the heat and oil or butter are at the right level.
Allow the okra to cook undisturbed for a few minutes, allowing the heat to penetrate and start the browning process. This initial contact with the heat helps to develop a nice sear and enhances the flavor of the okra.
As the okra cooks, you can gently stir or toss it in the pan using a spatula or wooden spoon. This helps to ensure even cooking and prevents any pieces from sticking to the pan.
Cook the okra for about 8-10 minutes, or until it becomes tender and develops a caramelized, golden-brown color. The exact cooking time may vary depending on the size of the okra pods and the desired level of crispness.
Keep a close eye on the okra as it cooks, adjusting the heat as needed to prevent it from burning. Cooking time can be reduced if you prefer the okra to have a slight crunch or extended for a softer texture.
Once the okra has reached your desired level of doneness, it’s time to move on to the next step and season it with delicious flavors.
Step 7: Seasoning and Flavoring the Okra
Now that the okra has been cooked to perfection on the stove top, it’s time to take its flavor to the next level by seasoning and flavoring it. This step allows you to customize the taste according to your preference and add an extra dimension to the dish.
There are numerous seasonings and flavorings that pair well with okra, so feel free to get creative and experiment with different combinations. Here are some popular options:
- Salt and pepper: A classic and simple choice that enhances the natural flavors of the okra. Sprinkle a pinch of salt and freshly ground black pepper over the cooked okra, adjusting the seasoning to taste.
- Garlic and herbs: Add minced garlic, dried herbs like thyme or oregano, and a dash of red pepper flakes for a burst of aromatic flavors. Sauté them with the okra for a minute or two before removing from the heat.
- Spice blends: Sprinkle some spice blends like Cajun seasoning, curry powder, or garam masala over the cooked okra to add a punch of exotic flavors. Adjust the amount according to your preferred level of spiciness.
- Lemon or lime juice: Squeeze some fresh lemon or lime juice over the cooked okra to give it a tangy and refreshing kick. The acidity helps balance the earthy flavors of the vegetable.
Feel free to explore different seasoning combinations based on your taste preferences and the overall flavor profile you desire. Remember to taste and adjust the seasoning as needed before moving on to the next step.
Once the okra is seasoned to your liking, it’s time to proceed to the next step and check for doneness.
Step 8: Checking for Doneness
As you near the end of the cooking process, it’s important to check the doneness of the okra to ensure that it is cooked to your desired level. This step ensures that the okra is tender, flavorful, and has the right texture.
To check for doneness, carefully pick up a piece of cooked okra with a fork or tongs. Take a bite or cut it open to assess its texture. The okra should be tender and easy to chew, without any raw or undercooked parts. It should have a slightly crisp exterior and a soft, melt-in-your-mouth interior.
If the okra is still too firm or crunchy, continue cooking it for a few more minutes until it reaches the desired level of tenderness. On the other hand, if the okra is becoming overly soft or mushy, it is a sign that it has been cooked for too long.
Remember that the cooking time can vary depending on various factors such as the size and thickness of the okra pods, the heat level, and personal preferences. It’s important to use your judgment when determining the doneness of the okra.
Once you are satisfied with the doneness of the okra, it’s time to move on to the final step and serve the cooked okra for a delightful gastronomic experience.
Read more: How To Cook Steak On Stove Top
Step 9: Serving and Enjoying the Cooked Okra
Congratulations! You’ve successfully cooked the okra on the stove top, and now it’s time to serve and savor your delicious creation. This final step is all about presenting the cooked okra and enjoying it to the fullest.
To serve the cooked okra, transfer it to a serving dish or individual plates. You can garnish it with some fresh herbs like chopped parsley or cilantro to add a touch of freshness and visual appeal.
Pair the cooked okra with your choice of main dishes or serve it as a standalone side dish. It complements a wide range of meals, such as grilled meats, rice dishes, or even as a topping for salads or pizza.
As you savor the cooked okra, take a moment to appreciate the flavors and textures. The okra should have a delightful blend of earthiness, slight sweetness, and subtle crunchiness. Enjoy the tender interior and the flavorful exterior that comes from the cooking process.
Remember to serve the cooked okra while it’s still warm for the best taste and texture. The flavors are at their peak when the okra is freshly cooked.
Whether you’re enjoying the okra as a side dish, a snack, or a part of a larger meal, take pleasure in its unique taste and the effort you put into cooking it on the stove top.
Now, sit back, relax, and savor each mouthful of your deliciously cooked okra!
With these simple steps, you can confidently prepare and enjoy stove top-cooked okra. Harness the diverse flavors and textures of this nutritious vegetable and make it a regular addition to your culinary repertoire.
So, get into the kitchen, gather your ingredients, and let the stove top magic begin with the wonderful world of okra!
Conclusion
Cooking okra on the stove top is a rewarding and delicious culinary journey. By following these step-by-step instructions, you can confidently select, prepare, and cook fresh okra to perfection.
From choosing the right okra pods to seasoning them with your favorite flavors, stove top cooking allows you to create a dish that is bursting with taste, texture, and nutrients.
Remember to handle the okra with care, wash and dry it thoroughly, and trim it properly before cooking. Heating the stove top to the right temperature and adding oil or butter to the pan sets the stage for a flavorful cooking process.
Sauté the okra on the stove top until it is tender, caramelized, and golden-brown. Season it with your preferred seasonings and spices to bring out the best of its natural flavors. Taste, adjust, and savor the moment as you check for doneness.
Finally, serve the cooked okra with pride and enjoy it as a versatile side dish or a satisfying main course accompaniment. The possibilities are endless, and the satisfaction in your cooking skills will be evident with each bite.
Cooking okra on the stove top not only opens up a world of flavors and textures but also promotes a healthy diet as okra is packed with vitamins, minerals, and dietary fiber.
So, why wait? Get ready to embark on an exciting culinary adventure and discover the joy of cooking okra on the stove top. Experiment with different flavors, techniques, and presentations to create your own signature okra dish.
Remember, cooking should be an enjoyable and creative process. Don’t be afraid to get creative and make the recipe your own. Happy cooking, and may your stove top adventures be filled with delicious success!
Frequently Asked Questions about How To Cook Okra On Stove Top
Was this page helpful?
At Storables.com, we guarantee accurate and reliable information. Our content, validated by Expert Board Contributors, is crafted following stringent Editorial Policies. We're committed to providing you with well-researched, expert-backed insights for all your informational needs.


0 thoughts on “How To Cook Okra On Stove Top”