
Articles
How To Poach An Egg On Stove Top
Modified: December 7, 2023
Learn how to poach an egg on the stove top with this easy step-by-step guide. Read more articles on cooking techniques and tips for delicious meals.
(Many of the links in this article redirect to a specific reviewed product. Your purchase of these products through affiliate links helps to generate commission for Storables.com, at no extra cost. Learn more)
Introduction
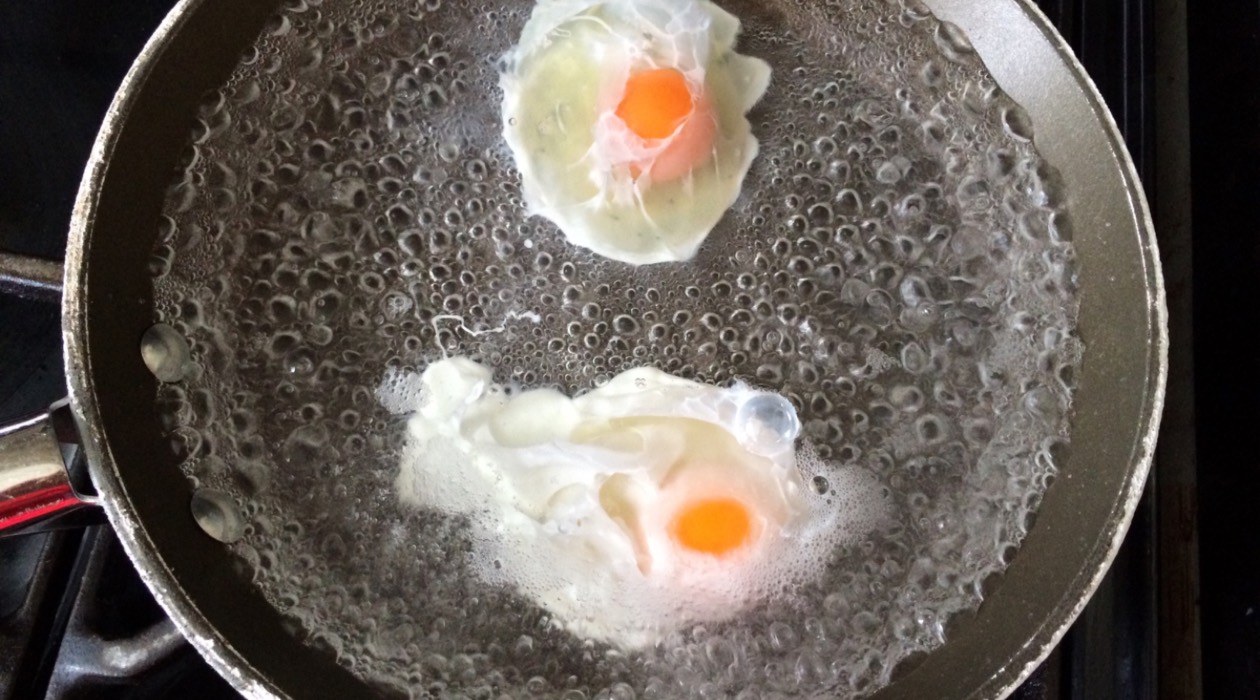
Poached eggs are a delicious and versatile dish that can be enjoyed on their own, used as a topping for salads or sandwiches, or served as a key ingredient in dishes such as Eggs Benedict. While poaching an egg may seem like a daunting task, it is actually quite simple with the right technique. In this article, we will guide you through the process of poaching an egg on a stovetop, ensuring a perfectly cooked egg with a beautifully runny yolk.
To achieve the perfect poached egg, you will need a few key pieces of equipment. Firstly, you will need a small saucepan or deep frying pan to hold the water for poaching. Ensure that the pan is large enough to accommodate the number of eggs you want to poach, with enough room for them to float freely.
Next, you will need a slotted spoon or a mesh skimmer. This will be used to gently lift the poached egg out of the water without damaging the delicate egg white. Having a small bowl or plate ready to place the poached egg on is also useful.
Lastly, you will need fresh eggs. The freshness of the eggs is crucial as it affects the texture and taste of the poached egg. Choose eggs that are within their expiration date and have a thick, gel-like white, as this will help the egg hold its shape during poaching.
Now that you have the necessary equipment, let’s dive into the step-by-step process of poaching an egg on a stovetop, and soon you’ll be able to enjoy perfectly poached eggs whenever you want.
Key Takeaways:
- Master the art of poaching eggs on the stovetop with simple steps and essential tools. Enjoy perfectly cooked, runny-yolked eggs for a delightful culinary experience.
- Elevate your dishes with perfectly poached eggs. Serve them on toast, salads, or as a classic Eggs Benedict topping for a versatile and delicious addition to any meal.
Read more: How To Store Poached Eggs
Equipment needed
Before you embark on your journey to poaching the perfect egg on a stovetop, it’s important to gather all the necessary equipment. Here’s what you’ll need:
- A small saucepan or deep frying pan: This will be used to hold the water for poaching the eggs. Make sure it’s large enough to accommodate the number of eggs you want to poach.
- A slotted spoon or mesh skimmer: This tool is essential for gently lifting the poached eggs out of the water. It helps drain excess water and prevents any damage to the delicate egg white.
- A small bowl or plate: This will be used to transfer the poached eggs once they’re cooked. Having a plate or bowl ready nearby will make it easier to move the eggs without breaking them.
- Fresh eggs: The quality of the eggs plays a crucial role in the outcome of your poached eggs. Look for eggs that are within their expiration date and have a thick, gel-like egg white. Fresh eggs are more likely to hold their shape during the poaching process.
- Vinegar (optional): Adding a splash of vinegar to the poaching water can help the egg white coagulate more quickly, resulting in a neater and more compact poached egg. However, this is an optional ingredient and can be omitted if desired.
- A timer or clock: Timing is crucial when poaching eggs. Having a timer or clock nearby will help you keep track of the cooking duration, ensuring perfectly cooked eggs with runny yolks and set whites.
Once you have gathered all these essential tools and ingredients, you are ready to move on to the next step: boiling the water for poaching the eggs.
Step 1: Boiling the water
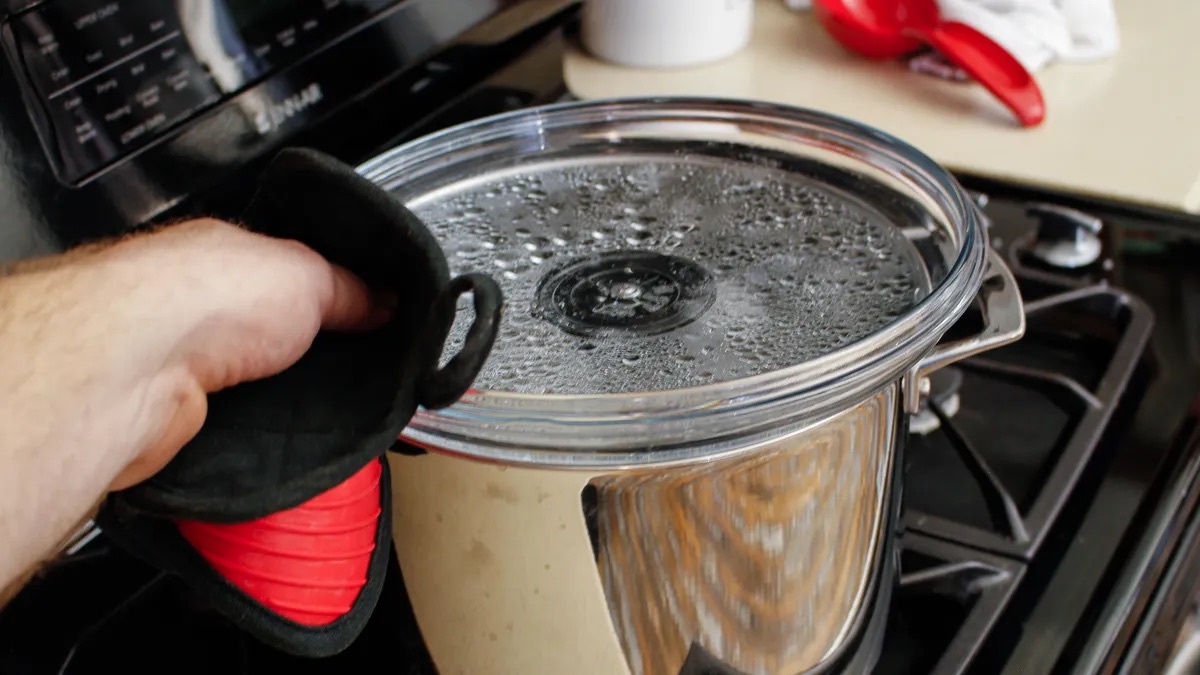
The first step in poaching an egg on a stovetop is to bring the water to a gentle boil. Follow these simple instructions to ensure the water is at the perfect temperature for poaching:
- Fill the small saucepan or deep frying pan with enough water to cover the eggs. It is recommended to fill it about 2/3 full, leaving enough room for the eggs to float freely.
- Place the pan on the stovetop over medium heat and allow the water to come to a gentle boil. It’s important to find the right balance here – you want the water to be simmering gently, not vigorously bubbling.
- If desired, you can add a splash of vinegar to the water. This can help the egg white coagulate more quickly, resulting in a neater poached egg. However, this step is optional and can be skipped if preferred.
- While waiting for the water to come to a gentle boil, you can move on to the next step of preparing the egg.
Now that you have the water simmering gently, you’re ready to move on to the next step: preparing the egg for poaching. Remember to keep an eye on the water to ensure it doesn’t come to a rolling boil, as this can lead to overcooking the eggs.
Step 2: Preparing the egg
Before you can poach an egg on a stovetop, it’s essential to properly prepare the egg. Follow these steps to ensure the egg is ready for poaching:
- Crack a fresh egg into a small bowl or ramekin. It’s important to crack the egg gently to avoid any shell fragments falling into the bowl.
- Inspect the egg for any shell fragments or abnormalities. Use a spoon or your fingers to carefully remove any shell fragments that may have fallen into the bowl.
- If desired, you can season the egg with salt and pepper or any other spices or herbs of your choice. This step is optional and can be skipped if you prefer to have the natural flavor of the egg shine through.
- Repeat these steps for each egg you plan to poach, cracking them into separate bowls or ramekins.
By cracking and inspecting the eggs in separate bowls or ramekins, you can ensure that each egg is the best quality and free of any unwanted debris. Preparing the eggs individually also makes it easier to add them to the simmering water in the next step.
Now that the eggs are prepared, it’s time to move on to the next step: creating a whirlpool in the water.
Step 3: Creating a whirlpool
Creating a whirlpool in the simmering water is a crucial step in achieving beautifully shaped poached eggs. Follow these steps to create a whirlpool:
- With the water gently simmering in the pan, use a spoon or spatula to create a circular motion in the water. Start from the center of the pan and gradually move outward.
- Continue stirring the water until you see a vortex forming in the center of the pan. The swirling motion helps gather the egg white around the yolk, resulting in a more compact and evenly shaped poached egg.
- Maintain the circular motion in the water, ensuring the whirlpool remains intact. This will help prevent the egg white from spreading out too much.
Creating a whirlpool may seem like a simple step, but it plays a significant role in achieving the desired shape of the poached eggs. The whirlpool method ensures that the egg white wraps around the yolk, giving the poached egg a classic, rounded shape.
Now that you’ve successfully created a whirlpool, it’s time to move on to the next step: adding the egg to the whirlpool.
Add a splash of vinegar to the simmering water before adding the egg. This helps the egg white to set and stay together.
Read more: How To Boil Eggs On The Stove Top
Step 4: Adding the egg to the whirlpool
Now that you have a swirling whirlpool in the simmering water, it’s time to gently add the prepared egg to the center of the vortex. Follow these steps to add the egg to the whirlpool:
- Hold the small bowl or ramekin with the cracked egg just above the water’s surface.
- Gently tilt the bowl or ramekin and carefully lower it into the center of the whirlpool. The swirling water will help envelop the egg and wrap the egg white around the yolk.
- Release the egg from the bowl or ramekin by gently sliding it into the swirling water. Be careful not to drop it from too high, as it may cause the egg to break or splatter.
- Repeat this step for each egg you plan to poach. It’s best to poach the eggs one at a time to ensure proper cooking and shape.
Adding the egg to the whirlpool is a delicate step, as it determines the shape and evenness of the poached egg. The swirling motion of the water helps maintain the egg’s integrity and prevents it from spreading out too much.
Now that the egg is added to the whirlpool, it’s time to move on to the next step: cooking the egg to perfection.
Step 5: Cooking the egg
Now that the egg is gently floating in the swirling water, it’s time to cook it to perfection. Follow these steps to ensure your poached egg is cooked just the way you like it:
- Set a timer for the desired cooking time. The cooking time can vary depending on how you prefer your poached eggs. For a soft and runny yolk, cook the egg for about 3-4 minutes. For a firmer yolk, cook it for 5-6 minutes.
- While the egg is cooking, monitor the water to ensure that it maintains a gentle simmer. Adjust the heat if necessary to maintain the ideal simmering temperature.
- During the cooking process, you may notice some foam forming on the water’s surface. Gently skim off any foam using a slotted spoon or mesh skimmer. This helps keep the poached egg clean and prevents any unwanted textures.
- For even cooking, you can gently swirl the water around the egg every now and then. This ensures that the water circulates evenly and the heat is distributed uniformly.
- Once the timer goes off, carefully remove the poached egg from the simmering water. Use a slotted spoon or mesh skimmer to lift the egg out, allowing any excess water to drain off. Place the egg on a plate or bowl lined with a kitchen towel or paper towel to absorb any remaining water.
Remember, the cooking time provided is just a guideline, and you can adjust it according to your personal preference. If you prefer firmer yolks, simply increase the cooking time slightly. Likewise, if you like a runnier yolk, reduce the cooking time a bit.
Now that the egg is cooked to perfection, it’s time to move on to the next step: removing the poached egg from the water.
Step 6: Removing the poached egg
Now that your poached egg is perfectly cooked, it’s time to remove it from the water. Follow these steps to safely and gently remove the poached egg:
- Position a slotted spoon or mesh skimmer near the poached egg, making sure it is underneath the egg.
- Gently lift the poached egg out of the water, allowing any excess water to drain off through the slots. Tip the spoon or skimmer slightly to one side to help the water drain off more effectively.
- Inspect the poached egg for any uneven edges or excess egg white. Use the edge of the spoon or skimmer to carefully trim off any unwanted portions, if desired.
- Once the excess water has drained off and any trimming is done, transfer the poached egg to a plate or bowl lined with a kitchen towel or paper towel to absorb any remaining moisture.
- Repeat these steps for each poached egg you have cooked, ensuring that each one is properly removed from the water.
Removing the poached egg from the water can be a delicate process to maintain its shape and prevent any damage. Using a slotted spoon or mesh skimmer allows you to lift the egg out gently while letting any excess water drain away.
With the poached egg safely removed, it’s time to move on to the final step: serving and enjoying your delicious creation!
Step 7: Serving and enjoying
Congratulations! You have successfully poached your egg on a stovetop. Now, it’s time to serve and enjoy your delicious creation. Follow these steps to present your poached egg to perfection:
- Prepare a plate or dish for serving. You can use a warm plate or line it with your favorite base, such as toast, English muffins, or a bed of greens.
- Gently transfer the poached egg from the towel-lined plate to your prepared serving dish. Be careful not to break the delicate yolk as you move the egg.
- Season the poached egg with a pinch of salt and freshly ground black pepper, if desired. You can also garnish it with chopped herbs, such as chives or parsley, for an added touch of flavor and visual appeal.
- If you’re serving the poached egg as a standalone dish, it’s now ready to be enjoyed as is. The silky, runny yolk pairs beautifully with a variety of flavors and textures. However, if you’re using the poached egg as a topping, carefully place it onto your desired base.
- Get creative with your poached egg! You can serve it on a bed of sautéed spinach, topped with hollandaise sauce for a classic Eggs Benedict. Or you can place it on avocado toast or a salad for a nutritious and satisfying meal. The possibilities are endless!
- Once you’ve served your poached egg, it’s best to enjoy it right away while the yolk is still warm and runny. Cut into the egg, allowing the yolk to flow out and mix with the other ingredients on your plate.
Remember, the joy of poached eggs is in the combination of textures and flavors. The soft, delicate egg white contrasts with the creamy, rich yolk, creating a delightful culinary experience.
Now that you’ve mastered the art of poaching an egg on a stovetop, it’s time to savor every delicious bite and impress your family and friends with your newfound skills. Enjoy!
Frequently Asked Questions about How To Poach An Egg On Stove Top
Was this page helpful?
At Storables.com, we guarantee accurate and reliable information. Our content, validated by Expert Board Contributors, is crafted following stringent Editorial Policies. We're committed to providing you with well-researched, expert-backed insights for all your informational needs.




0 thoughts on “How To Poach An Egg On Stove Top”