
Articles
How To Make Bread On Stove Top
Modified: October 27, 2024
Learn how to make delicious homemade bread on your stove top with this easy-to-follow step-by-step guide. Find articles and tips on perfecting your bread-making skills.
(Many of the links in this article redirect to a specific reviewed product. Your purchase of these products through affiliate links helps to generate commission for Storables.com, at no extra cost. Learn more)
Introduction
Welcome to the world of homemade bread! There’s nothing quite like the aroma of fresh-baked bread wafting through your kitchen. While baking bread in the oven is a common method, did you know that you can also make delicious bread right on your stove top? This alternative method is great for those times when you don’t have access to an oven or simply want to try something different.
In this article, we will guide you through the process of making bread on the stove top. It’s a wonderful way to enjoy the satisfaction of baking your own bread without the need for special equipment or lengthy baking times. So let’s dive in and discover how to whip up a delightful loaf of stove top bread!
Key Takeaways:
- Enjoy the satisfaction of baking homemade bread on your stove top with simple equipment and ingredients. Experiment with flavors and shapes to create delightful loaves and lasting memories.
- Overcome challenges and perfect your stove top bread baking skills with troubleshooting tips. Embrace the art of bread making, create a delightful aroma, and share the joy of homemade bread with loved ones.
Read more: How To Make A Stove Top Distiller
Choosing the Right Equipment
Before you begin making bread on the stove top, it’s important to gather the right equipment. While you don’t need any specialized tools, a few key items will make the process easier and more efficient.
1. Stove Top Pot: For stove top bread, you’ll need a heavy-bottomed pot with a lid. A cast iron Dutch oven or a stainless steel pot with a tight-fitting lid works best. Choose a pot that is appropriate in size for the amount of bread you plan to make.
2. Mixing Bowl: You’ll need a large mixing bowl to combine your ingredients and knead the dough. A stainless steel or plastic bowl works well. Make sure it’s deep enough to accommodate the rising dough.
3. Wooden Spoon or Spatula: A sturdy wooden spoon or spatula is essential for mixing the ingredients together. The wooden utensil helps to distribute and incorporate the ingredients evenly.
4. Bench Scraper or Pastry Cutter: A bench scraper or pastry cutter is useful for dividing and shaping the dough. It allows you to easily cut and lift the dough without damaging it.
5. Baking Parchment Paper: While not absolutely necessary, using parchment paper can prevent the bread from sticking to the pot. It also makes it easier to transfer the dough into the hot pot.
6. Oven Mitts or Heatproof Gloves: Since you’ll be working with a hot pot, it’s important to protect your hands. Use oven mitts or heatproof gloves to handle the pot and remove the lid during baking.
7. Cooling Rack: Once your bread is baked, you’ll need a cooling rack to prevent the bottom from becoming soggy. The rack allows air to circulate around the bread, helping it to cool uniformly.
Now that you have the right equipment, you’re ready to gather your ingredients and start creating your delicious stove top bread.
Gathering Ingredients
When it comes to making bread on the stove top, the ingredients are simple and straightforward. Here’s what you’ll need to gather:
1. Flour: Start with all-purpose flour for a basic bread recipe. You can also experiment with different types of flour like whole wheat or bread flour to add extra flavor and texture.
2. Yeast: Active dry yeast is a common choice for bread making. It’s important to check the expiration date to ensure that the yeast is fresh and active.
3. Water: You’ll need lukewarm water to activate the yeast and bring the dough together. The temperature should be around 110°F (43°C) to create an ideal environment for the yeast to bloom.
4. Salt: Salt enhances the flavor in bread and helps to regulate the yeast’s activity. Use fine sea salt or kosher salt for best results.
5. Sugar or Honey: A small amount of sugar or honey is added to the water and yeast mixture to provide food for the yeast. It helps to activate the yeast and promote fermentation.
6. Optional Additions: You can also add various ingredients to enhance the flavor and texture of your bread. This could include herbs, spices, grated cheese, nuts, dried fruits, or seeds. Be creative and experiment with different combinations.
Remember, the quality of your ingredients will impact the final result of your bread. Fresh flour and yeast, as well as good-quality salt and water, will contribute to a delicious homemade loaf.
Once all your ingredients are gathered, you’re ready to start mixing the dough and embarking on the bread-making journey.
Mixing the Dough
Now that you have your ingredients ready, it’s time to mix the dough for your stove top bread. Follow these steps:
- Activate the Yeast: In a small bowl, combine the lukewarm water, sugar or honey, and yeast. Stir gently to dissolve the sugar or honey and let it sit for about 5 minutes until it becomes frothy and bubbly. This indicates that the yeast is active and ready to be used.
- Combine the Dry Ingredients: In a large mixing bowl, combine the flour and salt. Make a well in the center of the flour mixture.
- Add the Yeast Mixture: Pour the activated yeast mixture into the well in the flour. Use a wooden spoon or spatula to gradually incorporate the flour into the liquid. Continue mixing until a rough dough forms.
- Knead the Dough: Transfer the dough onto a lightly floured surface. Knead the dough by pushing it away from you with the heels of your hands, then folding it back towards you. Continue kneading for about 10 minutes until the dough becomes smooth and elastic.
- Rest the Dough: Place the kneaded dough back into the mixing bowl and cover it with a clean kitchen towel or plastic wrap. Let it rest in a warm, draft-free area for about 1 to 2 hours or until it doubles in size. This is known as the first rise or proofing.
Mixing the dough is an essential step in bread making as it helps to develop the gluten and activate the yeast. The gluten gives the bread structure and elasticity, resulting in a soft and chewy texture.
With the dough mixed and ready, it’s time to let it rise and prepare the stove top for baking.
Letting the Dough Rise
After mixing the dough for your stove top bread, it’s important to let it rise. This process allows the yeast to ferment, creating air bubbles that give the bread its light and fluffy texture. Follow these steps to let your dough rise:
- Prepare the Rising Environment: Find a warm, draft-free spot in your kitchen for the dough to rise. A temperature of around 75°F (24°C) is ideal for the yeast to work its magic. You can place the covered bowl on a countertop or even in a turned-off oven.
- First Rise: Leave the dough undisturbed for about 1 to 2 hours, or until it has doubled in size. The exact time will depend on the temperature and humidity of your kitchen. Be patient and let the yeast work its magic.
- Poke Test: To check if the dough is ready, gently press your finger into the risen dough. If the indentation slowly springs back, it’s ready for the next step. If it springs back quickly, let it rise a bit longer.
- Deflate the Dough: Once the dough has doubled in size, gently punch it down to release any trapped air. This process is essential to redistribute the yeast and ensure an even rise during the second proofing.
- Second Rise: Shape the dough into a ball and place it back in the bowl. Cover it with a kitchen towel or plastic wrap and let it rise again for about 30 minutes to 1 hour. This allows the gluten to relax and the flavors to develop further.
- Final Test: To check if the dough is ready for baking, lightly press your finger into the dough. If the indentation slowly springs back, it’s ready to be shaped and cooked on the stove top.
Letting the dough rise is an essential step in bread making. It gives the bread its characteristic airy texture and allows the flavors to deepen. Once the dough has gone through its second rise, it’s time to prepare the stove top for baking.
When making bread on a stovetop, use a heavy-bottomed pan to ensure even heat distribution. Keep the heat low to prevent burning the bottom while the bread cooks through.
Read more: How To Make Espresso With Stove Top
Preparing the Stove Top
Before you start cooking your stove top bread, it’s important to properly prepare the stove top for baking. Here’s what you need to do:
- Select a Suitable Pot: Choose a heavy-bottomed pot with a tight-fitting lid. A cast iron Dutch oven or a stainless steel pot with a lid works best. The pot should be large enough to accommodate the size of your bread dough.
- Preheat the Pot: Place the empty pot (without the lid) on the stove top and preheat it over medium heat for about 10 minutes. This step ensures that the pot becomes hot and evenly distributes heat during baking.
- Add Baking Paper: While not necessary, lining the hot pot with parchment paper can prevent the bread from sticking to the bottom. This also makes it easier to remove the bread from the pot after baking.
- Place the Lid: Once the pot is hot, carefully remove it from the stove top using oven mitts or heatproof gloves. Place the lid aside and gently transfer the parchment-lined dough into the hot pot.
- Cover and Return to Heat: Cover the pot with the lid and return it to the stove top over low heat. This creates a controlled environment for the bread to bake, trapping steam and ensuring even cooking.
- Adjust the Heat: Depending on your stove, you may need to adjust the heat to maintain a constant temperature. Aim for a low to medium-low heat to prevent the bread from burning or sticking to the bottom of the pot.
By properly preparing the stove top and pot, you create an ideal baking environment for your stove top bread. Now that the stove top is ready, it’s time to shape the bread and get ready to cook it.
Shaping the Bread
Once your dough has finished its final rise, it’s time to shape it before cooking it on the stove top. Proper shaping creates a well-rounded loaf with a lovely crust. Follow these steps to shape your bread:
- Prepare Your Work Surface: Lightly flour a clean surface, such as a cutting board or countertop. Gently transfer the risen dough from the bowl onto the floured surface.
- Deflate the Dough: Using your fingertips, gently press down on the dough to deflate any large air pockets. This helps the dough to shape evenly.
- Create Surface Tension: Fold the dough in on itself, from one end to the other, to create surface tension. This helps the dough maintain its shape while rising and baking.
- Shape the Dough: Depending on your preference, you can shape the dough into a round ball or an oblong shape. To create a round loaf, tuck the edges of the dough underneath while gently rotating it in a circular motion. For an oblong shape, elongate the dough and fold the sides inward, pinching the seam to seal it.
- Place the Shaped Dough: Carefully transfer the shaped dough onto a piece of parchment paper or a lightly floured baking peel, if you have one. This makes it easier to transfer the bread into the hot pot.
- Dust with Flour: Lightly dust the top of the shaped loaf with flour. This adds a rustic touch and helps to create a beautiful crust during baking.
Shaping the dough is an important step in bread making, as it helps the bread hold its structure and results in an appealing final loaf. Now that your dough is beautifully shaped, it’s time to cook it on the stove top.
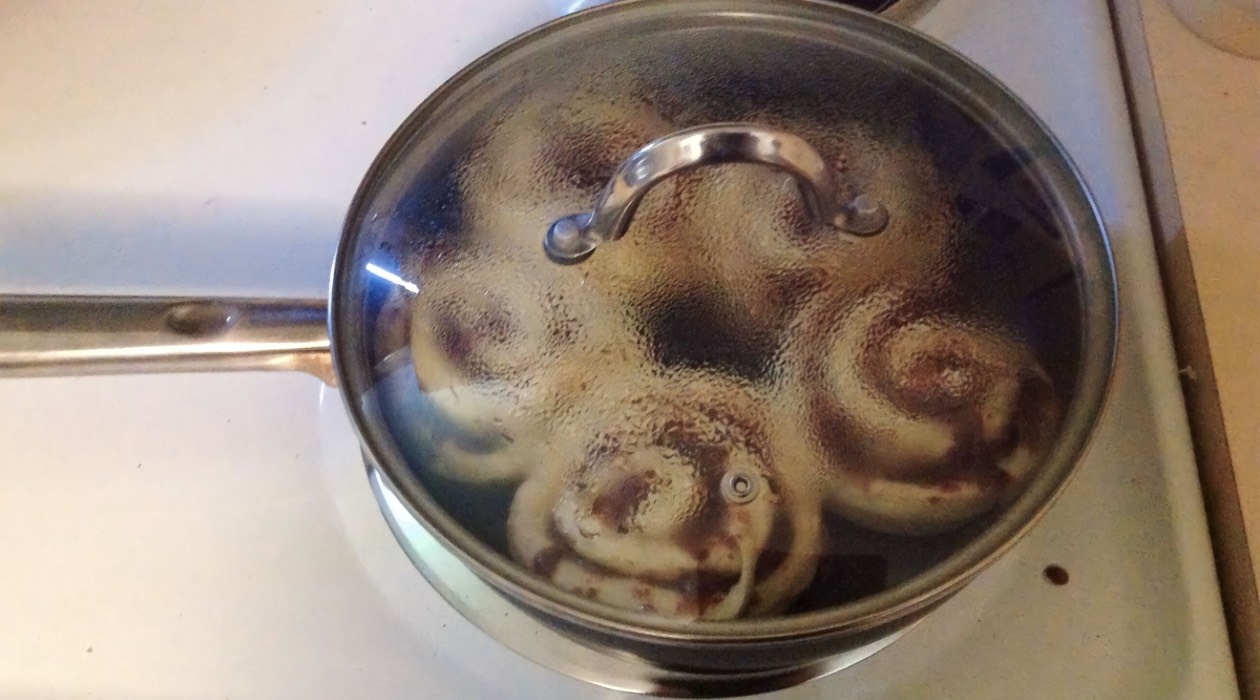
Cooking the Bread on Stove Top
Now comes the exciting part – cooking your bread on the stove top! This method creates a unique and delicious crust, and the results are truly satisfying. Follow these steps to cook your stove top bread:
- Preheat the Pot: Place the preheated pot with the lid on the stove top over low heat to maintain a consistent temperature throughout the cooking process.
- Transfer the Shaped Bread: Carefully transfer the shaped bread onto the parchment paper into the hot pot. Make sure to handle the pot with oven mitts or heatproof gloves to avoid any burns.
- Cover and Cook: Place the lid back on the pot to create a steamy environment for the bread to cook. Let the bread cook on low heat for about 20 to 30 minutes, depending on the size of your loaf. This slow cooking allows the bread to develop a crispy crust and a soft, tender interior.
- Check the Bread: After the initial cooking time, carefully remove the lid to check the progress. The bread should be golden brown and crusty on top. If needed, continue cooking for a few more minutes with the lid off to deepen the color and crisp up the crust.
- Remove and Cool: Once the bread is cooked to perfection, carefully lift it out of the pot using oven mitts or heatproof gloves. Transfer it to a cooling rack to allow it to cool completely.
Now you have a beautiful freshly baked bread that you made right on your stove top! Allow the bread to cool for at least 15 to 20 minutes before slicing into it. This helps the bread set and ensures a better texture.
Don’t be surprised if your kitchen is filled with an irresistible aroma while the bread is cooking. It truly is a delightful experience to enjoy homemade stove top bread!
Troubleshooting Tips
Baking bread on the stove top can sometimes present challenges. But fear not! Here are some troubleshooting tips to help you overcome common issues and achieve perfect results:
- Dense Bread: If your bread turns out dense and heavy, it may be due to over-kneading the dough or not allowing it to rise for a sufficient amount of time. Make sure to follow the recommended kneading and rising times, and avoid overworking the dough.
- Flat Bread: Flat bread can result from improper shaping or not allowing the dough to rise enough during the second proofing. Ensure that you give the dough enough time to rise and shape it properly to create tension on the surface.
- Burnt Bottom: If the bottom of your bread is burning, it could be because the heat is too high or the pot is not thick enough to distribute heat evenly. Adjust the stove top heat and consider placing a heat diffuser or adding a baking stone under the pot to prevent direct heat on the bottom.
- Sticky Bread: Sticky bread can be a result of using too much water or not properly coating the pot with flour or parchment paper. Be mindful of the hydration level in your dough and ensure that the pot is properly prepared to prevent sticking.
- Poor Crust: If your crust is not crispy enough, it may be because the pot was not preheated adequately or the lid was not kept on during the initial cooking process. Make sure to preheat the pot and keep the lid on throughout most of the cooking time to create a steamy environment for a crisp crust.
Remember, baking bread is a learning process, and practice makes perfect. Don’t be discouraged if you face any challenges along the way. Each attempt brings you closer to mastering the art of stove top bread baking.
Now that you have some troubleshooting tips, you’re armed with the knowledge to tackle any issues that may arise. So don’t hesitate – get into the kitchen, gather your ingredients, and start baking your own delicious stove top bread!
Read more: How To Make Biscuits On Stove Top
Conclusion
Congratulations! You have now learned how to make bread on the stove top, opening up a world of delicious homemade possibilities. Baking bread on the stove top is a fantastic alternative to using an oven, especially when you don’t have access to one or simply want to try a different cooking method.
We started by discussing the importance of choosing the right equipment and gathering the necessary ingredients. Mixing the dough and letting it rise were crucial steps in creating the perfect texture and flavor. We then explored the process of shaping the bread and preparing the stove top for cooking. Finally, we shared troubleshooting tips to help you overcome any challenges you may encounter along the way.
Remember, making bread on the stove top is an art form that requires practice and patience. Each batch will teach you something new and bring you closer to becoming a master bread baker. So don’t be afraid to experiment with different flavors, shapes, and techniques.
The joy of homemade bread goes beyond its incredible taste and aroma. It brings people together, warms the heart, and creates lasting memories. So gather your loved ones, share your stove top bread creations, and enjoy the simple pleasure of breaking bread together.
Now that you have all the knowledge and guidance, it’s time to put it into action. So roll up your sleeves, feel the dough in your hands, and embark on your stove top bread baking adventure. Happy baking!
Frequently Asked Questions about How To Make Bread On Stove Top
Was this page helpful?
At Storables.com, we guarantee accurate and reliable information. Our content, validated by Expert Board Contributors, is crafted following stringent Editorial Policies. We're committed to providing you with well-researched, expert-backed insights for all your informational needs.


0 thoughts on “How To Make Bread On Stove Top”