Articles
How To Cover Countertops With Contact Paper
Modified: December 7, 2023
Learn how to easily transform your countertops with contact paper in this comprehensive step-by-step guide. Enhance the look of your kitchen or bathroom with our helpful articles.
(Many of the links in this article redirect to a specific reviewed product. Your purchase of these products through affiliate links helps to generate commission for Storables.com, at no extra cost. Learn more)
Introduction
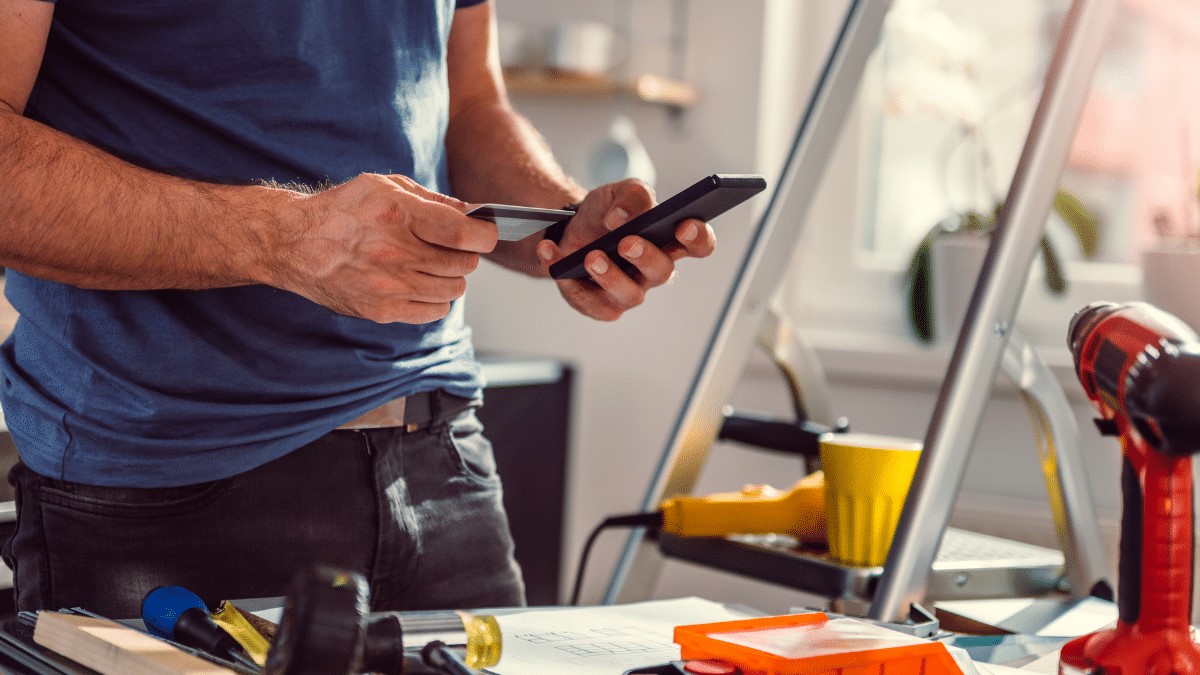
If you’re looking to give your kitchen or bathroom a fresh new look without the hassle and expense of replacing your countertops, contact paper might just be the solution you’re looking for. Contact paper is a self-adhesive material that can be easily applied to a variety of surfaces, including countertops, to mimic the appearance of more expensive materials like granite or marble.
In this article, we’ll explore the pros and cons of using contact paper for countertops, the different types available, and provide you with step-by-step instructions on how to apply it for a professional-looking finish. Whether you’re a DIY enthusiast on a tight budget or simply looking for a temporary makeover for your countertops, contact paper can offer a cost-effective and versatile solution.
Before we dive into the details, it’s essential to understand that while contact paper can transform the look of your countertops, it is not as durable or long-lasting as natural stone or solid surface materials. However, with proper application and maintenance, contact paper can provide a temporary solution that can withstand everyday use and enhance the aesthetics of your space.
Now, let’s take a closer look at the advantages and disadvantages of using contact paper for countertops.
Key Takeaways:
- Contact paper offers an affordable, easy-to-install, and versatile solution for transforming countertops with a wide range of designs. While not as durable as natural stone, it provides a cost-effective way to upgrade your space.
- Proper preparation, precise application, and regular maintenance are essential for achieving a professional-looking finish with contact paper. It’s a temporary, budget-friendly option suitable for those seeking a changeable design alternative.
Pros of using contact paper for countertops
Contact paper offers several benefits when it comes to covering countertops. Here are some of the key advantages:
- Affordability: One of the biggest advantages of using contact paper for countertops is its affordability. Compared to the cost of buying and installing new countertops, contact paper is a much more budget-friendly option. It allows you to achieve the look of expensive materials without the hefty price tag.
- Easy installation: Contact paper is designed to be user-friendly and easy to install. With a little preparation and the right tools, you can apply it to your countertops in a matter of hours. This makes it a great option for those who enjoy DIY projects or who want to quickly transform the appearance of their kitchen or bathroom.
- Variety of designs: Contact paper comes in a wide range of designs, patterns, and colors. Whether you want to mimic the look of natural stone, wood, or even abstract designs, you’ll find a contact paper that suits your style and complements your existing decor. This versatility allows you to personalize your countertops and create a unique look for your space.
- Removable and reversible: Unlike permanent countertop solutions, contact paper is removable, which means you can change the look whenever you want. If you grow tired of your current design or want to try something different, simply peel off the contact paper and replace it with a new one. This flexibility makes it an excellent choice for renters or anyone who likes to change their home’s aesthetic frequently.
- Easy to clean: Contact paper is relatively easy to clean and maintain. Most modern contact papers feature a water-resistant and wipeable surface, making it simple to remove spills and stains with a damp cloth or mild cleaning solution. However, it’s important to avoid using abrasive cleaners that could damage the contact paper’s surface.
With these advantages in mind, using contact paper for countertops can be a cost-effective and versatile way to upgrade the look of your kitchen or bathroom. It offers a wide array of design options, easy installation, and the ability to change your countertops’ appearance whenever you desire.
Cons of using contact paper for countertops
While there are many benefits to using contact paper for countertops, it’s important to consider the potential drawbacks before making a decision. Here are some of the cons associated with using contact paper:
- Durability: Contact paper is not as durable as natural stone or solid surface materials. It can be prone to scratches, cuts, and peeling, especially in high-traffic areas or with heavy use. While contact paper can withstand everyday wear and tear, it may not hold up as well in a busy kitchen or bathroom environment.
- Difficult to repair: If the contact paper gets damaged or peels off in certain areas, it can be challenging to repair or replace. While some minor imperfections can be disguised, more significant damage may require removing the entire sheet of contact paper and starting from scratch. This can be time-consuming and may result in additional costs if you need to purchase a new roll of contact paper.
- Moisture resistance: While most contact papers have some level of water resistance, extended exposure to moisture can cause it to peel or warp. Therefore, it’s important to avoid placing contact paper in areas that frequently come into contact with water, such as near sinks or dishwashers. Additionally, it’s crucial to wipe up any spills promptly to prevent water from seeping underneath the contact paper and causing damage.
- Limited heat resistance: Contact paper is not highly heat resistant, so it’s essential to use caution when placing hot pans or appliances directly on the surface. Heat can cause the adhesive to weaken or the contact paper to warp. Always use heat-resistant pads or trivets to protect the contact paper from heat sources.
- Not suitable for all countertops: Contact paper is best suited for smooth and flat surfaces. It may not adhere properly or create a seamless finish on uneven or textured countertops. Before applying contact paper, ensure your countertops are clean, dry, and in good condition to achieve the best results.
While contact paper can offer a cost-effective and attractive alternative to traditional countertops, it’s important to consider its limitations. If you have a busy household or require countertops that can withstand heavy use, contact paper may not be the ideal long-term solution. However, if you’re looking for a temporary or budget-friendly option, contact paper can still provide a significant visual upgrade to your countertops.
Types of contact paper for countertops
When it comes to contact paper for countertops, you’ll find a wide variety of options to choose from. Each type offers different patterns, textures, and finishes, allowing you to achieve the desired look for your space. Here are some common types of contact paper for countertops:
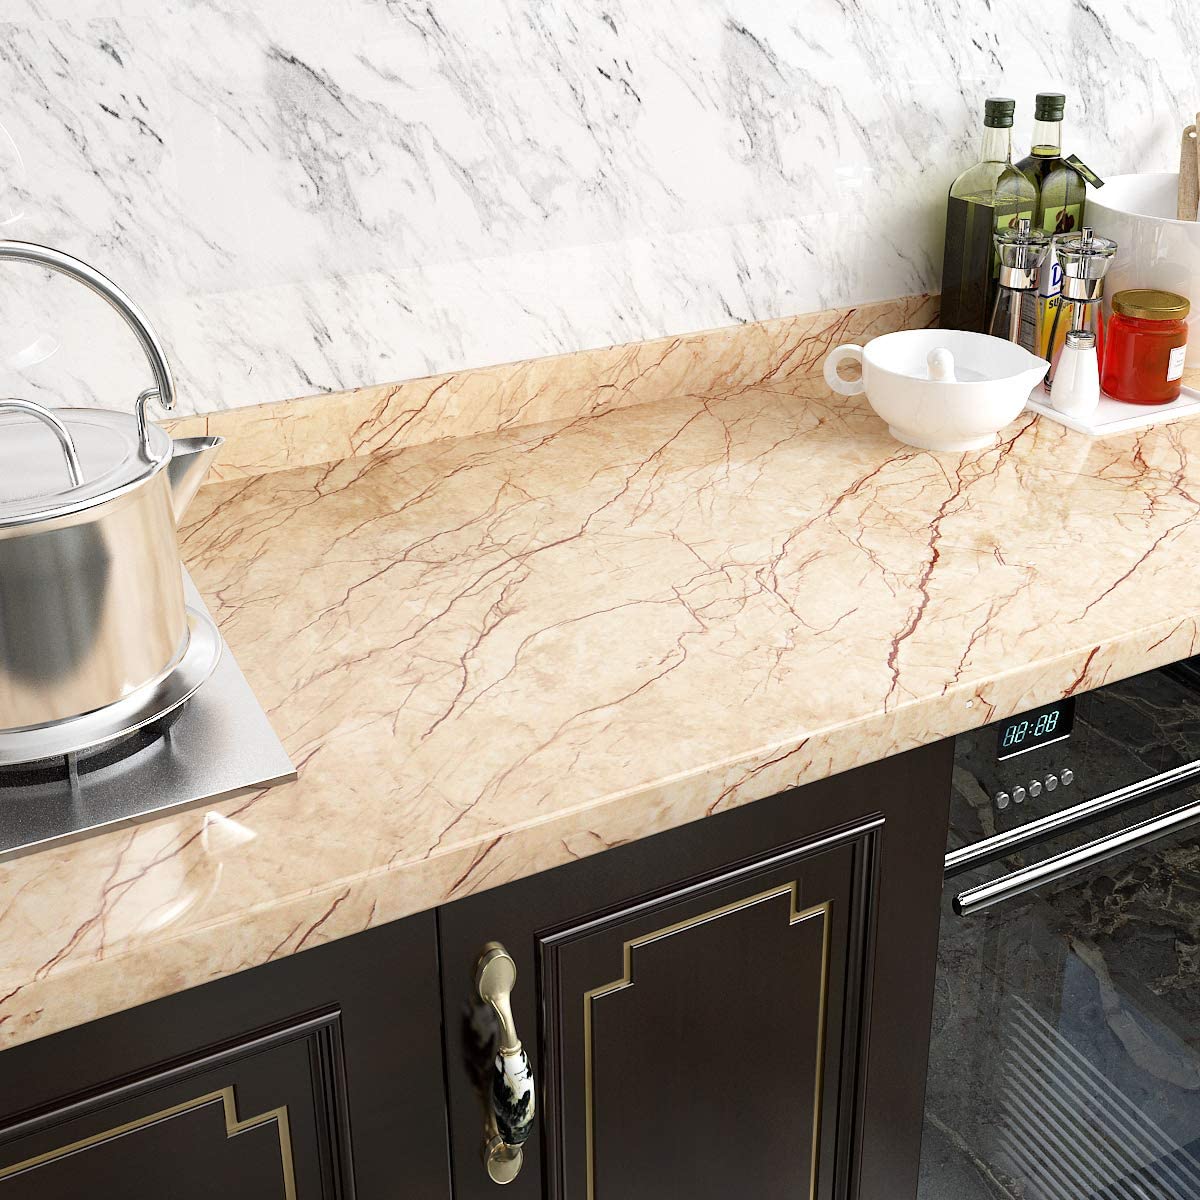
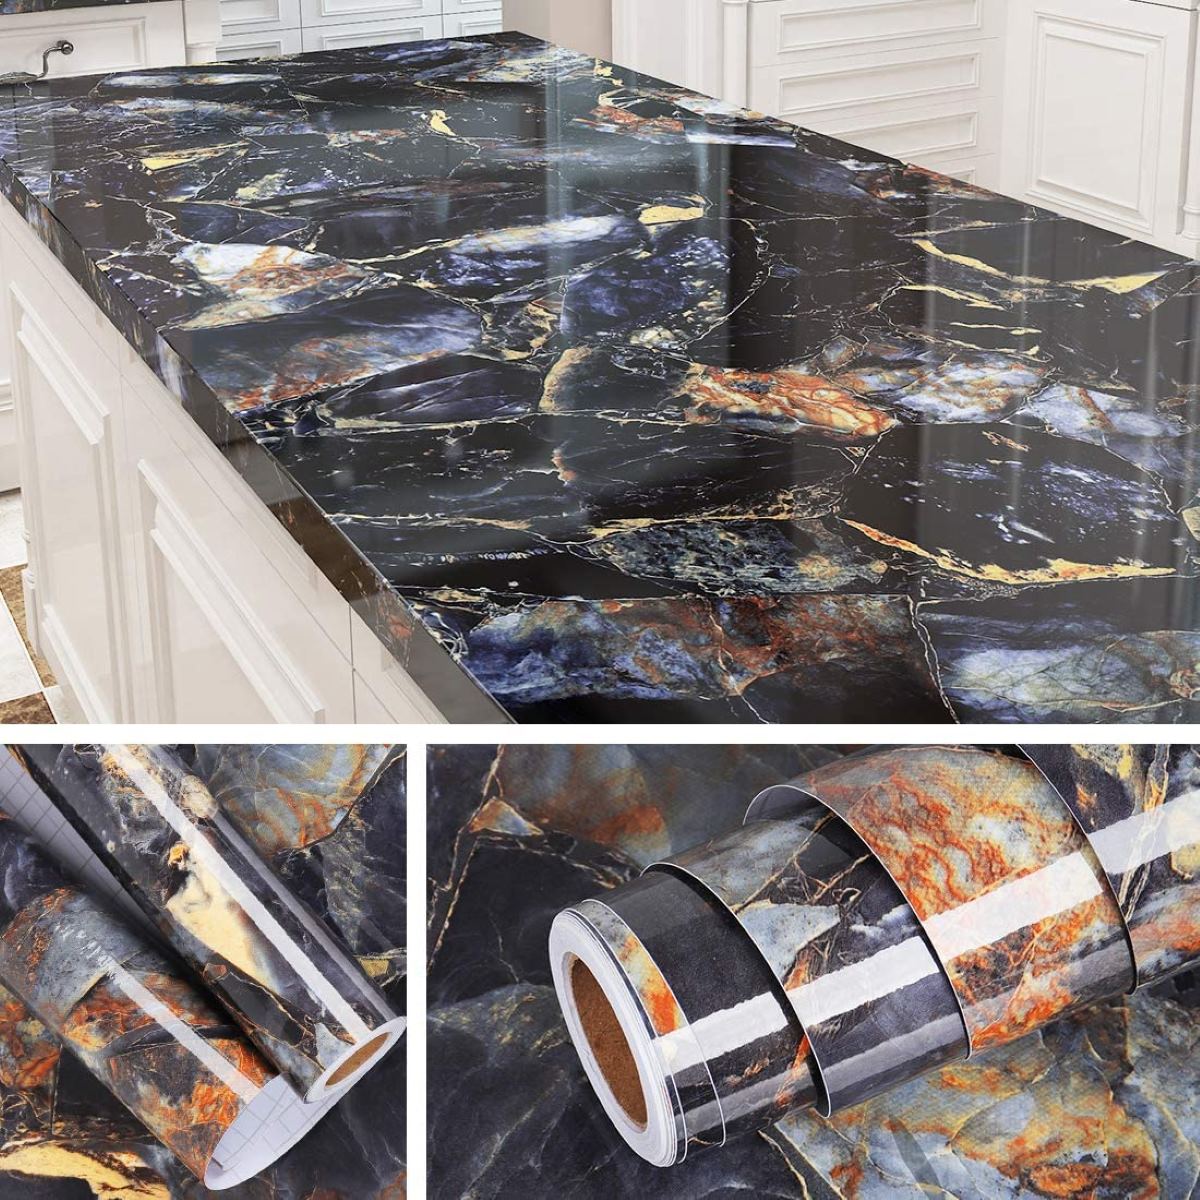
- Faux Marble: Faux marble contact paper is a popular choice for those looking to achieve an elegant and luxurious look. It mimics the veining and patterns found in natural marble, creating a sophisticated aesthetic without the cost and maintenance associated with real marble.
- Faux Granite: Faux granite contact paper provides the appearance of natural granite, complete with its distinctive speckles and textures. It’s a great option for adding a touch of elegance and modernity to your countertops without the higher price tag.
- Wood Grain: Wood grain contact paper offers a warm and organic look, mimicking the natural grain and texture of different wood species. It’s a popular choice for adding a rustic or farmhouse style to your countertops or creating a cozy atmosphere in your kitchen or bathroom.
- Abstract Designs: Abstract designs contact paper offers a more artistic and contemporary look. It features unique patterns, geometric shapes, or color gradients that can add a bold and eye-catching element to your countertops.
- Patterned: Patterned contact paper comes in various styles, including floral prints, stripes, dots, or even animal prints. It allows you to showcase your personality and personal taste while adding visual interest to your countertops.
Additionally, contact paper is available in different finishes, such as gloss or matte. The finish you choose can affect the overall appearance and feel of your countertops. Glossy finishes tend to create a polished and reflective surface, while matte finishes provide a more subtle and understated look.
Before purchasing contact paper, consider the existing color scheme and style of your kitchen or bathroom. Look for contact paper that complements your overall design aesthetic and enhances the visual appeal of your space.
Remember, when choosing contact paper for countertops, quality is essential. Opt for durable and high-quality contact paper that is specifically designed for use on countertops. This ensures that it can withstand regular use and maintain its appearance over time.
By selecting the right type and style of contact paper, you can transform your countertops and create a stunning focal point in your kitchen or bathroom.
Preparing the countertops for contact paper
Properly preparing your countertops before applying contact paper is crucial for achieving a smooth and long-lasting finish. Here are the steps to follow when preparing your countertops:
- Clean the countertops: Start by thoroughly cleaning your countertops to remove any dirt, grease, or residue. Use a mild cleanser or dish soap and water to wipe down the surface. Make sure to dry the countertops completely before proceeding.
- Remove any obstacles: Take the time to clear the countertops of any items, including appliances, utensils, or decorative objects. This will make the cleaning and application process easier and ensure that the contact paper adheres properly to the surface.
- Repair any damages: Inspect your countertops for any chips, cracks, or uneven surfaces. If you notice any imperfections, consider repairing them before applying the contact paper. Fill in any holes or cracks with a suitable filler and sand down any uneven areas to create a smooth surface.
- Sand the countertops (if necessary): If your countertops have a glossy or shiny finish, it’s recommended to lightly sand the surface to create a better adhesive bond for the contact paper. Use a fine-grit sandpaper and gently sand the entire countertop surface in a circular motion. Wipe away any dust or debris with a clean cloth.
- Prime the countertops (optional): Depending on the material of your countertops and the type of contact paper you’re using, you may want to consider applying a primer before applying the contact paper. Priming can help ensure better adhesion and prevent any discoloration or damage to the original surface. Consult the instructions on your contact paper package or consult with a professional if you’re unsure whether priming is necessary.
- Measure and cut the contact paper: Before applying the contact paper, carefully measure the dimensions of your countertops. Leave a small margin to ensure that the contact paper covers the entire surface. Use a ruler, measuring tape, and a sharp utility knife to cut the contact paper to the appropriate size and shape.
By properly cleaning, repairing, and preparing your countertops, you’ll create an optimal surface for the contact paper to adhere to. This will help ensure a smooth and seamless application, giving your countertops a professional and polished appearance.
Make sure to thoroughly clean and dry the countertop before applying the contact paper to ensure a smooth and long-lasting application. Any dirt or moisture left on the surface can cause the paper to bubble or peel over time.
Read more: How To Cover Ugly Countertops
Applying the contact paper to the countertops
Once you have prepared your countertops, it’s time to apply the contact paper. Follow these steps for a successful application:
- Start with a clean surface: Ensure that your countertops are clean and dry before beginning the application process. Any residue or moisture on the surface can hinder the contact paper’s adherence.
- Peel back a small portion: Begin by peeling back a small portion of the backing paper from the contact paper. Start at one edge or corner to make it easier to align with the edge of the countertop.
- Align and smooth: Align the exposed edge of the contact paper with the edge of the countertop and carefully press it onto the surface. Slowly and gradually peel away more of the backing paper as you smooth down the contact paper with a squeegee or a credit card. Apply even pressure to ensure that there are no air bubbles or wrinkles.
- Continue with the application: Gradually continue to peel away the backing paper while pressing and smoothing the contact paper onto the countertop. Work in small sections, taking care to maintain proper alignment and smoothness. If you encounter any air bubbles, gently lift the contact paper and smooth it down again.
- Trim excess contact paper: Once you have applied the contact paper to the entire surface, use a sharp utility knife or scissors to trim any excess paper along the edges of the countertops. Take your time and use a straight edge as a guide for clean and precise cuts.
- Seal the edges (optional): If desired, you can further enhance the longevity and appearance of the contact paper by sealing the edges. Apply a clear silicone caulk or adhesive along the edges of the contact paper to create a strong bond and prevent water or dirt from seeping underneath.
Remember to take your time during the application process to ensure a smooth and professional-looking finish. If you make a mistake or encounter any difficulties, you can carefully peel off the contact paper and start over. It’s important to work patiently and methodically for the best results.
Once you’ve successfully applied the contact paper to your countertops, step back and admire the transformation. You’ll be amazed at the visual impact it can make in your kitchen or bathroom!
Tips for a smooth and professional-looking finish
When applying contact paper to your countertops, following these helpful tips will ensure a smooth and professional-looking finish:
- Measure accurately: Take precise measurements of your countertops before cutting the contact paper. Double-check your measurements to ensure that you have the right size and avoid any wastage or mistakes.
- Use a clean work surface: Keep your work area clean and free from dust, debris, and any liquids that could interfere with the application process. A clean surface will make it easier to handle the contact paper and achieve a seamless finish.
- Work in small sections: Instead of trying to cover the entire countertop at once, work in small sections. This will make it easier to handle the contact paper and reduce the likelihood of wrinkles or air bubbles forming.
- Smooth out air bubbles: If you encounter air bubbles while applying the contact paper, gently lift that section and smooth it out with a squeegee or credit card. Start from the center and work your way outwards to eliminate any trapped air.
- Trim with precision: Take your time when trimming the excess contact paper along the edges of the countertops. Use a sharp utility knife or scissors and a straight edge as a guide to ensure clean and straight cuts.
- Avoid stretching the contact paper: When applying the contact paper, be careful not to stretch or pull it too tightly. Stretching can cause the paper to warp or distort, resulting in an uneven and unprofessional appearance.
- Smooth edges with a heat gun (optional): If you’re having trouble getting the contact paper to adhere to the curved edges or corners of the countertops, you can use a heat gun on a low setting to warm the contact paper slightly. This will make it more pliable and easier to smooth down.
- Take breaks if needed: Applying contact paper to countertops can be time-consuming, so don’t hesitate to take breaks if needed. Working with a clear and focused mind will help you achieve better results.
- Practice patience: Patience is key when applying contact paper. Take your time, work carefully, and don’t rush the process. The extra effort will result in a more professional-looking finish.
By following these tips, you’ll be able to achieve a smooth and seamless finish when applying contact paper to your countertops. A little attention to detail and precision will go a long way in transforming the appearance of your kitchen or bathroom.
Maintenance and care for contact paper countertops
While contact paper can provide a cost-effective and attractive solution for your countertops, proper maintenance and care are essential to ensure its longevity and appearance. Here are some tips to help you maintain your contact paper countertops:
- Regular cleaning: Clean your contact paper countertops regularly using a mild cleaning solution and a soft cloth or sponge. Avoid harsh chemicals or abrasive scrubbers that could damage the surface. Wipe up spills and stains promptly to prevent them from seeping into the contact paper.
- Avoid direct heat: Contact paper is not highly heat-resistant, so it’s important to use caution with hot pans, pots, or appliances. Always use trivets or heat-resistant pads to protect the contact paper from direct heat and prevent warping or damage.
- Prevent moisture damage: While contact paper is somewhat water-resistant, extended exposure to moisture can cause it to peel or warp. Wipe up any splashes or spills immediately and avoid placing wet objects directly on the contact paper surface.
- Avoid cutting directly on the surface: Sharp knives and utensils can leave scratches or cuts on contact paper countertops. Always use a cutting board or protective surface when working with sharp objects to prevent damage to the contact paper.
- Use caution with cleaning products: When using cleaning products on your countertops, ensure that they are safe for use on contact paper. Some harsh chemicals or abrasive cleaners can damage or discolor the contact paper surface. Stick to mild, non-abrasive cleaners recommended for use on delicate surfaces.
- Avoid excessive friction: Be mindful of abrasive materials or rough scrubbing that can cause friction on the contact paper surface. Excessive friction can lead to scratches or wear, diminishing the appearance of the countertops. Use gentle cleaning techniques and avoid using rough sponges or abrasive scrubbers.
- Maintain a clean and dry environment: Excessive humidity or moisture in the kitchen or bathroom can impact the adhesive on contact paper. Ensure that the surrounding environment remains clean and dry to prevent the contact paper from peeling or lifting.
- Inspect for damage: Regularly inspect your contact paper countertops for any signs of damage, such as peeling edges or bubbles. If you notice any issues, address them promptly to prevent further damage or deterioration.
- Replacement when necessary: Contact paper countertops may eventually show signs of wear and tear, especially in high-traffic areas. If the contact paper becomes significantly damaged or starts peeling, it may be time to replace it. Fortunately, contact paper is relatively inexpensive and easy to remove, allowing you to refresh your countertops as needed.
By following these maintenance tips, you can keep your contact paper countertops looking clean and attractive for an extended period. With proper care and attention, you’ll be able to enjoy the benefits of your contact paper transformation for years to come.
Removing contact paper from countertops
If you decide to change the look of your countertops or if the contact paper becomes damaged or worn out, you may need to remove it. Here are the steps to safely and effectively remove contact paper from countertops:
- Gather the necessary supplies: To remove the contact paper, you will need a few supplies, including a utility knife, a hairdryer or heat gun, a scraper or credit card, and a cleaning solution.
- Start with a corner: Locate a corner or edge of the contact paper and gently peel it back. Start slowly to avoid tearing the contact paper or damaging the surface of the countertop.
- Apply heat (if necessary): If the contact paper is not coming off easily, use a hairdryer or heat gun on a low setting to warm the adhesive. Glide the heat source back and forth over the contact paper, keeping it a few inches away from the surface. The heat helps loosen the adhesive and makes it easier to remove.
- Peel and scrape: As you apply heat, continue to peel back the contact paper, pulling it away from the countertop at a 180-degree angle. Use a scraper or credit card to gently lift the contact paper and remove any residual adhesive. Take your time and be careful not to scratch or damage the surface of the countertop.
- Clean the surface: Once the contact paper is removed, clean the countertop surface with a mild cleaning solution and a soft cloth or sponge. Remove any remaining adhesive residue by gently rubbing it with a cleaning solution or using a dedicated adhesive remover. Be cautious not to use any abrasive cleaners that could damage the countertop’s finish.
- Dry and inspect: After cleaning, ensure that the countertop is completely dry. Inspect the surface for any leftover adhesive or damage. If necessary, use a solvent or adhesive remover to carefully remove any stubborn residue. Take care not to use a product that could harm the countertop material.
- Prepare for the next step: Once the countertop is clean and free of adhesive, you can proceed with any further renovations or apply a new covering if desired.
By following these steps, you can safely remove contact paper from your countertops without causing damage. Taking the time to remove the contact paper properly will leave you with a clean and smooth surface, ready for the next design choice.
Read more: How To Cover Countertops In A Rental
Conclusion
Contact paper provides a convenient and cost-effective way to update the look of your countertops without the need for major renovations. It offers a wide range of design options, easy installation, and the flexibility to change your countertops’ appearance as desired. While it may not be as durable or long-lasting as natural stone or solid surface materials, contact paper can still provide a significant visual upgrade to your kitchen or bathroom.
Throughout this article, we’ve explored the pros and cons of using contact paper for countertops, the different types available, and provided step-by-step instructions on how to prepare and apply it for a professional-looking finish. We’ve also discussed tips for maintaining and caring for contact paper countertops, as well as how to properly remove it when necessary.
It’s important to remember that contact paper is a temporary solution, best suited for those on a budget, renters, or individuals looking for an easily changeable design option. If you have a busy household or require countertops that can withstand heavy use, contact paper may not be the ideal long-term choice. However, with proper application and maintenance, contact paper can transform the look of your countertops and provide an attractive and budget-friendly alternative.
Before embarking on your contact paper countertop project, take the time to explore different design options, measure your countertops accurately, and ensure proper preparation and application techniques. By doing so, you’ll increase the likelihood of achieving a smooth, professional-looking finish that enhances the overall aesthetics of your space.
Remember to follow the provided tips for maintenance and care to keep your contact paper countertops looking their best. Regular cleaning, avoiding excessive heat and moisture, and taking precautions to prevent damage will help extend the lifespan and beauty of your countertops.
Whether you choose a faux marble, granite, or wood grain design, contact paper can be a versatile and budget-friendly solution to transform your countertops. Enjoy the process of creating a fresh and stylish look in your kitchen or bathroom with the help of contact paper.
Frequently Asked Questions about How To Cover Countertops With Contact Paper
Was this page helpful?
At Storables.com, we guarantee accurate and reliable information. Our content, validated by Expert Board Contributors, is crafted following stringent Editorial Policies. We're committed to providing you with well-researched, expert-backed insights for all your informational needs.
0 thoughts on “How To Cover Countertops With Contact Paper”