Articles
What Paint To Use On Countertops
Modified: February 23, 2024
Discover the best articles on what paint to use on countertops. Find expert tips and advice for achieving a beautiful and durable finish.
(Many of the links in this article redirect to a specific reviewed product. Your purchase of these products through affiliate links helps to generate commission for Storables.com, at no extra cost. Learn more)
Introduction
Countertops play a crucial role in the overall aesthetics and functionality of a kitchen or bathroom. They are not only a practical surface for preparing meals or organizing personal items, but they also contribute to the overall design and style of the space.
However, over time, countertops can become outdated or worn out, leaving homeowners with the desire to transform their appearance without breaking the bank. One cost-effective and creative solution is painting countertops.
In this article, we will explore the different types of paint that can be used on countertops, the factors to consider when choosing the right paint, and the step-by-step process for achieving a successful painted countertop.
Whether you want to revamp your kitchen countertops, bathroom vanity, or any other surface, understanding the different paint options and following the proper techniques will help you achieve a stunning transformation.
So, if you’re ready to give your countertops a fresh and stylish look, let’s dive into the world of countertop painting!
Key Takeaways:
- Choose the right paint for your countertops based on factors like durability, heat resistance, and food safety to achieve a stunning and long-lasting finish.
- Properly prepare, prime, apply, and seal your painted countertops, and avoid harsh chemicals and prevent scratches and dents to maintain their beauty and durability.
Read more: What Paint To Use On Bathroom Countertops
Overview: Types of Paint for Countertops
When it comes to painting countertops, choosing the right type of paint is essential for achieving durable and long-lasting results. There are several paint options available, each with its own advantages and considerations. Let’s explore some of the most common types of paint for countertops:
1. Latex paint:
Latex paint is a popular choice for painting countertops due to its versatility and wide range of available colors. It is water-based, which means it dries quickly and has low levels of toxicity. Latex paint is also known for its durability and ability to withstand daily wear and tear.
2. Acrylic paint:
Similar to latex paint, acrylic paint is water-based and also offers a wide selection of colors. It provides excellent adhesion to various countertop materials, including laminate and tile. Acrylic paint is generally more resistant to moisture and staining, making it suitable for high-traffic kitchens and bathrooms.
3. Chalkboard paint:
If you want to add a unique and trendy touch to your countertops, consider using chalkboard paint. This type of paint not only transforms the surface into a functional area for writing notes and reminders, but it also provides a matte, smooth finish. Chalkboard paint works best on smooth and non-porous surfaces like laminate or metal.
Read more: What Paint To Use On Fireplace
4. Epoxy paint:
Epoxy paint is a highly durable and long-lasting option for painting countertops. It creates a hard, glossy finish that is resistant to water, chemicals, and stains. Epoxy paint is typically used on surfaces like concrete or natural stone, providing an attractive and seamless appearance.
Each type of paint has different properties, application requirements, and suitability for specific countertop materials. Consider the existing surface, desired finish, and durability when selecting the right paint for your countertop project.
Now that we have explored the various types of paint available, let’s delve into the factors you need to consider when choosing the best paint for your countertops.
Latex Paint
Latex paint is a popular choice for painting countertops due to its versatility, affordability, and wide range of available colors. It is a water-based paint that contains acrylic binders, making it durable and suitable for surfaces that require frequent cleaning and maintenance.
One of the major advantages of latex paint is its quick drying time. It typically dries to the touch within a few hours, allowing for multiple coats to be applied in a single day. This fast drying time makes it convenient for homeowners who want to complete their countertop painting project in a timely manner.
Additionally, latex paint is known for its low levels of toxicity, making it a safer option for indoor use. It emits fewer harmful fumes compared to oil-based paints, reducing the risk of health hazards during application and after the paint has dried.
Another benefit of latex paint is its ability to withstand daily wear and tear. It is resistant to chipping, cracking, and peeling, ensuring that your painted countertops will maintain their appearance over time. Latex paint is also relatively easy to clean. You can simply wipe the countertop with a mild soap and water solution, avoiding abrasive cleaning agents that may damage the paint.
When using latex paint on countertops, it is important to properly prepare the surface to ensure proper adhesion. Clean the countertop thoroughly, removing any grease, grime, or old paint. Sand the surface lightly to create a rough texture, which will help the paint adhere better. Apply a primer specifically designed for use with latex paint to promote better adhesion and enhance durability.
Once the surface is ready, you can begin applying the latex paint. Use a brush or roller for even coverage, working in small sections at a time. Allow each coat to dry completely before applying additional coats. Most latex paints require at least two coats for full coverage, but it’s best to follow the manufacturer’s instructions for the specific paint you are using.
After the final coat has dried, you can seal the countertop with a clear polyurethane topcoat for added protection. This will help protect the paint from stains, scratches, and moisture. Apply the topcoat following the manufacturer’s instructions, and allow it to dry thoroughly before using your newly painted countertops.
Overall, latex paint provides a cost-effective and durable option for painting countertops. Its quick drying time, low toxicity, and easy maintenance make it a popular choice among homeowners looking to refresh the look of their kitchen or bathroom surfaces.
Acrylic Paint
Acrylic paint is another popular choice for painting countertops due to its versatility, durability, and wide range of available colors. It is a water-based paint that contains acrylic binders, making it suitable for a variety of countertop materials, including laminate, tile, and concrete.
One of the major advantages of acrylic paint is its excellent adhesion properties. It adheres well to different surfaces, creating a strong bond that helps the paint withstand daily wear and tear. This makes it a suitable choice for high-traffic areas like kitchens and bathrooms.
In addition, acrylic paint offers good resistance to moisture and staining. It forms a protective barrier on the countertop surface, making it easier to clean and maintain. Wiping spills and stains with a mild detergent and water solution is usually sufficient to keep the painted surface looking clean and fresh.
Acrylic paint also dries relatively quickly, allowing for multiple coats to be applied in a single day. This makes the painting process more efficient, especially for those who want to complete their countertop project within a shorter time frame.
When using acrylic paint for countertops, proper surface preparation is crucial. Clean the countertop thoroughly to remove any dirt, grease, or old paint. If the surface is glossy or has a smooth texture, you may need to lightly sand it to create a rougher surface for better paint adhesion.
Using a primer formulated for use with acrylic paint is highly recommended. The primer not only helps the paint adhere better to the surface but also enhances the durability of the finished result. Apply the primer according to the manufacturer’s instructions, and allow it to dry completely before proceeding with the acrylic paint.
When applying the acrylic paint, use a brush or roller to ensure even coverage. Work in small sections, applying thin coats to prevent drips and ensure proper drying. Allow each coat to dry fully before applying additional coats. Follow the manufacturer’s instructions for the recommended number of coats and drying time.
Once the final coat has dried, it is recommended to apply a clear sealant or topcoat to enhance the durability and protection of the painted surface. The topcoat will provide an extra layer of resistance against stains, scratches, and moisture. Apply the topcoat according to the manufacturer’s instructions, and allow it to dry thoroughly before using the countertops.
Overall, acrylic paint is a versatile and durable option for painting countertops. Its adhesion properties, moisture resistance, and ease of maintenance make it a popular choice for homeowners looking to transform their kitchen or bathroom surfaces.
Chalkboard Paint
If you’re looking to add a unique and trendy touch to your countertops, consider using chalkboard paint. Chalkboard paint allows you to transform your countertops into a functional space for writing notes, reminders, or even creating artwork.
One of the major advantages of chalkboard paint is its matte, smooth finish. It provides a distinctive and stylish look that can instantly update the appearance of your kitchen or bathroom. The matte surface also helps to hide imperfections and gives the countertops a clean and modern aesthetic.
Chalkboard paint works best on smooth and non-porous surfaces such as laminate or metal. Before applying the paint, make sure the countertop is clean and free of any dirt, grease, or old paint. Sand the surface lightly to create a smooth and even texture. Apply a primer specifically designed for use with chalkboard paint to promote better adhesion and ensure long-lasting results.
Once the primer is dry, you can begin applying the chalkboard paint. Use a brush or roller to achieve even coverage, working in small sections at a time. Apply multiple coats, allowing each coat to dry completely before applying the next. Most chalkboard paints recommend at least three coats for optimal coverage.
After the final coat of chalkboard paint has dried, it is essential to condition the surface before using it as a chalkboard. To condition the surface, take a piece of chalk and rub it over the entire painted area. This will create a layer of chalk dust that will help prevent “ghosting” – the permanent marks left on the surface after erasing. Wipe off the excess chalk dust with a dry cloth or eraser.
Now, your countertops are ready to be used as a functional chalkboard surface. You can write, draw, or erase as desired. To clean the surface, simply wipe it with a damp cloth or sponge. Avoid using abrasive cleaners or materials that may scratch or damage the paint.
Keep in mind that chalkboard paint is not as durable or resistant to moisture and staining as other types of paint. It may require more frequent touch-ups and maintenance to keep the surface looking fresh. However, the versatility and creativity it offers make chalkboard paint a fun and unique option for countertop transformation.
So, unleash your imagination and bring a touch of whimsy and functionality to your countertops with chalkboard paint!
Read more: What Glue To Use On Laminate Countertops
Epoxy Paint
If you’re looking for a highly durable and long-lasting option for painting countertops, epoxy paint is an excellent choice. Epoxy paint is a two-part system that consists of a resin and a hardener. When mixed together, they create a chemical reaction that results in a hard, glossy finish.
One of the major advantages of epoxy paint is its exceptional durability. It is highly resistant to water, chemicals, stains, and scratches, making it suitable for high-traffic areas like kitchens and bathrooms. Epoxy paint provides a protective barrier that helps to extend the lifespan of your countertops.
When choosing epoxy paint for your countertops, there are a few factors that you should consider:
1. Durability:
Epoxy paint is known for its durability, but it’s important to choose a high-quality epoxy paint that is specifically formulated for countertops. Look for epoxy paints that are resistant to UV rays and yellowing over time. These features will ensure that your painted countertops maintain their appearance and durability for years to come.
2. Heat Resistance:
Countertops often come into contact with hot objects like pots, pans, and appliances. It is crucial to choose an epoxy paint that can withstand high temperatures to prevent any damage or discoloration. Look for epoxy paints that are heat-resistant and can handle the typical heat levels found in a kitchen environment.
3. Food Safety:
If you’re painting countertops in your kitchen, it is essential to choose an epoxy paint that is food-safe. Look for epoxy paints that are labeled as food-grade or non-toxic. These paints are formulated to meet safety standards and can be used on surfaces where food is prepared and served.
Read more: What Paint To Use On Mirrors
4. Application and Drying Time:
Epoxy paint requires careful preparation and application to achieve optimal results. Consider the application and drying time of the epoxy paint you choose. Some epoxy paints require multiple coats with specific drying intervals in between. It is important to follow the manufacturer’s instructions to ensure proper adhesion and a smooth finish.
5. Skill Level:
Epoxy paint application can be more challenging compared to other types of paint. It often requires meticulous surface preparation and precise mixing of the resin and hardener. If you’re not experienced in using epoxy paint, you may want to consider hiring a professional or seeking assistance to ensure a successful outcome.
By considering these factors, you can choose the right epoxy paint that meets your specific needs and ensures a durable and visually appealing finish for your countertops.
Now that we have explored the factors to consider when choosing paint for your countertops, let’s move on to the step-by-step process of painting your countertops to achieve a stunning transformation.
Durability
When it comes to painting countertops, durability is a crucial factor to consider. Countertops endure daily use, including food preparation, spills, and utensil impacts, so choosing a paint that can withstand this wear and tear is essential.
Several factors contribute to the durability of painted countertops:
1. Paint Quality:
The quality of the paint itself plays a significant role in its durability. Opt for high-quality paints specifically formulated for countertops. These paints are designed to provide better adhesion, resist chipping and peeling, and withstand regular cleaning and use.
Read more: What Paint To Use For Furniture
2. Surface Preparation:
Proper surface preparation is crucial for achieving a durable finish. Thoroughly clean the countertop and remove any grease, grime, or residues. Sand the surface lightly to create a rough texture, which helps the paint adhere better. Consider using a primer designed for use with the specific type of paint you are using, as it can improve adhesion and durability.
3. Application Technique:
The way you apply the paint can affect its durability. Follow the manufacturer’s instructions for the recommended number of coats and drying time between coats. Ensure even coverage and avoid leaving thick or uneven areas, as they can impact the paint’s longevity.
4. Topcoat or Sealant:
Applying a topcoat or sealant can provide an additional layer of protection and enhance the durability of the painted surface. Topcoats are available in various finishes, such as matte, satin, or glossy. They help resist stains, scratches, and UV damage, extending the lifespan of the painted countertops.
5. Proper Maintenance:
To maintain the durability of your painted countertops, follow proper maintenance practices. Clean the surface regularly with mild soap and water, avoiding harsh or abrasive cleaners that can damage the paint. Use cutting boards and trivets to prevent scratches and burns from hot pans or sharp utensils. Proper maintenance will help preserve the painted finish and ensure its durability over time.
When choosing the paint for your countertops, consider its durability as a critical factor. Investing in high-quality paint and following proper preparation and application techniques will help ensure your painted countertops can withstand daily use and retain their appearance for years to come.
Now that we understand the importance of durability, let’s explore another crucial factor to consider when choosing paint for your countertops: heat resistance.
Heat Resistance
Heat resistance is an important consideration when selecting paint for countertops, especially in kitchen settings where countertops often come into contact with hot objects such as pots, pans, and cooking utensils.
Not all paints can withstand high temperatures, and using a paint that is not heat resistant can lead to discoloration, scorch marks, or even the paint peeling or bubbling off the surface. Therefore, it is crucial to choose a heat-resistant paint that can withstand the heat generated in a kitchen environment.
Here are a few factors to consider when evaluating the heat resistance of a paint:
1. Paint Type:
Certain types of paint have inherently better heat resistance than others. Epoxy paints, for example, are known for their superior heat resistance and are commonly used in applications where high temperatures are expected.
2. Temperature Limitations:
Each paint product has a specific temperature limitation that indicates the maximum temperature it can withstand. When selecting paint for countertops, ensure that the temperature limit of the paint aligns with the highest temperature anticipated in your kitchen.
3. Proximity to Heat Sources:
Consider how close your countertops will be to heat sources such as stovetops or ovens. If your countertops are in close proximity to these heat sources, it is essential to choose a paint with a higher heat resistance to ensure it can handle the elevated temperatures.
4. Sealant or Topcoat:
Applying a heat-resistant sealant or topcoat can offer an additional layer of protection for your painted countertops. The sealant can help mitigate the impact of heat on the paint surface, enhancing its ability to withstand high temperatures. Be sure to choose a sealant or topcoat specifically designed for heat resistance.
5. Proper Usage:
Even with a heat-resistant paint, it is still important to use caution and employ some protective measures to prevent direct or prolonged exposure to extreme heat. Use trivets, hot pads, or cutting boards to create a barrier between hot objects and the painted surface.
By considering the heat resistance of the paint, you can ensure that your countertops remain in good condition and maintain their aesthetic appeal even when exposed to high temperatures. Remember to choose a paint that can withstand the specific heat conditions of your kitchen and, if necessary, supplement it with a heat-resistant sealant for added protection.
Now that we have covered heat resistance, let’s shift our focus to the critical factor of food safety when choosing paint for countertops.
Food Safety
When it comes to choosing paint for countertops in kitchen settings, it is crucial to prioritize food safety. Countertops are in direct contact with food preparation and serving areas, making it essential to select paints that are safe and non-toxic.
Here are some factors to consider in terms of food safety when choosing paint for your countertops:
1. Food-Grade Certification:
Look for paints that are labeled as “food-grade” or “food-safe.” These paints are specifically formulated and tested to meet safety standards for use in areas where food is prepared or served. They are designed to be non-toxic and safe for direct or incidental contact with food.
2. VOC Levels:
Volatile Organic Compounds (VOCs) are chemicals that can be emitted into the air from certain paints and coatings. When painting countertops in a kitchen, it is crucial to choose paints with low VOC content. Low or zero VOC paints minimize exposure to harmful chemicals and help maintain a healthier indoor air quality.
3. Certification and Compliance:
Ensure that the paint you choose complies with relevant regulations and industry standards for food safety. Look for paints that have been tested and certified by reputable organizations to meet safety and health requirements.
4. Curing Time:
Consider the curing time of the paint you are using. Curing is the process in which the paint fully sets and hardens. Allow the paint to cure completely before allowing direct contact with food. Follow the manufacturer’s recommended curing time to ensure the paint is fully dried and safe for food contact.
5. Maintenance and Cleaning:
Take into account the maintenance and cleaning requirements of the painted countertop. Choose paints that are easy to clean with mild soap and water, avoiding harsh cleaners that could potentially contaminate food or damage the paint surface. Proper maintenance and regular cleaning will help maintain the food safety of the painted countertops.
By considering food safety when choosing paint for countertops, you can ensure a healthy and safe environment in your kitchen. Selecting paints certified as food-grade, low in VOCs, and complying with regulations will provide peace of mind that your painted countertops are safe for food preparation and contact.
Now that we have covered the important factor of food safety, let’s move on to discussing the application and drying time of paints for countertops.
Read more: What To Use To Clean A Countertop Ice Maker
Application and Drying Time: Steps to Paint Countertops
Painting countertops is a multi-step process that requires proper preparation, application, and drying time to achieve a professional and long-lasting finish. By following the steps below, you can ensure a successful countertop painting project:
Step 1: Preparing the Surface
Start by thoroughly cleaning the countertop surface to remove any dirt, grease, or residues. Use a mild detergent or a specialized cleaner suitable for the specific countertop material. Scrub the surface with a sponge or soft cloth, and rinse it thoroughly. Allow the countertop to dry completely.
If there are any imperfections or scratches on the surface, consider filling them with a suitable filler and sanding it down to create a smooth and even surface for painting.
Step 2: Priming the Countertop
For better adhesion and durability, it is recommended to apply a primer to the countertop. Choose a primer specifically formulated for use on the countertop material and the type of paint you’ll be using. Apply an even coat of primer using a brush or roller, following the manufacturer’s instructions. Allow the primer to dry completely before proceeding to the next step.
Step 3: Applying the Paint
Begin by stirring the paint thoroughly to ensure it is well mixed. Use a brush or roller to apply the paint to the countertop surface. Work in small sections, starting from one edge and moving towards the other. Apply thin and even coats, avoiding excessive buildup that can lead to drips or an uneven finish.
For paints that require multiple coats, allow each coat to dry according to the manufacturer’s instructions before applying the next one. Take care to follow the recommended drying time to prevent smudging or disrupting the previous layer of paint. If necessary, lightly sand the surface between coats for a smooth finish.
Read more: How To Paint Over Laminate Countertops
Step 4: Sealing the Countertop
Once the final coat of paint is dry, consider applying a sealant or topcoat to protect and enhance the durability of the painted surface. Choose a sealant suitable for the type of paint you used. Apply the sealant according to the manufacturer’s instructions, using a brush or roller. Allow the sealant to dry completely before using the countertops.
Remember to follow proper safety precautions while working with paint, including adequate ventilation and the use of protective gear such as gloves and goggles.
By following these steps, you can achieve a beautifully painted countertop that transforms the look of your kitchen or bathroom. Now, let’s move on to some key tips for maintaining and caring for your newly painted countertop.
Preparing the Surface
Properly preparing the surface before painting is crucial to ensure a smooth and long-lasting finish on your countertops. Here are the steps to follow when preparing the surface:
1. Clear the Countertop
Start by removing all items, appliances, and accessories from the countertop. Clearing the surface will give you ample space to work and prevent any accidental damage to surrounding objects.
2. Clean Thoroughly
Next, thoroughly clean the countertop to remove any dirt, grease, or residues that may interfere with the paint’s adhesion. Use a mild soap or detergent and warm water to scrub the surface. Pay close attention to areas that are prone to buildup, such as around the stove or sink. Rinse the countertop thoroughly and allow it to dry completely.
Read more: How To Get Paint Off Countertops
3. Repair Any Damage
Inspect the countertop for any visible imperfections, such as scratches, chips, or dents. Depending on the material of your countertop, there are different ways to repair these damages. For laminate countertops, you can use a laminate repair paste or filler to fill in any chips or scratches. For other materials like wood or stone, consult a professional or use appropriate products and techniques to repair the damage.
4. Sand the Surface
To create a rougher texture that promotes better paint adhesion, lightly sand the countertop surface. Use a fine-grit sandpaper (around 120-180 grit) and sand in circular motions. Be gentle and avoid applying excessive pressure, as you want to create a slight roughness without damaging the surface. Sanding also helps to remove any glossy finish that might hinder paint adherence.
5. Remove Dust and Debris
After sanding, it is essential to remove any dust and debris from the countertop. Wipe the surface with a clean, damp cloth or use a vacuum cleaner with a brush attachment to eliminate all particles. Ensuring a clean and debris-free surface is crucial for a smooth and successful paint application.
By following these steps to properly prepare the surface, you create a clean and well-prepared canvas for painting your countertops. Taking the time to clean, repair, and sand will ultimately contribute to the overall quality and longevity of your finished painted countertops. Once the surface is prepared, you can proceed with priming and applying the paint for a stunning transformation.
Next, let’s explore the importance of priming your countertops before painting.
Priming the Countertop
Priming your countertop is a crucial step in the painting process as it helps to create a strong bond between the surface and the paint, resulting in a more durable and long-lasting finish. Here’s how to properly prime your countertop:
Read more: What Are Silicone Paint Brushes Used For
1. Choose the Right Primer
Select a primer specifically formulated for use on the material of your countertop and compatible with the type of paint you’ll be using. For example, if you have a laminate countertop, choose a primer designed specifically for laminate surfaces. Using the right primer ensures optimal adhesion and enhances the durability of the paint.
2. Prepare the Countertop
Ensure that the countertop surface is clean and completely dry before applying the primer. Remove any dust, debris, or residue that may interfere with the bonding of the primer. You can use a damp cloth or a vacuum cleaner with a brush attachment to ensure a clean surface.
3. Apply the Primer
Start by stirring the primer thoroughly to ensure it is well mixed. Using a brush or roller, apply an even coat of primer to the countertop surface. Work in small sections, starting from one edge and moving towards the other. Make sure the primer is applied in a thin and even layer, avoiding excessive buildup or drips.
Pay extra attention to edges and corners, ensuring that the primer is evenly applied to these areas as well. Use a brush or small foam roller to reach challenging or hard-to-reach spots.
4. Allow Proper Drying Time
Follow the manufacturer’s instructions for the recommended drying time of the primer. Typically, it takes around 2 to 4 hours for the primer to dry. However, drying times can vary depending on the specific product and environmental conditions such as temperature and humidity. Allow the primer to dry completely before proceeding to the next step.
Read more: What Paint To Use For Garage Door
5. Lightly Sand the Primer (Optional)
Once the primer is dry, you have the option to lightly sand the surface using a fine-grit sandpaper. This step can help smooth out any imperfections or brush marks, resulting in an even smoother finish when applying the paint. Be gentle and use short, light strokes while sanding to avoid removing too much of the primer.
6. Remove Dust
After sanding (if applicable), remove any dust or debris from the countertop surface. Use a clean, damp cloth or a vacuum cleaner with a brush attachment to ensure the primer is free from any particles that could affect the final paint application.
By properly priming your countertop, you create a strong foundation for the paint and enhance its adhesion and durability. The primer helps to prevent the paint from chipping, peeling, or discoloring, ensuring a beautiful and long-lasting transformation of your countertops.
Now that the countertop is primed and ready, it’s time to apply the paint and bring your vision to life.
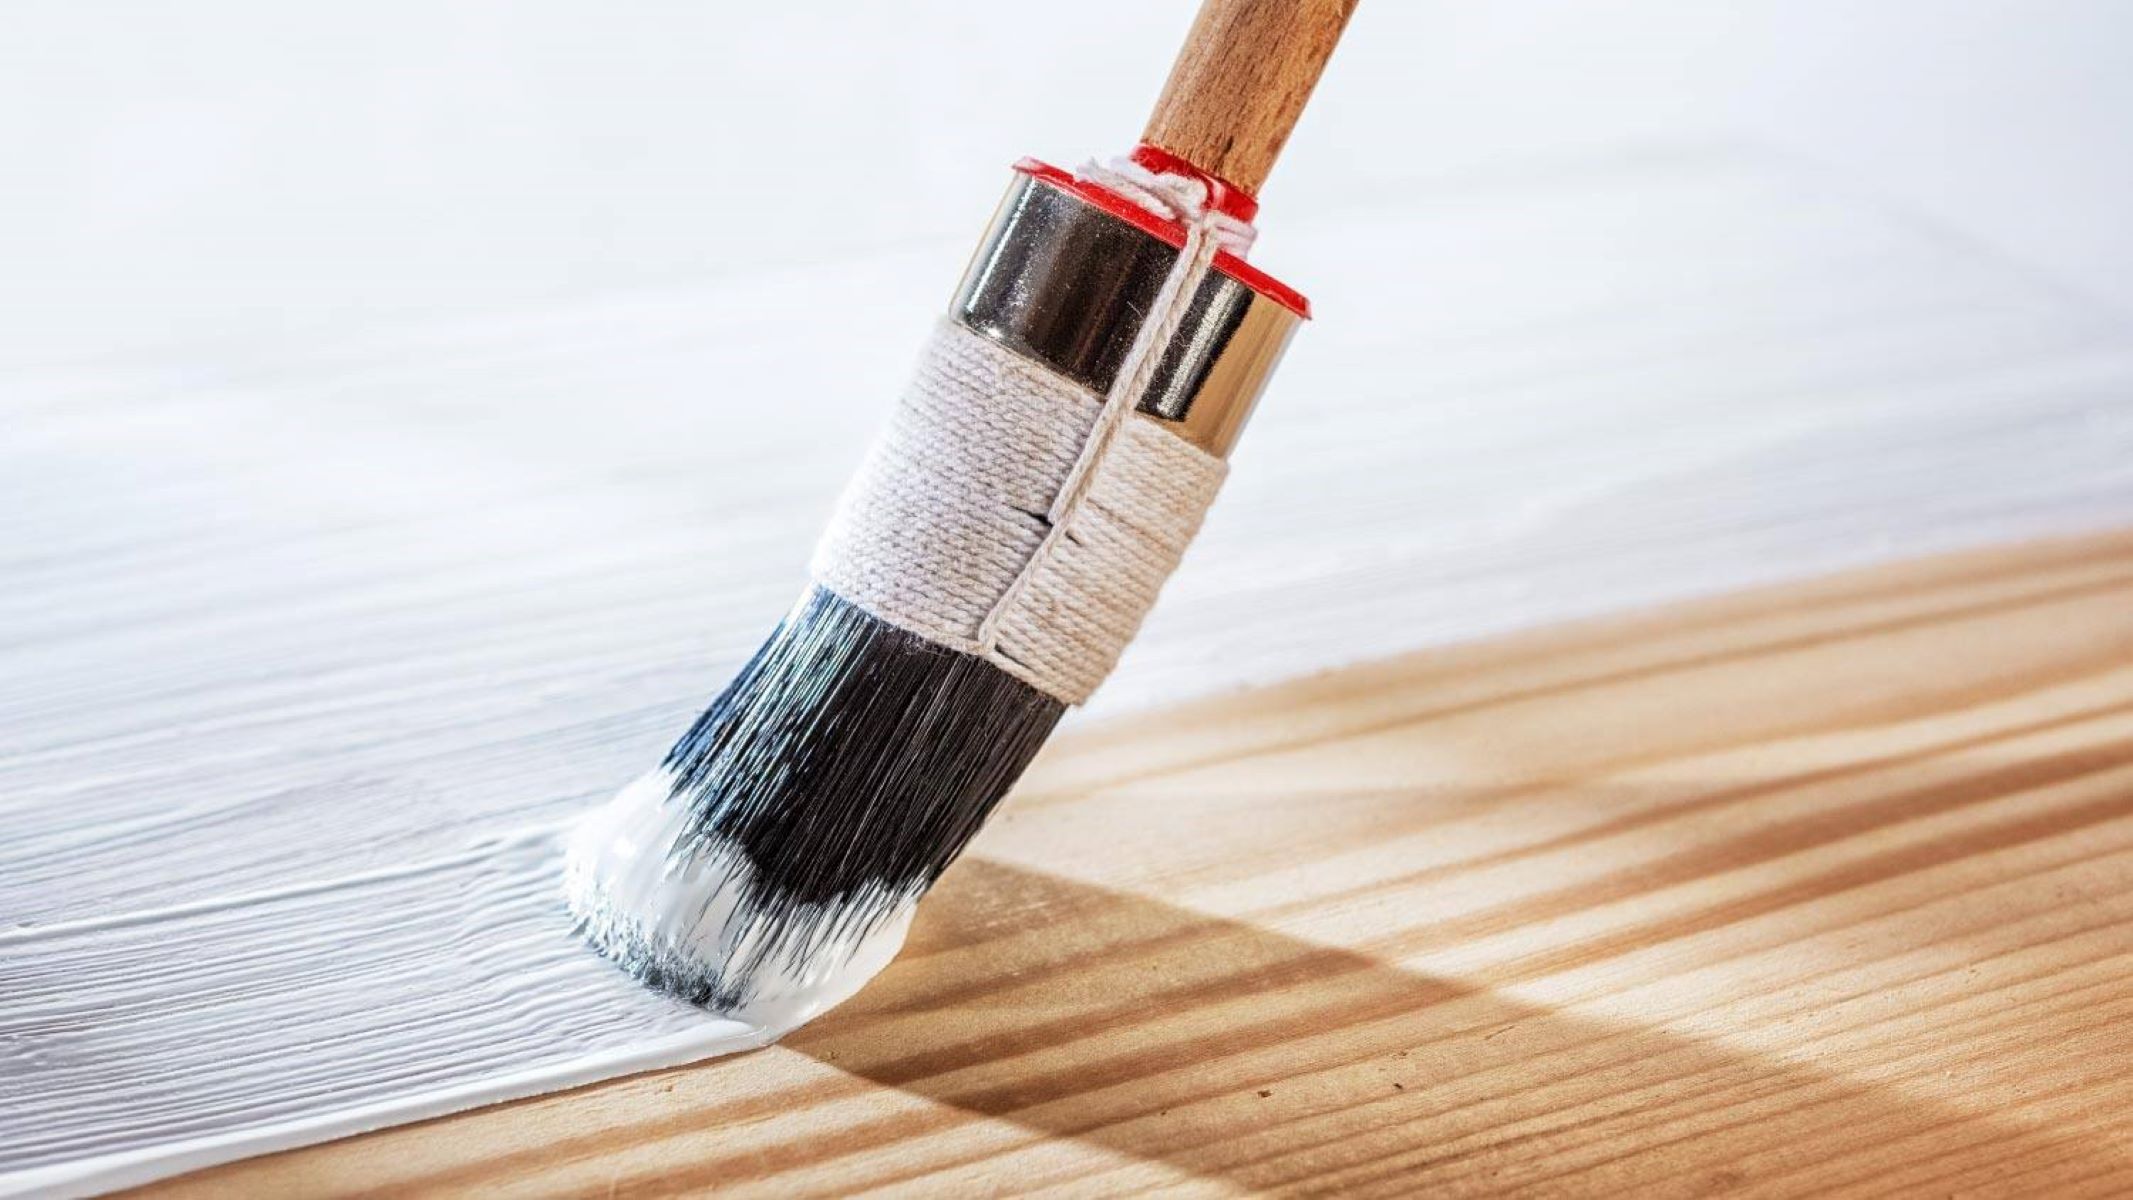
Applying the Paint
Applying the paint is the exciting part of the countertop painting process that brings your desired look and style to life. Here’s how to properly apply the paint to achieve a smooth and professional finish:
1. Choose the Right Paint
Select a paint specifically formulated for use on countertops and compatible with the primer you have applied. Consider factors such as the desired finish, durability, and the type of countertop material. Choose a high-quality paint that provides good coverage and is suitable for the look you want to achieve.
Read more: What Type Of Paint To Use On Brick
2. Stir the Paint
Before starting, thoroughly stir the paint using a paint stick or stirrer. This ensures that the color pigment, binders, and additives are well mixed and that the paint has a consistent texture throughout the application process.
3. Start with an Even Base Coat
Begin by applying an even base coat of paint to the countertop surface. Use a brush or roller, depending on the size and shape of the countertop. Apply the paint in thin and even layers, working in small sections at a time. Make sure to cover all areas evenly, including corners and edges.
4. Follow the Grain (if applicable)
If you are painting a wooden or wood-grained countertop, it’s important to follow the grain when applying the paint. This helps to create a more natural and realistic finish by mimicking the natural wood pattern. Use long, smooth strokes that follow the direction of the grain for a seamless look.
5. Allow the Paint to Dry
Follow the manufacturer’s instructions for the recommended drying time between coats. Allow the first coat of paint to dry completely before applying additional coats. It is usually best to apply at least two to three coats of paint for a solid and opaque finish, but the final number of coats will depend on the desired look and the coverage of the paint.
Read more: What Paint To Use On Aluminum Gutters
6. Sand between Coats (if necessary)
If desired, lightly sand the surface between coats of paint. This step helps to smooth out any imperfections or brush marks and promotes better adhesion between layers. Use a fine-grit sandpaper and gently sand in a circular motion. Be sure to remove any sanding dust before applying the next coat of paint.
7. Finish with a Protective Topcoat (optional)
To further enhance the durability and longevity of the painted countertop, you may choose to apply a protective topcoat or sealant. This topcoat provides an additional layer of protection against stains, scratches, and daily wear and tear. Follow the manufacturer’s instructions for application and drying time.
By following these steps for applying the paint, you can achieve a smooth and professional finish on your painted countertops. Take your time and be patient throughout the process to ensure the best possible results. Once the paint is dry and cured, you can enjoy your beautifully transformed countertops for years to come.
Now that the paint has been applied, let’s move on to the final step – sealing the countertop for added protection and longevity.
Sealing the Countertop
Sealing the countertop after painting is an important step in maintaining the longevity and durability of your painted surface. The sealant provides an extra layer of protection, preventing stains, scratches, and moisture from damaging the paint. Here’s how to properly seal your painted countertop:
1. Choose the Right Sealant
Select a sealant specifically designed for use on painted surfaces or countertops. Look for a sealant that is clear and non-yellowing to keep the beauty of your painted finish intact. Consider the type of paint you used and choose a sealant that is compatible with it.
Read more: What Are Different Paint Brushes Used For
2. Prepare the Countertop Surface
Before applying the sealant, ensure that the countertop surface is clean and completely dry. Use a clean cloth or vacuum cleaner with a brush attachment to remove any dust, dirt, or debris from the surface. This helps to ensure a smooth and even application of the sealant.
3. Apply the Sealant
Follow the manufacturer’s instructions for the recommended application method and drying time of the sealant. Generally, a brush or roller is used to apply the sealant in thin, even coats. Work in small sections to ensure even coverage on the entire countertop surface, including corners and edges.
Ensure that the sealant is spread evenly without any excess build-up or drips. This will help to achieve a smooth finish with optimal protection.
4. Allow the Sealant to Dry
After applying the sealant, allow it to dry completely according to the manufacturer’s instructions. This typically takes a few hours or overnight, depending on the specific product. Avoid using the countertop during this drying period to prevent any potential damage to the sealant.
5. Apply Multiple Coats (if necessary)
Depending on the specific sealant and the level of protection desired, you may need to apply multiple coats of sealant. Follow the manufacturer’s instructions for the recommended number of coats, drying time between coats, and any additional instructions for achieving the best results.
Read more: What Are Different Paint Brushes Used For
6. Regularly Maintain and Clean the Countertop
Even after applying the sealant, it’s essential to properly maintain and clean your painted countertops. Avoid using harsh or abrasive cleaners that may damage the sealant or the painted surface. Clean the countertops regularly with mild soap and water or a cleaner recommended for painted surfaces, and wipe away any spills or stains promptly.
7. Take Precautions for Longevity
While the sealant provides added protection, it’s still important to take precautions to maintain the longevity of your painted countertop. Use cutting boards, trivets, and heat-resistant mats to protect the surface from direct contact with hot objects, sharp utensils, and potential scratching.
By properly sealing your painted countertop and following these tips for maintenance, you can enjoy a beautiful and long-lasting finish. The sealant helps to protect the paint, enhance its durability, and make cleaning and maintenance easier.
Now that we have covered the process of sealing the countertop, let’s explore some additional tips for maintaining and caring for your newly painted countertop.
Proper Maintenance and Cleaning
Proper maintenance and regular cleaning are key to preserving the beauty and longevity of your newly painted countertop. Here are some essential tips to ensure your painted countertop stays in excellent condition:
1. Clean Spills Promptly
Wipe away spills and stains as soon as possible to prevent them from setting on the painted surface. Use a soft cloth or sponge and a mild soap or cleaner specifically recommended for painted surfaces. Avoid using abrasive cleaners or scrub brushes that could scratch or damage the paint.
Read more: What Are Different Paint Brushes Used For
2. Avoid Harsh Chemicals
Avoid using harsh chemicals and abrasive cleaners on your painted countertop, as they can damage the paint finish. Instead, opt for mild and non-abrasive cleaning solutions. Always read the labels of cleaning products and ensure they are safe for use on painted surfaces.
3. Use Soft Cloth or Sponge
When cleaning your painted countertop, use a soft cloth or sponge to avoid scratching the surface. Microfiber cloths are an excellent choice, as they are gentle yet effective in removing dirt and debris. Be gentle when wiping the surface to avoid rubbing off or damaging the paint.
4. Avoid Excessive Scrubbing
Avoid scrubbing the painted countertop vigorously, as this can strip off the paint or cause damage. Instead, use gentle circular motions and light pressure when cleaning. If stubborn stains or residue persist, try dampening the cloth or sponge with warm soapy water and gently blotting the area.
5. Handle with Care
Be cautious when handling heavy or sharp objects on the painted countertop. Use cutting boards, trivets, and heat-resistant mats to protect the surface from scratches, heat, and potential damage. Avoid dragging heavy items across the countertop, as this can scratch or chip the paint.
Read more: What Are Different Paint Brushes Used For
6. Regular Maintenance
Perform regular maintenance activities to keep your painted countertop in excellent condition. Wipe the surface regularly with a soft cloth to remove dust and debris. Periodically inspect the painted surface for any signs of wear or damage, and address them promptly to prevent further issues.
7. Touch-Ups and Maintenance Painting
Over time, your painted countertop may experience minor wear and tear, such as small scratches or chips. Keep a small quantity of the paint used on the countertop, so you can easily perform touch-ups as needed. This will help maintain the integrity and appearance of the painted surface.
Following these maintenance and cleaning tips will help ensure the longevity and beauty of your painted countertop. By giving it proper care and attention, you can enjoy your transformed countertop for years to come.
Now that you have all the necessary information for maintaining your painted countertop, it’s time to conclude our guide. Your beautifully painted countertop is now ready to be showcased and enjoyed in your kitchen or bathroom!
Avoiding Certain Chemicals
When it comes to maintaining and caring for your painted countertop, it’s crucial to avoid using certain chemicals that can potentially damage the painted surface. Here are some key chemicals to avoid:
1. Harsh Cleaners
Avoid using harsh cleaners that contain strong solvents, acids, alkalis, or abrasive ingredients. These can strip away the protective layers of the paint and cause it to fade, peel, or discolor over time. Instead, opt for mild and non-abrasive cleaners specifically formulated for use on painted surfaces.
Read more: What Are Different Paint Brushes Used For
2. Ammonia-Based Cleaners
Ammonia-based cleaners can be too harsh for painted countertops, as they can cause the paint to deteriorate and lose its shine. Avoid using cleaners that contain ammonia as an ingredient, and opt for gentler alternatives that are compatible with painted surfaces.
3. Bleach
Bleach is a powerful disinfectant, but it can be harmful to painted countertops. It can cause the paint to fade or change color, and it may weaken the protective layers of the paint. It’s best to avoid using bleach as a cleaning agent on your painted countertop.
4. Abrasive Scrubbing Agents
Avoid using abrasive scrubbing agents such as steel wool, harsh scrub brushes, or rough scouring pads. These can scratch the painted surface and remove the protective layers of the paint, compromising its durability and appearance.
5. Strong Stain Removers
While it’s important to address stains promptly, be cautious when using strong stain removers on your painted countertop. Some stain removers contain harsh chemicals that can damage the paint. Always read the labels of cleaning products and ensure they are safe for use on painted surfaces.
Read more: What Are Different Paint Brushes Used For
6. Citrus Cleaners
Citrus-based cleaners, although considered natural and eco-friendly, can be too acidic for painted countertops. The high acidity levels can damage the paint finish over time. Opt for milder cleaners that do not contain citrus extracts or acids.
By avoiding these chemicals, you can protect the integrity and appearance of your painted countertop. Instead, opt for gentle, non-abrasive, and pH-neutral cleaners that are safe for use on painted surfaces. Always read the labels of cleaning products and follow the manufacturer’s instructions to ensure compatibility with your painted countertop.
With proper care and attention, your painted countertop will maintain its beauty and durability for years to come. Enjoy your transformed space and the aesthetic appeal of your painted countertops!
Now that we have covered all the essential tips and guidelines for maintaining and caring for your painted countertop, you are well-equipped to keep it looking beautiful and vibrant. Best of luck with your newly transformed countertop!
Preventing Scratches and Dents
To ensure the long-term beauty and durability of your painted countertop, it’s important to take precautions to prevent scratches and dents. Here are some key tips to keep in mind:
1. Use Cutting Boards and Trivets
Avoid cutting or chopping directly on the painted countertop surface. Instead, use cutting boards to protect the paint from knife marks and scratches. Similarly, use trivets or hot pads when placing hot pots, pans, or dishes on the countertop to prevent heat damage and dents caused by the impact.
2. Avoid Dragging Heavy Objects
Avoid dragging heavy objects across the painted countertop, as this can cause scratches or dents. If you need to move heavy appliances or objects on the countertop, lift them instead of sliding or dragging them to prevent any potential damage to the paint surface.
Read more: What Are Different Paint Brushes Used For
3. Use Soft Cushions
Consider using soft cushions or bumpers on the bottom of small appliances or decorative objects that may come into contact with the countertop. This can help prevent scratches caused by the objects being moved or shifted on the surface.
4. Handle Utensils with Care
Be cautious when using sharp or metal utensils on the painted countertop surface. Avoid excessive force or scraping motions that can potentially damage the paint. Opt for softer silicone, plastic, or wooden utensils to minimize the risk of scratching the surface.
5. Regularly Clean and Inspect
Regularly clean the countertop with mild soap and water, and inspect the surface for any signs of wear or damage. Promptly address any issues to prevent them from worsening. By keeping the countertop clean and well-maintained, you can identify and address potential issues that may lead to scratches or dents.
By following these preventative measures, you can preserve the beauty and integrity of your painted countertop. Taking the necessary precautions will not only prevent scratches and dents but also help maintain the overall appearance and extend the lifespan of your painted countertop.
Conclusion
Painting countertops can be an excellent way to refresh the look of your kitchen or bathroom. By choosing the appropriate type of paint, properly preparing the surface, and following the steps outlined in this guide, you can achieve a stunning and durable finish.
Remember to consider factors such as durability, heat resistance, and food safety when selecting the paint for your countertop. Proper maintenance and cleaning are vital for preserving the appearance of your painted countertop, so be sure to use gentle cleansers and avoid harsh chemicals.
By preventing scratches and dents through careful handling and regularly inspecting the countertop, you can enjoy the beauty and functionality of your painted countertops for years to come.
Now, armed with this knowledge and guidance, it’s time to embark on your countertop painting journey and transform your space into something truly remarkable!
Frequently Asked Questions about What Paint To Use On Countertops
Was this page helpful?
At Storables.com, we guarantee accurate and reliable information. Our content, validated by Expert Board Contributors, is crafted following stringent Editorial Policies. We're committed to providing you with well-researched, expert-backed insights for all your informational needs.
0 thoughts on “What Paint To Use On Countertops”