Articles
How To Do Wainscoting In Dining Room
Modified: January 19, 2024
Learn how to install wainscoting in your dining room with our informative articles. Transform your space with this elegant and timeless design technique.
(Many of the links in this article redirect to a specific reviewed product. Your purchase of these products through affiliate links helps to generate commission for Storables.com, at no extra cost. Learn more)
Introduction
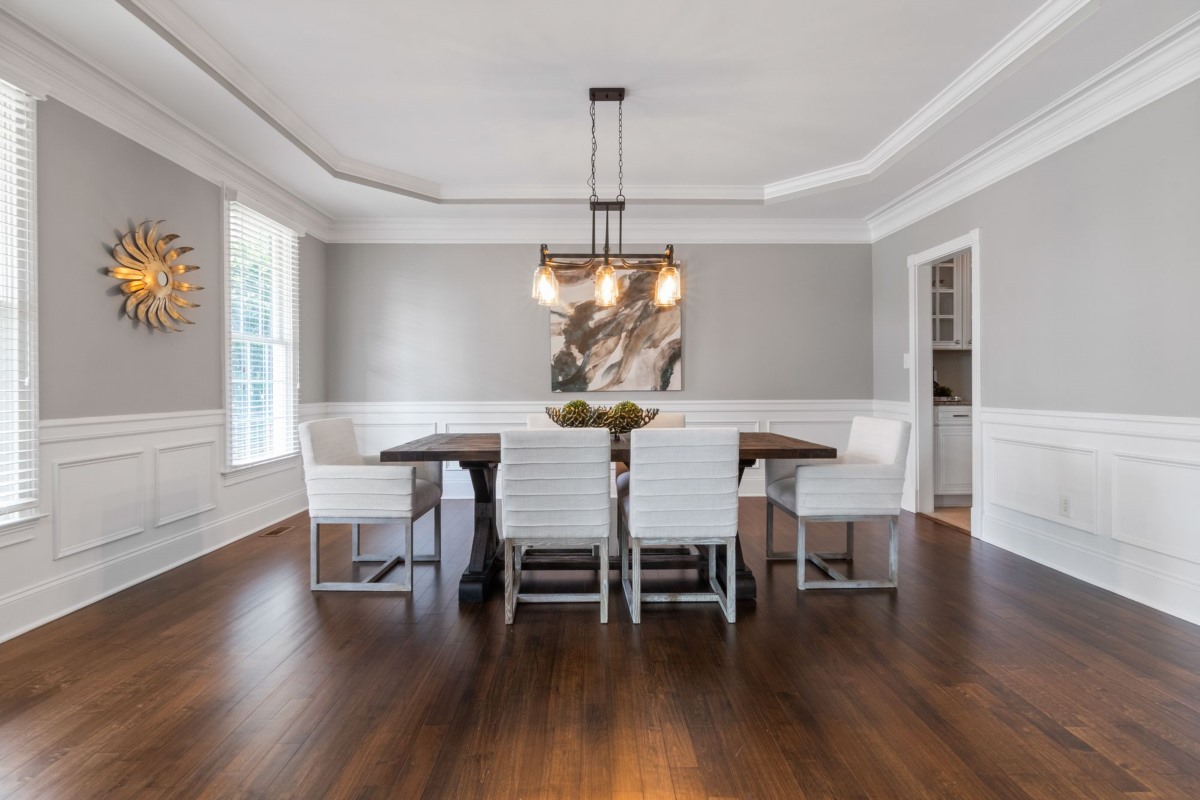
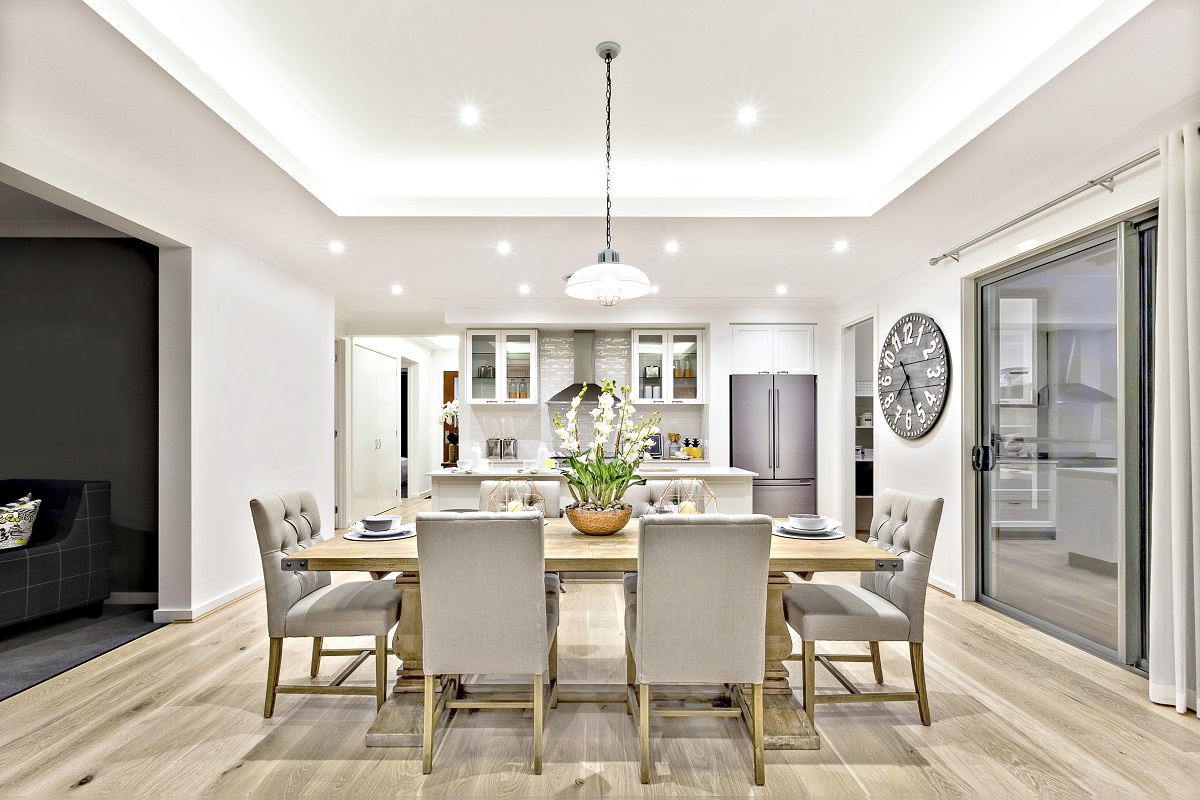
Wainscoting is a classic and elegant way to add visual interest and charm to a dining room. It consists of installing decorative panels, typically made of wood, on the lower half of the walls. This not only adds a touch of sophistication to the room but also protects the walls from scuffs and scratches.
When it comes to wainscoting, there are a variety of options to choose from, including different styles, materials, and installation techniques. In this article, we will guide you through the process of installing wainscoting in your dining room, from choosing the right material to adding the finishing touches.
Before diving into the installation process, it is essential to have a clear understanding of your desired style and the overall aesthetic you want to achieve. Wainscoting can range from traditional to modern, with various panel designs and configurations available. Take the time to explore different options and consider how they will complement your dining room’s existing décor.
Additionally, keep in mind the practical aspects of wainscoting. Think about its functionality and how it will meet your specific needs. Do you want the wainscoting to be purely decorative, or do you also want it to serve as a protective barrier for your walls? Identifying your priorities will help you make informed decisions as you move forward with the installation process.
Now that you have a solid foundation of what to consider when installing wainscoting in your dining room, let’s dive into the step-by-step process. In the next sections, we will discuss choosing the right material, measuring and planning, preparing the walls, installing the baseboard, chair rail, and panels, as well as adding the finishing touches to complete the look.
Remember, patience and attention to detail are key when undertaking a wainscoting project. By following this comprehensive guide, you will be able to transform your dining room into a space that exudes elegance and timeless appeal.
Key Takeaways:
- Transform your dining room with timeless elegance by installing wainscoting. Choose the right material, measure and plan meticulously, and add finishing touches for a stunning and sophisticated look.
- Elevate your dining room’s aesthetic and functionality with wainscoting. From wood to tile, meticulous installation and thoughtful finishing touches will create a space exuding timeless charm and enduring appeal.
Read more: What To Do With Formal Dining Room
Choosing the Right Material
When it comes to choosing the right material for your wainscoting, there are several factors to consider, including aesthetics, durability, and maintenance. Let’s explore some popular options:
- Wood: Wood is the most traditional and versatile material for wainscoting. It offers a timeless and elegant look, with the ability to be stained or painted in various colors. Common wood choices include oak, pine, and walnut. Wood wainscoting can be customized with different panel designs and profiles to match the overall style of your dining room.
- MDF: Medium-Density Fiberboard (MDF) is a cost-effective alternative to solid wood. It is made of compressed wood fibers, offering a smooth and consistent surface. MDF wainscoting is easy to paint and can mimic the look of real wood at a fraction of the cost. However, it is not as durable as solid wood and may be prone to moisture damage.
- Beadboard: Beadboard is a type of wainscoting that features narrow vertical planks with a distinctive groove, known as a bead, running along each board’s edge. It adds a charming and cottage-like aesthetic to your dining room. Beadboard panels are typically made of wood or MDF and can be painted in a variety of colors to match your desired style.
- Tile: If you prefer a more modern or contemporary look, consider using tile for your wainscoting. Subway tiles, mosaic tiles, or even large-format tiles can create a sleek and polished appearance. Tile wainscoting is exceptionally durable and easy to clean, making it an ideal choice for dining rooms with high traffic or messy eaters.
- PVC: PVC wainscoting is a budget-friendly and moisture-resistant option. It is made of polyvinyl chloride (PVC) and comes in pre-formed panels or moldings. PVC wainscoting can be easily installed and requires minimal maintenance. However, it may not offer the same aesthetic appeal as traditional wood options.
When choosing the material for your wainscoting, consider the overall style of your dining room, the level of maintenance you are comfortable with, and your budget. Each material has its own advantages and limitations, so make sure to evaluate your options carefully to find the perfect fit.
Once you have chosen the material for your wainscoting, it’s time to move on to the next step: measuring and planning. This is a crucial stage to ensure a precise and balanced installation. Stay tuned for our next section on how to measure and plan for your wainscoting project.
Measuring and Planning
Before you start installing your wainscoting, it is crucial to carefully measure and plan the layout to ensure a precise and balanced installation. Follow these steps to get started:
- Measure the height: Decide how high you want your wainscoting to be on the wall. A standard height is usually around one-third of the total wall height, but you can adjust it based on your preferences. Use a tape measure to measure the desired height and mark it on the wall using a pencil.
- Measure the wall length: Measure the length of each wall where you plan to install wainscoting. Take accurate measurements from corner to corner and record them. Keep in mind that walls are not always perfectly straight, so measure at multiple points to account for any variations.
- Plan the panel arrangement: Consider the panel configuration you want to achieve. Common options include using full panels along the entire wall or combining full panels with smaller panels or beadboard. Use a pencil to mark the layout on the wall, taking into account any doors, windows, or other architectural features that may affect the arrangement.
- Calculate the number of panels: Based on your wall measurements and panel arrangement, calculate the number of panels you will need. Remember to account for any adjustments needed for doors, windows, or corners. This will ensure you have enough panels for the installation and minimize material waste.
- Mark the stud locations: Locate the wall studs using a stud finder. Mark the stud locations on the wall, as these will be the secure points for attaching the wainscoting panels. Knowing the stud locations will also help you avoid nails or screws hitting the studs during the installation.
Once you have completed these steps, you are ready to move on to the next stage of the wainscoting installation process: preparing the walls. Proper wall preparation is essential to achieve a smooth and seamless finish. In the next section, we will guide you through the process of preparing the walls for your wainscoting project.
Preparing the Walls
Before installing the wainscoting panels, it is important to properly prepare the walls to ensure a smooth and long-lasting finish. Follow these steps to prepare your walls:
- Remove any existing moldings: If there are any baseboards or moldings on the walls, carefully remove them using a pry bar or a putty knife. Take precautions not to damage the walls or the moldings if you plan to reuse them after the wainscoting installation.
- Patch and repair the walls: Inspect the walls for any holes, cracks, or imperfections. Use spackling compound or joint compound to fill in these areas, and smooth them out with a putty knife. Allow the compound to dry according to the manufacturer’s instructions, and then sand the patched areas until they are smooth and flush with the surrounding wall surface.
- Sand the walls: To create a smooth surface for the wainscoting panels, use sandpaper or a sanding block to lightly sand the walls. This will help remove any rough patches or bumps and create a more even surface for the adhesive or nails used during installation. Wipe away any dust or debris with a damp cloth after sanding.
- Prime the walls: Applying a primer to the walls before installing the wainscoting will create a better surface for paint or adhesive to adhere to. Use a roller or a brush to apply a coat of primer, following the manufacturer’s instructions. Allow the primer to dry completely before moving on to the next step.
- Mark the layout: Using a level and a pencil, mark the layout of the wainscoting panels on the walls. This will ensure a precise and symmetrical installation. Make sure to transfer the measurements and panel arrangement from the previous step onto the walls.
By taking the time to properly prepare your walls, you will create the foundation for a successful wainscoting installation. Once the walls are prepared, you can proceed with installing the baseboard, chair rail, and panels. These steps will be covered in the following sections of this guide.
Now that your walls are ready, it’s time to move on to the installation process. In the next sections, we will guide you through the steps of installing the baseboard, chair rail, and panels to bring your wainscoting project to life.
Installing the Baseboard
The baseboard acts as the foundation for your wainscoting, providing a decorative and functional element that joins the wainscoting panels with the existing flooring. Follow these steps to install the baseboard:
- Measure and cut the baseboard: Measure the length of each wall where you plan to install the baseboard. Use a miter saw or a hand saw to cut the baseboard to the measured length. Ensure the ends of the baseboard are cut at a 45-degree angle for a clean and precise fit at the corners.
- Dry fit the baseboard: Place the cut baseboard along the bottom of the wall, ensuring it is properly aligned and fits snugly. Make any necessary adjustments to the length or angle of the cut before proceeding.
- Apply adhesive or use nails: Depending on the type of baseboard and your preference, you can either apply construction adhesive to the back of the baseboard or use finishing nails to secure it to the wall. If using adhesive, apply a continuous bead along the back of the baseboard. If using nails, place them approximately every 12 inches along the length of the baseboard.
- Attach the baseboard: Press the baseboard firmly against the wall, ensuring it is level and properly aligned with your layout marks. If using adhesive, hold the baseboard in place for a few moments to allow the adhesive to bond. If using nails, use a nail set to countersink the nails slightly below the surface of the baseboard.
- Fill the nail holes: If you used nails to secure the baseboard, fill the nail holes with wood filler using a putty knife. Allow the filler to dry and then sand it to create a smooth surface that blends seamlessly with the baseboard.
- Paint or finish the baseboard: Once the baseboard is securely installed and any necessary repairs or adjustments have been made, you can paint or finish the baseboard to match your desired aesthetic. Use a brush or a roller to apply your chosen paint or stain, following the manufacturer’s instructions. Allow the paint or finish to dry completely before proceeding.
By following these steps, you will be able to install the baseboard with precision and achieve a polished look for your wainscoting. Next, we will move on to installing the chair rail, which adds a decorative and functional element to your dining room wainscoting.
Stay tuned for the next section where we will guide you through the process of installing the chair rail.
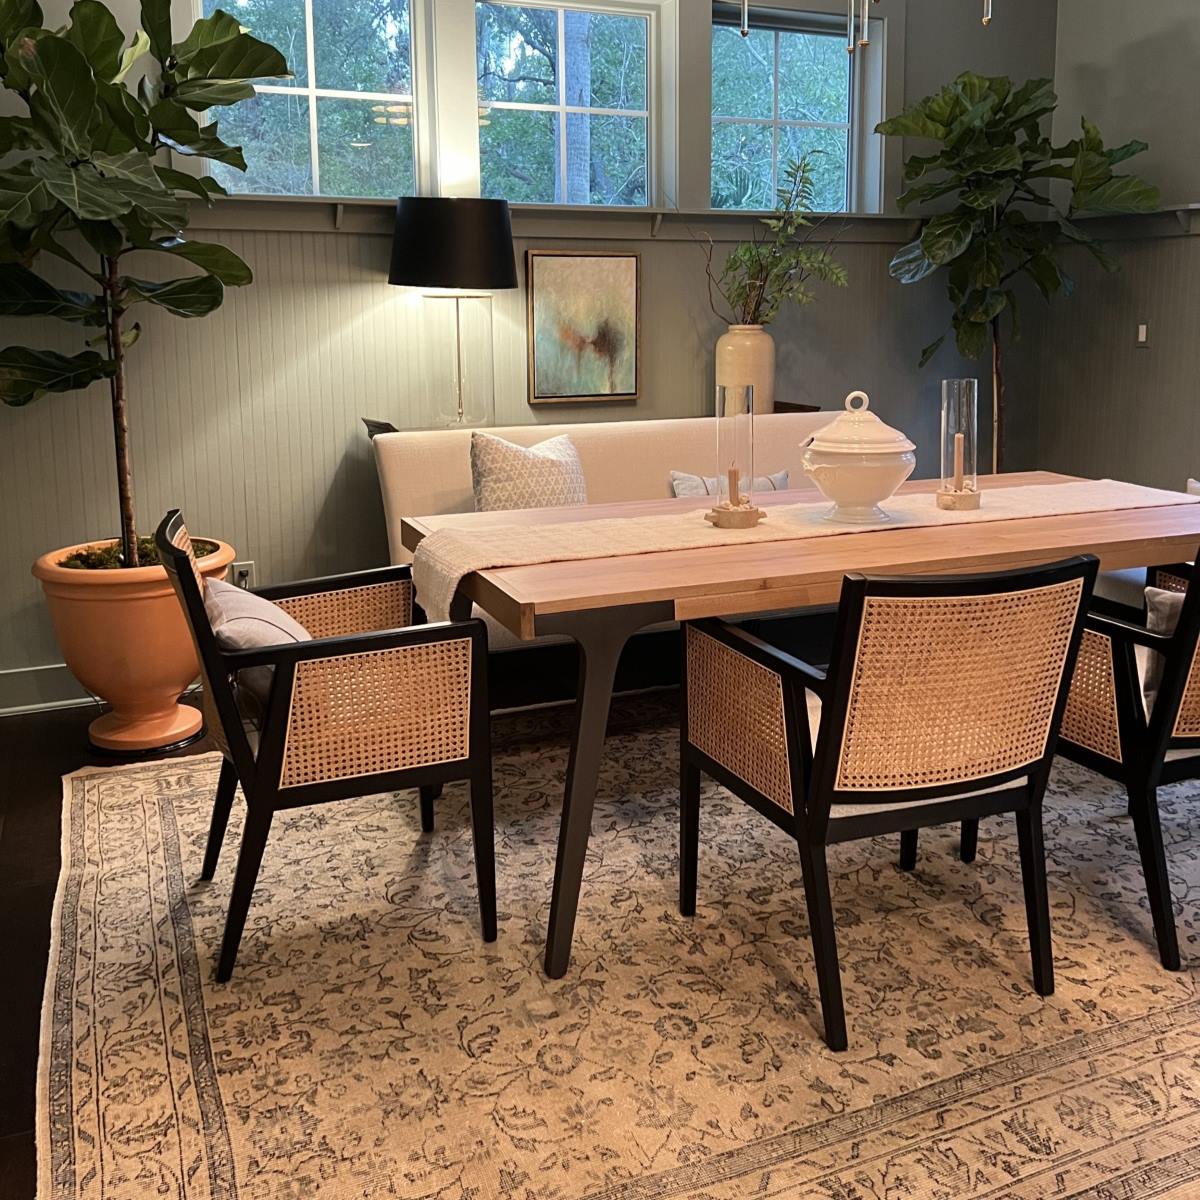
When installing wainscoting in a dining room, be sure to measure and plan carefully to ensure the panels are evenly spaced and the overall look is balanced. Use a level to ensure the panels are straight and consider using a chair rail for a finished look.
Read more: What Is In A Dining Room?
Installing the Chair Rail
The chair rail serves as a decorative element that adds visual interest and divides the wainscoting panels from the upper portion of the wall. Follow these steps to install the chair rail:
- Measure and cut the chair rail: Measure the length of each wall where you plan to install the chair rail. Use a miter saw or a hand saw to cut the chair rail to the measured length. Ensure the ends of the chair rail are cut at a 45-degree angle for a clean and precise fit at the corners.
- Dry fit the chair rail: Place the cut chair rail along the top of the wainscoting panels, ensuring it is properly aligned and fits snugly. Make any necessary adjustments to the length or angle of the cut before proceeding.
- Apply adhesive or use nails: Similar to the baseboard installation, you can choose to apply a construction adhesive or use finishing nails to secure the chair rail to the wall. Apply adhesive in a continuous bead on the back of the chair rail or use nails placed every 12 inches along the length of the chair rail.
- Attach the chair rail: Press the chair rail firmly against the wall, aligning it with the layout marks you made. Ensure it is level and properly aligned with the baseboard. Hold it in place for a few moments to allow the adhesive to bond, or use a nail set to countersink the nails slightly below the surface of the chair rail.
- Fill the nail holes: If you used nails to secure the chair rail, fill the nail holes with wood filler using a putty knife. Allow the filler to dry and then sand it to create a smooth surface that blends seamlessly with the chair rail.
- Paint or finish the chair rail: Once the chair rail is securely installed and any necessary repairs or adjustments have been made, you can paint or finish the chair rail to match your desired aesthetic. Apply your chosen paint or stain using a brush or roller, following the manufacturer’s instructions. Allow the paint or finish to dry completely before proceeding.
By following these steps, you will be able to install the chair rail with precision, creating a beautiful and cohesive look for your dining room wainscoting. Now that you have installed the baseboard and chair rail, it’s time to move on to the next step: installing the panels. This will be covered in the following section.
Stay tuned for the next section, where we will guide you through the process of installing the wainscoting panels.
Installing the Panels
Installing the wainscoting panels is the most critical step in creating the desired look for your dining room. Follow these steps to properly install the panels:
- Measure and cut the panels: Measure the height and length of each section of the wall where you plan to install the panels. Use a saw or a utility knife to cut the panels to the measured size, ensuring they fit snugly within the space.
- Dry fit the panels: Place the cut panels onto the wall, making sure they align with your layout marks and fit properly. This step allows you to make any necessary adjustments before permanently attaching the panels.
- Apply adhesive or use nails: Choose whether to use an adhesive or nails to secure the panels to the wall. Apply construction adhesive in a zigzag pattern on the back of the panel or use finishing nails to attach them. Be sure to follow the manufacturer’s instructions for the adhesive or nail placement.
- Attach the panels: Press the panels firmly against the wall, aligning them with the layout marks. Ensure they are level and properly positioned. If using adhesive, hold the panels in place for a few minutes to allow the adhesive to bond. If using nails, use a nail set to countersink the nails and fill the holes with wood filler if desired.
- Repeat the process: Continue measuring, cutting, and attaching the remaining panels until the entire wall is covered. Take your time to ensure a precise and uniform installation, paying attention to corners and edges for a seamless appearance.
- Fill any gaps: If there are small gaps between the panels, use caulk to fill them in. Apply a thin bead of caulk along the edges and smooth it with a caulk smoothing tool or your finger. This will create a finished and polished look.
- Paint or finish the panels: Once the panels are securely installed and any necessary repairs or adjustments have been made, you can paint or finish them to match your desired aesthetic. Apply your chosen paint or stain using a brush or roller, following the manufacturer’s instructions. Allow the paint or finish to dry completely before proceeding.
By following these steps, you will be able to install the wainscoting panels accurately, creating a stunning and sophisticated look in your dining room. The final step is to add the finishing touches, which will be covered in the next section.
Continue reading to learn how to add those final details and complete your wainscoting project.
Adding Finishing Touches
With the wainscoting panels installed, it’s time to add the final touches that will elevate the overall look of your dining room. Follow these steps to complete your wainscoting project:
- Fill and touch up: Inspect the wainscoting panels for any gaps, holes, or imperfections. Use wood filler or caulk to fill in any small gaps or nail holes. Allow it to dry, then sand the filled areas to create a smooth surface. Touch up any painted areas with additional paint, if necessary, for a seamless finish.
- Install additional moldings: Consider adding additional decorative moldings to enhance the wainscoting. This could include adding crown molding along the top of the wall or picture rail molding above the chair rail. Measure and cut these moldings to size, following the same installation steps as the baseboard and chair rail.
- Accessorize: Add some extra flair to your wainscoting by incorporating decorative elements. Hang framed artwork or mirrors on the wall above the wainscoting panels, or install wall sconces for added elegance. Choose accessories that complement the style and color scheme of your dining room.
- Consider lighting: Strategic lighting will further enhance the beauty of your wainscoting. Install wall-mounted or recessed lights to highlight the wainscoting panels, creating a warm and inviting ambiance in your dining room. Consult with a professional electrician to ensure proper installation and wiring.
- Regular maintenance: To keep your wainscoting looking its best, regular maintenance is key. Dust and clean the panels regularly with a soft cloth or duster. Avoid using harsh chemicals or abrasive cleaners, as they can potentially damage the wood or finish. If needed, consult the manufacturer’s guidelines for specific cleaning and maintenance instructions.
By following these steps and adding the finishing touches, you will complete your wainscoting project and achieve a stunning and elegant dining room. Sit back and admire the transformation you have made to your space.
Remember, wainscoting not only adds beauty and character to your dining room, but also serves as a protective barrier for your walls. Enjoy the benefits and the enduring appeal of your wainscoting for years to come.
Congratulations on successfully installing wainscoting in your dining room! If you have any further questions or need assistance, feel free to consult with a professional or seek guidance from home improvement experts.
Happy decorating!
Conclusion
Wainscoting is a timeless and elegant addition to any dining room. By following the steps outlined in this guide, you can successfully install wainscoting and transform your space with a touch of sophistication and charm.
From choosing the right material to measuring and planning, preparing the walls, installing the baseboard, chair rail, and panels, to adding the finishing touches, each step plays a vital role in achieving a seamless and polished look. Taking the time to carefully consider your options and plan accordingly will ensure a successful outcome.
Remember to choose a material that not only complements your desired style but also meets your practical needs. Whether you opt for the warmth of wood, the durability of tile, or the affordability of PVC, selecting the right material will contribute to the overall aesthetic and functionality of your wainscoting.
Proper measurement, planning, and wall preparation are crucial to ensure a precise and balanced installation. Taking the time to measure accurately, mark the layout, and repair any imperfections on the walls will create the foundation for a seamless installation.
Installing the baseboard, chair rail, and panels requires attention to detail and patience. Carefully fitting and securing each element will contribute to the overall visual impact and quality of your wainscoting project. Make sure to fill any gaps, touch up paint, and consider additional moldings and decorative elements to enhance the overall look.
Once your wainscoting is in place, don’t forget to maintain it properly. Regular cleaning and gentle maintenance will help preserve its beauty and longevity. Adding lighting and accessories can further elevate the ambiance of your dining room, highlighting the elegance of your wainscoting.
With your wainscoting project complete, enjoy the transformed space and relish in the beauty and functionality it brings to your dining room. Whether you’re hosting dinner parties or simply enjoying family meals, your wainscoting will undoubtedly be a stunning focal point in the room.
Remember that this guide serves as a starting point, and it’s always a good idea to consult with professionals or seek further guidance if needed. Every dining room is unique, and personalizing your wainscoting project to fit your specific style and preferences will create a truly one-of-a-kind space.
Embrace the beauty and elegance of wainscoting, and enjoy the timeless charm it brings to your dining room for years to come.
Frequently Asked Questions about How To Do Wainscoting In Dining Room
Was this page helpful?
At Storables.com, we guarantee accurate and reliable information. Our content, validated by Expert Board Contributors, is crafted following stringent Editorial Policies. We're committed to providing you with well-researched, expert-backed insights for all your informational needs.


0 thoughts on “How To Do Wainscoting In Dining Room”