Tableware
How To Clean A Dining Room
Modified: October 30, 2024
Learn how to properly clean your dining room tableware with our step-by-step guide. Remove stubborn stains and keep your dishes looking sparkling clean.
(Many of the links in this article redirect to a specific reviewed product. Your purchase of these products through affiliate links helps to generate commission for Storables.com, at no extra cost. Learn more)
Introduction
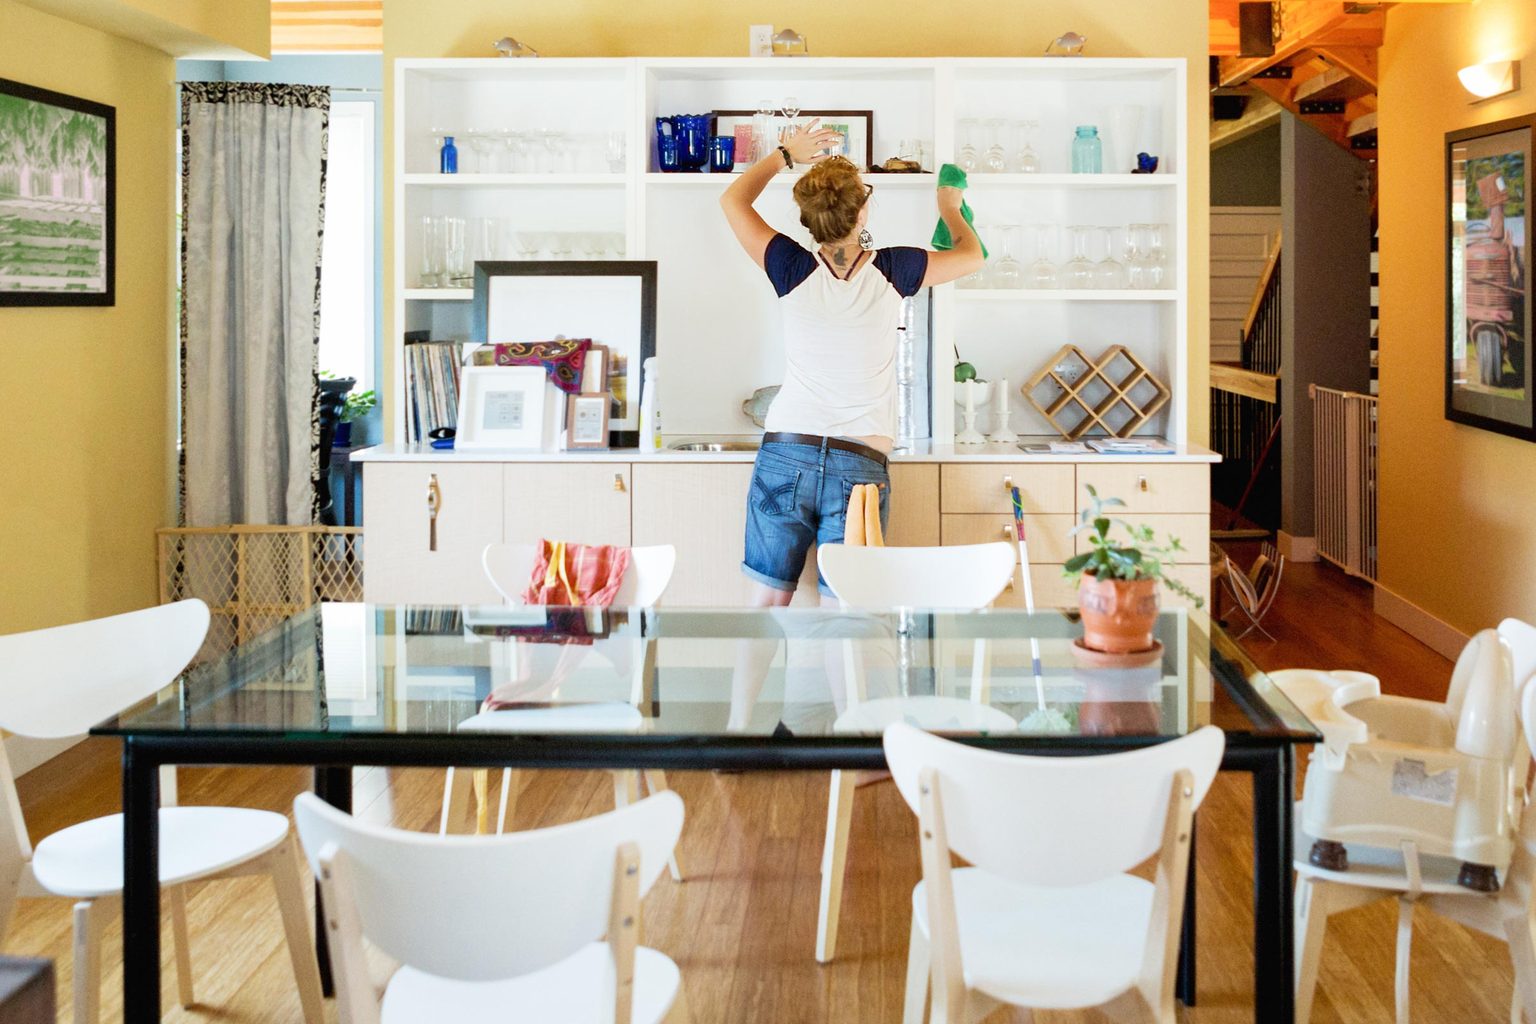
Welcome to our comprehensive guide on how to clean a dining room. The dining room is a central gathering place in many homes, where families and friends come together to share meals and create lasting memories. As such, it’s essential to keep this space clean and inviting. Regular cleaning not only ensures hygienic conditions but also prolongs the lifespan of your furniture and decor.
In this article, we will walk you through a step-by-step process to effectively clean your dining room. We will cover everything from clearing and organizing the space to mopping the floor and cleaning the light fixtures. Whether you’re hosting a dinner party or simply want a neat and tidy dining area for your everyday meals, this guide has got you covered.
Before we dive into the cleaning process, let’s talk about the supplies you’ll need. Gather these items ahead of time to make your cleaning experience more efficient:
- All-purpose cleaner
- Mild dish soap
- Microfiber cloths
- Duster or dusting cloth
- Vacuum cleaner or broom and dustpan
- Mop and bucket
- Glass cleaner
- Cleaning solution for wood furniture (if applicable)
- Lint-free cloth
Having these supplies ready will save you time and ensure you have everything necessary to clean all the different components of your dining room effectively.
Now that you have your supplies ready, let’s begin the process of cleaning your dining room to perfection.
Key Takeaways:
- Keep your dining room clean and inviting by following a step-by-step process, from clearing and organizing to mopping the floor and cleaning light fixtures. Regular maintenance ensures a welcoming space for meals and gatherings.
- Gather the necessary supplies, such as all-purpose cleaner, mild dish soap, and microfiber cloths, to efficiently clean your dining room. Pay attention to specific furniture and surface needs, and establish a regular maintenance routine for long-lasting cleanliness and beauty.
Read more: How To Clean Dining Room Table
Supplies Needed
Before you start cleaning your dining room, gather the following supplies to ensure you have everything you need:
- All-purpose cleaner: This versatile cleaner will be used to wipe down surfaces, clean chairs, and remove grime.
- Mild dish soap: Ideal for cleaning glass surfaces, such as windows and mirrors.
- Microfiber cloths: These lint-free cloths are perfect for dusting and wiping down surfaces. They are more effective than traditional cotton cloths as they trap dust and dirt better.
- Duster or dusting cloth: Use a duster or a microfiber dusting cloth to collect dust from surfaces, corners, and crevices.
- Vacuum cleaner or broom and dustpan: Depending on your flooring, a vacuum cleaner or broom and dustpan will be necessary to remove debris from the floor.
- Mop and bucket: Use a mop and bucket filled with a suitable cleaning solution to mop the floor and remove stubborn stains.
- Glass cleaner: For a streak-free shine on glass surfaces, invest in a quality glass cleaner.
- Cleaning solution for wood furniture (if applicable): If your dining room furniture includes wooden tables or chairs, make sure you have a suitable cleaning solution specifically formulated for wood.
- Lint-free cloth: A lint-free cloth is perfect for polishing wood furniture and adding a nice finishing touch.
Having these supplies on hand will make the cleaning process easier and more efficient. Make sure to check that your cleaning products are suitable for the specific materials in your dining room, such as glass, wood, or upholstery. Once you have everything ready, you’re all set to begin cleaning your dining room!
Step 1: Clearing and Organizing
Before diving into the actual cleaning process, it’s important to first clear and organize your dining room. This step will make the cleaning process easier and more efficient.
Start by removing any clutter from the dining table, such as dishes, utensils, or decorations. Clearing the table will give you a clean surface to work with. Set aside any items that don’t belong in the dining room, and return them to their proper place later.
Next, clear out any unnecessary items from the dining room itself. Put away any miscellaneous items, such as books, toys, or paperwork, that may have found their way into the dining room. Decluttering the space will create a more organized and visually appealing environment.
Once the dining room is cleared of clutter, it’s time to organize. Take a moment to assess your dining room furniture and decor. Arrange chairs around the table neatly, ensuring that they are even and symmetrical. If you have a buffet or sideboard, organize and display items in an aesthetically pleasing manner.
If you have any decorative items or centerpieces on your dining table, take the time to dust them off and arrange them in an appealing way. Consider adding fresh flowers or a simple centerpiece to enhance the overall look.
Organizing your dining room not only makes it look more inviting but also creates a more functional space for meals and gatherings. Once you’ve cleared and organized your dining room, you’re ready to move on to the next step: dusting and wiping surfaces.
Step 2: Dusting and Wiping Surfaces
Now that your dining room is cleared and organized, it’s time to tackle the dust and grime that may have accumulated on surfaces. Dusting and wiping down surfaces will not only make your dining room look cleaner but also help maintain the condition of your furniture and decor.
Start by dusting the surfaces using a duster or a microfiber cloth. Dust off the dining table, chairs, sideboard, and any other furniture in the room. Pay special attention to corners, crevices, and decorative items. Dust has a tendency to accumulate in these areas and can quickly make your dining room look dirty.
After dusting, prepare an all-purpose cleaner diluted with water according to the instructions on the product. Moisten a microfiber cloth with the cleaning solution and wipe down all the surfaces in your dining room. Start from the top and work your way down, ensuring that you cover all areas. Wipe down the table, chairs, sideboard, and any other surfaces such as shelves or display cabinets.
For wooden surfaces, make sure to use a cleaning solution specifically designed for wood. Follow the instructions on the product and use a lint-free cloth to gently wipe the surfaces. This will help maintain the beauty and longevity of your wooden furniture.
Pay extra attention to high-touch areas such as chair backs and armrests that accumulate dirt and oils from regular use. Wipe them thoroughly to remove any grime or smudges.
Once you have finished wiping down all the surfaces, take a step back and admire the refreshed look of your dining room. Dusting and cleaning the surfaces not only improves the aesthetic appeal but also creates a cleaner and healthier environment for your meals. Now it’s time to move on to the next step: cleaning the dining table.
Step 3: Cleaning the Dining Table
The dining table is often the centerpiece of the dining room, so keeping it clean and free from stains is essential. In this step, we will guide you on how to effectively clean and maintain your dining table.
Start by removing any items from the table, such as placemats, table runners, or centerpieces. Set them aside for cleaning or storage.
If there are any food crumbs or loose debris on the table, use a soft bristle brush or a cloth to gently brush them off. Make sure to get into the crevices and corners of the table where dirt tends to accumulate.
Next, prepare a mild solution of dish soap and warm water. Dampen a microfiber cloth with the soapy water and gently wipe down the entire surface of the dining table. Pay attention to any sticky or greasy spots and give them a little extra scrubbing.
If your dining table has a protective finish, avoid using harsh or abrasive cleaners as they may damage the surface. Stick to mild dish soap or an all-purpose cleaner diluted with water.
For a more thorough clean, you can use a wood cleaner suitable for your table’s finish. Follow the instructions on the product and apply it to the table using a lint-free cloth. Wipe it in the direction of the wood grain to avoid leaving streaks or scratches.
After cleaning, rinse the table by wiping it with a damp cloth to remove any soap residue. Make sure to wring out the cloth well to avoid over-wetting the table.
Lastly, use a dry lint-free cloth to wipe and dry the dining table thoroughly. This will ensure that no water spots or streaks are left behind.
Once your dining table is clean and dry, you can reassemble the items you previously removed, such as placemats or centerpieces. Admire the refreshed and gleaming surface of your dining table, ready to host many more memorable meals and gatherings.
Now that the dining table is clean, it’s time to move on to the next step: cleaning the chairs.
Read more: How To Clean Fabric On Dining Room Chairs
Step 4: Cleaning the Chairs
Chairs in the dining room often endure a lot of use and can quickly accumulate dirt, stains, and spills. Thus, it’s important to regularly clean and maintain them to keep them looking fresh and inviting. In this step, we will guide you through the process of cleaning your dining room chairs.
Start by removing any cushions or seat covers from the chairs. If the cushions are removable, follow the manufacturer’s instructions for cleaning. If they are not removable, spot clean any stains or spills using a mild detergent and water solution. Blot the stain gently with a clean cloth, being careful not to scrub too vigorously.
For the chair frames, use an all-purpose cleaner diluted with water to wipe down the surfaces. Moisten a microfiber cloth with the cleaning solution and wipe the chair frames thoroughly, paying attention to areas that come in contact with hands or food.
If your chairs have fabric upholstery, vacuum them using an upholstery attachment to remove any loose dirt or debris. For stains or spills on fabric upholstery, consult the manufacturer’s instructions for recommended cleaning methods. Gently blot the stained area with a clean cloth or use a fabric cleaner specifically designed for upholstery.
If your dining chairs have leather upholstery, use a leather cleaner and conditioner to clean and maintain the leather surface. Follow the instructions on the product and apply the cleaner using a soft cloth. Wipe the chairs gently and evenly to avoid excessive moisture or damage to the leather.
For wooden chair frames, you can use a wood cleaner or polish suitable for the specific type of wood. Apply the cleaner to a lint-free cloth and wipe the surfaces of the chairs. This will help remove dirt and bring out the natural beauty of the wood.
Once you have finished cleaning the chairs, allow them to dry fully before putting any cushions or seat covers back on. If necessary, use a fan or open windows to aid in the drying process.
Once the chairs are dry, reattach the cushions or seat covers, ensuring they are secure and properly aligned. Stand back and admire the refreshed and clean chairs that are now ready to provide comfortable seating for your dining experiences.
With the chairs clean and ready, it’s time to move on to the next step: vacuuming or sweeping the floor.
Use a microfiber cloth to dust all surfaces in the dining room, including the table, chairs, and any shelves or cabinets. This will help to trap and remove dust more effectively than a regular cloth.
Step 5: Vacuuming or Sweeping the Floor
The floor of your dining room is prone to collecting dust, dirt, and crumbs, so regularly vacuuming or sweeping is essential to keep it clean and free from debris. In this step, we will guide you on how to effectively clean the floor of your dining room.
If you have carpeted flooring in your dining room, start by using a vacuum cleaner with a beater brush or rotating brush attachment. Run the vacuum across the entire floor, focusing on high-traffic areas and under the dining table and chairs. Pay attention to any spills or crumbs that may have collected on the carpet surface.
If there are any stubborn stains on the carpet, treat them with a carpet stain remover according to the product instructions. Blot the stain gently with a clean cloth or use a soft brush to work the stain remover into the carpet fibers. Be sure to test the stain remover on a small, inconspicuous area first to ensure it doesn’t cause any discoloration or damage.
If you have hard flooring, such as hardwood, laminate, or tile, start by sweeping the floor using a broom and dustpan. Sweep up any loose dirt, crumbs, or debris, paying extra attention to corners and edges. Consider using a microfiber broom or a broom with soft bristles to minimize scratching on hardwood or delicate surfaces.
Once you have swept the floor, use a vacuum cleaner with a brush attachment or a microfiber mop to remove any remaining dust or small debris. Move the vacuum or mop in a back-and-forth motion, ensuring you cover the entire floor surface. Pay attention to any hard-to-reach areas, such as under furniture or along baseboards.
If your hard flooring is visibly dirty or has spills, dampen a microfiber cloth or mop with a mild cleaning solution diluted in water. Avoid using excessive water, as it can damage certain types of flooring. Wring out the cloth or mop well and gently clean the floor, making sure to remove any stains or sticky residue.
After vacuuming or sweeping and mopping, allow the floor to dry completely before walking on it or replacing any rugs or furniture that were temporarily moved.
With a clean and dirt-free floor, your dining room will feel fresh and inviting. Now that the floor is clean, let’s move on to the next step: mopping the floor.
Step 6: Mopping the Floor
Mopping the floor is an important step in deep cleaning your dining room. It helps remove stains, spills, and stubborn dirt from hard flooring surfaces, leaving your dining area looking pristine and hygienic. In this step, we will guide you through the process of effectively mopping the floor in your dining room.
Start by preparing a cleaning solution suitable for your type of flooring. For hardwood or laminate floors, use a wood floor cleaner recommended by the manufacturer. If you have tile, vinyl, or linoleum floors, a general all-purpose cleaner diluted with warm water will work well.
Fill a bucket with the cleaning solution and warm water, following the instructions on the cleaning product. Make sure not to use excessive amounts of water as it may damage the flooring.
Dip a mop into the cleaning solution, then wring it out to remove excess liquid. The mop should be damp, not soaking wet. Starting from one corner of the room, mop the floor in a back-and-forth motion, working your way towards the opposite end.
Pay close attention to any stains or spills on the floor, using a bit of extra pressure to remove them. If necessary, let the cleaning solution sit on stubborn stains for a few minutes before mopping over them again.
Remember to periodically rinse the mop with clean water and wring it out well to avoid spreading dirt or residue across the floor. Replace the cleaning solution as needed to maintain its effectiveness.
After mopping the entire floor, allow it to air dry or use a dry mop or clean towels to soak up any excess moisture. Make sure the floor is completely dry before allowing foot traffic or replacing any furniture.
Once the floor is dry, take a moment to admire its clean and refreshed appearance. Regular mopping helps maintain the longevity of your flooring and keeps your dining room looking its best.
With the floor now clean and dry, let’s move on to the next step: cleaning the light fixtures in your dining room.
Step 7: Cleaning the Light Fixtures
Cleaning the light fixtures in your dining room is essential to keep them shining bright and free from dust and grime. Over time, dust and dirt can accumulate on light fixtures, impacting their appearance and reducing the amount of light they emit. In this step, we will guide you through the process of effectively cleaning the light fixtures in your dining room.
Before starting the cleaning process, ensure that the light fixtures are turned off and cool to the touch. This will prevent any accidents and ensure your safety.
Start by removing any lampshades or covers from the light fixtures. If the lampshades are fabric, check the manufacturer’s instructions for cleaning recommendations. Some fabric lampshades can be gently vacuumed or brushed to remove dust, while others may require spot cleaning with a mild detergent and water solution.
For glass or plastic light covers, prepare a mixture of mild dish soap and warm water. Dampen a microfiber cloth with the soapy solution and gently wipe down the covers, making sure to remove any smudges or fingerprints. For stubborn dirt or grime, you may need to use a soft brush or sponge to scrub the surface.
If the light fixtures have exposed bulbs, use a dry cloth or duster to carefully remove any dust or cobwebs from the bulbs and surrounding areas. Be cautious when cleaning near electrical components and avoid applying excessive pressure on the bulbs.
For chandeliers or pendant lights with multiple bulbs, it’s best to remove the individual light bulbs and clean them separately. Wipe each bulb using a dry cloth or a cloth lightly dampened with glass cleaner to ensure they are clean and free from smudges.
Once you have finished cleaning the light fixtures and their components, allow them to air dry completely before reassembling and turning the lights back on. Make sure all the fixtures are securely in place and aligned properly.
With clean and shining light fixtures, your dining room will be beautifully illuminated, creating a warm and inviting ambiance for your meals and gatherings.
Now that the light fixtures are clean, let’s move on to the next step: window and mirror cleaning in the dining room.
Read more: How Can You Clean Fabric Dining Room Chairs?
Step 8: Window and Mirror Cleaning
Windows and mirrors play a significant role in the overall appearance of your dining room. Dust, fingerprints, and smudges can quickly accumulate, compromising the clarity and cleanliness of these surfaces. In this step, we will guide you on how to effectively clean the windows and mirrors in your dining room.
Start by gathering the necessary supplies, including a glass cleaner, lint-free cloths, and a squeegee. Make sure the glass cleaner you choose is suitable for the specific surfaces you’ll be cleaning.
Begin by dusting the window frames and sills using a dry cloth or a duster. Remove any loose dirt or debris that may have accumulated.
Next, spray the glass cleaner onto the glass surface, covering it evenly. Avoid spraying the cleaner directly onto wooden frames or any surrounding surfaces.
Using a lint-free cloth, wipe the glass in a circular motion, starting from the top and working your way down. Pay attention to any stubborn marks or smudges, using a gentle pressure to remove them. For large windows, a squeegee can be more efficient in removing the cleaner and leaving a streak-free finish.
If you have hard-to-reach windows, consider using an adjustable window cleaning tool or an extension pole to safely clean the higher areas.
For mirrors in your dining room, follow the same process as cleaning windows. Spray the glass cleaner onto a lint-free cloth and wipe the mirror in a circular motion. Ensure that the entire mirror surface is thoroughly cleaned and free from streaks.
Once you have finished cleaning the windows and mirrors, allow them to air dry or use a dry lint-free cloth to remove any remaining moisture or streaks.
Take a step back and admire the crystal-clear windows and mirrors in your dining room, allowing natural light to illuminate the space and reflect its overall cleanliness.
Now that the windows and mirrors are sparkling clean, let’s move on to the final step: adding the finishing touches and maintenance.
Step 9: Final Touches and Maintenance
Now that you have cleaned and freshened up your dining room, it’s time to add the final touches and establish a maintenance routine to keep your space looking its best. In this step, we will guide you through the final touches and provide tips for ongoing maintenance.
First, take a moment to ensure that everything is in its place. Arrange any decorative items, centerpieces, or table settings to your liking. Make sure that chairs are aligned neatly and evenly around the table, creating a visually pleasing setup.
Consider adding some fresh flowers or a potted plant to bring life and vibrancy to the dining room. Natural elements can enhance the atmosphere and create a welcoming ambiance.
Once you have completed the finishing touches, establish a regular maintenance routine to keep your dining room clean on an ongoing basis. Here are a few tips:
- Wipe down surfaces regularly to prevent dust and dirt buildup.
- Vacuum or sweep the floor at least once a week, or more frequently if needed.
- Spot clean any spills or stains on the carpet or upholstery immediately to prevent permanent damage.
- Wipe down light fixtures periodically to keep them free from dust and grime.
- Clean windows and mirrors every few weeks to maintain their clarity and shine.
- Consider scheduling a deep clean of the dining room, including furniture and upholstery, on a quarterly or semi-annual basis, depending on your needs.
By incorporating these maintenance tasks into your routine, you can maintain a clean and inviting dining room that you and your guests will enjoy.
With the final touches in place and a maintenance plan established, you have successfully cleaned and rejuvenated your dining room. Sit back, relax, and appreciate the pleasant environment you have created for your meals, gatherings, and cherished moments with loved ones.
Congratulations on completing the comprehensive cleaning process for your dining room!
Note: It’s important to always follow the manufacturer’s instructions for cleaning specific materials and products in your dining room to prevent any damage or discoloration. Safety precautions should also be taken when working with cleaning solutions.
Conclusion
Cleaning a dining room is not just about making it look presentable. It is about creating a clean and inviting space where you can enjoy meals, gatherings, and special moments with your loved ones. By following the step-by-step process outlined in this comprehensive guide, you can effectively clean and maintain your dining room to keep it looking its best.
From clearing and organizing the space to dusting and wiping surfaces, cleaning the dining table and chairs, vacuuming or sweeping the floor, mopping the floor, cleaning the light fixtures, and attending to the windows and mirrors, each step plays a crucial role in achieving a clean and refreshed dining room.
Remember to utilize the appropriate supplies for each task, such as all-purpose cleaners, mild dish soap, microfiber cloths, dusters, vacuums, mops, and glass cleaners. Additionally, be mindful of the specific needs of your furniture and surfaces, such as using wood cleaners for wood furniture or fabric cleaners for upholstery.
Once your dining room is clean, take pride in the well-organized and sparkling space you have created. Incorporate the finishing touches, such as arranging decorative items and adding fresh flowers or plants, to enhance the overall ambiance of the room.
Lastly, maintenance is key to preserving the cleanliness and beauty of your dining room. Establish a regular cleaning routine, including dusting, vacuuming, spot cleaning, and periodic deep cleaning. By adhering to these practices, you can ensure that your dining room remains a welcoming and hygienic environment for years to come.
Now that you have the knowledge and tools to clean your dining room with ease, go ahead and transform it into a space where you can create lasting memories, savor delicious meals, and enjoy the company of loved ones. A clean and inviting dining room awaits!
Frequently Asked Questions about How To Clean A Dining Room
Was this page helpful?
At Storables.com, we guarantee accurate and reliable information. Our content, validated by Expert Board Contributors, is crafted following stringent Editorial Policies. We're committed to providing you with well-researched, expert-backed insights for all your informational needs.


0 thoughts on “How To Clean A Dining Room”