Articles
How To Dry Herbs From Garden
Modified: August 17, 2024
Learn the best methods for drying herbs from your garden and preserve their flavors for future use. Discover expert gardening tips for herb preservation.
(Many of the links in this article redirect to a specific reviewed product. Your purchase of these products through affiliate links helps to generate commission for Storables.com, at no extra cost. Learn more)
Introduction
Have you ever wondered what to do with an abundant herb harvest from your garden? Drying herbs is a fantastic way to preserve their flavor and aroma for year-round use. Not only does it allow you to enjoy the taste of your homegrown herbs long after the growing season ends, but it also provides the opportunity to create your own unique herbal blends.
Drying herbs is a simple and cost-effective method that can be done with minimal equipment. Whether you’re a seasoned gardener or a beginner looking to explore the world of herbs, this article will guide you through the process of drying herbs from your garden.
In this article, we will discuss the reasons why drying herbs is advantageous and how to choose the right herbs for drying. We will also cover the step-by-step process of harvesting, preparing, and drying herbs using various methods such as air drying, using a dehydrator, and oven drying. Finally, we will explore the proper storage techniques to maintain the quality and flavor of your dried herbs.
So, if you’re ready to embark on a journey of preserving the essence of your garden, let’s dive into the art of drying herbs!
Key Takeaways:
- Preserve your garden’s essence year-round by drying herbs. Enjoy concentrated flavors, create unique blends, and savor the benefits of herbs in your culinary creations.
- Choose robust, leafy, and low-water content herbs for drying. Harvest with care, prepare meticulously, and store properly to maintain their freshness and potency.
Why Dry Herbs?
Drying herbs is a valuable technique that offers numerous benefits. Whether you have an overflowing herb garden or you want to savor the flavors of your favorite herbs all year round, drying them is the perfect solution. Here are a few reasons why drying herbs is worth your time and effort:
- Prolong Shelf Life: Fresh herbs have a limited shelf life and can quickly lose their flavor and potency. By drying them, you extend their shelf life significantly, allowing you to enjoy their goodness for months or even years.
- Concentrated Flavor: Dried herbs have a more concentrated flavor compared to fresh herbs, making them a powerful addition to your culinary creations. The drying process intensifies the aroma and enhances the taste, helping you achieve delicious, flavorful dishes.
- Year-Round Availability: If you’re an avid cook or enjoy herbal teas, having access to dried herbs throughout the year allows you to experiment with different flavors and enjoy your favorite dishes even when certain herbs are out of season.
- Cost-Effective: Buying dried herbs from the store can be expensive, especially if you use them frequently. Drying herbs from your garden not only saves you money but also ensures you have a fresh and reliable supply whenever you need it.
- Preserve Nutritional Value: While some nutrients may be lost during the drying process, drying herbs helps retain certain vitamins and minerals. This means you can still enjoy the health benefits of herbs even when they are dried.
- Create Unique Blends: Drying herbs opens up a world of possibilities for creating your own custom herb blends. You can mix and match different herbs according to your taste preferences and experiment with unique flavor profiles in your recipes.
- Homemade Gifts: Dried herbs make thoughtful and personalized gifts for family and friends. You can create beautiful herb bundles or homemade spice blends, adding a touch of your garden’s magic to the gifts you share.
Whether you’re a seasoned chef or a gardening enthusiast, drying your herbs is a rewarding experience that allows you to enjoy the flavors and benefits of herbs all year long. Now that we understand the reasons why drying herbs is advantageous, let’s explore the next step in the process: choosing the right herbs to dry.
Choosing the Right Herbs
When it comes to drying herbs, not all herbs are created equal. Some herbs are better suited for drying due to their flavor, aroma, and the way they retain their qualities after drying. Here are a few considerations to keep in mind when choosing the herbs to dry:
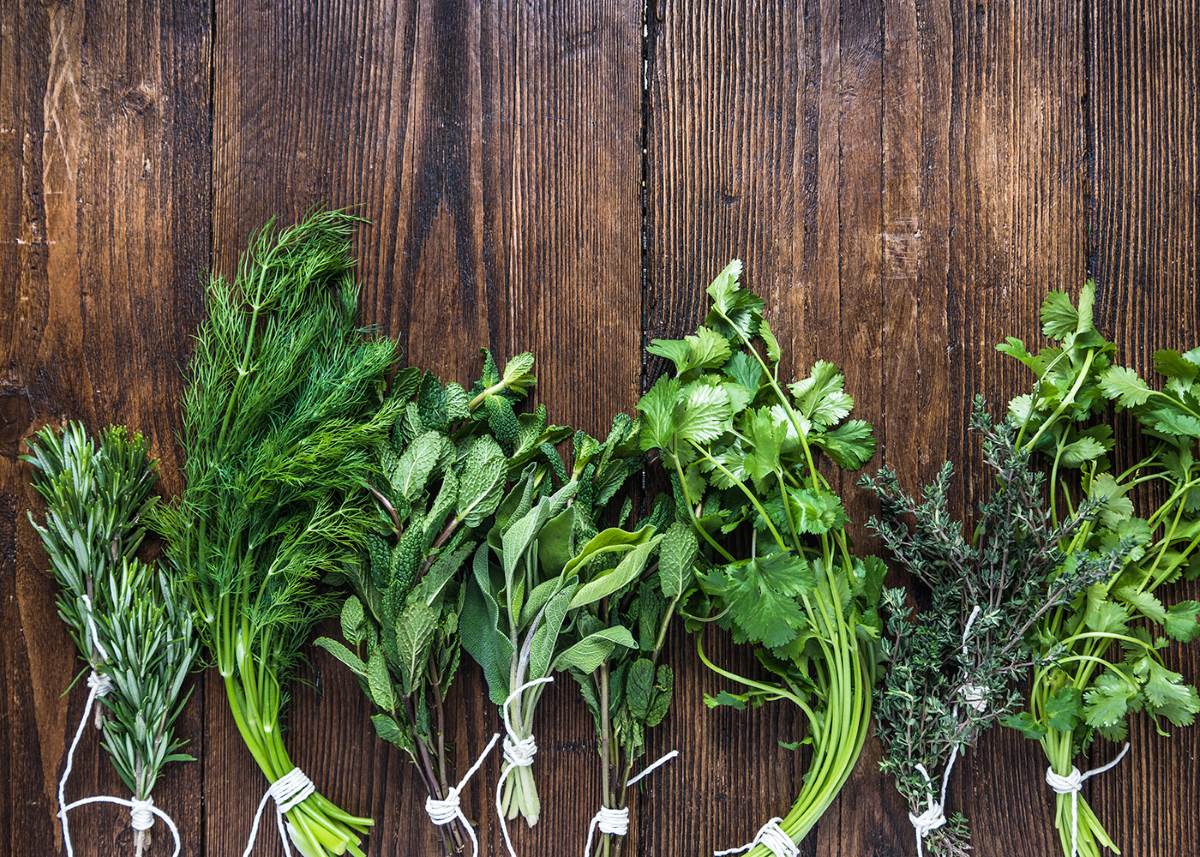
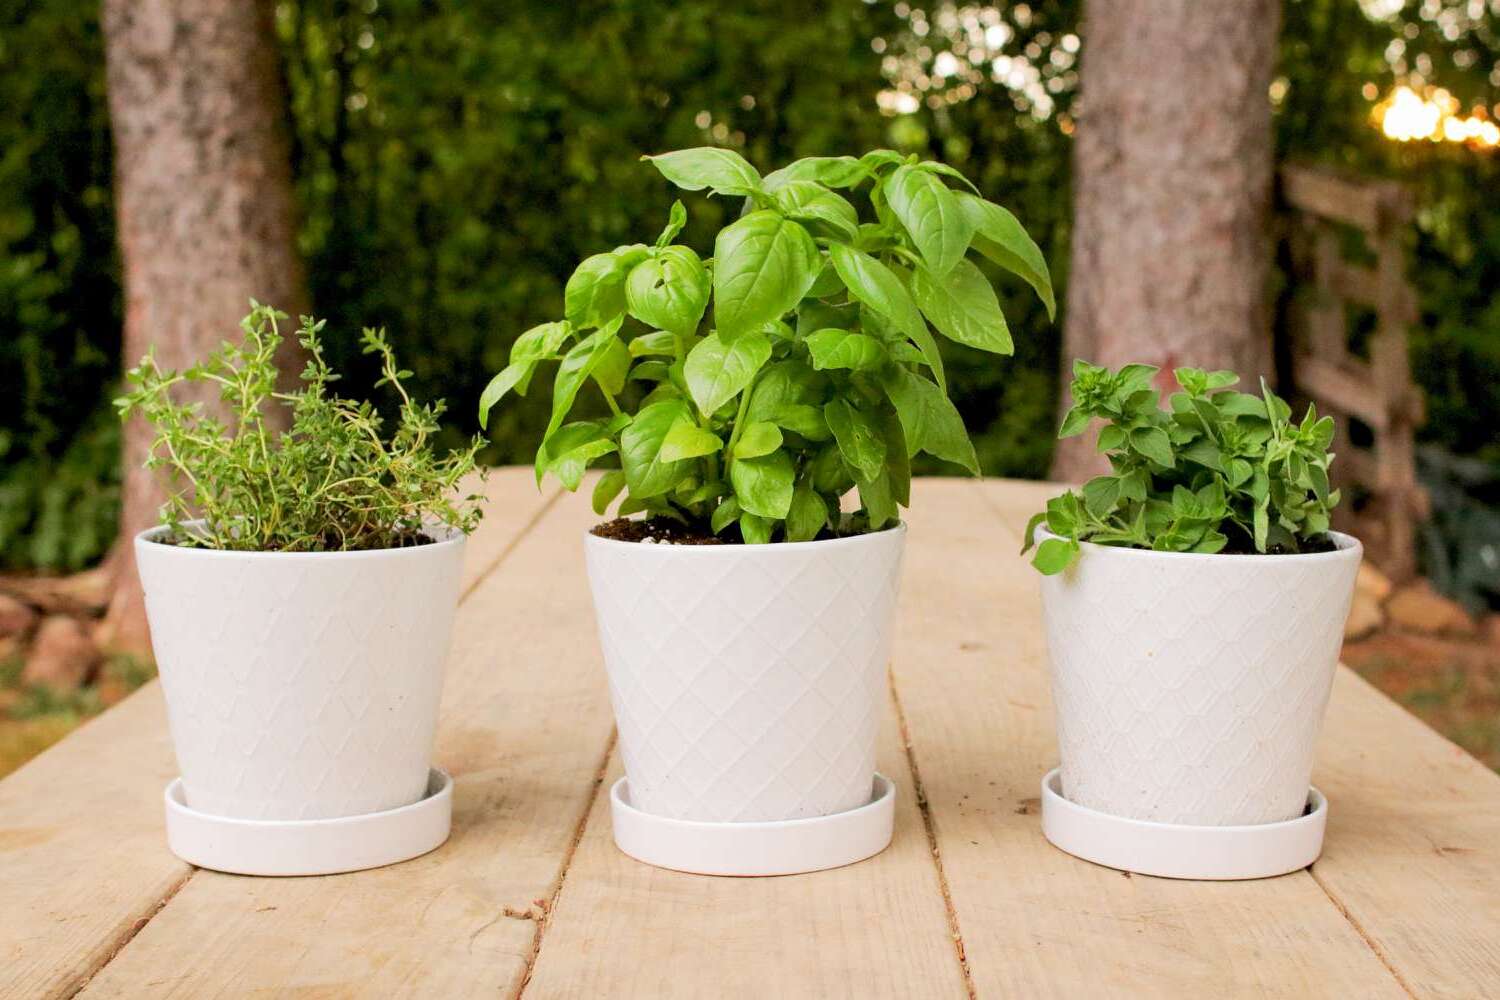
- Robust Herbs: Robust herbs with strong flavors and aromas tend to retain their characteristics well after drying. Some examples of robust herbs include rosemary, thyme, sage, oregano, and bay leaves. These herbs can stand up to the drying process without losing their potency.
- Leafy Herbs: Leafy herbs, such as mint, basil, and parsley, are excellent candidates for drying. They not only dry well but also provide a burst of flavor and aroma when used in culinary dishes and herbal teas.
- Herbs without High Water Content: Herbs with high water content, like cilantro and chives, are more challenging to dry effectively. They tend to lose their flavor quickly and may become limp during the drying process. If you still want to dry these herbs, consider using a dehydrator or freezing them instead.
- Culinary Favorites: Choose herbs that you frequently use in your cooking. Drying these herbs will ensure you always have them on hand to enhance your dishes. Popular culinary favorites for drying include basil, thyme, rosemary, and oregano.
- Medicinal Herbs: If you are interested in drying herbs for medicinal purposes, consider herbs such as lavender, chamomile, calendula, and peppermint. These herbs not only offer health benefits but also retain their medicinal properties when dried.
- Aesthetic Appeal: Some herbs, like lavender, rose petals, and colorful flower petals, are not only flavorful but also add visual appeal to dried arrangements and potpourri. These herbs can be a wonderful addition to your drying collection.
Remember, when choosing herbs for drying, it’s important to select healthy, pesticide-free plants. Harvest the herbs when they are at their peak, just before they bloom, to capture the maximum flavor and aroma. Now that we have chosen the herbs to dry, let’s move on to the next step: harvesting the herbs from the garden.
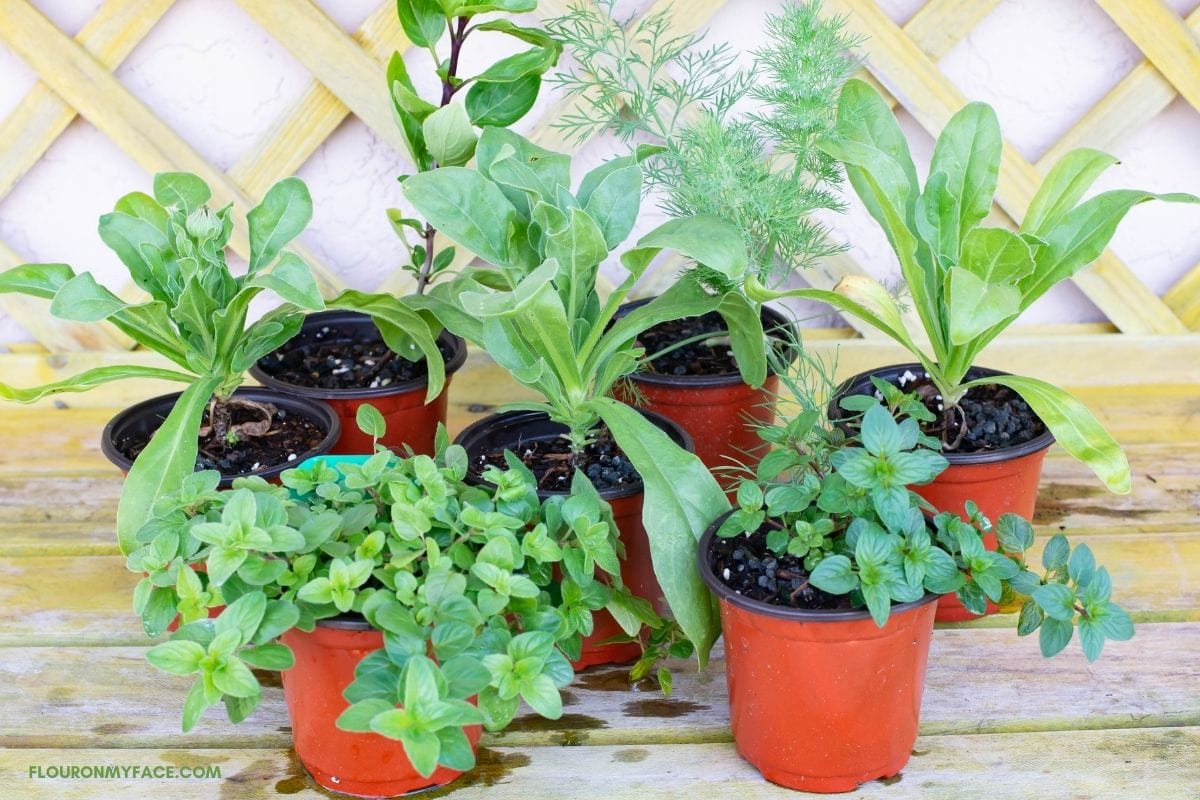
Harvesting Herbs from the Garden
Harvesting herbs from your garden is a rewarding process that requires a few simple steps to ensure optimum flavor and quality when drying. Here are some guidelines to follow when harvesting herbs:
- Timing: Harvest your herbs when they are at their peak, just before they flower. This is when the herbs contain the highest concentration of essential oils, giving them the most flavor and aroma.
- Weather Conditions: Choose a dry day to harvest your herbs. Early in the morning is often the best time, as the dew has evaporated and the herbs are at their freshest.
- Tools: Use clean and sharp gardening shears or scissors to cut the herbs. This will ensure clean cuts and prevent damage to the plants.
- Selective Harvesting: Harvest only the healthy and mature parts of the plants. Remove any damaged, discolored, or wilted leaves or stems. By doing so, you’ll maintain the quality of the remaining herbs.
- Cut or Pinch? Different herbs respond differently to harvesting techniques. For leafy herbs like basil and mint, pinch the leaves off the stems just above a leaf node to encourage bushier growth. For woody herbs like rosemary and thyme, use shears to cut the branches just above a healthy set of leaves.
- Quantity: Avoid overharvesting your plants to allow them to continue growing and producing new foliage. A general rule of thumb is to never harvest more than one-third of the plant at once.
- Washing: If your herbs are dirty or have small insects, gently wash them with cool running water and pat them dry with a clean towel. Ensure they are completely dry before proceeding to the next step.
Following these guidelines will help you harvest your herbs with care, maintaining their freshness and flavor. Once you’ve harvested your herbs, it’s time to prepare them for drying, which we will explore in the next section.
Preparing Herbs for Drying
Before you begin the drying process, it’s important to properly prepare your herbs. Preparing the herbs ensures they are clean, free from any pests or debris, and ready for drying. Follow these steps to prepare your herbs for drying:
- Remove Unwanted Parts: Take a moment to inspect the harvested herbs and remove any damaged, discolored, or wilted leaves or stems. This will help maintain the quality of the dried herbs.
- Separate and Sort: Separate different herb varieties to prevent them from mingling flavors during the drying process. Sort them into small batches based on the type and thickness of the leaves.
- Rinse and Dry: If your herbs are dirty or have small insects, gently rinse them under cool running water and pat them dry with a clean towel. Make sure they are completely dry before proceeding to the next step. Excess moisture can delay the drying process and may promote mold or spoilage.
- Consider the Method of Drying: Depending on the herbs and your personal preference, consider the method of drying you will use: air drying, using a dehydrator, or oven drying. Each method has its own unique requirements and benefits.
- Consider Leaving Stems: In some herbs, such as thyme and rosemary, the stems are also flavorful and can be used in cooking. Consider leaving the stems intact while drying. However, for leafy herbs like basil and mint, it’s best to remove the leaves from the stems.
- Optional Blanching: Some herbs, like parsley and cilantro, benefit from blanching before drying. Blanching involves dipping the herbs in boiling water for a few seconds and then transferring them to ice-cold water to stop the cooking process. This technique helps preserve the color and flavor of the herbs.
By taking the time to properly prepare your herbs, you ensure that they are clean, untangled, and ready for the drying process. The next step is to choose your preferred drying method, which we will explore in the following sections.
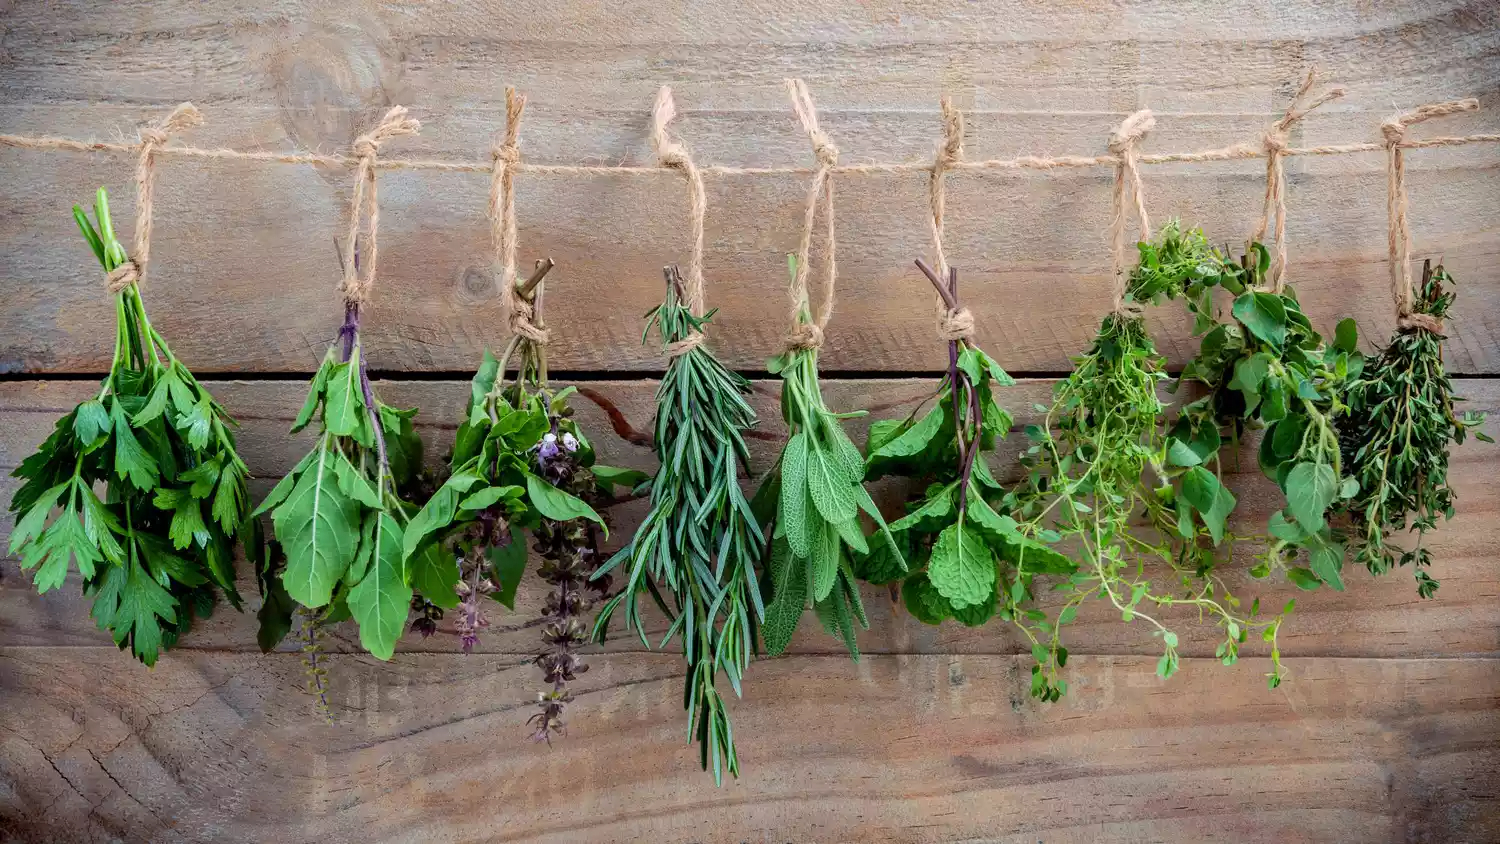
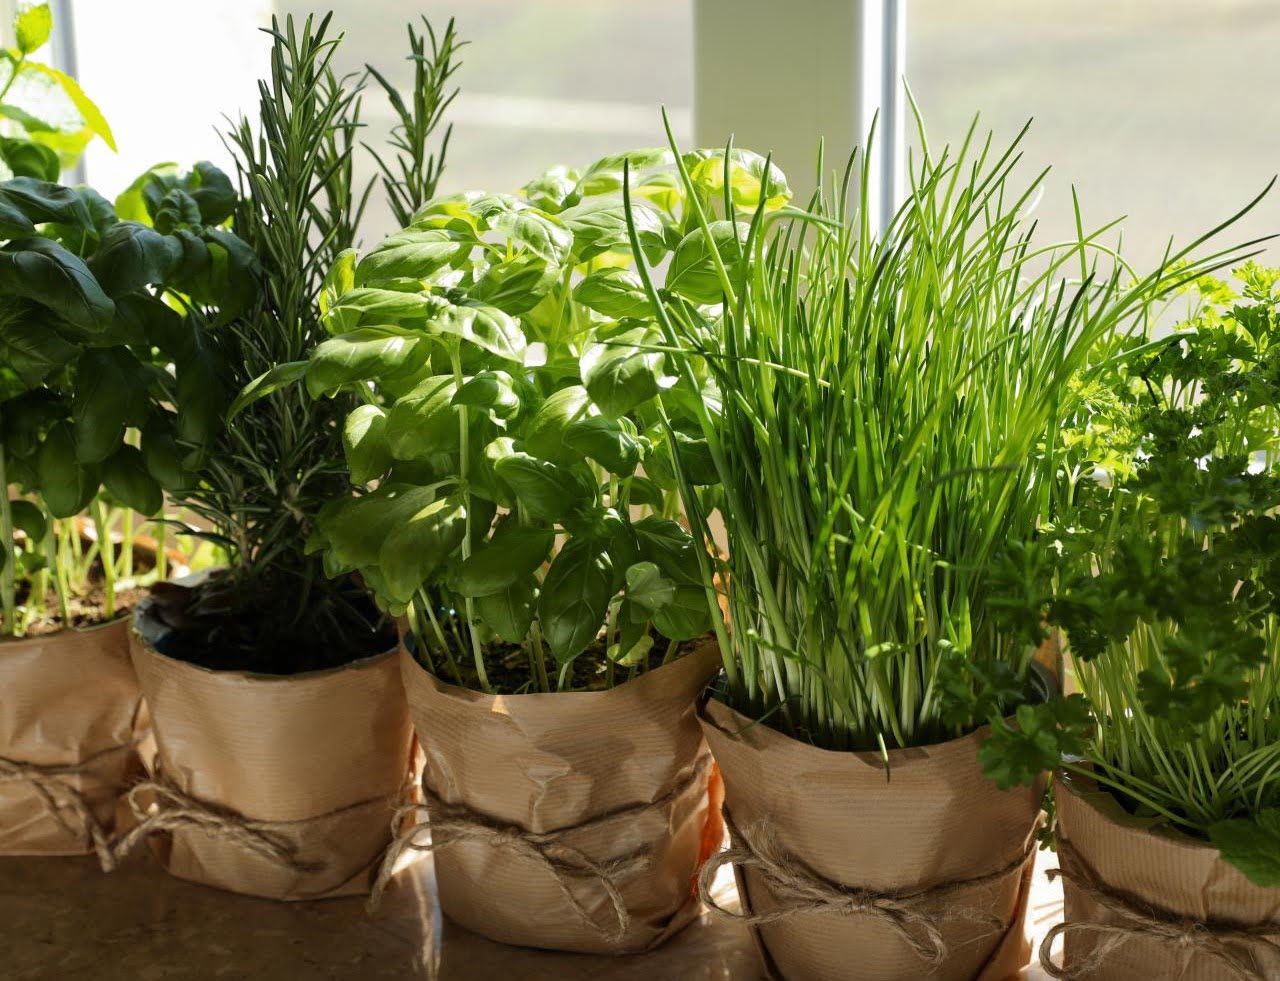
After harvesting your herbs, tie them into small bundles and hang them upside down in a warm, dry place with good air circulation. This will help them to dry out evenly and retain their flavor.
Read more: A Beginner’s Guide To Indoor Herb Gardening
Air Drying Herbs
Air drying herbs is one of the simplest and most traditional methods of preserving the flavor and fragrance of your garden herbs. This method requires minimal equipment and allows the herbs to slowly dry naturally, retaining their essential oils and flavors. Follow these steps to air dry your herbs:
- Bundle the Herbs: Take small bunches of herbs and tie them together at the stems using twine or rubber bands. Make sure the bundles are small enough to allow good air circulation.
- Hang the Bundles: Find a well-ventilated, dry area to hang the herb bundles. Choose a location away from direct sunlight, as it can cause the herbs to lose their color and flavor.
- Avoid Moisture: Hang the bundles upside down to help gravity pull moisture away from the stems. This helps prevent mold and mildew formation during the drying process.
- Patience: Allow the herbs to air dry for about 1 to 2 weeks, or until they become crisp and crumble easily. The drying time can vary depending on the herb, humidity levels, and thickness of the leaves.
- Check for Dryness: To check if the herbs are fully dry, gently crumble a leaf between your fingers. If it easily crumbles without any moisture, the herbs are ready for storage.
- Strip Leaves: Once the herbs are dry, carefully strip the leaves from the stems and discard any remaining stems or debris. Keep the dried leaves intact or coarsely crush them, depending on your preference.
- Storage: Store the dried herbs in airtight containers, away from light and moisture. Label each container with the herb type and date of drying to ensure freshness.
Air drying is a simple and effective method for preserving the flavors and aromas of herbs. It is ideal for low-moisture herbs such as rosemary, thyme, oregano, and sage. However, keep in mind that some delicate herbs like basil and mint may not retain their vibrant green color using this method but will still retain their flavor.
Now that you know how to air dry herbs, let’s explore another popular method – using a dehydrator – for drying herbs, which offers faster and more controlled drying.
Using a Dehydrator to Dry Herbs
If you want to expedite the drying process and have more control over temperature and airflow, using a dehydrator is an excellent option. A dehydrator can evenly and efficiently dry your herbs while preserving their flavor and nutrients. Follow these steps to dry herbs using a dehydrator:
- Prepare the Herbs: Wash and pat dry your herbs. Remove any damaged or wilted parts and separate them into small bunches or single layers for even drying.
- Arrange on Dehydrator Trays: Place the herb sprigs or leaves on the dehydrator trays in a single layer, ensuring there is enough space between them for proper airflow.
- Set Temperature: Different herbs require different drying temperatures. Set the dehydrator to the appropriate temperature, generally between 95°F and 115°F (35°C and 46°C), based on the herb you are drying. Refer to the herb-specific drying guidelines for the best results.
- Monitor and Rotate Trays: Check on the herbs periodically and rotate the trays to ensure even drying. This will help prevent any herbs from sticking together or drying unevenly.
- Drying Time: The drying time can vary depending on the herb and the moisture content. Generally, herbs take around 1 to 4 hours to dry thoroughly in a dehydrator.
- Check for Dryness: To check if the herbs are sufficiently dry, remove a few leaves and crush them gently between your fingers. If they crumble easily, without any moisture or stickiness, they are ready for storage.
- Strip Leaves and Store: Once dried, remove the leaves from the stems and discard any remaining stems or debris. Store the dried herbs in airtight containers, away from light and moisture, and label them accordingly.
Using a dehydrator is a convenient and efficient method for drying herbs, especially if you have a large harvest or want to preserve the herbs quickly. The controlled environment ensures consistent drying, resulting in vibrant and flavorful herbs.
If you don’t have a dehydrator, don’t worry! There’s another method you can use to dry herbs, and it’s as simple as using your oven. Let’s explore oven drying herbs in the next section.
Oven Drying Herbs
If you don’t have a dehydrator but still want a quicker drying process compared to air drying, you can use your oven to dry herbs. The low heat in the oven helps remove moisture from the herbs while preserving their essential oils and flavors. Here’s how you can oven dry herbs:
- Preheat the Oven: Preheat your oven to the lowest temperature setting, usually around 150°F to 200°F (65°C to 93°C). It’s important not to use a high temperature to prevent the herbs from burning or losing their potency.
- Prepare the Herbs: Wash and gently pat dry your herbs. Remove any damaged or wilted parts, and separate the leaves from the stems.
- Spread on Baking Sheets: Place the herb leaves in a single layer on baking sheets lined with parchment paper. Ensure they are evenly spaced out for proper airflow and drying.
- Oven Drying Time: The drying time can vary based on the herb and moisture content. Generally, it takes around 30 minutes to 1 hour for herbs to dry in the oven. Keep a close eye on them to prevent over-drying.
- Rotate and Flip: Rotate the baking sheets midway through the drying process to ensure even drying. You can also flip the leaves to ensure both sides dry uniformly.
- Check for Dryness: To check if the herbs are fully dry, crumble a leaf between your fingers. If it easily crumbles without any moisture, they are ready to be removed from the oven.
- Cool and Store: Once the herbs are dry, remove them from the oven and allow them to cool completely. Store the dried herbs in airtight containers, away from light and moisture.
Oven drying herbs is a convenient and effective method, particularly if you don’t have access to a dehydrator. It allows for a faster drying process while still preserving the flavors and aromas of your herbs.
Now that you’re familiar with the three drying methods – air drying, using a dehydrator, and oven drying – let’s move on to the final step: storing your dried herbs properly.
Storing Dried Herbs Properly
Once your herbs are dried, it’s crucial to store them properly to maintain their flavor, aroma, and longevity. Here are some guidelines for storing dried herbs:
- Cool and Dry Storage: Store your dried herbs in a cool, dark, and dry place. Excessive light, heat, and moisture can degrade the quality of the herbs.
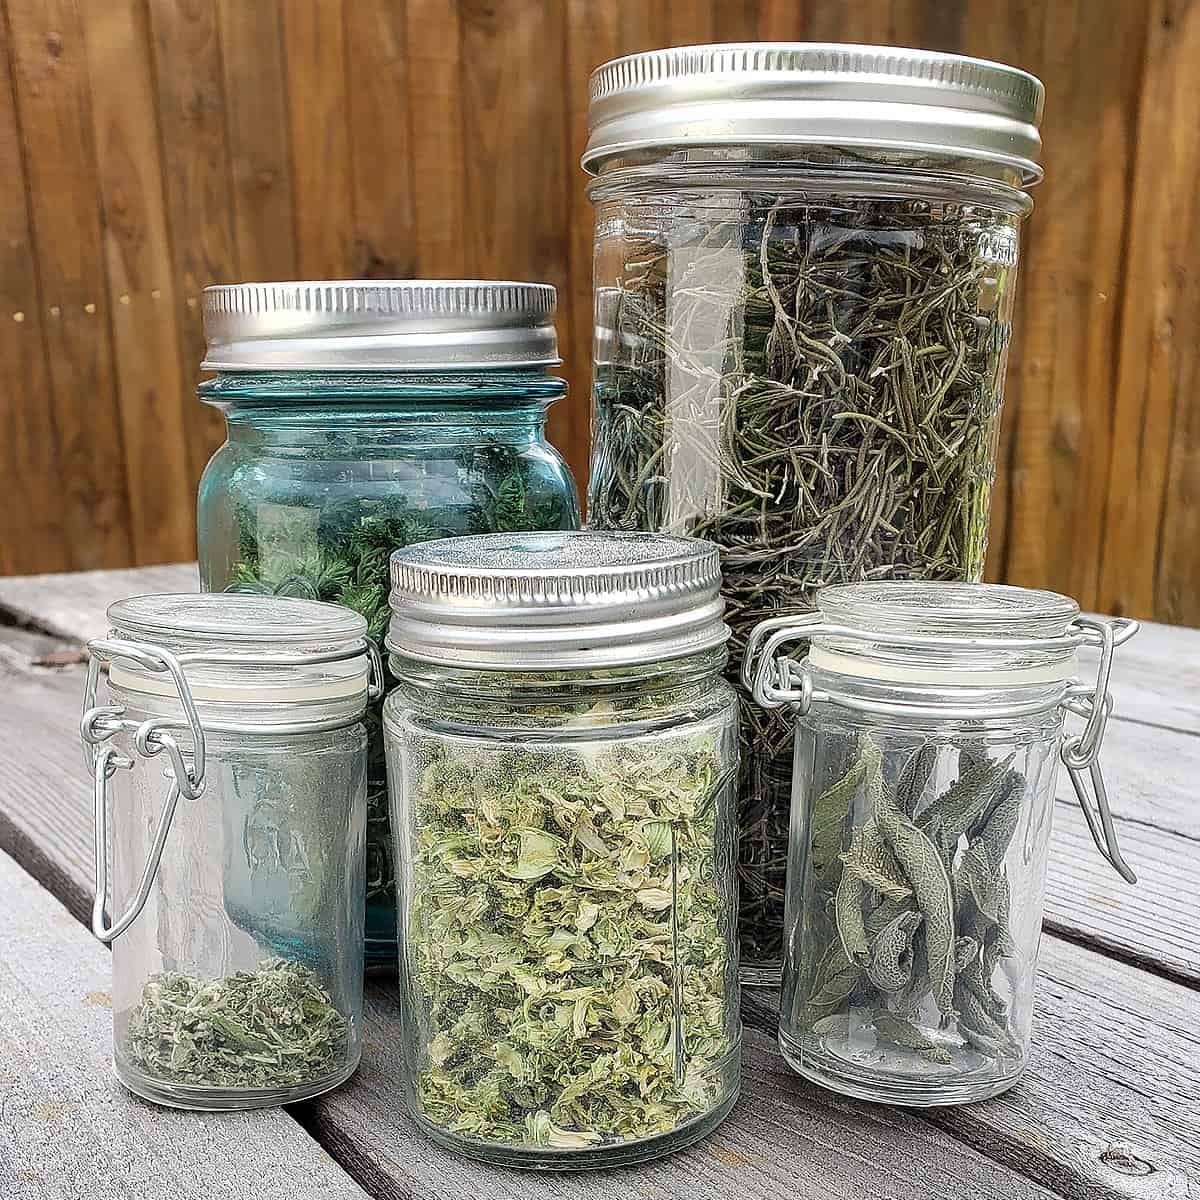
- Airtight Containers: Transfer the dried herbs to airtight containers such as glass jars, metal tins, or resealable plastic bags. Make sure the containers are clean and dry before use.
- Label and Date: Label each container with the name of the herb and the date of drying. This helps you keep track of the freshness and ensures you use the herbs within a reasonable timeframe.
- Store Separately: It’s best to store different herb varieties separately to maintain their individual flavors and aromas. This prevents cross-contamination and ensures the integrity of each herb.
- Avoid Crushing until Ready to Use: To preserve the maximum flavor, it’s recommended to keep the herbs in whole or coarsely crushed form until you are ready to use them. This helps retain their potency.
- Proper Herb Identification: If you have multiple herbs, it’s helpful to label each container clearly to avoid confusion. Even dried herbs can vary in appearance, so accurate labeling is essential.
- Monitor for Freshness: Periodically check your dried herbs for any signs of moisture, discoloration, mold, or loss of aroma. If you notice any of these, discard the affected herbs as they may have spoiled.
- Maximize Shelf Life: While dried herbs can retain their flavor for months to a year, it’s best to use them within six months for optimal taste and potency.
Proper storage ensures that your dried herbs maintain their quality and are ready to enhance your culinary creations whenever you need them. With a well-stocked supply of dried herbs, you’ll have the power to infuse a myriad of flavors into your dishes throughout the year.
Now that you’re equipped with the knowledge of drying and storing herbs, you can enjoy the fruits of your garden all year round. Whether you choose the air drying, dehydrator, or oven drying method, rest assured that your dried herbs will add a delicious touch to your culinary adventures.
So, go ahead and explore the world of dried herbs. Let your creativity and taste buds guide you as you sprinkle, infuse, and savor the delightful flavors and aromas that only dried herbs can offer!
Read more: 50 Quick And Easy Herb Garden Ideas
Conclusion
Preserving the flavors, aromas, and benefits of herbs from your garden is a gratifying endeavor. Drying herbs provides a practical and cost-effective way to enjoy the taste of your homegrown herbs throughout the year. By following the steps outlined in this article, you can successfully dry your herbs and create a well-stocked supply of flavor-packed ingredients.
We began by exploring the reasons why drying herbs is advantageous. From prolonging shelf life to creating unique blends, drying herbs offers a multitude of benefits for avid cooks, herbal enthusiasts, and those seeking homemade gifts with a personal touch. Choosing the right herbs for drying plays a crucial role in achieving the best results. Robust herbs and leafy varieties are ideal candidates for drying, while high-water content herbs may be better suited for alternative preservation methods.
Harvesting herbs from your garden requires careful timing, consideration of weather conditions, and selective handling to ensure the best quality. Preparing the herbs for drying involves removing unwanted parts, sorting, and considering the specific method of drying you will use.
We covered three popular methods of drying herbs: air drying, using a dehydrator, and oven drying. Each method has its own advantages, whether it’s the simplicity and natural process of air drying, the controlled and efficient drying of a dehydrator, or the faster drying time of an oven.
After successfully drying your herbs, storing them correctly is crucial for maintaining their freshness and flavor. Cool and dry storage in airtight containers, proper labeling, and monitoring for freshness will help you enjoy the full potential of your dried herbs.
In conclusion, drying herbs from your garden is a rewarding and practical way to enjoy their flavors and benefits all year long. Whether you’re an experienced gardener or just starting out, exploring the art of drying herbs allows you to create an abundant supply of culinary delights, herbal remedies, and thoughtful gifts.
So, don’t let your herb harvest go to waste. Embrace the art of drying herbs and savor the taste of your garden in every dish you create!
Frequently Asked Questions about How To Dry Herbs From Garden
Was this page helpful?
At Storables.com, we guarantee accurate and reliable information. Our content, validated by Expert Board Contributors, is crafted following stringent Editorial Policies. We're committed to providing you with well-researched, expert-backed insights for all your informational needs.


0 thoughts on “How To Dry Herbs From Garden”