Home>Garden Essentials>How To Grow Herbs From Seed
Garden Essentials
How To Grow Herbs From Seed
Modified: March 15, 2024
Learn how to grow herbs from seed in your garden and enjoy fresh and aromatic flavors right at your fingertips. Step-by-step guide to cultivating your own herb garden.
(Many of the links in this article redirect to a specific reviewed product. Your purchase of these products through affiliate links helps to generate commission for Storables.com, at no extra cost. Learn more)
Introduction
Growing herbs from seed is an enjoyable and rewarding experience for gardeners of all levels. Whether you have a sprawling garden or just a small balcony, cultivating your own herbs allows you to have fresh, aromatic ingredients at your fingertips – perfect for enhancing your culinary creations or creating soothing herbal teas.
Not only is growing herbs from seed a cost-effective way to build your garden, but it also offers a sense of satisfaction as you witness the entire growth process – from a tiny seed to a flourishing plant. By following some simple steps and providing the right conditions, you can successfully grow a wide range of herbs and enjoy their flavors, scents, and healing properties.
In this guide, we will walk you through the essential steps to get started on your herb-growing journey. From selecting the right seeds to properly caring for and harvesting your herbs, you’ll have all the knowledge you need to create a thriving herb garden.
So, roll up your sleeves, don your gardening gloves, and let’s dive into the world of growing herbs from seed!
Key Takeaways:
- Growing herbs from seed is a fun and rewarding way to have fresh ingredients at your fingertips. Choose the right seeds, prepare the soil, and provide proper care to watch your herbs flourish!
- Harvesting your herbs at the right time and preserving them for later use ensures a continuous supply of fresh flavors. Enjoy the process and savor the fruits of your herb-growing labor!
Read more: How Long To Grow Herbs From Seed
Choosing the Right Seeds
The first step in growing herbs from seed is selecting the right seeds for your garden. With a wide variety of herbs available, it’s important to consider factors such as your climate, available space, and personal preferences.
When choosing herb seeds, take into account the growing requirements of each herb. Some herbs, such as basil and parsley, prefer full sun and well-drained soil, while others, like mint and chives, tolerate partial shade and moist soil.
Furthermore, consider the purpose of the herbs you want to grow. If you plan on using them for culinary purposes, look for culinary herb varieties specifically bred for their flavor profiles. On the other hand, if you’re interested in the aromatic or medicinal properties of herbs, opt for varieties that are known for their fragrance and therapeutic benefits.
It’s also worth considering whether you want to grow annual or perennial herbs. Annual herbs, like cilantro and dill, complete their lifecycle in one season, while perennial herbs, such as lavender and thyme, come back year after year. By incorporating a mix of annuals and perennials, you can enjoy a continuous supply of fresh herbs in your garden.
When purchasing herb seeds, make sure to choose a reputable supplier that offers high-quality seeds. Look for seeds that have a good germination rate and are free from diseases or pests. You can find a wide selection of herb seeds at local garden centers, online retailers, or even swap seeds with fellow gardeners.
Lastly, consider the quantity of seeds you require. Some herbs, like basil, can be sown generously, while others, like rosemary, require just a few seeds. Take into account your available space and the frequency at which you plan on using the herbs to determine how many seeds to purchase.
By carefully selecting the right herb seeds for your garden, you’ll be setting yourself up for a successful and bountiful herb-growing experience.
Preparing the Soil
A crucial step in successfully growing herbs from seed is preparing the soil. Herb plants thrive in well-draining soil that is rich in organic matter. Here are some steps to ensure your soil is ready to nurture your herb seeds:
- Clear the area: Begin by clearing the area where you plan to sow your herb seeds. Remove any weeds, rocks, or debris that may hinder the growth of your herbs.
- Loosen the soil: Using a garden fork or a tiller, loosen the soil to a depth of around 6-8 inches. This will help improve the soil’s drainage and allow the roots of your herbs to penetrate easily.
- Add compost: Spread a layer of compost over the tilled soil. Compost adds organic matter and nutrients, promoting healthy root development. Mix the compost into the soil using the garden fork or tiller.
- Check the pH level: Most herbs prefer a slightly acidic to neutral pH level. Use a pH testing kit to determine the pH of your soil. If it’s too acidic, add lime to raise the pH. If it’s too alkaline, add sulfur or peat moss to lower the pH.
- Level the soil: Rake the soil to create a smooth and level surface. This will make it easier to sow the herb seeds evenly.
It’s important to note that different herbs have varying soil requirements. Some herbs, like lavender and rosemary, prefer well-drained soil on the sandy side, while others, like mint and lemon balm, thrive in more moist soil. Consider the specific needs of the herbs you’re growing and make any necessary adjustments to the soil composition accordingly.
Before sowing the seeds, make sure the soil has had enough time to settle and is adequately moist. Avoid working with the soil when it’s excessively wet, as this can lead to compaction and poor drainage.
By taking the time to properly prepare the soil, you’ll be providing your herb seeds with a healthy and nutrient-rich environment to grow and flourish.
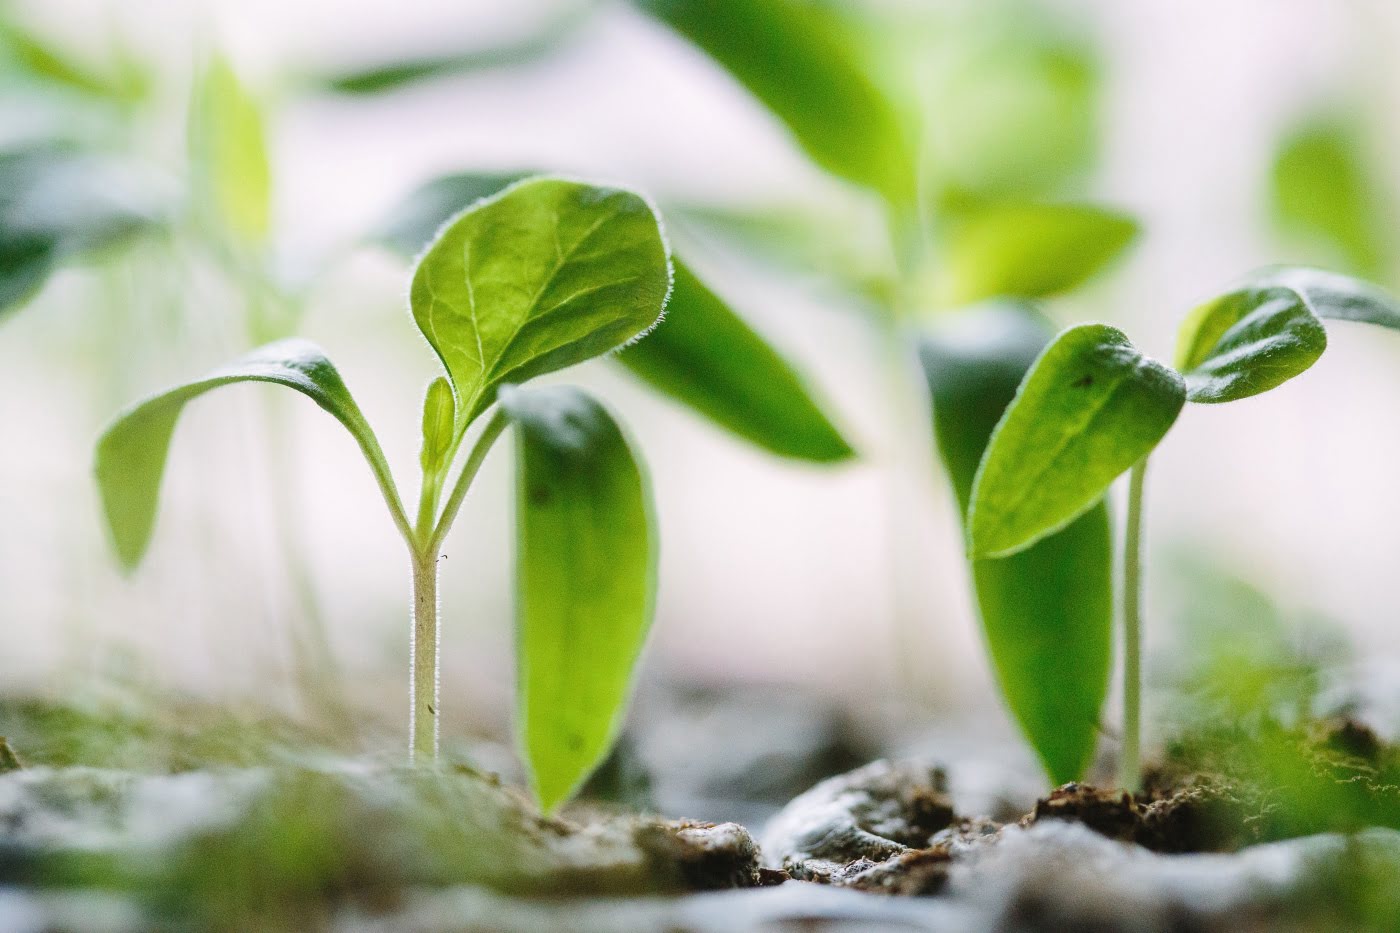
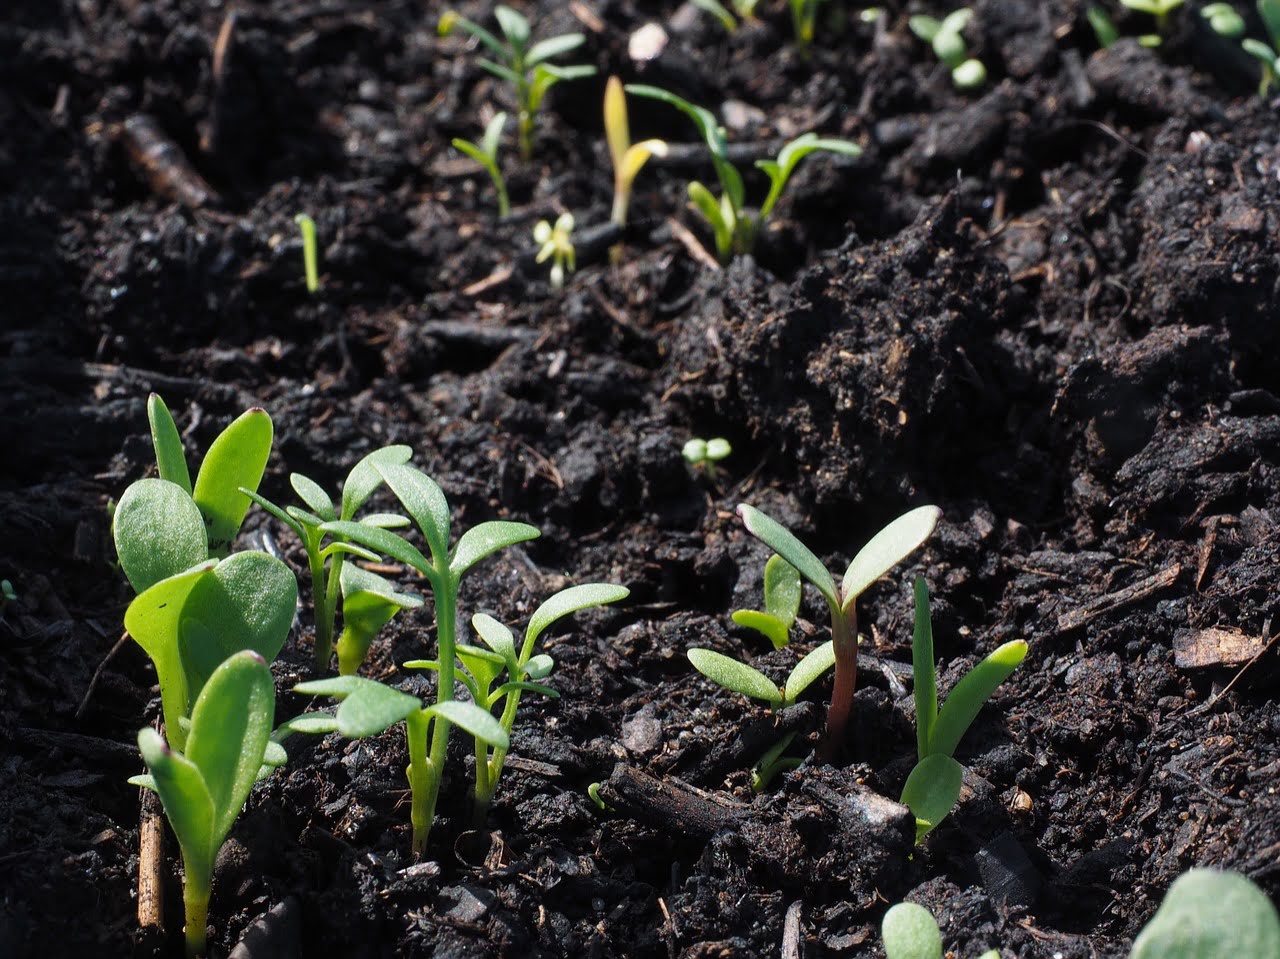
Sowing the Seeds
Once you have chosen your herb seeds and prepared the soil, it’s time to sow the seeds. Follow these steps to ensure successful seed germination:
- Read the seed packet: Each herb seed has its own specific requirements for sowing depth and spacing. Read the instructions on the seed packet carefully to determine the optimal conditions for your seeds.
- Prepare furrows or holes: Use a gardening tool, such as a small trowel or your finger, to create furrows or holes in the soil. The depth should be according to the instructions on the seed packet.
- Sow the seeds: Place the herb seeds into the furrows or holes, following the recommended spacing. Try to space the seeds evenly to allow room for each seedling to grow.
- Cover and tamp the soil: Gently cover the seeds with a thin layer of soil or vermiculite. Lightly tamp down the soil to ensure good soil-to-seed contact without compacting it too much.
- Water gently: Use a watering can with a fine spray or a misting nozzle to water the seeds gently. Avoid using a heavy stream of water, as it can dislodge the seeds or create uneven soil saturation.
It’s important to keep the soil consistently moist during the germination period. Check the moisture level regularly and water as needed, ensuring the soil doesn’t dry out or become waterlogged.
Some herb seeds, especially those with hard outer shells, benefit from pre-soaking or scarification to improve germination rates. Check the seed packet or do some research to see if your chosen herb seeds require any special treatment before sowing.
Remember to label the area where you’ve sown the seeds. This will help you identify the herbs as they sprout, especially if you’re growing multiple varieties.
Now that your seeds are sown, it’s time to wait for those little green sprouts to emerge and embark on their journey towards becoming flourishing herb plants.
Providing Proper Watering
Watering is a crucial aspect of herb seedling care, as it plays a vital role in their growth and survival. Here are some guidelines to ensure proper watering for your herb plants:
- Monitor soil moisture: Check the moisture level of the soil regularly. Stick your finger into the soil about an inch deep, and if it feels dry, it’s time to water. Avoid overwatering, as it can lead to root rot and other fungal diseases.
- Water deeply: When watering, make sure to soak the soil thoroughly, allowing the water to reach the root zone. Shallow watering only leads to surface-level root development, making the plants more susceptible to stress and drought.
- Time of day: Water your herb plants in the early morning or late afternoon. This allows the leaves to dry before evening, reducing the risk of fungal diseases. Watering during midday can lead to excessive evaporation and potential sunburn on the leaves.
- Avoid wetting the foliage: Direct the water towards the base of the plants, avoiding wetting the foliage. Wet leaves can create an environment for fungal diseases to thrive.
- Use a watering can or drip irrigation: Avoid using a high-pressure hose or sprinkler system, as it can disturb the soil and displace the seeds. Opt for a watering can with a fine nozzle or a drip irrigation system for more precise and gentle watering.
- Modify watering frequency: Adjust the frequency of watering based on weather conditions. During hot, dry periods, you may need to water more frequently. On the other hand, during cooler and rainy spells, you can reduce the frequency.
It’s important to strike a balance when it comes to watering. While herbs generally prefer well-drained soil, they still require consistent moisture for healthy growth. Avoid letting the soil dry out completely or become waterlogged.
Keep in mind that different herbs have varying water requirements. Herbs like basil and parsley prefer consistently moist soil, while herbs like rosemary and thyme are more drought-tolerant and prefer slightly drier conditions.
Observing and understanding the moisture needs of your herbs will help you establish a watering routine that keeps your plants happy and thriving.
Read more: How To Grow Herbs From Seeds Indoors
Ensuring Adequate Sunlight
Adequate sunlight is essential for the healthy growth and development of herbs. Most herbs thrive in full sun, which is typically defined as receiving at least 6 hours of direct sunlight per day. Here’s how to ensure your herb plants receive the necessary sunlight:
- Choose the right location: Select a location for your herb garden that receives ample sunlight throughout the day. Ideally, this area should be free from obstructions such as tall buildings or trees that cast shadows and limit sunlight exposure.
- Observe sunlight patterns: Spend some time in your chosen garden area to observe the sunlight patterns. Note how the sun moves across the sky and which parts of the garden receive the most sunlight. This will help you determine the best spots for planting your herbs.
- Consider sunlight requirements: Different herbs have varying sunlight requirements. While most herbs prefer full sun, some can tolerate partial shade. Read the seed packet or do some research to understand the specific sunlight needs of the herbs you’re growing.
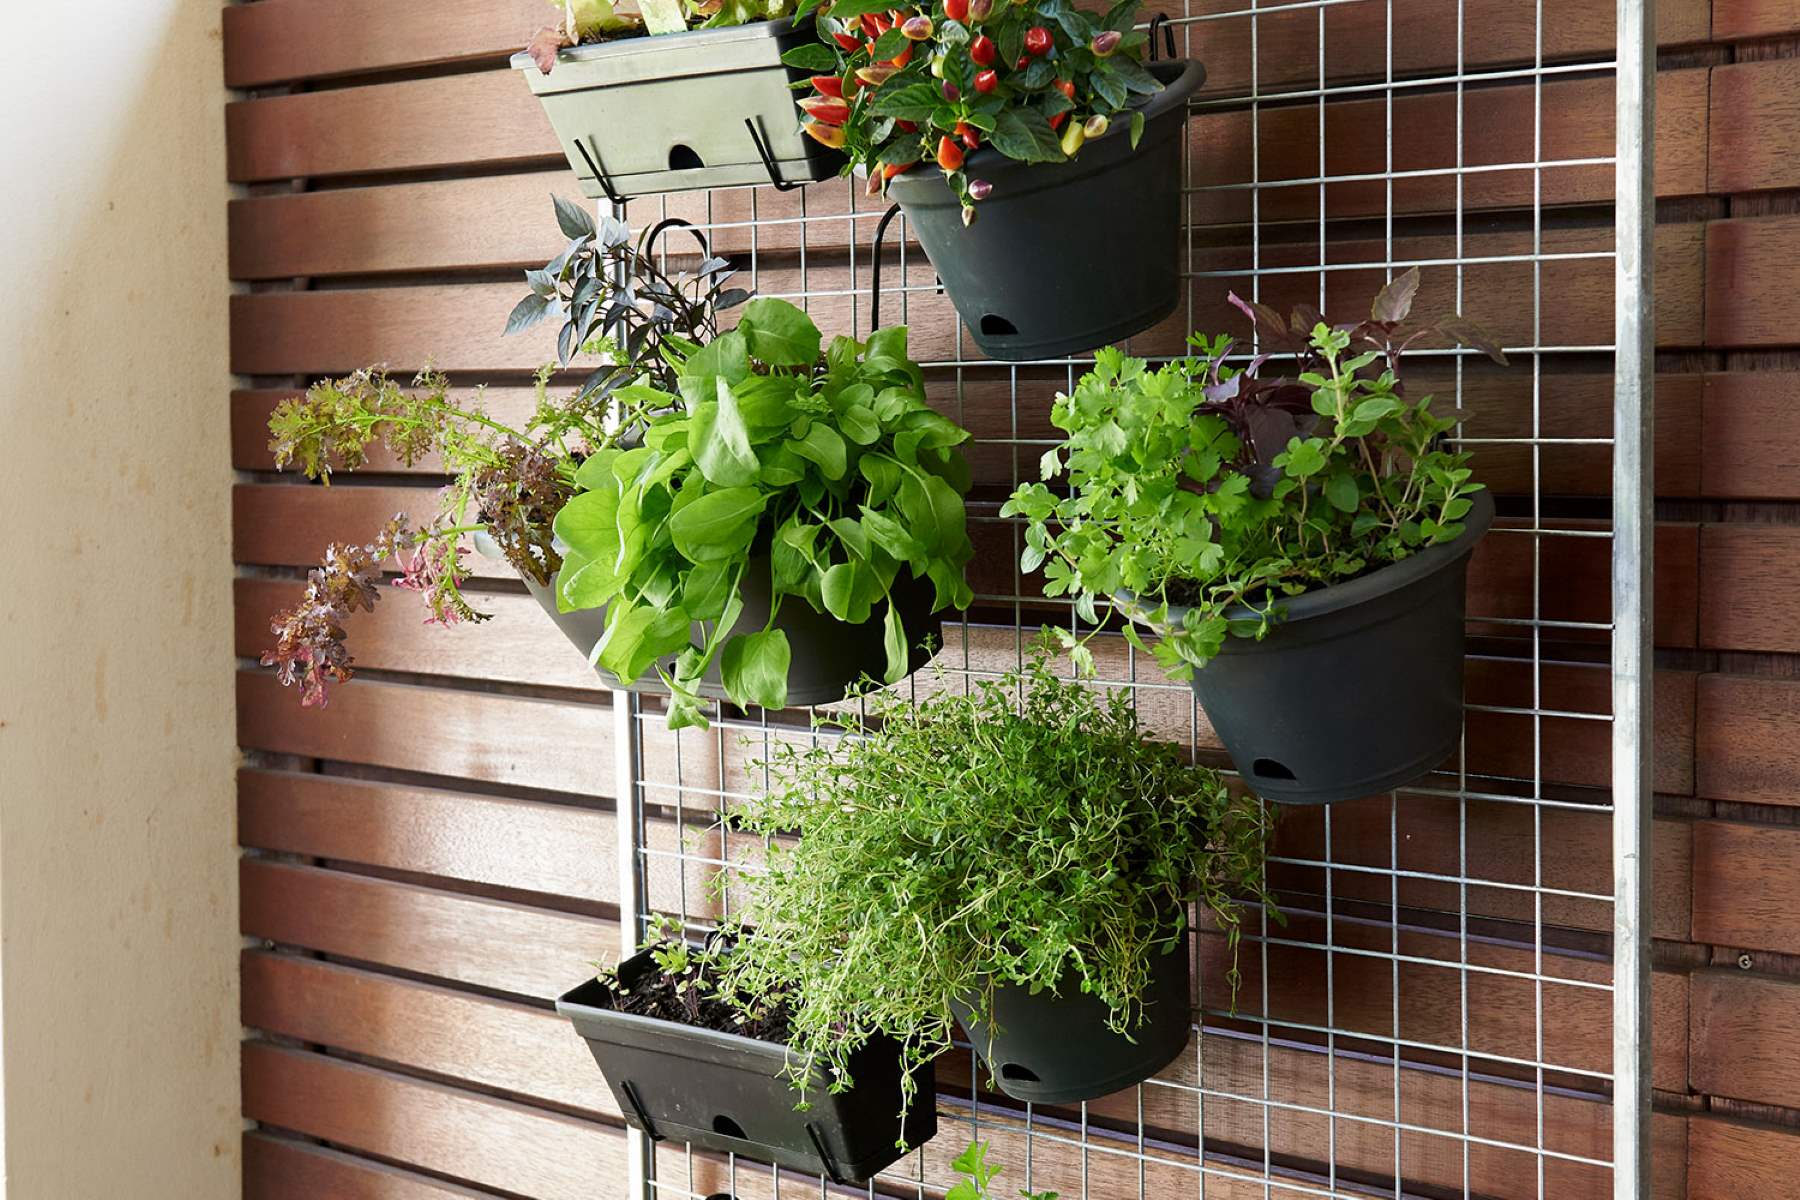
- Rotate pots for even exposure: If you’re growing herbs in containers, it’s essential to rotate the pots periodically to ensure all sides receive equal sunlight. This helps prevent uneven growth and promotes overall plant health.
- Protect from extreme heat: In hot summer climates, herbs may benefit from some protection during the hottest part of the day. Consider providing shade or using shade cloth to filter the intense midday sun, preventing heat stress.
If you live in an area with limited sunlight or have space constraints that prevent you from providing the recommended amount of direct sunlight, you can still grow herbs successfully. Look for herbs that tolerate shade or try container gardening that allows you to move the plants to catch the sunlight throughout the day.
Remember that insufficient sunlight can result in weak, leggy plants with reduced flavor and aroma. By ensuring your herbs receive adequate sunlight, you’ll be setting them up for robust growth and a bountiful harvest.
Maintaining the Growing Environment
Maintaining the proper growing environment is crucial to support the healthy growth and development of your herb plants. Here are some factors to consider when maintaining the growing environment:
- Temperature: Most herbs thrive in temperatures between 60°F and 75°F (15°C and 24°C). However, specific herbs may have different temperature preferences. Ensure that your herb garden is located in an area with temperatures within the desired range for your chosen herbs.
- Air circulation: Good air circulation is important to prevent the buildup of moisture and the risk of diseases. Avoid overcrowding your herbs, as this can restrict airflow. If growing herbs indoors, consider using a fan to promote air movement.
- Weed control: Regularly remove any weeds that may compete with your herb plants for nutrients and water. Mulching around the herbs can help suppress weed growth and maintain a neat appearance.
- Pest management: Keep an eye out for common herb pests such as aphids, caterpillars, and spider mites. Regularly inspect your plants for any signs of infestation and take appropriate measures, such as handpicking pests or using organic pest control methods.
- Disease prevention: Proper sanitation practices can reduce the risk of diseases. Remove any infected or diseased plant material promptly. Avoid overhead watering, as it can promote the spread of fungal diseases.
- Support structures: Some herbs, like climbing varieties of mint or beans, may require support structures such as trellises or stakes. Provide these structures as needed to help the herbs grow upright and to prevent them from sprawling and taking up excessive space.
- Regular maintenance: Regularly inspect your herb plants for any signs of stress, nutrient deficiencies, or other issues. Prune any dead or yellowing leaves and trim the herbs as needed to maintain their desired shape and size.
It’s essential to regularly tend to your herb garden and provide the necessary care to create an optimal growing environment. By attending to these maintenance tasks, you’ll support the long-term health and productivity of your herbs.
When growing herbs from seed, make sure to plant them in well-draining soil, keep the soil consistently moist, and provide plenty of sunlight. This will help the seeds germinate and grow into healthy plants.
Pruning and Thinning
Pruning and thinning your herb plants are important practices to maintain their health, shape, and productivity. Here’s what you need to know about pruning and thinning your herb garden:
- Reasons for pruning: Pruning helps promote bushier growth, prevent legginess, and encourage the production of new leaves. It also helps maintain the shape and size of your herb plants, preventing them from becoming overcrowded.
- Timing of pruning: The timing of pruning depends on the herb. Generally, it’s best to prune your herbs when they have reached a reasonable size and have developed a solid root system. Avoid pruning too early when the plants are too young or pruning late in the growing season when the plants are preparing for dormancy.
- Tools for pruning: For most herbs, you can simply use a pair of clean, sharp garden shears or scissors to prune. Make sure to sanitize the tools with rubbing alcohol or a bleach solution to reduce the risk of spreading diseases between plants.
- Pruning techniques: When pruning, focus on removing dead, damaged, or diseased leaves and stems. Pinch back the growth tips to encourage bushier growth. Additionally, consider harvesting regularly, as this also functions as a form of pruning and encourages continuous growth.
- Thinning overcrowded plants: If your herb garden is overcrowded, thinning is necessary to ensure adequate airflow and sunlight penetration. Carefully remove excess seedlings or mature plants, leaving ample space between each plant to prevent competition for resources.
- Woody herbs: Some herbs like rosemary and lavender may become woody over time. Prune them more aggressively by cutting back about one-third of the plant’s growth each year to maintain their shape and vigor.
It’s essential to be mindful when pruning and thinning your herbs, as excessive cutting or removing too many plants can stress them. Always ensure you’re following proper techniques and adjusting the pruning approach based on the specific needs of each herb.
By regularly pruning and thinning your herb plants, you’ll maintain their health, promote robust growth, and ensure a bountiful harvest of flavorful and aromatic leaves.
Fertilizing the Herbs
Fertilizing your herb plants is important to provide them with the necessary nutrients for healthy growth and optimum production of leaves and flowers. Follow these guidelines to properly fertilize your herbs:
- Choose the right fertilizer: When selecting a fertilizer, opt for a balanced, slow-release organic fertilizer. Look for options that have equal or similar amounts of nitrogen, phosphorus, and potassium (N-P-K) to provide a well-rounded nutrient profile.
- Timing of fertilization: Herbs generally benefit from low to moderate fertilization. It’s best to fertilize your herbs right before their active growth periods, such as spring and early summer. Avoid fertilizing during winter dormancy or late in the growing season.
- Follow package instructions: Carefully read and follow the package instructions for the specific fertilizer you’re using. Different fertilizers have different application rates, so it’s important to apply the correct amount to avoid over- or under-fertilization.
- Apply evenly and water in: Sprinkle the fertilizer evenly around the base of the herb plants, keeping it a few inches away from the stem. After applying the fertilizer, water the plants thoroughly to help the nutrients penetrate the soil and reach the roots.
- Organic alternatives: If you prefer organic fertilizers, there are several options available. You can use compost, well-rotted manure, or other organic matter to enrich the soil and provide nutrients. Additionally, you can brew homemade organic fertilizers such as compost tea or seaweed extract.
- Watch for signs of nutrient deficiency: Keep an eye on your herb plants for any signs of nutrient deficiency, such as yellowing leaves, stunted growth, or poor production. If you notice any such signs, it may indicate the need for additional fertilization.
- Avoid excessive fertilization: While nutrients are essential, too much fertilizer can cause more harm than good. Over-fertilization can lead to excessive leaf growth, reduced flavor intensity, and may even burn the roots. Always follow the recommended application rates and avoid applying more fertilizer than necessary.
It’s important to note that some herbs, like mint or chives, are generally more robust and don’t require heavy fertilization. However, herbs grown in containers may need more frequent fertilization as nutrients leach out of the soil more quickly.
By providing your herb plants with adequate and appropriate fertilization, you’ll support their overall health, vigor, and productivity, ensuring a plentiful harvest of flavorful and aromatic leaves.
Read more: How To Grow Herbs From Seeds In Pots
Transplanting the Seedlings
Transplanting seedlings is a crucial step in the herb growing process, as it allows young plants to establish strong roots and continue their growth in a more spacious environment. Here’s how to successfully transplant your herb seedlings:
- Timing: It’s important to transplant your herb seedlings at the right time, usually when they have developed their first set of true leaves and are sturdy enough to handle the process.
- Prepare the new planting area: Choose a location that provides the ideal growing conditions for your herbs, considering factors such as sunlight, soil quality, and drainage. Clear any weeds or debris from the area, and prepare the soil by loosening it and incorporating compost or organic matter.
- Water the seedlings: Before transplanting, water the seedlings thoroughly to ensure they are well-hydrated and the soil is moist. This helps reduce transplant shock and makes it easier to remove the seedlings from their containers.
- Gently remove the seedlings: Carefully loosen the soil around the seedlings and gently ease them out of their pots or trays. Handle the seedlings by their leaves, avoiding the delicate stems which can be easily damaged.
- Dig proper holes: Dig holes in the new planting area that are slightly larger and deeper than the root systems of the seedlings. Space the holes according to the mature size of the herbs, providing enough room for them to grow without crowding.
- Transplant the seedlings: Place each seedling into its respective hole and fill in the soil around the roots, gently firming it down. Make sure the seedlings are at the same depth they were in their original containers, with the soil level just above the root collar.
- Water and mulch: After transplanting, water the seedlings again to help settle the soil around the roots. Apply a layer of mulch around the base of the plants to conserve moisture, suppress weed growth, and regulate soil temperature.
- Provide care and monitoring: Keep a close eye on the transplanted seedlings, monitoring their growth and providing the necessary care. Protect the young plants from extreme weather conditions, such as excessive heat or strong winds, until they become established.
It’s important to note that not all herbs respond well to transplanting, so it’s best to research the specific requirements of the herbs you’re growing. Some herbs, like basil and dill, prefer direct sowing in the garden rather than being transplanted.
By following proper transplanting techniques and providing the necessary care, you’ll give your herb seedlings the best chance to thrive and flourish in their new growing environment.
Troubleshooting Common Issues
While growing herbs from seed can be a rewarding experience, it’s not uncommon to encounter a few bumps along the way. Here are some common issues that herb growers may face and how to troubleshoot them:
- Poor germination: If your seeds have failed to germinate or have a low germination rate, it could be due to factors such as old or low-quality seeds, improper storage, or unfavorable conditions. To improve germination, ensure you’re using fresh seeds, store them correctly in a cool and dry place, and follow the recommended growing conditions for each herb.
- Leggy or stretched seedlings: Leggy or stretched seedlings occur when the plants reach for insufficient light. To prevent this issue, provide adequate light by placing your seed trays near a sunny window or using artificial grow lights. Additionally, consider rotating the trays regularly to ensure even light exposure.
- Pests: Common pests that can affect herb plants include aphids, caterpillars, and mites. To control pests, regularly inspect your plants for signs of infestation, such as distorted leaves or webbing. Remove pests by hand, use insecticidal soap or neem oil, or introduce beneficial insects like ladybugs or lacewings to combat the pests naturally.
- Disease: Herbs can be susceptible to diseases like powdery mildew, fungal leaf spots, or root rot. To prevent diseases, ensure proper air circulation and avoid overwatering. Remove any infected plant material promptly, water at the base of the plant to avoid wetting the foliage, and consider using organic fungicides if necessary.
- Yellowing leaves: Yellowing leaves can indicate a range of issues, including nutrient deficiencies, overwatering, or pest infestation. Check the soil moisture, adjust watering if needed, and ensure proper fertilization. Conduct a soil test to assess nutrient levels and consider applying appropriate organic fertilizers or amendments to address any deficiencies.
- Wilting: Wilting can be caused by underwatering, overwatering, or root problems. Check the soil moisture level, adjust your watering routine accordingly, and ensure proper drainage. If the roots appear damaged, consider transplanting the affected plants into fresh soil.
Remember that prevention is key when it comes to addressing common issues. Providing proper care, including adequate sunlight, proper watering, and regular monitoring, can help significantly reduce the likelihood of encountering problems in your herb garden.
If issues persist or you’re unsure how to address them, don’t hesitate to seek advice from local garden centers, horticulture experts, or fellow gardeners who may have experience with the specific herb varieties you’re growing.
Harvesting the Herbs
Harvesting your herbs is a delightful reward for all the effort you’ve put into growing them. Here are some tips to guide you on harvesting your herbs at the peak of their flavor and aroma:
- Timing: Harvest herbs when they have reached maturity and are at their freshest. Each herb has its own optimum stage of growth for harvesting. For leafy herbs like basil and parsley, harvest before they start flowering. For flowering herbs like lavender and chamomile, harvest when the flowers are just beginning to open.
- Tools: Use clean, sharp gardening shears or scissors for harvesting. This ensures clean cuts and minimizes damage to the plants.
- Method of harvesting: When harvesting leafy herbs, selectively pick leaves from different parts of the plant to promote bushier growth. For herbs with woody stems, such as rosemary or thyme, cut a few inches of the stem from the plant. Avoid removing more than one-third of the plant’s foliage at once, as this can stunt its growth.
- Timing of harvest: Harvest herbs in the morning, after the dew has dried but before the heat of the day. This is when the essential oils responsible for the herbs’ fragrance and flavor are at their highest concentration.
- Care after harvest: After harvesting, gently rinse the herbs under cool water to remove any dirt or debris. Pat them dry with a clean towel or use a salad spinner to remove excess moisture. If you’re not using them immediately, store the herbs wrapped in a damp paper towel or in a plastic bag in the refrigerator. Proper storage helps prolong their freshness.
- Continuous harvesting: Regularly harvesting your herbs stimulates new growth and ensures a continuous supply throughout the growing season. As long as the plants are healthy and growing vigorously, you can continue harvesting leaves as needed.
- Preservation methods: If you have more herbs than you can use fresh, consider preserving them for later use. Herbs can be dried, frozen, or made into herb-infused oils, vinegars, or butters. Each preservation method has its own process, so do some research or consult reliable resources for specific techniques.
Enjoy experimenting with different methods of preserving and using your harvested herbs. Whether you use them in cooking, teas, or homemade beauty products, the flavors and aromas of your freshly harvested herbs will add a touch of freshness and vibrancy to your creations.
Remember, harvesting is a gratifying experience, so take the time to savor and enjoy the fruits of your labor!
Conclusion
Growing herbs from seed is a fulfilling and rewarding endeavor that allows you to bring the beauty, aroma, and flavors of nature right into your garden or home. By following the steps and tips outlined in this guide, you can cultivate a thriving herb garden and enjoy the benefits of fresh herbs throughout the year.
From choosing the right seeds and preparing the soil to sowing, watering, and providing adequate sunlight, each step is critical in ensuring the success of your herb-growing journey. Maintenance tasks such as pruning, thinning, fertilizing, and troubleshooting common issues will help you nurture robust plants and overcome any challenges that may arise along the way.
Harvesting your herbs at the peak of their growth and learning various preservation methods will enhance your culinary creations, teas, and homemade remedies, allowing you to fully appreciate the aromatic and flavorful qualities of your herbs.
Remember that every herb is unique, with its own specific requirements and characteristics. Take the time to understand the individual needs of the herbs you’re growing, paying attention to factors such as sunlight, watering, and pruning techniques.
Whether you have a sprawling garden or just a small windowsill, growing herbs from seed is a wonderful way to connect with nature, nurture your green thumb, and add fresh, herbal delights to your everyday life.
So, embrace the joy of herb gardening and let your seeds sprout into vibrant plants that will bring you countless moments of enjoyment, whether in the kitchen, in your home, or simply by immersing yourself in the beauty and fragrance of your very own herb garden.
Frequently Asked Questions about How To Grow Herbs From Seed
Was this page helpful?
At Storables.com, we guarantee accurate and reliable information. Our content, validated by Expert Board Contributors, is crafted following stringent Editorial Policies. We're committed to providing you with well-researched, expert-backed insights for all your informational needs.


0 thoughts on “How To Grow Herbs From Seed”