Articles
How To Fix A Gas Fireplace
Modified: February 23, 2024
Discover the best articles for fixing your gas fireplace and learn step-by-step instructions to troubleshoot common issues. Improve your fireplace's efficiency and ensure a cozy and warm home.
(Many of the links in this article redirect to a specific reviewed product. Your purchase of these products through affiliate links helps to generate commission for Storables.com, at no extra cost. Learn more)
Introduction
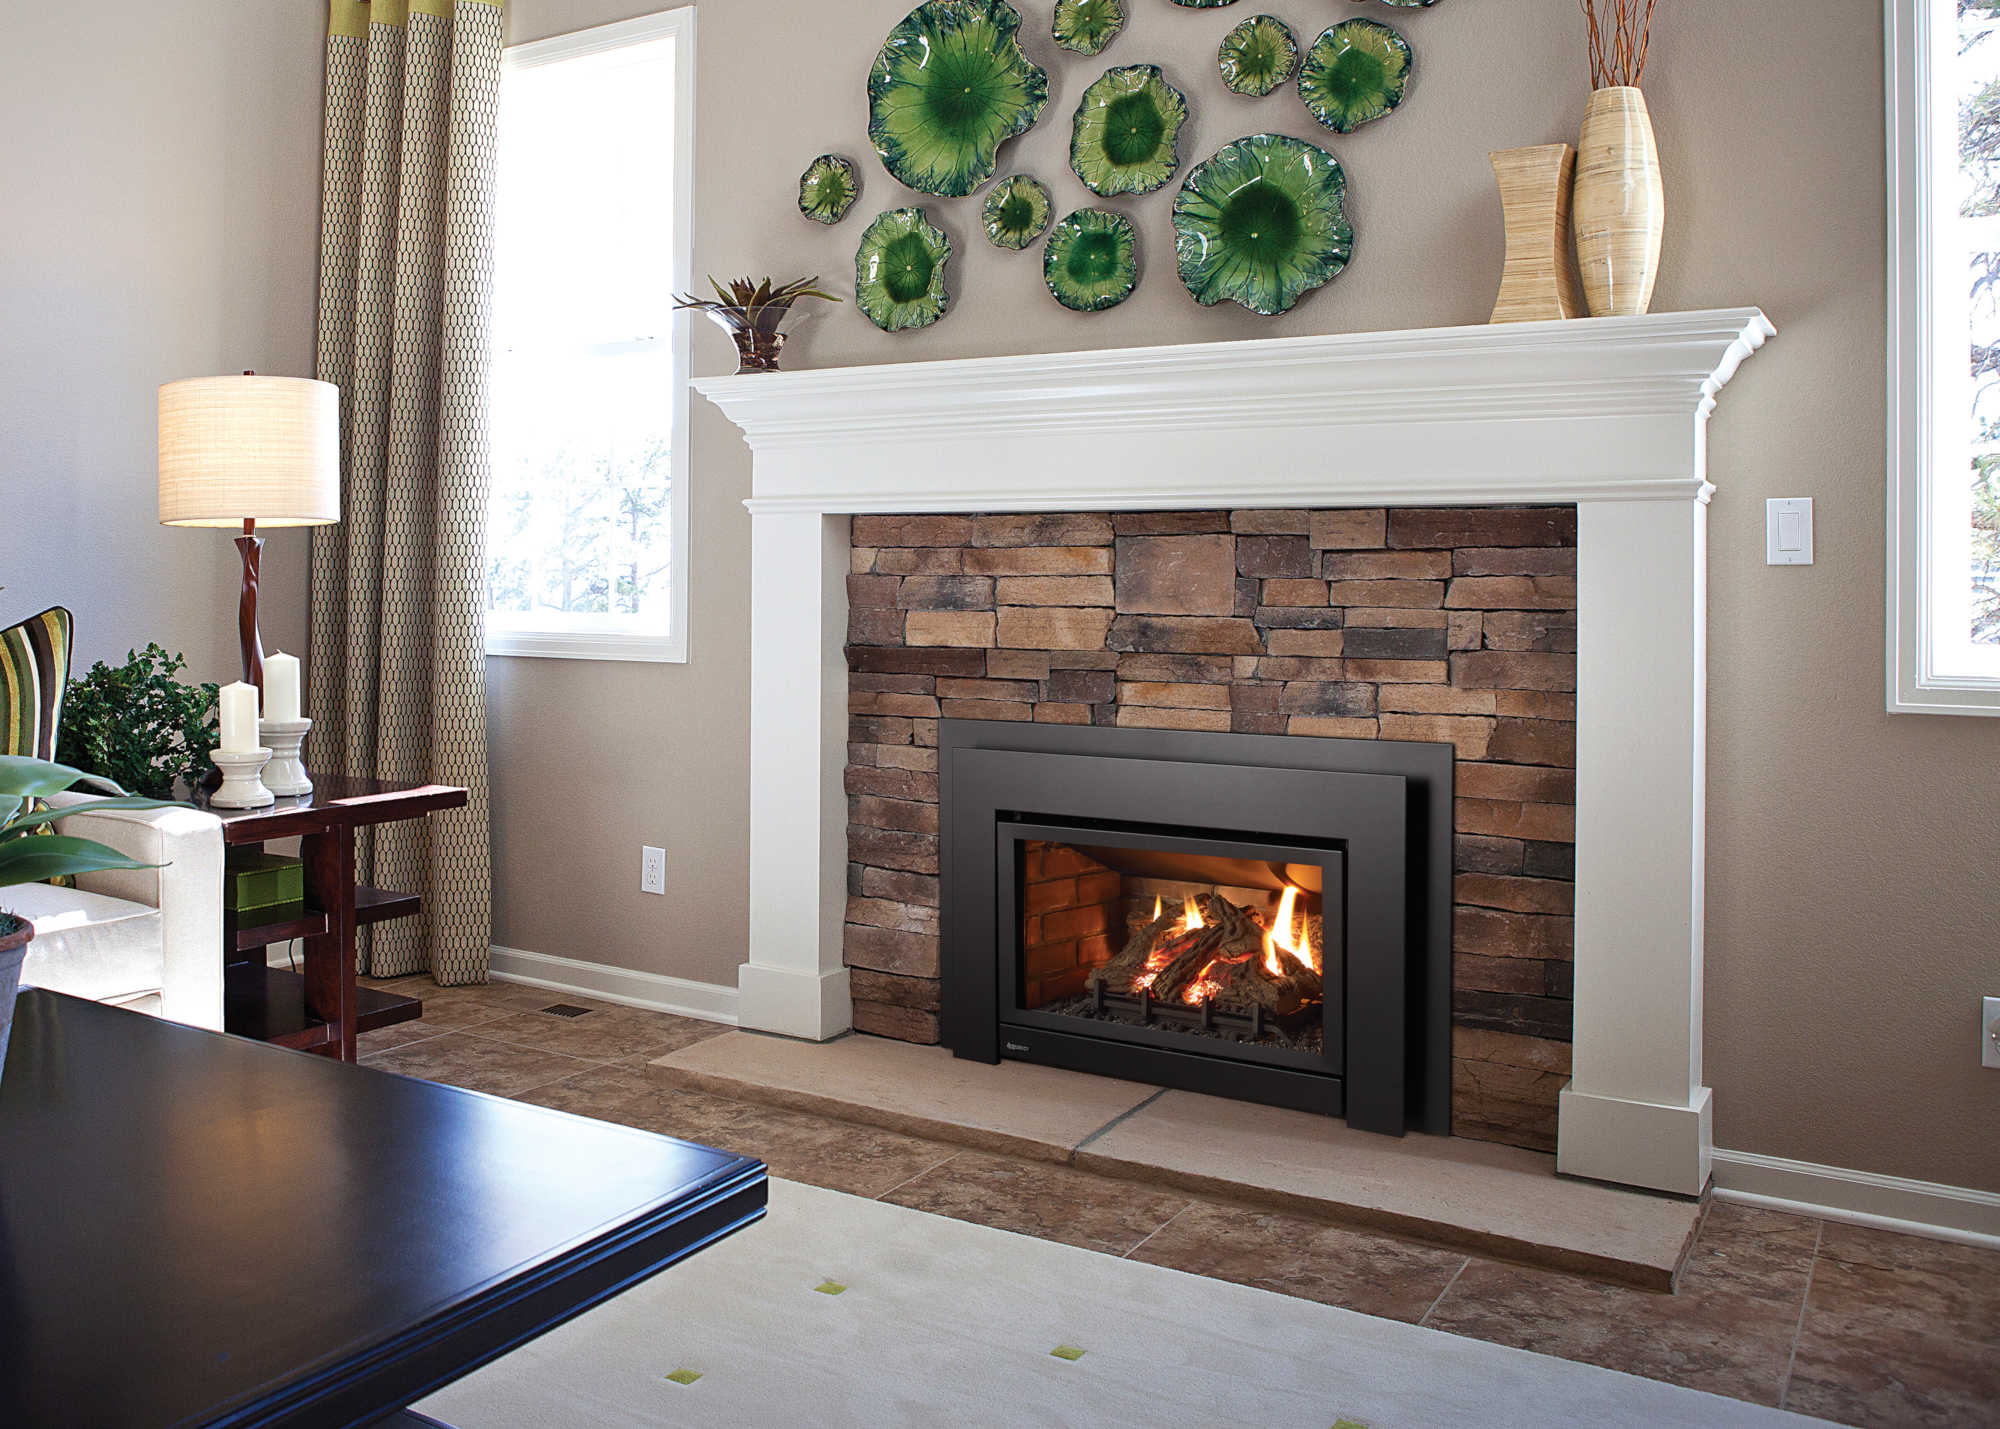
Welcome to our comprehensive guide on how to fix a gas fireplace. A gas fireplace is a wonderful addition to any home, providing warmth, ambiance, and a cozy atmosphere. However, like any appliance, a gas fireplace can experience issues over time. Whether it’s a problem with the burner, pilot assembly, thermocouple, or gas valve, it’s important to address these issues promptly to ensure your fireplace is functioning safely and efficiently.
In this article, we will walk you through the step-by-step process of troubleshooting and fixing common problems with gas fireplaces. But before we dive into the details, it’s crucial to understand that working with gas appliances can be potentially hazardous. If you are not confident in your abilities or do not feel comfortable working with gas, we highly recommend contacting a professional technician or plumber to help you diagnose and fix any issues with your gas fireplace.
That being said, if you are knowledgeable about gas appliances and feel confident in your abilities, this guide will provide you with the necessary information to safely address common problems and get your gas fireplace up and running again.
Please note that the specific steps and procedures may vary depending on the make and model of your gas fireplace. Be sure to consult your fireplace’s manufacturer’s manual for detailed instructions that are specific to your unit. Additionally, always follow safety precautions and guidelines outlined by the manufacturer to minimize any risks or potential hazards.
Now that we’ve covered the necessary precautions and disclaimers, let’s dive into the tools and materials needed to fix a gas fireplace.
Key Takeaways:
- Ensure safety first when fixing a gas fireplace by following manufacturer’s instructions, turning off the gas supply, and wearing protective gear. Regular maintenance and prompt repairs contribute to optimal performance.
- Troubleshoot and address common gas fireplace issues by cleaning components, checking for gas leaks, and testing the unit. Prioritize safety, and seek professional help if unsure or uncomfortable with handling gas appliances.
Read more: Who To Call To Fix Gas Fireplace
Safety Precautions
Before attempting to fix a gas fireplace, it is important to prioritize safety to prevent accidents or injuries. Keep in mind the following safety precautions:
- Shut off the Gas Supply: Always turn off the gas supply to the fireplace before attempting any repairs or maintenance. Locate the gas shut-off valve, typically located near the fireplace, and turn it off. This will ensure that no gas is flowing to the unit while you work on it.
- Ventilate the Area: Gas fireplaces produce carbon monoxide, which is a colorless and odorless gas that can be deadly. Ensure that the area where the fireplace is located is well-ventilated. Open windows or doors to allow fresh air to circulate while you work on the unit.
- Wear Protective Gear: When working with gas appliances, it is essential to protect yourself. Wear safety goggles, gloves, and a mask to prevent any potential injuries or exposure to harmful substances. Additionally, do not wear loose clothing that could get caught on any moving parts.
- Read the Manufacturer’s Manual: Familiarize yourself with the manufacturer’s instructions and guidelines specific to your gas fireplace. Each unit may have specific safety considerations or unique procedures. Following the manufacturer’s recommendations will ensure that you are performing the repairs correctly and safely.
- Know your Limits: Gas fireplace repairs can range from simple to complex. If you are unsure about any aspect of the repair process, do not hesitate to contact a professional technician. It is always better to be safe than to put yourself or your home at risk.
- Check for Gas Leaks: Before starting any repairs, it is crucial to check for gas leaks. Apply a solution of soapy water around the gas connections and look for any bubbles. If you see bubbles, there is a gas leak. In this case, immediately turn off the gas supply and contact a professional for assistance.
- Keep Fire Extinguisher Nearby: In case of any emergencies, it is advisable to have a fire extinguisher nearby. This will allow you to quickly extinguish any fire that may occur during the repair process.
By following these safety precautions, you can minimize the risks associated with working on a gas fireplace and ensure a safe environment for yourself and others.
Now that you are aware of the safety measures, let’s proceed to the tools and materials you will need to have on hand before starting the repair process.
Tools and Materials Needed
Before you begin fixing your gas fireplace, gather the necessary tools and materials to ensure a smooth repair process. Here are the items you will need:
- Screwdrivers: You’ll need both a flathead and Phillips screwdriver to remove screws and access various components of the fireplace.
- Pliers: Pliers will be helpful for tasks such as tightening or loosening connections and gripping small parts.
- Wire Brush: A wire brush is essential for cleaning the burner and pilot assembly. It will help remove dirt, debris, and soot that may be obstructing the flames.
- Wrench: Depending on your fireplace, you may need an adjustable wrench or a specific-sized wrench to loosen or tighten gas connections.
- Replacement Parts: If you have identified any faulty components, be sure to have the appropriate replacement parts on hand. This may include a thermocouple, igniter, gas valve, or other specific parts for your gas fireplace model.
- Gas Leak Detection Solution: You will need a solution of soapy water to check for gas leaks. This solution is created by mixing dish soap with water.
- Fire Extinguisher: It is always a good safety practice to have a fire extinguisher nearby in case of any emergencies that may arise during the repair process.
- Manufacturer’s Manual: Refer to your gas fireplace’s manufacturer’s manual throughout the repair process. It will provide specific instructions, diagrams, and troubleshooting tips for your particular unit.
By having these tools and materials ready, you will be well-equipped to tackle any issues with your gas fireplace. Now that you are prepared, let’s move on to the step-by-step repair process.
Step 1: Turn Off the Gas Supply
Before you start working on your gas fireplace, it is crucial to turn off the gas supply to ensure your safety. Follow these steps to properly shut off the gas supply:
- Locate the Gas Shut-Off Valve: The gas shut-off valve is typically located near the fireplace. It may be a lever or a knob. Look for a valve that is perpendicular to the gas pipe, indicating that it is closed.
- Turn Off the Gas Valve: Using an adjustable wrench or your hand, turn the valve clockwise to close it. Ensure that the valve is fully closed to stop the flow of gas to the fireplace.
- Verify the Gas Supply is Off: To confirm that the gas supply is indeed off, try turning on your gas fireplace. If it doesn’t ignite or produce a flame, then the gas supply is successfully shut off.
- Leave the Valve Closed: Keep the gas valve closed until you have completed the repairs and are ready to test the fireplace. This will prevent any accidental gas leaks during the repair process.
Remember, safety is paramount when working with gas appliances. Always double-check that the gas supply is turned off before proceeding with any repairs. If you are uncertain about locating or shutting off the gas supply valve, consult your gas fireplace’s manufacturer’s manual or contact a professional technician for assistance.
Now that you have turned off the gas supply, we can move on to the next step of cleaning the burner and pilot assembly.
Step 2: Clean the Burner and Pilot Assembly
A common issue that can affect the performance of a gas fireplace is a dirty burner or clogged pilot assembly. Cleaning these components will help ensure proper gas flow and a strong, consistent flame. Follow these steps to clean the burner and pilot assembly:
- Inspect the Burner and Pilot Assembly: Before cleaning, visually inspect the burner and pilot assembly for any debris, dirt, or soot. Ensure that the burner ports are clear and not blocked by any obstructions.
- Turn off the Gas Supply: Double-check that the gas supply to the fireplace is turned off. This is a crucial safety precaution to prevent any accidents or gas leaks during the cleaning process.
- Remove the Burner and Pilot Assembly: Depending on your fireplace model, you may need to unscrew or unclip the burner and pilot assembly to access them for cleaning. Use a screwdriver or pliers, if necessary, to remove any screws or clips holding these components in place.
- Clean the Burner: Use a wire brush to gently clean the burner. Remove any dirt, debris, or soot by brushing the burner ports in a back-and-forth motion. Make sure to remove any obstructions that can hinder the gas flow. Be careful not to damage the burner ports during this process.
- Clean the Pilot Assembly: Similarly, use a wire brush to clean the pilot assembly. Brush away any dirt and debris from the pilot orifice and thermocouple. These are critical components that need to be free from any blockages for the gas fireplace to ignite properly.
- Inspect and Reassemble: After cleaning, carefully inspect the burner and pilot assembly for any remaining dirt or obstructions. Once satisfied, reassemble the burner and pilot assembly, securely fastening them back into place.
By regularly cleaning the burner and pilot assembly, you can ensure optimal performance and prevent issues such as weak flames or difficulty in igniting the fireplace. Remember to refer to your manufacturer’s manual for specific instructions on cleaning and removing these components for your particular fireplace model.
Now that the burner and pilot assembly are clean, let’s move on to the next step: checking and replacing the thermocouple if necessary.
Read more: What Is A Gas Fireplace
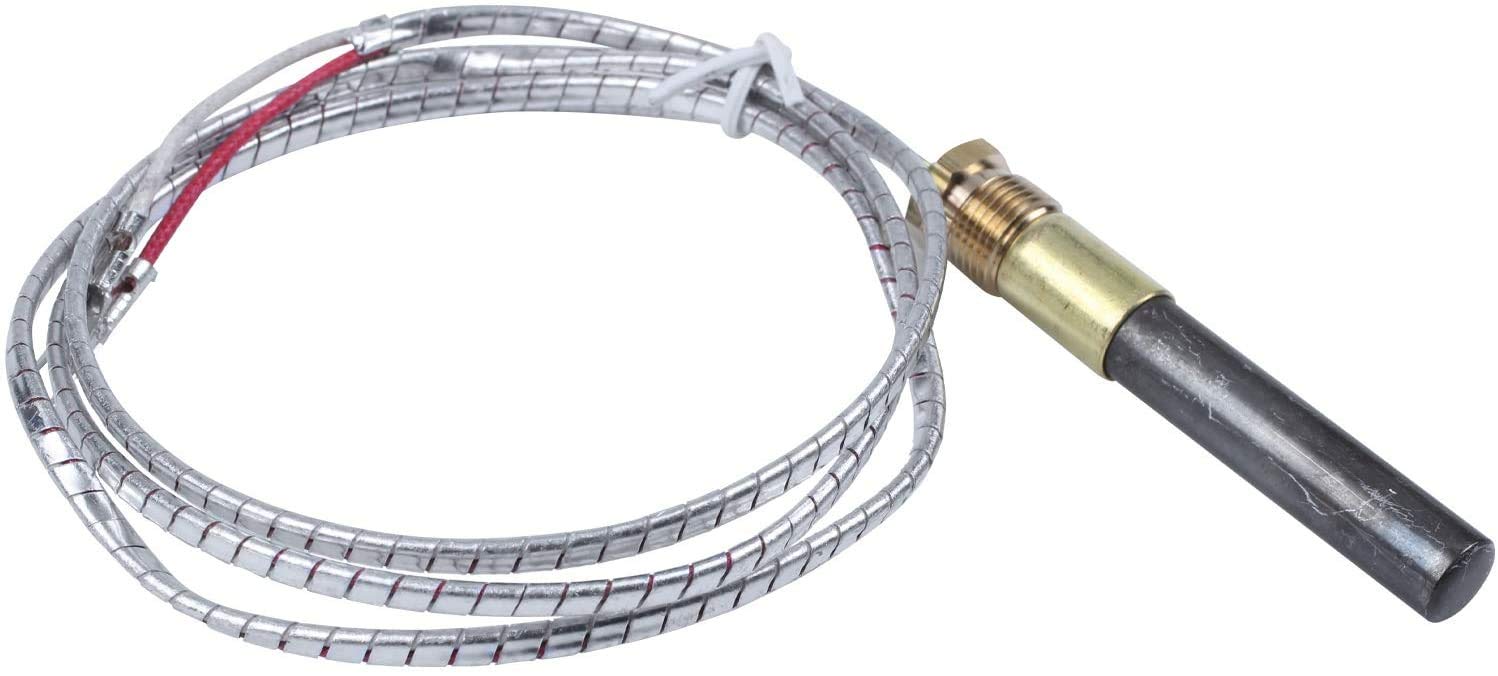
Step 3: Check and Replace the Thermocouple
The thermocouple plays a vital role in the proper functioning of a gas fireplace. It is a safety device that detects whether the pilot light is lit or not. If the thermocouple is faulty or worn out, it can cause the gas fireplace to malfunction or not ignite at all. Here’s how you can check and replace the thermocouple:
- Verify the Gas Supply is Turned Off: Before inspecting or replacing the thermocouple, ensure that the gas supply to the fireplace is turned off. This is essential to prevent any potential gas leaks during the process.
- Locate the Thermocouple: The thermocouple is a copper or bronze tube that is connected to the gas control valve. Follow the thermocouple from the gas control valve to the pilot assembly, where it is positioned near the pilot flame.
- Inspect the Thermocouple: Check the thermocouple for any visible signs of damage, wear, or corrosion. Look for areas where the tube may be bent or cracked. A faulty thermocouple may not send the correct signal to the gas control valve, causing the fireplace to shut off or not ignite.
- Test the Thermocouple: Use a multimeter set to millivolts to test the thermocouple. Disconnect the thermocouple from the gas control valve and attach the multimeter’s leads to the thermocouple’s connections. Light the pilot flame and observe the multimeter’s reading. If the thermocouple does not generate a minimum of 25 millivolts, it is likely faulty and needs replacement.
- Replace the Thermocouple: If the thermocouple is found to be faulty, carefully remove it from its position. Take note of the length and type of thermocouple to purchase an appropriate replacement. Install the new thermocouple by screwing it into the gas control valve and adjusting its positioning near the pilot flame.
- Reassemble and Test: Once the new thermocouple is installed, reassemble any components that were removed. Turn on the gas supply and test the fireplace to ensure that the pilot light stays lit and the fireplace functions correctly.
Properly checking and replacing a faulty thermocouple can often resolve issues with a gas fireplace not staying lit or failing to ignite. However, if you are unsure about performing this task or encounter any difficulties, it is advisable to seek the assistance of a professional technician.
Now that you have checked and replaced the thermocouple if needed, let’s move on to the next step: inspecting the gas valve.
Make sure to regularly clean and inspect the gas fireplace’s burner and pilot assembly to ensure proper functioning and prevent any potential issues.
Step 4: Inspect the Gas Valve
The gas valve is a critical component in your gas fireplace, as it controls the flow of gas to the burner and regulates the flame. A faulty gas valve can cause issues such as weak flames, inconsistent heating, or the fireplace not turning on. Here’s how to inspect the gas valve:
- Ensure the Gas Supply is Turned Off: Prior to inspecting the gas valve, double-check that the gas supply to the fireplace is turned off. This is essential for your safety.
- Locate the Gas Valve: Locate the gas valve, which is typically connected to the gas control panel or positioned near the gas supply line. Refer to your fireplace’s manufacturer’s manual for its exact location.
- Visually Inspect the Gas Valve: Carefully examine the gas valve for any signs of damage, corrosion, or loose connections. Look for any visible leaks or debris around the valve. If you notice any issues, it may be necessary to replace the gas valve.
- Test the Gas Valve: If you suspect a fault with the gas valve, you can use a multimeter to test its functionality. Switch the multimeter to the ohm setting and touch the red and black probes to the gas valve terminals. A reading of zero or infinite resistance indicates a faulty valve.
- Replace the Gas Valve: If the gas valve is found to be faulty or not functioning correctly, it will need to be replaced. This is a complex task that is best performed by a professional technician, as it involves working with gas lines and ensuring proper installation.
- Consult a Professional: If you are unsure about inspecting or replacing the gas valve, it is recommended to consult a qualified technician. They have the expertise and knowledge to handle gas-related components and ensure your fireplace is functioning safely and efficiently.
Inspecting the gas valve is essential for diagnosing any issues with your gas fireplace. If you notice any damage, leaks, or suspect a faulty gas valve, it is important to address it promptly to prevent further problems.
Now that you have inspected the gas valve, let’s move on to the next step: cleaning or replacing the igniter.
Step 5: Clean or Replace the Igniter
The igniter is responsible for creating the spark that ignites the gas and starts the flame in your gas fireplace. Over time, the igniter can become dirty or worn out, resulting in ignition problems. Here’s how you can clean or replace the igniter:
- Turn off the Gas Supply: Before working on the igniter, make sure the gas supply to the fireplace is turned off. This is a crucial safety precaution to prevent any gas leaks.
- Locate the Igniter: The igniter is usually found near the burner or pilot assembly. Refer to your fireplace’s manufacturer’s manual for its specific location.
- Inspect the Igniter: Carefully examine the igniter for any visible dirt, debris, or damage. If the igniter is covered in residue or appears worn, it may need cleaning or replacement.
- Clean the Igniter: If the igniter is dirty, use a soft brush or cloth to gently remove any accumulated dirt or debris. Be cautious not to damage the delicate components of the igniter during cleaning.
- Test the Igniter: After cleaning, you can test the igniter by turning on the fireplace. Observe if the igniter produces a spark and ignites the gas. If it fails to create a spark or the flame does not light, the igniter may need to be replaced.
- Replace the Igniter: If cleaning the igniter does not resolve the issue, it may be necessary to replace it. Consult your fireplace’s manufacturer’s manual for the appropriate replacement igniter for your specific model. It is recommended to follow the manufacturer’s instructions or seek the assistance of a professional to ensure proper installation.
Regularly cleaning or replacing the igniter can help maintain the proper functioning of your gas fireplace and ensure reliable ignition. If you are unsure about cleaning or replacing the igniter yourself, it is best to consult a professional technician for assistance.
Now that you have cleaned or replaced the igniter, let’s move on to the next step: adjusting the flame height.
Step 6: Adjust the Flame Height
The flame height in your gas fireplace affects both its appearance and efficiency. If you notice that the flame is too low or too high, you can adjust it to achieve the desired aesthetic and optimize heat output. Here’s how to adjust the flame height:
- Turn off the Gas Supply: Before making any adjustments, ensure that the gas supply to the fireplace is turned off. This is crucial to prevent any accidental gas leaks or injuries.
- Locate the Flame Adjustment Screw: The flame adjustment screw is typically located near the gas control valve or on the burner assembly. Refer to your fireplace’s manufacturer’s manual for its exact location.
- Identify Clockwise and Counterclockwise Direction: Determine which direction is clockwise and which is counterclockwise for turning the flame adjustment screw. This may vary depending on your fireplace model.
- Adjust the Flame Height: Use a flathead screwdriver to turn the flame adjustment screw. Turning it clockwise will lower the flame height, while turning it counterclockwise will increase the flame height. Make small adjustments and observe the flame until you achieve the desired height.
- Test and Evaluate: After making adjustments, turn on the gas supply and ignite the fireplace to test the flame height. Observe the flame to ensure it is balanced, steady, and does not produce excessive soot or carbon buildup. Adjust further if necessary.
- Observe Safety Clearance: While adjusting the flame height, ensure that it does not come into contact with any nearby combustible materials. Maintain a safe clearance between the flame and surrounding components, such as mantels, curtains, or furniture.
By adjusting the flame height, you can customize the appearance of your gas fireplace and optimize its performance. However, it is essential to exercise caution and follow the manufacturer’s guidelines to prevent any safety hazards or damage to the unit.
Now that you have adjusted the flame height, let’s move on to the next step: checking for gas leaks.
Read more: How To Use Gas Fireplace
Step 7: Check for Gas Leaks
Ensuring that there are no gas leaks in your gas fireplace is crucial for your safety. Even a small gas leak can pose a serious risk, so it’s important to regularly check for any signs of leakage. Here’s how you can check for gas leaks:
- Turn off the Gas Supply: Before conducting a gas leak test, ensure that the gas supply to the fireplace is turned off. This is essential to prevent any accidental gas leaks during the process.
- Mix a Solution of Soapy Water: Create a solution of soapy water by mixing dish soap with water. Stir to create a soapy mixture.
- Apply the Soapy Solution: Using a brush or spray bottle, apply the soapy solution to all the gas connections, including the gas shut-off valve, gas control valve, gas hose, and any other visible connections. Pay extra attention to areas where you suspect a leak might occur.
- Look for Bubbles: Observe the gas connections and look for any bubbles forming. If you see bubbles, it is an indication of a gas leak. Even small bubbles should be taken seriously.
- Addressing Gas Leaks: If you detect a gas leak, it is crucial to act promptly. Turn off the gas supply immediately, open windows and doors to ventilate the area, and contact a professional technician to fix the leak. Avoid using the fireplace until the leak is repaired.
- Perform Regular Leak Checks: It’s good practice to perform a gas leak test periodically, especially if you notice any unusual odors or suspect a potential issue. Regular maintenance and checks will help ensure the safety and proper functioning of your gas fireplace.
Checking for gas leaks is an essential step in maintaining the safety of your gas fireplace. If you detect a gas leak or are unsure about performing the test yourself, it is advisable to seek the assistance of a professional technician who has the expertise and specialized tools to handle gas-related issues.
Now that you have checked for gas leaks, let’s move on to the final step: testing the fireplace to ensure it functions correctly.
Step 8: Test the Fireplace
After completing the necessary repairs and maintenance, it’s crucial to test your gas fireplace to ensure that it functions correctly and safely. Here’s how you can test your fireplace:
- Turn on the Gas Supply: Make sure the gas supply to the fireplace is turned on. It should have been turned off during the repair process.
- Ignite the Fireplace: Follow the manufacturer’s instructions to ignite the fireplace. This typically involves turning the control knob to the “On” or “Ignite” position and pressing the ignition button. Refer to your fireplace’s manual for specific ignition instructions for your model.
- Observe the Flame: Once the fireplace is ignited, observe the flame. It should be strong, steady, and provide consistent heat. A healthy flame should be blue with yellow tips and should not produce excessive soot, odors, or any unusual noises.
- Check for Proper Functioning: Test all the features and controls of your gas fireplace, such as adjusting the flame height, turning on/off the unit, and adjusting the temperature settings. Ensure that all the functions work smoothly and as intended.
- Monitor for any Issues: Keep an eye on the fireplace for a period of time after igniting it. Watch for any unusual behavior, such as flame fluctuation, irregular heating, or the presence of any gas odors. If you notice anything unusual, it may indicate a problem that requires further inspection or professional assistance.
By testing your gas fireplace, you can verify that the repairs and maintenance have been successful and that the unit is operating safely and efficiently. If you encounter any issues or if the fireplace does not function as expected during the testing process, it is advised to contact a professional technician for further assistance.
With the completion of the testing process, you have successfully gone through the steps to fix and maintain your gas fireplace. Regular maintenance and prompt repairs when needed will contribute to the safety, longevity, and optimal performance of your gas fireplace.
Remember to follow the manufacturer’s instructions, consult the manufacturer’s manual, and prioritize safety at all times during the repair and maintenance process. If you are unsure about any aspect or encounter any difficulties, it’s always best to seek the help of a qualified technician.
Now you can enjoy the warmth and cozy ambiance of your fully functioning gas fireplace with confidence!
Conclusion
Fixing a gas fireplace may seem like a daunting task, but with the right knowledge and precautions, you can troubleshoot and address common issues yourself. In this comprehensive guide, we have walked you through the step-by-step process of fixing a gas fireplace, from turning off the gas supply to testing the functionality. By following these steps and adhering to safety precautions, you can ensure that your gas fireplace is in proper working condition.
Throughout the repair process, it’s important to prioritize safety. Working with gas appliances can be potentially hazardous, so always turn off the gas supply, ventilate the area, wear protective gear, and consult the manufacturer’s manual. If you are unsure or uncomfortable with handling gas appliances, it is advised to seek the help of a professional technician.
Regular maintenance is crucial in keeping your gas fireplace functioning at its best. Cleaning the burner and pilot assembly, inspecting and replacing the thermocouple, checking the gas valve, cleaning or replacing the igniter, adjusting the flame height, and testing the unit are all essential steps to ensure optimal performance and safety.
By following the steps outlined in this guide and performing regular maintenance, you can enjoy the warmth, comfort, and ambiance of your gas fireplace year-round. Remember to consult your fireplace’s manufacturer’s manual for specific instructions and always prioritize safety when working with gas appliances.
If you encounter any complex issues or have doubts about repairing your gas fireplace, it is recommended to seek the assistance of a professional technician. They have the expertise and experience necessary to handle more advanced repairs and ensure the safety and longevity of your gas fireplace.
Enjoy the cozy and inviting atmosphere that your fully functional gas fireplace brings to your home, and stay warm in the colder seasons!
Frequently Asked Questions about How To Fix A Gas Fireplace
Was this page helpful?
At Storables.com, we guarantee accurate and reliable information. Our content, validated by Expert Board Contributors, is crafted following stringent Editorial Policies. We're committed to providing you with well-researched, expert-backed insights for all your informational needs.

0 thoughts on “How To Fix A Gas Fireplace”