Home>Articles>How To Install Network Adapter Without Internet
Articles
How To Install Network Adapter Without Internet
Modified: October 20, 2024
Learn how to install a network adapter without an internet connection. Our comprehensive guide provides step-by-step instructions and troubleshooting tips. Enhance your knowledge with our informative articles.
(Many of the links in this article redirect to a specific reviewed product. Your purchase of these products through affiliate links helps to generate commission for Storables.com, at no extra cost. Learn more)
Introduction
Setting up a network adapter without an internet connection can be a daunting task, especially when you’re faced with limited resources but still need to get online. Whether you’re working with a new device that doesn’t have a pre-installed network adapter driver or you’ve encountered issues with your existing driver, there are several methods you can use to install a network adapter without internet access. In this article, we’ll explore these methods and provide step-by-step instructions to help you get your network adapter up and running.
Before we dive into the different methods, let’s briefly discuss what a network adapter is and why it’s crucial for connecting to the internet. A network adapter, also known as a network interface controller or NIC, is a hardware device that allows your computer to communicate with other devices on a network. It is responsible for converting data into a format that can be transmitted over the network and vice versa.
When you purchase a new computer or install a fresh operating system, the network adapter driver is typically pre-installed or automatically downloaded by the operating system. However, there may be instances where the driver is missing or outdated, causing connectivity issues. This is where the following methods come in handy.
Key Takeaways:
- Stay connected even without internet by using a driver CD, downloading from the manufacturer’s website, or utilizing Windows built-in features. These methods ensure your network adapter is up and running smoothly.
- In a pinch, use USB tethering from your smartphone or try manually updating driver files to resolve connectivity issues. These creative solutions help you stay online without the need for an internet connection.
Read more: How To Install Driver For Network Adapter
Method 1: Using the Driver CD
If you have a driver CD that came with your network adapter, you’re in luck. This method allows you to install the necessary driver software without requiring an internet connection. Follow these steps:
- Insert the driver CD into your computer’s CD/DVD drive.
- Open “My Computer” or “This PC” and browse to the CD/DVD drive.
- Locate the folder containing the network adapter driver installation files.
- Double-click on the installer file (usually named “Setup” or “Install”) to start the installation process.
- Follow the on-screen prompts and instructions to install the driver.
- Once the installation is complete, restart your computer.
Your network adapter should now be installed and ready to use. You can check if the installation was successful by going to the Device Manager:
- Press the Windows key + X and select “Device Manager” from the menu.
- In the Device Manager window, expand the “Network adapters” section.
- You should see your network adapter listed without any warning symbols, indicating that it’s installed correctly.
If you encounter any issues during the installation or your network adapter is still not working, don’t worry. There are alternative methods you can try to get your network adapter up and running without an internet connection.
Method 2: Downloading from Manufacturer’s Website Using Another Device
If you don’t have a driver CD or the CD doesn’t contain the latest version of the network adapter driver, you can manually download the driver from the manufacturer’s website using another device with an internet connection. Here’s how:
- Using a computer or smartphone with internet access, open a web browser and go to the manufacturer’s website.
- Navigate to the support or downloads section of the website.
- Search for the specific model or make of your network adapter.
- Look for the latest version of the network adapter driver compatible with your operating system.
- Download the driver installation file to the device.
Now that you have the driver installation file, you can transfer it to the computer without internet access using a USB drive or any other external storage device. Follow these steps:
- Connect the USB drive or external storage device to the computer without internet access.
- Copy the downloaded driver installation file from the USB drive to the computer.
- Locate the driver installation file on the computer and double-click on it.
- Follow the on-screen prompts and instructions to install the driver.
- Once the installation is complete, restart your computer.
After restarting, check the Device Manager to ensure that the network adapter is installed correctly. If you encounter any issues or if the network adapter still doesn’t work, move on to the next method.
It’s important to note that downloading drivers from the manufacturer’s website ensures you have the most up-to-date and compatible drivers for your network adapter. This method can be time-consuming, so make sure you have access to another device with internet connectivity before proceeding.
Method 3: Using Windows Built-in Network Adapter Driver
If you’re unable to access the internet and don’t have the driver CD or the ability to download drivers from the manufacturer’s website, you can try using the built-in network adapter driver provided by Windows. Here’s how:
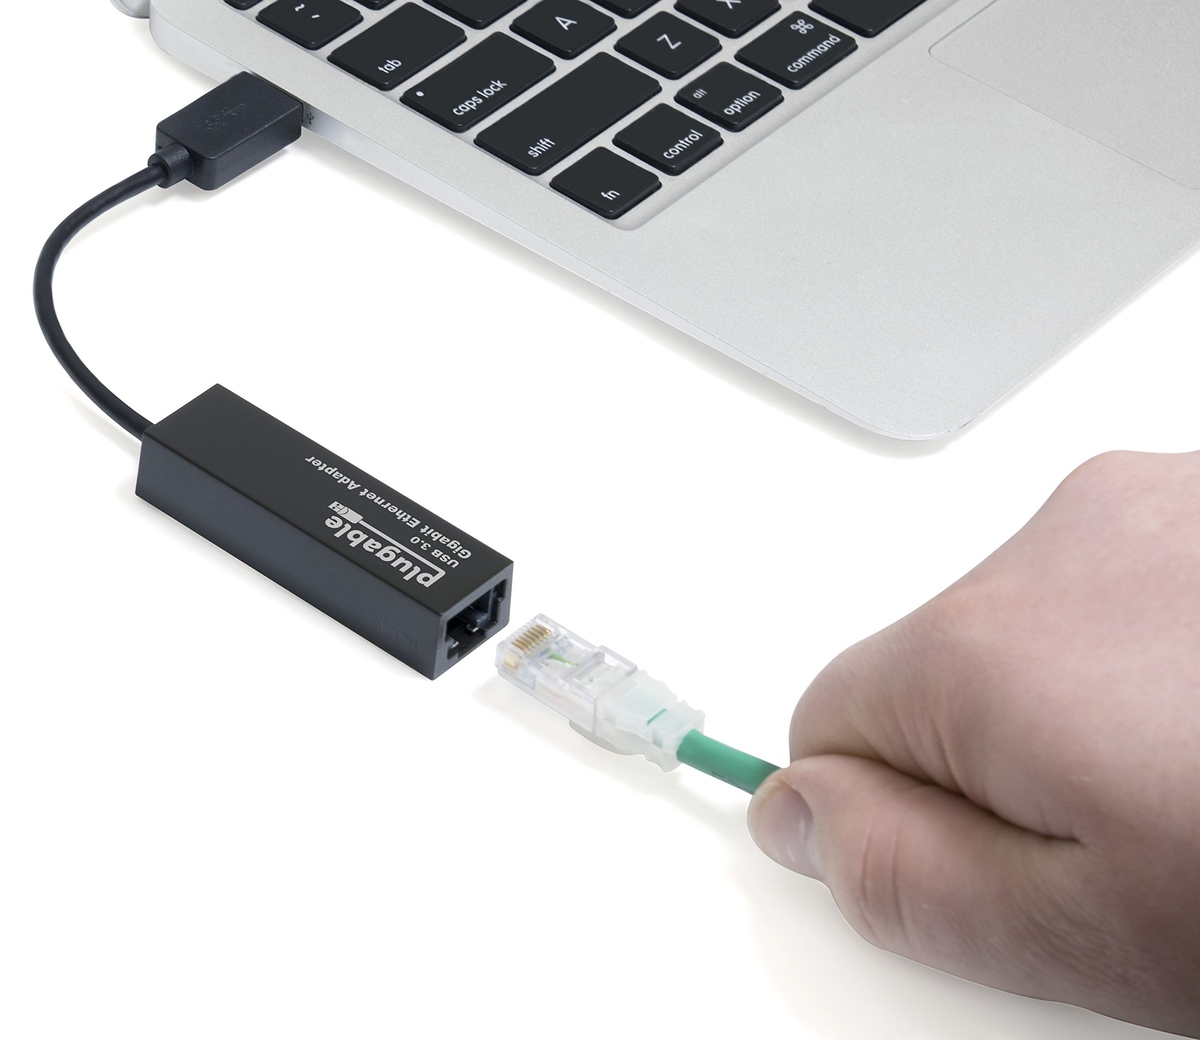
- Connect your computer to the internet using an Ethernet cable. This allows Windows to search for and install the appropriate network adapter driver.
- Plug one end of the Ethernet cable into your computer’s Ethernet port and the other end into the Ethernet port of a router or modem.
- Wait for a few minutes to allow Windows to detect the connection and search for the driver.
- If Windows successfully finds the driver, it will automatically install it. You can check the progress by opening the Network Connections window:
- Press the Windows key + X and select “Network Connections” from the menu.
- The network adapter should appear in the list as a connected device.
- If Windows is unable to find the driver, you can manually install it:
- Open the Device Manager. Press the Windows key + X and select “Device Manager” from the menu.
- Expand the “Network adapters” section.
- Right-click on the network adapter and select “Update driver” from the context menu.
- Choose the option to search automatically for updated driver software.
- Windows will search for the driver online and install it if available. Follow the on-screen instructions.
- Once the driver installation is complete, restart your computer.
After restarting, check the Device Manager to ensure that the network adapter is installed correctly and functioning properly. If you’re still experiencing connectivity issues, you might need to explore other methods to install the network adapter without an internet connection.
Using Windows built-in network adapter driver can be a convenient option when you have a reliable Ethernet connection available. However, it might not always provide the latest or most optimized driver for your specific network adapter.
You can install a network adapter without internet by downloading the driver on another device, transferring it to the computer, and then installing it manually. You can also use a USB drive or CD to transfer the driver.
Method 4: Using USB Tethering from Your Smartphone
If you have a smartphone with internet access, you can utilize the USB tethering feature to install a network adapter without an internet connection. USB tethering allows you to share your smartphone’s internet connection with your computer using a USB cable. Here’s how to use USB tethering to install a network adapter:
- Connect your smartphone to your computer using a USB cable.
- On your smartphone, go to the settings and locate the tethering or hotspot option.
- Enable USB tethering. This will activate the internet sharing feature.
- On your computer, open the network settings.
- Look for the new network connection labeled as “Ethernet” or “USB Ethernet.”
- Click on the network connection and select “Properties” or “Configure.”
- In the properties window, click on the “Driver” tab.
- Click on the “Update Driver” button.
- Choose the option to search for drivers automatically.
Windows will now search for the appropriate driver and install it using the internet connection provided by your smartphone. Ensure that you have a stable and reliable data connection on your smartphone during this process.
Once the driver installation is complete, you might need to restart your computer for the changes to take effect. After restarting, your network adapter should be installed and ready to use.
Remember to disable USB tethering on your smartphone once the installation is complete to conserve battery life.
Using USB tethering from your smartphone is a great option if you have limited resources but need to get online to install a network adapter driver. However, it’s worth noting that this method requires a compatible USB cable and a smartphone with USB tethering capabilities.
Read more: What Is Network Adapter
Method 5: Renaming and Updating Driver Files
If none of the previous methods have worked, you can try renaming and updating the driver files manually. This method involves locating the driver files on your computer, renaming them, and then updating the driver through the Device Manager. Here’s how to do it:
- Open the Device Manager by pressing the Windows key + X and selecting “Device Manager” from the menu.
- Expand the “Network adapters” section and identify your network adapter.
- Right-click on the network adapter and select “Properties.”
- Navigate to the “Driver” tab and select “Driver Details.”
- Note down the name and location of the driver files listed.
- Close the properties window and go back to the Device Manager.
- Right-click on the network adapter again and select “Uninstall device.”
- Confirm the uninstallation and restart your computer.
- Next, open File Explorer and navigate to the location of the driver files you noted down earlier.
- Rename the driver files by adding “.old” at the end of each file name (e.g., if the file name is “netadapter.sys,” rename it to “netadapter.sys.old”).
- Once the files are renamed, go back to the Device Manager.
- Click on “Action” in the Device Manager window and select “Scan for hardware changes.”
- Windows will now detect the network adapter as a new device and attempt to install the driver for it.
- Follow the on-screen prompts and instructions to complete the driver installation.
- After the installation is finished, restart your computer.
Upon restarting, the driver for your network adapter should be updated. You can check the Device Manager to ensure that the driver is installed correctly without any error symbols. If you continue to experience issues, you may need to consult the manufacturer’s support website or seek professional assistance.
It’s important to note that manually renaming and updating driver files can be a complicated process. Exercise caution and ensure you have backups or restore points in case anything goes wrong.
Conclusion
Installing a network adapter without an internet connection may seem challenging, but there are several methods you can use to get your network adapter up and running. Whether you have a driver CD, access to a device with internet connectivity, or need to rely on built-in Windows features, there’s a solution for you.
In Method 1, using the driver CD allows you to install the necessary driver software directly from the CD. Method 2 involves downloading the driver from the manufacturer’s website using another device with internet access and transferring it to your computer. Method 3 utilizes the built-in network adapter driver provided by Windows. In Method 4, you can employ USB tethering from your smartphone to share its internet connection. Finally, Method 5 involves manually renaming and updating driver files to resolve any issues.
Remember, it’s important to check the Device Manager after installing the network adapter driver to ensure it’s working correctly. If you’re still encountering problems, consider consulting the manufacturer’s support website or seeking professional assistance.
By following these methods, you can successfully install a network adapter without an internet connection and regain access to the online world. Stay connected, browse the web, and enjoy all the benefits of being online.
So, whether you’re setting up a new device or facing connectivity issues with your existing network adapter, these methods will help you overcome obstacles and get your network adapter installed and running smoothly.
Frequently Asked Questions about How To Install Network Adapter Without Internet
Was this page helpful?
At Storables.com, we guarantee accurate and reliable information. Our content, validated by Expert Board Contributors, is crafted following stringent Editorial Policies. We're committed to providing you with well-researched, expert-backed insights for all your informational needs.


0 thoughts on “How To Install Network Adapter Without Internet”