
Articles
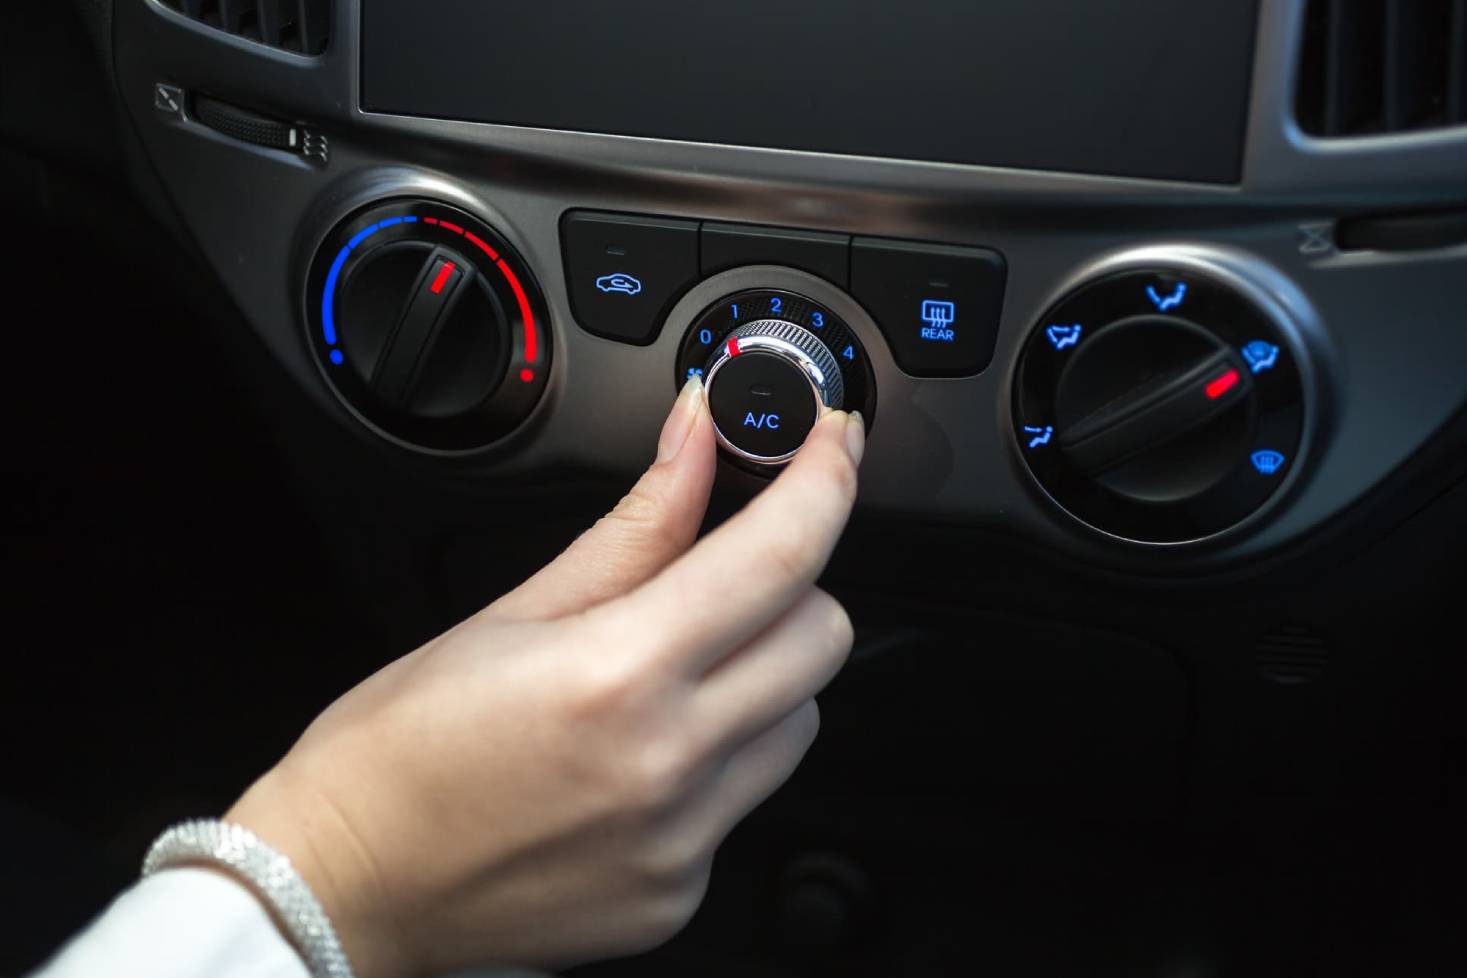
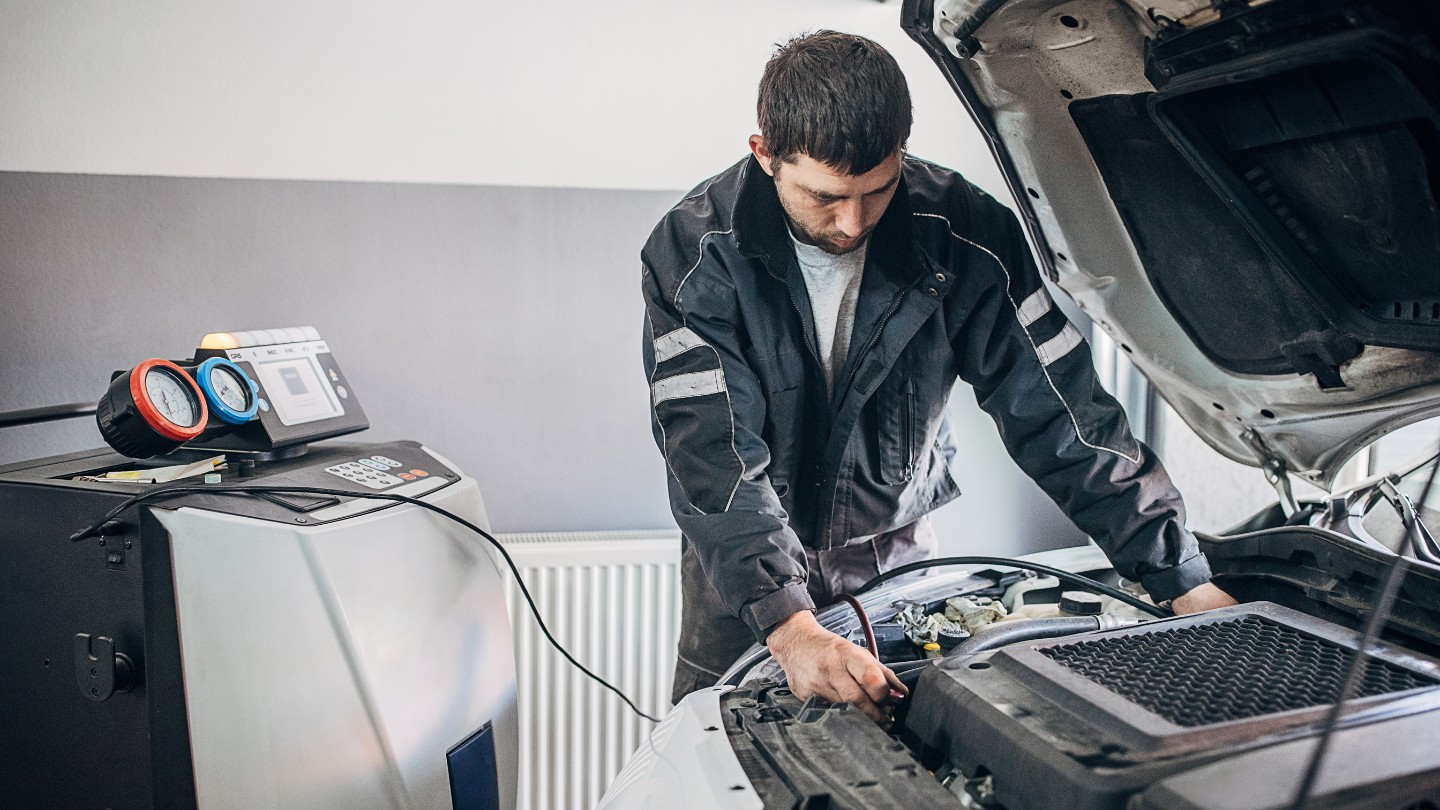
How To Fix Car AC
Modified: January 5, 2024
Learn how to fix your car's AC with these informative articles. Find step-by-step guides and troubleshooting tips to keep your car cool and comfortable.
(Many of the links in this article redirect to a specific reviewed product. Your purchase of these products through affiliate links helps to generate commission for Storables.com, at no extra cost. Learn more)
Introduction
Having a working air conditioning (AC) system in your car is essential for comfortable driving, especially during hot summer months. However, it can be incredibly frustrating when your car’s AC stops working or doesn’t cool as it should. Fortunately, many common AC issues can be fixed without taking your car to a mechanic, saving you time and money.
In this article, we will guide you through some common AC problems and provide step-by-step instructions on how to fix them. From checking for leaks to recharging the system, cleaning the AC condenser, and even replacing components like the AC compressor and evaporator, we will cover it all. We’ll also touch on fixing electrical issues that may be affecting your car’s AC performance.
Before we get started, it’s important to note that while these steps can help you fix certain AC issues, there may be cases where professional assistance is required. If you’re unsure about tackling any of these repairs or if your AC problem persists after attempting the fixes mentioned, it’s best to consult a qualified mechanic.
Now, let’s dive into the common AC issues and how you can fix them to enjoy a cool and comfortable ride.
Key Takeaways:
- Keep your car’s AC running smoothly by checking for leaks, recharging the system, and cleaning the condenser. Addressing common issues like weak airflow and strange odors can save time and money on unnecessary mechanic visits.
- Tackle electrical issues and advanced repairs like replacing the AC compressor and evaporator to ensure your car’s AC system operates at its best. Regular maintenance and professional help when needed can keep you cool on the road.
Read more: How Much Does It Cost To Fix AC In Car
Common AC Issues
Before delving into the specific troubleshooting steps, it’s helpful to understand some of the common AC issues that can arise in a car. By identifying the problem, you can better determine the appropriate solution. Here are a few common AC issues:
- No cool air: One of the most common complaints is when the AC system blows out warm or hot air instead of cool air. This could be due to a refrigerant leak, a faulty compressor, or a clogged condenser.
- Weak airflow: If the airflow from your car’s vents is weak, it could indicate a problem with the blower motor, a clogged air filter, or blocked vents.
- Strange odors: Unpleasant odors coming from the AC vents can be caused by mold or mildew growth in the system. This is often a result of moisture buildup in the evaporator core.
- Loud noises: Unusual noises, such as rattling, squeaking, or banging sounds, are indicators of potential AC problems. These noises could be caused by a failing AC compressor, a loose belt, or debris in the blower fan.
- AC cycles on and off: If your AC system continuously cycles on and off, it may be due to low refrigerant levels, a malfunctioning pressure switch, or a faulty thermostat.
- Electrical issues: Electrical problems can cause various AC issues, including intermittent cooling, non-functioning controls, or inoperative fans.
Now that you have a better understanding of the common AC problems that can occur, let’s move on to troubleshooting and fixing these issues to get your car’s AC system back in top shape.
Checking for Leaks
One common cause of AC problems is refrigerant leaks. If your car’s AC system has a low refrigerant level, it won’t be able to cool the air effectively. Checking for leaks is an essential step in diagnosing and fixing these issues. Here’s how you can do it:
- Visual Inspection: Start by visually inspecting the AC system components, including the hoses, fittings, and connections. Look for any signs of visible oil or refrigerant residue, which are indicators of a leak.
- UV Dye: If a visual inspection doesn’t reveal any leaks, you can add UV dye to the AC system. This dye will mix with the refrigerant and leak out if there is a problem. Run the AC system for a while, and then use a UV light to check for any fluorescent traces of the dye.
- Leak Detection Kit: Another option is to use a leak detection kit, which typically includes a UV light and special glasses. The kit can help you identify leaks by illuminating any UV dye or adding a dye to the AC system that reacts with leaks.
- Professional Assistance: If you’re unable to locate the leak or if the leak detection methods mentioned above don’t yield results, it’s best to seek professional assistance. An experienced mechanic will have the necessary tools and expertise to identify and fix the leaks in your car’s AC system.
Once you’ve located the source of the leak, it’s crucial to repair it before proceeding. Depending on the size and location of the leak, you may need to replace a damaged hose, tighten loose fittings, or repair a faulty connection. Keep in mind that refrigerant leaks should be addressed promptly to prevent further damage to the AC system and improve its overall performance.
Now that you’ve checked for leaks and made any necessary repairs, it’s time to move on to recharging the AC system to ensure optimal cooling performance.
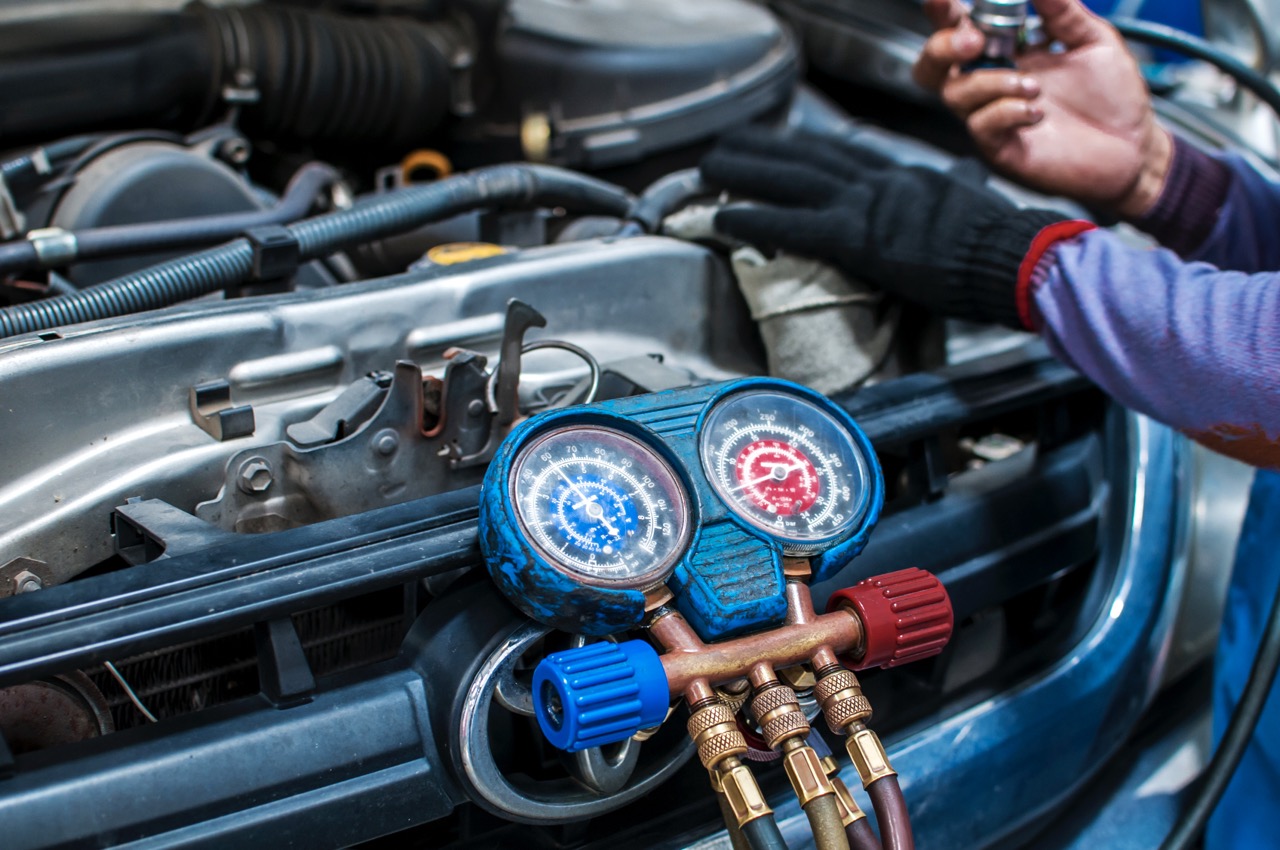
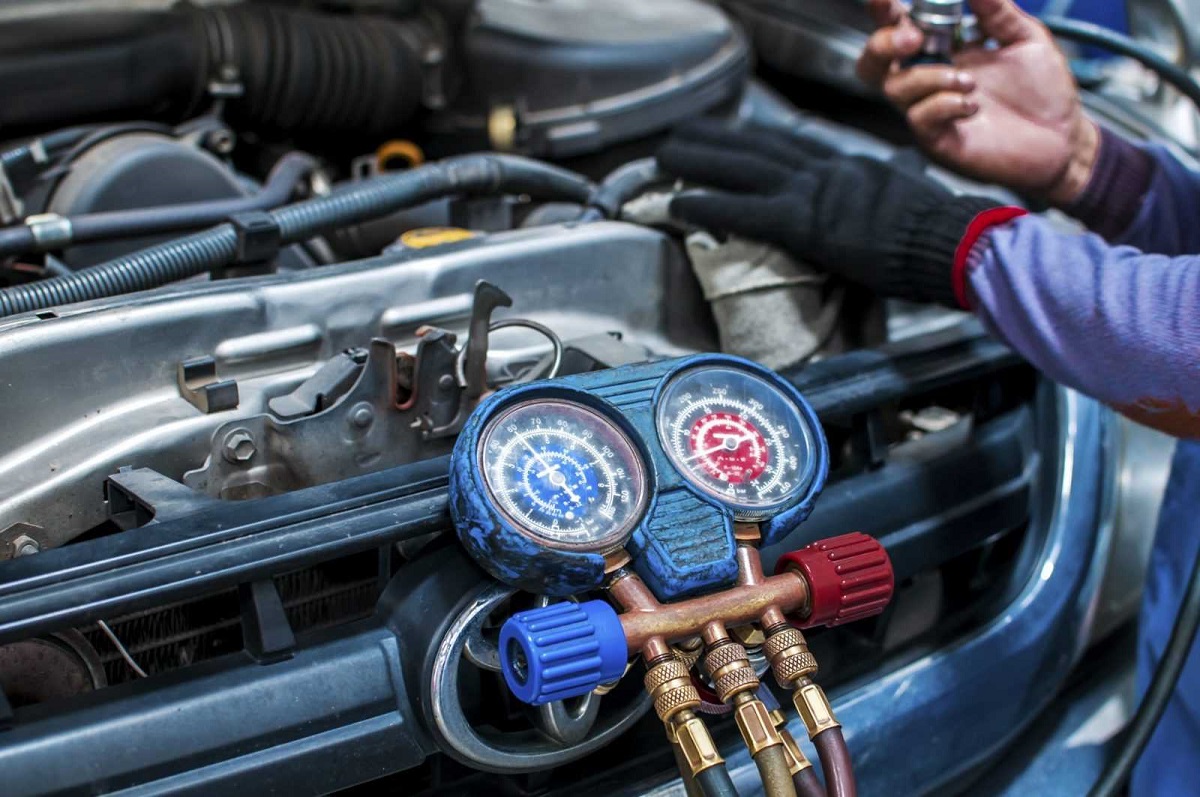
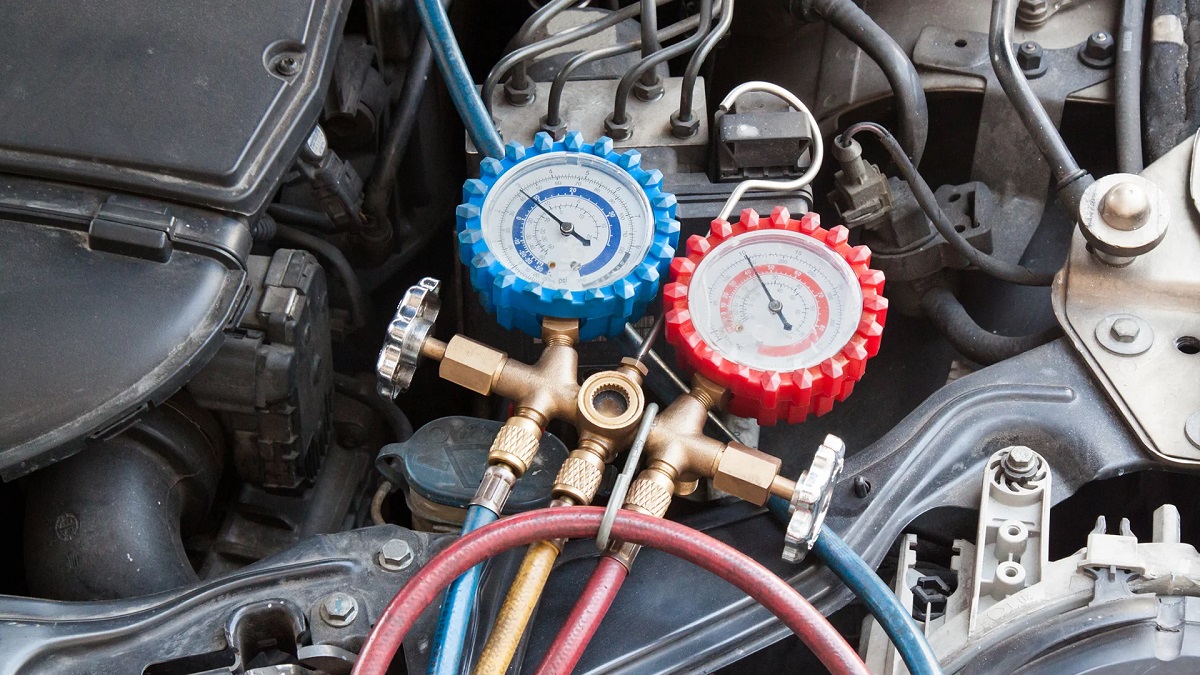
Recharging the System
If your car’s AC system is not blowing cold air or isn’t cooling as effectively as it used to, it may be due to a low refrigerant level. Recharging the system can help restore proper cooling performance. Here’s a step-by-step guide on how to recharge your car’s AC system:
- Gather the necessary materials: To recharge your AC system, you’ll need an AC recharge kit, which typically includes a canister of refrigerant and a pressure gauge. You’ll also need safety goggles and gloves.
- Locate the low-pressure port: The low-pressure port is usually located near the AC compressor. Refer to your car’s manual or consult online resources to find its exact location.
- Prepare the system: Start by ensuring that your car’s engine is off and that the AC system is not running. Put on your safety goggles and gloves for protection.
- Attach the recharge hose: Take the recharge hose from the AC recharge kit and attach it to the low-pressure port. The hose will only fit onto the correct port, so you don’t have to worry about connecting it incorrectly.
- Check the pressure: Once the hose is connected, check the pressure gauge on the recharge kit. It will indicate the current pressure of the system. Make a note of it for reference.
- Add refrigerant: Shake the canister of refrigerant well before attaching it to the recharge hose. Slowly open the valve and allow the refrigerant to flow into the AC system. Keep an eye on the pressure gauge, and stop adding refrigerant once you reach the recommended pressure level.
- Monitor the system: Disconnect the recharge hose from the low-pressure port once you’ve finished adding refrigerant. Start your car’s engine and turn on the AC system to check if the air is now blowing cold. Monitor the system for any signs of leaks or irregularities.
It’s important to note that overcharging the AC system with refrigerant can be as detrimental as having low refrigerant levels. If you’re unsure of the correct pressure levels or if you suspect other issues with your AC system, it’s best to consult a mechanic for professional assistance.
Now that you’ve recharged the AC system, it’s time to move on to cleaning the AC condenser to ensure proper airflow and cooling performance.
Cleaning the AC Condenser
The AC condenser plays a crucial role in the cooling process of your car’s AC system. Over time, it can accumulate dirt, debris, and insects, which can hinder airflow and reduce cooling efficiency. Cleaning the AC condenser is a simple yet effective way to improve its performance. Follow these steps to clean the condenser:
- Locate the condenser: The AC condenser is typically located at the front of the car, behind the grille. Take a moment to familiarize yourself with its position.
- Turn off the engine: Ensure that your car’s engine is turned off and that the AC system is not running before you start cleaning the condenser.
- Remove debris: Use a soft-bristle brush or compressed air to gently remove any debris, leaves, or dust that may have accumulated on the surface of the condenser. Pay attention to the fins and ensure that they are clean and free from obstructions.
- Clean with water: Use a hose to direct a steady stream of water onto the condenser. Start from the top and work your way down, washing away any remaining dirt or grime. Avoid using excessive pressure as it may damage the fins.
- Dry thoroughly: Once you’ve finished cleaning, let the condenser air dry completely before starting your car’s engine or turning on the AC system.
- Inspect for damage: While cleaning the condenser, also inspect it for any signs of damage, such as bent fins or leaks. If you notice any significant damage, it’s advisable to consult a professional for repair or replacement.
- Regular maintenance: To prevent excessive buildup of debris on the condenser in the future, make it a habit to regularly check and clean it. This will help maintain proper airflow and optimize cooling performance.
By periodically cleaning the AC condenser, you can ensure that the system operates at its best and delivers optimal cooling performance. However, if you’re experiencing persistent AC issues or suspect other underlying problems, it’s recommended to seek professional help.
Next, we’ll discuss potential solutions for replacing the AC compressor, a component that is often responsible for AC malfunctions.
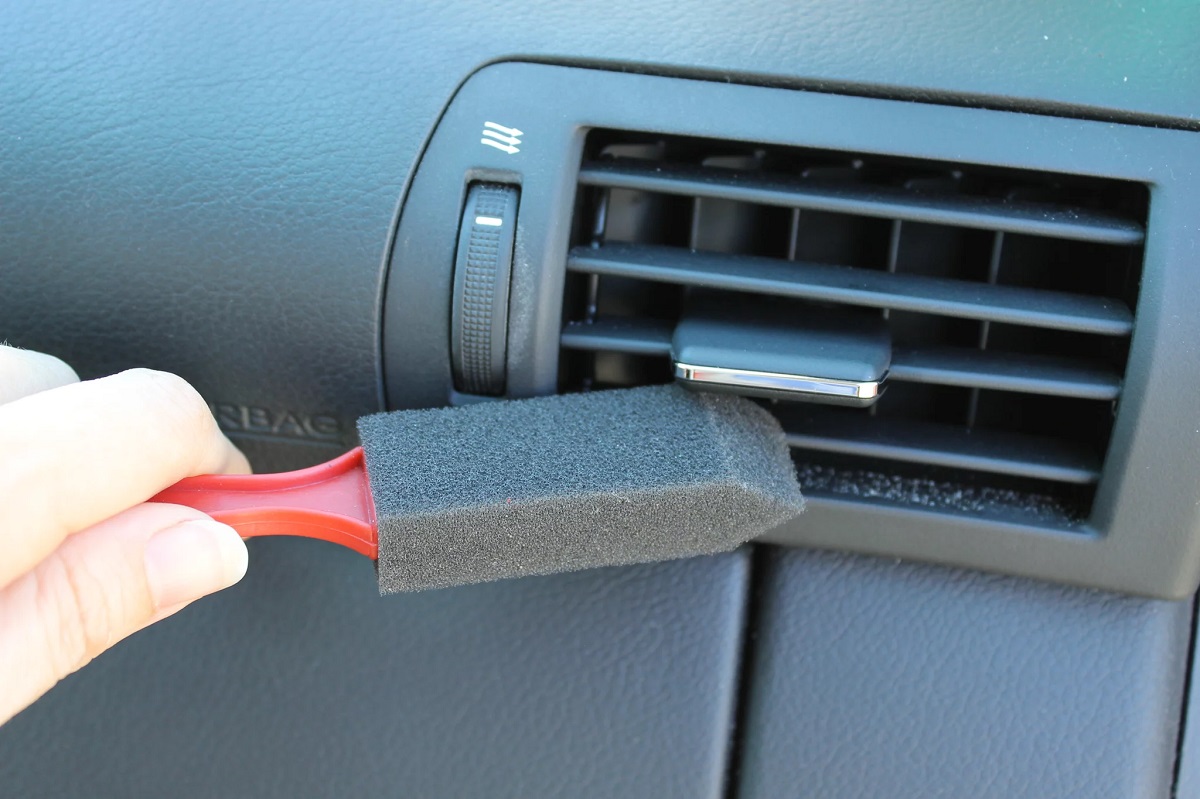
Regularly check and replace your car’s cabin air filter to ensure proper airflow and prevent clogging. This can help improve the performance of your car’s AC system.
Read more: Car AC Blowing Hot Air How To Fix
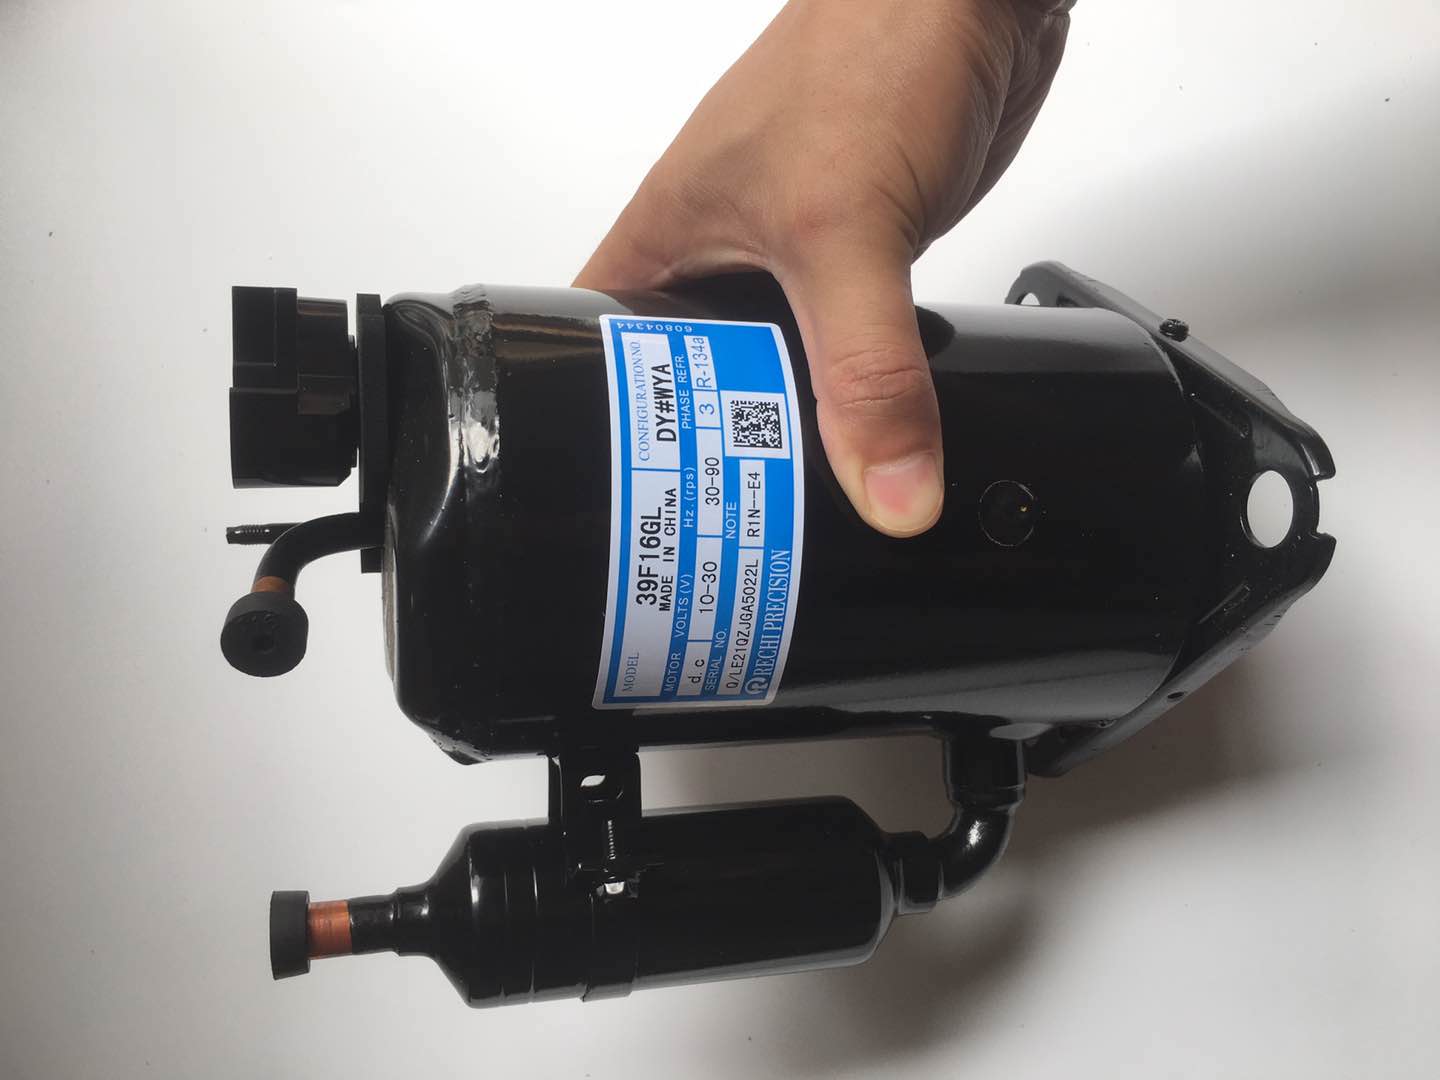
Replacing the AC Compressor
The AC compressor is a vital component of your car’s AC system, responsible for pressurizing and circulating the refrigerant. A faulty or failing compressor can result in a complete loss of cooling or reduced cooling performance. If you’ve determined that the AC compressor needs to be replaced, follow these steps:
- Gather the necessary tools: Before you begin, gather the tools you’ll need, including a wrench, socket set, refrigerant recovery machine, and new O-rings.
- Recover the refrigerant: To replace the AC compressor, you’ll need to recover the refrigerant from the system. This requires the use of a refrigerant recovery machine, which safely captures and stores the refrigerant. Follow the manufacturer’s instructions to properly recover the refrigerant.
- Remove the old compressor: Once the refrigerant is recovered, locate the AC compressor. It is usually attached to the engine with bolts. Use the appropriate wrench or socket set to remove the bolts and disconnect any electrical connections or hoses connected to the compressor.
- Install the new compressor: Carefully install the new AC compressor in the same position as the old one. Ensure that the new compressor is compatible with your car’s make and model. Attach the bolts to secure it in place and reconnect any electrical connections or hoses.
- Replace O-rings: It’s essential to replace the O-rings when installing a new AC compressor. These rubber seals help ensure a proper seal and prevent refrigerant leaks. Lubricate the new O-rings with refrigerant oil and install them on any connections that were disconnected during the replacement process.
- Vacuum the system: Prior to recharging the AC system with refrigerant, it’s necessary to vacuum out any air and moisture that may have entered during the replacement process. Connect a vacuum pump to the system, following the manufacturer’s instructions, and vacuum the system for the recommended time.
- Recharge the system: Once the system is properly vacuumed, it’s time to recharge it with refrigerant. Refer to the manufacturer’s instructions on the proper amount and type of refrigerant to use. Use an AC recharge kit and follow the steps outlined in the “Recharging the System” section of this article.
It’s worth mentioning that replacing the AC compressor can be a complex and technical task. If you’re not familiar with automotive repairs or lack the necessary tools, it’s best to leave this job to a professional mechanic who has experience with AC system repairs.
Next, we’ll discuss another component that can cause AC issues: the AC evaporator.
Replacing the AC Evaporator
The AC evaporator is responsible for removing heat from the air before it enters the car’s cabin. Over time, the evaporator can become clogged, leak refrigerant, or develop other issues that impact its performance. If you determine that the AC evaporator needs to be replaced, follow these steps:
- Gather the necessary tools: Before starting the replacement process, gather the required tools, including a wrench or socket set, screwdriver, refrigerant recovery machine, and new O-rings.
- Recover the refrigerant: Similar to replacing the AC compressor, recovering the refrigerant is the first step. Use a refrigerant recovery machine to safely collect and store the refrigerant from the system before proceeding.
- Locate the evaporator: The AC evaporator is typically located inside the car’s dashboard or behind the glove compartment. Refer to your car’s manual or consult online resources for the exact location.
- Remove the dashboard: In order to access the AC evaporator, you may need to remove parts of the dashboard. This can typically be done by removing screws, bolts, and clips. Follow the manufacturer’s instructions or consult a repair manual specific to your car’s make and model.
- Disconnect the evaporator: Once you’ve gained access to the AC evaporator, carefully disconnect the electrical connections, hoses, and any other components that are connected to it. Take note of the connections and their positions to reinstall them correctly later.
- Remove the old evaporator: Use a wrench or socket set to remove any bolts or screws that secure the evaporator in place. Carefully lift out the old evaporator and dispose of it properly.
- Install the new evaporator: Take the new evaporator and position it in the same location as the old one. Secure it with the appropriate bolts or screws, ensuring a tight fit. Reconnect the electrical connections and hoses that were disconnected earlier.
- Replace O-rings: Just like with the AC compressor replacement, it’s important to replace the O-rings when installing a new evaporator. Lubricate the new O-rings with refrigerant oil and install them on the connections that were disconnected.
- Reassemble the dashboard: Once the new evaporator is securely in place, follow the steps in reverse order to reassemble the dashboard. Make sure all screws, bolts, and clips are properly tightened. Double-check all connections to ensure they are secure.
- Recharge the system: After the evaporator replacement, use an AC recharge kit to recharge the system with the appropriate amount and type of refrigerant. Refer to the “Recharging the System” section of this article for detailed instructions on how to recharge your car’s AC system.
Replacing the AC evaporator is a complex and time-consuming task that requires technical knowledge and skill. If you’re not experienced in automotive repairs, it’s recommended to seek professional help for this particular repair.
Now that we’ve discussed the replacement of both the AC compressor and evaporator, let’s move on to fixing electrical issues that can affect your car’s AC system.
Fixing Electrical Issues
Electrical issues can sometimes be the culprit behind AC problems in your car. If you’re experiencing issues such as intermittent cooling, non-functioning controls, or inoperative fans, addressing these electrical problems is essential. Here are some steps to help you fix electrical issues in your car’s AC system:
- Check the fuses: Start by checking the fuses related to the AC system. Locate the fuse box in your car, which is typically found under the dashboard or in the engine compartment. Use the fuse diagram on the fuse box cover or in the owner’s manual to identify the AC-related fuses. If you find a blown fuse, replace it with the same amperage rating.
- Inspect the wiring: Examine the wiring connections for any signs of damage or corrosion. Loose or damaged wiring can cause electrical issues in the AC system. Use a wiring diagram specific to your car’s make and model to ensure proper connections.
- Test the relays: Relays are responsible for switching power to various components of the AC system. Test the relays related to the AC system using a multimeter. Follow the manufacturer’s instructions or consult a repair manual to correctly test the relays.
- Check the control module: The control module, also known as the AC switch or control panel, can sometimes malfunction and cause issues. Inspect the control module and its connections for any visible signs of damage. If necessary, replace the control module with a new one.
- Verify the temperature sensor: The temperature sensor helps regulate the operation of the AC system. Test the temperature sensor using a multimeter or refer to a repair manual to ensure it is functioning properly. If the sensor is faulty, replace it with a new one.
- Consult with a professional: If you have checked all the above steps and are still unable to fix the electrical issues in your car’s AC system, it may be best to consult with a professional. An experienced mechanic will have the expertise and diagnostic tools to accurately identify and resolve electrical issues.
Electrical issues can sometimes be complex and require specialized knowledge. If you’re not confident in your ability to diagnose and fix electrical issues, it’s advisable to seek professional help to avoid causing further damage to your car’s AC system.
With these steps, you can address common electrical issues and restore proper functionality to your car’s AC system. Next, we’ll conclude with some final thoughts.
Conclusion
Having a properly functioning air conditioning (AC) system in your car is crucial for a comfortable and enjoyable driving experience, especially during hot weather. While encountering AC issues can be frustrating, many common problems can be resolved without the need for professional intervention. Understanding the common AC problems and knowing how to tackle them can save you time, money, and unnecessary trips to the mechanic.
In this article, we covered various AC issues and provided step-by-step instructions on how to fix them. We started by discussing common AC problems, such as no cool air, weak airflow, strange odors, loud noises, AC cycling issues, and electrical problems. Understanding and identifying the specific issue is the first step in resolving the problem.
We then delved into methods for checking for leaks in the AC system. Locating and repairing any refrigerant leaks is essential for restoring proper cooling performance. Recharging the system was also covered, providing guidance on how to add refrigerant to the AC system using an AC recharge kit.
To optimize AC performance, we explored the importance of cleaning the AC condenser. Removing debris from the condenser helps to ensure proper airflow and cooling efficiency. Additionally, we tackled more advanced repairs, including replacing the AC compressor and AC evaporator. These components play crucial roles in the AC system, and replacing them can resolve more serious AC issues.
Finally, we addressed electrical issues that can affect the AC system. Checking fuses, inspecting wiring connections, testing relays, and verifying the temperature sensor are important steps in troubleshooting and fixing electrical problems.
It is worth noting that while the steps provided in this article offer guidance for common AC issues, there may be instances where professional assistance is required. If you are unsure or uncomfortable with performing any of the repairs mentioned, it is always best to consult a qualified mechanic.
By following the steps outlined in this article and maintaining regular AC system maintenance, you can prolong the life of your car’s AC system and enjoy a cool and comfortable ride for years to come.
Frequently Asked Questions about How To Fix Car AC
Was this page helpful?
At Storables.com, we guarantee accurate and reliable information. Our content, validated by Expert Board Contributors, is crafted following stringent Editorial Policies. We're committed to providing you with well-researched, expert-backed insights for all your informational needs.


0 thoughts on “How To Fix Car AC”