Articles
How To Find Car AC Leak
Modified: October 19, 2024
Learn how to find car AC leaks with our informative articles. Get step-by-step instructions and expert tips for detecting and fixing AC leaks.
(Many of the links in this article redirect to a specific reviewed product. Your purchase of these products through affiliate links helps to generate commission for Storables.com, at no extra cost. Learn more)
Introduction
Welcome to the world of car AC systems! Whether you are experiencing a decrease in cooling efficiency or an unpleasant smell when you turn on your car’s air conditioning, a possible culprit could be a refrigerant leak. AC leaks can be frustrating and, if not addressed promptly, can lead to costly repairs. In this article, we will guide you on how to find a car AC leak and provide you with the necessary tools and steps to identify and fix the problem.
Understanding the basic workings of a car’s AC system is essential in determining the presence of a leak. Car AC systems operate on the principle of refrigeration, which involves the circulation and cooling of refrigerant gas. The refrigerant absorbs heat from the air inside your vehicle and releases it outside, resulting in cool air flowing through the vents. The refrigerant, typically in a gas form, is highly pressurized and contained within a closed system.
However, over time, wear and tear, or external factors such as debris or accidents, can cause damage to the AC system, leading to refrigerant leaks. These leaks can occur in various components of the system, including the AC compressor, condenser, evaporator, or the connecting hoses and fittings. Identifying the presence of a leak is crucial in order to fix it and restore your car’s cooling system to its optimal functionality.
There are several signs that may indicate a car AC leak. One of the most noticeable signs is a decrease in cooling performance. If you notice that your AC is blowing warm or cool air instead of cold air, there may be a leak in the system. Another common sign is the presence of oil stains or wetness around the AC components or fittings. This can indicate a refrigerant leak, as the refrigerant often contains an oily substance.
Now that we’ve learned about the basics of car AC systems and identified some signs of a leak, let’s move on to the tools you will need to effectively find a car AC leak.
Key Takeaways:
- Identifying a car AC leak involves recognizing signs such as decreased cooling performance, warm air from vents, oil stains, hissing sounds, and foul odors. Utilize visual inspection, UV dye tests, pressure testing, electronic leak detection, and professional inspection to pinpoint and repair the leak.
- Fixing a car AC leak requires expertise and may involve sealing the leak, replacing faulty components, repairing or replacing O-rings and seals, or performing a refrigerant system recharge. Prioritize safety and seek professional help for effective and long-term solutions.
Read more: How To Find AC Leak
Understanding Car AC Systems
Before delving into the process of finding a car AC leak, it is crucial to have a basic understanding of how car AC systems work. Car air conditioning systems are complex and rely on a combination of mechanical and electrical components to provide cool air inside a vehicle.
The main components of a car AC system include:
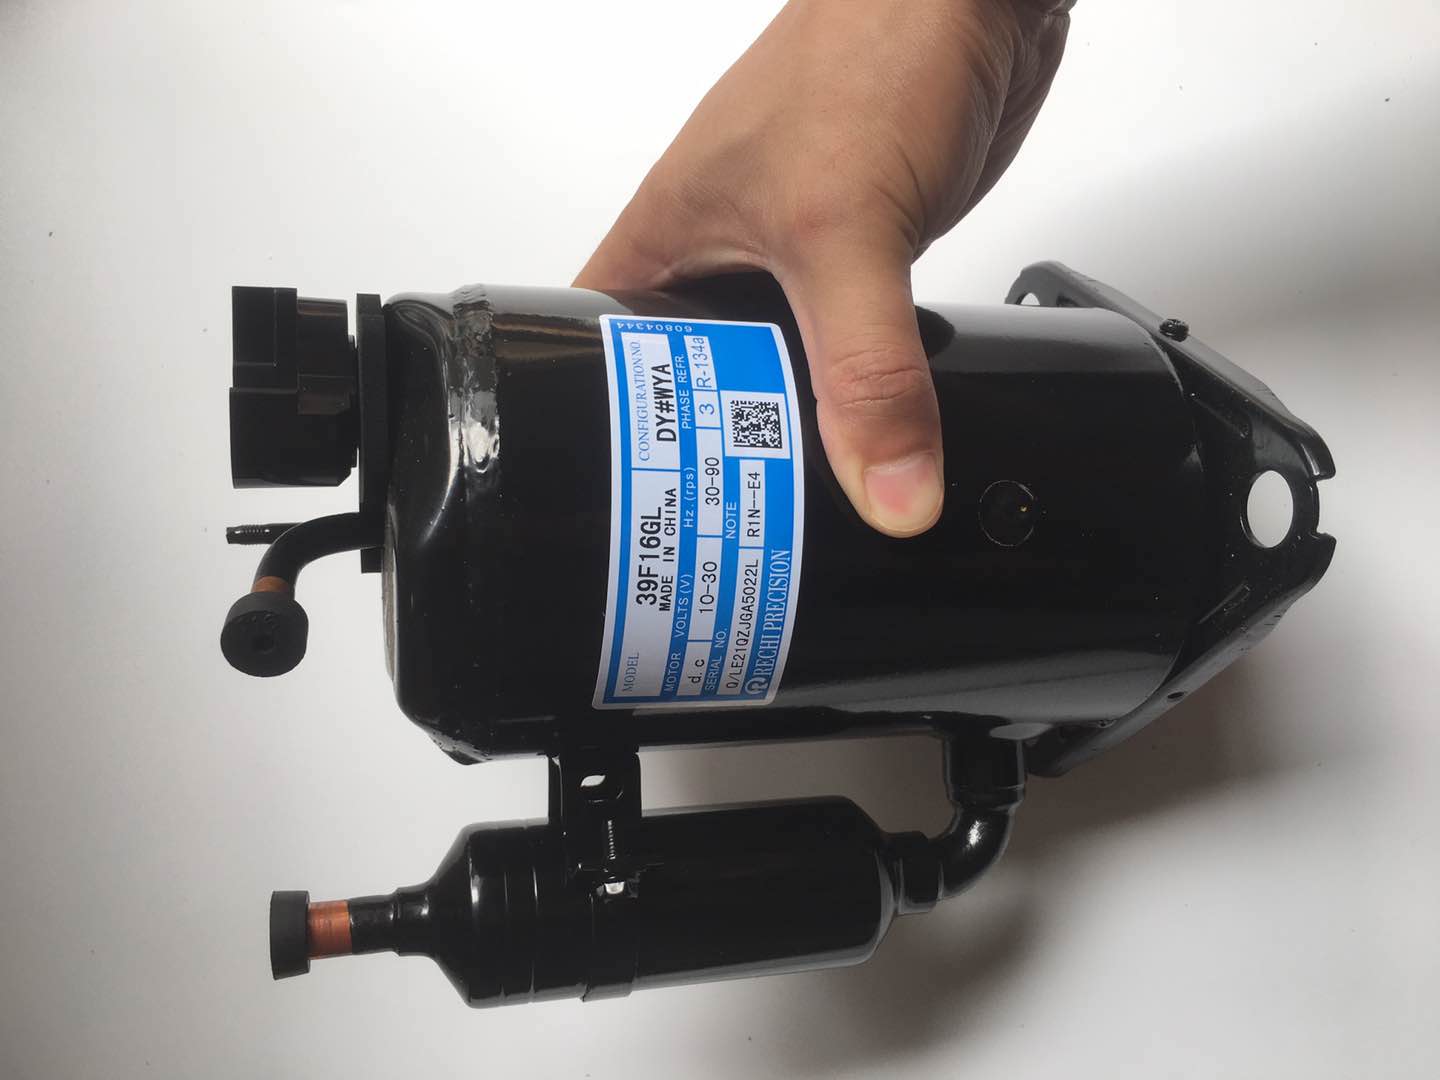
- Compressor: This component is responsible for pressurizing the refrigerant and circulating it through the system. The compressor is typically driven by a belt connected to the engine.
- Condenser: The condenser helps dissipate heat from the refrigerant by passing it through a network of fins and tubes. It is usually located in front of the radiator.
- Expansion Valve: The expansion valve regulates the flow of refrigerant into the evaporator by controlling its pressure and temperature.
- Evaporator: The evaporator cools the incoming air by removing heat from it. As the refrigerant evaporates, it absorbs heat from the surrounding air, resulting in cold air circulating inside the vehicle.
- Refrigerant: The refrigerant is a fluid that absorbs and releases heat, allowing the system to cool the air inside the car. R134a is commonly used in modern car AC systems.
In a properly functioning AC system, the refrigerant undergoes a continuous cycle, changing between liquid and gas states. The compressor pressurizes the refrigerant, which then flows to the condenser, where it releases heat. The high-pressure refrigerant then travels to the expansion valve, which controls its flow into the evaporator. In the evaporator, the refrigerant evaporates, absorbing heat from the surrounding air. Finally, the refrigerant returns to the compressor, and the cycle repeats.
Now that you have a basic understanding of the key components and operation of a car AC system, let’s move on to identifying the signs that indicate a potential AC leak.
Signs of a Car AC Leak
Identifying the signs of a car AC leak is crucial to address the issue promptly and prevent further damage to your AC system. Here are some common signs that indicate a potential AC leak:
- Decreased Cooling Performance: If you notice that your car’s air conditioning is not cooling as effectively as it used to, it could be a sign of a refrigerant leak. The reduced refrigerant level can result in insufficient cooling and lower airflow.
- Warm Air from Vents: When you turn on your AC and feel warm or mildly cool air instead of cold air, it is a clear indication that something is wrong with your AC system. A refrigerant leak can cause the air conditioning to blow warm or lukewarm air instead of the desired cool air.
- Presence of Oil Stains or Wetness: Refrigerant often contains an oily substance, which can leave stains or cause wetness around the AC components or fittings. If you notice oil stains near the AC compressor, condenser, or hoses, it indicates a potential refrigerant leak.
- Hissing or Bubbling Sounds: A refrigerant leak can sometimes produce hissing or bubbling sounds. If you hear unusual noises coming from your AC system, it is advisable to get it inspected for any leaks.
- Foul Odor: A refrigerant leak can also lead to foul odors coming from the AC vents. If there is a pungent smell or a musty odor when you turn on the AC, it could indicate a refrigerant leak and mold growth within the system.
It is important to note that while these signs provide a strong indication of a refrigerant leak, they might also be symptoms of other AC system issues. Therefore, it is recommended to consult a professional mechanic or AC specialist to accurately diagnose and address the problem.
Now that we have discussed the signs of a potential AC leak, let’s move on to the tools you will need to effectively find and detect a car AC leak.
Tools Needed for Finding a Car AC Leak
When it comes to finding a car AC leak, having the right tools can make the process much easier and more accurate. Here are some essential tools you will need to effectively detect a car AC leak:
- UV Leak Detection Kit: A UV leak detection kit is a common tool used to identify refrigerant leaks in car AC systems. The kit typically includes UV dye that is added to the AC system, along with UV glasses and a UV light. The dye circulates with the refrigerant and is visible under the UV light, making it easier to locate the source of the leak.
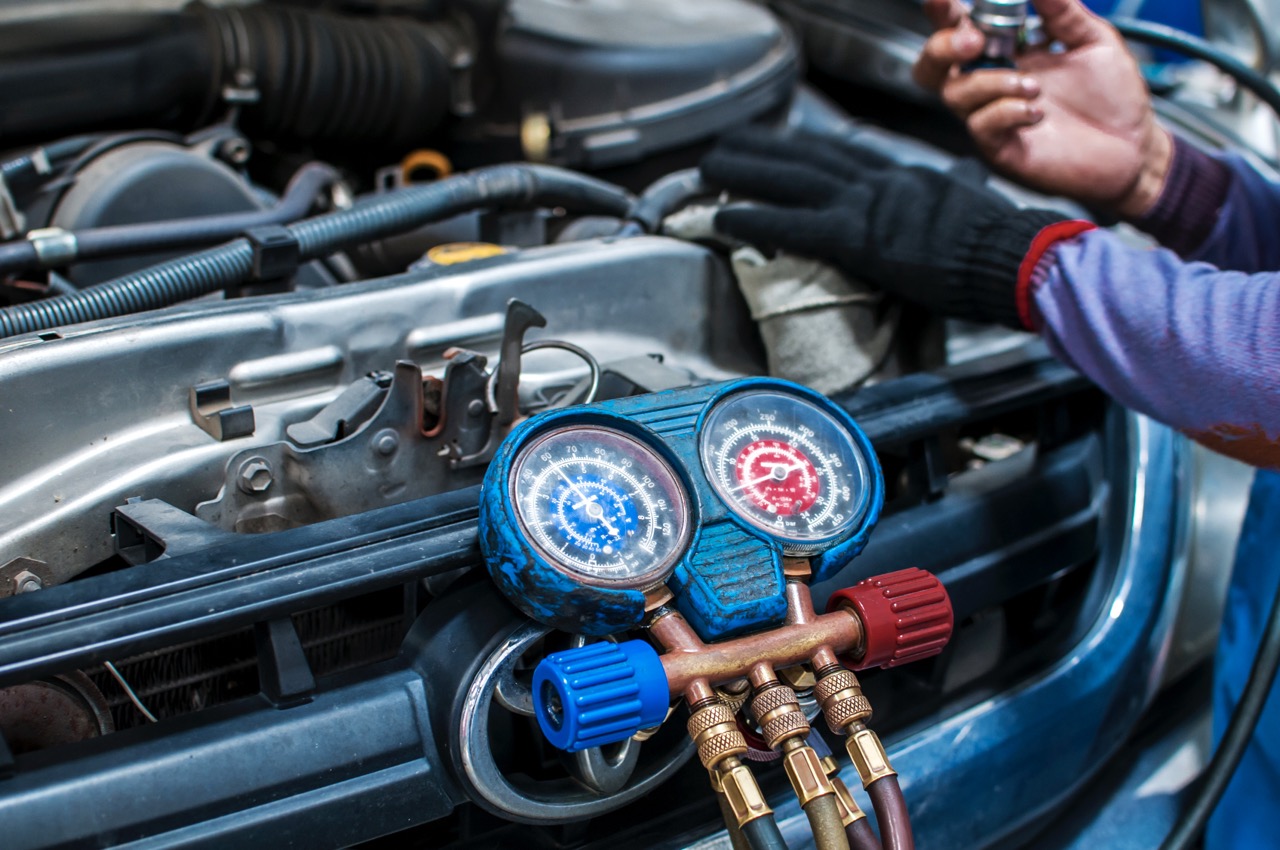
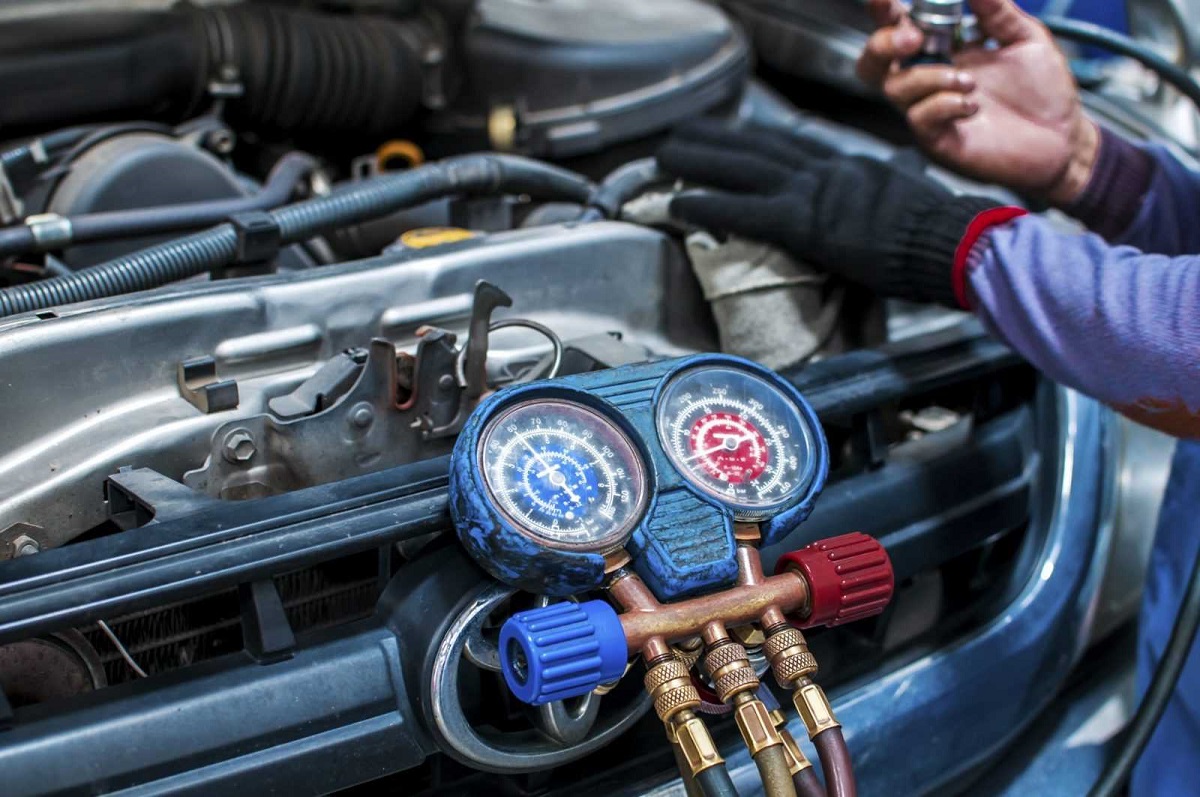
- AC Pressure Gauges: AC pressure gauges are essential for measuring the pressure levels in the AC system. They typically consist of low-pressure and high-pressure gauges that help identify irregular pressure readings, which can be indicative of a leakage or other AC system issues.
- Leak Detection Console: A leak detection console is a specialized tool used by professionals to detect refrigerant leaks in car AC systems. It is equipped with advanced sensors and can accurately locate and measure the severity of a leak.
- Electronic Leak Detector: An electronic leak detector is a handheld device that is used to detect refrigerant leaks by sensing the presence of halogen gases, such as those found in AC systems. It works by emitting an audible or visual signal when it detects a leak, helping to pinpoint the exact location.
- Leak Detection Additives: Leak detection additives are special chemicals that can be added to the AC system to help identify leaks. They react with the escaping refrigerant and produce visible signs, such as foam or bubbles, making it easier to locate the leak source.
- Soap and Water Solution: Although it may sound simple, a soap and water solution can be a handy tool for detecting AC leaks. By applying the solution to the AC fittings and components, you can observe if there are any bubbles forming, indicating the presence of a refrigerant leak.
Having these tools at your disposal will greatly assist in your efforts to identify and locate a car AC leak. However, it’s important to remember that some tools, like the leak detection console, may require professional expertise to operate effectively. If you are unsure about using certain tools, it is always best to seek the assistance of a qualified mechanic or AC technician.
Now that you know the essential tools required, let’s move on to the step-by-step process of finding a car AC leak.
Steps to Find a Car AC Leak
Now that you have the necessary tools, let’s dive into the step-by-step process of finding a car AC leak:
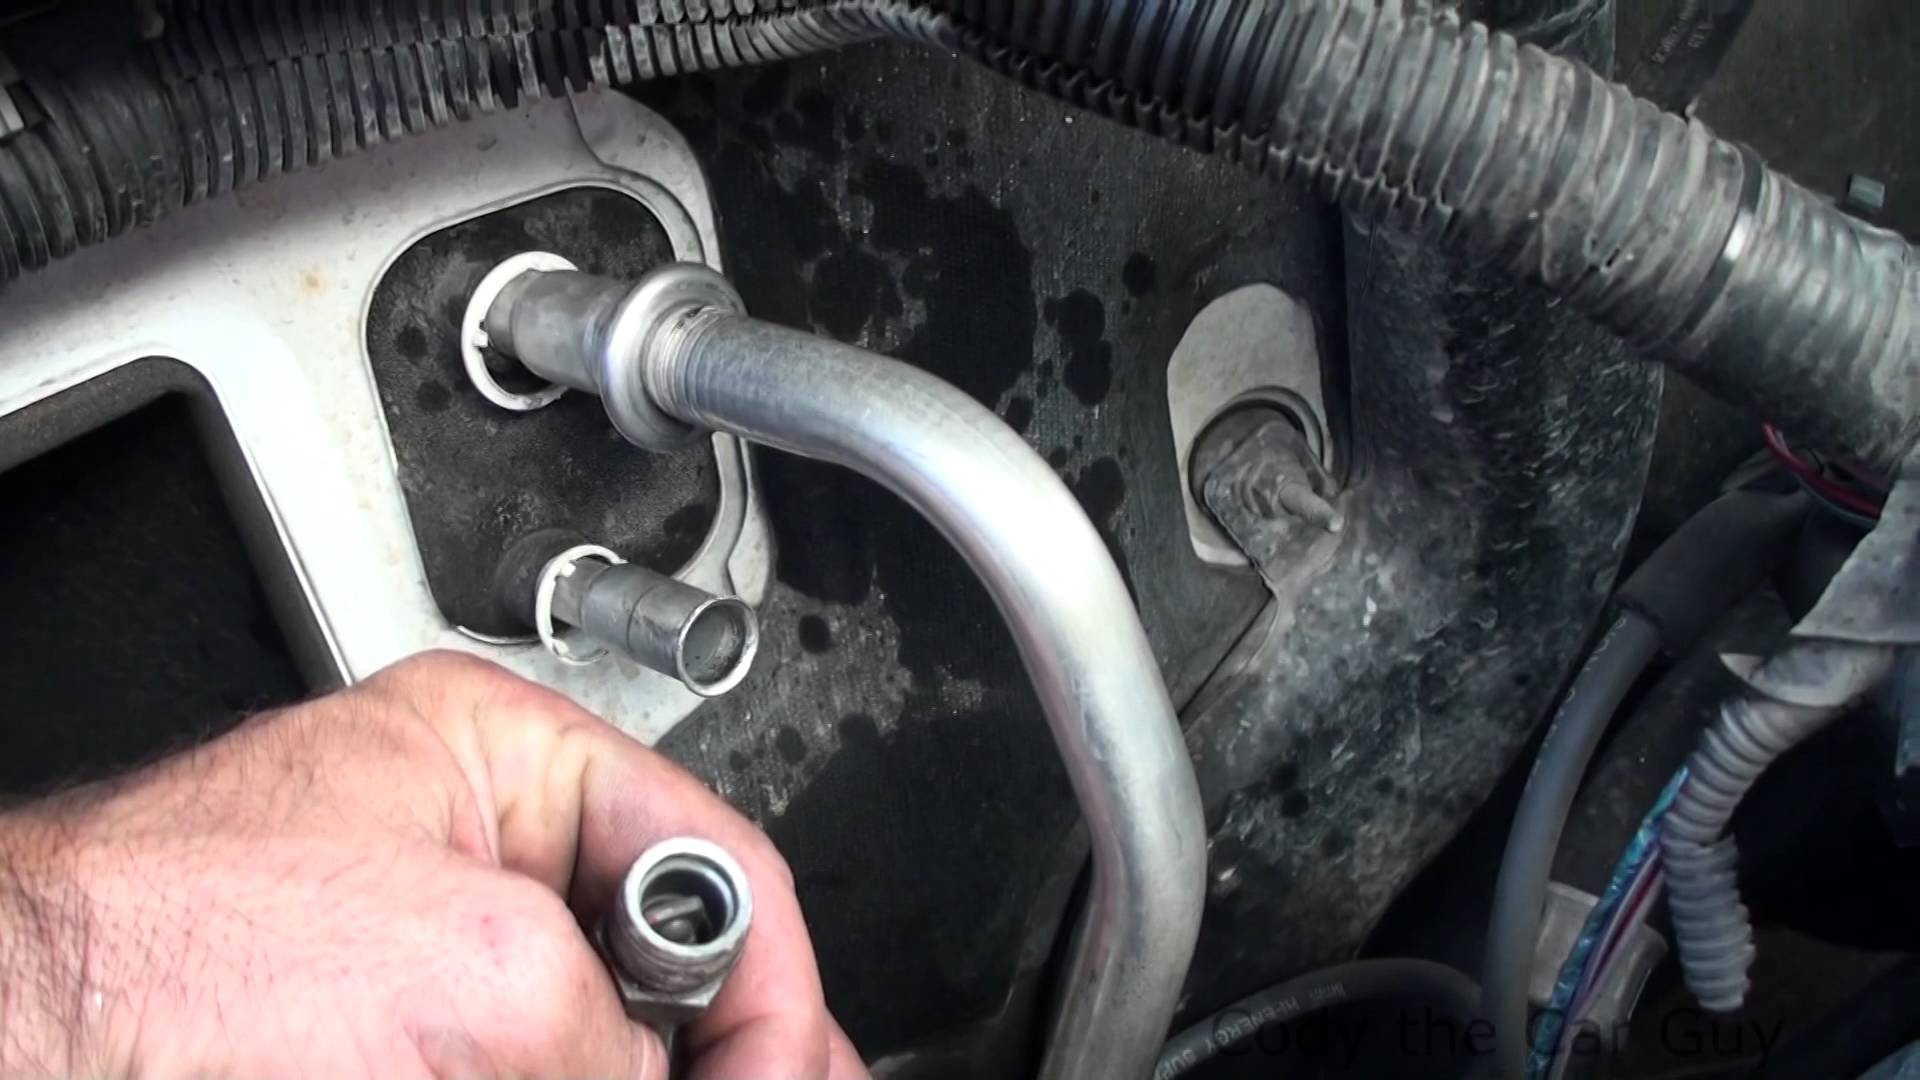
- Visual Inspection: Start by visually inspecting the AC system components, hoses, and fittings for any signs of oil stains, wetness, or physical damage. Look for cracks, loose connections, or damaged seals that may indicate a potential leak.
- UV Dye Test: If no leaks are visible, you can perform a UV dye test. Add UV dye to the AC system following the manufacturer’s instructions. Run the AC for a while so that the dye can circulate. Then, using a UV light, check for any fluorescent traces of the dye around the AC components, hoses, and fittings. The UV dye will help pinpoint the exact location of the leak.
- Pressure Test: Use AC pressure gauges to measure the high and low pressure levels in the AC system. If the pressure readings are abnormal or fluctuating, it may indicate a leak. Additionally, you can perform a pressure test by applying pressurized nitrogen to the AC system and monitoring for any pressure drops, which may signify a leak.
- Electronic Leak Detection: Utilize an electronic leak detector to scan the AC system for the presence of halogen gases, indicating a refrigerant leak. Move the detector along the AC components, hoses, and fittings, and observe for any audible or visual signals indicating a leak.
- Leak Detection Additives: Another method is to add leak detection additives to the AC system. These additives react with the leaking refrigerant and produce visible signs, such as foam or bubbles, making it easier to identify the source of the leak.
- Professional Inspection: If you are unable to locate the leak or if you suspect a complex issue with the AC system, it is advisable to consult a professional mechanic or AC technician. They have the expertise and advanced tools to conduct a comprehensive inspection and accurately detect and fix the leak.
Remember, safety is paramount when working with car AC systems. Always exercise caution and follow best practices, such as wearing safety goggles and gloves, when handling refrigerant and using AC tools.
Once you have successfully identified the AC leak, the next step is to fix it. Let’s delve into the necessary steps to address the issue and restore your car’s AC system to optimal functionality.
Read more: How To Find Roof Leak
Visual Inspection
The first step in finding a car AC leak is to visually inspect the AC system components, hoses, and fittings. This initial inspection can help identify any visible signs of oil stains, wetness, or physical damage that may indicate a potential leak.
Here are the key steps to follow when conducting a visual inspection:
- Start by parking your vehicle on a level surface and ensuring the engine is turned off.
- Open the hood and locate the AC compressor, condenser, evaporator, and other components of the AC system.
- Carefully examine these components for any signs of oil stains, wet spots, or visible refrigerant leaks. Pay close attention to areas where AC hoses connect to various components, as well as the fittings and connections.
- Look for physical damage such as cracks, dents, or loose connections that may be causing the leak. Inspect the seals and gaskets for wear or deterioration as well.
- If you notice any visible signs of a leak, take note of the location and the severity of the leak. This information will be helpful during the repair process.
It is important to note that not all AC leaks may be visible during a visual inspection, especially if the leak is small or located in hard-to-reach areas. In such cases, further diagnostic steps, such as a UV dye test or pressure test, may be necessary to identify the leak source.
While performing the visual inspection, it is also a good idea to check for any other potential AC system issues, such as damaged or worn-out belts, loose wiring, or debris accumulation in the AC system. These issues can affect the overall performance of the AC system.
If you are unsure about what to look for or suspect a complex issue with your car’s AC system, it is recommended to seek the assistance of a professional mechanic or AC technician. They have the expertise and experience to conduct a thorough inspection and accurately diagnose any AC leaks or related problems.
Once you have completed the visual inspection, if no leaks are visible, you can proceed to the next step: performing a UV dye test to further detect any potential AC leaks.
UV Dye Test
If no visible leaks are detected during the visual inspection, the next step in finding a car AC leak is to perform a UV dye test. A UV dye test involves adding a fluorescent dye to the AC system that helps identify the source of a leak when observed under a UV light.
Follow these steps to perform a UV dye test:
- Purchase a UV leak detection kit from an automotive store or online. The kit typically includes UV dye, UV glasses, and a UV light.
- Ensure the vehicle’s engine is turned off and cool, and the AC system is not running.
- Locate the low-pressure port on the AC system. The port is usually found on the suction line or near the compressor.
- Connect the UV dye injector to the low-pressure port. Follow the instructions provided with the kit, as the specific connection method may vary depending on the kit.
- Inject the correct amount of UV dye into the AC system according to the kit’s instructions. Take care to avoid overfilling the system.
- Start the engine and run the AC system for a few minutes to allow the dye to circulate throughout the system.
- Turn off the engine and inspect the AC components, hoses, and fittings with a UV light. The UV light will make any traces of the UV dye fluoresce, making it easy to identify the location of the leak.
- Look for any fluorescent traces of dye around the AC system components, fittings, connections, or hoses. The presence of bright green or yellowish-green dye indicates the presence of a leak.
- Take note of the specific area where the dye is concentrated, as this will help during the repair process.
It is important to note that the UV dye may take some time to circulate throughout the system, so it is advisable to wait for at least a few hours or even overnight before conducting the UV light inspection.
If a leak is detected using the UV dye test, it is recommended to consult a professional mechanic or AC technician for further inspection and repair. They have the expertise and equipment to properly address the leak and ensure the overall integrity of the AC system.
If no fluorescent traces of dye are detected during the UV light inspection, it is possible that the leak is too small or located in a hard-to-reach area. In such cases, further diagnostic steps, such as a pressure test or electronic leak detection, may be necessary to locate the source of the leak.
Once the UV dye test is completed, you can proceed to the next step in the process of finding a car AC leak.
Check for oil or dye residue around AC components, use a UV light to detect leaks, and inspect the AC hoses and connections for any signs of damage or corrosion.
Pressure Test
If a car AC leak cannot be visually identified or detected using a UV dye test, a pressure test can help pinpoint the location of the leak by measuring the pressure levels in the AC system. A pressure test involves pressurizing the system with a specific gas and monitoring for any pressure drops, which can indicate the presence of a leak.
Follow these steps to perform a pressure test:
- First, ensure the vehicle’s engine is turned off and cool, and the AC system is not running.
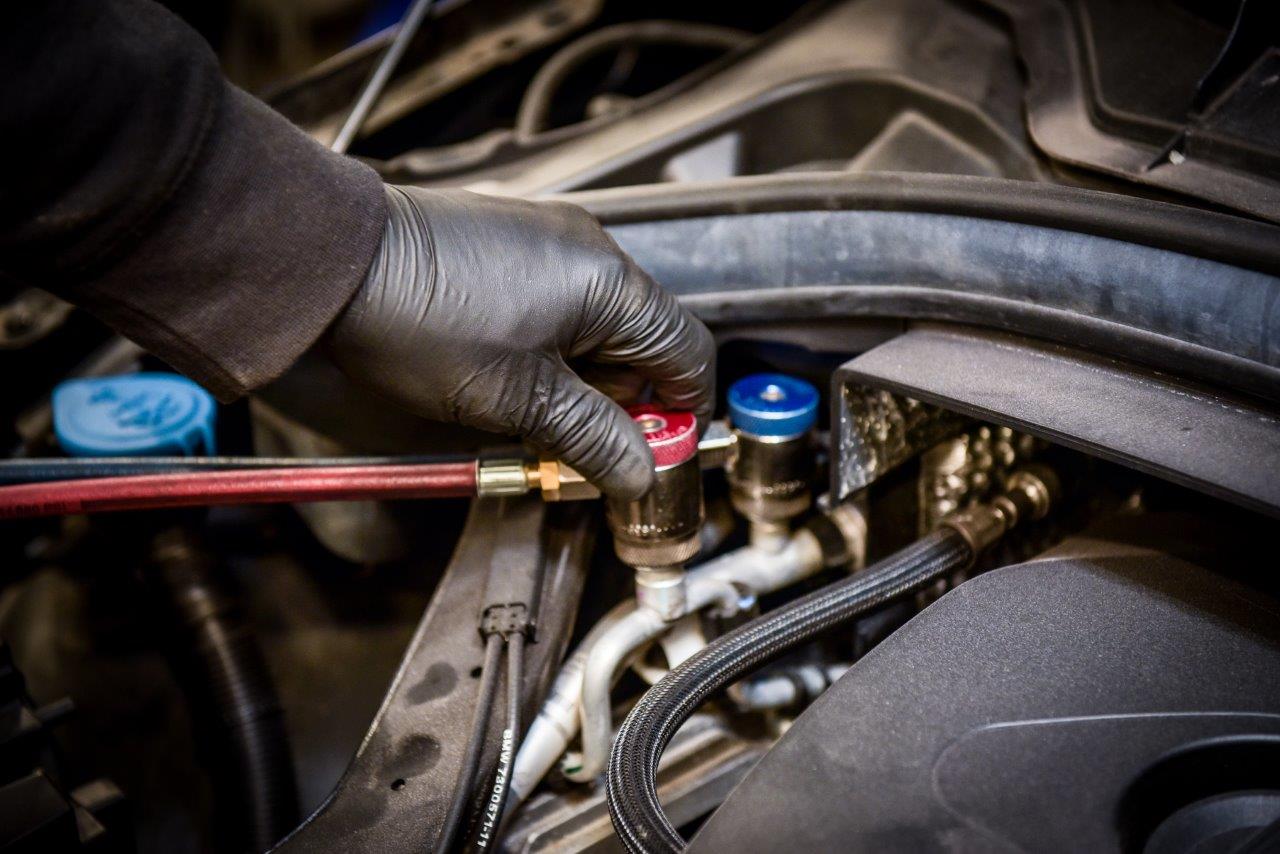
- Identify the high and low-pressure service ports on the AC system. The high-pressure port is typically located on the line between the compressor and the condenser, while the low-pressure port is usually found on the line between the compressor and the evaporator.
- Connect the AC pressure gauges to the high and low-pressure service ports. The low-pressure gauge is connected to the low-pressure port, and the high-pressure gauge is connected to the high-pressure port.
- Once the gauges are connected, refer to the manufacturer’s instructions to interpret the readings properly.
- Start the engine and let it idle, then turn on the AC system to the maximum cooling setting.
- Observe the pressure readings on the gauges. The pressure levels will differ depending on factors such as ambient temperature and the specific AC system design of your vehicle.
- Monitor the gauge readings for any significant pressure drops or fluctuations. If the pressure drops rapidly or continuously, it may indicate a leak in the system.
- If a leak is suspected, use a soap and water solution to apply to the AC fittings, connections, and components. Watch for any formation of bubbles, which would indicate a leak.
- Take note of any pressure drops or bubble formations, as these will help identify the location of the leak.
It is important to note that pressure testing requires a certain level of expertise and specialized equipment. If you are not familiar with performing pressure tests or interpreting the gauge readings, it is recommended to seek the assistance of a professional mechanic or AC technician. They have the knowledge and experience to accurately conduct the test and diagnose any leaks in the AC system.
If a leak is identified during the pressure test, it is advisable to consult a professional for further inspection and repair. They will be able to determine the exact location of the leak and provide the necessary solutions to fix the issue.
Once the pressure test is completed, and any leaks have been addressed, you can proceed to the next steps in the process of finding and fixing a car AC leak.
Electronic Leak Detection
If a car AC leak cannot be easily identified through visual inspection or other methods, electronic leak detection is a reliable technique to locate leaks in the AC system. This method utilizes a handheld electronic leak detector that can sense the presence of halogen gases, such as the refrigerants commonly used in AC systems.
Follow these steps to perform electronic leak detection:
- Ensure the vehicle’s engine is turned off and cool, and the AC system is not running.
- Locate the AC system components, hoses, and fittings that you suspect may be leaking. Pay attention to the AC compressor, condenser, evaporator, and the connections between them.
- Read and follow the instructions provided with the electronic leak detector to prepare it for use. Some detectors may require calibration or warm-up time before use.
- Turn on the electronic leak detector and place the sensor tip near the suspected areas of the leak. Move the sensor slowly and systematically, covering all the possible leak points.
- Observe the detector for any audible or visual signals indicating the presence of a leak. Some detectors produce a beeping sound, while others have LED lights that indicate a leak.
- When the detector alerts you to a leak, hold the sensor in that area for a moment to ensure accurate detection and to pinpoint the precise location of the leak.
- Take note of the location and severity of the leak, as this information will be helpful during the repair process.
Electronic leak detectors are highly sensitive and can detect small leaks that may not be visible to the naked eye. They are particularly useful for locating leaks in hard-to-reach areas or within the internal components of the AC system.
It is important to note that electronic leak detection requires a certain level of expertise and the proper handling of the equipment. If you are unfamiliar with this technique or unsure about the results, it is advisable to consult a professional mechanic or AC technician. They have the experience and knowledge to perform accurate electronic leak detection and provide the necessary repair solutions.
Once the leak has been detected using electronic leak detection, you can proceed with the appropriate measures to fix the leak and restore the proper functioning of your car’s AC system.
Read more: How To Find A Leak In An Air Conditioner
Adding Leak Detection Additives
If other methods of detecting a car AC leak have been unsuccessful, adding leak detection additives to the AC system can be an effective solution. Leak detection additives are specially formulated chemicals that react with the refrigerant and produce visible signs, such as foam or bubbles, indicating the presence of a leak.
Follow these steps to add leak detection additives to your AC system:
- Purchase a leak detection additive specifically designed for car AC systems. These additives are typically available in auto parts stores or online.
- Ensure the vehicle’s engine is turned off and cool, and the AC system is not running.
- Locate the low-pressure port on the AC system. The low-pressure port is typically located on the line between the compressor and the evaporator.
- Connect an injector tool to the low-pressure port. The injector tool is included with the leak detection additive kit or can be purchased separately.
- Follow the instructions provided with the leak detection additive to add the correct amount to the AC system. The instructions may vary depending on the specific product, so it is important to follow them accurately.
- Once the additive is added, start the engine and run the AC system for a few minutes to allow the additive to circulate thoroughly.
- Inspect the AC system components, hoses, and fittings for any signs of foam or bubbles. The presence of foam or bubbles indicates the location of a leak.
- Take note of the specific areas where the foam or bubbles are concentrated as this information will assist in locating and repairing the leak.
Leak detection additives can help to reveal leaks that are too small or difficult to detect using other methods. However, it is crucial to note that these additives are temporary solutions and may not provide a permanent fix for the leak. Once the leak is identified, it is recommended to consult a professional mechanic or AC technician to assess the severity of the leak and perform the necessary repairs.
It is important to follow the manufacturer’s instructions and guidelines when adding leak detection additives to your AC system to ensure safe and effective results. If you are unsure about the process or concerned about damaging your AC system, it is best to seek the assistance of a professional.
Once the leak has been detected using leak detection additives, you can proceed with the appropriate measures to fix the leak and restore the proper functioning of your car’s AC system.
Professional Inspection
If your attempts to find a car AC leak using various methods have been unsuccessful, or if you are uncertain about the location or severity of the leak, it is advisable to seek a professional inspection. A professional mechanic or AC technician has the expertise and advanced tools to conduct a comprehensive inspection and accurately detect and diagnose the leak in your car’s AC system.
Here’s what you can expect during a professional inspection for a car AC leak:
- Find a reputable automotive repair shop or AC specialist that specializes in AC system repairs.
- Book an appointment for an AC system inspection, specifying that you suspect a refrigerant leak.
- On the scheduled day, bring your vehicle to the repair shop and explain the symptoms you have been experiencing and the steps you have taken so far to detect the leak.
- The mechanic or AC technician will perform a thorough examination of the AC system, starting with a visual inspection of the components, hoses, and fittings.
- If necessary, they may utilize specialized equipment such as electronic leak detectors, pressure gauges, or UV lights to pinpoint the leak location.
- Once the leak is detected, they will provide you with a detailed diagnosis, including the exact location and severity of the leak.
- Based on the diagnosis, they will recommend the appropriate repair solutions and provide an estimate for the cost of repairs.
- If you agree to proceed with the repairs, they will perform the necessary fixes using their expertise and specialized equipment.
- After the repairs are complete, the mechanic or AC technician will test the system to ensure the leak has been resolved and the AC system is functioning properly.
Professional inspection is particularly important if you are inexperienced with car AC systems or if the AC system requires complex repairs. Attempting to fix the leak yourself without proper knowledge and expertise can lead to further damage and potentially costly repairs.
By entrusting the inspection and repair process to a professional, you can have peace of mind knowing that your AC system is in capable hands. They have the skills and experience to accurately diagnose and fix the leak, ensuring the optimal performance of your car’s AC system.
Once the professional inspection is complete, and the necessary repairs have been performed, you can enjoy the cool comfort of a fully functional AC system in your vehicle.
Fixing a Car AC Leak
Once a car AC leak has been identified, it is crucial to take the necessary steps to fix the issue and restore the proper functioning of your AC system. The specific repair methods will depend on the location and severity of the leak, as well as the advice provided by a professional mechanic or AC technician. Here are some common repair options for fixing a car AC leak:
- Sealing the Leak: In some cases, minor leaks in AC system components, hoses, or fittings can be sealed using specialized sealants or repair kits. These products are designed to form a temporary seal around the leak and prevent refrigerant from escaping. However, it is important to note that this is a temporary solution and may not be suitable for all types of leaks or long-term reliability.
- Replacing Faulty Components: If the leak is originating from a specific component, such as a damaged hose, a cracked condenser, or a faulty seal, the best course of action may be to replace the damaged part. This ensures a proper, long-lasting repair and helps prevent future leaks in the same area. The replacement process may involve removing and reinstalling the AC system component, followed by recharging the system with the correct amount of refrigerant.
- Repairing or Replacing O-Rings: O-rings are small rubber seals found in various fittings and connections in the AC system. If an O-ring is damaged or worn, it can cause a refrigerant leak. In such cases, the O-ring can be replaced to fix the leak. It is important to use O-rings that are specifically designed for automotive AC systems to ensure a proper fit and seal.
- Repairing or Replacing Seals and Gaskets: Seals and gaskets are crucial components that help maintain a proper seal between different AC system parts. Over time, these seals and gaskets can deteriorate, causing leaks. Repairing or replacing them is essential for resolving the leak. This repair may involve disassembling and reassembling certain parts of the AC system. It is best to consult a professional mechanic or AC technician for this type of repair.
- Refrigerant System Recharge: After the leak has been fixed, it is necessary to recharge the refrigerant system to ensure the proper amount of refrigerant is present. This is typically done using specialized equipment and the correct type and amount of refrigerant specified for your vehicle.
It is important to remember that fixing a car AC leak requires knowledge and expertise in automotive AC systems. If you are not comfortable or experienced in working with AC systems, it is highly recommended to seek the assistance of a professional mechanic or AC technician. They have the necessary skills, tools, and experience to accurately diagnose the issue and perform the proper repairs.
By addressing the leak promptly and seeking professional assistance, you can ensure the longevity and optimal performance of your car’s AC system, keeping you comfortable during those hot summer drives.
Conclusion
Dealing with a car AC leak can be a frustrating and inconvenient experience. However, by following the steps outlined in this guide, you can effectively identify and address the issue, restoring your car’s AC system to its optimal functionality.
We started by understanding the basics of car AC systems and the signs that may indicate a leak. By recognizing the decreased cooling performance, warm air from the vents, oil stains or wetness, hissing or bubbling sounds, and foul odors, you can quickly identify a potential AC leak.
To detect a car AC leak, we explored various methods and tools. Visual inspection helps identify visible signs of a leak, while a UV dye test utilizes fluorescent dye and UV light to highlight the leak source. Pressure testing and electronic leak detection offer alternative ways to pinpoint the location of the leak. Additionally, adding leak detection additives can reveal small or hard-to-detect leaks.
If your DIY efforts are unsuccessful, it is advisable to seek a professional inspection. A qualified mechanic or AC technician can utilize their expertise and specialized equipment to accurately detect and diagnose the leak in your car’s AC system.
Once the leak is identified, there are various repair options available, including sealing the leak, replacing faulty components, repairing or replacing O-rings and seals, or performing a refrigerant system recharge. Depending on the severity and location of the leak, a professional mechanic or AC technician will recommend the appropriate repair solution.
Remember, it is important to prioritize safety and seek professional help if you are unsure or uncomfortable working with car AC systems. The knowledge and experience of professionals can ensure the proper functioning and long-term reliability of your car’s AC system.
By effectively finding and fixing a car AC leak, you can enjoy cool and comfortable rides in your vehicle, even on the hottest days of the year. So, stay cool and drive with comfort!
Now that you've got a handle on tackling car AC leaks, why stop there? Dive deeper into home maintenance with our detailed guide on HVAC systems. This next article breaks down the complexities, ensuring you understand how to keep your home's climate control in top shape year-round.
Frequently Asked Questions about How To Find Car AC Leak
Was this page helpful?
At Storables.com, we guarantee accurate and reliable information. Our content, validated by Expert Board Contributors, is crafted following stringent Editorial Policies. We're committed to providing you with well-researched, expert-backed insights for all your informational needs.


0 thoughts on “How To Find Car AC Leak”