Articles
How To Clean Car AC Condenser
Modified: September 2, 2024
Learn effective ways to clean your car AC condenser and improve its performance. Read our informative articles for tips and techniques.
(Many of the links in this article redirect to a specific reviewed product. Your purchase of these products through affiliate links helps to generate commission for Storables.com, at no extra cost. Learn more)
Introduction
Welcome to our guide on how to clean your car’s AC condenser! The air conditioning system in your car plays a crucial role in keeping you cool and comfortable during those hot summer days. But over time, the AC condenser can become dirty and clogged with debris, affecting its efficiency and performance. Regular maintenance and cleaning of the condenser can help ensure that your car’s AC system operates at its best.
In this article, we will cover everything you need to know about cleaning your car’s AC condenser. We will walk you through the process step by step, making it easy for you to tackle this task yourself. Whether you are a seasoned car enthusiast or a novice DIYer, we’ve got you covered!
Before we dive into the cleaning process, let’s take a moment to understand what the AC condenser is and why it is important to keep it clean.
Key Takeaways:
- Regularly cleaning your car’s AC condenser is crucial for optimal cooling performance and prolonging the lifespan of the entire AC system. It ensures efficient heat transfer and a comfortable driving experience, especially during hot summer days.
- By following a step-by-step cleaning process and testing the functionality of your car’s AC system, you can confidently maintain a cool and comfortable ride throughout the year. Proper maintenance of the AC condenser is essential for overall vehicle performance and comfort.
Read more: What Does An AC Condenser Do In A Car
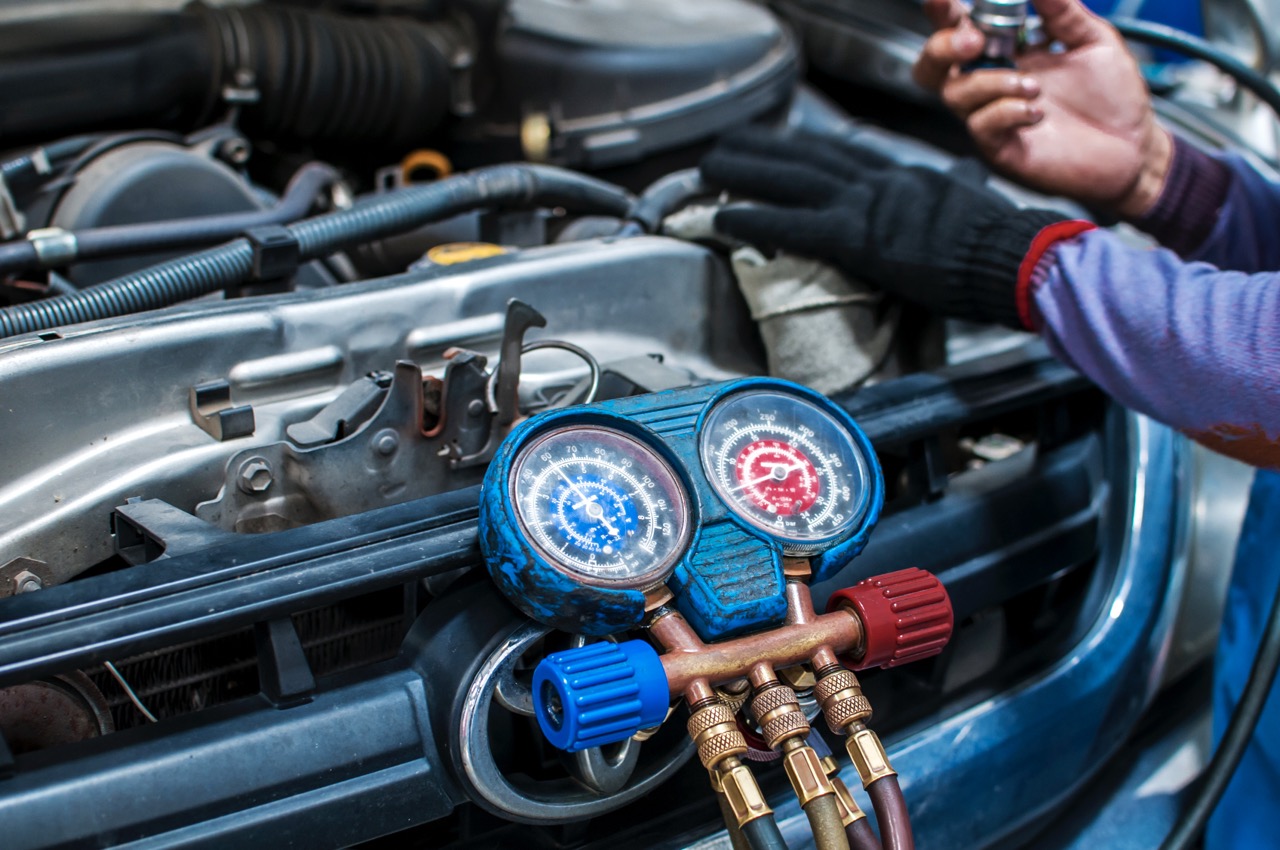
Understanding the Car AC Condenser
The car AC condenser is a vital component of the air conditioning system. It is typically located at the front of the vehicle, in front of the radiator. While the radiator is responsible for cooling the engine, the AC condenser has the important role of removing heat from the refrigerant in the AC system, allowing it to cool down before it enters the car’s cabin.
The condenser works by utilizing the air that passes through it as you drive. It has a network of small tubes, called fins, which contain the refrigerant. These fins maximize the surface area, allowing for efficient heat transfer between the refrigerant and the surrounding air. As the refrigerant flows through the condenser tubes, it releases heat to the outside air, turning the hot, high-pressure refrigerant into a cool, low-pressure gas.
Over time, the condenser can accumulate dirt, debris, and other contaminants, especially if you frequently drive in dusty or polluted environments. This buildup restricts the airflow and insulates the fins, reducing the condenser’s efficiency and hindering heat transfer. As a result, the AC system may struggle to cool the air effectively, and you may notice a decrease in cooling performance.
By regularly cleaning the AC condenser, you can remove the accumulated dirt and debris, allowing for optimal airflow and heat transfer. This not only improves the cooling performance but also helps prolong the lifespan of the entire AC system.
Now that we have a clear understanding of the car AC condenser and its importance, let’s move on to identifying the signs that indicate it’s time for a cleaning.
Signs of a Dirty AC Condenser
A dirty AC condenser can manifest in various signs and symptoms that indicate it is in need of cleaning. Being aware of these signs can help you identify when it’s time to clean your car’s AC condenser. Here are some common indicators of a dirty condenser:
-
Reduced Cooling Performance: If you notice that your car’s AC system is not cooling as effectively as it used to, it could be due to a dirty condenser. As dirt and debris accumulate on the condenser fins, it hampers the airflow and heat transfer, making it harder for the system to cool the air.
-
Poor Airflow: Another telltale sign of a dirty AC condenser is reduced airflow from the vents. As the condenser becomes clogged, it restricts the amount of air passing through, leading to weaker airflow into the cabin.
-
Longer Cooling Times: A dirty condenser can also cause prolonged cooling times. If your car’s AC system takes much longer to cool the cabin than usual, it could be a sign of a compromised condenser.
-
Overheating Engine: The car’s AC condenser sits in front of the radiator, where it can accumulate debris that obstructs airflow. This can result in decreased cooling of the radiator, leading to increased engine temperatures. If you notice your engine running hotter than normal, a dirty condenser might be to blame.
-
Visible Dirt and Debris: In some cases, you may be able to physically see dirt and debris accumulated on the condenser fins. Take a look at the front of your car, just behind the grille, and inspect the condenser for any signs of dirt, leaves, or other debris.
It’s important to address these signs of a dirty condenser promptly to prevent further damage to the AC system and ensure optimal performance. Now that you know what to look out for, let’s move on to the preparation necessary before cleaning the AC condenser.
Preparing for the Cleaning Process
Before diving into the cleaning process, it’s essential to take some necessary steps to ensure your safety and the effectiveness of the cleaning. Proper preparation will help make the cleaning process smoother and more efficient. Here are some important steps to follow when preparing to clean your car’s AC condenser:
-
Choose the Right Location: Find a suitable location to carry out the cleaning. Ideally, you should choose an open space with good ventilation to allow for proper airflow. Avoid cleaning the condenser in a confined or enclosed area, as this can hinder the evaporation of water and cleaning agents.
-
Gather the Necessary Materials: Make sure you have all the tools and materials needed for the cleaning process. This includes a soft brush or fin comb, a gentle detergent or condenser cleaner, a water hose or pressure washer, and safety equipment like gloves and safety goggles.
-
Wait for the Engine to Cool Down: Before starting the cleaning process, ensure that your vehicle’s engine has had sufficient time to cool down. It’s important to avoid touching or working around hot engine components to prevent any accidents or injuries.
-
Disconnect the Battery: To avoid any potential electrical shocks or damage to the electrical system, it’s recommended to disconnect the negative terminal of the battery. This will ensure safety while working near the AC condenser.
By following these preparation steps, you will be ready to tackle the cleaning process effectively and safely. With the right tools and materials in hand and taking necessary safety precautions, you can now proceed to the next step: gathering the tools and materials needed for cleaning the AC condenser.
Tools and Materials Needed
When it comes to cleaning your car’s AC condenser, having the right tools and materials is crucial for a successful and efficient cleaning process. Here are the essential tools and materials you will need:
-
Soft Brush or Fin Comb: A soft-bristled brush or a fin comb is essential for gently removing dirt and debris from the condenser fins without causing any damage. Choose a brush with bristles that are not too rigid to avoid bending or damaging the delicate fins.
-
Gentle Detergent or Condenser Cleaner: You will need a mild detergent or a condenser cleaner specifically designed for cleaning air conditioning components. Avoid using harsh chemicals or solvents, as they can corrode the condenser’s fins and other parts.
-
Water Hose or Pressure Washer: A water hose with a spray nozzle or a pressure washer will be needed to rinse off the condenser after applying the detergent or cleaner. Make sure the water pressure is not too high to prevent bending or damaging the fins.
-
Gloves and Safety Goggles: It’s important to protect your hands and eyes during the cleaning process. Wear a pair of gloves to avoid any skin irritation or contact with cleaning agents. Safety goggles will help shield your eyes from flying debris.
-
Bucket or Spray Bottle: You may need a bucket or a spray bottle for mixing the detergent or condenser cleaner with water, depending on the instructions provided by the manufacturer.
-
Clean Towels or Microfiber Cloth: Prepare some clean towels or microfiber cloths for wiping and drying the condenser after cleaning. These materials are gentle on the fins and help prevent any moisture buildup.
Having these tools and materials at hand will ensure that you are well-equipped to clean your car’s AC condenser thoroughly. With everything prepared, you are now ready to move on to the step-by-step process of cleaning the condenser, which we will explore in the next sections.
Read also: 14 Amazing AC Condenser Cover for 2025
Step 1: Safely Disconnecting the Battery
Before you start cleaning your car’s AC condenser, it’s essential to ensure your safety by disconnecting the battery. This step will help prevent any potential electrical shocks or damage to the electrical system. Follow these steps to safely disconnect the battery:
-
Locate the Negative Terminal: Open the hood of your car and locate the battery. The negative terminal can be identified by the “-” symbol marked on the battery or an adjacent component.
-
Prepare the Necessary Tools: To disconnect the battery, you may need a wrench or a socket set, depending on the type of connectors used.
-
Wear Safety Gloves: Before handling the battery, it’s important to put on a pair of safety gloves to protect your hands from any accidental contact with electrical currents.
-
Remove the Negative Terminal: Use a wrench or a socket set to loosen the nut or bolts securing the negative terminal connector. Once loose, carefully lift the connector off the battery terminal.
-
Secure the Disconnected Cable: To prevent accidental reconnection, secure the disconnected negative cable away from the battery terminal. You can use a zip tie or wrap it with electrical tape.
By disconnecting the battery, you eliminate the risk of electrical accidents while working on the AC condenser. Remember that the negative terminal is disconnected, rendering the electrical system in your car temporarily inactive. Take caution not to touch the negative terminal or allow the disconnected cable to come into contact with any metal surfaces.
Now that the battery is safely disconnected, you can proceed with locating the AC condenser, which is the next step in the cleaning process.
Step 2: Locating the AC Condenser
Locating the AC condenser in your car is an important step before you can proceed with cleaning it. The condenser is typically located at the front of the vehicle, in front of the radiator. Here’s how you can find it:
-
Open the Hood: Begin by lifting the hood of your car, ensuring it is securely propped open to provide easy access to the engine bay.
-
Identify the Radiator: Locate the radiator, which is usually positioned in the center or towards the front of the engine bay. The radiator is responsible for cooling the engine coolant.
-
Find the AC Condenser: The AC condenser is positioned in front of the radiator. It is often rectangular or square in shape and has a network of fins that allow for heat transfer. Take a closer look at the area just behind the grille, and you should be able to spot the condenser.
Depending on your specific car model, the location of the AC condenser may vary slightly. However, it is typically situated in the same area—front and center of the engine bay. If you’re having trouble locating it, consult your car’s owner’s manual or seek assistance from a professional mechanic.
Once you have successfully located the AC condenser, you’re ready to move on to the next step—removing debris and dirt from the condenser. We’ll cover this in the following section.
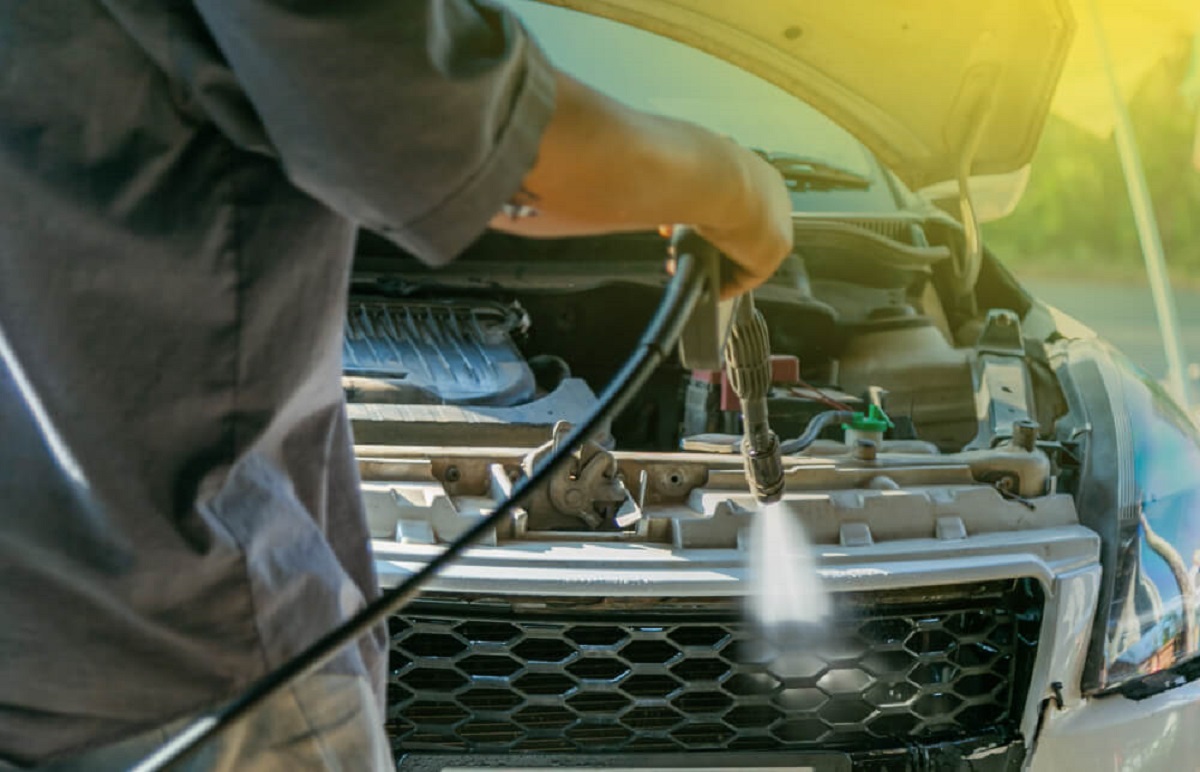
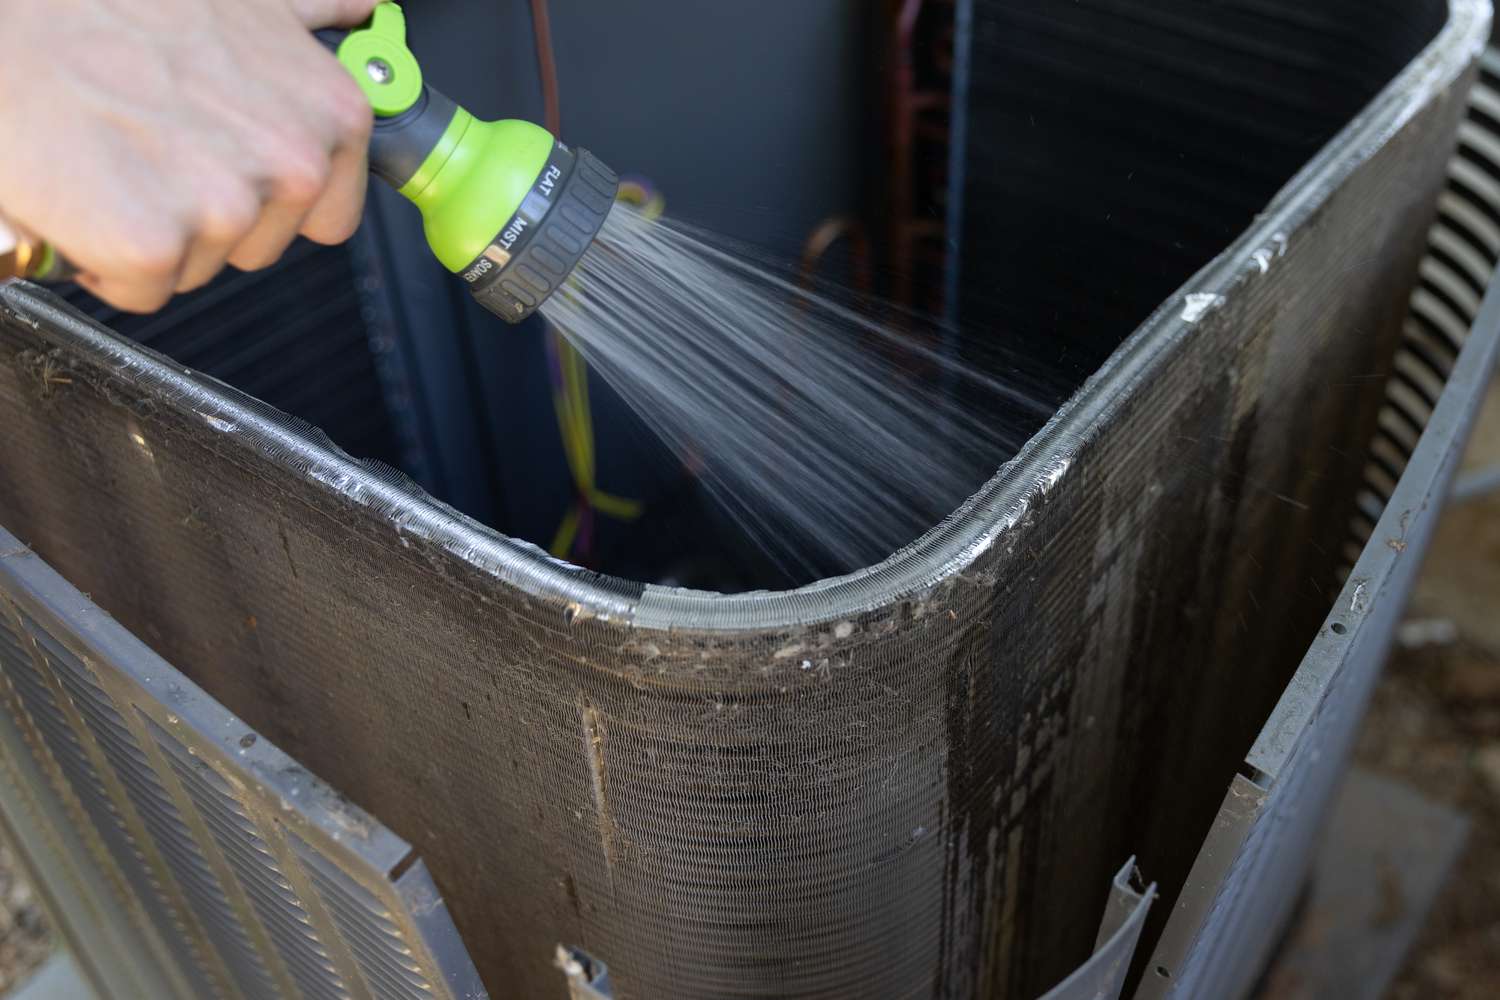
Step 3: Removing Debris and Dirt
Now that you’ve located the AC condenser, it’s time to remove any visible debris and dirt from its surface. This step is crucial to ensure optimal airflow and heat transfer. Here’s how you can remove debris and dirt from the condenser:
-
Inspect the Condenser: Carefully examine the condenser’s fins for any visible debris, such as leaves, insects, or dust. Use a flashlight if needed to get a better view of the fins.
-
Use a Soft Brush or Fin Comb: Gently brush or comb the condenser fins to dislodge any loose debris. Start from the top and work your way down, using light strokes to avoid bending or damaging the delicate fins. Be thorough in your cleaning, ensuring you cover the entire surface area.
-
Remove Larger Debris by Hand: If you come across larger debris, such as leaves or twigs, carefully remove them by hand. Take caution not to damage the fins or yourself while doing so.
-
Inspect for Stubborn Debris: After brushing and removing the loose debris, inspect the condenser for any stubborn dirt or stuck-on debris. If you notice any, you can use compressed air or a vacuum cleaner with a soft brush attachment to gently remove it.
-
Repeat if Necessary: If the condenser is heavily soiled or you notice stubborn debris that is difficult to remove, you may need to repeat the brushing and cleaning process a few times until the condenser is clear of all visible dirt and debris.
It’s important to handle the condenser fins with care during this step, as they are delicate and can easily become damaged. Avoid using excessive force or sharp tools that could bend or puncture the fins. Take your time and be patient to ensure a thorough cleaning. Once you have removed the visible debris and dirt, you can proceed to the next step—cleaning the condenser fins. We will cover this in the following section.
Regularly clean the car AC condenser with a soft brush or compressed air to remove dirt and debris. This will help maintain efficient cooling and prevent potential damage to the system.
Step 4: Cleaning the Fins
After removing the visible debris and dirt from the condenser, the next step is to clean the fins more thoroughly. This will help improve airflow and ensure optimal heat transfer. Follow these steps to clean the condenser fins:
-
Prepare the Cleaning Solution: In a bucket or spray bottle, mix a gentle detergent or a condenser cleaner with water according to the manufacturer’s instructions. Ensure the solution is well-mixed.
-
Apply the Cleaning Solution: Using a soft brush or a spray bottle, apply the cleaning solution to the condenser fins. Gently work the solution into the fins, paying attention to heavily soiled areas.
-
Let the Solution Sit: Allow the cleaning solution to sit on the condenser fins for a few minutes. This will help loosen any stubborn dirt or grime that may be trapped in between the fins.
-
Brush the Fins: After the solution has had time to work, use a soft brush to agitate the fins. Brush in a back-and-forth motion, being careful not to apply excessive pressure that could damage the fins. Continue until you feel the fins are thoroughly cleaned.
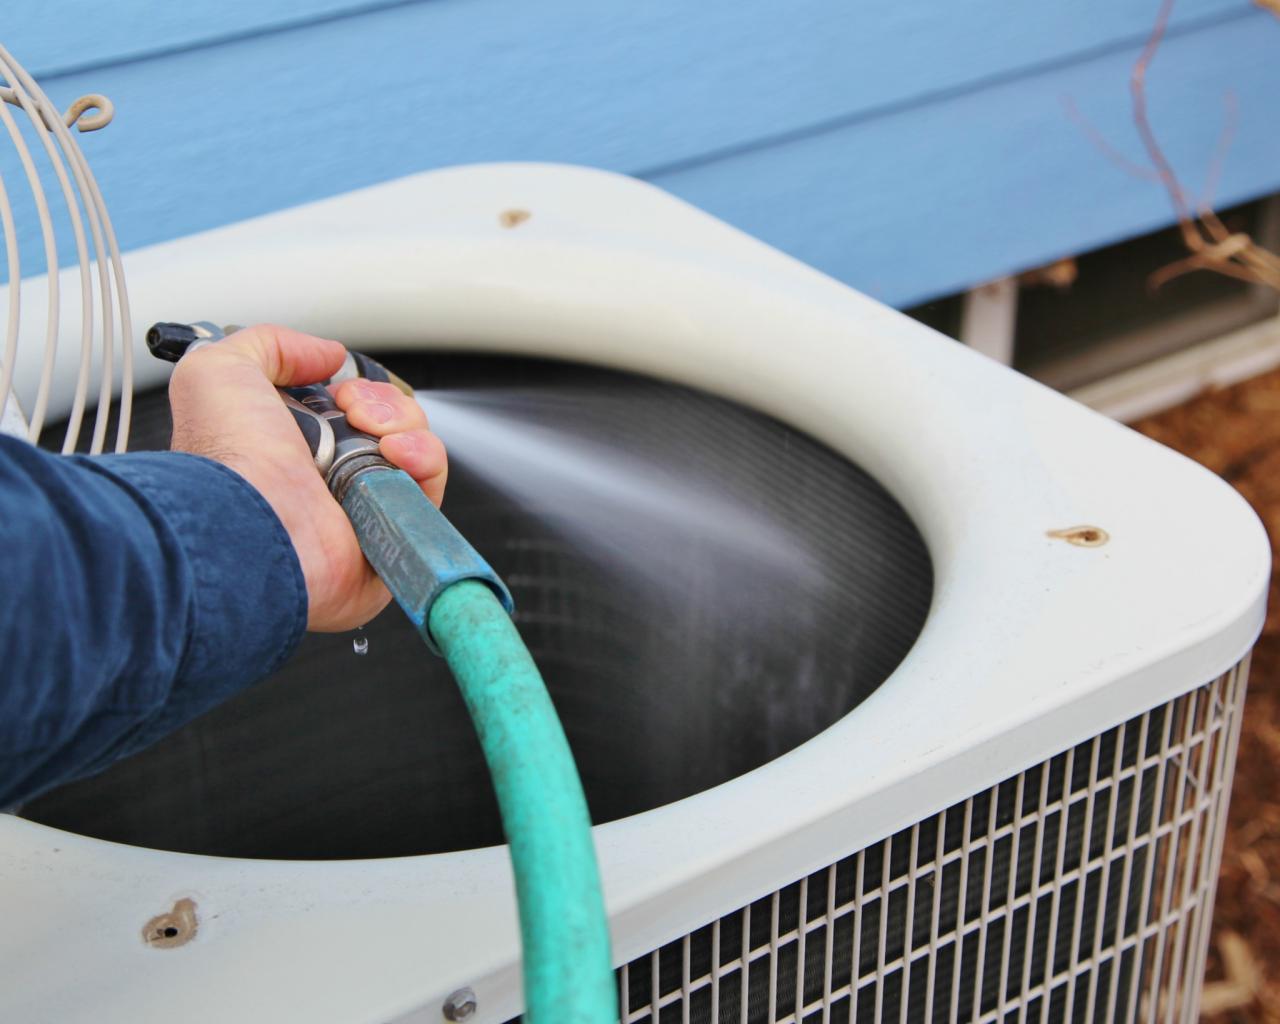
-
Rinse with Water: Once the fins have been brushed, use a water hose or pressure washer with a gentle spray nozzle to thoroughly rinse off the cleaning solution and any remaining dirt. Start from the top and work your way down. Be sure to rinse both the front and back of the condenser.
-
Repeat if Necessary: If you notice that some areas of the fins are still dirty, you may need to repeat the cleaning process. Apply more cleaning solution and brush again until the fins are completely clean.
Remember to be gentle and avoid using excessive force when brushing the fins, as they can easily bend or become damaged. Take your time and be thorough to ensure a proper cleaning. Once the fins are clean, it’s time to move on to the next step—washing the condenser as a whole.
Read more: How To Prevent Condensation On Car Windows
Step 5: Washing the Condenser
After the fins have been cleaned, it’s important to wash the condenser as a whole to remove any remaining residue and ensure a thorough cleaning. Follow these steps to wash the condenser:
-
Prepare a Rinse Solution: Fill a bucket or spray bottle with clean water. This will be used to rinse off any remaining cleaning solution and dirt from the condenser.
-
Apply the Rinse Solution: Using a water hose or spray bottle, evenly distribute the clean water over the condenser. Make sure to cover both the front and back of the condenser, allowing the water to flow through the fins and flush out any remaining debris.
-
Rinse Thoroughly: Continue rinsing the condenser until the water runs clear and all traces of cleaning solution and dirt are removed. Pay extra attention to the fins and ensure that water flows through them freely.
-
Check for Proper Drainage: Confirm that the water is draining properly and not pooling around the condenser. Pooled water can attract dirt and debris, leading to future clogs and reduced cooling efficiency.
During the washing process, it’s essential to avoid using high-pressure water that could bend or damage the fins. Use a moderate water pressure to ensure a thorough rinse without causing any harm. Additionally, keep in mind that the condenser may continue to release water for a short period after rinsing, so be patient and allow it to drain fully.
Now that the condenser has been washed and is free from debris and dirt, it’s time to move on to the next step—drying the condenser. We will explore this step in the following section.
Step 6: Drying the Condenser
Properly drying the condenser after washing is an important step to prevent water spots, corrosion, and potential damage. Follow these steps to effectively dry the condenser:
-
Use Clean Towels or Microfiber Cloth: Have a few clean towels or microfiber cloths on hand for drying. These materials are gentle and won’t scratch or damage the condenser.
-
Gently Pat the Condenser: Begin by patting the condenser fins with the towels or microfiber cloths. Start from the top and work your way down, making sure to cover the entire surface area. Be careful not to press too hard to avoid bending the delicate fins.
-
Air Dry if Possible: For a more thorough dry, you can allow the condenser to air dry naturally. This can be done by simply letting the car sit in a well-ventilated area, allowing the airflow to remove any remaining moisture. Avoid driving the car immediately after washing to minimize moisture buildup.
-
Double-Check for Moisture: After drying, inspect the condenser to ensure it is completely dry. Look for any remaining moisture or water droplets and use the towels or cloth to gently dry any lingering damp spots.
It’s important to be patient during the drying process and ensure that the condenser is completely dry before moving on to the reassembly step. Any remaining moisture can lead to issues such as corrosion or reduced cooling performance.
With the condenser properly dried, you can now proceed to the next step—reassembling the components. This will bring your car’s AC system closer to its optimal functioning state, which we will explore in the following section.
Step 7: Reassembling the Components
After cleaning and drying the condenser, it’s time to reassemble the components to complete the cleaning process. Follow these steps to reassemble the condenser:
-
Inspect the Surrounding Components: Before reassembling, take a moment to inspect the surrounding components and ensure they are clean and free from any debris or dirt. Clear away any debris, leaves, or other obstructions that may hinder proper airflow.
-
Position the Condenser: Carefully position the condenser back in its original place, aligning it properly with the mounting brackets or clips. Make sure the condenser sits securely in position.
-
Reattach Any Fasteners: If there were any fasteners or clips holding the condenser in place, reattach them securely to ensure the condenser is stable. Double-check that all connections are secure.
-
Reconnect Any Electrical Connections: If you had disconnected any electrical connections during the cleaning process, such as sensors or connectors, make sure to reconnect them properly. Refer to your car’s documentation or markings for the correct connections.
Ensure that all components are correctly positioned and securely connected before moving on to the final step. Check for any loose or dangling wires, and make sure there are no visible issues with the surrounding components.
Now that you have reassembled the condenser and its surrounding components, it’s time to move on to the final step—reconnecting the battery for the proper functioning of your car’s AC system. We will cover this step in the following section.
Step 8: Reconnecting the Battery
After completing the cleaning and reassembly of the condenser, the final step is to reconnect the battery. This step is crucial to restore power to your car’s electrical system and ensure the proper functioning of the AC system. Follow these steps to safely reconnect the battery:
-
Locate the Negative Terminal: Open the hood of your car and locate the negative terminal of the battery, which is marked with a “-” symbol or nearby components.
-
Remove any Covers or Protective Caps: If there are any covers or protective caps on the battery terminals, carefully remove them to expose the terminals.
-
Prepare the Negative Cable: Take the negative cable that you previously disconnected and remove any securing ties or tape. Ensure that the cable is free from any obstructions.
-
Connect the Negative Terminal: Position the negative cable onto the negative terminal of the battery. Align the connector with the terminal and tighten the nut or bolt securely using a wrench or socket set.
-
Inspect for Proper Connection: Double-check that the negative cable is securely connected and there is no movement or play in the connection. Ensure that the cable is properly seated and tightly fastened.
-
Replace any Covers or Protective Caps: If you removed any covers or protective caps in Step 2, carefully replace them onto the battery terminals to provide added protection.
With the battery safely reconnected, the electrical power is restored, and your car’s AC system is ready to be tested. However, before doing so, it’s a good idea to perform some final checks to ensure everything is in order.
Now that you have successfully reconnected the battery, the next step is to test the functionality of your car’s AC system. We will cover this testing process in the next section.
Read more: How To ReplACe AC Condenser
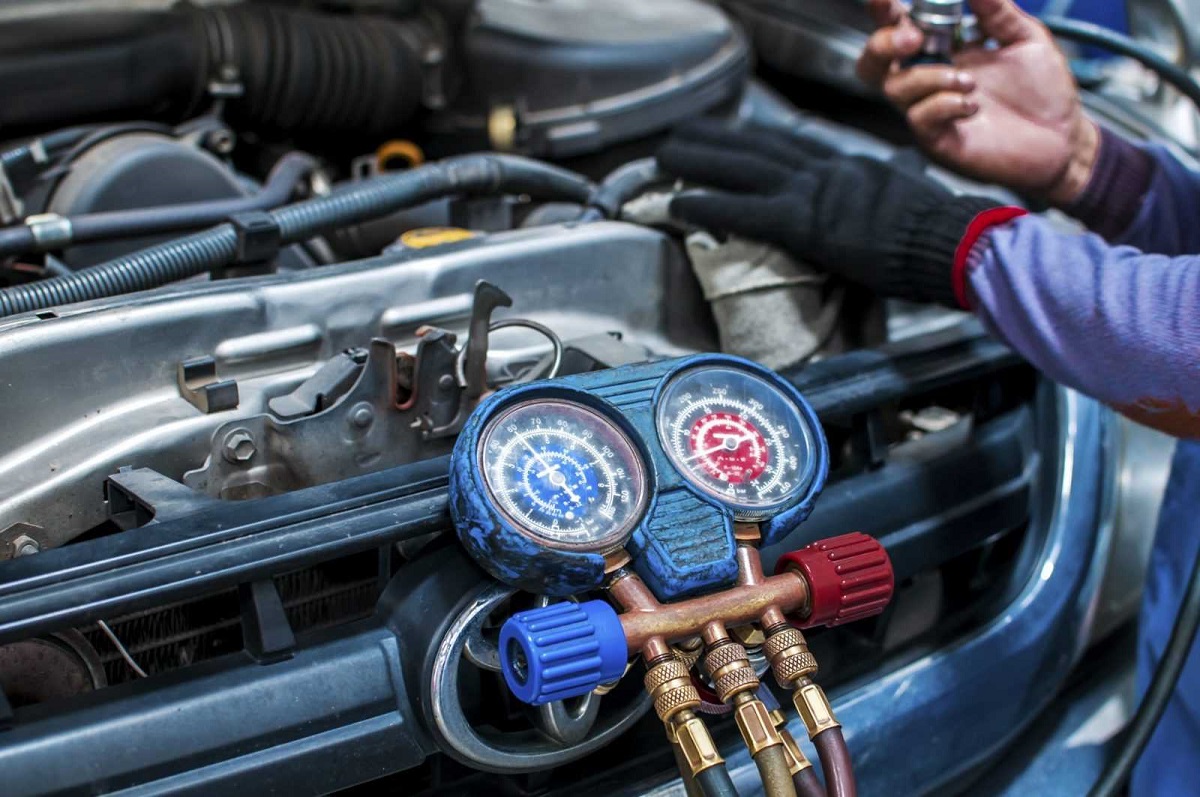
Testing the AC System
After completing the cleaning and reconnection process, it’s important to test the functionality of your car’s AC system to ensure it’s working properly. Follow these steps to test the AC system:
-
Start the Engine: Turn on the engine and let it run for a few minutes to warm up.
-
Set the AC Controls: Set the temperature to the coldest setting and turn the AC system on. Make sure the fan speed is set to a comfortable level.
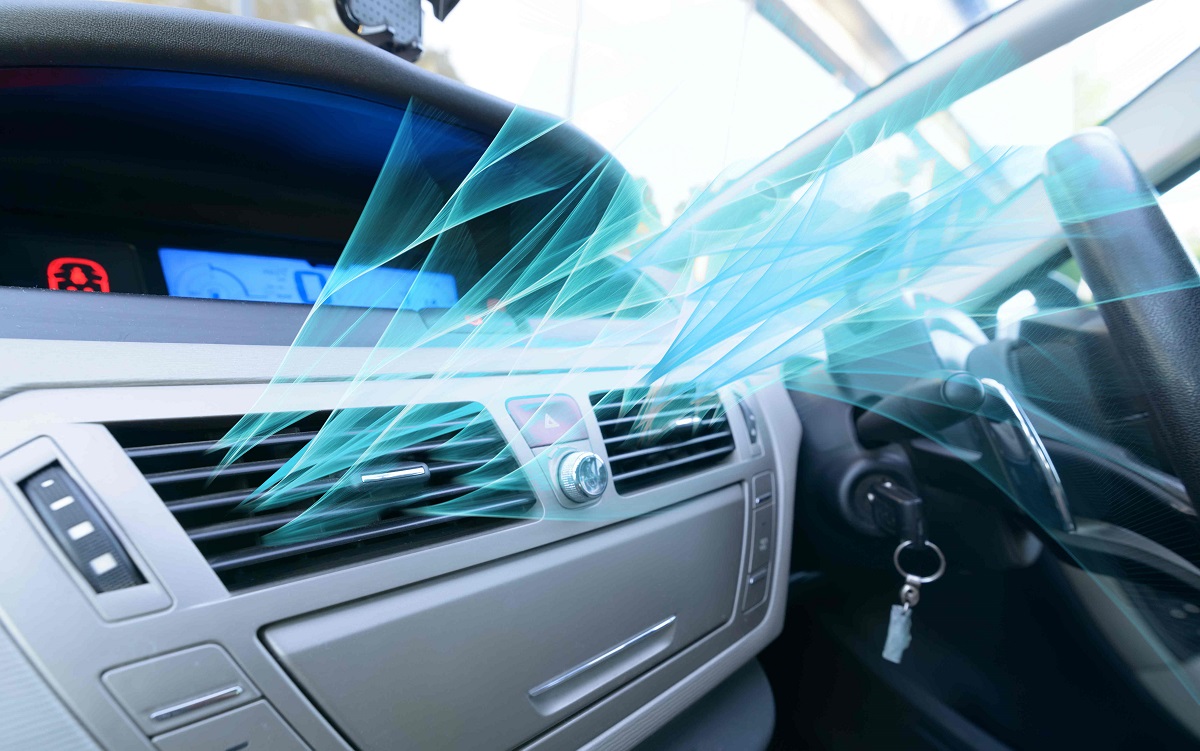
-
Check for Cool Air: Feel the airflow coming from the vents. Verify that the air is cool and refreshing. If the air is not as cold as expected or if you notice any unusual odors, there may be an issue with the AC system that requires further attention.
-
Monitor Cooling Performance: Leave the AC system running for a few minutes to allow it to reach its maximum cooling performance. Pay attention to any changes in the cooling performance or unusual noises that may indicate a problem.
-
Check for Proper Airflow: Ensure that the airflow from the vents is strong and consistent. If you notice weak or unbalanced airflow, it may indicate a clogged or partially blocked airflow duct that needs to be addressed.
-
Listen for Unusual Noises: While the AC system is running, listen for any unusual noises such as grinding, rattling, or hissing. These noises may suggest an issue with the AC compressor or other components that require professional attention.
If the AC system is functioning well and the air is cool and refreshing with consistent airflow, congratulations! You have successfully cleaned and restored your car’s AC system. If any issues or concerns persist, it may be necessary to consult a professional mechanic or AC specialist for further diagnosis and repairs.
Remember to periodically inspect and clean the AC condenser to maintain optimal performance and extend the lifespan of your car’s AC system. Regular maintenance and cleaning will help ensure that you can enjoy cool and comfortable drives even during hot summer days.
With the AC system tested and functioning properly, you have successfully completed the cleaning process. Follow the manufacturer’s recommended maintenance schedule and continue to care for your AC system to keep it in top-notch condition.
Now that you’ve learned how to clean the car’s AC condenser and tested its functionality, you can enjoy a cool and comfortable ride throughout the year. Safe travels!
Conclusion
Keeping your car’s AC condenser clean is an essential part of maintaining a well-functioning air conditioning system. Regular cleaning not only improves the efficiency and performance of the AC system but also helps prolong its lifespan. By following the step-by-step guide we have provided, you can confidently clean your car’s AC condenser yourself.
We started by understanding the car AC condenser and its importance in the cooling process. We then explored the signs of a dirty condenser to help you identify when it’s time for a cleaning. Preparing adequately before the cleaning process ensures safety and efficiency.
We discussed the essential tools and materials needed for the cleaning, and then proceeded with the step-by-step process. We covered disconnecting the battery, locating the AC condenser, removing debris and dirt, cleaning the fins, washing the condenser, drying it thoroughly, and reassembling the components. Finally, we reconnected the battery and tested the functionality of the AC system.
Regularly cleaning your car’s AC condenser will help you enjoy a cool and comfortable ride, particularly during hot summer days. It promotes optimal airflow and heat transfer, allowing the AC system to cool the air effectively. By incorporating this maintenance task into your regular car care routine, you can ensure that your AC system operates efficiently and provides you with the comfort you desire.
Remember, if you face any difficulties or if the AC system continues to experience issues after cleaning the condenser, it’s always wise to consult a professional mechanic or AC specialist for further evaluation and repairs.
Taking care of your car’s AC condenser is a small but important step towards maintaining overall vehicle performance and comfort. So, roll down the windows, turn up the music, and enjoy the refreshing coolness of a well-functioning AC system on your next drive.
Frequently Asked Questions about How To Clean Car AC Condenser
Was this page helpful?
At Storables.com, we guarantee accurate and reliable information. Our content, validated by Expert Board Contributors, is crafted following stringent Editorial Policies. We're committed to providing you with well-researched, expert-backed insights for all your informational needs.


0 thoughts on “How To Clean Car AC Condenser”