
Articles
How To Install A Wood Fireplace Insert
Modified: October 18, 2024
Learn how to properly install a wood fireplace insert with our informative articles. Get step-by-step instructions and expert tips for a successful installation.
(Many of the links in this article redirect to a specific reviewed product. Your purchase of these products through affiliate links helps to generate commission for Storables.com, at no extra cost. Learn more)
Introduction
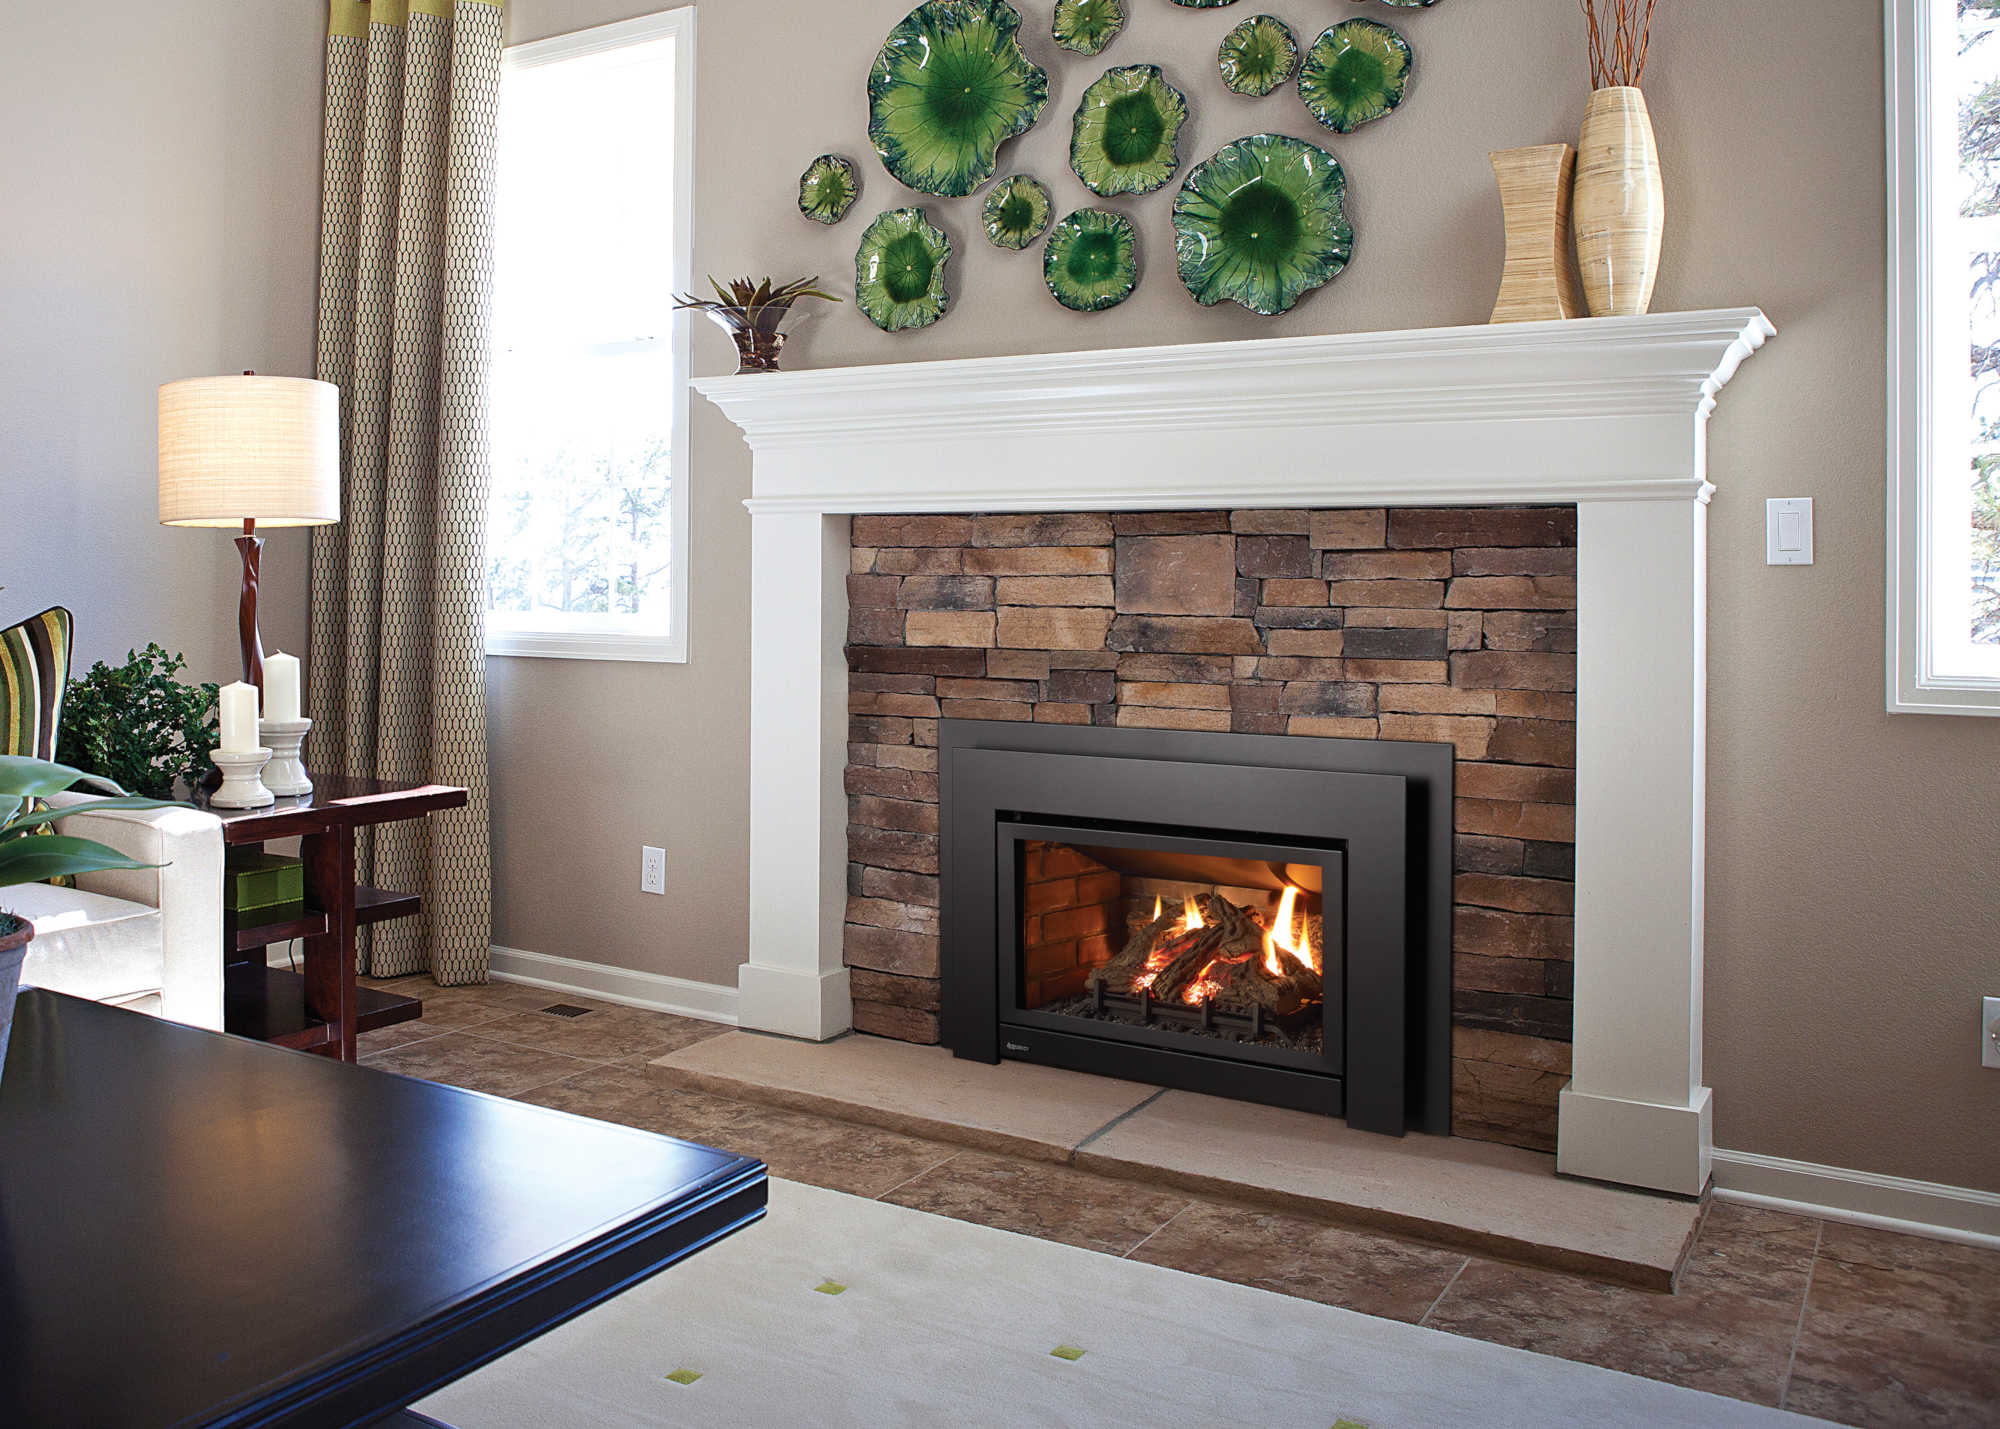
Welcome to the ultimate guide on how to install a wood fireplace insert. A wood fireplace insert is a fantastic addition to any home, providing both warmth and ambiance. Whether you’re looking to upgrade your existing fireplace or want to bring the cozy feel of a fireplace to a room that doesn’t have one, installing a wood fireplace insert is a great choice.
Before we dive into the installation process, let’s talk a little bit about what a wood fireplace insert is and why you might want one. A wood fireplace insert is a type of heating appliance that is designed to be inserted into an existing fireplace. It is a self-contained unit that is specifically engineered to increase the efficiency and functionality of a traditional wood-burning fireplace.
Now you might be wondering, why would I want a wood fireplace insert? Well, there are several benefits to installing one. First and foremost, a wood fireplace insert is much more efficient than a traditional fireplace. The insert is equipped with a closed combustion system, which means it burns wood more efficiently and produces more heat. This translates to lower energy costs and a more comfortable living space. Additionally, a wood fireplace insert is much safer than an open fireplace as it reduces the risk of sparks and embers escaping the firebox.
Now that you know the advantages of installing a wood fireplace insert, let’s get started with the installation process. In this guide, we will walk you through each step, from gathering the necessary materials and tools to testing and enjoying your new wood fireplace insert.
Remember, safety is of the utmost importance when working with any heating appliance, so be sure to follow all manufacturer instructions and consult a professional if you have any doubts or concerns. Now, let’s begin our journey to a warm and cozy home with a wood fireplace insert.
Key Takeaways:
- Installing a wood fireplace insert enhances home efficiency, reduces energy costs, and increases safety. Follow the step-by-step guide to create a warm and cozy atmosphere while minimizing heat loss and potential hazards.
- Enjoy the warmth and ambiance of your new wood fireplace insert by following safety guidelines, regular maintenance, and responsible use. Create lasting memories and a comfortable space for relaxation and gatherings with loved ones.
Read more: How To Remove A Wood Fireplace Insert
Step 1: Gather Materials and Tools
Before you begin the installation process, it’s essential to gather all the necessary materials and tools. Having everything prepared beforehand will ensure a smoother and more efficient installation. Here’s a list of the materials and tools you’ll need:
Materials:
- Wood fireplace insert
- Flue liner
- Vent pipes
- Fireproof insulation
- Masonry screws
- High-temperature sealant
- Chimney cap
- Insulation tape
- Fireplace surround material (optional)
Tools:
- Tape measure
- Pencil or marker
- Drill
- Screwdriver
- Level
- Hacksaw or reciprocating saw
- Tin snips
- Wire brush
- Heat-resistant gloves
- Safety goggles
Make sure to double-check the manufacturer’s specifications and instructions for your specific wood fireplace insert, as you may need additional materials or tools. Also, ensure that all the materials you purchase are compatible with your existing fireplace structure.
Once you have gathered all the necessary materials and tools, you can move on to the next step of preparing the fireplace for the installation of the wood fireplace insert.
Step 2: Prepare the Fireplace
Preparing the fireplace is crucial to ensure a successful installation of the wood fireplace insert. This step involves cleaning and assessing the condition of the existing fireplace and making any necessary repairs or modifications. Here’s what you need to do:
1. Start by cleaning the fireplace thoroughly. Remove any debris, ashes, or soot using a wire brush and a vacuum cleaner. It’s important to have a clean and clear space before installing the wood fireplace insert.
2. Check the condition of the fireplace damper. The damper is a metal plate that can be opened or closed to control airflow. If the damper is damaged or not functioning properly, it may need to be repaired or replaced. Consult a professional if needed.
3. Inspect the chimney for any cracks, loose bricks, or missing mortar. These issues can affect the structural integrity of the chimney and should be addressed before installing the wood fireplace insert. If you notice any significant damage, it’s best to consult a chimney specialist for repairs.
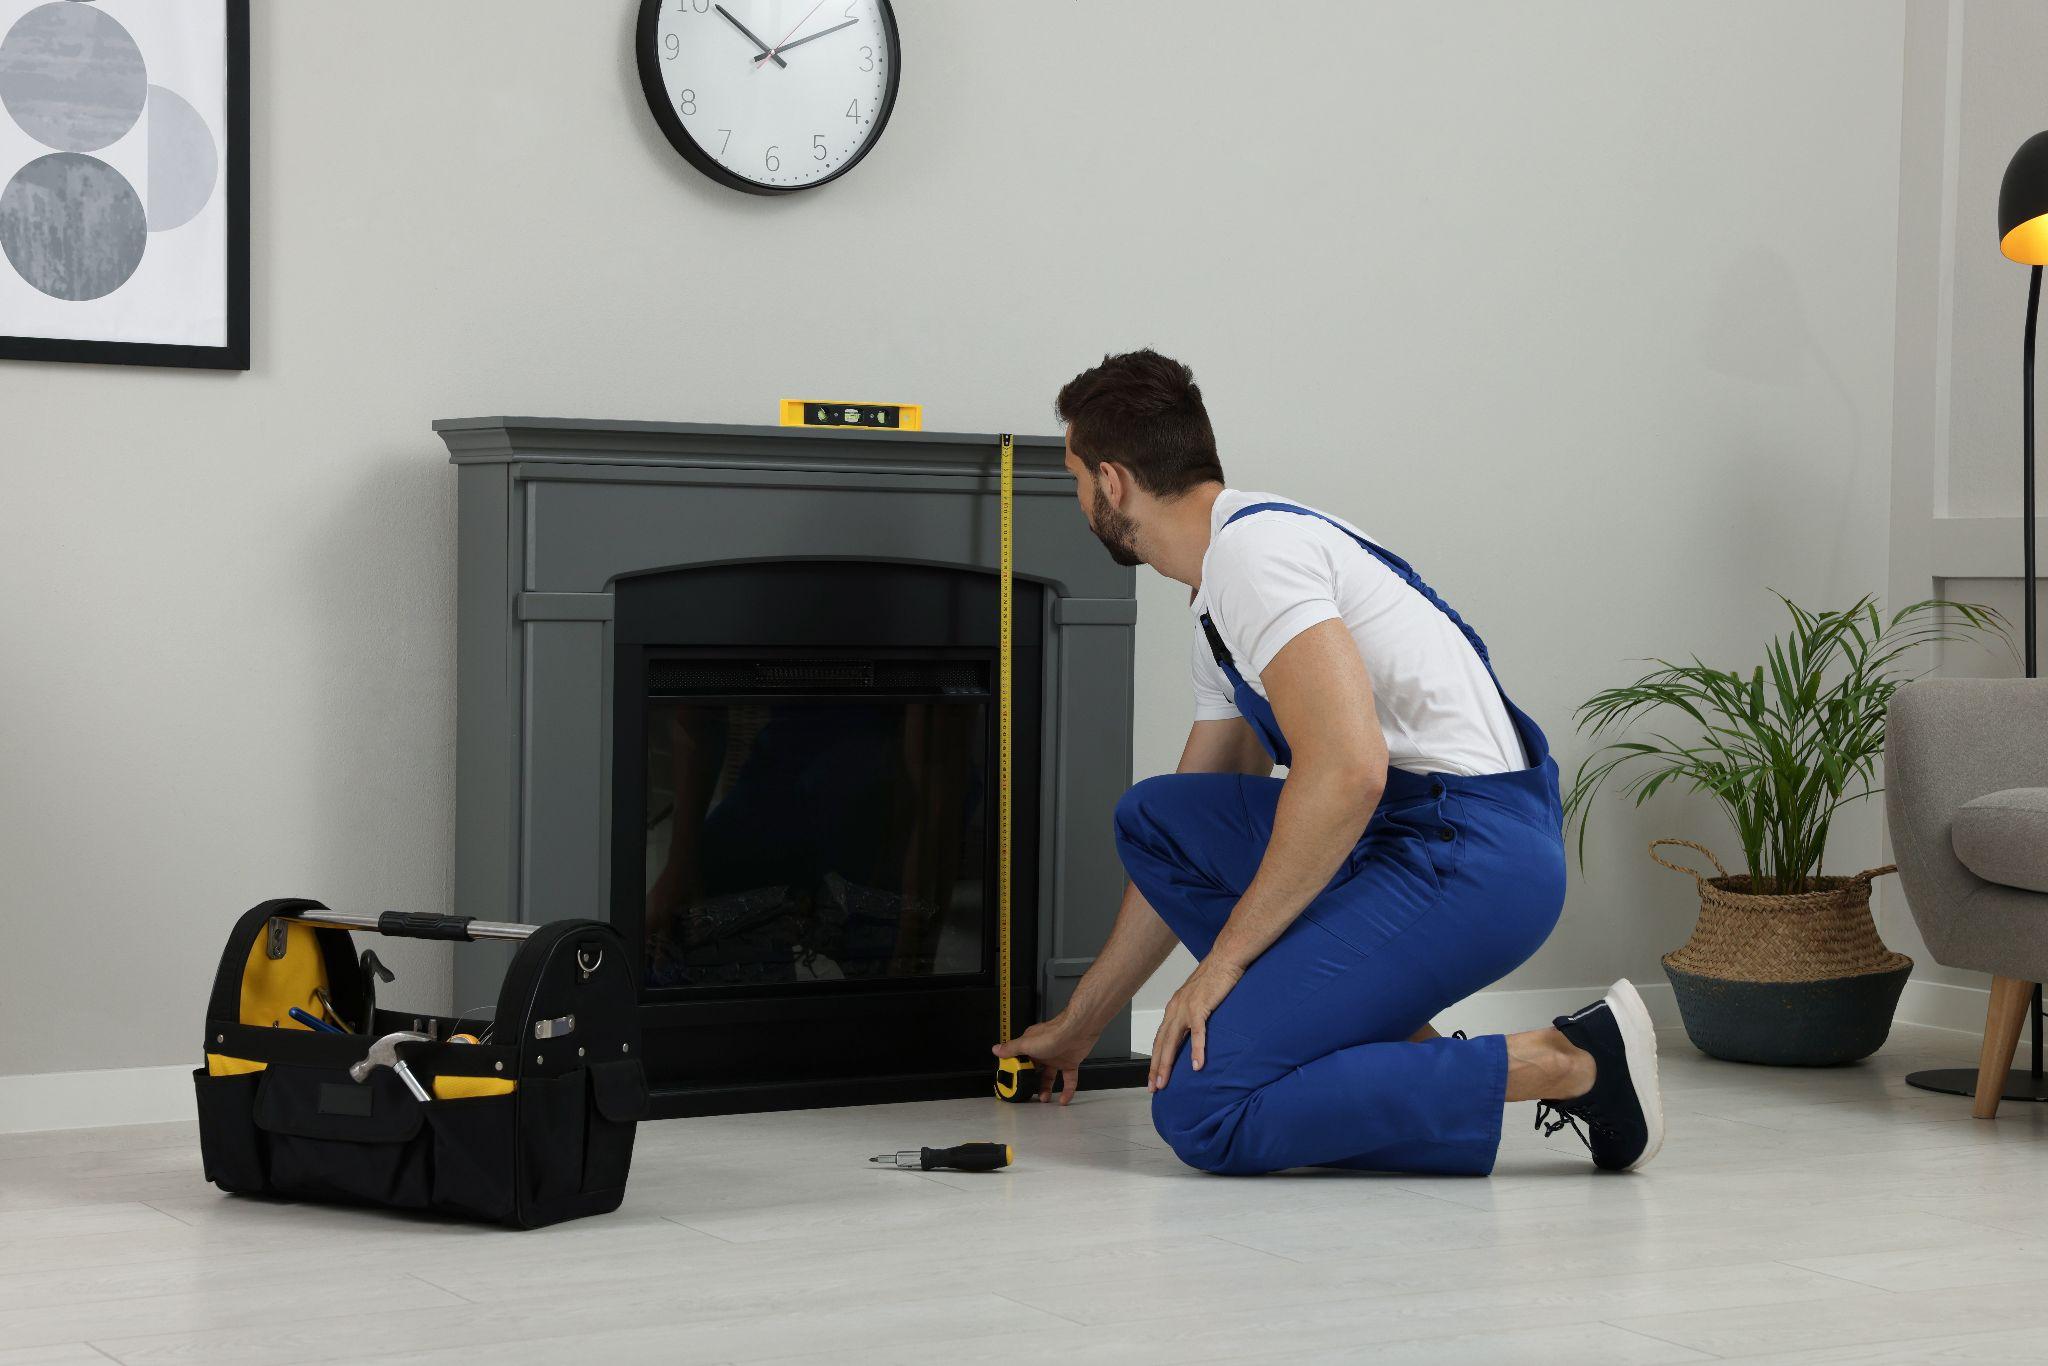
4. Measure the dimensions of the existing fireplace opening. This will help you determine the appropriate size of the wood fireplace insert you need to purchase. Measure the width, height, and depth of the opening, and record the measurements for reference.
5. Decide if you want to install a fireplace surround. A surround is a decorative feature that enhances the appearance of the fireplace. If you choose to install a surround, make sure you have the necessary materials and tools on hand.
By properly preparing the fireplace, you ensure an optimal environment for the installation of the wood fireplace insert. Cleaning the fireplace, inspecting for any damage, and measuring the dimensions will help you proceed with confidence to the next steps of the installation process.
Step 3: Measure and Cut the Flue Liner
One of the crucial steps in installing a wood fireplace insert is measuring and cutting the flue liner. The flue liner is a pipe that directs the smoke and gases from the fireplace to the outside. Here’s how you can measure and cut the flue liner:
1. Start by measuring the height of the chimney. Use a tape measure to determine the distance from the top of the chimney to the bottom. This measurement will help determine the length of the flue liner you will need. It’s important to choose a flue liner that fits the dimensions of your chimney accurately.
2. Measure the inside diameter of the chimney. Use a tape measure or a diameter gauge to determine the exact size of the flue liner required. It’s crucial to have a properly sized flue liner for efficient airflow and to comply with safety standards.
3. Purchase the correct length and diameter of flue liner. You can find flue liners at home improvement stores or through specialty suppliers. Make sure to choose a high-quality, durable flue liner that meets local building codes and regulations.
4. Cut the flue liner to the desired length. Use a hacksaw or reciprocating saw to carefully trim the flue liner to match the height of your chimney. Make sure to wear safety goggles and gloves to protect yourself during this step.
5. Smooth the cut edges of the flue liner. Use a file or sandpaper to remove any burrs or rough edges from the cut end of the flue liner. This step will ensure a proper fit and prevent any obstruction in the airflow.
Remember, when working with flue liner materials, it’s important to follow all safety precautions and guidelines provided by the manufacturer. If you’re unsure about cutting the flue liner yourself, it’s best to consult a professional for assistance.
By accurately measuring and cutting the flue liner, you ensure a proper fit and efficient operation of the wood fireplace insert. This step sets the foundation for the successful installation of the insert and brings you closer to enjoying a warm and cozy home environment.
Step 4: Insert the Flue Liner
Now that you have measured and cut the flue liner, it’s time to insert it into the chimney. The flue liner is a crucial component that directs the smoke and gases safely out of your home. Here’s how you can insert the flue liner:
1. Begin by carefully lifting the flue liner into the chimney. Make sure to have a helper assist you as the liner can be heavy and cumbersome to handle alone. Take care to avoid damaging the liner or the chimney walls during this process.
2. Slowly lower the flue liner into the chimney, ensuring that it is aligned properly. The liner should fit snugly into the chimney without any gaps or excessive bending. Use a level to ensure that the flue liner is straight and properly positioned.
3. As you lower the flue liner, have your helper support the top end to prevent it from falling and causing any damage or injury. It’s essential to take your time and be cautious during this step to ensure a safe and secure installation.
4. Once the flue liner is fully inserted into the chimney, secure it in place. Depending on the type of flue liner and chimney system you have, this may involve using masonry screws or other appropriate fasteners. Refer to the manufacturer’s instructions for the recommended method of securing the flue liner.
5. Inspect the joints of the flue liner to make sure they are properly aligned and sealed. Use high-temperature sealant to seal any gaps or openings. This step is crucial to prevent any leakage of smoke or gases into your home.
6. Verify that the flue liner extends above the chimney’s crown. This ensures proper ventilation and prevents any rain or debris from entering the flue. If needed, install a chimney cap at the top of the flue liner to provide additional protection.
By correctly inserting the flue liner, you ensure a safe and efficient exhaust system for your wood fireplace insert. Take your time during this step to guarantee a secure and properly aligned connection. With the flue liner in place, you’re ready to move on to the next step of installing the wood fireplace insert.
Before installing a wood fireplace insert, make sure to have the chimney inspected and cleaned to ensure it is safe and clear of any debris. This will help prevent potential hazards and ensure proper ventilation.
Read more: How To Install An Electric Fireplace Insert
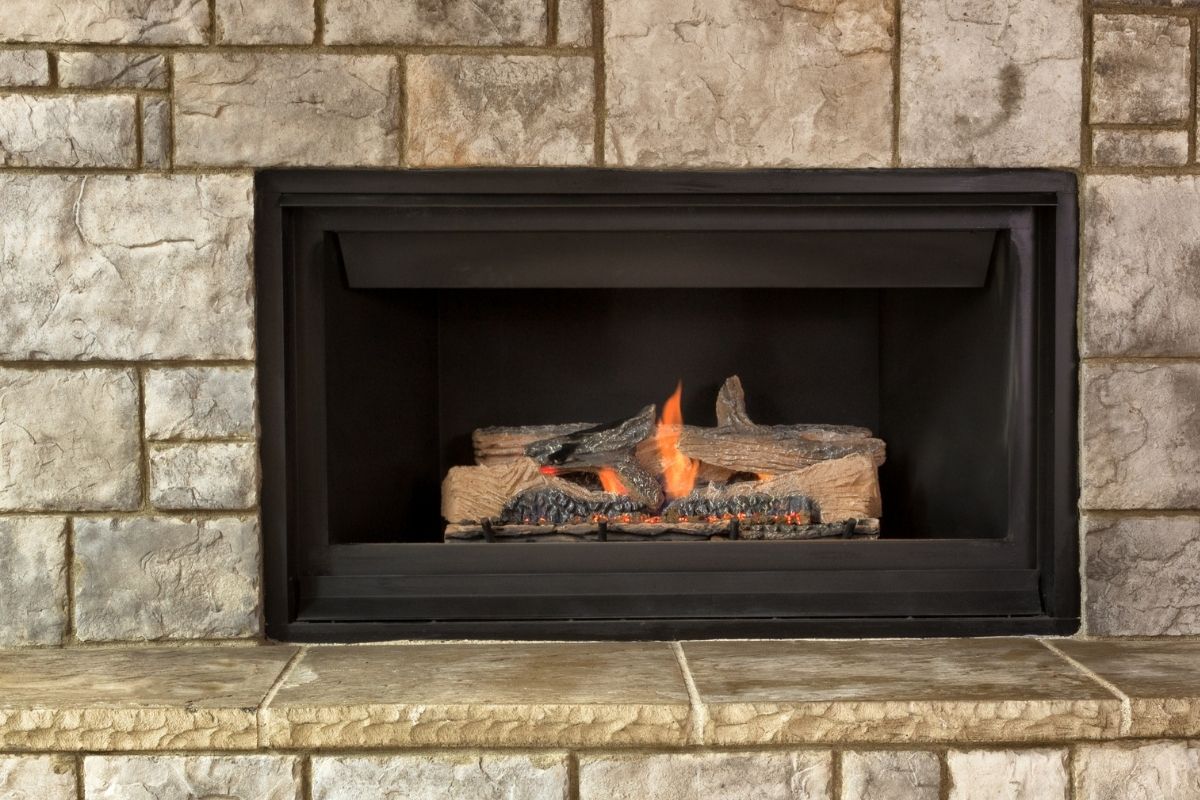
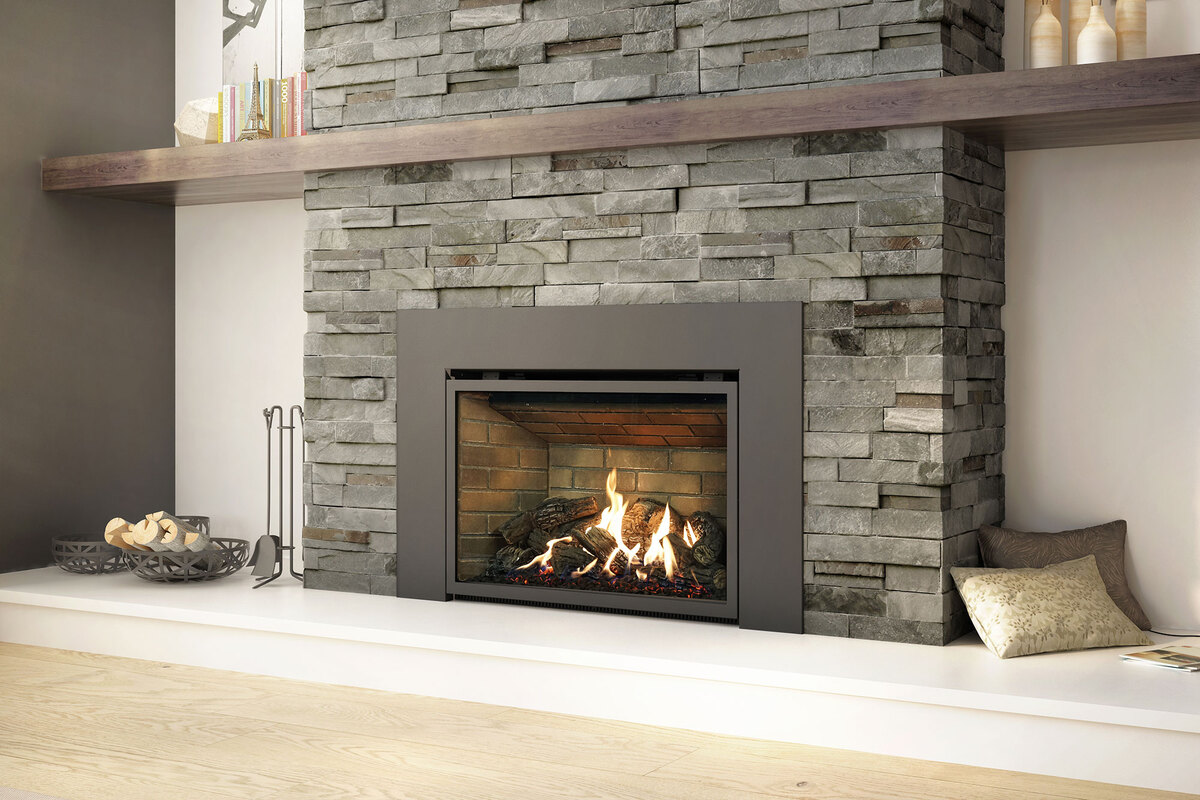
Step 5: Install the Fireplace Insert
With the flue liner in position, it’s time to install the wood fireplace insert. Follow these steps to ensure a proper installation:
1. Position the wood fireplace insert in front of the fireplace opening. Make sure it is centered and aligned with the opening. You may need the help of another person to assist in lifting and positioning the insert.
2. Carefully guide the insert into the fireplace opening, ensuring that it fits snugly. Check that there is a proper clearance between the insert and the surrounding walls or existing fireplace structure, as recommended by the manufacturer.
3. Once the insert is in place, check that it is level from all angles. Use a level tool to ensure that it is sitting straight and balanced. Adjust the insert if necessary to achieve a level position.
4. Secure the wood fireplace insert to the existing fireplace structure using the recommended attachment method. This may involve using brackets, screws, or other hardware specified by the manufacturer. Follow the instructions closely to ensure a secure and safe connection.
5. Install any necessary trim or surrounds around the fireplace insert. This step is optional but can enhance the aesthetic appeal of the installation. Measure and cut the trim to fit the dimensions of the insert, and secure it in place according to the manufacturer’s instructions.
6. Follow the specific instructions provided with the wood fireplace insert to connect any electrical components, such as fans or controls. If the insert requires a power source, ensure that it is safely connected and grounded according to electrical codes.
Remember to consult the manufacturer’s instructions for your specific wood fireplace insert model as each one may have unique installation requirements. Additionally, if you’re unsure about any aspect of the installation process, it’s always a good idea to seek professional assistance.
With the wood fireplace insert securely installed, you’re one step closer to enjoying the warmth and ambiance it brings to your home. Now, let’s move on to the next step of connecting the vent pipes.
Step 6: Connect the Vent Pipes
Properly connecting the vent pipes is a crucial step in the installation of a wood fireplace insert. The vent pipes are responsible for carrying the combustion gases safely out of your home. Follow these steps to ensure a successful connection:
1. Begin by identifying the specific venting system required for your wood fireplace insert. Different models may have different venting configurations, such as direct vent or vertical venting. Familiarize yourself with the manufacturer’s recommendations and instructions.
2. Measure and cut the vent pipes to the required length. Use a hacksaw or reciprocating saw to cut the pipes with precision. It’s important to measure twice and cut once to ensure accurate pipe lengths.
3. Connect the vent pipes according to the manufacturer’s instructions. Typically, the vent pipes will have male and female ends that fit together snugly. Slide the pipes together and secure them using the provided locking mechanisms or clamps.
4. Align the vent pipes with the corresponding outlets or exhaust ports on the wood fireplace insert. Ensure that the connections are tight and secure to prevent any leaks. Use high-temperature sealant or tape to seal any gaps or joints as recommended by the manufacturer.
5. Depending on the venting system, you may need to install additional components, such as elbows, connectors, or termination caps. Follow the manufacturer’s instructions for the proper installation of these components to ensure efficient and safe venting.
6. Verify that the vent pipes are properly supported and aligned. Use brackets or straps to secure the pipes to the surrounding walls or ceiling, as necessary. This will prevent any sagging or movement of the pipes over time.
7. Inspect the venting system for any signs of damage or obstruction. Ensure that the pipes are clear and free from debris, and check that the termination cap is securely in place. Regular maintenance and cleaning of the venting system are essential for proper functionality.
Remember to consult the specific instructions provided by the manufacturer for your wood fireplace insert model. Following the manufacturer’s recommendations will ensure a safe and efficient connection of the vent pipes.
With the vent pipes properly connected, you’re one step closer to enjoying the warmth and comfort of your wood fireplace insert. The next step involves insulating and sealing the surrounding area to enhance the efficiency of the installation.
Step 7: Insulate and Seal the Surrounding Area
Proper insulation and sealing are essential to maximize the efficiency and safety of your wood fireplace insert. This step helps to minimize heat loss and prevent any drafts or leaks. Follow these steps to effectively insulate and seal the surrounding area:
1. Insulate the fireplace and chimney walls. Use fireproof insulation material, such as fiberglass or rock wool, to fill any gaps or voids around the fireplace insert and within the chimney structure. This insulation will help to prevent heat loss and improve the overall efficiency of the wood fireplace insert.
2. Seal any gaps or openings around the fireplace insert. Use high-temperature sealant to seal the area where the insert meets the fireplace opening. Pay close attention to any cracks or gaps between the insert and the surrounding walls or flooring. This sealing will prevent drafts and ensure that all combustion gases are properly directed up the venting system.
3. Install a fireplace surround if desired. A surround not only adds an aesthetic touch but also helps to further insulate the area around the wood fireplace insert. Choose a surround material that is heat-resistant and complements the style of your home. Follow the manufacturer’s instructions for installing the surround securely.
4. Inspect the area for any combustible materials. Ensure that there are no flammable objects, such as furniture or curtains, in close proximity to the wood fireplace insert. Clear any potential hazards to maintain a safe installation environment.
5. Consider installing a hearth pad or protective barrier around the wood fireplace insert. This provides an additional layer of insulation and protection against accidental contact with the hot surfaces of the insert. Follow the manufacturer’s recommendations for the appropriate type and size of the hearth pad.
6. Check all external vents and termination caps. Make sure they are securely attached and free from any obstructions or damage. Inspect the seals around the vent pipes to ensure they are intact and properly sealed against any moisture or gas leakage.
By insulating and sealing the surrounding area, you create a more efficient and safe environment for your wood fireplace insert. These measures help to maintain consistent heat levels, prevent energy loss, and ensure optimal performance of the insert.
With the installation and insulation complete, it’s time for the final step: testing and enjoying your wood fireplace insert.
Step 8: Test and Enjoy your Wood Fireplace Insert
You’re almost there! Now that you’ve completed the installation, insulation, and sealing of your wood fireplace insert, it’s time to test it out and finally enjoy the warm and cozy atmosphere it brings. Follow these steps to ensure everything is working properly:
1. Before starting a fire, double-check that the damper is fully open. This allows for proper airflow and prevents the accumulation of smoke inside your home.
2. Ignite a small test fire using dry, seasoned firewood. Observe the flames to ensure that they’re drawing up the flue liner correctly and that there are no excessive smoke or backdrafts. Adjust the airflow as needed to achieve a clean, efficient burn.
3. Monitor the performance of your wood fireplace insert. Is it producing enough heat to warm the intended space? Is the flame steady and consistent? Take note of any unusual smells, noises, or smoke leakage and address them promptly. If you have concerns about the performance or safety, consult a professional for assistance.
4. Familiarize yourself with the operation of any fan or blower systems that are part of your wood fireplace insert. These can help distribute heat more evenly throughout the room and improve your overall comfort. Follow the manufacturer’s instructions for careful operation of these components.
5. Establish a regular maintenance routine. Clean your wood fireplace insert regularly, following the manufacturer’s guidelines. This typically involves removing ashes, cleaning the glass door or viewing window, and inspecting and cleaning the venting system. Keeping your wood fireplace insert well-maintained will improve its longevity and performance.
6. Finally, sit back, relax, and enjoy the warmth and ambiance of your new wood fireplace insert. Whether you’re gathering with loved ones, reading a book, or simply unwinding after a long day, your wood fireplace insert will provide a cozy and inviting atmosphere for years to come.
Remember, it’s important to follow all safety guidelines and regulations when operating your wood fireplace insert. Never leave it unattended while a fire is burning, and always use caution when handling or adding firewood. By taking proper care of your wood fireplace insert and practicing responsible use, you can enjoy its benefits safely and comfortably.
Congratulations on successfully installing your wood fireplace insert. Now sit back, relax, and let the warmth and beauty of your new fireplace enhance your home and create lasting memories.
Read more: What Is A Fireplace Insert
Conclusion
Congratulations on completing the installation of your wood fireplace insert! You’ve transformed your home into a more comfortable and inviting space, and you’re now equipped to enjoy the cozy ambiance and warmth that a wood fireplace insert brings. Here’s a recap of what you’ve accomplished:
Throughout this guide, you’ve learned the importance of gathering the necessary materials and tools, preparing the fireplace, measuring and cutting the flue liner, inserting the flue liner, installing the wood fireplace insert, connecting the vent pipes, insulating and sealing the surrounding area, and testing the functionality of the insert. Each step was integral to ensuring a safe and efficient installation process.
By installing a wood fireplace insert, you’ve enhanced the efficiency of your fireplace and reduced energy costs. The closed combustion system allows for better heat distribution and minimizes heat loss compared to traditional fireplaces. Additionally, the increased safety features of a wood fireplace insert, such as reduced risk of sparks and embers escaping, provide peace of mind for you and your loved ones.
Remember to regularly maintain and care for your wood fireplace insert to ensure its optimal performance. Cleaning the insert, inspecting the venting system, and following any maintenance schedules outlined by the manufacturer will keep your fireplace in excellent condition for years to come.
As you enjoy the warmth and comfort of your wood fireplace insert, don’t forget to create lasting memories around it. Gather with friends and family, cozy up with a good book, or simply savor quiet moments of relaxation. Your wood fireplace insert has created a focal point in your home that adds both style and functionality to the space.
Thank you for following this guide on how to install a wood fireplace insert. We hope that it has provided you with valuable insights and guidance throughout the installation process. If you have any further questions or need assistance, don’t hesitate to seek the help of a professional or consult the manufacturer’s resources.
Enjoy your new wood fireplace insert, and may it bring you many years of warmth, comfort, and joy!
Frequently Asked Questions about How To Install A Wood Fireplace Insert
Was this page helpful?
At Storables.com, we guarantee accurate and reliable information. Our content, validated by Expert Board Contributors, is crafted following stringent Editorial Policies. We're committed to providing you with well-researched, expert-backed insights for all your informational needs.


0 thoughts on “How To Install A Wood Fireplace Insert”