Home>Articles>How To Clean A Chimney With A Fireplace Insert

Articles
How To Clean A Chimney With A Fireplace Insert
Modified: February 24, 2024
Learn how to clean a chimney with a fireplace insert in this informative article. Get expert tips and step-by-step instructions to keep your fireplace clean and safe.
(Many of the links in this article redirect to a specific reviewed product. Your purchase of these products through affiliate links helps to generate commission for Storables.com, at no extra cost. Learn more)
Introduction
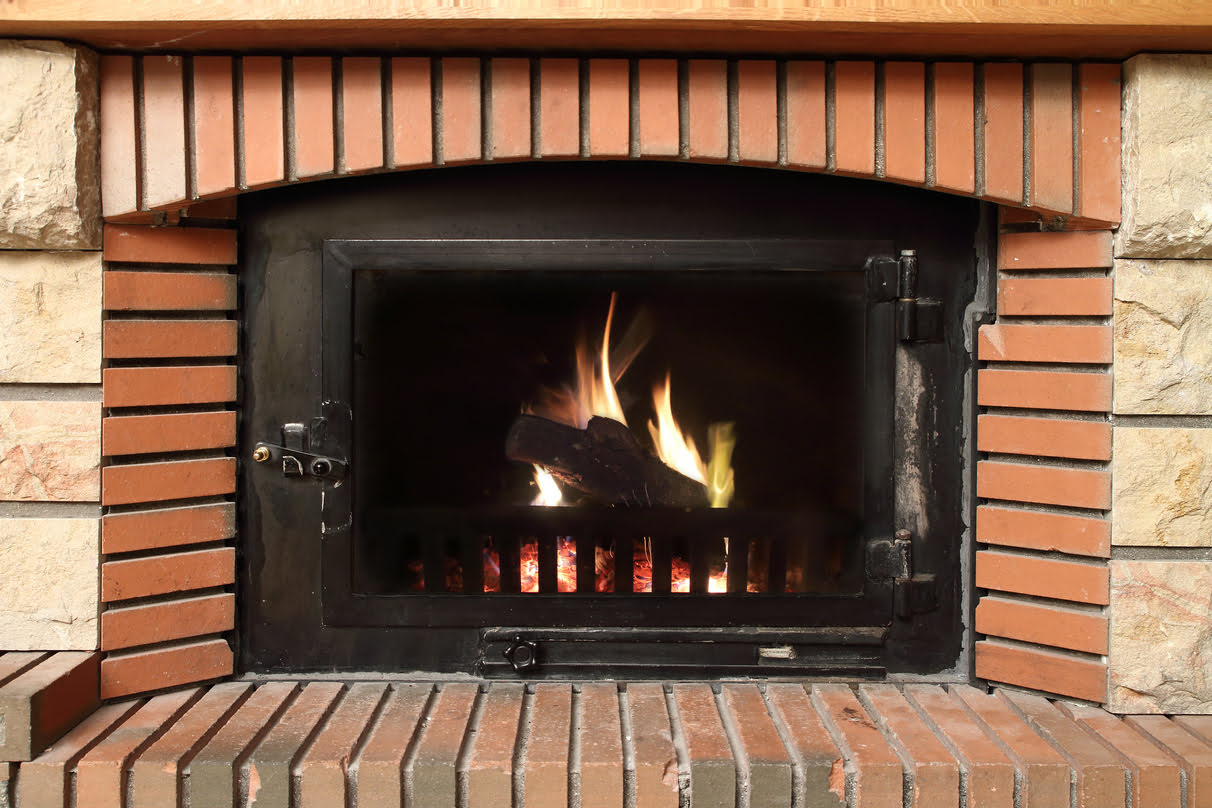
Welcome to our comprehensive guide on how to clean a chimney with a fireplace insert. Chimneys are an essential element in homes with traditional fireplaces, allowing smoke and toxins to safely exit the house.
However, over time, chimneys can become clogged with soot, creosote, and debris, which can decrease their efficiency and pose a fire hazard. That’s where regular chimney cleaning comes in. Cleaning a chimney with a fireplace insert may seem like a daunting task, but with the right tools, materials, and safety precautions, it can be a straightforward process.
In this article, we will provide you with step-by-step instructions on how to effectively and safely clean your chimney with a fireplace insert, ensuring that your home remains cozy and your fireplace functions optimally. But before we dive into the cleaning process, let’s go over some essential safety precautions to keep in mind.
Key Takeaways:
- Safety First
Prioritize safety by wearing protective gear, working with a partner, and following manufacturer’s instructions. Regular maintenance and professional inspections are essential for a safe and efficient chimney with a fireplace insert. - Step-by-Step Cleaning Process
Gather necessary supplies, protect the surrounding area, remove and clean the fireplace insert, scrub the chimney, and perform final maintenance. Following these steps ensures a well-maintained and functional fireplace insert.
Read more: How To Clean A Fireplace Insert
Safety Precautions
Prior to starting any chimney cleaning task, it is crucial to prioritize safety. Here are some important safety precautions to keep in mind:
- Wear Protective Gear: Ensure you have appropriate safety equipment, including safety goggles, gloves, a mask, and sturdy footwear. This will protect you from airborne soot and debris.
- Work with a Partner: It is always recommended to have someone nearby while cleaning a chimney. They can assist you if any unforeseen circumstances arise.
- Use Ladder Safety: If you need to access the roof, make sure to use a stable and sturdy ladder. Place it on level ground and have someone hold it steady while you climb.
- Check for Flammable Materials: Before starting the cleaning process, remove any flammable materials or objects from the area surrounding the fireplace.
- Turn Off Heating Sources: Ensure that all heating sources, such as gas or electric fireplaces, are turned off and cool to the touch before starting the cleaning process.
- Allow for Ventilation: Open windows and doors to provide proper ventilation during the cleaning process, allowing any fumes or odors to dissipate.
- Inspect Chimney Condition: Before cleaning, inspect the chimney for any signs of damage or deterioration. If you notice any cracks or structural issues, it is best to contact a professional chimney sweep for assistance.
- Be Mindful of Carbon Monoxide: Carbon monoxide is a deadly gas that can be produced when burning fuel. Ensure that your home is equipped with carbon monoxide detectors and that they are functioning properly.
- Keep Fire Extinguisher Handy: It is always a good idea to have a fire extinguisher nearby in case of emergencies.
By adhering to these safety precautions, you can ensure a safe and efficient chimney cleaning process. Now that you are equipped with the necessary safety measures, let’s move on to the tools and materials you will need for the task.
Tools and Materials Needed
Before you embark on cleaning your chimney with a fireplace insert, it is important to gather the necessary tools and materials. Here is a list of what you will need:
- Chimney Brush: Purchase a chimney brush that is appropriate for the size of your chimney and fireplace insert. It should have sturdy bristles to effectively remove built-up debris and soot.
- Extendable Rods: These are used to attach to the chimney brush, allowing you to easily reach and clean the entire length of the chimney.
- Drop Cloth/Tarps: Protect the area around the fireplace by covering it with a drop cloth or tarp. This will catch any debris or soot that may fall during the cleaning process.
- Vacuum Cleaner: Use a vacuum cleaner with a long hose attachment to remove loose debris and soot from the fireplace insert and surrounding area.
- Bucket and Sponge: These will be used for cleaning the fireplace insert, removing any dirt or residue that has accumulated.
- Cleaning Solution: Choose a fireplace insert cleaner that is suitable for the type of material your insert is made of. Read the manufacturer’s instructions and follow them closely.
- Rags and Cleaning Brushes: These are handy for scrubbing and cleaning hard-to-reach areas of the fireplace insert.
- Protective Gear: As mentioned in the safety precautions, make sure to have safety goggles, gloves, a mask, and sturdy footwear to protect yourself during the cleaning process.
By having these tools and materials prepared, you will be well-equipped to effectively clean your chimney with a fireplace insert. Now that we have everything we need, let’s move on to the step-by-step guide on how to clean the fireplace insert.
Step 1: Gather Necessary Supplies
Before you begin the cleaning process, it’s important to gather all the necessary supplies. By having everything ready, you can work efficiently and avoid interruptions. Here are the supplies you will need for cleaning a chimney with a fireplace insert:
- Chimney brush: Choose a brush that matches the size and shape of your chimney. It should have sturdy bristles to effectively remove debris.
- Extendable rods: These rods will attach to the chimney brush and allow you to reach different sections of the chimney.
- Drop cloth or tarps: Cover the area around the fireplace to catch any debris or soot that may fall during the cleaning process.
- Vacuum cleaner: Use a vacuum cleaner with a long hose attachment to remove loose debris and soot from the fireplace insert and surrounding area.
- Bucket and sponge: You’ll need these for cleaning the fireplace insert, removing any dirt or residue.
- Cleaning solution: Choose a cleaning solution that is suitable for your specific fireplace insert. Read the manufacturer’s instructions and follow them closely.
- Rags and cleaning brushes: These will come in handy for scrubbing and cleaning hard-to-reach areas.
- Protective gear: Wear safety goggles, gloves, a mask, and sturdy footwear to protect yourself during the cleaning process.
Take the time to gather all these supplies before you start cleaning. This will save you from having to interrupt the process to search for a specific tool or material.
Once you have everything ready, you can move on to the next step: protecting the surrounding area.
Step 2: Protect the Surrounding Area
Before you begin cleaning the chimney with a fireplace insert, it’s important to protect the area surrounding the fireplace. This will prevent any debris, soot, or cleaning solution from damaging your floors, furniture, or other belongings. Follow these steps to effectively protect the surrounding area:
- Place drop cloths or tarps: Spread drop cloths or tarps on the floor, covering a wide area around the fireplace. Secure them in place using tape or weights to prevent them from shifting during the cleaning process.
- Cover furniture and belongings: If there are any nearby furniture pieces, decorative items, or electronics, cover them with plastic sheets or additional drop cloths. This will ensure that they are protected from any falling debris or cleaning solutions.
- Remove or cover valuables: If there are any valuable items in the vicinity of the fireplace, consider moving them to a safe location temporarily. If moving them is not feasible, cover them with plastic sheets or additional drop cloths to prevent any potential damage.
- Seal off the fireplace: If your fireplace has glass doors or a screen, close and secure them to prevent any debris or cleaning solution from entering the room.
- Turn off electronics and cover vents: To prevent the spread of dust or debris, turn off any nearby electronics and cover air vents using plastic sheets or tape.
By taking the time to protect the surrounding area, you can ensure that your floors, furniture, and belongings remain clean and undamaged during the cleaning process. Once you have adequately protected the area, you are ready to move on to the next step: removing the fireplace insert.
Read more: How Often To Clean Gas Fireplace Chimney
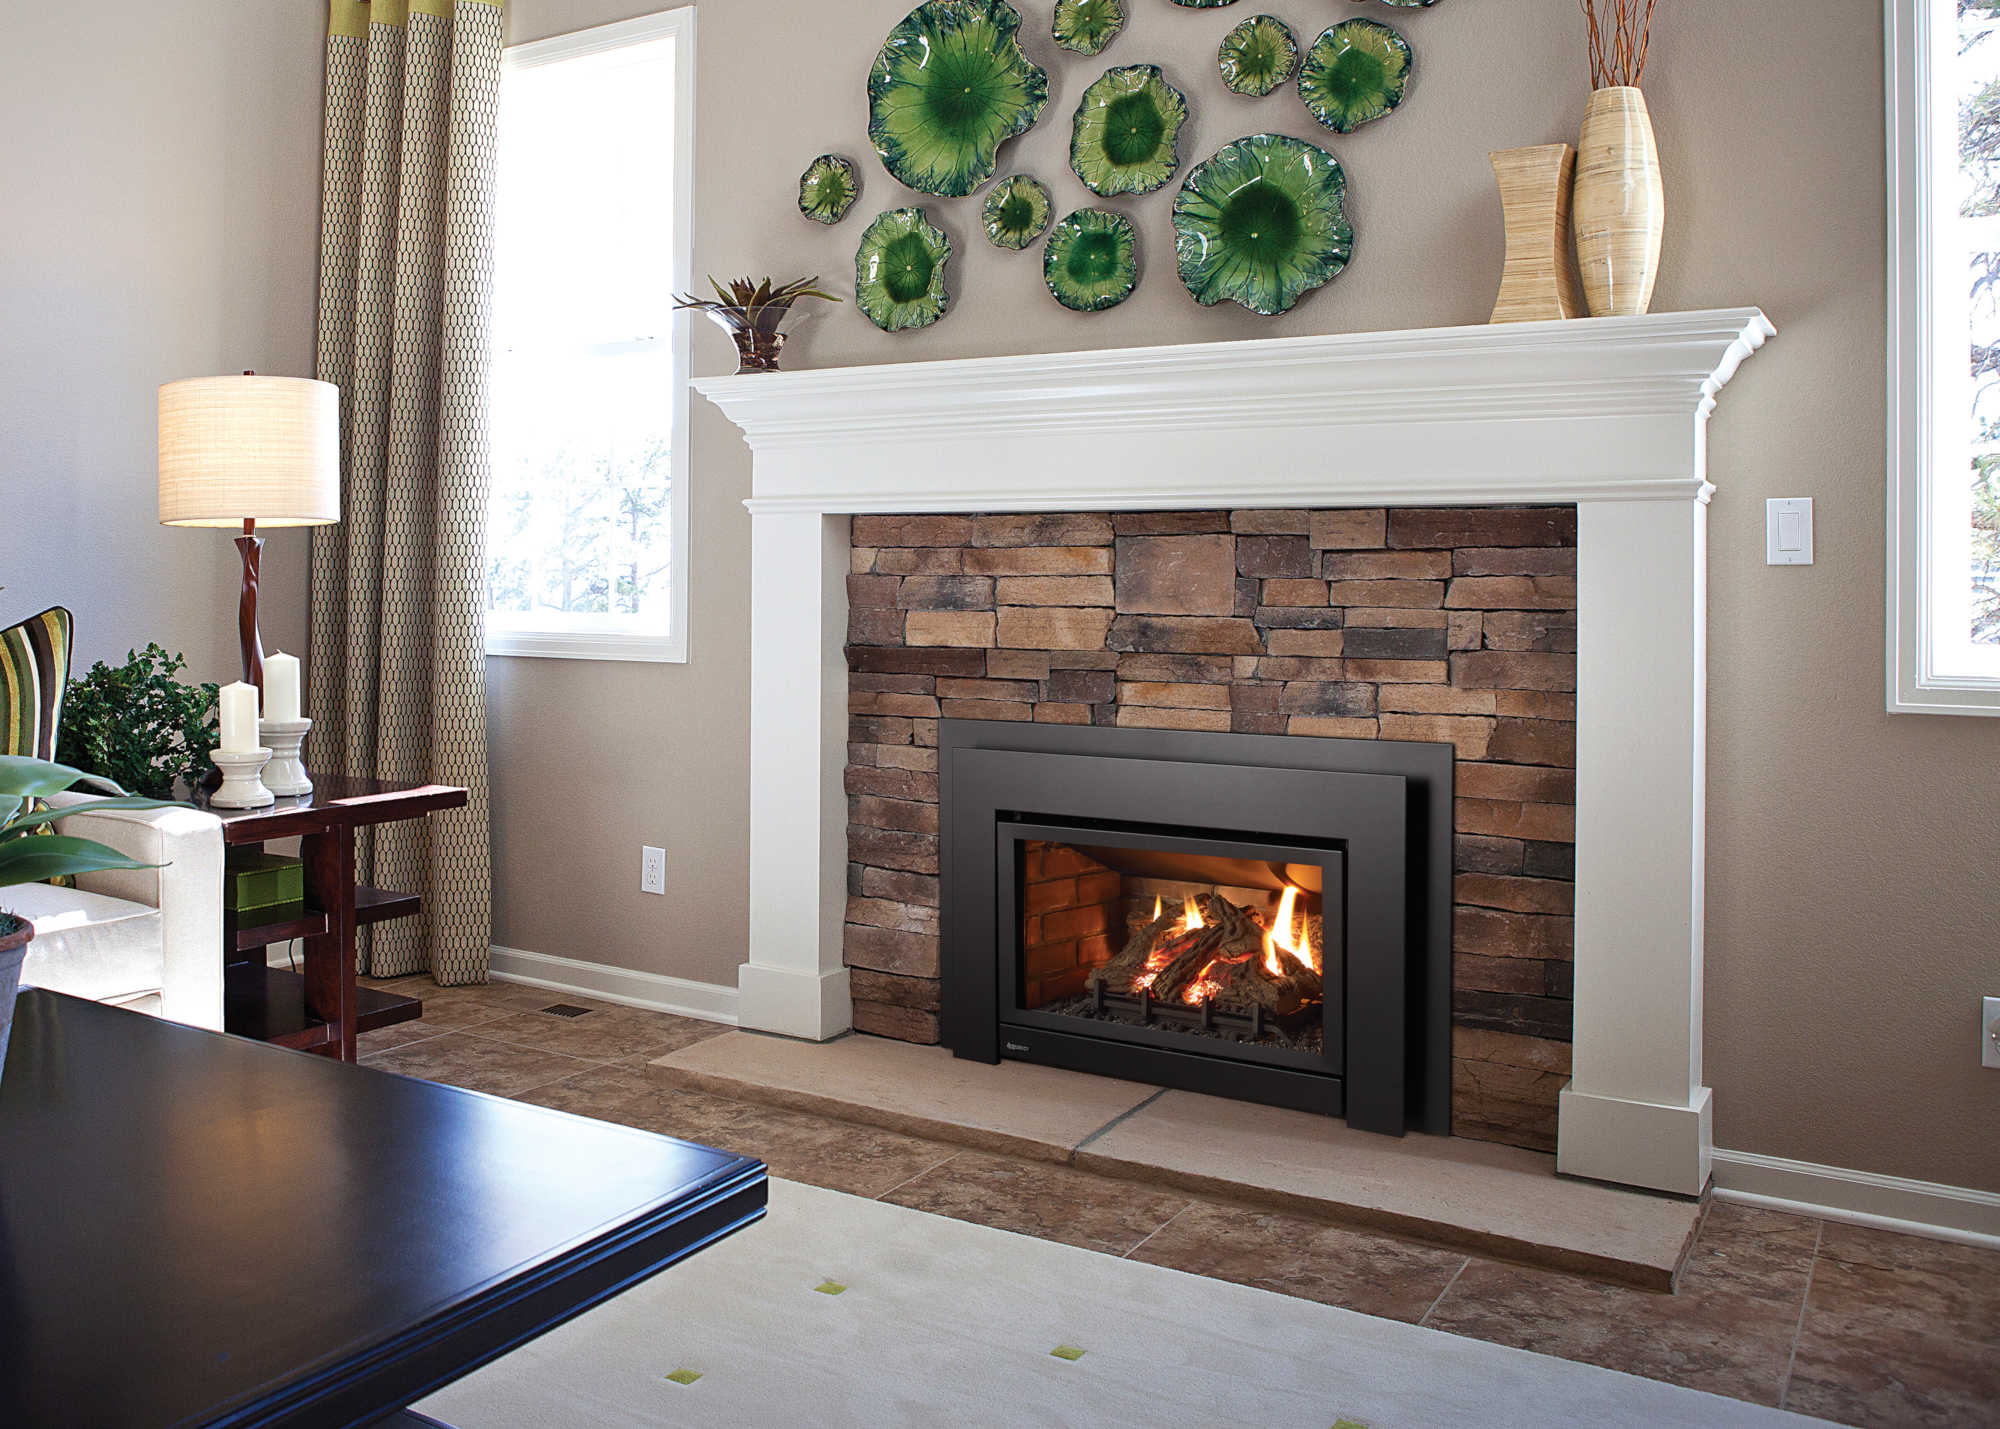
Step 3: Remove Fireplace Insert
Removing the fireplace insert is an essential step in the chimney cleaning process. This will allow you to gain access to the chimney and effectively clean it. Follow these steps to safely remove the fireplace insert:
- Turn off the fireplace: Ensure that the fireplace is completely turned off and the flames are extinguished. Let it cool down for at least a few hours before attempting to remove the insert.
- Read the manufacturer’s instructions: Different fireplace inserts may have specific instructions for removal. Consult the manufacturer’s manual or documentation to ensure you follow the correct procedure.
- Remove any panels or doors: Start by removing any removable panels or doors from the fireplace insert. Carefully lift them off or unscrew them according to the manufacturer’s instructions.
- Disconnect the vent pipe: If your fireplace insert is connected to a vent pipe, disconnect it carefully. This may involve unscrewing or sliding the attachment points. Use caution and follow the manufacturer’s instructions.
- Detach the insert from the fireplace: Depending on the type of fireplace insert, there may be screws or brackets holding it in place. Carefully remove these attachments, ensuring the insert is stable and will not fall during the removal process.
- Recruit a partner for assistance: Fireplace inserts can be heavy and bulky, so it is advisable to have someone help you lift and remove it. Communicate and coordinate your movements to ensure a safe and smooth removal.
- Set the fireplace insert aside: Once the insert is detached from the fireplace, place it on a clean and secure surface. Take care not to damage the surrounding area or any components of the insert during this step.
By following these steps, you will be able to successfully remove the fireplace insert, allowing you to proceed with cleaning both the insert and the chimney. However, if you are unsure or uncomfortable with removing the insert yourself, it is recommended to seek assistance from a professional chimney sweep.
Now that the insert is safely removed, you can move on to the next step: cleaning the fireplace insert itself.
Before cleaning a chimney with a fireplace insert, make sure to turn off the gas or electricity to the fireplace. Use a chimney brush to remove any built-up creosote and soot, and consider hiring a professional for a thorough cleaning.
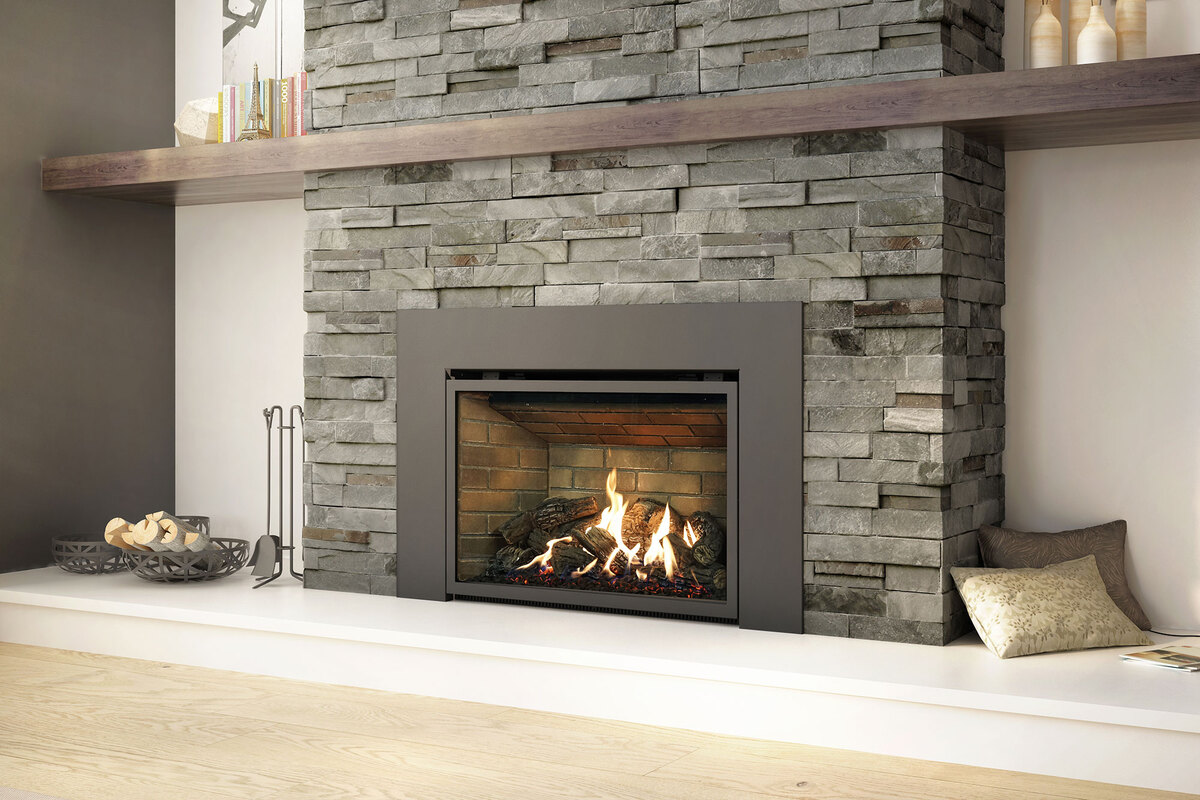
Step 4: Clean the Fireplace Insert
Now that the fireplace insert has been safely removed, it’s time to clean it thoroughly. Cleaning the fireplace insert will remove any accumulated soot, dirt, and debris, ensuring optimal performance and aesthetics. Follow these steps to effectively clean the fireplace insert:
- Remove loose debris: Use a vacuum cleaner with a hose attachment to remove any loose debris, such as ashes or small particles, from the fireplace insert. Pay attention to the corners, vents, and hard-to-reach areas.
- Mix a cleaning solution: Prepare a solution of warm water and a suitable fireplace insert cleaner recommended by the manufacturer. Follow the instructions on the cleaner package for the correct dilution ratio.
- Scrub the fireplace insert: Dip a sponge or rag into the cleaning solution and gently scrub the inside and outside surfaces of the fireplace insert. Pay special attention to areas with visible dirt or stains. If necessary, use a soft-bristle brush for tougher areas.
- Wipe down with clean water: After scrubbing, dampen a clean sponge or rag with clean water and wipe down the entire fireplace insert to remove any residual cleaning solution. This step helps prevent any chemicals from lingering on the surfaces.
- Dry the fireplace insert: Use dry rags or towels to thoroughly dry the fireplace insert. Proper drying is essential to prevent rust or other damage to the insert.
- Inspect for any damage: While cleaning, take the opportunity to inspect the fireplace insert for any signs of damage or wear. Check for any cracks, loose parts, or areas that may need repair or replacement. If you notice any issues, consult a professional for further assistance.
By following these steps, you will be able to effectively clean the fireplace insert, removing any built-up soot and grime. Once the fireplace insert is clean, you can proceed to the next step: cleaning the chimney itself.
Note: The cleaning process may vary depending on the type of fireplace insert you have. Always refer to the manufacturer’s instructions and follow their recommended cleaning methods to ensure proper care and maintenance of your specific fireplace insert.
Step 5: Clean the Chimney
Now that the fireplace insert is clean, it’s time to focus on cleaning the chimney itself. Regular chimney cleaning is crucial to maintain proper airflow and prevent the buildup of dangerous substances like creosote. Follow these steps to effectively clean the chimney:
- Attach the chimney brush to the extendable rods: Take the chimney brush you selected earlier and securely attach it to the extendable rods. Make sure it is securely tightened to prevent it from coming loose during the cleaning process.
- Climb onto the roof: Exercise caution and use a stable ladder to access the roof. Be mindful of your surroundings and ensure that you have a secure footing.
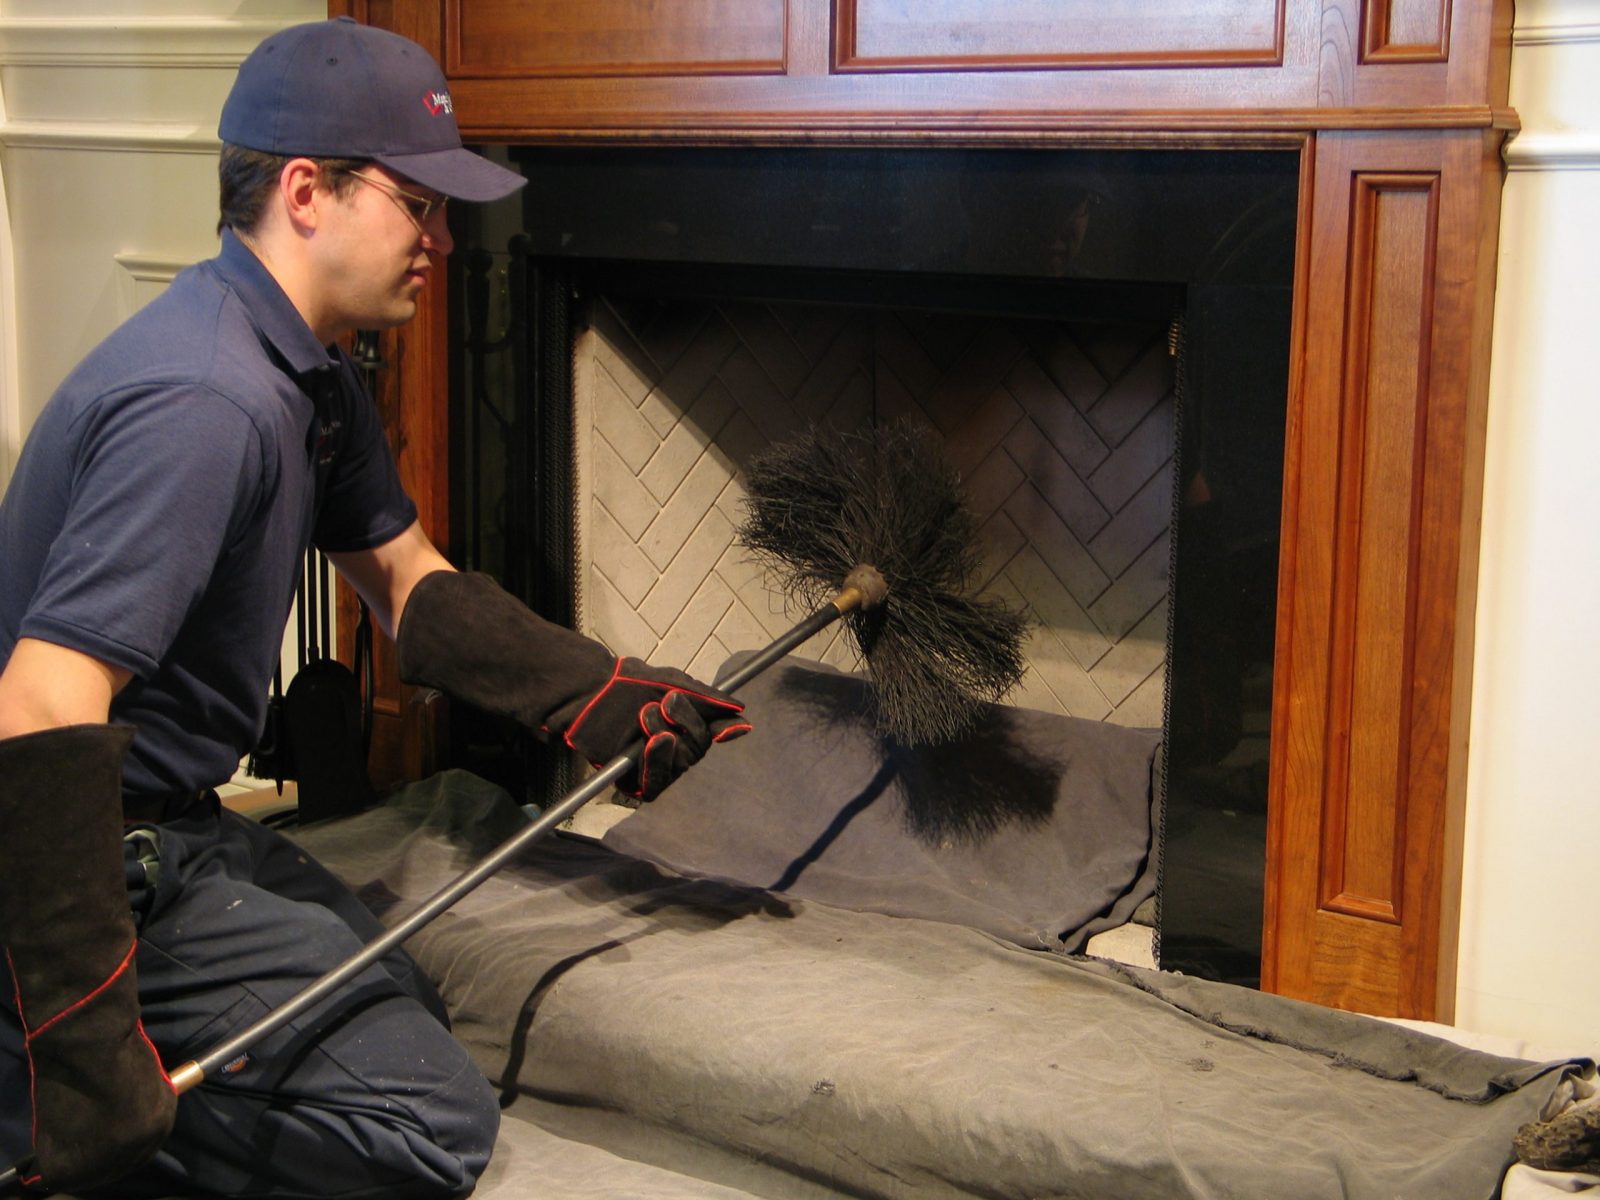
- Insert the chimney brush into the chimney: Carefully lower the chimney brush attached to the extendable rods into the chimney. Start at the bottom and work your way up, using a steady and controlled motion.
- Scrub the chimney walls: Once the chimney brush is inserted, move it up and down, using a scrubbing motion to dislodge any buildup of soot, creosote, or debris. Apply steady pressure while maintaining a smooth and controlled motion.
- Extend the rods as needed: If your chimney is tall, you may need to extend the rods further to reach the entire length of the chimney. Attach additional rods as necessary, ensuring they are securely fastened.
- Continue brushing and repeating: Move the chimney brush up and down the chimney in a systematic manner, working in small sections at a time. Repeat this process until you have covered the entire length of the chimney.
- Remove the chimney brush: Carefully remove the chimney brush from the chimney, making sure it does not dislodge any debris or soot in the process. Retract the extendable rods as needed.
- Clean the fireplace area: Once the chimney is cleaned, inspect the fireplace area for any fallen debris or soot. Use a vacuum cleaner or a brush and dustpan to remove any residue that may have fallen during the chimney cleaning process.
By following these steps, you will effectively clean the chimney, removing any buildup and ensuring proper airflow. It is important to note that chimney cleaning can be a complex task, and if you feel unsure or uncomfortable performing it yourself, it is best to seek professional assistance from a qualified chimney sweep.
Now that the chimney is clean, you can proceed to the next step: reinstalling the fireplace insert.
Step 6: Reinstall the Fireplace Insert
With the chimney clean and the fireplace area cleared of any debris, it’s now time to reinstall the fireplace insert. Follow these steps to safely and effectively reinstall the insert:
- Inspect the fireplace insert: Before reinstalling, carefully inspect the fireplace insert for any signs of damage or wear. Ensure that all components are intact and in good condition. If any issues are detected, consult a professional for assistance.
- Position the fireplace insert: Carefully position the fireplace insert back into its original place, aligning it with the designated opening in the fireplace. Take your time to ensure a proper fit and secure placement.
- Reattach the insert: Depending on the type of insert, this step may involve securing screws, brackets, or latches to hold the insert in place. Refer to the manufacturer’s instructions for the correct procedure.
- Reconnect the vent pipe: If your fireplace insert is connected to a vent pipe, carefully reconnect it using the appropriate attachment method. Ensure a secure fit to prevent any leaks or disconnections.
- Replace any panels or doors: If you removed any panels or doors earlier, now is the time to reinstall them. Follow the manufacturer’s instructions to properly secure them back in place.
- Ensure stability: Once the fireplace insert is back in position, check for stability. Shake the insert gently to ensure it is secure and properly aligned. If it feels loose or misaligned, double-check the attachments and make any necessary adjustments.
- Clear away any mess: Before moving on, clean up any debris or mess that may have accumulated during the reinstalling process. Use a vacuum cleaner or brush to ensure a clean and tidy fireplace area.
By following these steps, you will successfully reinstall the fireplace insert, ensuring that it is securely in place and functioning properly. Take care to follow the manufacturer’s instructions and guidelines to maintain the safety and efficiency of the fireplace insert.
Now that the insert is reinstalled, it’s time for the final step: performing a last cleaning and doing any necessary maintenance.
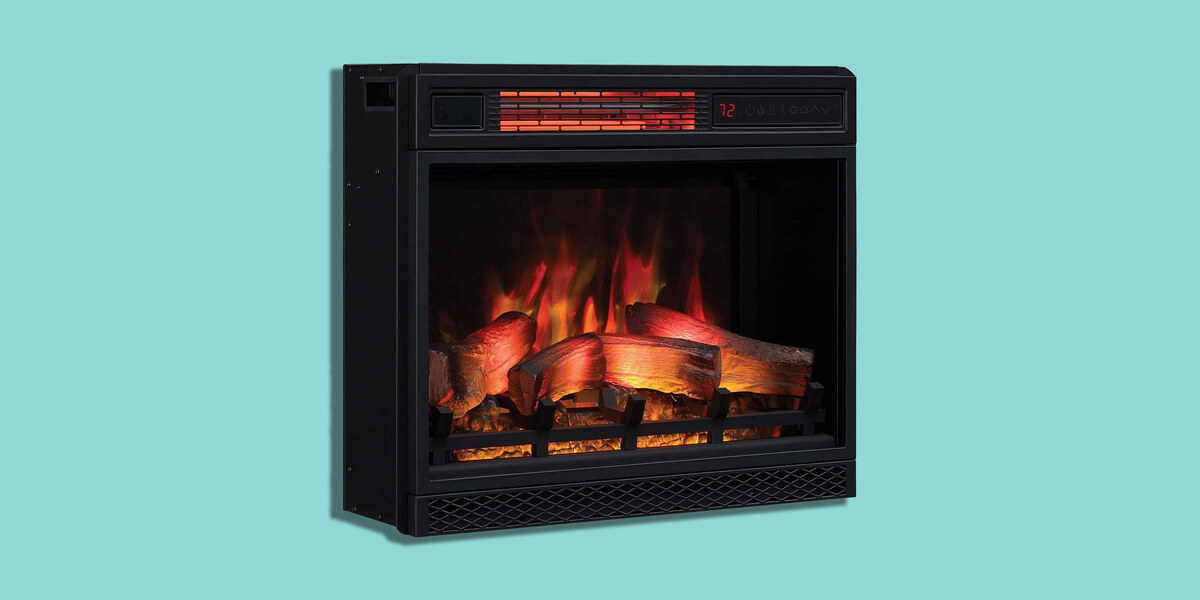
Read more: What Is A Fireplace Insert
Step 7: Final Cleaning and Maintenance
After reinstalling the fireplace insert, it’s important to perform a final cleaning and implement proper maintenance practices. This will help keep your chimney and fireplace in optimal condition. Follow these steps for the final cleaning and maintenance:
- Clean the fireplace area: Use a vacuum cleaner or a brush and dustpan to clean up any debris, dust, or residue that may have accumulated during the reinstallation process. This will ensure a clean and tidy fireplace area.
- Inspect the chimney and fireplace: Take a moment to visually inspect both the chimney and fireplace. Look for any signs of damage, such as cracks, loose components, or excessive soot buildup. If you notice any issues, consider contacting a professional chimney sweep for further assessment and repairs.
- Consider professional inspection and maintenance: While regular cleaning is important, it is also recommended to have your chimney and fireplace professionally inspected and maintained at least once a year. They can identify any potential issues and perform necessary maintenance to keep your system in excellent working condition.
- Follow manufacturer’s maintenance recommendations: Refer to the manufacturer’s instructions for any specific maintenance recommendations for your particular fireplace insert. This may include cleaning filters, lubricating moving parts, or replacing certain components. Adhering to the manufacturer’s guidelines will help prolong the lifespan of your fireplace and ensure its proper functioning.
- Make chimney cleaning a regular practice: To prevent excessive soot buildup and potential hazards, make chimney cleaning a regular part of your home maintenance routine. Depending on the usage and type of fuel used, it is generally recommended to clean the chimney at least once a year.
- Maintain proper ventilation: Ensure that your home has adequate ventilation to allow proper airflow and prevent the buildup of harmful gases. This includes periodically checking and cleaning air vents and ensuring that the chimney flue is open during fireplace use.
- Keep an eye on fire and smoke: Pay attention to the color and behavior of the fire and smoke produced by your fireplace. If you notice any unusual patterns, odors, or changes in flame color, it may indicate an issue that requires professional attention.
By following these final cleaning and maintenance steps, you can ensure a clean and well-maintained chimney and fireplace. Regular maintenance and care will contribute to the efficient and safe operation of your fireplace insert.
Remember, if you are ever unsure about any aspect of chimney cleaning or maintenance, it is always best to seek professional assistance from a qualified chimney sweep. They have the knowledge and expertise to handle any issues and ensure the safety of your home and family.
Congratulations! You have completed the process of cleaning your chimney with a fireplace insert. Enjoy your well-maintained fireplace and the warm, cozy ambience it provides.
Conclusion
Cleaning a chimney with a fireplace insert may seem like a daunting task, but with the right tools, materials, and safety precautions, it can be a manageable process. By following the step-by-step guide outlined in this article, you can effectively clean your chimney and maintain the optimal performance of your fireplace insert.
We started by emphasizing the importance of safety precautions, including wearing protective gear, working with a partner, and being mindful of potential hazards. Next, we discussed the tools and materials you will need, such as a chimney brush, extendable rods, drop cloths, a vacuum cleaner, and cleaning solutions.
The step-by-step process covered gathering necessary supplies, protecting the surrounding area, removing the fireplace insert, cleaning the insert itself, cleaning the chimney, reinstalling the insert, and performing final cleaning and maintenance. Each step was explained in detail to ensure a thorough and efficient cleaning process.
Throughout the entire process, we emphasized the importance of following the manufacturer’s instructions for your specific fireplace insert and maintaining safety at all times. We also highlighted the significance of regular maintenance and professional inspections to ensure the longevity and proper functioning of your chimney and fireplace.
Remember, if you ever feel unsure or uncomfortable with any aspect of chimney cleaning or maintenance, it is always best to seek the assistance of a qualified professional. They have the knowledge and expertise to handle any issues and ensure the safety of your home and family.
By taking the time to clean and maintain your chimney with a fireplace insert, you can enjoy a well-functioning fireplace, enhanced energy efficiency, and peace of mind knowing that you are reducing the risk of fire hazards. So, roll up your sleeves, gather your supplies, and embark on the task of cleaning your chimney with confidence!
Frequently Asked Questions about How To Clean A Chimney With A Fireplace Insert
Was this page helpful?
At Storables.com, we guarantee accurate and reliable information. Our content, validated by Expert Board Contributors, is crafted following stringent Editorial Policies. We're committed to providing you with well-researched, expert-backed insights for all your informational needs.


0 thoughts on “How To Clean A Chimney With A Fireplace Insert”