Home>Articles>How To Fry Chicken Legs In An Electric Skillet
Articles
How To Fry Chicken Legs In An Electric Skillet
Modified: August 24, 2024
Learn how to fry delicious chicken legs in an electric skillet with this step-by-step guide. Discover helpful articles on frying chicken for a tasty meal.
(Many of the links in this article redirect to a specific reviewed product. Your purchase of these products through affiliate links helps to generate commission for Storables.com, at no extra cost. Learn more)
Introduction
There’s nothing quite like the taste of perfectly fried chicken legs. Crispy on the outside, juicy and flavorful on the inside, it’s a comfort food favorite for many. While traditionally fried in a deep fryer or a large pot, you can achieve equally delicious results using an electric skillet. This versatile kitchen appliance allows for precise heat control and even cooking, making it an ideal choice for frying chicken legs.
In this article, we will guide you through the step-by-step process of frying chicken legs in an electric skillet. From preparing the chicken to achieving the perfect golden brown crispiness, we’ll cover all the essential techniques and tips to help you create a mouthwatering dish that will have everyone coming back for seconds.
Before we dive into the cooking process, it’s important to note that safety should always be your top priority when working with hot oil. Make sure to follow all safety precautions, such as keeping a fire extinguisher nearby, using oven mitts or heat-resistant gloves, and never leaving the skillet unattended while frying.
Now, let’s gather our ingredients and get started on this finger-licking good recipe.
Key Takeaways:
- Safety first! When frying chicken legs in an electric skillet, prioritize safety by choosing the right oil, monitoring temperature, and handling hot oil with caution. Following safety precautions ensures a smooth and accident-free cooking process.
- Perfectly fried chicken legs are achievable with the right techniques. From preparing the chicken to serving the final dish, each step plays a crucial role in creating crispy, flavorful homemade fried chicken legs.
Read more: How To Fry Chicken In Electric Skillet
Safety Precautions
When frying chicken legs in an electric skillet, it’s crucial to prioritize safety to prevent accidents and ensure a smooth cooking process. Here are some important safety precautions to keep in mind:
- Choose a safe location: Place the electric skillet on a stable and heat-resistant surface, away from any flammable materials or objects. Keep it out of reach of children and pets.
- Use the right oil: Opt for oils with high smoke points, such as vegetable, canola, or peanut oil. Avoid using oils like olive or sesame, as they have lower smoke points and can produce excessive smoke or even catch fire at high temperatures.
- Monitor the temperature: Use a cooking thermometer to maintain the oil at a consistent temperature. The ideal frying temperature for chicken legs is around 350°F (175°C). Avoid overheating the oil, as it can lead to splattering and potential burns.
- Avoid overcrowding: Fry chicken legs in batches to prevent overcrowding the skillet, which can cause a drop in oil temperature and uneven cooking. Overcrowding also increases the risk of oil splatters.
- Handle hot oil with caution: When adding or removing chicken legs from the skillet, use tongs or a slotted spoon to prevent burns from splattering oil. Avoid placing wet or damp chicken in hot oil, as it can cause oil to splatter more.
- Keep a fire extinguisher nearby: In case of a grease fire, having a fire extinguisher within reach is essential. It’s also a good idea to know how to properly use a fire extinguisher beforehand.
- Clean up properly: After frying, allow the oil to cool completely before disposing of it properly. Never pour hot oil down the drain, as it can cause clogs and potential fire hazards.
By following these safety precautions, you can minimize the risk of accidents and ensure a safe frying experience. Now that we’ve covered the safety aspect, let’s move on to the ingredients needed for frying chicken legs in an electric skillet.
Ingredients
To fry chicken legs in an electric skillet, you will need the following ingredients:
- 6-8 chicken legs
- Vegetable, canola, or peanut oil for frying
- All-purpose flour or a coating mix of your choice
- Seasonings: salt, black pepper, garlic powder, paprika, and any other spices you prefer
Feel free to adjust the quantities based on the number of chicken legs you plan to fry.
Now that we have our ingredients ready, let’s move on to the step-by-step process of frying chicken legs in an electric skillet.
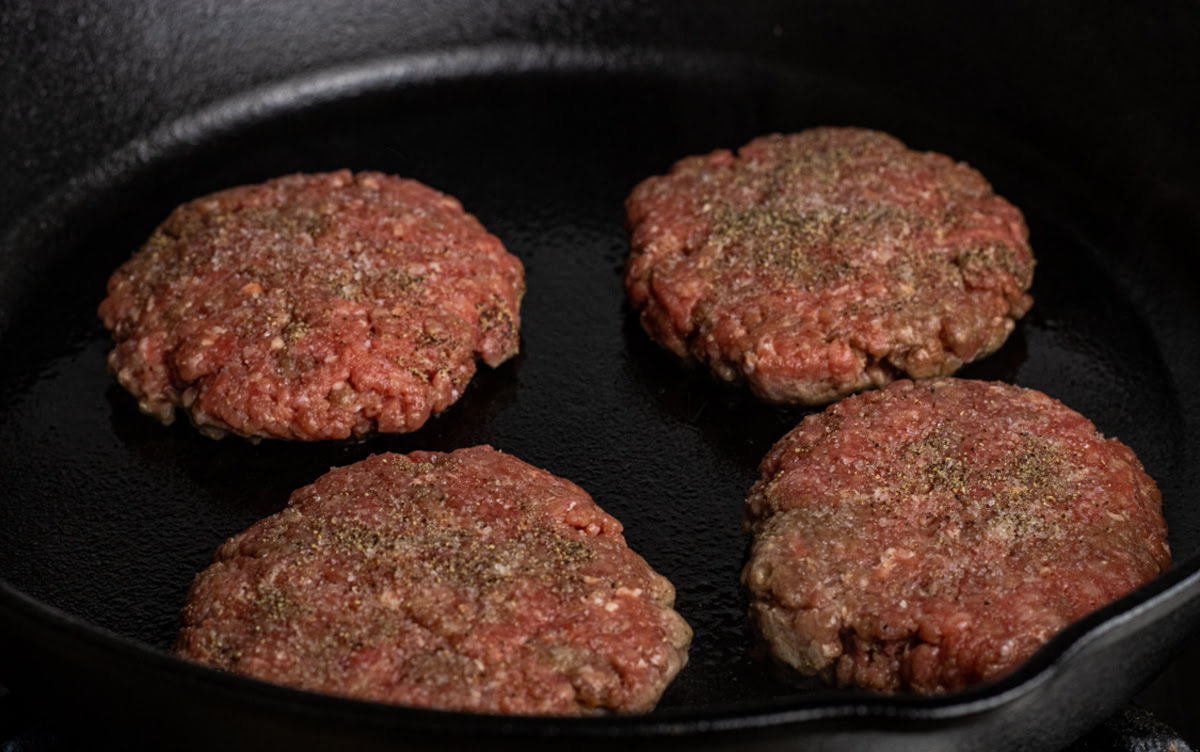
Step 1: Preparing the Chicken Legs
The first step in frying chicken legs in an electric skillet is to properly prepare the chicken. Follow these steps:
- Wash the chicken legs under cold running water and pat them dry with paper towels. Ensure that they are completely dry before proceeding.
- If desired, you can remove the skin from the chicken legs for a healthier option. Simply grip the skin firmly and pull it away from the meat. However, keeping the skin on will result in a crispier exterior.
- Next, season the chicken legs with salt, black pepper, garlic powder, paprika, or any other spices you prefer. Ensure that the seasoning is evenly distributed by rubbing it gently onto the chicken legs.
- Let the seasoned chicken legs sit at room temperature for about 15-20 minutes. This allows the flavors to penetrate the meat and enhances the overall taste.
Once the chicken legs are properly prepared, it’s time to move on to the next step: heating the electric skillet.
Step 2: Heating the Electric Skillet
Before you start frying the chicken legs, it’s important to properly heat the electric skillet. Follow these steps:
- Place the electric skillet on a stable and heat-resistant surface. Make sure there is ample space for the skillet, ensuring it is not too close to any walls or other appliances.
- Check the manufacturer’s instructions for your specific electric skillet to determine the appropriate temperature settings for frying.
- Turn on the electric skillet and set the temperature to the desired frying temperature, usually around 350°F (175°C). Allow the skillet to preheat for a few minutes until it reaches the desired temperature.
- During the preheating process, you can test the temperature using a cooking thermometer to ensure it is accurate. This will help you achieve consistent results throughout the frying process.
Once the electric skillet is properly heated, we can move on to the next step: adding oil to the skillet.
Step 3: Adding Oil
Adding the right amount of oil to the electric skillet is crucial for achieving crispy and evenly fried chicken legs. Follow these steps:
- Choose an oil with a high smoke point, such as vegetable, canola, or peanut oil. These oils are ideal for frying as they can withstand the high temperatures required.
- Add enough oil to the electric skillet to ensure that it covers the bottom by about 1/2 inch (1.3 cm) or as specified in the manufacturer’s instructions.
- Slowly pour the oil into the skillet, taking care to prevent any spills or splatters.
- Allow the oil to heat up for a few minutes until it reaches the desired frying temperature. Use a cooking thermometer to ensure the oil has reached the optimal temperature of around 350°F (175°C).
It is important not to overfill the skillet with oil, as it can lead to spills and accidents. Additionally, using too little oil may result in uneven cooking and a less crispy texture.
Now that the oil is properly added to the electric skillet, we can move on to the next step: seasoning the chicken legs.
Step 4: Seasoning the Chicken Legs
Seasoning the chicken legs is an important step to enhance their flavor. Follow these steps:
- Take the chicken legs that you prepared in Step 1.
- In a small bowl, mix together the desired seasonings, such as salt, black pepper, garlic powder, paprika, and any other spices or herbs of your choice. Adjust the quantities based on your taste preferences.
- Pat the chicken legs dry with paper towels to remove any excess moisture.
- Sprinkle the seasoning mixture evenly over all sides of the chicken legs, using your hands to gently rub it into the meat.
- Make sure to coat the chicken legs thoroughly to ensure that each bite is flavorful.
Allow the seasoned chicken legs to sit at room temperature for 15-20 minutes before frying. This will allow the flavors to penetrate the meat and enhance the taste.
Now that the chicken legs are seasoned and ready, it’s time to move on to the next step: placing the chicken legs in the skillet.
To ensure even cooking, make sure the chicken legs are at room temperature before frying them in the electric skillet. This will help them cook more evenly and prevent the outside from burning before the inside is fully cooked.
Step 5: Placing Chicken Legs in the Skillet
Now that your chicken legs are seasoned and ready to be fried, it’s time to carefully place them in the electric skillet. Follow these steps:
- Using tongs or a slotted spoon, carefully place the chicken legs into the heated oil in the electric skillet.
- Make sure to lay the chicken legs in a single layer without overcrowding the skillet. Overcrowding can lead to uneven cooking and a loss of crispiness.
- If you are frying large quantities of chicken legs, it’s best to fry them in batches, allowing each batch to cook fully before adding the next.
- Take caution when placing the chicken legs into the hot oil to avoid any splattering or hot oil burns. Keep a safe distance from the skillet as you do this.
- Once all the chicken legs are in the skillet, close the lid if your electric skillet has one. This helps to retain heat and ensures even cooking.
Now that the chicken legs are in the skillet, it’s time to move on to the next step: frying them to golden brown perfection.
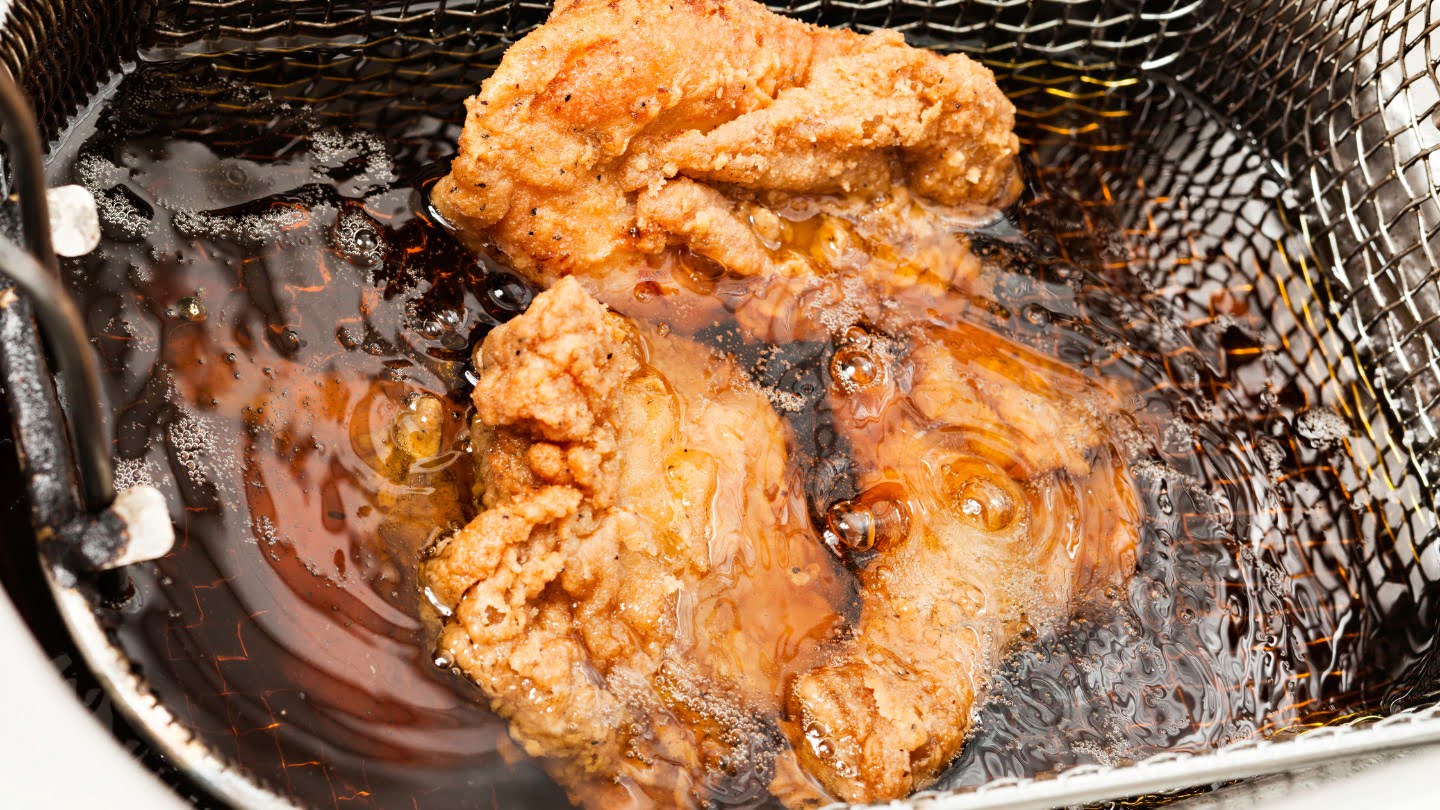
Step 6: Fry the Chicken Legs
With the chicken legs in the electric skillet, it’s time to start frying them to achieve that delicious golden brown crispiness. Follow these steps:
- Allow the chicken legs to cook undisturbed for several minutes on one side until it becomes golden brown. The exact cooking time will depend on the size of the chicken legs, but it typically takes around 8-10 minutes per side.
- Monitor the heat of the electric skillet to ensure that the oil temperature remains steady and that the chicken legs cook evenly.
- For even cooking, you can gently press down on the chicken legs using a spatula or tongs to ensure that they make contact with the hot oil. Be careful not to apply too much pressure to avoid splattering hot oil.
- During the frying process, keep the electric skillet covered with a lid to help trap heat and maintain consistent cooking temperature.
Remember to flip the chicken legs halfway through the cooking time to ensure that both sides cook evenly. Flipping them gently with tongs or a spatula will help achieve this.
The frying process will result in a crispy and golden-brown exterior while keeping the chicken legs juicy and tender on the inside.
Once the chicken legs are nicely fried, it’s time to move on to the next step: flipping them.
Step 7: Flipping the Chicken Legs
Flipping the chicken legs is a crucial step to ensure that they cook evenly on both sides and achieve that perfect golden brown color. Follow these steps:
- Using tongs or a spatula, carefully flip each chicken leg to the other side. Be gentle to avoid any splattering or hot oil burns.
- Once flipped, allow the chicken legs to continue frying for the remaining cooking time. This ensures that both sides are cooked to perfection.
- Keep in mind that the cooking time may vary depending on the size of the chicken legs and the desired level of crispiness. The total cooking time for frying chicken legs in an electric skillet is typically 16-20 minutes.
- Continue monitoring the heat and adjusting the temperature as needed to maintain an optimal frying temperature.
- If the chicken legs start to brown too quickly, adjust the heat lower to prevent them from burning.
Flipping the chicken legs halfway through the cooking process ensures that both sides develop a beautiful golden brown color and a crispy texture.
Now that the chicken legs are flipped, it’s important to check for doneness to ensure they are cooked all the way through.
Step 8: Checking for Doneness
Checking for doneness is an essential step to ensure that the chicken legs are cooked all the way through. Follow these steps:
- After flipping the chicken legs, continue cooking them for the remaining cooking time.
- To check for doneness, insert a meat thermometer into the thickest part of the chicken leg, away from the bone. The internal temperature should reach 165°F (74°C).
- If you do not have a meat thermometer, you can also check for doneness by cutting into the thickest part of the chicken leg. The meat should be white throughout, with no pink or translucent areas.
- If the chicken legs are not fully cooked, continue frying them for a few more minutes, checking for doneness again as needed.
- Once the chicken legs are cooked through, remove them from the electric skillet to prevent overcooking.
Properly cooked chicken legs should have a crispy golden-brown exterior and tender and juicy meat on the inside.
Now that the chicken legs are cooked and ready, let’s move on to the next step: removing and draining them.
Step 9: Removing and Draining the Chicken Legs
Once the chicken legs are cooked to perfection, it’s time to carefully remove them from the electric skillet and allow them to drain excess oil. Follow these steps:
- Using tongs or a slotted spoon, carefully lift each chicken leg from the electric skillet, allowing any excess oil to drip back into the skillet.
- Place the cooked chicken legs on a plate lined with paper towels or a wire rack to drain off any remaining oil. This helps to ensure that the chicken legs stay crispy and prevents them from becoming greasy.
- Allow the chicken legs to rest for a few minutes, which helps to retain their juices and allows any excess oil to be absorbed by the paper towels or drained away.
While the chicken legs are draining, you can take this time to prepare any desired side dishes or sauces to serve alongside the fried chicken legs.
Now that the chicken legs are drained and ready, it’s time to move on to the final step: serving and enjoying the delicious homemade fried chicken legs.
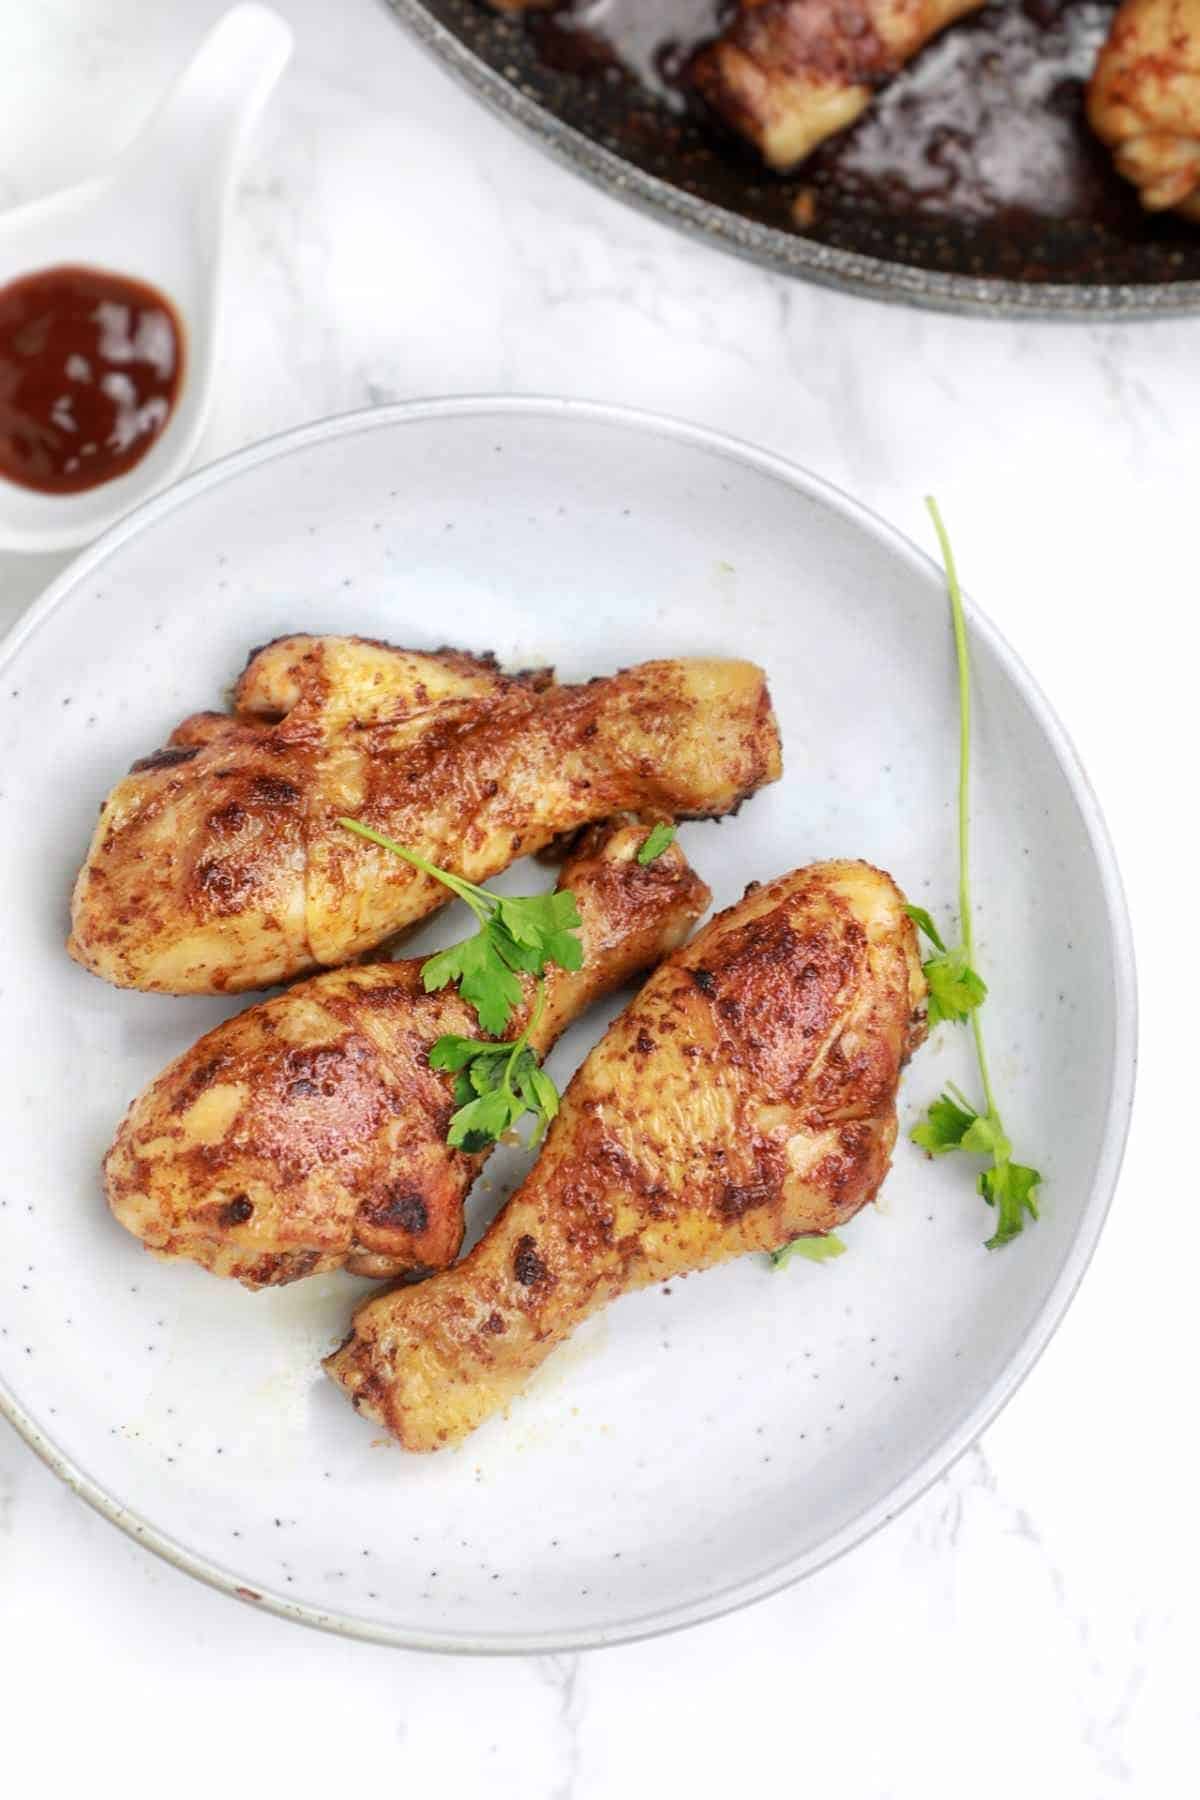
Step 10: Serving and Enjoying the Fried Chicken Legs
Now that you have successfully fried the chicken legs, it’s time to serve and enjoy them. Follow these steps:
- Transfer the drained and crispy fried chicken legs to a serving platter.
- Garnish the chicken legs with fresh herbs, such as parsley or cilantro, for an added pop of color and flavor (optional).
- Serve the fried chicken legs hot alongside your favorite side dishes. Popular accompaniments include mashed potatoes, coleslaw, cornbread, or a fresh green salad.
- For extra indulgence, serve with an array of dipping sauces or condiments like barbecue sauce, honey mustard, ranch dressing, or hot sauce.
- Dig in and enjoy the flavorful and tender meat encased in a crispy, golden-brown crust.
- Remember to savor each bite and share this delicious dish with family and friends.
Fried chicken legs make for a satisfying main course or a delightful addition to any gathering or picnic. They are sure to be a crowd pleaser!
Congratulations on successfully frying chicken legs in an electric skillet. With these steps, you can now confidently recreate this tasty dish anytime you crave it.
Enjoy your homemade fried chicken legs and the delightful flavors you have created!
Thank you for following this guide, and we hope you found it helpful. Happy cooking!
Disclaimer: Remember to exercise caution when working with hot oil and follow all safety precautions.
Conclusion
Frying chicken legs in an electric skillet is a convenient and simple way to achieve crispy, flavorful results. With the right techniques and a few simple steps, you can enjoy homemade fried chicken legs that rival your favorite restaurant’s version.
Throughout this guide, we have covered everything from preparing the chicken legs to serving and enjoying the final product. By following the step-by-step instructions, you can confidently fry chicken legs in an electric skillet, creating a dish that will impress your family and friends.
Remember to prioritize safety when working with hot oil, and always follow the recommended safety precautions. This will help ensure an accident-free cooking process.
From properly seasoning the chicken legs to flipping them to achieve an even golden brown color, each step plays a crucial role in creating the perfect fried chicken legs. Taking the time to prepare the chicken, heat the electric skillet, and season the meat will result in a delicious, crispy exterior and juicy, tender meat on the inside.
Once the chicken legs are fried to perfection, serve them alongside your favorite side dishes and dipping sauces for a complete and satisfying meal. Whether you’re hosting a gathering or simply enjoying a family dinner, homemade fried chicken legs are sure to be a hit.
Now that you have the knowledge and techniques to fry chicken legs in an electric skillet, it’s time to roll up your sleeves, gather your ingredients, and start cooking. Embrace your inner chef and bring the tantalizing aroma and mouthwatering taste of crispy fried chicken legs into your own kitchen.
So go ahead, grab your electric skillet, and get ready to impress with your culinary skills. With a little practice and experimentation, you’ll be frying up irresistible chicken legs in no time.
Thank you for joining us on this frying adventure, and we wish you happy cooking and many delicious meals ahead!
Hungry for more ways to use your electric skillet? Dive into our detailed guide on versatile electric skillet cooking methods, perfect for any home chef eager to expand their culinary skills. Plus, don't miss out on our collection of the year's best skillet recipes, offering everything from quick meals to gourmet dishes. Whether you're a seasoned cook or just starting, these articles are packed with tips and tricks to help you create delectable dishes with ease.
Frequently Asked Questions about How To Fry Chicken Legs In An Electric Skillet
Was this page helpful?
At Storables.com, we guarantee accurate and reliable information. Our content, validated by Expert Board Contributors, is crafted following stringent Editorial Policies. We're committed to providing you with well-researched, expert-backed insights for all your informational needs.


0 thoughts on “How To Fry Chicken Legs In An Electric Skillet”