Home>Articles>How To Cook Frozen Chicken In Electric Skillet
Articles
How To Cook Frozen Chicken In Electric Skillet
Modified: August 20, 2024
Discover the best method to cook frozen chicken in an electric skillet with our informative articles. Get step-by-step instructions and helpful tips for perfectly cooked chicken every time.
(Many of the links in this article redirect to a specific reviewed product. Your purchase of these products through affiliate links helps to generate commission for Storables.com, at no extra cost. Learn more)
Introduction
Cooking frozen chicken in an electric skillet can be a quick and convenient way to prepare a delicious meal. Whether you forgot to defrost your chicken ahead of time or simply prefer the convenience of cooking from frozen, an electric skillet can help you achieve perfectly cooked chicken every time. In this article, we will guide you through the process of cooking frozen chicken in an electric skillet, providing you with handy tips and tricks along the way.
Before we dive into the cooking process, it’s important to note that the success of your dish will heavily depend on the type and quality of your electric skillet. With a wide range of options available on the market, it’s essential to choose an electric skillet that is suitable for cooking frozen meats. Look for skillets with adjustable temperature controls, non-stick surfaces, and a size that accommodates the quantity of chicken you wish to cook.
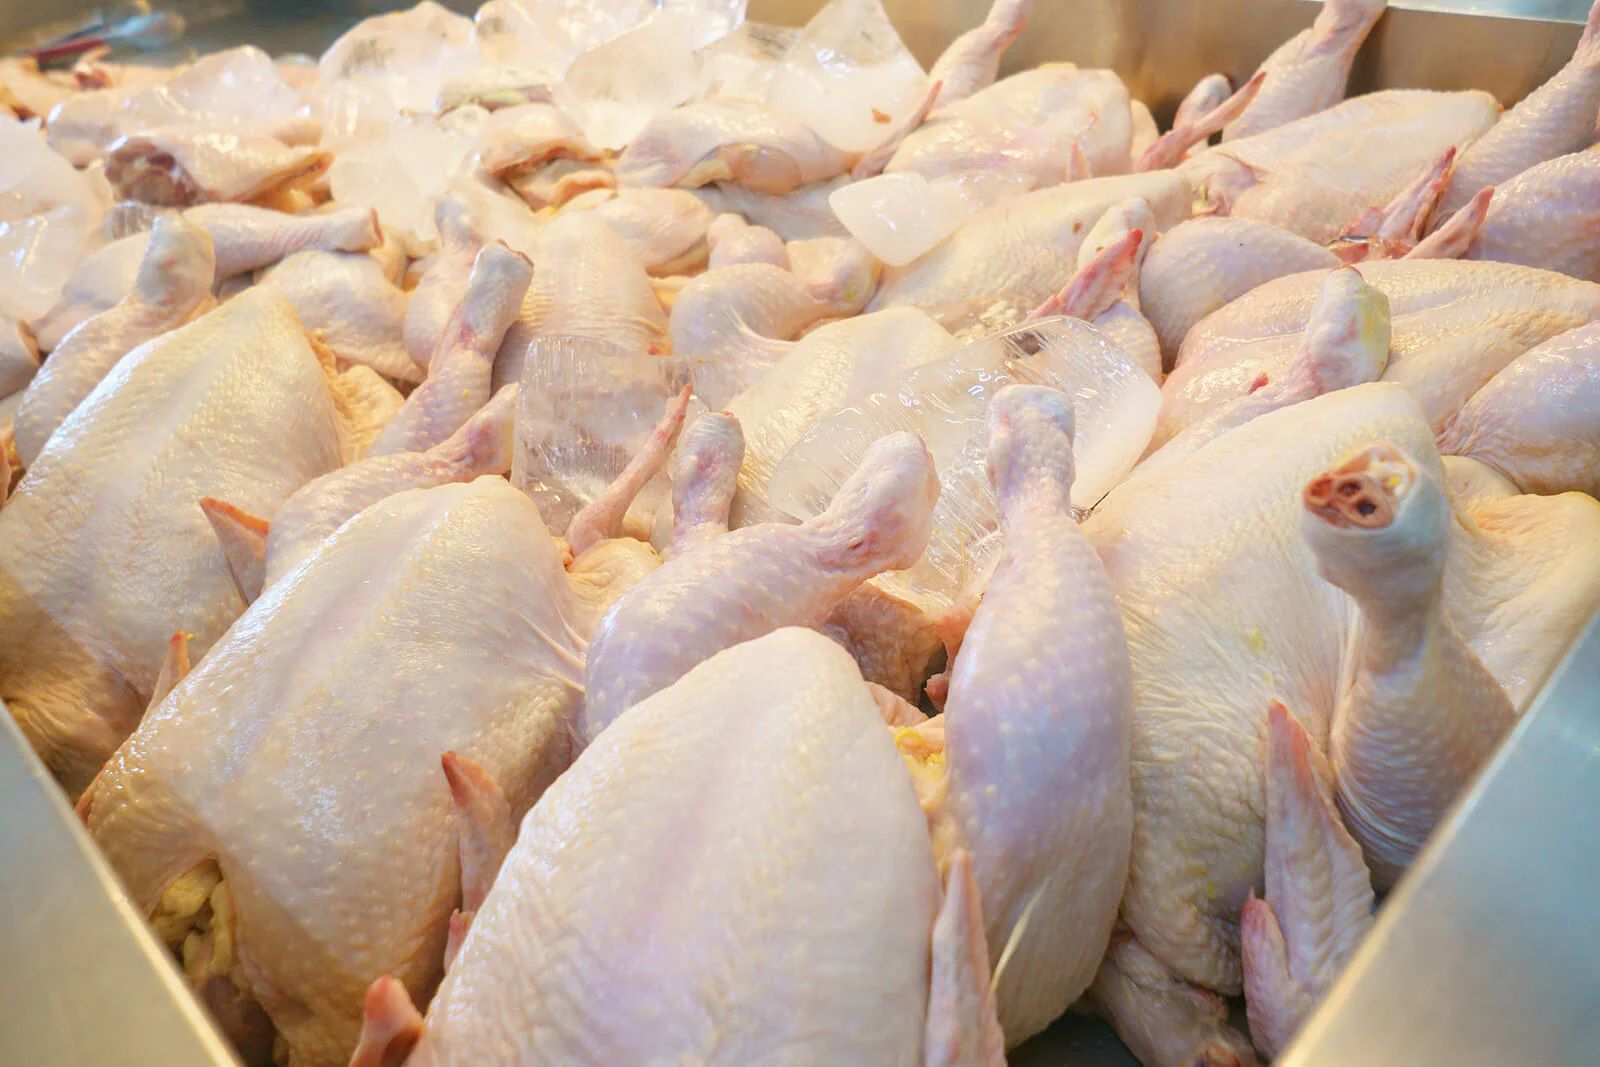
Now that you have your electric skillet ready, let’s move on to the next step: preparing the frozen chicken. Start by choosing high-quality frozen chicken breasts or thighs. Ensure they are properly sealed and stored at the appropriate temperature to maintain their freshness.
When you are ready to start cooking, remove the chicken from the freezer and let it thaw partially. This can be done by placing it in the refrigerator for a few hours or using the defrost function on your microwave. Partially thawing the chicken will help ensure even and thorough cooking.
Next, thoroughly rinse the chicken under cold water to remove any ice particles or freezer burn. Pat the chicken dry with paper towels and season it with your preferred spices and herbs. This will give your chicken added flavor and enhance its overall taste.
With the frozen chicken prepared, it’s time to set up your electric skillet. Place the skillet on a heat-resistant surface, making sure it’s level and stable. Connect the skillet to a power source and adjust the temperature setting according to your recipe or the recommended cooking time for frozen chicken. Most electric skillets have a temperature range of 175°F to 400°F, allowing you to easily control the cooking process.
Key Takeaways:
- Cooking frozen chicken in an electric skillet is convenient and efficient, requiring proper preparation, temperature control, and careful monitoring of doneness to ensure safe and delicious results.
- Choosing the right electric skillet, preparing the frozen chicken with seasoning and partial thawing, and following proper cleaning and maintenance procedures are essential for successful and enjoyable cooking experiences.
Read more: How To Fry Chicken In Electric Skillet
Choosing the Right Electric Skillet
When it comes to cooking frozen chicken in an electric skillet, selecting the right skillet is key to achieving the best results. Here are some factors to consider when choosing the perfect electric skillet:
Size and Capacity: Make sure to choose an electric skillet that is large enough to accommodate the amount of chicken you plan to cook. If you’re cooking for a larger group or family, opt for a skillet with a bigger capacity.
Temperature Control: Look for an electric skillet with adjustable temperature controls. This will allow you to easily regulate the heat and ensure your chicken cooks evenly. The ability to set a specific temperature is especially important when cooking frozen chicken, as it requires a gradual and consistent increase in heat.
Non-Stick Surface: A non-stick surface is essential when cooking chicken, whether it’s frozen or not. This will prevent the chicken from sticking to the skillet during cooking and make cleaning up a breeze. Non-stick surfaces also require less oil or cooking spray, making your chicken a healthier option.
Heat Distribution: A skillet with even heat distribution is crucial to ensure that your chicken cooks thoroughly and evenly. Look for skillets with multiple heat zones or efficient heating elements that evenly distribute heat across the cooking surface.
Durability and Quality: Opt for an electric skillet made from high-quality materials that will withstand regular use. Stainless steel skillets are a popular choice due to their durability and heat retention properties.
Additional Features: Consider any additional features or accessories that may enhance your cooking experience. This could include a detachable temperature probe, a glass lid for easy monitoring, or a drip tray to collect excess liquid.
By taking these factors into account, you can ensure that you choose an electric skillet that is best suited for cooking frozen chicken. Remember, investing in a high-quality skillet will not only guarantee delicious results but also make your cooking experience more enjoyable. Now that you have your electric skillet ready, let’s move on to preparing the frozen chicken.
Preparing the Frozen Chicken
Now that you have your electric skillet ready, it’s time to prepare the frozen chicken for cooking. Proper preparation is crucial to ensure the chicken cooks evenly and retains its juices and flavors. Follow these steps to prep your frozen chicken:
Thaw Partially: Start by partially thawing the frozen chicken. This can be done by placing it in the refrigerator for a few hours or using the defrost function on your microwave. Partially thawing the chicken will help it cook more evenly and prevent the outside from overcooking while the inside remains frozen.
Rinse and Dry: Once the chicken is partially thawed, rinse it under cold water to remove any ice particles or freezer burn. This step is important for maintaining the quality and taste of the chicken. After rinsing, pat the chicken dry with paper towels to remove any excess moisture.
Seasoning: Season the chicken with your preferred spices and herbs to enhance its flavor. You can use a simple salt and pepper seasoning or get creative with a variety of herbs and spices such as garlic powder, paprika, or dried Italian herbs. Rub the seasonings onto both sides of the chicken to ensure even distribution.
Marinating: If you have more time, consider marinating the partially thawed chicken before cooking. Marinating not only adds flavor but also helps tenderize the meat. You can use a store-bought marinade or make your own using a combination of oil, vinegar or citrus juice, and spices. Allow the chicken to marinate in the refrigerator for at least 30 minutes before cooking.
By properly preparing the frozen chicken, you’ll ensure that it cooks evenly and is bursting with flavor. Now let’s move on to setting up the electric skillet for cooking the chicken.
Setting up the Electric Skillet
Setting up the electric skillet properly is crucial to achieving optimal cooking results for your frozen chicken. Here’s how to set up your electric skillet:
Choose the Right Surface: Place the electric skillet on a flat and heat-resistant surface. Avoid placing it on a surface that is sensitive to heat or prone to damage. A sturdy and stable surface will ensure that the skillet remains secure during cooking.
Connect to Power: Plug the electric skillet into a power source. Ensure that the power cord is safely positioned away from any water or heat sources to prevent any accidents. Make sure the power cord is not stretched or obstructed in any way.
Adjust the Temperature: Most electric skillets come with adjustable temperature controls. Set the temperature according to the recipe or the recommended cooking time for frozen chicken. Start with a lower temperature and gradually increase it as the chicken cooks. This will help ensure that the chicken cooks evenly without drying out or burning.
Preheat the Skillet: Preheat the electric skillet for a few minutes before adding the chicken. Preheating the skillet will help promote even cooking and prevent the chicken from sticking to the surface. Make sure the skillet reaches the desired temperature before proceeding to the next step.
Add Cooking Oil: Depending on the non-stick properties of your skillet, you may need to add a small amount of cooking oil to prevent the chicken from sticking. Use a cooking oil with a high smoke point, such as vegetable or canola oil. Coat the bottom of the skillet with a thin layer of oil, ensuring that the entire surface is covered.
Place the Chicken in the Skillet: Carefully place the prepared frozen chicken in the electric skillet, making sure not to overcrowd the pan. Leave enough space between each piece to allow for even cooking and airflow. If you have a large quantity of chicken, it’s best to cook in batches to ensure optimal results.
Congratulations! Your electric skillet is now set up and ready to cook the frozen chicken. In the next section, we’ll cover the cooking process in detail, so you can achieve perfectly cooked chicken every time.
Cooking the Frozen Chicken
Now that the electric skillet is set up, it’s time to start cooking the frozen chicken. Follow these steps to ensure the chicken gets cooked to perfection:
Cook on Low Heat: Start by cooking the frozen chicken on low heat. This will allow the chicken to defrost slowly and cook evenly. Gradually increase the heat as needed during the cooking process.
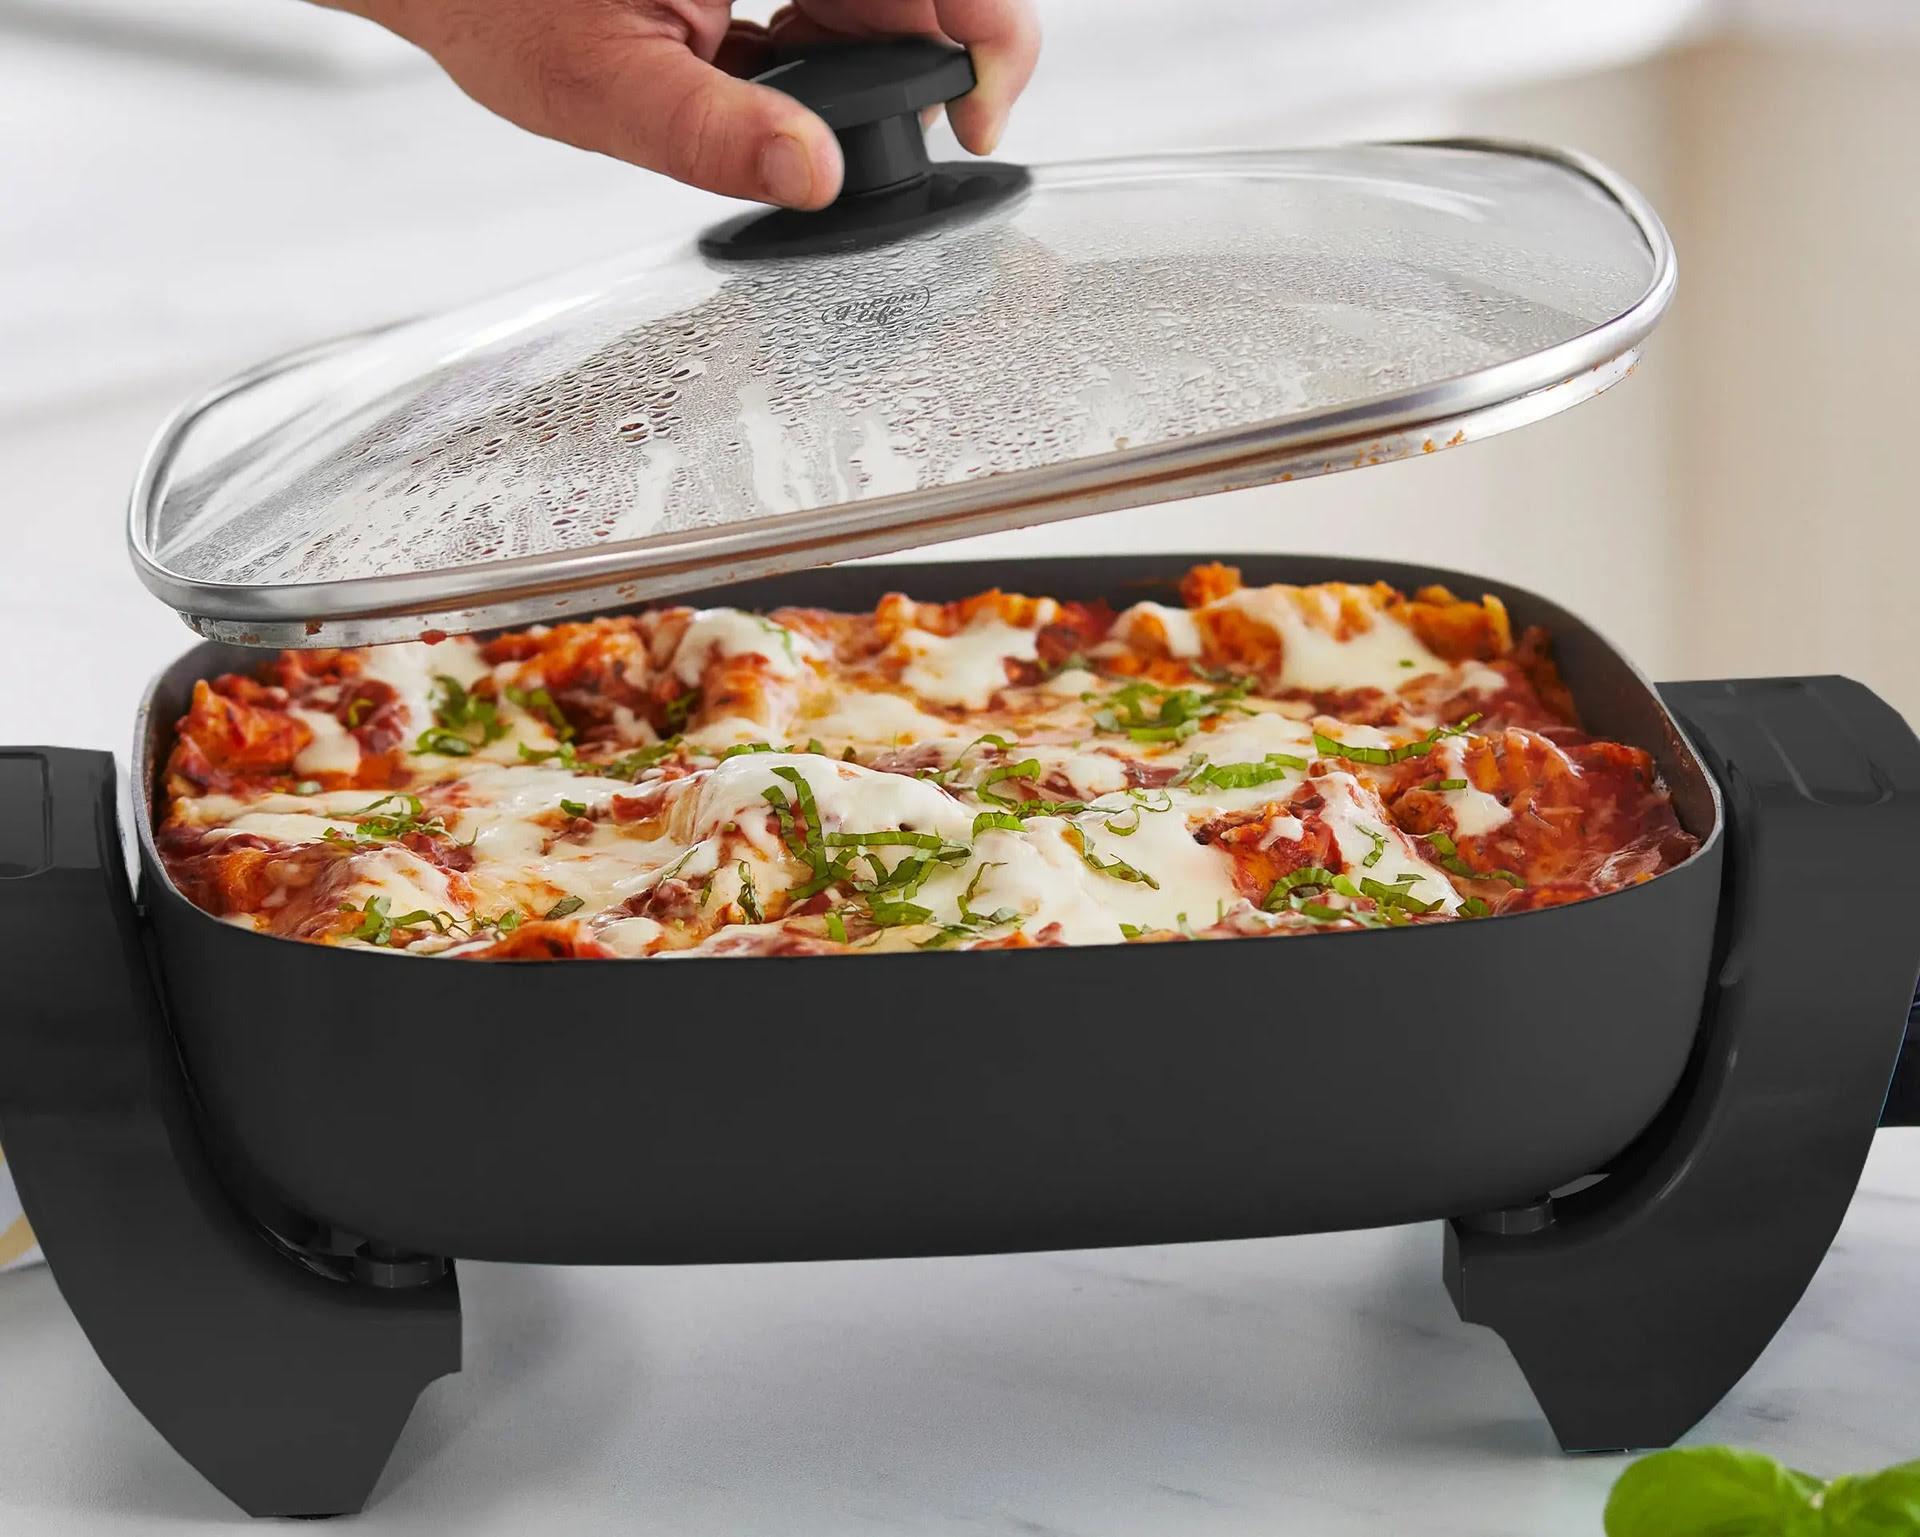
Cover the Skillet: Cover the electric skillet with a lid to trap the heat and moisture. This will help the chicken cook more quickly and prevent it from drying out. However, if you prefer a crispy exterior on the chicken, you can leave the skillet uncovered for the last few minutes of cooking.
Flip the Chicken: After a few minutes of cooking, carefully flip the chicken using tongs or a spatula. This will ensure that both sides cook evenly and develop a golden brown color. Remember, it’s important not to overcrowd the skillet, as this can hinder the cooking process and result in unevenly cooked chicken.
Monitor the Temperature: Use a meat thermometer to check the internal temperature of the chicken. The chicken should reach a minimum internal temperature of 165°F (74°C) to ensure it is fully cooked and safe to eat. Insert the thermometer into the thickest part of the chicken without touching the bone for an accurate reading.
Baste or Brush with Sauce: If desired, baste the chicken with your favorite sauce or brush it with a glaze for added flavor. This can be done towards the end of the cooking process to prevent the sauce from burning. Apply the sauce evenly to the chicken and continue cooking for a few more minutes to let the flavors meld.
Adjust Cooking Time: The cooking time for frozen chicken can vary based on the thickness and size of the pieces. Use the recommended cooking times as a general guideline, but always rely on the internal temperature to determine doneness. If the chicken is not cooked through, continue to cook for a few more minutes until it reaches the desired internal temperature.
By following these steps, you’ll be able to cook frozen chicken in your electric skillet with ease. The next section will guide you on how to check for doneness to ensure your chicken is cooked to perfection.
To cook frozen chicken in an electric skillet, ensure the skillet is preheated to at least 375°F before adding the chicken. Sear each side for 6-8 minutes, then reduce heat and cover to cook through. Use a meat thermometer to ensure it reaches 165°F.
Read more: How To Broil Chicken In An Electric Skillet
Checking for Doneness
Checking for doneness is a crucial step when cooking frozen chicken in an electric skillet. To ensure your chicken is cooked to perfection and safe to eat, follow these guidelines:
Internal Temperature: The most accurate way to determine if the chicken is cooked is by checking its internal temperature. Insert a meat thermometer into the thickest part of the chicken without touching the bone. The chicken should reach a minimum internal temperature of 165°F (74°C) to ensure it is fully cooked and safe to consume.
Visual Appearance: Another way to check for doneness is by visually inspecting the chicken. It should have a golden brown color on the outside, and the juices should run clear when pierced with a fork. If the chicken appears pink or the juices are still pink or bloody, it is not fully cooked and needs more time on the skillet.
Texture and Firmness: The texture and firmness of the chicken can also indicate its doneness. Fully cooked chicken should be tender and juicy, with no signs of rawness or excessive toughness. You can test the chicken by gently pressing it with a fork or your finger. If it feels firm and springs back slightly, it is likely cooked.
No Pinkness: When checking for doneness, make sure there is no pinkness in the center of the chicken. Pink or raw-looking chicken indicates that it is undercooked and needs more time on the skillet. Ensure that the chicken is cooked through and opaque all the way to the center for safe consumption.
Remember, the cooking time may vary depending on the thickness of the chicken pieces and the specific recipe you are following. It is always advisable to rely on the internal temperature as the most reliable indicator of doneness.
Once you have determined that the chicken is fully cooked, it’s time to remove it from the electric skillet and prepare it for serving.
Removing the Chicken from the Electric Skillet
After cooking the frozen chicken to perfection in the electric skillet, it’s time to remove it from the skillet. Follow these simple steps to safely remove the chicken:
Turn off the Heat: Before removing the chicken, ensure that the electric skillet is turned off and unplugged from the power source. Safety should always be the top priority throughout the cooking process.
Use Heat-Resistant Utensils: Use heat-resistant tongs or a spatula to carefully lift the cooked chicken from the skillet. Avoid using utensils with plastic handles, as they may not withstand the heat of the skillet. Stainless steel or silicone utensils are recommended for this purpose.
Rest the Chicken: Once you have removed the chicken from the skillet, allow it to rest for a few minutes before serving. This resting period helps the juices redistribute throughout the meat, resulting in a more tender and flavorful chicken.
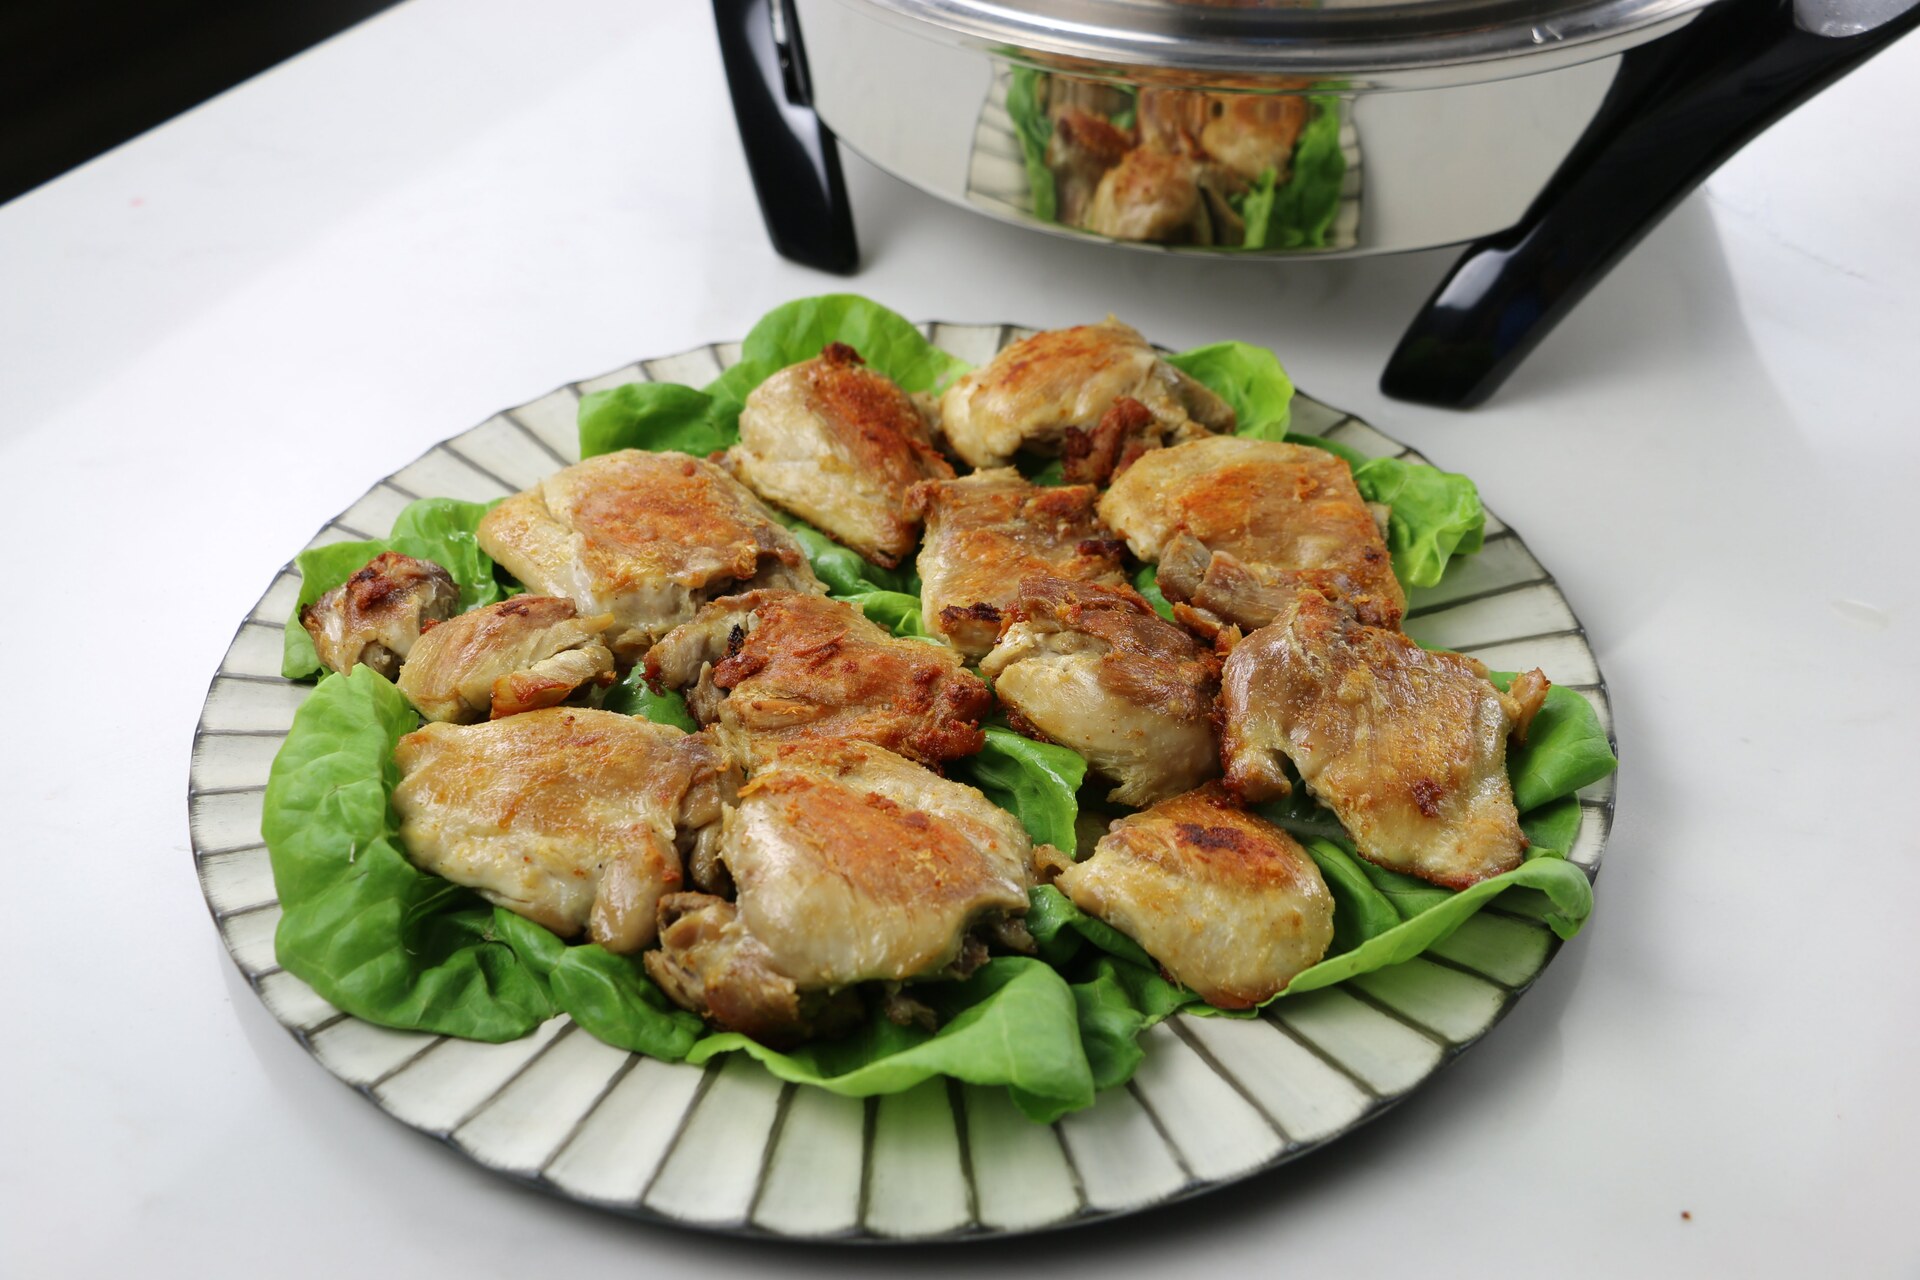
Transfer to a Plate: Carefully transfer the chicken from the utensil to a clean serving plate. Arrange the chicken pieces neatly on the plate, ensuring they are not stacked on top of each other to preserve their presentation.
By following these steps, you can safely and efficiently remove the cooked chicken from the electric skillet. Now, it’s time to serve and enjoy your delicious creation.
Serving and Enjoying the Cooked Chicken
Now that your frozen chicken is perfectly cooked and ready to be enjoyed, it’s time to serve it up and savor the flavors. Follow these tips to present and enjoy your cooked chicken:
Garnish and Presentation: Enhance the visual appeal of your cooked chicken by garnishing it with fresh herbs, such as parsley or cilantro. You can also add a sprinkle of paprika or a squeeze of lemon juice for a pop of color and flavor.
Accompaniments: Consider serving your cooked chicken alongside a variety of sides and condiments. Popular options include steamed vegetables, mashed potatoes, rice, or a fresh salad. The choice of accompaniments depends on your personal preferences and the overall theme of your meal.
Sauce or Gravy: If desired, serve the cooked chicken with a side of sauce or gravy. A homemade barbecue sauce, creamy mushroom sauce, or tangy lemon butter sauce can elevate the flavors and add a touch of richness to the chicken. Drizzle the sauce over the chicken or serve it in a separate bowl for dipping.
Family-Style or Individual Plating: Decide whether you want to serve the chicken family-style, allowing everyone to help themselves, or individually plated for a more formal presentation. Family-style serving creates a warm and casual atmosphere, while individual plating showcases the chicken as a centerpiece on each plate.
Savor the Flavors: Take a moment to appreciate the aroma and taste of the cooked chicken. Chew slowly and savor the tender meat and the well-seasoned flavors. Enjoy the fruits of your cooking efforts and relish in the satisfaction of a perfectly cooked meal.
Leftover Storage: If you have leftovers, store them in an airtight container in the refrigerator. The cooked chicken can be enjoyed later as part of a sandwich, salad, or as a protein-packed addition to other meals. Ensure proper storage and consume the leftovers within a few days for the best taste and quality.
Remember, the joy of cooking and enjoying a meal lies in sharing it with loved ones or savoring the experience solo. Whether it’s a casual weekday dinner or a special occasion, serving and enjoying your cooked chicken should be a moment of delight and satisfaction.
Now that you know how to serve and enjoy your cooked chicken, let’s move on to the final step – cleaning the electric skillet.
Cleaning the Electric Skillet
After enjoying a delicious meal cooked in your electric skillet, it’s important to clean it thoroughly to maintain its performance and prolong its lifespan. Follow these steps to clean your electric skillet effectively:
Cooling Down: Allow the electric skillet to cool down completely before cleaning. This will prevent any potential accidents and make the cleaning process safer.
Disconnect from Power: Ensure that the electric skillet is unplugged from the power source before cleaning. Safety should always be the top priority.
Remove Power Cord (If Detachable): If the power cord of your electric skillet is detachable, remove it before cleaning. This will make it easier to clean the skillet without interference from the cord.
Wash Non-Electric Parts: Remove any non-electric parts, such as the lid or temperature control probe, if applicable. Wash these parts separately using warm soapy water. Rinse them thoroughly and dry them completely before reassembling.
Wipe the Skillet Surface: Use a damp cloth or sponge to wipe the interior and exterior surfaces of the electric skillet. Remove any food residues or spills, paying extra attention to any stubborn spots. Avoid submerging the electric skillet in water, as this can damage the electrical components.
Use Mild Detergent: If necessary, use a mild dishwashing detergent for stubborn stains. Apply the detergent to the cloth or sponge and gently scrub the affected areas. Rinse the skillet thoroughly with clean water to remove any detergent residue.
Dry Thoroughly: After cleaning, ensure that the electric skillet is completely dry before storing it. Wipe the skillet with a dry cloth or allow it to air dry naturally. Moisture can lead to rust or damage the electrical components, so it’s important to ensure the skillet is thoroughly dried.
Storage: Once the electric skillet is clean and dry, store it in a cool and dry place. Avoid stacking heavy objects on top of the skillet to prevent any potential damage.
By following these cleaning steps, you can keep your electric skillet in great condition and ready for use whenever you need it. Regular cleaning and proper maintenance will help ensure the longevity and performance of your electric skillet.
Now that you know how to clean your electric skillet, let’s wrap up this article.
Read more: How To Make Bbq Chicken In Electric Skillet
Conclusion
Cooking frozen chicken in an electric skillet is a convenient and efficient way to prepare a delicious meal. By following the steps outlined in this article, you can easily achieve perfectly cooked chicken with minimal effort. From choosing the right electric skillet to preparing the frozen chicken, setting up the skillet, cooking the chicken, and checking for doneness, each step plays a crucial role in ensuring the best results.
Remember to choose an electric skillet that is suitable for cooking frozen meats, with adjustable temperature controls and a non-stick surface. Thaw the frozen chicken partially, rinse and dry it, and season it with your preferred spices before placing it in the electric skillet. Set the skillet to the appropriate temperature and cook the chicken evenly on both sides, keeping a close eye on the internal temperature to ensure it reaches a safe minimum of 165°F (74°C).
Once the chicken is cooked to perfection, carefully remove it from the electric skillet using heat-resistant utensils. Allow it to rest before serving and enjoy it alongside your favorite sides and accompaniments. Remember to clean the electric skillet thoroughly after each use to maintain its performance and prolong its lifespan.
Whether you’re cooking for yourself, your family, or hosting a gathering, cooking frozen chicken in an electric skillet provides a convenient and tasty option. With practice and experimentation, you can explore different seasoning and marinating techniques to create a variety of flavors and textures.
So, the next time you find yourself with frozen chicken and an electric skillet at hand, feel confident in your ability to create a delicious and hassle-free meal. With the right equipment, proper preparation, and a little bit of patience, you’ll be able to cook frozen chicken to perfection and enjoy a flavorful and satisfying dish.
Happy cooking!
Frequently Asked Questions about How To Cook Frozen Chicken In Electric Skillet
Was this page helpful?
At Storables.com, we guarantee accurate and reliable information. Our content, validated by Expert Board Contributors, is crafted following stringent Editorial Policies. We're committed to providing you with well-researched, expert-backed insights for all your informational needs.


0 thoughts on “How To Cook Frozen Chicken In Electric Skillet”