Articles
How To Hide Electrical Cord On Wall
Modified: October 20, 2024
Learn how to hide electrical cords on the wall with these helpful articles. Say goodbye to unsightly wires and create a clean and organized space.
(Many of the links in this article redirect to a specific reviewed product. Your purchase of these products through affiliate links helps to generate commission for Storables.com, at no extra cost. Learn more)
Introduction
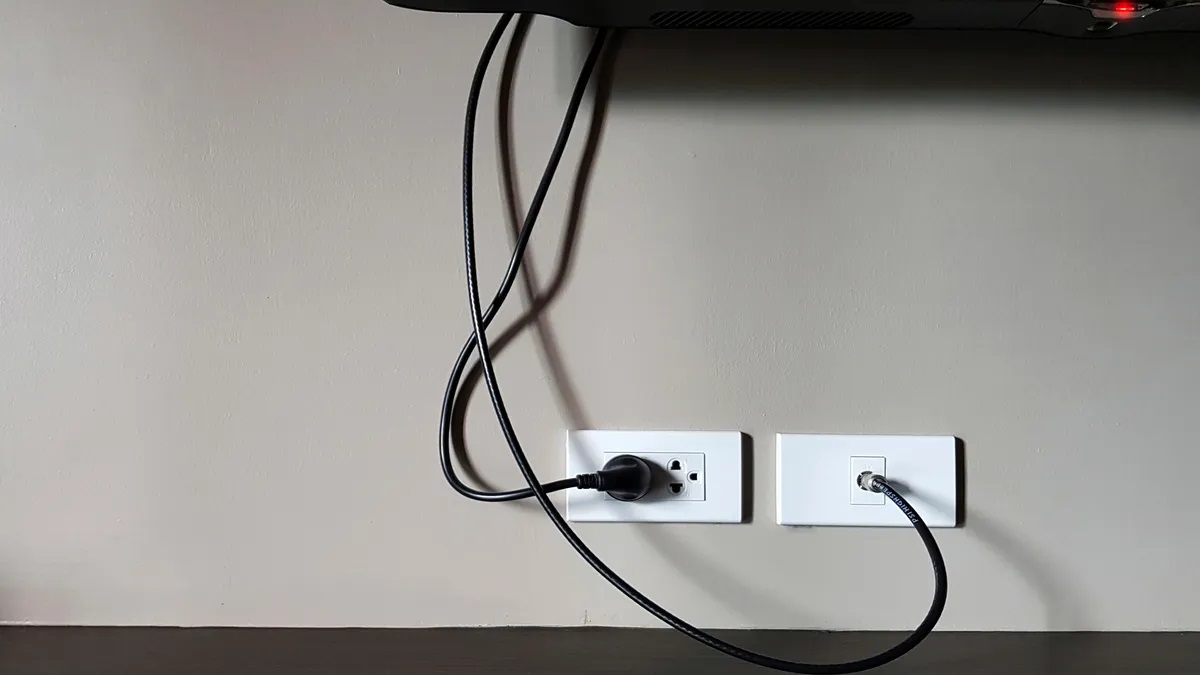
Electrical cords are a necessary part of our modern lives, but they can often be an eyesore when they dangle from the wall or lie exposed on the floor. Fortunately, there are simple and effective solutions for hiding electrical cords on the wall, allowing you to maintain a clean and organized living space. In this article, we will guide you through the process of concealing electrical cords with ease.
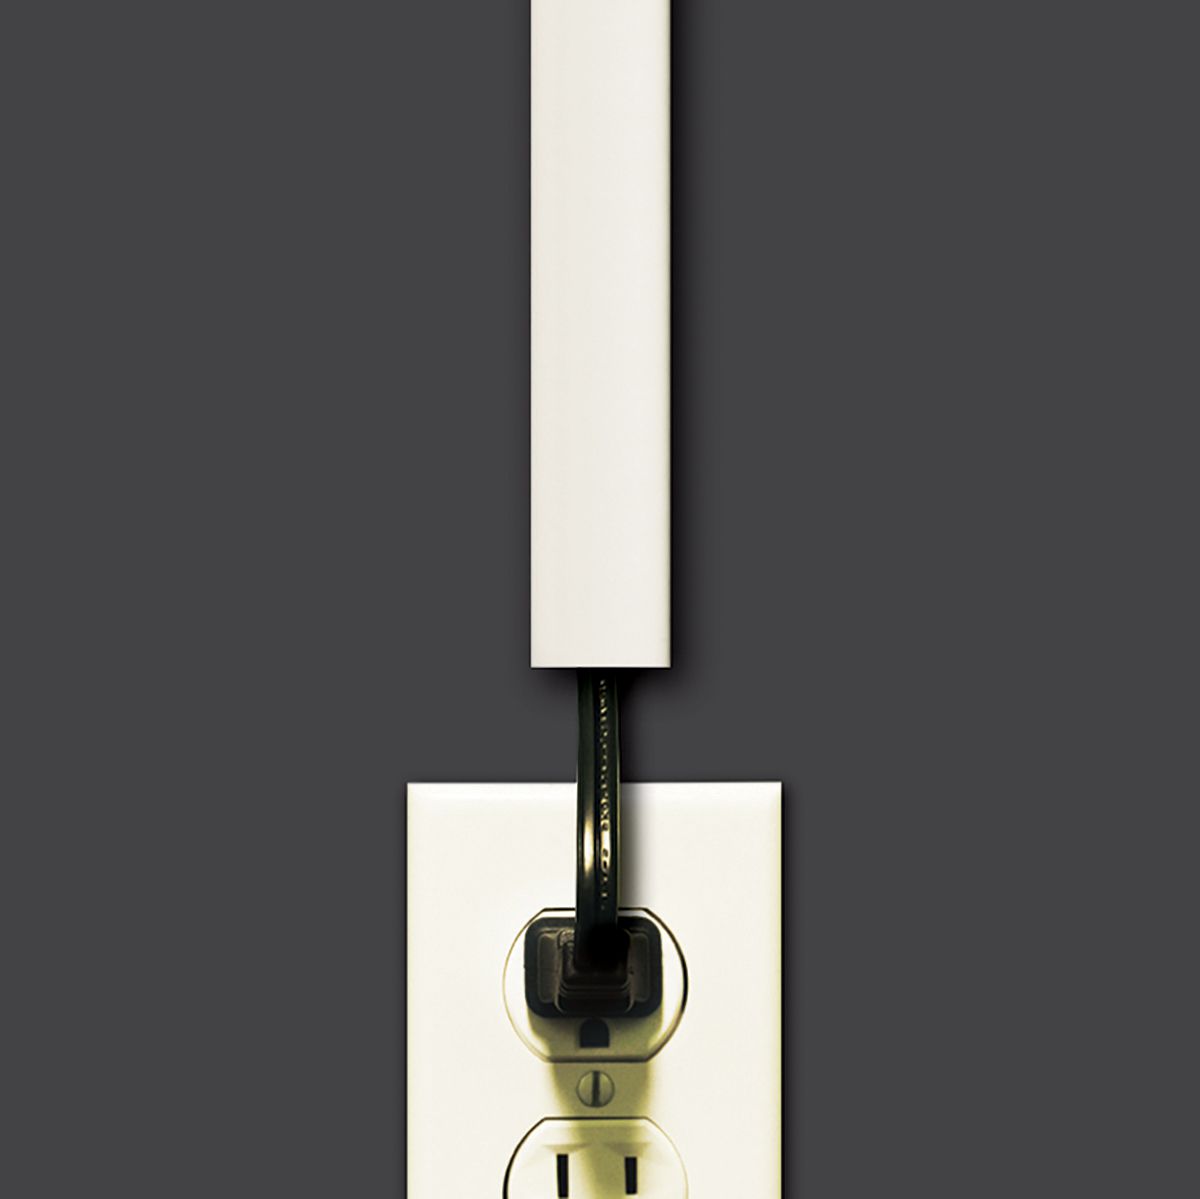
When it comes to hiding electrical cords on the wall, one of the most popular and effective methods is using a cord concealer. This is a specially designed channel that can be easily attached to the wall, providing a discrete pathway for the cords to run through. With a wide variety of cord concealers available on the market, you can choose the one that best matches your wall color or blends seamlessly with your existing décor.
Before you begin hiding your electrical cords, be sure to gather all the necessary tools and materials. This will help you complete the task smoothly and efficiently. The tools you may need include a measuring tape, a level, a pencil, a utility knife, a screwdriver, a paintbrush, sandpaper, and a putty knife. Additionally, you will need a cord concealer, which can be purchased at your local hardware store or online.
Now that you have a clear understanding of what’s involved in hiding electrical cords on the wall, let’s dive into the step-by-step process. With a little bit of patience and some basic DIY skills, you’ll have those unsightly cords concealed in no time. Follow along as we walk you through each stage of the process, from measuring and preparing the wall surface to securely installing the cord concealer and adding the finishing touches.
Key Takeaways:
- Concealing electrical cords on the wall is made easy with cord concealers, proper preparation, and secure installation. Choose the right concealer, gather tools, measure, prepare, install, secure, and cover for a seamless, clutter-free space.
- Maintain safety and organization by periodically checking the condition of the cord concealer and cords. Consider additional tips such as labeling cords, using cord management solutions, and seeking professional assistance if needed.
Read more: How To Hide Electric Recliner Cords
Choosing the Right Cord Concealer
When it comes to selecting the right cord concealer, there are a few factors to consider. The type of cord concealer you choose will depend on the size and number of cords you need to hide, as well as the aesthetic preferences of your space. Here are some things to keep in mind when making your decision:
1. Size and Capacity: Cord concealers come in different sizes and capacities. Consider the number of cords you need to conceal and their thickness to determine the appropriate size of the cord concealer. Some cord concealers can accommodate multiple cords, while others are designed for single cords.
2. Material: Cord concealers are typically made of plastic, rubber, or PVC. Plastic cord concealers are lightweight and easy to install, while rubber or PVC concealers are more durable and provide better protection for the cords. Choose a material that suits your needs and budget.
3. Style and Color: Cord concealers are available in various styles, such as flat adhesive strips or pre-formed channels. Consider the aesthetic of your space and choose a cord concealer that matches or blends in with your wall color and décor.
4. Accessibility: If you anticipate the need to add or remove cords frequently, consider a cord concealer with a hinged or snap-on design. This will make it easier to access the cords without having to remove the entire concealer.
5. Installation Method: Some cord concealers come with adhesive backing for easy installation, while others require screws or nails to secure them to the wall. Consider the installation method that best suits your needs and the surface of your wall.
6. Safety Features: Look for cord concealers that have built-in safety features, such as rounded edges or fire-resistant materials. These features can help prevent accidents and ensure the safety of your electrical cords.
By considering these factors and selecting the cord concealer that best meets your needs, you can ensure a successful and visually pleasing solution for hiding your electrical cords on the wall. Now that you have chosen the right cord concealer, let’s move on to the next step: gathering the necessary tools and materials.
Tools and Materials Needed
Before you begin concealing your electrical cords on the wall, it’s important to gather all the necessary tools and materials. Having everything on hand will make the process smoother and more efficient. Here’s a list of what you’ll need:
1. Measuring tape: Essential for accurately measuring the length of the cord and determining the placement of the cord concealer.
2. Level: Helps ensure that the cord concealer is installed straight and level on the wall.
3. Pencil: Used for marking the measurements and placement of the cord concealer on the wall.
4. Utility knife: Used to cut the cord concealer to the desired length and make any necessary adjustments.
5. Screwdriver: Needed if your chosen cord concealer requires screws for installation.
6. Paintbrush: If you plan on painting or wallpapering over the cord concealer, a paintbrush will come in handy.
7. Sandpaper: Used to smooth out any rough edges or imperfections on the wall surface before installation.
8. Putty knife: Can be used to apply putty or spackle to fill in any gaps or holes on the wall surface.
9. Cord concealer: The main component of this project, the cord concealer provides a discreet pathway for the cords to run through.
When selecting a cord concealer, make sure you choose one that is compatible with the size and number of cords you need to hide. You can find cord concealers in a variety of sizes and colors to match your preferences and existing decor.
Once you have gathered all the necessary tools and materials, you’re ready to move on to the next step: measuring the length of the cord.
Step 1: Measure the Length of the Cord
Before you install the cord concealer, it’s important to measure the length of the cord that needs to be hidden. This will ensure that you have the correct size of cord concealer and will help you determine the placement on the wall. Here’s how to measure the length of the cord:
- Start by unplugging the cord and detaching it from any devices or power sources.
- With a measuring tape, carefully measure the entire length of the cord from one end to the other.
- Take note of the measurement and add a few extra inches to provide some leeway when installing the cord concealer.
- If you have multiple cords that need to be concealed, measure each cord separately and add up the total length.
It’s essential to have an accurate measurement of the cord length to ensure that you purchase the correct size of cord concealer. Remember, it’s better to have a slightly longer cord concealer than a shorter one, as you can always trim it down if needed.
Once you have measured the length of the cord, it’s time to move on to the next step: preparing the wall surface for installation.
Step 2: Prepare the Wall Surface
Before installing the cord concealer, it’s essential to prepare the wall surface to ensure a smooth and secure installation. Follow these steps to properly prepare the wall for concealing your electrical cords:
- Ensure that the area where you plan to install the cord concealer is clean and free from dust or dirt. Use a damp cloth or sponge to wipe down the surface and remove any debris.
- If there are any existing nails, screws, or other hardware on the wall, remove them using a screwdriver or pliers. Fill in any holes or gaps left behind with a wall putty or spackle, using a putty knife to smooth out the surface. Allow it to dry according to the manufacturer’s instructions, and then sand down any rough areas until the wall surface is smooth.
- If your wall has a textured finish, you may need to sand down the texture in the area where you plan to install the cord concealer. This will ensure a flush fit and a more seamless appearance.
- To ensure that the cord concealer adheres properly to the wall surface, you can use sandpaper to lightly roughen up the area. This will create a better surface for the adhesive to bond with.
- Now, use a pencil and a level to mark the desired placement of the cord concealer on the wall. Take into consideration any obstacles or corners that may affect the position of the concealer. Double-check the levelness of your markings to ensure a straight installation.
By properly preparing the wall surface, you are creating a clean and even foundation for the cord concealer installation. This will help ensure a secure attachment and a professional-looking finish.
With the wall surface prepared, you’re ready to move on to the next step: installing the cord concealer.
Read more: How To Hide Electrical Box On Wall
Step 3: Install the Cord Concealer
With the wall surface prepared, it’s time to install the cord concealer. Follow these steps to securely attach the cord concealer to the wall:
- Start by taking the cord concealer and ensure that it is the correct size and length for your cords. If needed, use a utility knife to trim the concealer to the desired length.
- If your cord concealer comes with adhesive backing, carefully peel off the protective strip to reveal the adhesive side.
- Align the cord concealer with the marked placement on the wall, making sure it is level and straight. Gently press it against the wall, starting from one end and moving towards the other end.
- If your cord concealer requires screws for installation, use a screwdriver to attach the concealer to the wall. Refer to the manufacturer’s instructions for the specific screw placement and installation process.
- Ensure that the cord concealer is firmly attached to the wall, checking for any loose or wobbly sections. Make any necessary adjustments before moving on to the next step.
It’s important to properly install the cord concealer to ensure that it securely holds and hides your electrical cords. Take your time during this step to guarantee a clean and stable installation.
Once the cord concealer is securely in place, you’re ready to move on to the next step: securing the cords inside the concealer.
Use cord covers or raceways to conceal electrical cords on the wall. These can be painted to match the wall for a seamless look. Be sure to follow safety guidelines and avoid overloading the covers.
Step 4: Secure the Cord Inside the Concealer
After installing the cord concealer on the wall, it’s time to secure the electrical cords inside. This will not only provide a neat and organized appearance but also help prevent the cords from slipping out or becoming tangled. Follow these steps to secure the cords inside the cord concealer:
- Start by gathering all the cords that need to be concealed.
- Carefully insert the cords into the open channel of the cord concealer. You may need to gently push or guide the cords to ensure they are fully inside the concealer.
- If necessary, use cable ties or cord clips to keep the cords organized and prevent them from shifting or tangling inside the concealer. These can be attached at regular intervals along the length of the cord, ensuring a secure and tidy setup.
- Ensure that the cords are positioned flat and flush inside the concealer, allowing the cover of the concealer to fit snugly without any bulges or obstructions. This will create a seamless and clean appearance.
- Once the cords are securely positioned inside the cord concealer, close the cover or snap the concealer shut, depending on its design. Double-check that the cover is completely closed and secure.
By properly securing the cords inside the cord concealer, you are reducing the risk of accidents and creating a more visually appealing space. This step ensures that your cords are neatly organized and out of sight.
With the cords securely positioned inside the concealer, you’re ready to move on to the final step: painting or wallpapering over the concealer to further blend it into the wall.
Step 5: Paint or Wallpaper Over the Concealer
After securing the cords inside the cord concealer, the next step is to further blend the concealer into the wall by painting or wallpapering over it. This will help create a seamless and cohesive look with your existing wall decor. Here’s how to paint or wallpaper over the cord concealer:
- If you plan to paint over the cord concealer, start by gathering the necessary painting supplies such as paint, paintbrush, painter’s tape, and a drop cloth to protect the surrounding area.
- Using painter’s tape, carefully mask off the areas around the cord concealer to avoid getting paint on unintended areas.
- Use a paintbrush to apply the paint evenly to the cord concealer. It’s recommended to use the same color as the surrounding wall for a seamless blend. Apply multiple coats if necessary, allowing each coat to dry before applying the next.
- If you prefer to wallpaper over the cord concealer, measure and cut a piece of wallpaper to fit the length and width of the cord concealer. Make sure to leave a small overlap on both ends to ensure complete coverage.
- Apply wallpaper adhesive to the back of the wallpaper piece and carefully position it over the cord concealer, smoothing out any wrinkles or bubbles with a wallpaper smoother or a clean, dry cloth.
- Allow the paint or wallpaper adhesive to dry fully according to the manufacturer’s instructions.
- Once dry, carefully remove the painter’s tape and clean up any paint or wallpaper residue using a damp cloth.
By painting or wallpapering over the cord concealer, you’re effectively camouflaging it into the wall, making it virtually invisible and seamlessly integrated into your decor.
With the cord concealer painted or wallpapered over, you’re ready to move on to the final step: testing and finalizing the installation.
Step 6: Test and Finalize the Installation
After completing the previous steps of measuring, preparing, installing, securing, and covering the cord concealer, it’s important to test and finalize the installation to ensure that your electrical cords are hidden and the overall appearance is seamless. Follow these final steps for a thorough assessment:
- Start by reconnecting the electrical cords to their respective devices or power sources.
- Gently tug on the cords to ensure that they remain securely held within the cord concealer. Check for any signs of the cords slipping out or becoming exposed.
- Observe the overall appearance of the cord concealer installation. Step back and assess how well it blends in with the surrounding wall and existing decor. Look for any areas that require touch-ups or further adjustments.
- Pay attention to any potential safety hazards. Ensure that the cord concealer is properly installed and does not pose a tripping or fire hazard.
- If you notice any issues or areas that need improvement, take the necessary steps to address them. This may include repositioning cords, securing loose sections of the cord concealer, or making touch-ups to the paint or wallpaper.
- Once you are satisfied with the installation, take a moment to appreciate your efforts and enjoy the clutter-free and visually appealing space you have created.
By testing and finalizing the installation, you can have peace of mind knowing that your electrical cords are safely concealed and your wall maintains a clean and organized appearance.
Congratulations! You have successfully hidden your electrical cords on the wall using a cord concealer. With your cords out of sight, you can now enjoy a clutter-free and aesthetically pleasing space in your home or office.
Remember to periodically check the cord concealer and the cords themselves for any signs of wear or damage. This will help ensure that your cords remain safely hidden and functional for years to come.
Thank you for following this step-by-step guide, and we hope it has been helpful in achieving a neat and organized environment in your space.
Additional Tips and Safety Precautions
While you have successfully hidden your electrical cords on the wall using a cord concealer, here are some additional tips and safety precautions to consider:
- Before working with any electrical cords, always ensure that they are unplugged and disconnected from any power sources to prevent the risk of electric shock.
- Consider labeling your cords for easy identification when needed. This can be done using cord labels or colored tape, which will help you quickly identify the correct cord when making adjustments or reconnections.
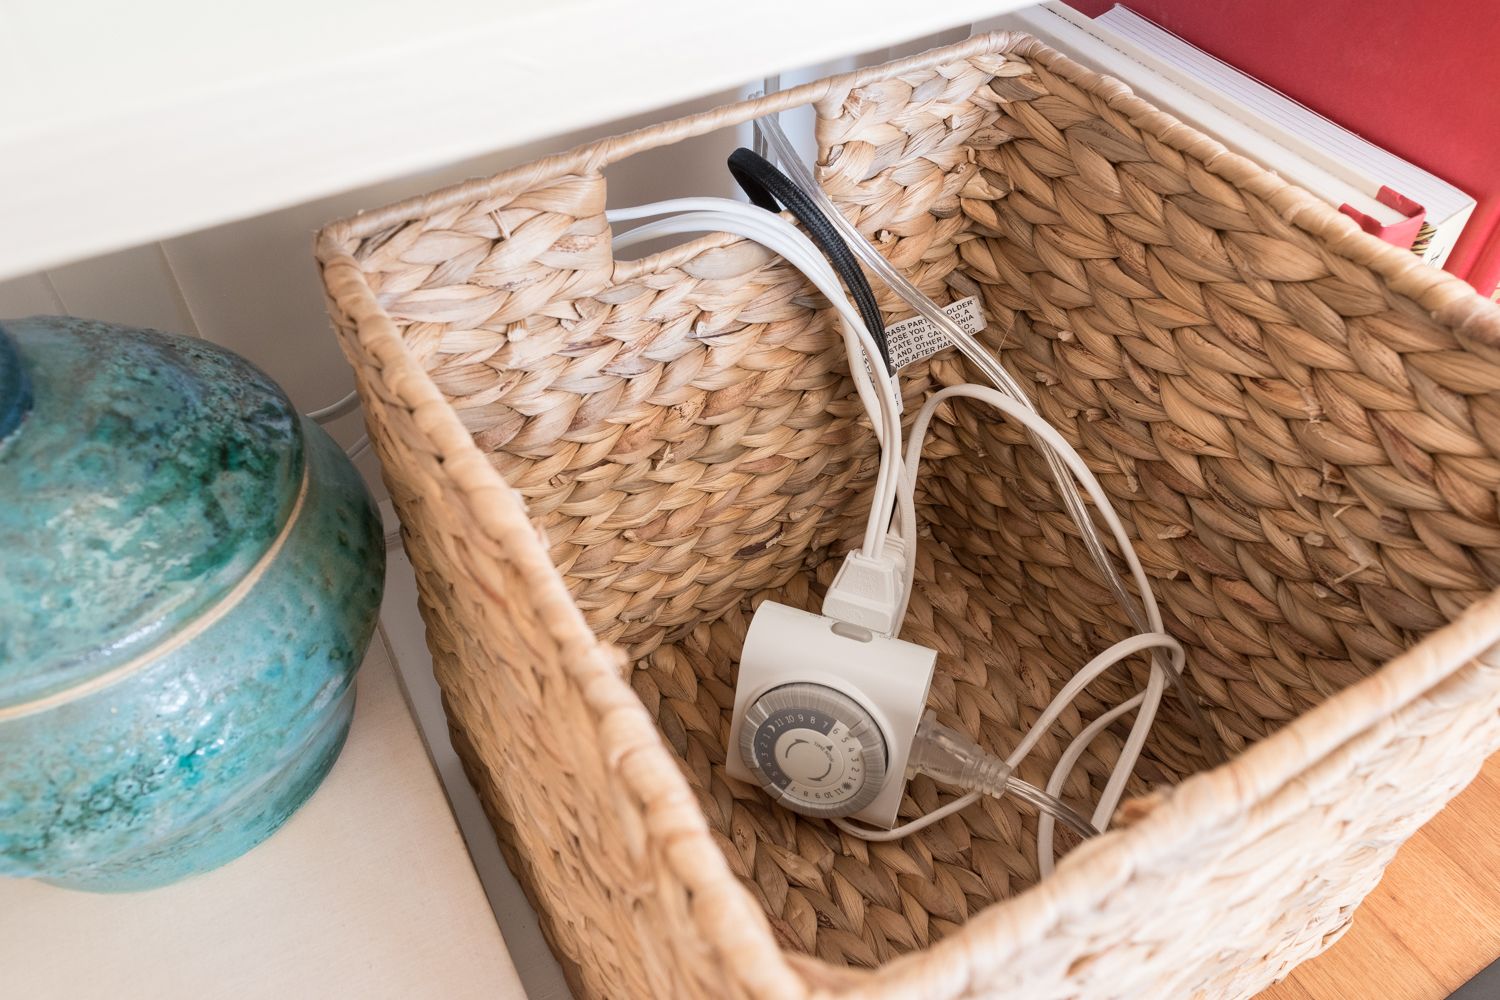
- If you have a large number of cords to conceal, consider using cord management solutions such as cord sleeves or cord organizers. These can help keep your cords organized and prevent them from tangling within the cord concealer.
- Regularly inspect the condition of the cord concealer, especially if it is located in a high-traffic area. Check for any signs of wear, damage, or loosening of the cords inside. Replace the cord concealer if necessary.
- When painting or wallpapering over the cord concealer, take care to ensure that the cover or opening of the concealer remains accessible. This will allow for easy access to the cords if any adjustments or maintenance is required in the future.
- If you have young children or pets, consider securing the cord concealer further by using corner guards or cable management clips to prevent them from tampering with or accidentally exposing the cords.
- Always follow the manufacturer’s instructions and guidelines when installing the cord concealer or using any related products. This will help ensure proper installation and maintain safety standards.
- If you encounter any difficulties during the installation process or have specific concerns, do not hesitate to seek assistance from a professional electrician or handyman.
By keeping these additional tips and safety precautions in mind, you can maintain a safe and well-organized space while effectively concealing your electrical cords on the wall.
Remember, safety should always be a top priority when working with electrical components. If you are unsure or uncomfortable with any aspect of the installation process, it is recommended to seek professional help.
Thank you for following this comprehensive guide, and we hope it has provided you with the necessary knowledge to successfully hide electrical cords on your wall.
Happy organizing!
Conclusion
Congratulations! You have reached the end of this comprehensive guide on how to hide electrical cords on the wall. By following the step-by-step process and implementing the tips and precautions provided, you have successfully concealed your cords, creating a clean and organized living or workspace.
By choosing the right cord concealer, preparing the wall surface, installing the concealer securely, and finalizing the installation with paint or wallpaper, you have achieved a seamless integration of your electrical cords into your wall. Not only does this improve the aesthetics of your space, but it also reduces the risk of accidents and tripping hazards.
Remember to periodically check the condition of the cord concealer and the cords themselves to ensure they are in good working order. If any wear or damage is detected, take prompt action to address the issue and maintain safety standards.
Now, you can enjoy the benefits of a clutter-free environment, with your electrical cords hidden from view. Your space will appear more organized, visually appealing, and conducive to productivity and relaxation.
We hope this guide has been helpful in guiding you through the process of hiding electrical cords on the wall. By utilizing the right tools, materials, and techniques, you have successfully tackled this task with ease.
If you have any further questions or concerns, do not hesitate to seek assistance from a professional electrician or handyman. They can provide expert advice and ensure the safe concealment of your cords.
Thank you for taking the time to follow this guide, and we wish you the best of luck in creating a neat and organized living or work environment!
Frequently Asked Questions about How To Hide Electrical Cord On Wall
Was this page helpful?
At Storables.com, we guarantee accurate and reliable information. Our content, validated by Expert Board Contributors, is crafted following stringent Editorial Policies. We're committed to providing you with well-researched, expert-backed insights for all your informational needs.


0 thoughts on “How To Hide Electrical Cord On Wall”