Articles
How To Hide Outside Electrical Box
Modified: October 20, 2024
Learn how to hide your outside electrical box with our informative articles. Find expert tips and tricks for a seamless and aesthetic solution.
(Many of the links in this article redirect to a specific reviewed product. Your purchase of these products through affiliate links helps to generate commission for Storables.com, at no extra cost. Learn more)
Introduction
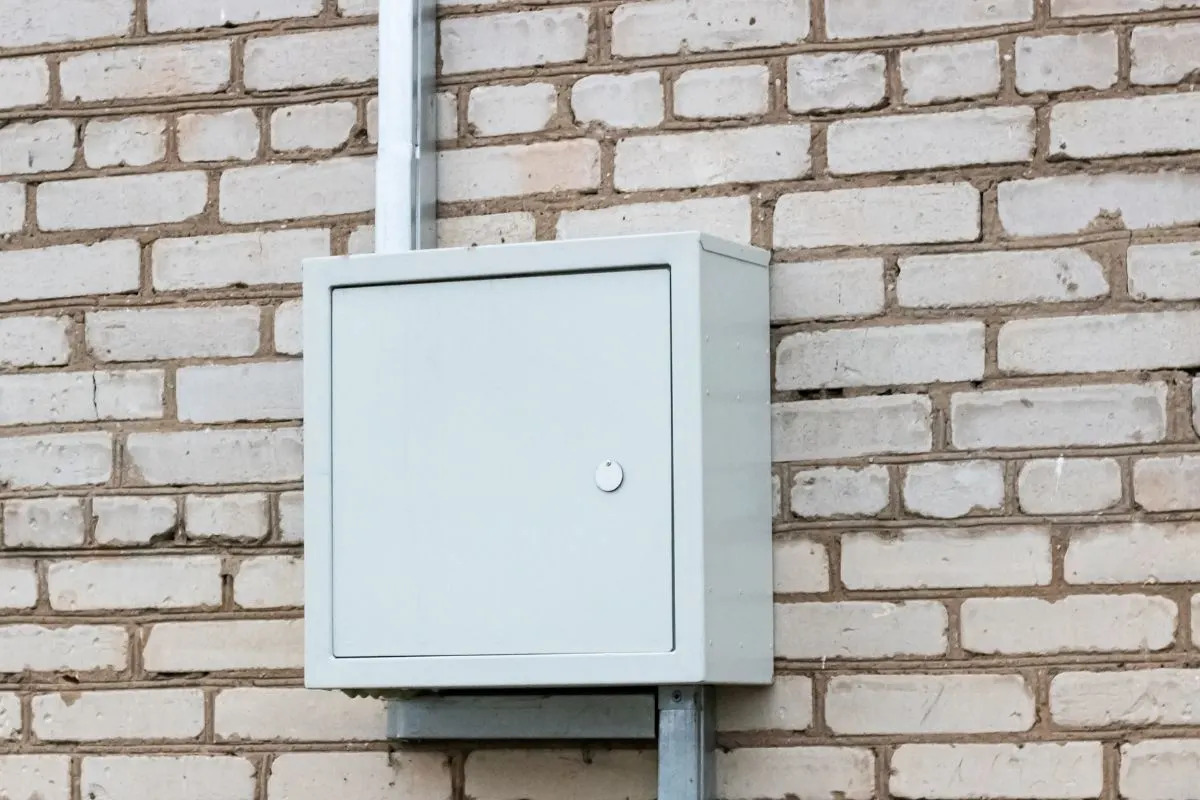
Electrical boxes are an essential part of any outdoor electrical system. They provide a safe and secure housing for electrical connections and wiring. However, the appearance of these boxes may not always blend seamlessly with the surrounding environment, potentially detracting from the overall aesthetics of your outdoor space. Thankfully, there are several methods available to hide these outdoor electrical boxes and maintain the visual appeal of your outdoor area.
In this article, we will guide you through the process of hiding an outside electrical box, step by step. Whether you have an unsightly utility box, circuit breaker panel, or any other type of electrical box, we will show you how to effectively conceal it while ensuring easy access and functionality.
We will cover the materials needed, the tools required, and the methods to disguise or cover the electrical box. By following these steps, you will be able to discreetly hide your outdoor electrical box, creating a more visually pleasing and cohesive outdoor space.
Before we proceed, it’s important to note that while concealing an outdoor electrical box can enhance aesthetics, safety should always be the top priority. Make sure that any disguise or cover you choose does not compromise the functionality of the electrical box or impede access for maintenance or emergency purposes.
Now, let’s dive into the step-by-step process of hiding an outside electrical box, which will surely elevate the appearance of your outdoor space.
Key Takeaways:
- Concealing an outdoor electrical box involves assessing the location, choosing a method, gathering tools, preparing the area, installing a cover, testing functionality, and maintaining the disguise to seamlessly blend with the surroundings while ensuring safety and accessibility.
- Prioritizing safety and functionality, concealing an outdoor electrical box involves careful planning, creative methods, and regular maintenance to seamlessly integrate the box into the outdoor space while maintaining easy access for maintenance or emergency purposes.
Read more: How To Hide Electrical Box On Wall
Step 1: Assess the location and type of electrical box
The first step in hiding an outside electrical box is to assess its location and the type of box you need to conceal. This will help you determine the most appropriate method and materials to use for the task.
Start by examining the surroundings of the electrical box. Take note of any existing landscaping, structures, or fixtures that may provide natural cover. Consider the overall aesthetic of your outdoor space and how you want the electrical box to blend in.
Next, identify the type of electrical box you have. Common types include utility boxes, junction boxes, and circuit breaker panels. Each type may require a different approach to concealment, so understanding the specific box you’re dealing with is crucial.
Once you have assessed the location and type of electrical box, you can begin planning the most effective hiding method. Some common methods include camouflage, disguises, or using decorative covers. Additionally, you may also consider integrating the box into existing structures, such as fences or outdoor cabinets, to create a seamless appearance.
Remember, it’s important to ensure that whatever method you choose does not impede the functionality or accessibility of the electrical box. The box should still be easily accessible for maintenance or in case of emergencies.
By assessing the location and type of electrical box, you will have a better idea of how to proceed with the hiding process. This initial step sets the foundation for successful concealment while maintaining the functionality and safety of the electrical box.
Step 2: Choose the appropriate method to conceal the electrical box
Once you have assessed the location and type of your outdoor electrical box, the next step is to choose the most suitable method to conceal it. There are several methods available, each with its own advantages and considerations.
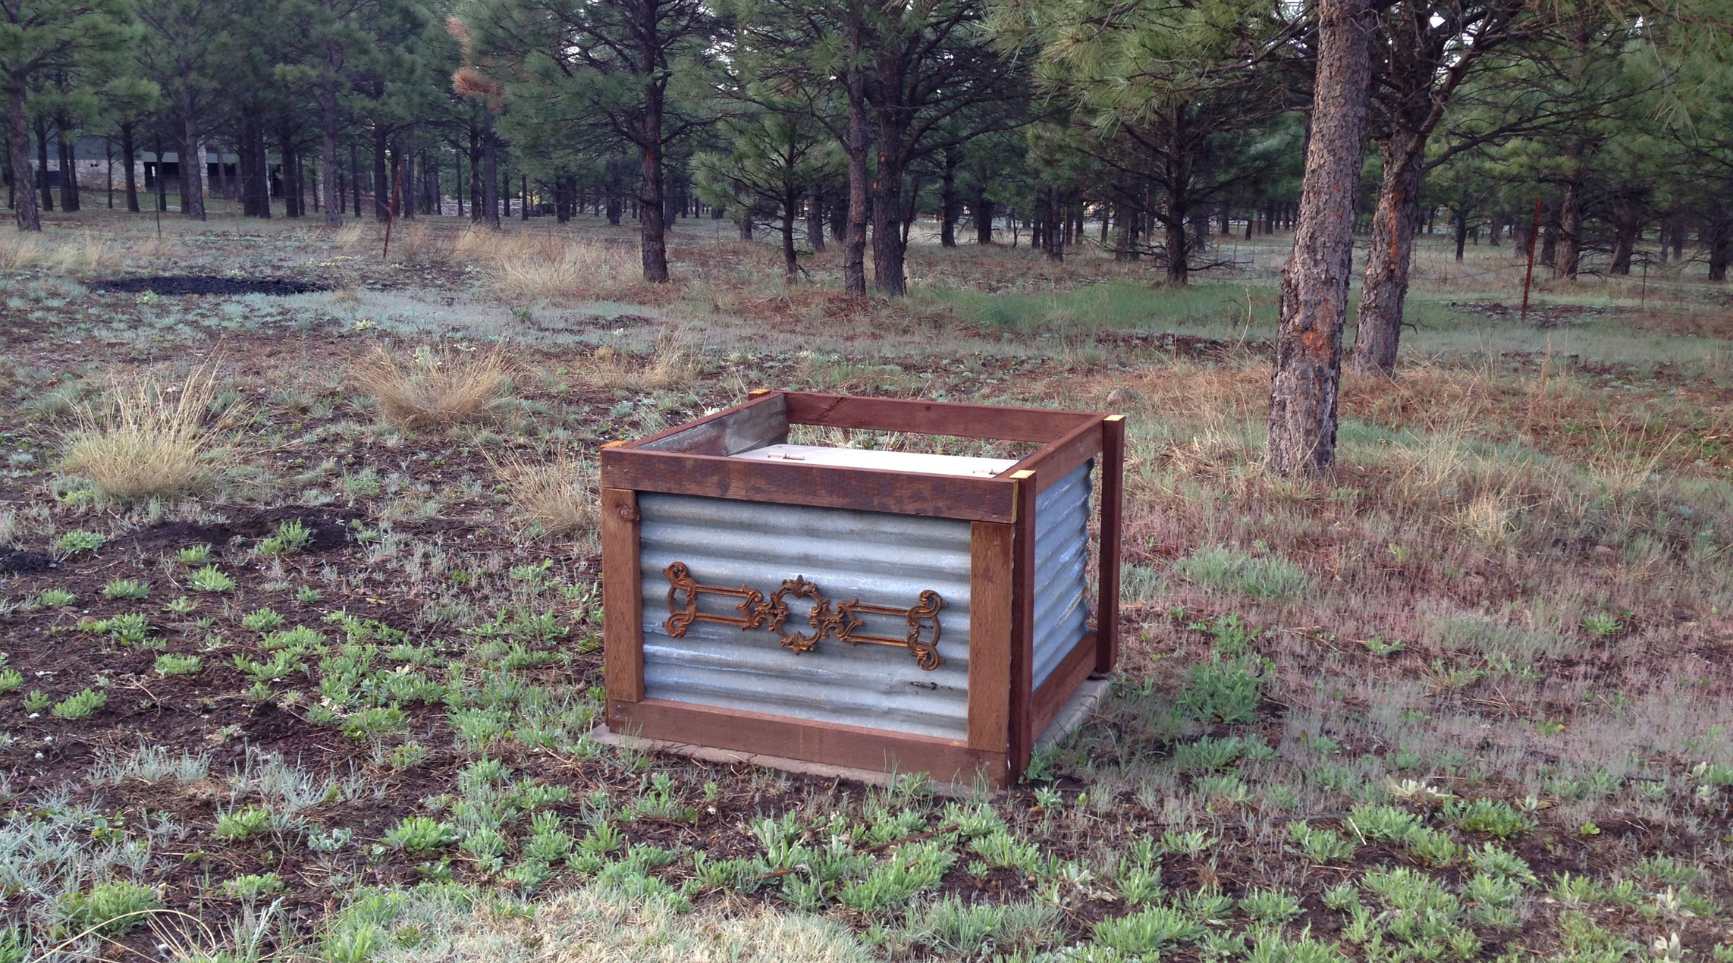
One common method is camouflage. This involves blending the electrical box with its surroundings by using materials and colors that match or complement the surrounding environment. For example, if the electrical box is located near trees or shrubs, you can use paint or adhesive coverings in earthy tones to mimic the natural colors of the foliage.
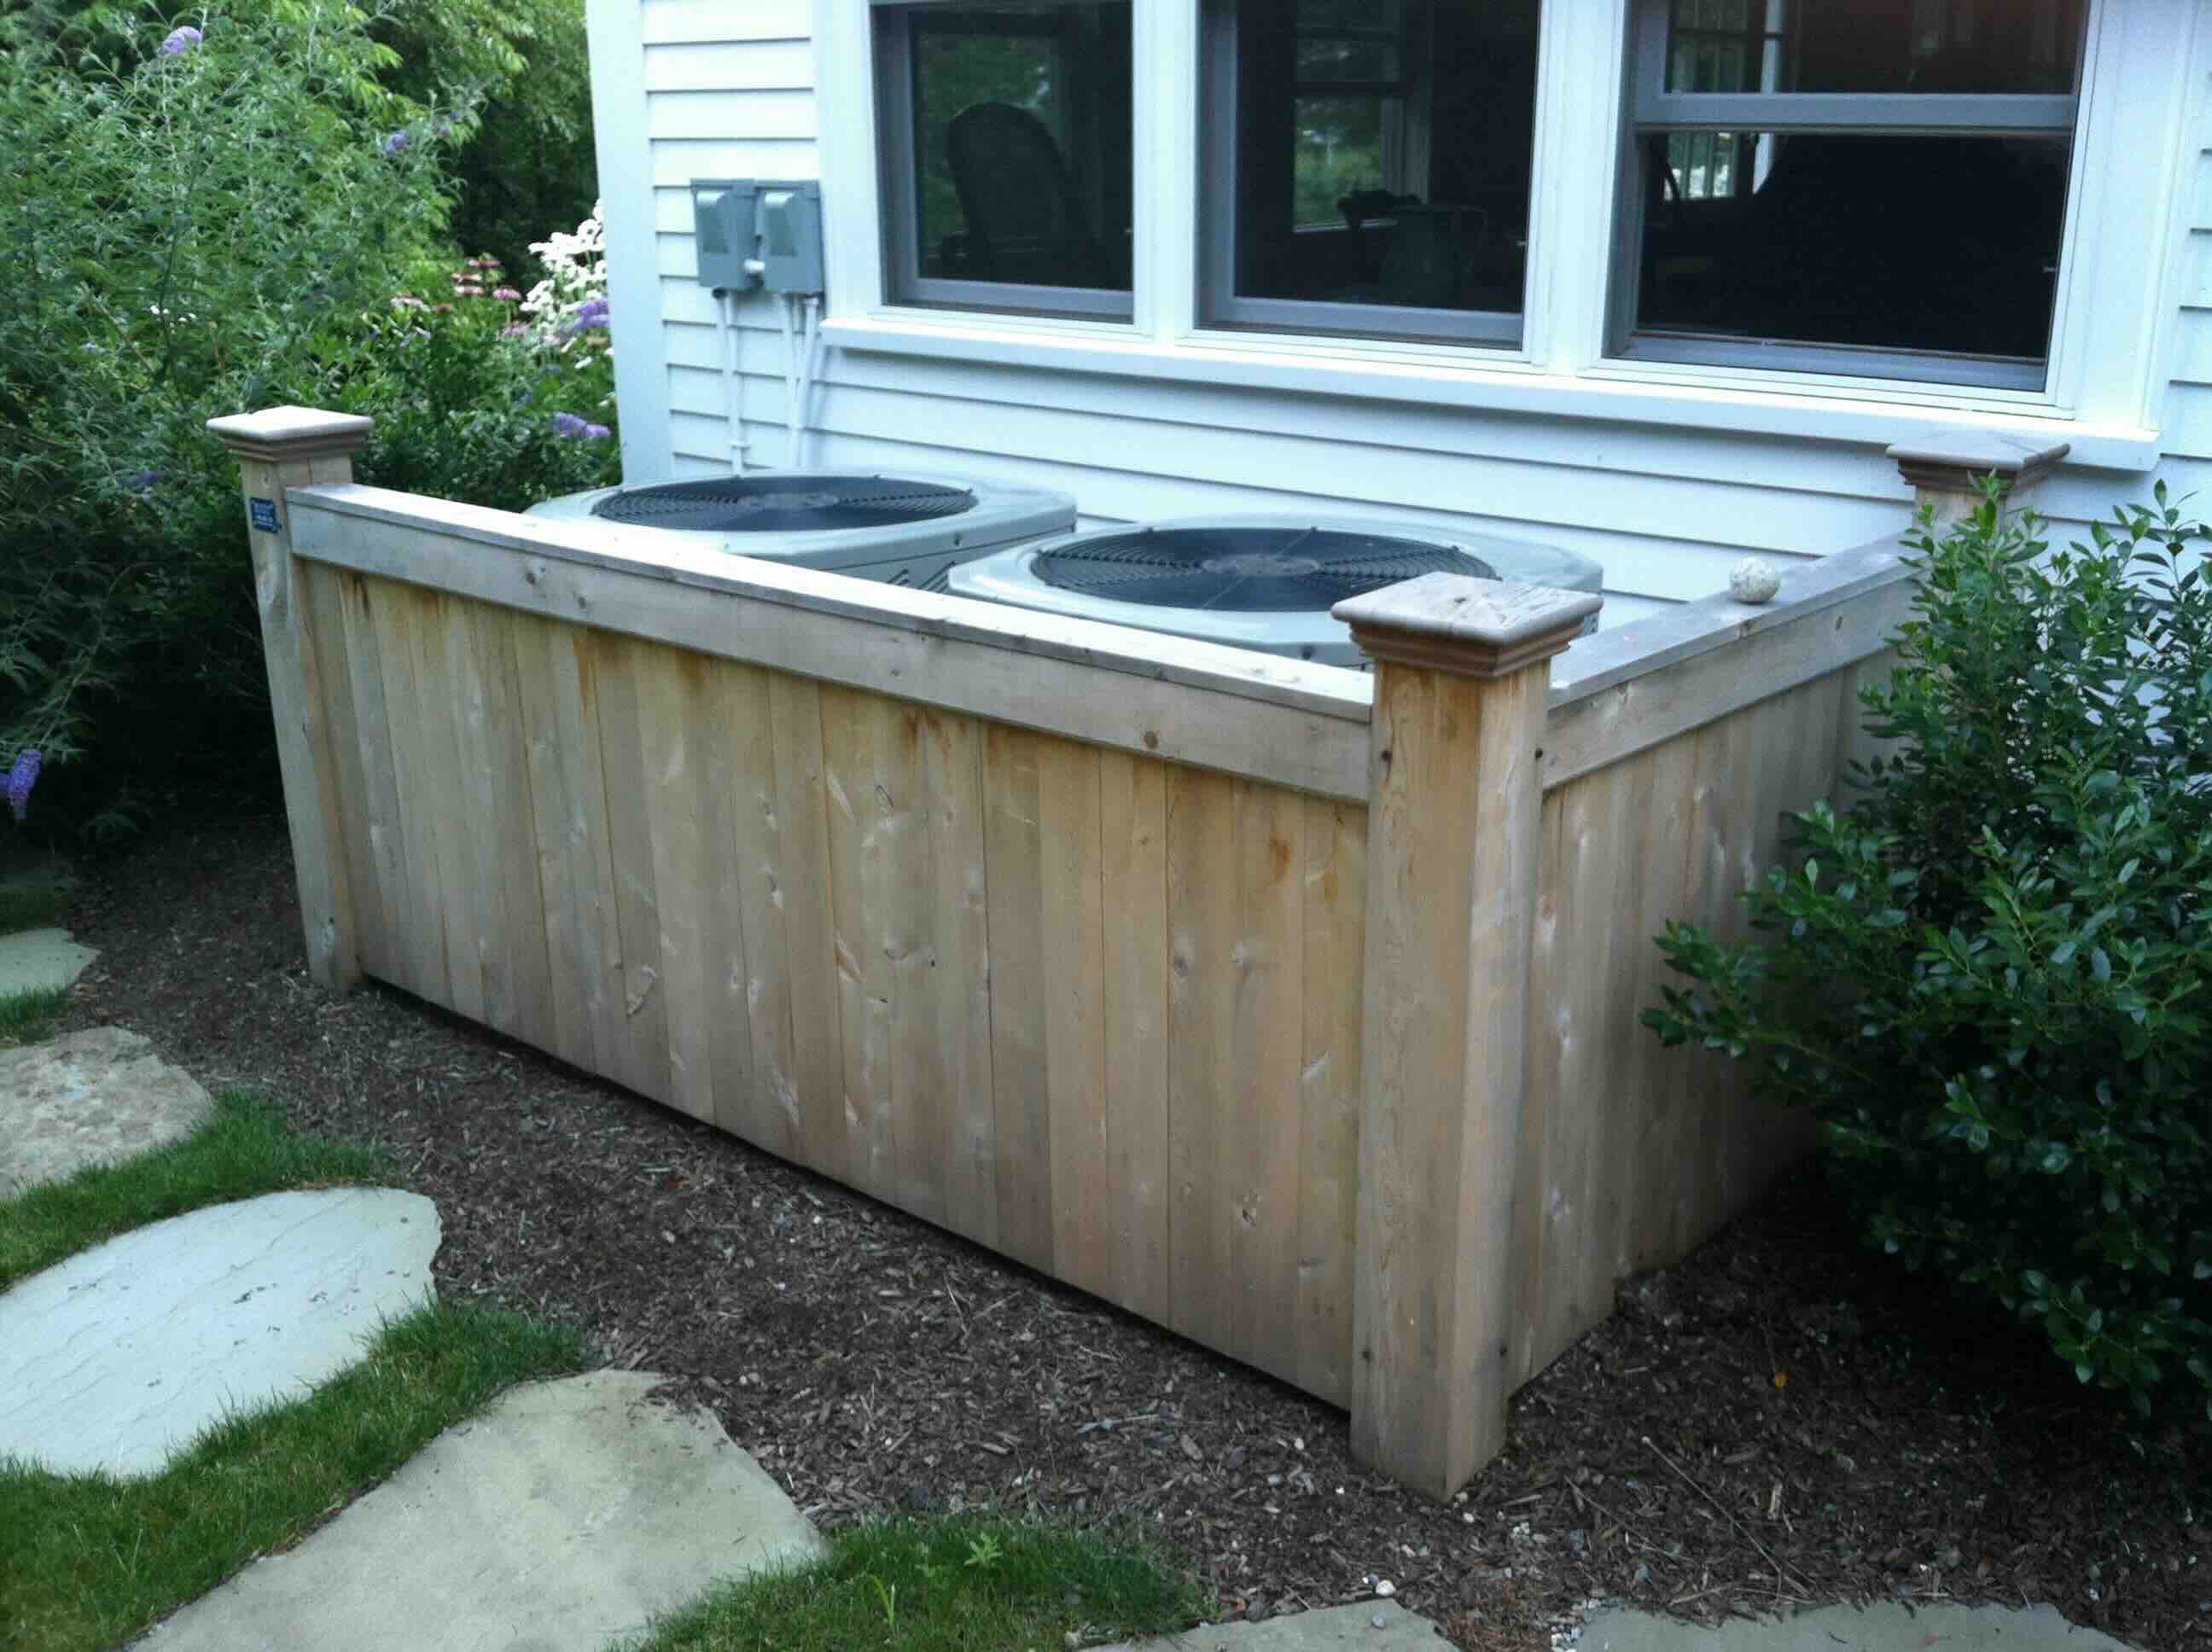
Another popular option is to use a disguise. This method involves creating a cover or enclosure that completely hides the electrical box, making it look like something else. For instance, you can create a wooden cabinet with a hinged door that opens to provide access to the electrical box. This not only conceals the box but also adds a decorative element to your outdoor space.
Decorative covers are also available as ready-made options to hide outdoor electrical boxes. These covers are designed to mimic various outdoor elements such as rocks, planters, or statues, making them blend seamlessly into your landscape. They are typically made of durable materials, such as polyresin, that can withstand outdoor conditions.
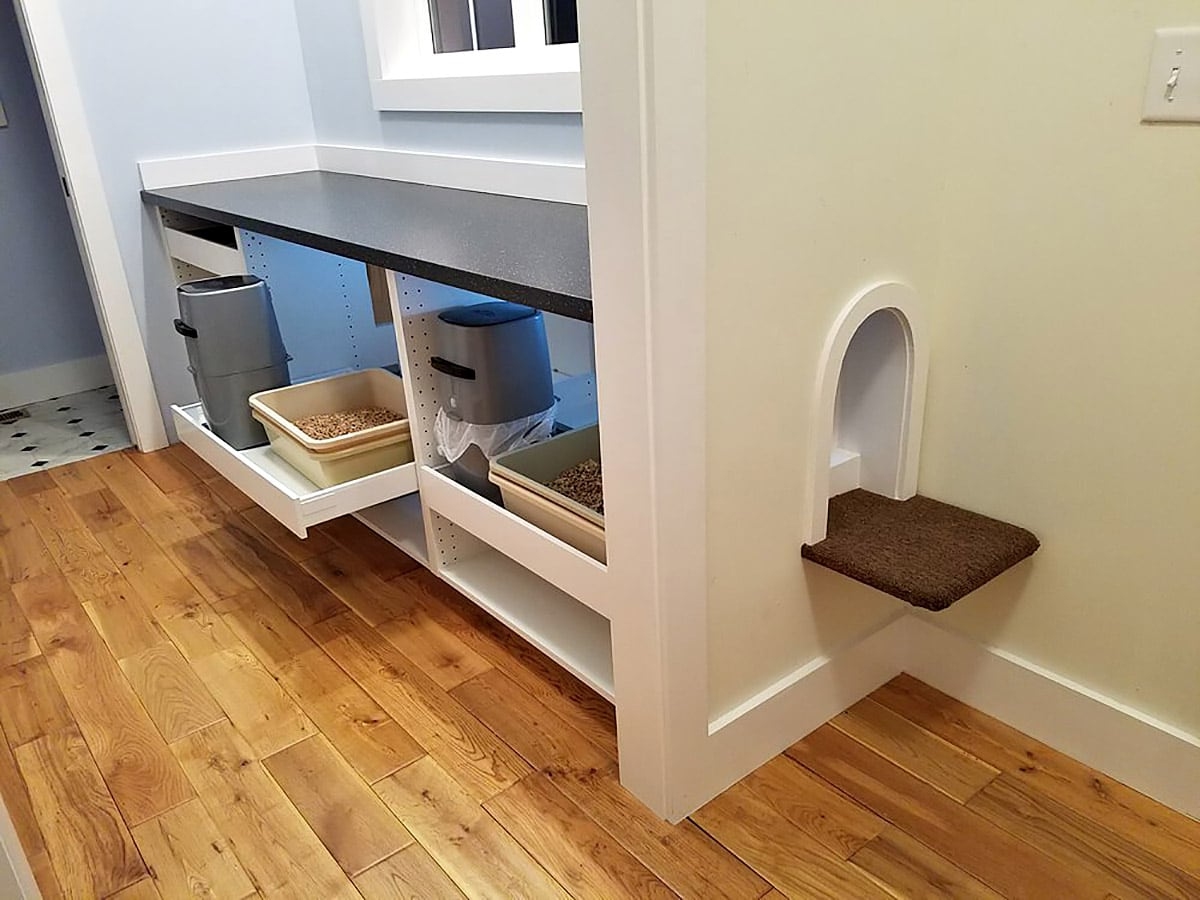
If you prefer a more discreet approach, integrating the electrical box into existing structures can be a great option. For example, you can hide the box behind a decorative screen or incorporate it into a wooden fence or trellis. This method allows the electrical box to become a functional part of your outdoor features while maintaining its accessibility.
When choosing the method to conceal your electrical box, consider factors such as the aesthetics of your outdoor space, the level of concealment desired, and the ease of access for maintenance purposes. Select a method that not only hides the box effectively but also enhances the overall visual appeal of your outdoor area.
By carefully considering the options and choosing the appropriate method, you can successfully conceal your outdoor electrical box, ensuring it seamlessly blends with its surroundings while remaining easily accessible when needed.
Step 3: Gather the necessary tools and materials
Before you begin concealing your outdoor electrical box, it’s essential to gather the necessary tools and materials. Having everything prepared beforehand will make the process smoother and more efficient.
The specific tools and materials you’ll need may vary depending on the chosen method of concealment and the type of electrical box you’re working with. However, here are some general items that you might find useful for this step:
- Screwdriver or power drill: These tools are necessary for removing any existing covers or enclosures on the electrical box.
- Measuring tape: You’ll need this to determine the dimensions of the box and plan your concealment method accordingly.
- Paint or adhesive coverings: If you’re opting for camouflage, you may require paint or adhesive coverings in colors that match the surroundings.
- Wood or other materials: For disguises or integration into existing structures, you’ll need appropriate materials such as wood, PVC, or metal.
- Saw or cutting tools: These tools are necessary for cutting the materials to the required size and shape.
- Screws, nails, or adhesives: Depending on the method chosen, you may require screws, nails, or adhesives to secure the disguise or cover in place.
- Decorative elements: If you’re using a decorative cover, gather any additional elements such as rocks, plants, or statues that will enhance the disguise.
- Protective gear: Ensure you have gloves, safety glasses, and a mask if necessary, to protect yourself during the installation process.
It’s worth mentioning that the specific tools and materials needed may vary depending on your project’s unique requirements. For instance, if you’re integrating the electrical box into an existing structure, you may need additional tools such as a level and a post hole digger.
Take the time to evaluate your chosen method of concealment and make a comprehensive list of the tools and materials necessary. This way, you can ensure you have everything you need before starting the actual process of hiding the outside electrical box.
Step 4: Prepare the area around the electrical box
Before you begin concealing the outside electrical box, it’s important to prepare the area surrounding it. Proper preparation ensures a smooth installation process and enhances the overall appearance of the concealed box.
Start by clearing any debris or vegetation around the electrical box. Remove any leaves, twigs, or other materials that may obstruct the installation or pose a fire hazard. This will create a clean and safe working environment.
Next, consider the landscape and the overall design of your outdoor space. If necessary, trim any plants or shrubs that may impede the concealment process or obstruct the visibility of the disguised box. You want to ensure that the concealment method seamlessly blends with its surroundings.
Inspect the electrical box itself and ensure that it is in good working condition. If there are any loose wires or damaged components, it’s important to address them before proceeding with the concealment process. Safety should always be a top priority when working with electrical components.
If you’re planning to paint or apply adhesive coverings to camouflage the box, make sure the surface is clean and free from dust or dirt. Use a damp cloth to wipe down the exterior, ensuring a smooth and even application of paint or adhesive.
In some cases, it may be necessary to secure any loose parts or tighten screws on the electrical box itself. Check for any loose connections or signs of wear and tear, and address them before proceeding with the concealment.
By taking the time to prepare the area around the electrical box, you’ll create a clean and safe environment for the installation process. This will not only ensure a smooth installation but also contribute to the overall longevity and functionality of the concealed box.
Consider using a weatherproof electrical box cover to hide the outside electrical box. These covers are designed to protect the box from the elements and can be painted to blend in with the surrounding area.
Read more: How To Hide HVAC Unit Outside
Step 5: Install a disguise or cover for the electrical box
Now that you have assessed the location, chosen a method of concealment, gathered the necessary tools and materials, and prepared the area around the electrical box, it’s time to install a disguise or cover for the box.
Depending on the method chosen, the installation process may vary. Here are some general steps to follow:
- If you’re using a camouflage method, start by applying the selected paint or adhesive coverings to the exterior of the electrical box. Make sure to follow the instructions provided by the manufacturer for best results. Apply multiple coats if necessary, allowing proper drying time between each coat.
- If you’re installing a disguise or enclosure, position it over the electrical box in the desired location. Double-check the measurements and alignment to ensure a proper fit.
- Secure the disguise or cover in place using screws, nails, or adhesives. Follow the manufacturer’s instructions to ensure a secure and reliable attachment.
- If you’re integrating the electrical box into an existing structure, such as a fence or cabinet, use appropriate tools and techniques to ensure a seamless connection. Cut and shape the materials as necessary to accommodate the box and create a cohesive look.
- Once the disguise or cover is installed, step back and evaluate the overall appearance. Make any necessary adjustments to ensure that it blends with the surrounding environment and achieves the desired level of concealment.
Throughout the installation process, take care to not damage any electrical components or obstruct access to the box. Ensure that the disguise or cover does not interfere with the functionality of the electrical box or compromise its safety features.
If you’re unsure about any step of the installation process, consult a professional electrician who can provide guidance and ensure that the installation is done correctly and safely.
Remember, the goal is to create a concealed electrical box that seamlessly integrates into its surroundings while maintaining easy access for maintenance or emergency purposes.
By following these steps, you’ll successfully install a disguise or cover for the electrical box, transforming it into an inconspicuous element in your outdoor space.
Step 6: Secure the disguise or cover in place
Once you have installed the disguise or cover for the electrical box, it’s crucial to securely fasten it in place. This step ensures that the concealment remains stable and functional over time. Here are some guidelines to follow:
- If you’re using screws or nails to secure the disguise or cover, ensure that they are appropriate for outdoor use and capable of securely holding the materials together. Use a drill or screwdriver to drive the screws or nails into the designated areas, making sure they are tight and flush with the disguise or cover.
- If you’re using adhesives, select a high-quality adhesive that is suitable for the materials being used. Apply the adhesive according to the manufacturer’s instructions, ensuring proper coverage and contact between the surfaces. Use clamps or other stabilizing tools if necessary to hold the disguise or cover in place while the adhesive dries.
- For disguises or covers integrated into existing structures, such as fences or cabinets, ensure a secure attachment using appropriate hardware or fastening methods. Reinforce the connection points to prevent any movement or dislodgement of the disguise or cover.
- After securing the disguise or cover, check for any loose or unstable areas. Shake or gently apply pressure to ensure that the concealment remains firmly in place. Make any necessary adjustments or reinforcements as needed.
It’s important to note that while secure attachment is necessary, be mindful not to damage any electrical components or hinder access to the electrical box. Ensure that the installation does not compromise the safety or functionality of the electrical box.
Additionally, periodically check and inspect the disguise or cover for any signs of wear and tear or degradation. Maintenance may be required over time to ensure the continued effectiveness and stability of the concealment.
By following these steps to securely fasten the disguise or cover in place, you can ensure a long-lasting and reliable concealment of the electrical box, seamlessly integrating it into your outdoor space.
Step 7: Test the functionality of the electrical box
After successfully concealing the outside electrical box, it’s important to test its functionality to ensure that it remains fully operational. This step is crucial for the safety and proper functioning of your electrical system. Here’s what you need to do:
- Double-check that all connections and wires are properly secured and tightly fastened inside the electrical box. Ensure that there are no loose or exposed wires that could pose a safety hazard.
- Make sure that the cover or disguise does not obstruct access to any switches, outlets, or other components within the electrical box. Ensure that you can easily open or remove the disguise or cover if necessary.
- Verify that all circuits and switches connected to the electrical box are functioning correctly. Test each switch and outlet to ensure that power is flowing correctly and that there are no abnormalities.
- If you had to turn off the power during the concealment process, turn it back on and confirm that the electrical box is receiving power as it should. Check for any flickering lights, buzzing sounds, or other signs of electrical issues.
- If you notice any abnormalities or problems during the testing process, it’s crucial to address them immediately. Consult a licensed electrician to diagnose and resolve any electrical issues.
- Ensure that there is adequate ventilation and airflow around the disguised or covered electrical box. Overheating can cause damage to electrical components and potentially create a fire hazard.
- Periodically check the functionality of the electrical box and the stability of the concealment. Perform routine maintenance to ensure that the box remains in optimal condition and continue to monitor for any signs of wear or damage.
Testing the functionality of the electrical box ensures that it operates safely and effectively even after being concealed. This step provides peace of mind and reassurance that your electrical system is functioning properly.
Remember, if you encounter any electrical issues or problems during the testing process, it’s important to consult a professional electrician for assistance. Safety should always be the top priority when working with electrical systems.
By diligently testing the functionality of the electrical box, you can ensure the ongoing reliability and safety of your concealed outdoor electrical system.
Step 8: Maintain and periodically check the disguise or cover
Once you have successfully concealed the outside electrical box, it’s important to establish a routine for maintenance and periodic checks. This step ensures that the disguise or cover remains in optimal condition and continues to effectively hide the electrical box. Here’s how to maintain and assess the concealment:
- Regularly inspect the disguise or cover for any signs of wear, damage, or deterioration. Look for cracks, fading, or loosening of any attachments.
- Periodically clean the disguise or cover to remove dirt, dust, or debris that may accumulate over time. Use a gentle cleanser and a soft cloth to avoid damaging the materials.
- Check for any loose screws, nails, or adhesives that may need tightening or replacing. Ensure that the disguise or cover remains securely fastened in place.
- Inspect the surrounding area for any changes in foliage, landscaping, or structures that may impact the camouflage or integration of the disguise. Make any necessary adjustments to maintain a seamless appearance.
- Ensure that the electrical box remains easily accessible for maintenance or emergency purposes. Verify that there are no obstructions or barriers that hinder the opening or removal of the disguise or cover.
- Consider weather conditions and their potential impact on the concealment. Extreme temperatures, high winds, or heavy rainfall may accelerate wear and tear or compromise the integrity of the disguise or cover. Take necessary precautions or make adjustments as needed.
- If the disguise or cover utilizes decorative elements, periodically assess their condition and replace or repair as necessary to maintain the desired visual effect.
- Regularly monitor the functionality of the electrical box itself. Test switches, outlets, and other components to ensure proper operation and address any electrical issues promptly.
By implementing a maintenance routine and periodically checking the disguise or cover, you can ensure that it continues to effectively hide the outside electrical box while maintaining its visual appeal. Regular assessments and upkeep will help to identify and address any potential problems before they worsen.
Remember, safety should always be a priority when maintaining and checking the concealment. Be cautious of any electrical components and consult a professional electrician if you are unsure or if any electrical issues arise.
With regular maintenance and periodic checks, you can prolong the lifespan and effectiveness of the disguise or cover, ensuring the long-term concealment and aesthetics of your outdoor electrical box.
Read more: How To Hide An Extension Cord Outside
Conclusion
Hiding an outside electrical box is a valuable step in enhancing the overall aesthetics and visual appeal of your outdoor space. With the right approach and careful consideration, you can seamlessly integrate the electrical box into its surroundings while maintaining easy access for maintenance or emergency purposes.
In this article, we have walked you through the step-by-step process of concealing an outside electrical box. Starting with assessing the location and type of box, we progressed to choosing an appropriate method of concealment, gathering the necessary tools and materials, preparing the area, installing a disguise or cover, securing it in place, testing the functionality of the electrical box, and finally, maintaining and periodically checking the disguise or cover.
Throughout the process, it is essential to prioritize safety and ensure that the electrical box remains easily accessible. Regular maintenance and periodic checks will help to identify and address any issues that may arise, ensuring the long-term effectiveness of the concealment.
Remember, when attempting to hide an outside electrical box, it’s important to consult a professional electrician if you are uncertain about any aspect of the process or encounter any electrical issues. They can provide expert guidance and ensure that the concealment is done safely and in compliance with regulations.
By following the steps outlined in this article, you can transform the appearance of your outdoor space while maintaining the functionality and safety of the electrical box. Enjoy your newly concealed outdoor electrical box and the improved aesthetics of your outdoor area.
Now that you've got some great ideas on hiding that unsightly outdoor electrical box, why not take your exterior design skills to the next level? Dive into our collection of DIY outdoor projects, where creativity meets practicality. Whether you're looking to enhance your home's curb appeal or just enjoy a fun weekend project, these DIY endeavors are sure to impress. From simple upgrades to more elaborate transformations, you'll find plenty of inspiration to make your outdoor space shine. Ready to roll up your sleeves and get started? Check out our guide and see what projects await!
Frequently Asked Questions about How To Hide Outside Electrical Box
Was this page helpful?
At Storables.com, we guarantee accurate and reliable information. Our content, validated by Expert Board Contributors, is crafted following stringent Editorial Policies. We're committed to providing you with well-researched, expert-backed insights for all your informational needs.


0 thoughts on “How To Hide Outside Electrical Box”