Home>Articles>17 DIY Outdoor Projects Guaranteed To Boost Curb Appeal
Articles
17 DIY Outdoor Projects Guaranteed To Boost Curb Appeal
Modified: October 27, 2024
Discover 17 captivating and easy-to-follow DIY articles on outdoor projects that will instantly enhance your home's curb appeal.
(Many of the links in this article redirect to a specific reviewed product. Your purchase of these products through affiliate links helps to generate commission for Storables.com, at no extra cost. Learn more)
Introduction
Welcome to our comprehensive guide on DIY outdoor projects that are guaranteed to boost your curb appeal. Whether you’re looking to spruce up your home for your own enjoyment or preparing to sell it, enhancing the exterior of your property can make a significant impact. The exterior of your home is the first thing visitors see, and it sets the tone for what awaits inside.
While professional landscaping and home improvement services can be costly, there are countless projects you can tackle on your own to transform your outdoor space. From small enhancements to larger renovations, these DIY projects will not only improve your home’s curb appeal but also provide a sense of accomplishment and pride as you make your mark on your property.
In this guide, we will highlight 17 DIY outdoor projects that can give your home’s exterior a fresh and inviting look. We’ll cover everything from simple updates like painting your front door to more involved projects like creating custom shutters or building a garden trellis. Let’s take a closer look at each of these projects and explore how they can elevate the curb appeal of your home.
Key Takeaways:
- Elevate your home’s exterior with DIY outdoor projects that reflect your personal style and creativity. From upgraded front doors to captivating garden sculptures, each project enhances curb appeal and creates a welcoming outdoor space.
- Infuse nature into your outdoor projects to create a harmonious connection with the environment. Consider integrating natural elements, such as plants, lighting, and landscaping, to further enhance the appeal of your DIY endeavors.
Upgraded Front Door
Your front door is the focal point of your home’s exterior, so why not make it stand out with an upgrade? The first step is to assess the current state of your front door. Is it worn, faded, or outdated? If so, it might be time for a refresh.
One of the easiest ways to upgrade your front door is by giving it a fresh coat of paint. Choose a color that complements your home’s exterior and adds a pop of personality. Consider using a bold hue like red, blue, or yellow to make a statement. Alternatively, a classic black or white can give your front door a timeless look.
If you want to take your front door upgrade to the next level, consider replacing the door hardware. Swap out the old doorknob and lockset with a modern or decorative option that adds a touch of style. You can also add a kickplate or a door knocker for added visual interest.
Another way to upgrade your front door is by adding decorative glass inserts. These inserts come in a variety of styles, from traditional to contemporary, and can instantly elevate the appearance of your entryway. Not only do they add visual appeal, but they also allow natural light to filter into your home’s interior.
When selecting an upgraded front door, consider options that offer energy efficiency and security features. Look for doors with insulated cores and weather stripping to maximize energy savings and keep your home comfortable year-round. Additionally, choose a door with a sturdy construction and a multipoint locking system for added security.
Remember, the front door is not just about aesthetics; it’s also about functionality. Make sure your upgraded front door is durable, weather-resistant, and easy to maintain. With a properly upgraded front door, you can create a welcoming and stylish entrance that sets the tone for your entire home.
Fresh Exterior Paint
If your home’s exterior is looking tired and in need of a facelift, one of the most impactful DIY projects you can tackle is giving it a fresh coat of paint. Not only will a new paint job make your home look brand new, but it will also protect your exterior from the elements.
Before diving into the paint selection process, it’s important to prepare the surface properly. Start by cleaning the exterior of your home to remove dirt, grime, and any loose paint. Use a power washer or a scrub brush and mild detergent to ensure a clean and smooth surface for painting.
Once the surface is clean and dry, it’s time to choose your paint colors. Consider the style and architecture of your home when selecting colors. Traditional homes often look great with neutral or earth-tone colors, while more modern or contemporary homes can handle bolder color choices.
While the main color of your home is important, don’t forget about accents. Consider painting your front door, shutters, or trim in a contrasting color to add visual interest and create a focal point. This can make a big impact and give your home a unique and personalized touch.
When it comes to choosing the right type of paint, opt for high-quality exterior paint that is formulated to withstand the elements. Look for paint that is resistant to cracking, peeling, and fading, as well as one that offers UV protection. Consider using a paint with a satin or semi-gloss finish for added durability and easy maintenance.
When applying the paint, be sure to follow the manufacturer’s instructions and use the appropriate tools. Use brushes and rollers designed for exterior painting, and take your time to ensure a smooth and even application. Consider using a paint sprayer for larger areas to ensure a professional finish.
Not only will a fresh coat of paint improve your home’s curb appeal, but it can also increase its value. In fact, studies have shown that a well-maintained exterior with fresh paint can significantly boost the sale price of a property. So, roll up your sleeves and give your home’s exterior the makeover it deserves with a fresh coat of paint.
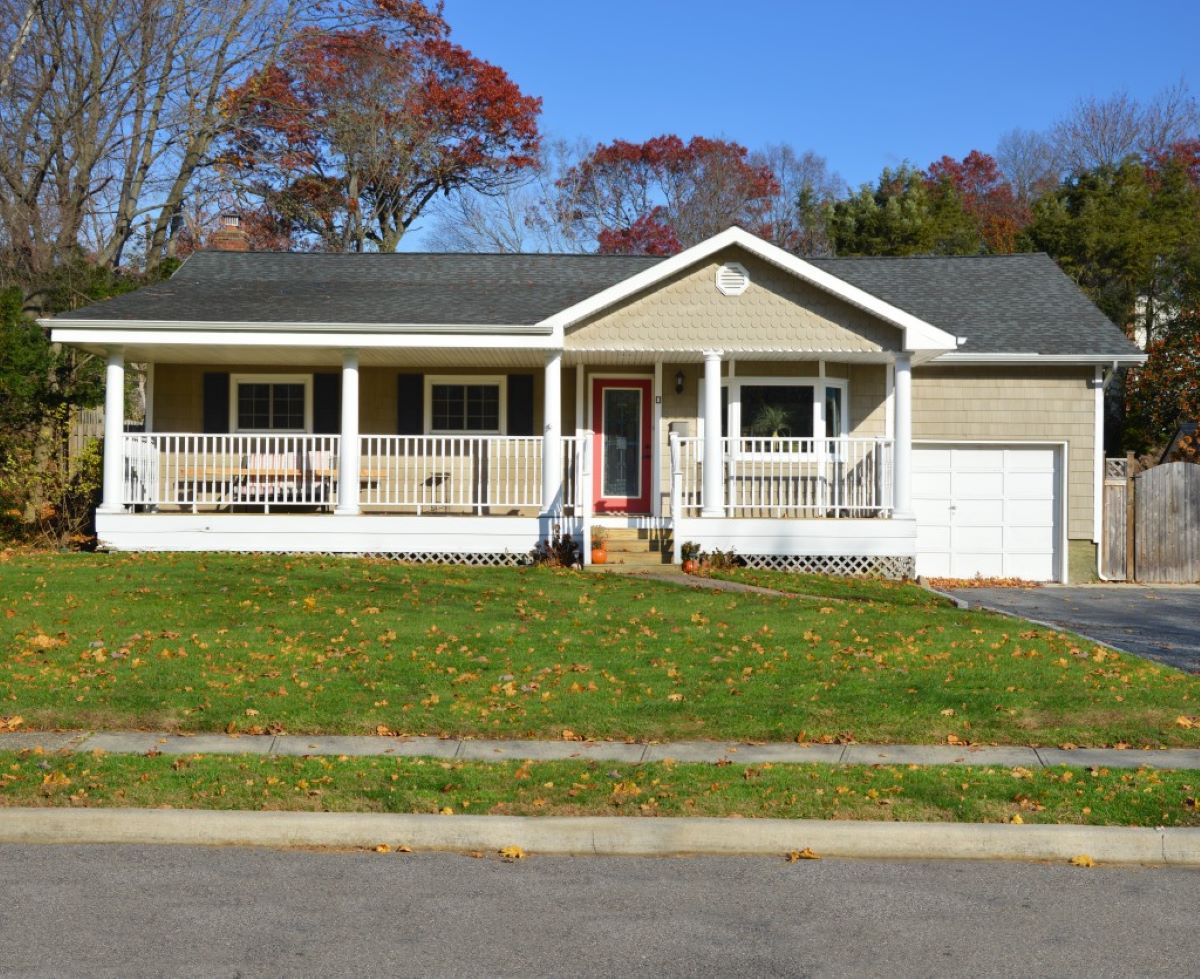
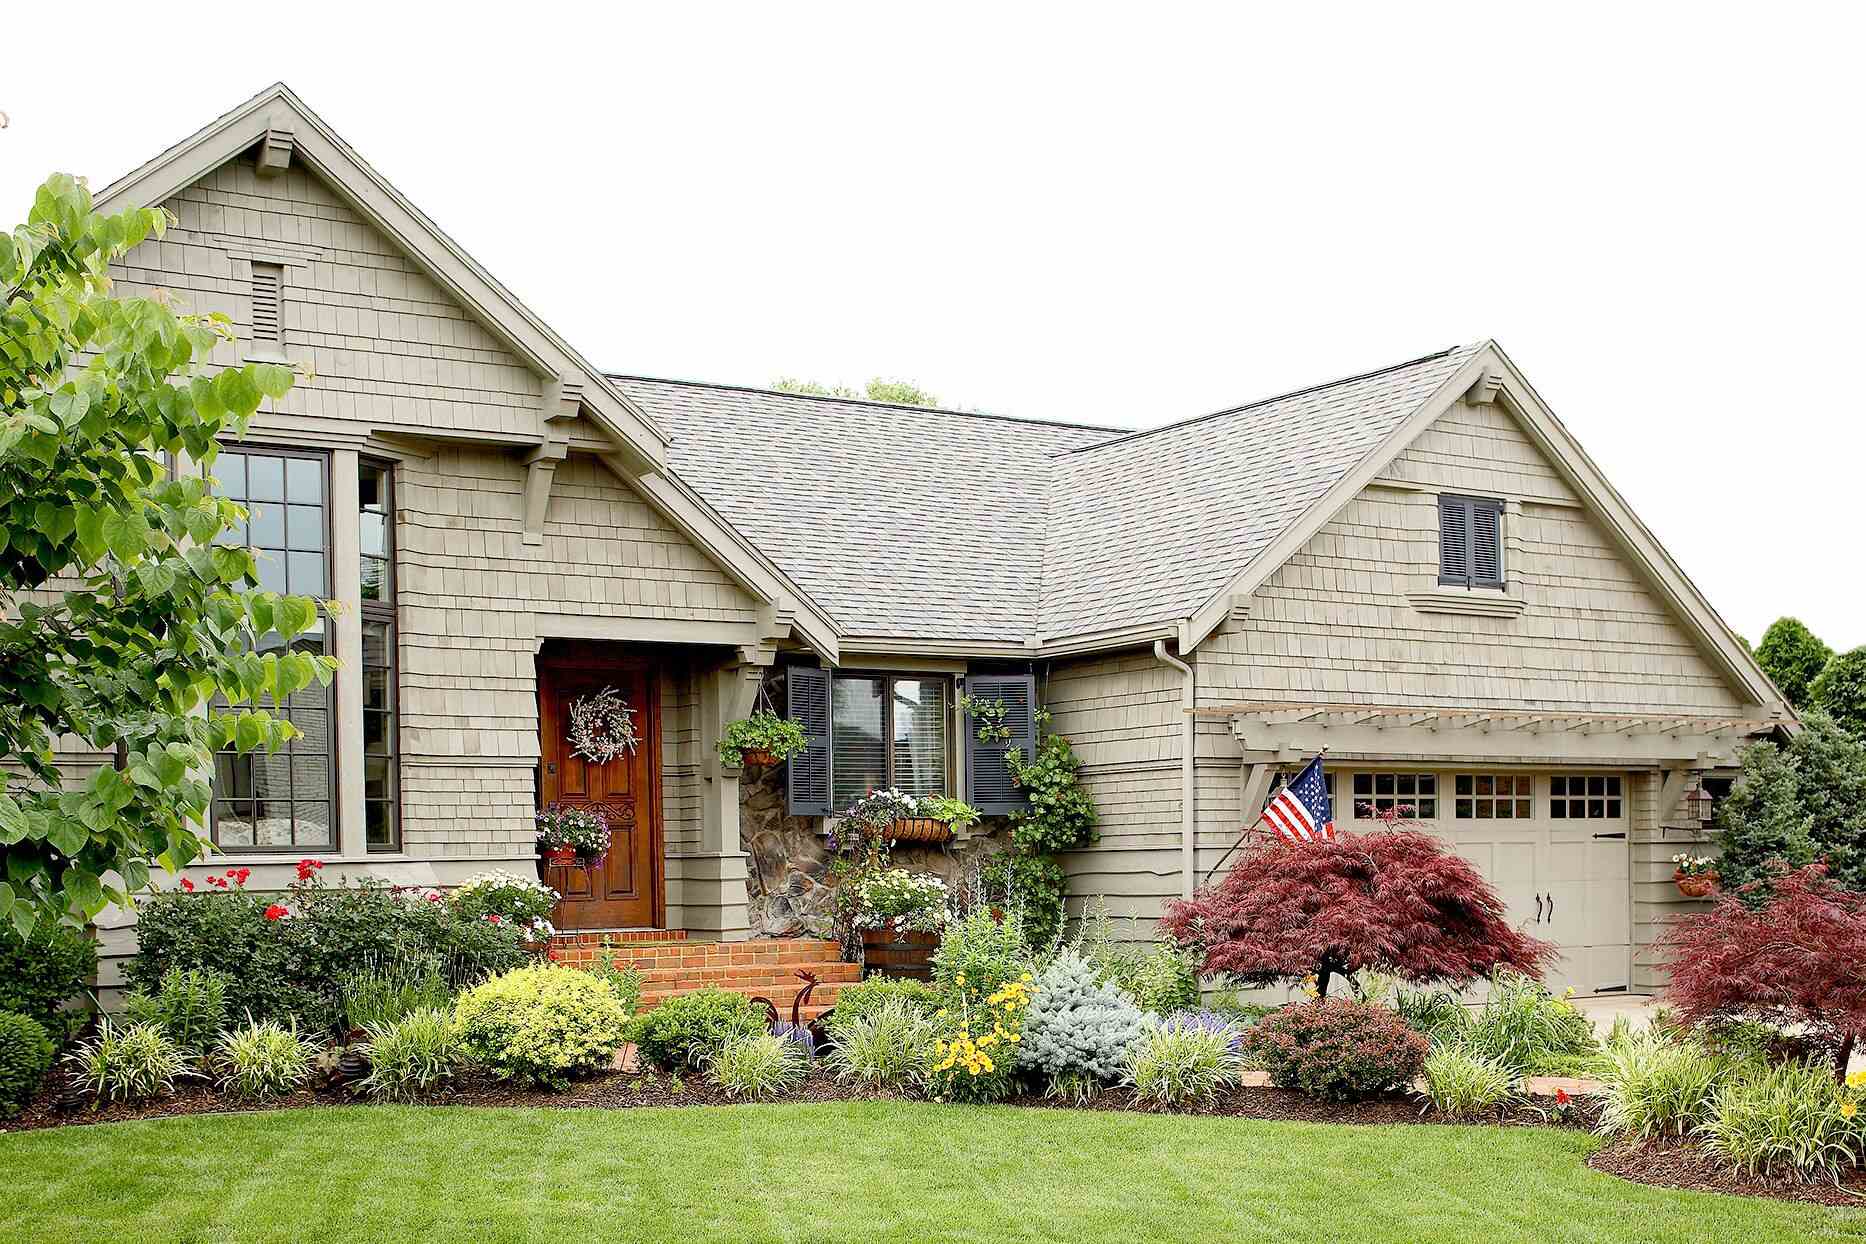
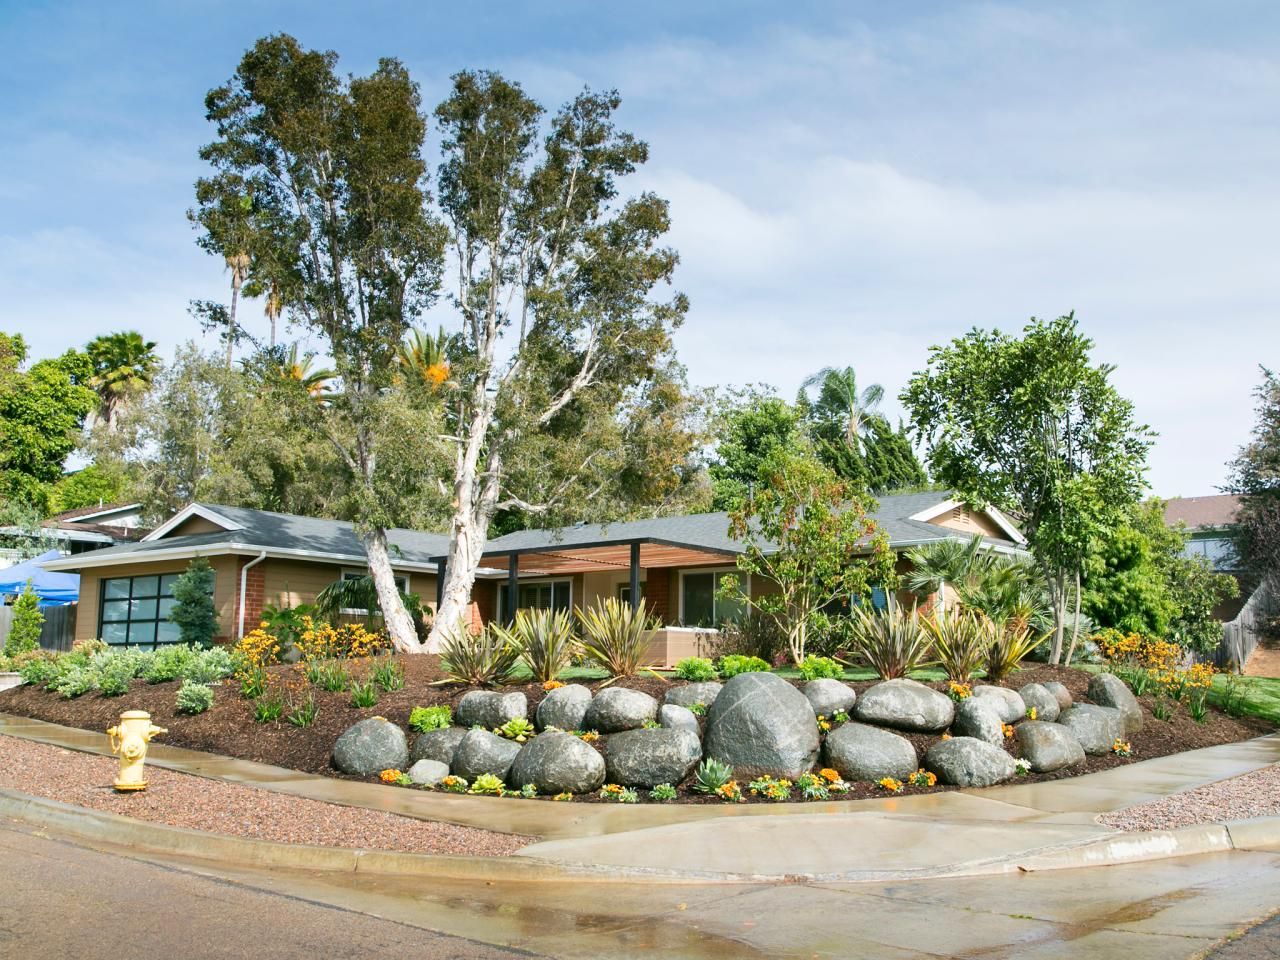
Enhanced Landscaping
One of the most effective ways to boost curb appeal is by enhancing your landscaping. A well-maintained and thoughtfully designed landscape can transform the exterior of your home and create a welcoming atmosphere. Here are some DIY landscaping projects to consider:
1. Lawn Maintenance: Start by maintaining a lush and healthy lawn. Regularly mow, water, and fertilize your lawn to keep it looking green and vibrant. Consider reseeding any bare patches and remove any weeds or debris that detract from its appearance.
2. Flower Beds and Garden: Add pops of color to your landscape by creating flower beds and planting seasonal flowers. Choose a variety of flowers that bloom at different times of the year to ensure a continuous display of vibrant colors. Also, consider adding shrubs and small trees to add depth and texture to your garden.
3. Mulching: Add mulch to your flower beds to give them a polished and defined look. Mulch not only helps retain moisture and suppress weed growth but also creates a neat and tidy appearance. Choose a mulch color that complements your home’s exterior and other elements in your landscaping.
4. Pathways and Walkways: Create pathways and walkways to guide visitors to your front door or through your garden. Use materials such as gravel, pavers, or stepping stones to design an appealing and functional path. Consider adding landscape lighting along the pathway to add an extra touch of elegance and safety.
5. Focal Points and Features: Install focal points and features to add interest and personality to your landscape. This can include a water feature, a garden sculpture, or an outdoor seating area. Choose elements that reflect your style and enhance the overall aesthetics of your property.
6. Tree and Shrub Trimming: Prune any overgrown trees or shrubs to maintain a neat and well-manicured appearance. Trimming not only improves the overall look of your landscape but also promotes healthy growth and reduces the risk of damage from falling branches.
7. Lawn Edging: Create clean and defined boundaries between your lawn and other landscaping elements by adding lawn edging. This simple addition can make a big difference in the overall appearance of your landscape.
In summary, enhancing your landscaping is a DIY project that can instantly boost your home’s curb appeal. With a well-maintained lawn, colorful flower beds, defined pathways, and thoughtful focal points, you can create a visually appealing and inviting outdoor space that enhances the beauty of your home.
Eye-Catching Mailbox
An often overlooked but impactful aspect of your home’s curb appeal is the mailbox. While its primary function is to receive mail, a dull and uninspiring mailbox can detract from the overall appearance of your property. Why settle for a basic mailbox when you can have one that adds a touch of personality and style?
When considering an eye-catching mailbox, think about the architectural style of your home. Choose a design that complements the overall aesthetic and blends seamlessly with the surrounding landscaping. You can opt for a modern, sleek mailbox for a contemporary home or a more ornate, traditional design for a classic-style home.
Materials play a crucial role in creating an eye-catching mailbox. Consider durable options that can withstand various weather conditions. Popular choices include stainless steel, wrought iron, aluminum, and even stone or concrete. Choose a material that not only suits your style but also ensures longevity.
In addition to the mailbox itself, consider other design elements that can enhance its appeal. Attach decorative numbers or decals to clearly display your house number or add a personal touch. Incorporate planters or flowers around the mailbox to bring life and color to the area.
Furthermore, consider the location of your mailbox. Is it easily visible and accessible from the street? Make sure it stands out and is clearly identifiable for mail carriers and guests. You can enhance its visibility by adding landscape lighting or reflective materials, especially if your mailbox is positioned in a dimly lit area.
Keep in mind any local regulations or restrictions regarding mailbox design and placement. It’s essential to adhere to postal service guidelines and any homeowners’ association rules to avoid any potential issues or violations.
By upgrading to an eye-catching mailbox, you can add a unique touch to your home’s exterior and make a statement in your neighborhood. Your mailbox becomes more than just a practical feature but a decorative element that reflects your personal style and attention to detail.
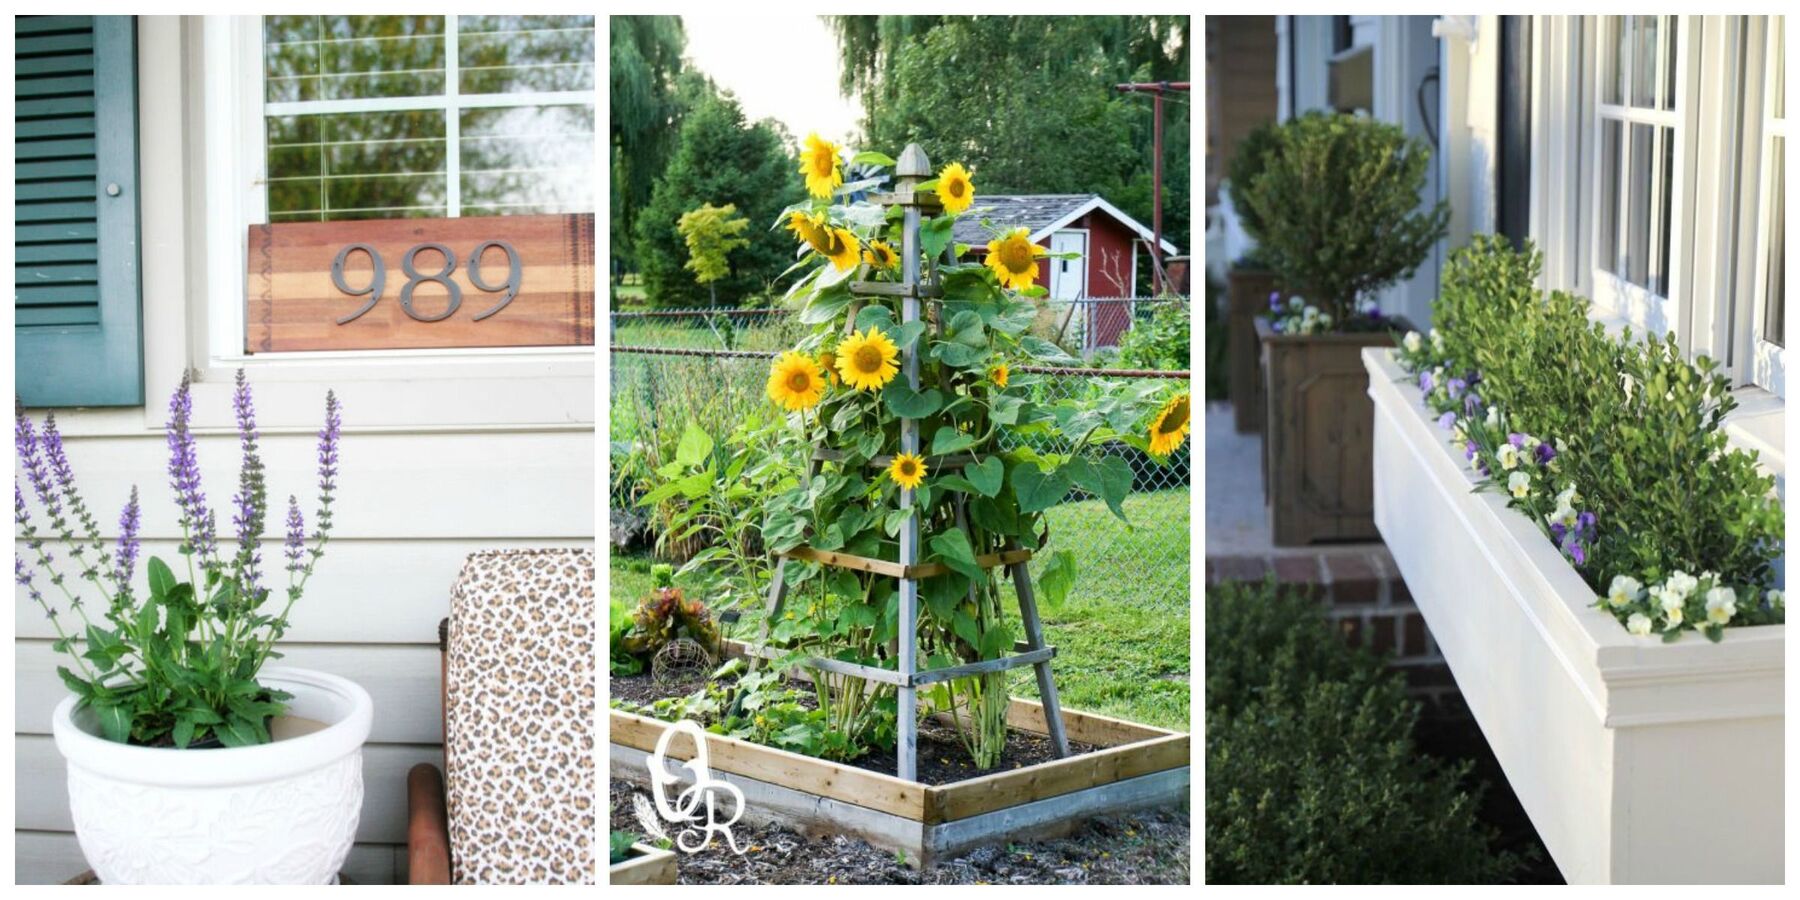
Stylish House Numbers
When it comes to enhancing your home’s curb appeal, even the smallest details can make a big difference. One such detail is the house numbers. Stylish house numbers not only serve a practical purpose in identifying your home but also add a decorative element that can elevate the overall look of your exterior.
Gone are the days of basic, plain numbers mounted on the wall or mailbox. Today, there is a wide range of stylish house number options available to suit various architectural styles and personal preferences. Consider these ideas to make your house numbers stand out:
1. Material Options: Explore different materials to find a house number style that complements your home. Common options include metal (such as stainless steel, brass, or bronze), ceramic, wood, or even illuminated numbers. Choose a material that withstands outdoor conditions and reflects your desired aesthetic.
2. Font and Design: Pay attention to the font and design of your house numbers. Opt for a font that complements the architectural style of your home. There are numerous font styles available, from classic and elegant to modern and bold. Additionally, consider numbers with decorative flourishes or unique shapes for added visual interest.
3. Size and Scale: Ensure the size and scale of your house numbers are appropriate for your home. Large, boldly displayed numbers work well on larger homes, while smaller, more delicate numbers may be suitable for smaller homes or townhouses. Strive for a balance that is both readable and visually appealing.
4. Placement: Consider alternative placements for your house numbers to make them more eye-catching. Instead of the traditional placement by the front door, you can place them on a decorative plaque, an entry gate, or even on your mailbox. Just ensure they are visible and clearly legible.
5. Color and Contrast: Create visual impact with your house numbers by choosing colors that contrast with the background they are mounted on. For example, if your home’s exterior is light-colored, opt for dark-colored numbers, or vice versa. This contrast will make the numbers pop and be easily visible from a distance.
6. Lighting: Consider adding lighting to your house numbers to enhance visibility at night. Illuminated numbers can provide an elegant and modern touch while ensuring that your home’s address is easily identifiable in the evening.
Remember, the goal is to make your house numbers easy to read while injecting a sense of style into your home’s exterior. By choosing stylish house numbers and thoughtfully placing them, you can enhance your home’s curb appeal and make a lasting impression on visitors and passersby.
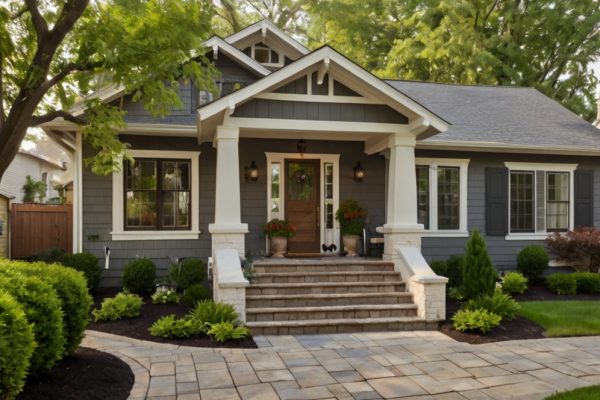
Charming Pathway
A charming pathway leading to your front door not only adds visual appeal to your home’s exterior but also creates a welcoming and inviting atmosphere. A well-designed pathway can elevate the overall aesthetics of your landscaping and guide guests to your entrance in style. Here are some ideas for creating a charming pathway:
1. Material Selection: Choose a material that suits your home’s architectural style and personal preferences. Popular options include natural stone, brick pavers, concrete, gravel, or even wood. Consider the durability, maintenance requirements, and the desired aesthetic appeal when selecting the material.
2. Style and Pattern: Consider the overall look and feel you want to achieve with your pathway. Depending on your home’s style, you can opt for a formal, symmetrical design or a more organic and curving layout. Also, think about the pattern you want to create with the chosen material—straight lines, herringbone, or even a mosaic-like arrangement.
3. Border or Edging: Define and enhance your pathway by adding borders or edging. This can be achieved with materials like bricks, stones, or metal strips. Edging not only helps maintain the shape of the pathway but also adds a polished and finished look to the overall design.
4. Incorporate Greenery: Integrate greenery along the pathway to soften its appearance and create a more natural and inviting atmosphere. This can be done by planting low-growing shrubs, colorful flowers, or even installing planter boxes or hanging baskets along the path. The combination of hardscape and greenery adds depth and visual interest.
5. Lighting: Add lighting fixtures along the pathway to enhance safety and create an enchanting ambiance during the evening hours. Solar-powered stake lights, low-voltage pathway lights, or even string lights can illuminate the path and highlight its charm, making it more visually appealing.
6. Add Decorative Elements: Personalize your pathway by incorporating decorative elements that reflect your style and personality. This could include garden sculptures, stepping stones with intricate designs, or ornamental planters strategically placed along the path. These elements add interest and create a unique focal point within your landscaping.
7. Maintenance and Accessibility: Consider the practical aspect of maintaining your pathway and ensuring it is accessible year-round. Take into account factors like weeding, edging maintenance, and ensuring a smooth, even surface. Additionally, ensure the pathway is wide enough to accommodate comfortable passage for multiple people.
A charming pathway not only adds beauty and functionality to your home’s exterior but also enhances its curb appeal. By selecting the right materials, incorporating greenery, and adding personal touches, you can create a pathway that is visually pleasing, inviting, and complements the overall design of your property.
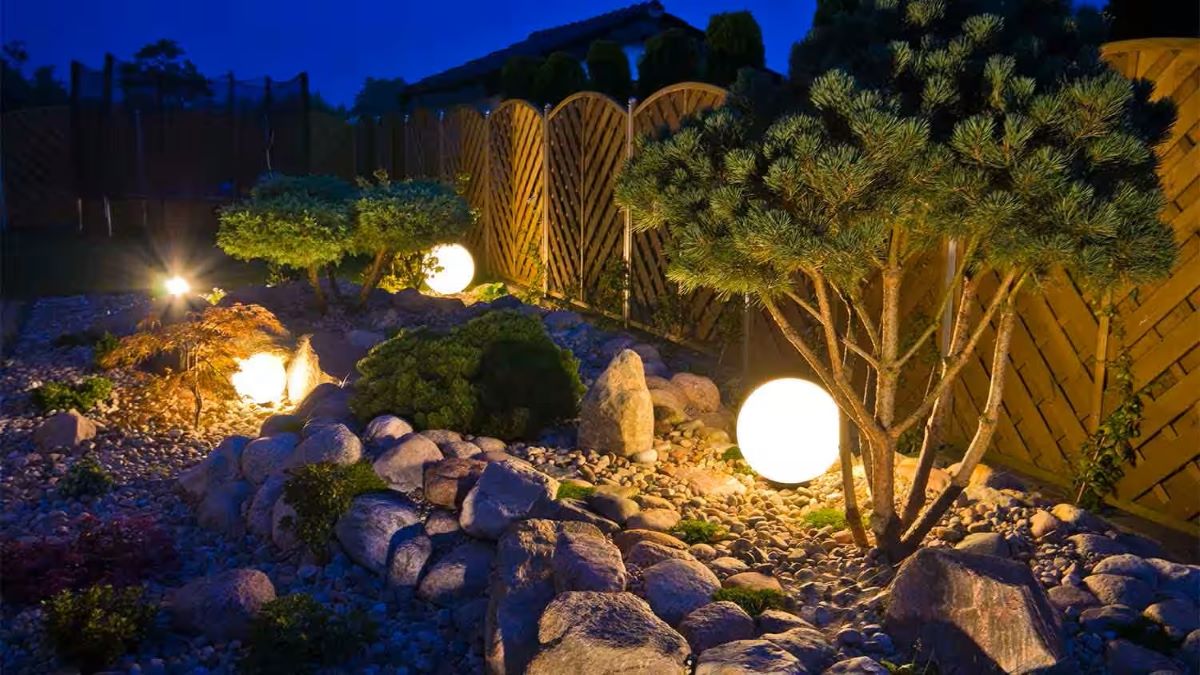
Outdoor Lighting Fixtures
Outdoor lighting fixtures are not only functional but also play a crucial role in enhancing the beauty and safety of your home’s exterior. Well-placed and thoughtfully designed outdoor lighting can transform your outdoor space, creating ambiance, highlighting architectural features, and adding a layer of security. Here are some ideas to consider when upgrading your outdoor lighting:
1. Entryway Lighting: Start by focusing on the entryway to create a warm and inviting atmosphere. Install wall-mounted sconces or hanging lanterns on either side of the front door to provide adequate lighting for guests while adding charm and character to your home’s facade.
2. Pathway Lighting: Illuminate your pathway to guide visitors safely to your front door while adding visual interest. Use low-voltage path lights or stake lights along the edges of the pathway to create a charming and welcoming ambiance. Consider spacing the lights evenly and adjusting their height to ensure optimal lighting coverage.
3. Accent Lighting: Highlight architectural features, such as pillars, columns, or prominent landscaping elements, with accent lighting. Use well-placed spotlights or uplights to create dramatic shadows and draw attention to specific areas. This can add depth and dimension to your home’s exterior and create a visually captivating effect.
4. Deck and Patio Lighting: Extend the functionality of your outdoor living spaces by incorporating lighting into decks, patios, or pergolas. Install recessed lights or string lights to create a cozy and inviting atmosphere for evening enjoyment. Additionally, consider adding task lighting for areas where you’ll be grilling or dining.
5. Landscape Lighting: Illuminate your landscape to showcase the beauty of your trees, shrubs, and flower beds. Use directional lighting or well lights to cast a soft glow on focal points, creating an enchanting scene. Experiment with different angles and intensities to achieve the desired effect.
6. Security Lighting: Enhance the safety and security of your property by installing motion-sensor lights or floodlights around the perimeter. These lights will automatically turn on when motion is detected, deterring potential intruders and providing peace of mind. Ensure that these lights are strategically placed to cover vulnerable areas.
7. Energy Efficiency: Consider using energy-efficient lighting options to reduce energy consumption and lower your utility bills. LED lights are an excellent option as they are long-lasting, emit a bright and warm light, and are available in various styles and colors to suit your outdoor aesthetic.
When planning your outdoor lighting, remember to strike a balance between functionality and aesthetics. Consider the overall design and architectural style of your home, as well as the intended purpose of each lighting fixture. With well-designed outdoor lighting, you can enhance the beauty of your home’s exterior, create a welcoming ambiance, and provide an extra layer of security for you and your guests.
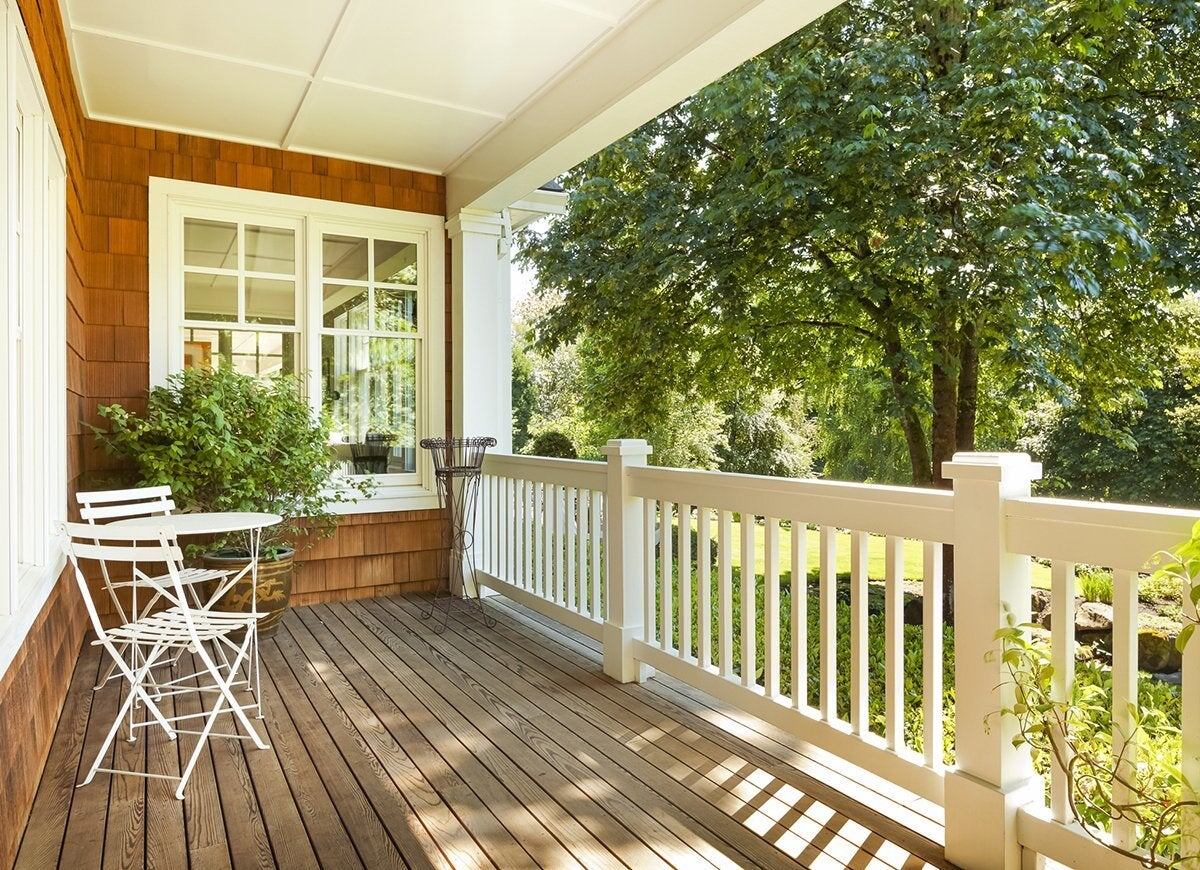
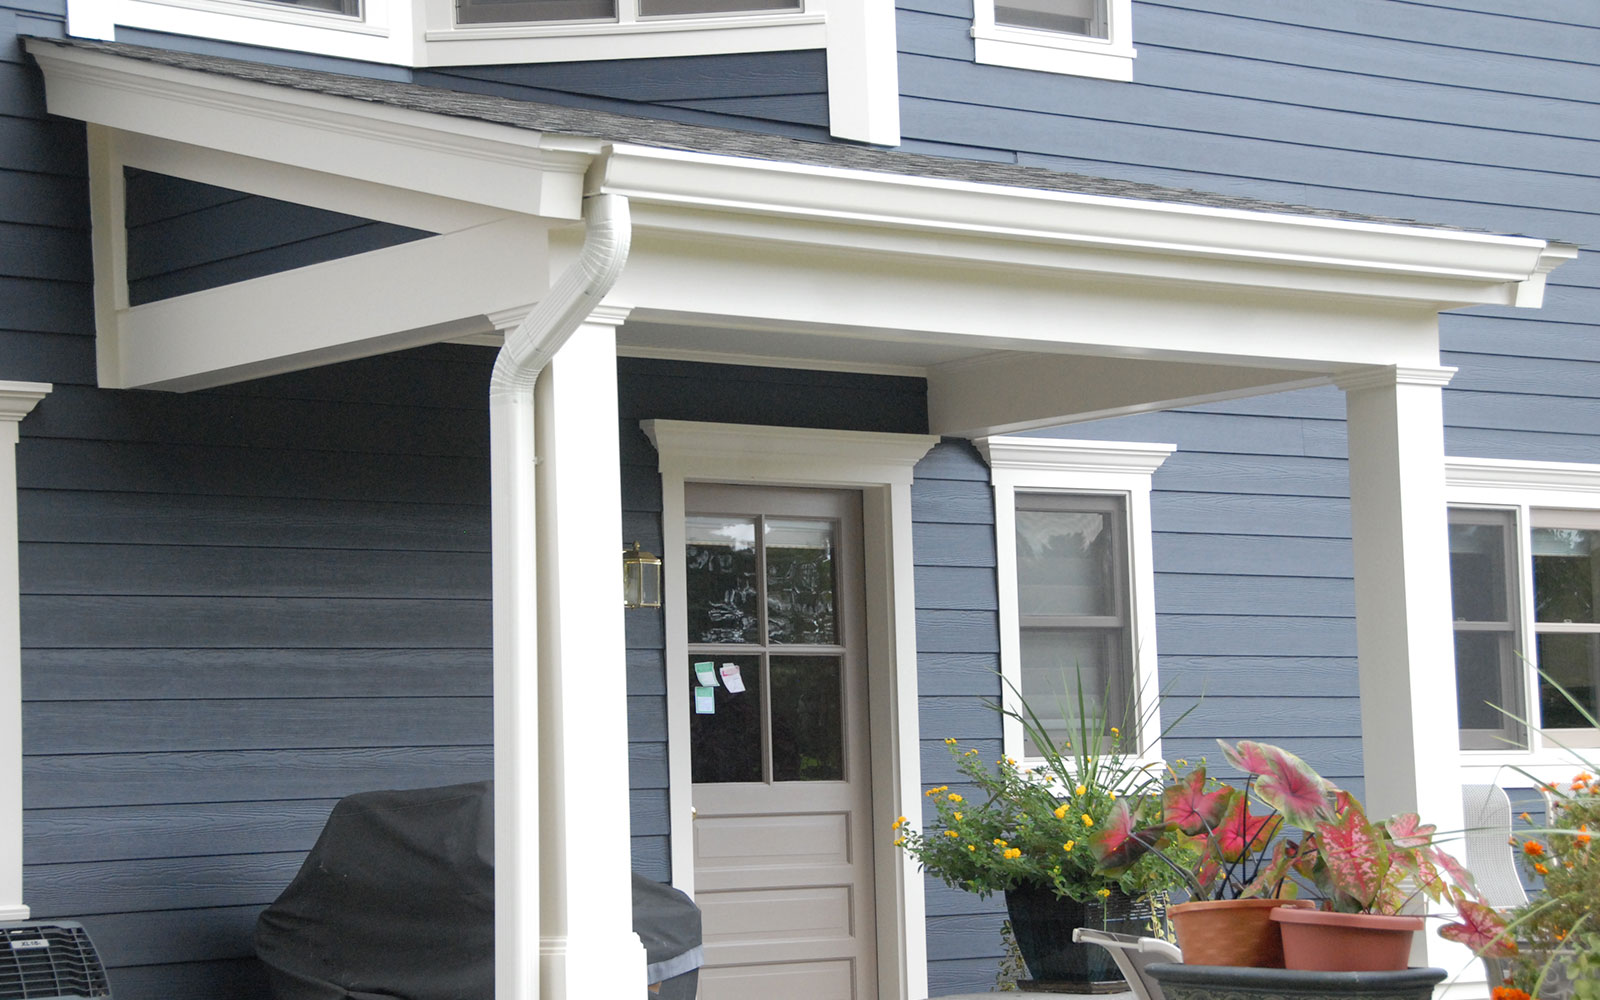
Inviting Front Porch
A front porch is one of the most inviting and welcoming features of a home’s exterior. It serves as a place to relax, socialize, and enjoy the outdoors. By making a few simple changes and additions, you can transform your front porch into an inviting and cozy space that enhances the overall curb appeal of your home. Here are some ideas to create an inviting front porch:
1. Comfortable Seating: Start by adding comfortable seating options to encourage relaxation and socialization. Consider a porch swing, rocking chairs, or a cozy outdoor sofa and accentuate them with cushions and pillows in weather-resistant fabrics. Choose seating that complements the style and scale of your porch.
2. Outdoor Rug: Define and anchor your front porch seating area with an outdoor rug. A rug adds warmth, texture, and a pop of color to your porch, elevating its overall aesthetic. Opt for a rug that can withstand outdoor elements and is easy to clean.
3. Lighting: Install appropriate lighting fixtures to create a warm and inviting ambiance for your front porch. Consider wall sconces, hanging lanterns, or string lights to provide both functional and decorative lighting. Soft, warm lighting will help create a cozy and welcoming atmosphere.
4. Greenery and Plants: Incorporate greenery and plants to bring life and freshness to your front porch. Add potted plants in various sizes and heights to create layers and visual interest. Consider using hanging baskets and window boxes to maximize the use of space and add a touch of color.
5. Welcoming Decor: Add personal touches and decorative elements that reflect your style and personality. Hang a seasonal wreath on the front door, display decorative lanterns or decorative wall art, and arrange outdoor accessories such as pillows, blankets, or a small side table. These details will create a warm and inviting ambiance.
6. Privacy and Shade: Install a privacy screen or hang outdoor curtains to create a sense of seclusion and provide shade when needed. This will not only enhance the comfort of your front porch but also add a touch of elegance to its overall design.
7. Seasonal Decorations: Update your front porch decor according to the seasons and holidays. Add seasonal plants, wreaths, and accessories to create a festive and inviting atmosphere. This showcases your attention to detail and gives your front porch a fresh look throughout the year.
By implementing these ideas, you can create an inviting front porch that becomes an extension of your home’s living space. It will not only make a positive first impression but also provide a cozy and relaxing spot for you to enjoy the outdoors and connect with your neighbors and guests.
Read more: 17 Do-It-Yourself Outdoor Project Ideas
Customized Shutters
Add a personal touch to your home’s exterior by customizing your shutters. Shutters not only serve a functional purpose but also add character, charm, and curb appeal to your windows. By customizing your shutters, you can create a unique and stylish look that enhances the overall aesthetics of your home. Here are some ideas to get you started:
1. Material: Choose the material for your shutters based on durability, maintenance requirements, and the desired style. Common options include wood, vinyl, aluminum, and composite materials. Consider the architectural style of your home and the surrounding elements when making your decision.
2. Color: Select a color that complements your home’s exterior and adds visual interest. You can choose a coordinating color that blends with your home’s overall color scheme, or opt for a contrasting hue to make the shutters stand out. Consider using bold and vibrant colors for a modern look or classic and muted tones for a traditional appearance.
3. Size and Shape: Customize the size and shape of your shutters to suit the proportions of your windows and the architectural style of your home. Consider the scale of your windows and the desired outcome. If your windows are smaller, opt for narrower and more elongated shutters, while larger windows can accommodate wider and more substantial shutters.
4. Louver Design: Decide on the louver design of your shutters, as it can significantly impact the overall look. Choose from traditional louvered shutters, board-and-batten shutters, or even louverless shutters for a sleek and modern appearance. Each design offers a different aesthetic appeal, so select the one that best fits your desired style.
5. Hardware and Accessories: Pay attention to the hardware and accessories you use to customize your shutters. Consider decorative hinges, shutter dogs, or holdbacks to add an extra layer of charm and authenticity. These details can make a big difference in the overall appearance of your shutters.
6. Operational or Non-Operational: Decide if you want your shutters to be purely decorative or functional. While operational shutters can add a level of authenticity, non-operational shutters can still provide the desired look and curb appeal without the need for regular maintenance.
7. Professional Installation: Unless you have experience and knowledge in shutter installation, it’s recommended to hire a professional to ensure proper and secure installation. This will ensure that your customized shutters are installed correctly, providing years of enjoyment and enhancing your home’s exterior.
Customizing your shutters allows you to have a unique and personalized touch to your home’s exterior. Adding custom shutters can create a lasting impression, elevate the curb appeal, and give your home that extra layer of style and charm that reflects your taste and personality.
Consider adding outdoor lighting to your DIY projects to enhance curb appeal. Well-placed lighting can highlight architectural features and landscaping, creating a welcoming atmosphere.
DIY Garden Trellis
A garden trellis is not only a functional structure to support climbing plants but also a beautiful addition that adds visual interest and verticality to your garden. Building a DIY garden trellis allows you to customize the design and size to suit your garden’s needs while adding a unique touch to your outdoor space. Here’s how you can create your own garden trellis:
1. Determine the Purpose: Decide how you plan to use your garden trellis. Will it be used to support flowering vines, vegetables, or both? The purpose will help determine the overall design and size of your trellis.
2. Select the Material: Choose a material for your trellis that is both durable and aesthetically pleasing. Common options include wood, bamboo, PVC pipe, metal, or even salvaged materials. Consider the style of your garden and the surrounding elements when making your decision.
3. Plan the Design: Sketch out the design and dimensions of your trellis. Consider the available space, the height you require, and the type of plants you intend to grow. Decide if you want a simple grid design, a more intricate pattern, or a combination of both that integrates with your garden’s overall theme.
4. Gather Materials and Tools: Collect all the necessary materials and tools based on your chosen design. This may include lumber or bamboo poles, screws or nails, wire mesh or netting, and appropriate tools such as a saw, drill, and wire cutters.
5. Construct the Frame: Start by building the frame of your trellis. Cut the wooden or bamboo poles to the desired length and assemble them according to your design. Use screws or nails to secure the joints, ensuring a sturdy structure that can withstand the weight of climbing plants.
6. Attach the Crossbars: Install the crossbars horizontally across the vertical poles, providing support for the climbing plants. The spacing between the crossbars will depend on the type of plants you want to grow. Use screws or wire to secure the crossbars, ensuring they are evenly spaced and level.
7. Add Wire Mesh or Netting: Attach wire mesh or netting to the trellis frame, providing a surface for plants to climb and grow. Use wire or zip ties to attach the mesh securely to the frame, ensuring it is taut and can support the weight of the plants as they grow.
8. Install in the Garden: Choose a suitable location in your garden for the trellis and secure it into the ground. Dig holes or use anchors to ensure stability and prevent the trellis from tipping over during strong winds or heavy plant growth.
9. Plant and Maintain: Once your trellis is installed, it’s time to plant your climbing plants or vine varieties at the base. Train the plants to climb the trellis by gently tying them to the support structure as they grow. Regularly maintain and prune the plants to ensure they grow along the trellis and maintain an organized and attractive appearance.
A DIY garden trellis adds visual interest, maximizes vertical space, and allows you to grow an abundance of climbing plants in your garden. By customizing the design and building the trellis yourself, you’ll have a unique structure that enhances the beauty and functionality of your outdoor space.
Flower Box Display
A flower box display is a charming and versatile way to bring color and beauty to your home’s exterior. Whether you have a small balcony, a window ledge, or a spacious porch, flower boxes allow you to showcase your favorite flowers and plants in a compact and visually appealing manner. Creating a DIY flower box display is easier than you think. Here’s how:
1. Determine Placement: Decide where you want to showcase your flower boxes. Consider areas that receive adequate sunlight and complement the architectural style of your home. Window ledges, railings, and porch railings are popular options.
2. Select the Right Flower Boxes: Choose flower boxes that suit your style and needs. There are various materials available, including wood, plastic, metal, and fiberglass. Consider factors such as durability, weather resistance, and drainage capabilities when making your selection.
3. Choose the Right Plants: Select plants that thrive in the available sunlight and fit the size of your flower boxes. Consider factors such as flowering period, color scheme, and height. Mix and match different plants to create a visually pleasing arrangement.
4. Prepare the Flower Boxes: Before planting, ensure that your flower boxes have proper drainage holes to prevent waterlogged soil. Line the bottom of the boxes with a layer of gravel or small rocks to improve drainage.
5. Planting Technique: Fill the flower boxes with a quality potting mix, leaving enough space for the plants to grow. Follow the planting instructions for each plant, ensuring proper spacing and depth. Add more potting mix around the plants, gently firming it down.
6. Watering and Maintenance: Water your flower boxes regularly, ensuring the soil remains moist but not waterlogged. Monitor the plants for any signs of pests, disease, or nutrient deficiencies, and take appropriate measures to address them. Deadhead flowers to encourage continuous blooming.
7. Seasonal Refresh: Update your flower box display with the changing seasons. Swap out summer annuals for fall flowers and winter pansies. This refreshing touch keeps your display vibrant and exciting throughout the year.
8. Complement with Accessories: Add decorative elements to enhance the visual appeal of your flower boxes. Consider including trailing vines, ornamental grasses, or even small garden ornaments. Additionally, you can place plant stands or decorative pots beside the flower boxes for added height and interest.
9. Remember the Environment: Choose plants that are suitable for your region and climate. This ensures that your flower box display stays healthy and thrives throughout the seasons. Consider native plants or drought-tolerant varieties for a sustainable and environmentally friendly garden.
A DIY flower box display allows you to showcase your creativity while enhancing the beauty of your home’s exterior. By selecting the right flower boxes, choosing complementary plants, and providing proper care, you can create a stunning and ever-changing display that brings joy and color to your outdoor space.
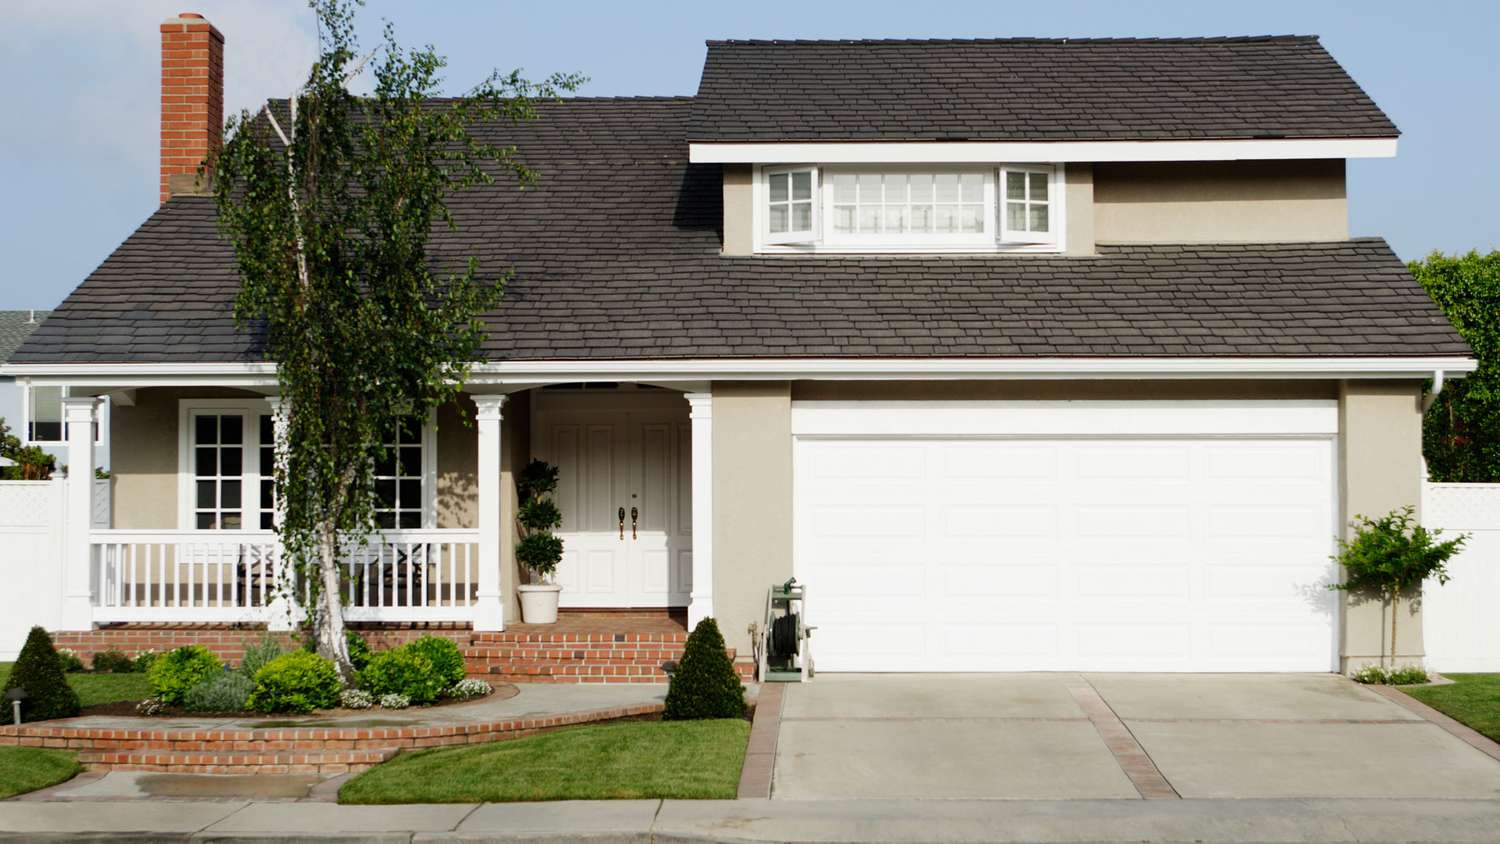
Revamped Garage Door
Don’t overlook the garage door when it comes to enhancing your home’s curb appeal. A revamp of your garage door can have a significant impact on the overall aesthetics of your home’s exterior. Whether you have a plain or outdated garage door, a few simple DIY techniques can transform it into a focal point that complements and elevates the look of your property. Here’s how to revamp your garage door:
1. Cleaning and Repair: Start by thoroughly cleaning your garage door to remove dirt, grime, and any debris. Inspect the door for any damage or signs of wear and make any necessary repairs, such as fixing dents or replacing broken parts.
2. Fresh Coat of Paint: One of the most effective ways to revamp your garage door is by giving it a fresh coat of paint. Choose a paint color that complements your home’s exterior and adds visual interest. Consider using a bold color that stands out or a more subtle shade that harmonizes with the rest of your facade.
3. Creative Painting Techniques: Take your garage door revamp to the next level by using creative painting techniques. Consider adding a faux wood finish or a textured look to mimic the appearance of expensive materials. You can also incorporate stencils or painter’s tape to create patterns or designs that add character to the door.
4. Decorative Hardware: Add decorative hardware to your garage door to enhance its visual appeal. Install handles, hinges, or faux straps to create a carriage-house style or a vintage look. Make sure to choose hardware that complements the style of your home and that is appropriate for your garage door material.
5. Windows and Inserts: Consider adding windows or window inserts to your garage door for a more upscale and polished appearance. Windows can let natural light into your garage and provide an architectural interest. Window inserts are a more affordable option and can be easily installed to create the illusion of windows.
6. Lighting: Install outdoor lighting fixtures around your garage door to highlight and accentuate its features, even after dark. Use wall-mounted sconces on either side of the door or overhead lighting to create a warm and inviting glow. Lighting not only adds safety but also highlights the newly revamped garage door as a focal point.
7. Landscaping: Enhance the overall impact of your revamped garage door by adding landscaping elements around it. Plant flowers, shrubs, or ornamental grasses near the door to soften its look and create a cohesive and welcoming environment.
8. Regular Maintenance: To keep your revamped garage door looking its best, perform regular maintenance and cleaning. Inspect the door for any signs of wear or damage, touch up paint as necessary, and keep the area around the garage door free from debris.
A revamped garage door can completely transform the look of your home’s exterior. By using simple DIY techniques such as painting, adding decorative hardware, and incorporating lighting, you can give your garage door a fresh and stylish look that enhances your curb appeal and adds value to your property.
Refreshed Driveway
Your driveway is an important element of your home’s exterior, and refreshing it can significantly enhance the overall curb appeal. A well-maintained and visually appealing driveway can make a positive first impression and set the tone for the rest of your property. Here are some DIY tips to refresh your driveway:
1. Repair and Clean: Start by repairing any cracks, potholes, or other damage to your driveway. Fill in cracks with a suitable crack filler and use asphalt patching material for larger areas of damage. Once the repairs are complete, thoroughly clean the surface by power washing or using a driveway cleaner to remove dirt, stains, and moss.
2. Seal Coating: Apply a fresh layer of seal coating to protect the surface of your driveway and give it a renewed appearance. Seal coating not only helps prevent damage from UV rays, oil spills, and harsh weather conditions but also provides a sleek and polished look. Follow the manufacturer’s instructions for the application process.
3. Add Borders: Install borders or edging along the sides of your driveway to create a defined and polished look. This can be done using materials such as bricks, pavers, or stones. Borders not only add visual appeal but also help contain the driveway surface and prevent gravel or soil from spreading onto the surrounding areas.
4. Enhance with Stenciling or Stamping: Take your driveway refresh to the next level by adding decorative elements through stenciling or stamping. Consider using stencils or templates to create patterns or designs on the surface of your driveway. Alternatively, invest in stamping tools to imprint textures like brick, cobblestone, or tile onto the concrete surface.
5. Accentuate with Pathway Lighting: Illuminate your driveway with pathway lighting to improve safety and create an inviting ambiance. Line the edges of your driveway with solar-powered stake lights, low-voltage LED lights, or recessed lighting fixtures. This not only enhances visibility at night but also adds a touch of elegance.
6. Incorporate Landscaping: Use landscaping to add visual interest and softness to your driveway. Plant flowers, shrubs, or ornamental grasses along the sides to create a welcoming and cohesive look. Consider incorporating flower beds or using decorative pots and planters to add color and greenery.
7. Clear Clutter: Keep your driveway clear of clutter and vehicles that are not in use. A clutter-free driveway creates a spacious and organized appearance and allows your refreshed driveway to take center stage.
8. Regular Maintenance: Maintain the refreshed look of your driveway by performing regular maintenance. Sweep away debris, clean up oil stains promptly, and reseal the surface periodically to protect it from damage and maintain its renewed appearance.
By implementing these DIY tips, you can refresh your driveway and transform it into an attractive and functional feature of your home’s exterior. A well-maintained and visually appealing driveway not only enhances your curb appeal but also provides a sense of pride and satisfaction as you welcome guests to your home.
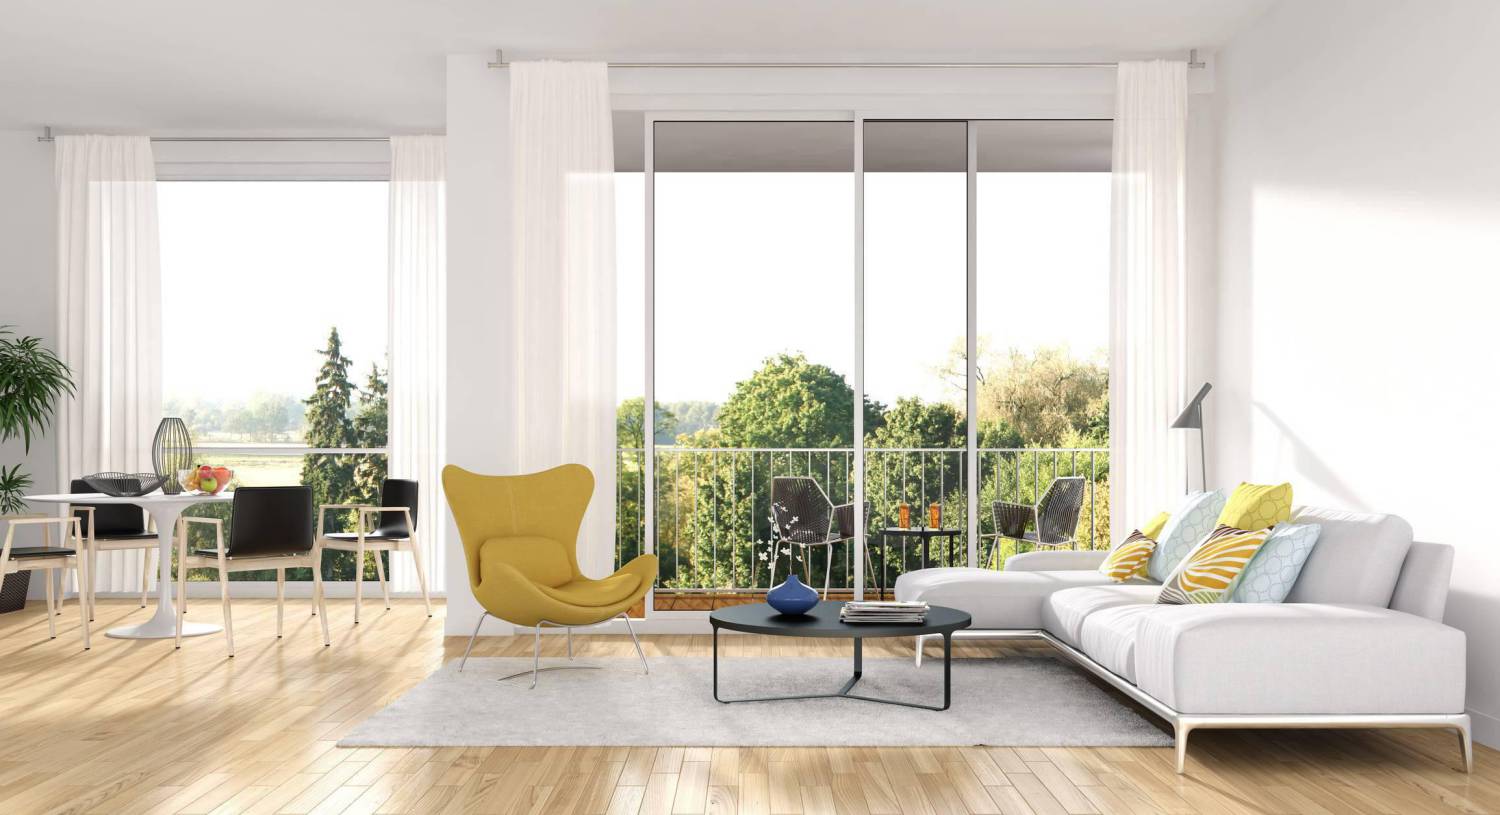
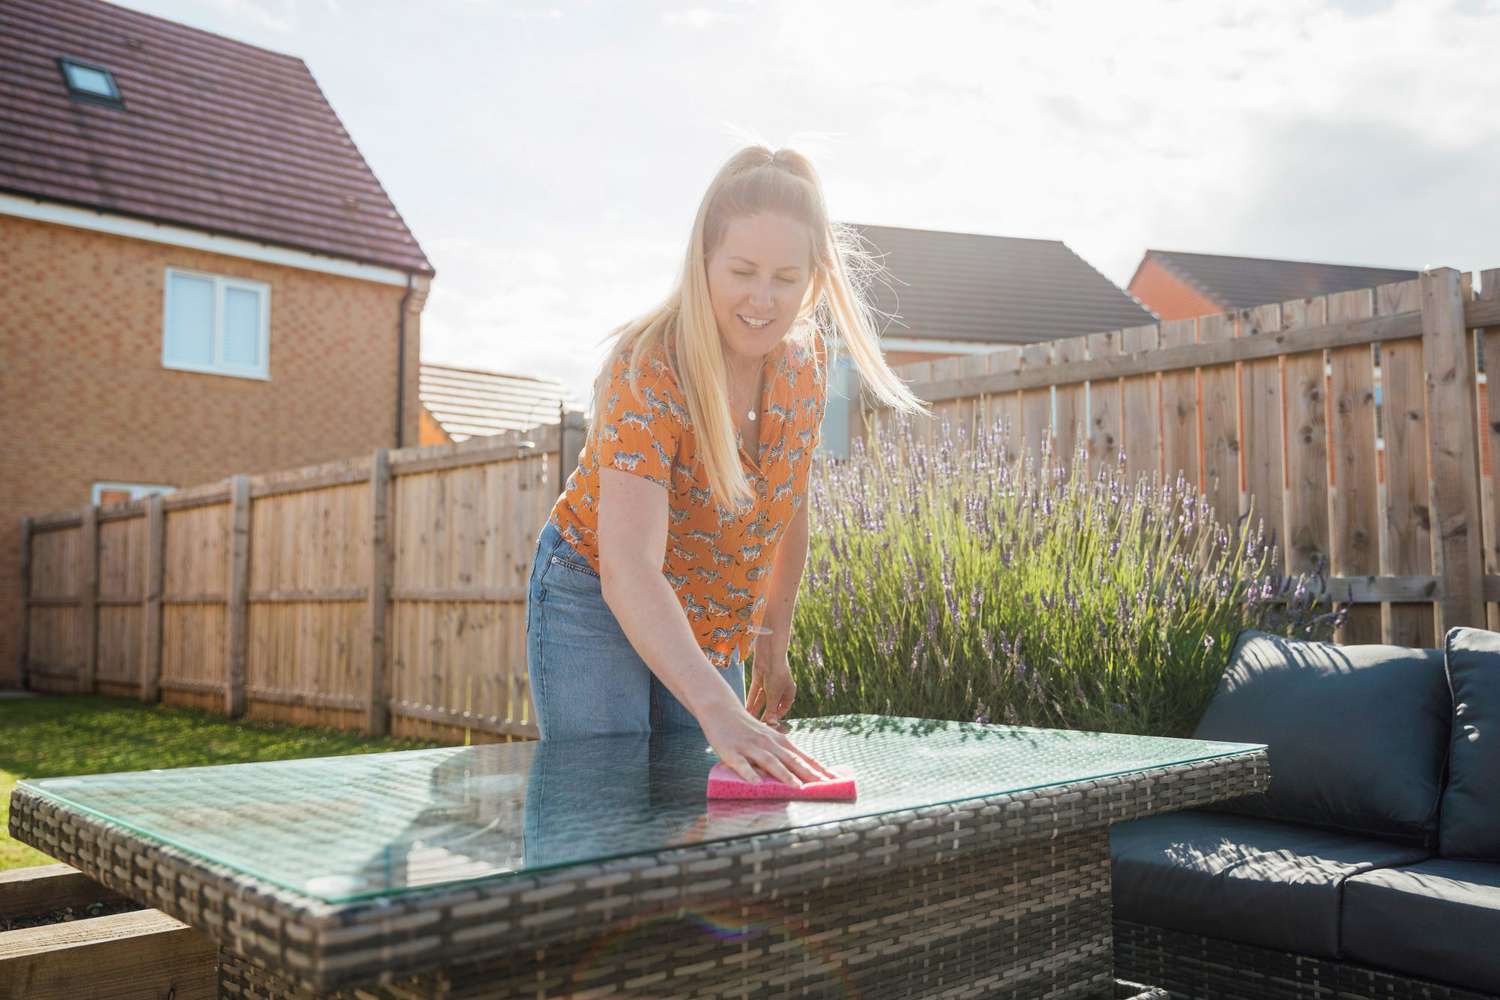
Outdoor Seating Area
An outdoor seating area is a wonderful addition to any home’s exterior, providing a comfortable and inviting space to relax, entertain, and enjoy the outdoors. Whether you have a small balcony, a spacious deck, or a patio, creating a DIY outdoor seating area allows you to personalize the space to match your style and needs. Here are some ideas to help you create the perfect outdoor seating area:
1. Define the Space: Determine the area where you want to set up your outdoor seating. Consider the size, accessibility, and surrounding landscape. Define the space using boundaries such as rugs, plants, or furniture arrangements to create a cozy and intimate environment.
2. Comfortable Seating: Select comfortable seating options that suit your space and preferences. Opt for weather-resistant outdoor furniture that is durable and easy to clean. Choices range from lounge chairs, outdoor sofas, benches, hammocks, or even repurposed furniture with weatherproof cushions. Add throw pillows and outdoor blankets for extra comfort and style.
3. Shade and Shelter: Consider adding shade and shelter to your outdoor seating area to protect against the sun, wind, or rain. Install a pergola, canopy, awning, or a patio umbrella to provide relief from intense sunlight. This will create a comfortable space for relaxation even on hot summer days.
4. Lighting: Incorporate lighting options to extend the use of your outdoor seating area into the evening. Install string lights, solar-powered lanterns, or low-voltage path lights to create a cozy and enchanting ambiance. Consider using dimmable or adjustable lighting to set the mood for different occasions.
5. Outdoor Rug: Anchor your outdoor seating area and add a touch of softness by placing an outdoor rug. Choose a rug that complements the overall style and color scheme of your outdoor space. Opt for materials that are weather-resistant and easy to clean, such as polypropylene or bamboo.
6. Side Tables and Surfaces: Include side tables and surfaces to hold beverages, snacks, and other necessities. Select materials that can withstand outdoor elements, such as metal, wicker, or teak. Consider using multi-purpose furniture like storage ottomans or benches with built-in storage to maximize functionality.
7. Privacy Screens: Add privacy screens or partitions to create a sense of seclusion and intimacy in your outdoor seating area. Use outdoor curtains, lattice panels, or tall potted plants strategically placed to create a sense of privacy without blocking natural light and airflow.
8. Personal Touches: Infuse your own personal style and creativity into your outdoor seating area. Add decorative elements like artwork, mirrors, or wall hangings. Include potted plants, colorful cushions, or outdoor rugs that reflect your taste and create a welcoming atmosphere.
9. Outdoor Heating: Consider options for outdoor heating to extend the usability of your seating area into the cooler seasons. Install a fire pit, an outdoor fireplace, or patio heaters to create warmth and a cozy ambiance, allowing you to enjoy your outdoor space year-round.
Creating an outdoor seating area gives you a designated space to relax, entertain, and connect with nature. By incorporating comfortable seating, adding shade and lighting, and infusing your personal style, you can create an outdoor oasis that becomes an extension of your living space and enhances the overall beauty of your home’s exterior.
Window Boxes
Window boxes are a charming and versatile addition to any home’s exterior. They not only provide a beautiful display of colors and textures but also allow you to add greenery and flowers to areas that may lack traditional garden space. Whether you have a large window or a small balcony, window boxes can instantly enhance the visual appeal and create a delightful focal point. Here’s how to create your own window boxes:
1. Measure and Select: Measure the width and depth of your windows to determine the appropriate size for your window boxes. Choose window boxes made of weather-resistant materials such as wood, metal, or PVC. Consider the style that best complements your home’s exterior aesthetic.
2. Prep and Install: Before installing the window boxes, ensure that your windows and sills are clean and in good condition. Use brackets or brackets with adjustable supports to secure the window boxes to the window sill or the wall beneath the window. Ensure that the brackets are sturdy and securely anchored.
3. Soil and Drainage: Fill the window boxes with a high-quality potting mix that provides good drainage. Ensure that the window boxes have small drainage holes or that you add a layer of gravel at the bottom to prevent waterlogging. Proper drainage is essential to keep the plants healthy and thriving.
4. Plant Selection: Choose a variety of plants that suit the lighting conditions and climate of your location. Consider using a combination of trailing, upright, and filler plants to create depth and visual interest. Select flowers and foliage that harmonize with your home’s color scheme and personal preferences.
5. Planting Technique: Start by planting the taller or upright plants in the back of the window box to create a vertical element. Place the trailing or cascading plants towards the front or sides to add depth and a sense of lushness. Fill in any remaining gaps with filler plants.
6. Watering and Maintenance: Regularly water your window boxes to keep the soil moist but not waterlogged. Pay attention to the specific watering needs of each plant variety. Fertilize periodically to promote healthy growth and vibrant blooms. Remove spent flowers and trim back any leggy growth to maintain a tidy appearance.
7. Seasonal Refresh: Update your window boxes with seasonal flowers and foliage to keep them looking fresh throughout the year. Swap out cool-season plants with warm-season varieties and transition from spring blooms to summer flowers. This allows you to enjoy a continually changing display of colors and textures.
8. Supporting Elements: Enhance the overall look of your window boxes by incorporating supporting elements. Add decorative brackets or corbels beneath the boxes to add visual interest. Consider hanging window box accessories like wrought iron hooks or colorful ribbons to further elevate their appeal.
Window boxes are a wonderful way to bring beauty and nature closer to your home. By choosing the right plants, providing proper care, and regularly refreshing the displays, you can create stunning window boxes that enhance the beauty of your home’s exterior and bring joy to your surroundings.
Decorative FencingA decorative fence is not only a practical way to create privacy and define your property but also an opportunity to add style and charm to your home’s exterior. By choosing a decorative fencing design that complements the architecture and enhances the overall aesthetics of your property, you can create a visually appealing and cohesive look. Here’s how to incorporate decorative fencing into your outdoor space:
1. Select the Right Design: Consider the style of your home and the overall theme of your landscaping when choosing a decorative fencing design. Whether you prefer a classic picket fence, a decorative wrought iron design, or a modern geometric pattern, select a style that complements your home and reflects your personal taste.
2. Choosing the Material: Select a material that suits your desired aesthetic, as well as your budget and maintenance preferences. Common options for decorative fencing include wood, vinyl, aluminum, wrought iron, or a combination of materials. Each material has its own advantages in terms of durability, maintenance, and style.
3. Height and Scale: Determine the appropriate height and scale for your decorative fence based on your needs and local regulations. Consider factors such as privacy requirements, visibility, and the overall proportion to the surrounding landscaping and structures. Strive for a balance that provides privacy while maintaining an open and welcoming feel.
4. Incorporate Gates and Entrances: Enhance the functionality and visual appeal of your decorative fence by incorporating gates and entrances. Choose a gate design that complements the overall style of the fence and provides accessibility to your property. Install decorative hardware, such as hinges and latches, that adds an extra touch of charm.
5. Add Decorative Elements: Consider adding decorative elements to your fence to make it truly standout. These elements can include finials, post caps, trim pieces, or even personalized engravings. These intricate details can add a touch of elegance and uniqueness to your decorative fencing.
6. Picking the Right Color: Choose a color that complements your home’s exterior and the surrounding landscape. Consider whether you want your fence to blend in with the environment or make a statement as a focal point. Opt for a paint or stain that is specifically formulated for outdoor use and provides durability and long-lasting color.
7. Balancing Function and Aesthetics: Remember to consider both the functional and aesthetic aspects of your decorative fencing. It should serve its purpose in terms of privacy, security, and property delineation while seamlessly integrating with the overall design and enhancing the beauty of your outdoor space.
8. Regular Maintenance: Maintain the beauty and longevity of your decorative fence through regular cleaning and maintenance. Periodically inspect for any damage or wear, and promptly address any issues to prevent further deterioration. Clean the fence as needed and apply touch-ups or fresh coats of paint or stain as necessary.
By incorporating decorative fencing into your outdoor space, you can create a functional and aesthetically pleasing barrier that adds character and charm to your home’s exterior. From the design and materials to the color and accessories, every element of your decorative fence can contribute to enhancing the overall curb appeal and making a lasting impression.
Garden Sculptures
Garden sculptures are a captivating and unique addition to any outdoor space. They can serve as focal points, create visual interest, and add a touch of artistic flair to your garden. Whether you prefer classical statues, whimsical figurines, or abstract art pieces, incorporating garden sculptures allows you to personalize and enhance the beauty of your outdoor oasis. Here’s how to incorporate garden sculptures into your landscape:
1. Choose a Theme: Decide on a theme or concept for your garden sculptures. Consider the overall style and ambiance you want to create. It could be a reflection of your personal interests, a specific artistic era, or a harmonious connection to nature. Having a theme will help guide your selection and arrangement of sculptures.
2. Select the Right Sculptures: Choose sculptures that fit your chosen theme and reflect your personal taste. Consider the size, shape, and material of the sculptures, as well as their durability in outdoor conditions. Common materials for outdoor sculptures include bronze, stone, ceramic, and resin. Select sculptures that complement your garden’s overall design.
3. Placement and Scale: Determine the appropriate placement and scale for your garden sculptures. Consider the size of your garden and the surrounding landscape. A large sculpture can act as a centerpiece, while smaller sculptures can be placed strategically among plants or tucked into hidden corners. Experiment with different positions to find the perfect balance.
4. Create a Focal Point: Use a striking garden sculpture as a focal point to draw attention and create a sense of awe. Place it in a prominent location, such as at the end of a pathway, at the center of a garden bed, or beside a water feature. This will create a captivating focal point that anchors the overall design of your garden.
5. Blend with Nature: Integrate your garden sculptures harmoniously with the surrounding natural elements. Consider placing sculptures amidst lush greenery, alongside blooming flowers, or near flowing water. This juxtaposition of art and nature creates an enchanting and organic atmosphere in your garden.
6. Lighting to Enhance: Illuminate your garden sculptures with strategic lighting to enhance their beauty during the evening hours. Use spotlights or accent lights to create dramatic effects and cast shadows. Highlight specific features of the sculptures and create a magical ambiance that extends into the night.
7. Consider Moving and Rotating: Keep your garden fresh and dynamic by periodically moving and rotating your sculptures. This helps prevent stagnation and allows you to showcase different pieces at different times. It also provides an opportunity to experiment and create new visual compositions within your garden.
8. Maintenance: Regularly clean and maintain your garden sculptures to ensure they remain in excellent condition. Follow any specific care instructions provided by the manufacturer for each sculpture’s material. Remove debris, wipe away any dirt or grime, and inspect for any signs of damage. Make any necessary repairs promptly to prolong the life of your sculptures.
Garden sculptures add a touch of artistic expression and personality to your outdoor space. By selecting meaningful pieces, considering their placement and scale, and combining them harmoniously with nature, you can create a captivating garden that reflects your style and captivates the senses.
Conclusion
Enhancing your home’s curb appeal through DIY outdoor projects is a rewarding and creative endeavor. From upgrading your front door and refreshing the exterior paint to creating inviting front porches and captivating garden sculptures, each project has the power to transform your home’s exterior and make a lasting impression. By infusing your personal style, attention to detail, and a dash of creativity, you can create a welcoming and visually stunning outdoor space that reflects your taste and enhances the overall beauty of your property.
Remember to consider the functionality and maintenance aspects of each project, ensuring that they not only look great but also serve a purpose. Regular upkeep and attention to detail will help prolong the lifespan of your efforts and keep your outdoor space looking its best for years to come.
As you embark on these DIY outdoor projects, consider nature as your canvas. Integrating natural elements, such as plants, lighting, and landscaping, will further enhance the appeal of your projects and create a harmonious connection with the environment around you.
Lastly, enjoy the journey of creating a home exterior that brings you joy and pride. Each project is an opportunity to infuse your personality and make a statement with your home. Whether it’s through colorful flower boxes, stylish house numbers, or a charming pathway, your creativity and attention to detail will shine through in the final result.
So, roll up your sleeves, gather your tools, and get ready to create an outdoor space that will be the envy of the neighborhood. With these DIY outdoor projects, you can transform your home’s curb appeal, create lasting memories, and make a strong statement of style and pride in your property.
Frequently Asked Questions about 17 DIY Outdoor Projects Guaranteed To Boost Curb Appeal
Was this page helpful?
At Storables.com, we guarantee accurate and reliable information. Our content, validated by Expert Board Contributors, is crafted following stringent Editorial Policies. We're committed to providing you with well-researched, expert-backed insights for all your informational needs.

0 thoughts on “17 DIY Outdoor Projects Guaranteed To Boost Curb Appeal”