Articles
How To Wire A Shallow Electrical Box
Modified: August 31, 2024
Learn how to wire a shallow electrical box with this comprehensive guide. Find step-by-step instructions and expert advice in our articles.
(Many of the links in this article redirect to a specific reviewed product. Your purchase of these products through affiliate links helps to generate commission for Storables.com, at no extra cost. Learn more)
Introduction
When it comes to electrical installations, safety and proper wiring are of utmost importance. Whether you’re replacing an old electrical box or installing a new one, understanding the process and following the necessary steps is crucial. In this article, we will guide you through the process of wiring a shallow electrical box.
A shallow electrical box, also known as a shallow outlet box or a shallow junction box, is typically used when there is limited space in the installation area. These boxes are designed to be mounted close to the surface, providing a compact and low-profile solution for managing electrical connections.
Wiring a shallow electrical box may seem intimidating, but with the right tools and knowledge, it can be a straightforward task. By following the step-by-step instructions outlined in this article, you’ll be able to complete the process safely and effectively.
Before we dive into the details, it’s important to note that electrical work should be carried out by a qualified professional whenever possible. However, if you have a good understanding of electrical systems and feel confident in your abilities, you can proceed with caution.
In the following sections, we will cover the tools and materials you’ll need, the safety precautions to take, and the step-by-step process of wiring a shallow electrical box. By the end of this guide, you’ll have the knowledge and confidence to successfully complete this electrical installation.
Key Takeaways:
- Properly wiring a shallow electrical box requires understanding the box, gathering the right tools, and following safety precautions. By carefully preparing, stripping, connecting, and securing the wires, you can ensure a safe and reliable electrical installation.
- Testing the connections and following the step-by-step process are crucial for successfully wiring a shallow electrical box. By prioritizing safety and thorough testing, you can enjoy the benefits of a clean and organized electrical system.
Read also: 9 Best Shallow Electrical Box for 2025
Understanding Shallow Electrical Boxes
Before you begin wiring a shallow electrical box, it’s important to have a clear understanding of what it is and how it functions.
A shallow electrical box is a device that provides a secure enclosure for electrical connections. It is typically made of durable materials such as plastic or metal and is designed to be mounted directly onto a wall or ceiling surface. These boxes are shallower in depth compared to standard electrical boxes, allowing for installation in areas with limited space.
Shallow electrical boxes are commonly used in retrofitting projects, where there is a need to add or modify electrical outlets or switches in existing walls. They are also useful in areas where the depth of the wall cavity is restricted, such as in shallow walls or when installing fixtures on tiled surfaces.
These boxes come in various shapes and sizes to accommodate different types of electrical devices. Some examples include single-gang shallow boxes for switches or outlets, and shallow ceiling boxes for light fixtures or fans.
When choosing a shallow electrical box, it’s important to consider the specific requirements of your electrical installation. Ensure that the box is compatible with the wiring method, conductor size, and the type of device you plan to install.
Many shallow boxes come with detachable wiring compartments, which make them easier to work with. These compartments allow you to prepare the electrical connections outside the box and then simply attach the compartment to the box after wiring.
Understanding the purpose and characteristics of shallow electrical boxes is essential before diving into the wiring process. By properly selecting and installing the appropriate box for your specific application, you can ensure a safe and reliable electrical connection.
Tools and Materials Required
Before you start wiring a shallow electrical box, gather the necessary tools and materials to ensure a smooth and efficient installation process. Here are the essentials:
- Shallow electrical box: Choose a box that is suitable for your specific application, considering factors such as the size, shape, and depth of the box.
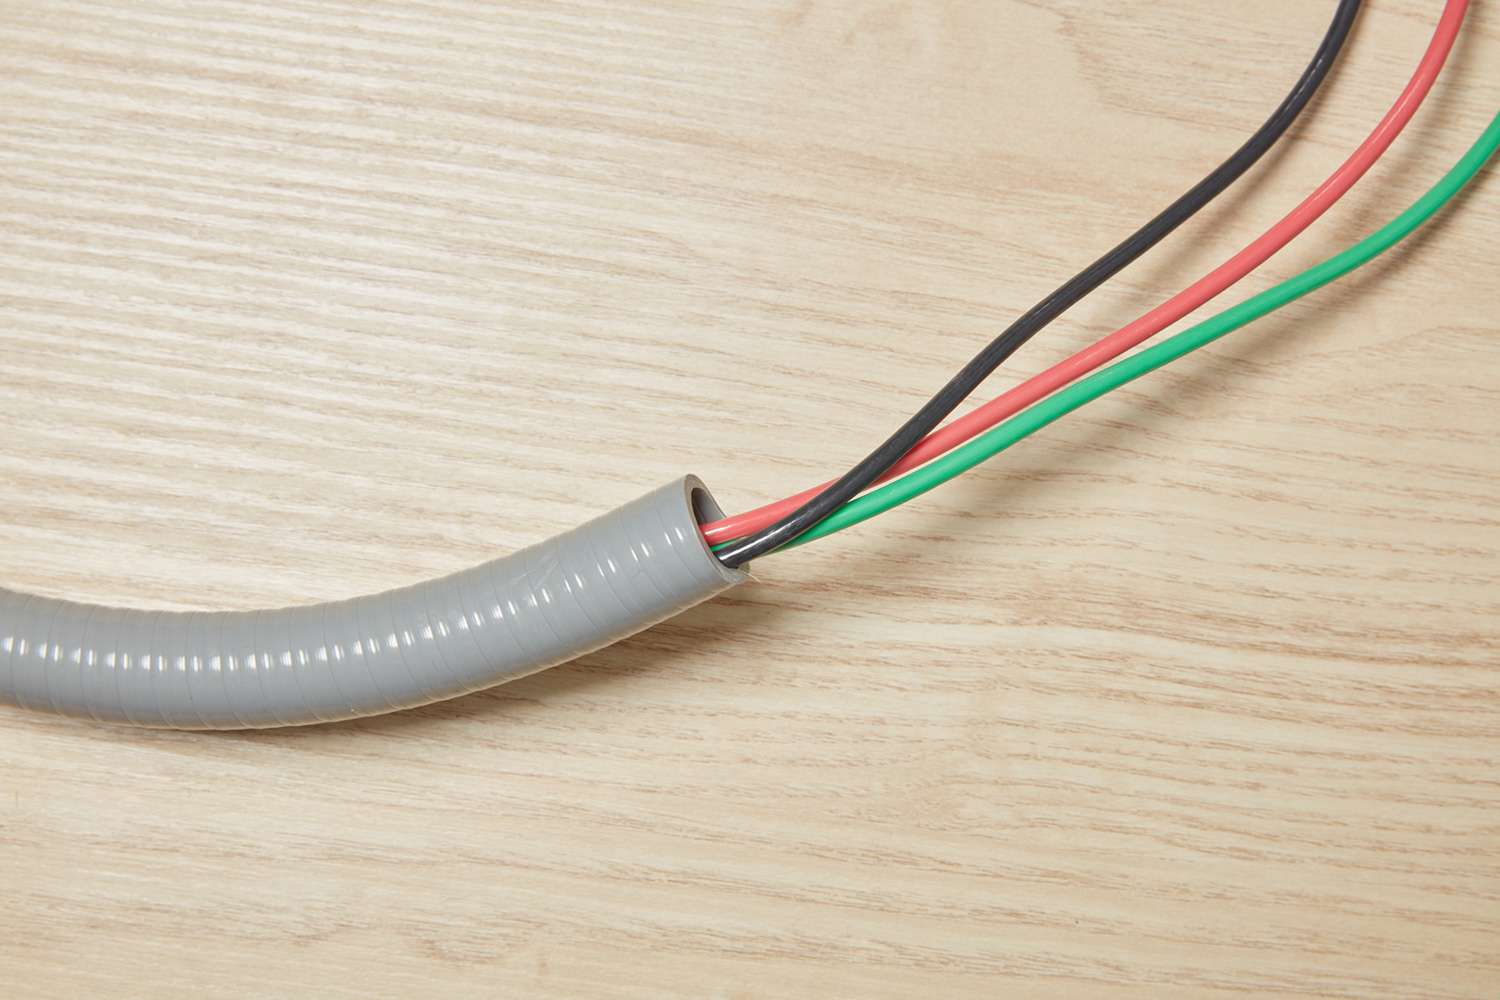
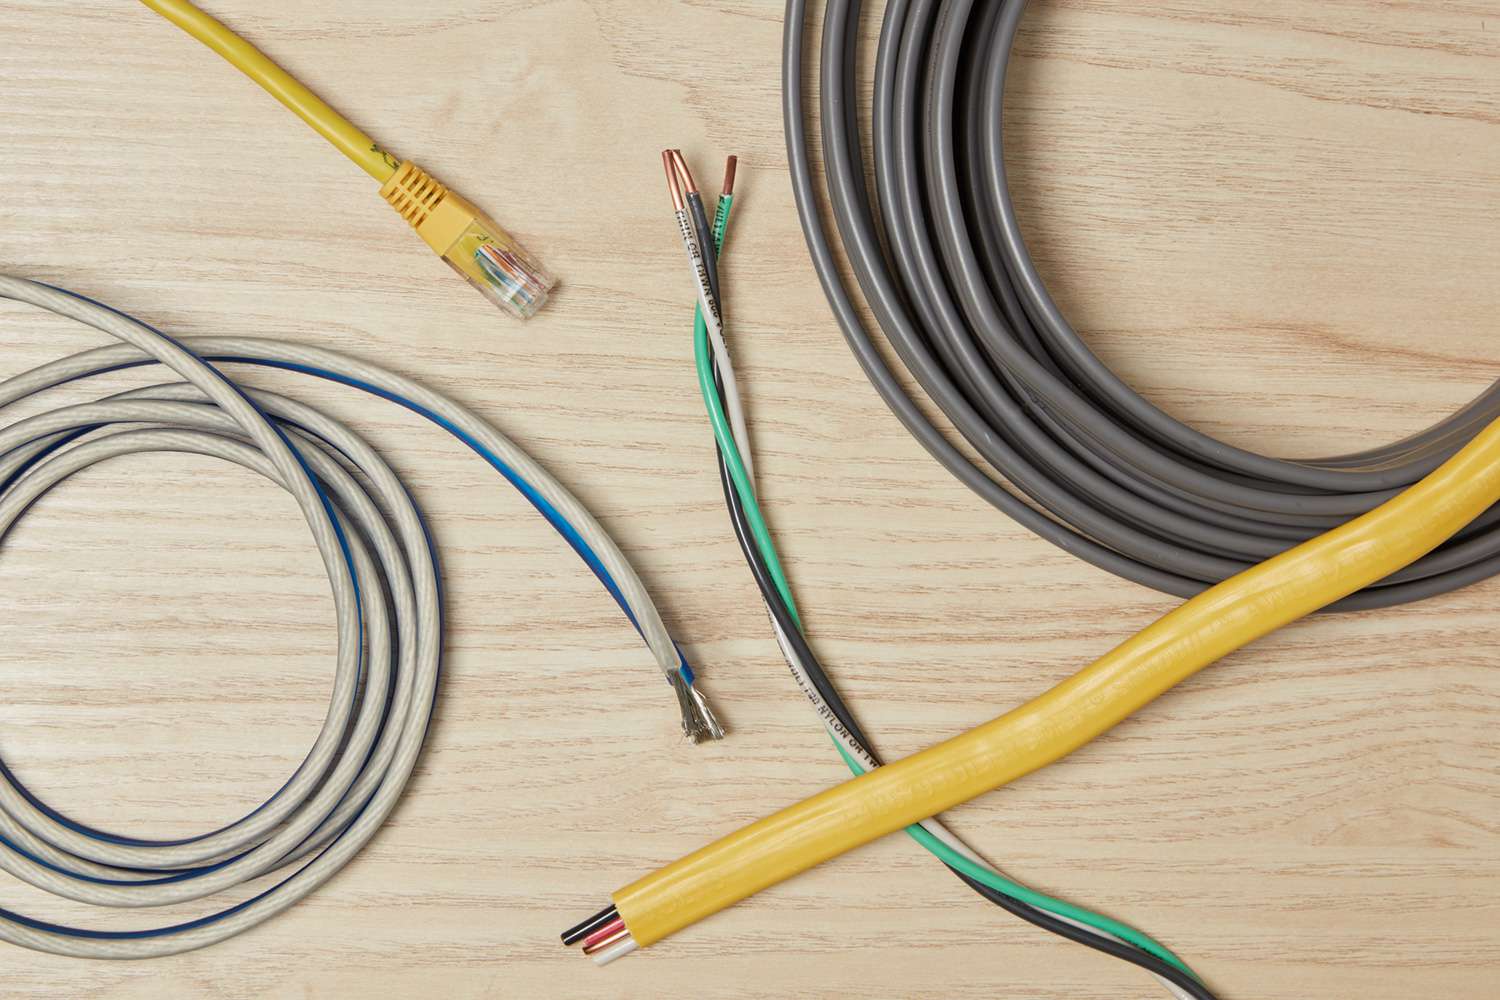
- Electrical cables: Depending on your project, you may need different types of electrical cables, such as non-metallic sheathed cable (NM), armored cable (AC), or conduit and wire.
- Wire stripper: Use a wire stripper to remove the insulation from the ends of the electrical wires, exposing the conductive copper.
- Wire connectors: These connectors are used to secure and join electrical wires together. Choose connectors appropriate for the wire size and type you are working with.
- Needle-nose pliers: These pliers are handy for manipulating and twisting wires, as well as for gripping small objects.
- Screwdriver: Depending on the type of screws used, you may need a Phillips or flathead screwdriver to secure the electrical box and cover plate.
- Utility knife: A utility knife is useful for cutting and stripping the outer sheath of electrical cables.
- Voltage tester: Always use a voltage tester to ensure the power is turned off and to verify that the wires are not live before working on them.
- Electrical tape: Electrical tape is used to insulate and protect wire connections.
- Pencil or marker: These tools come in handy for marking the placement of the electrical box on the wall or ceiling.
- Measuring tape: To measure the dimensions and distances accurately.
- Step ladder: If installing a shallow electrical box on the ceiling, a step ladder will allow you to reach the installation area safely.
By gathering these tools and materials beforehand, you’ll have everything you need to complete the wiring of a shallow electrical box efficiently and with ease.
Safety Precautions
Working with electricity can be dangerous if proper safety precautions are not followed. Before you begin wiring a shallow electrical box, it’s important to prioritize safety. Here are some essential safety measures to keep in mind:
- Ensure the power is turned off: Before starting any electrical work, shut off the power at the circuit breaker or fuse box. Use a voltage tester to double-check that the wires are not live before proceeding.
- Wear protective gear: Always wear safety goggles or glasses to protect your eyes from any debris that may be produced during the installation. Additionally, use insulated gloves and work boots to protect yourself from electric shocks.
- Work in a well-lit area: Adequate lighting will help you see what you’re doing and avoid mistakes or potential dangers.
- Use proper ladder safety: If you need to work at a height, make sure to use a sturdy step ladder or platform. Ensure that it is properly set up and stable before climbing on it.
- Avoid water and damp areas: Do not attempt any electrical work in wet or damp conditions. Water and electricity do not mix and can pose a serious risk of electric shock.
- Follow local electrical codes: Familiarize yourself with the electrical codes and regulations in your area. Always adhere to these guidelines to ensure that your installation is safe and meets the required standards.
- Check for hidden wires: Before drilling or making any modifications to walls or ceilings, use a stud finder or wire detector to ensure that you won’t accidentally damage any hidden wires.
- Properly secure connections: Ensure that all wire connections are securely fastened using wire connectors or terminals. Loose or exposed wires can pose a safety hazard and potentially cause electrical fires.
- Double-check your work: After completing the wiring, double-check all connections and ensure that everything is properly installed. Look for any signs of damage, frayed wires, or loose fittings.
- If in doubt, seek professional help: If you’re unsure about any aspect of the installation or feel uncomfortable working with electricity, it’s best to seek the assistance of a qualified electrician.
Remember, safety should always be your top priority when working with electrical systems. By following these safety precautions, you can reduce the risk of accidents and ensure a successful and secure installation of your shallow electrical box.
Step 1: Turn off the Power
Before you begin wiring a shallow electrical box, it is absolutely crucial to turn off the power to the circuit you’ll be working on. Here’s how to do it:
- Locate the circuit breaker or fuse box: The circuit breaker or fuse box is usually located in the basement, utility room, or an accessible area in your home. It contains individual switches or fuses that control the power to different circuits.
- Identify the correct circuit: Look for the breaker or fuse that corresponds to the area or room where you’ll be installing the shallow electrical box. If you’re unsure, you can use a non-contact voltage tester to identify the live circuit by touching the tester to the wires or electrical outlets.
- Turn off the circuit: If your home has a circuit breaker panel, flip the switch corresponding to the circuit you’ll be working on to the “off” position. If your home has a fuse box, carefully remove the fuse from the corresponding slot.
- Double-check the power: After turning off the circuit, use a voltage tester to confirm that the wires or outlets are no longer live. This extra step will ensure your safety before proceeding.
Remember, never assume that the power is off without verifying it with a voltage tester. Even if you think you have turned off the correct circuit, there is always a risk of mislabeling or wiring errors. Taking the time to turn off the power and confirm that it is off will protect you from accidental electrical shocks and potential hazards.
Once you have confirmed that the power is off, you can proceed confidently to the next steps of wiring your shallow electrical box.
Read more: How To Count Wires In An Electrical Box
Step 2: Prepare the Junction Box
After turning off the power, the next step in wiring a shallow electrical box is preparing the junction box. Here’s how to do it:
- Choose the appropriate junction box: Select a shallow electrical box that is suitable for your specific application. Consider the size and shape of the box, as well as any specific features or requirements needed for your electrical installation.
- Mark the location: Using a pencil or marker, mark the desired location of the junction box on the wall or ceiling. Ensure that it is level and positioned correctly according to your project requirements.
- Cut the opening: Using a keyhole saw or a suitable cutting tool, carefully cut out the opening for the junction box. Follow the marked guidelines and exercise caution to prevent damage to the surrounding area.
- Insert the box: Place the shallow electrical box into the opening and ensure that it fits securely. Some boxes may have mounting tabs or screws that need to be secured to the wall or ceiling.
- Ensure proper orientation: Make sure that the knockout holes or entrance points for the electrical cables are positioned appropriately for your wiring needs. Adjust the box if necessary.
Preparing the junction box properly is essential for a successful wiring installation. Taking the time to accurately mark and cut the opening, as well as ensuring a secure fit, will help create a stable foundation for the electrical connections.
Once the junction box is prepared and securely in place, you can proceed to the next step of stripping the wires.
Step 3: Strip the Wires
With the junction box prepared, it’s time to strip the insulation from the ends of the electrical wires. Properly stripping the wires will allow for secure connections inside the shallow electrical box. Follow these steps to strip the wires:
- Gather the necessary tools: Ensure you have a wire stripper that is suitable for the gauge of the wire you are working with. A wire stripper typically has different-sized cutting slots to accommodate various wire sizes.
- Identify the wires: Take a moment to identify the different wires you will be working with. This might include live wires, neutral wires, and ground wires. Always exercise caution when handling live wires and ensure the power is turned off.
- Strip the wires: Place the end of a wire into the appropriate cutting slot of the wire stripper, making sure to align it correctly. Squeeze the handle of the wire stripper and carefully pull it towards the end of the wire. This will remove the insulation, exposing the conductor within. Repeat this process for each wire.
- Strip the appropriate length: Depending on the electrical connection you are making, strip the wire to the appropriate length. Typically, this is around 1/2 inch (12 mm) to 3/4 inch (19 mm) of bare wire exposed. Be cautious not to strip too much insulation, as this can lead to exposed wire contacts and potential hazards.
- Inspect the stripped wires: After stripping the wires, visually inspect each one to ensure no strands of the conductor are damaged or frayed. If necessary, trim any excess strands or re-strip the wire if the conductor is compromised.
By carefully stripping the wires and ensuring the proper length, you set the stage for successful and secure connections within the shallow electrical box.
With the wires stripped, you are now ready to move on to the next step: connecting the wires inside the junction box.
When wiring a shallow electrical box, make sure to use the appropriate size and type of wire connectors to secure the wires in place. This will help prevent any loose connections and ensure the safety of the electrical installation.
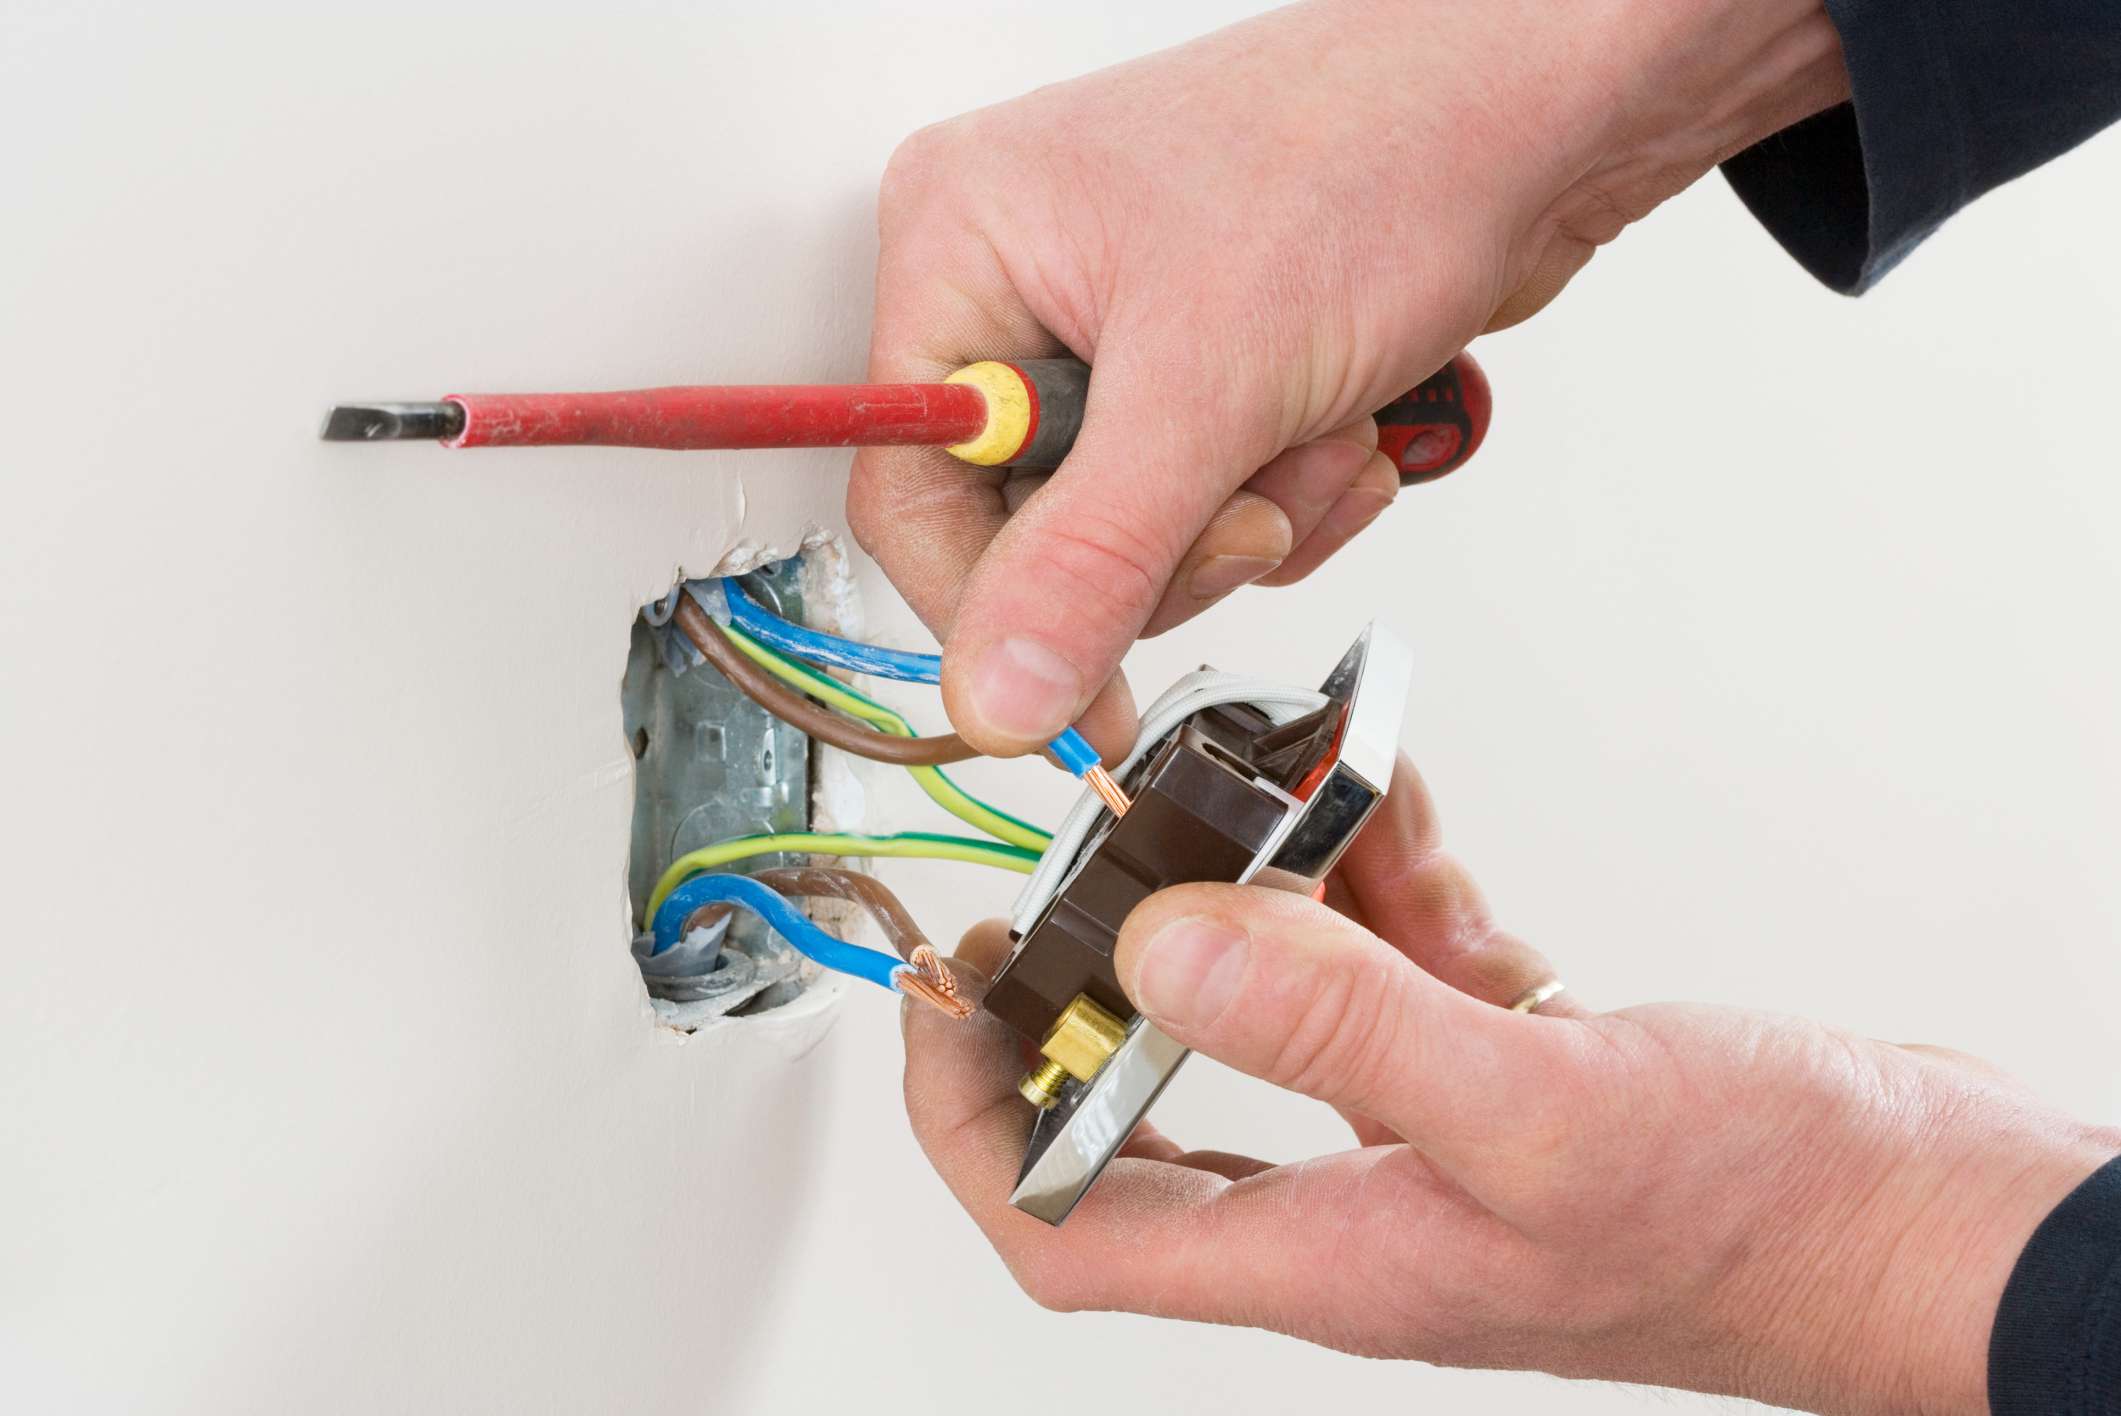
Step 4: Connect the Wires
With the wires stripped, it’s time to connect them inside the shallow electrical box. Properly connecting the wires will ensure a secure and reliable electrical installation. Follow these steps to connect the wires:
- Identify the wires: Take a moment to identify the different wires you will be working with. This includes the hot (live) wire, neutral wire, and ground wire. Check the wire colors to help distinguish between them. The hot wire is typically black or red, the neutral wire is white or gray, and the ground wire is green or bare copper.
- Make proper connections: Connect the corresponding wires together using wire connectors or terminals. Twist the exposed ends of the wires together in a clockwise direction, ensuring a tight and secure connection.
- Hot wire connections: Connect the hot wire to the appropriate terminal or wire in the shallow electrical box. This could be a switch, outlet, or another device, depending on your specific installation. Follow the manufacturer’s instructions or the wiring diagram for proper connection.
- Neutral wire connections: If you have a neutral wire, connect it to the appropriate terminal or wire in the shallow electrical box. Similar to the hot wire, this could be connected to a specific device or terminal.
- Ground wire connections: Connect the ground wire to the grounding screw or terminal in the shallow electrical box. Ensure that the grounding wire is securely fastened to provide proper grounding for the electrical system.
- Ensure proper insulation: After making the connections, ensure that the wire connections are properly insulated. Use electrical tape to wrap each wire connection, providing an extra layer of protection and preventing accidental contact.
Take your time during this step to ensure that each wire connection is secure and properly aligned. Double-check that the wire connectors or terminals are tightly fastened to prevent any loose connections or potential hazards.
Once the wires are securely connected, you can proceed to the next step: securing the wire connections.
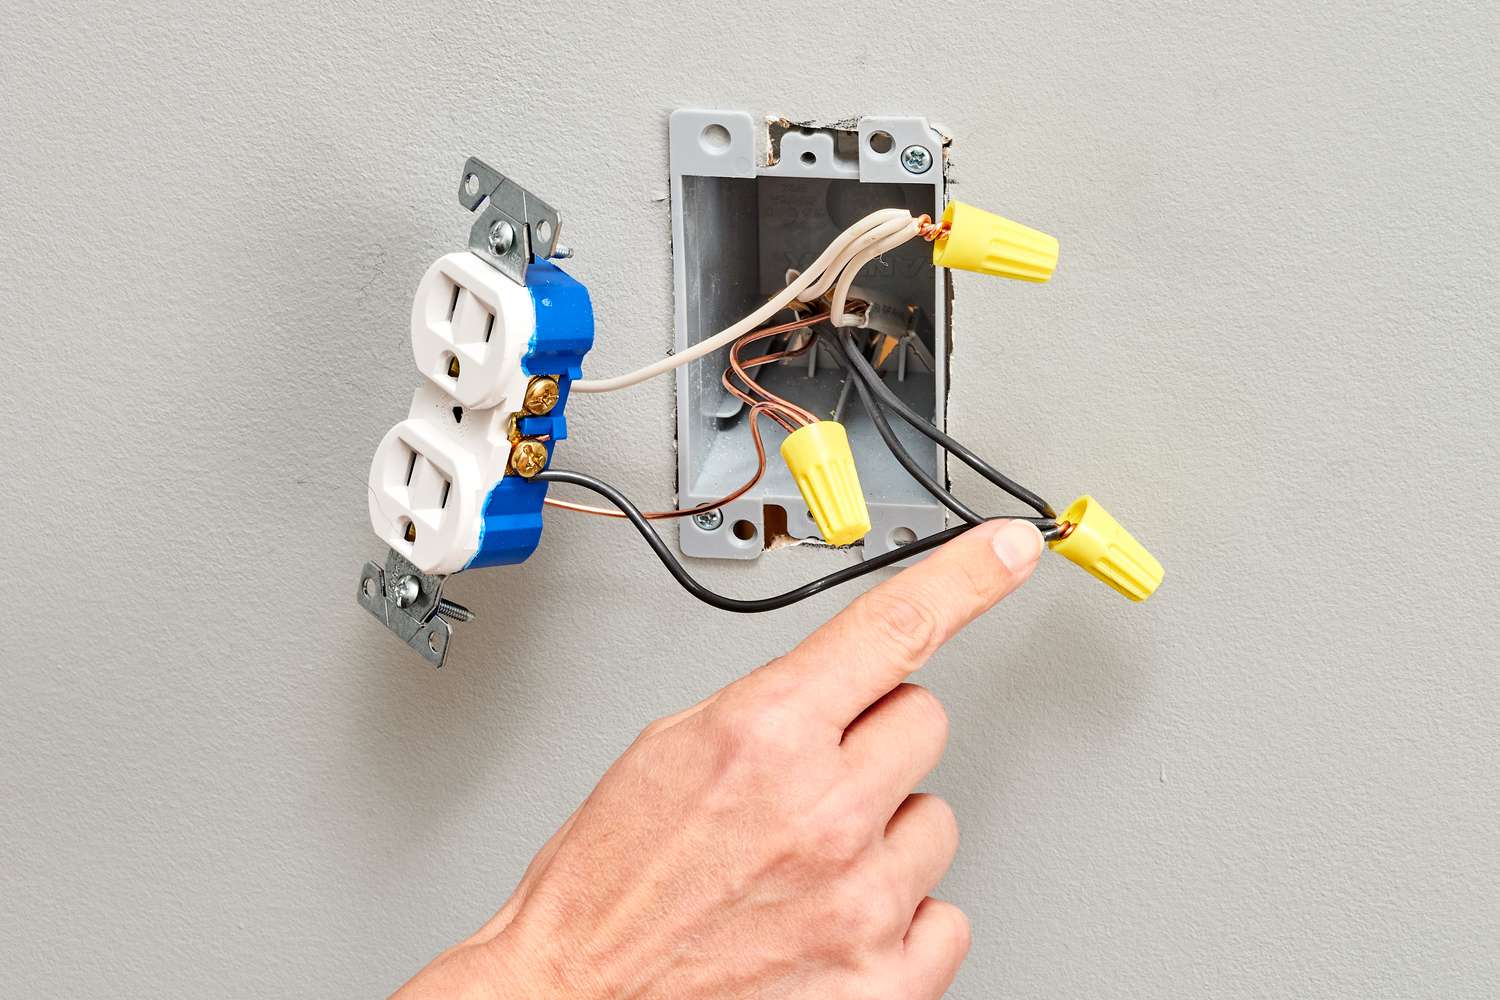
Step 5: Secure the Connections
After connecting the wires in the shallow electrical box, it’s important to secure the connections to ensure they remain safe and stable. Follow these steps to properly secure the wire connections:
- Inspect the connections: Before proceeding, visually inspect the wire connections to ensure they are properly aligned and tightly secured. Double-check that all the wires are securely connected and there are no loose or exposed conductors.
- Use wire connectors: If you haven’t already done so, use wire connectors or terminals to secure the twisted wire connections. Make sure to choose connectors that are appropriate for the wire gauge you are working with.
- Twist the connectors: With the wire connectors in place, use pliers to twist them clockwise, ensuring a tight and secure connection. This will help prevent any accidental disconnections or wires coming loose over time.
- Tug test: Give each wire connection a gentle tug to ensure it holds firm. If any wires come loose, resecure them with additional twists or by trimming and restripping the wires if necessary.
- Arrange the wires: Arrange the connected wires neatly inside the shallow electrical box to avoid overcrowding or any interference with other components or devices. Proper wire management will make the installation cleaner and more organized.
- Trim excess wire length: If there is excessive wire length inside the box, use wire cutters to carefully trim the excess. Leaving too much wire can lead to potential hazards, such as wires being accidentally pulled or exposed later on.
By properly securing the wire connections, you ensure a reliable and safe electrical installation. Taking the time to inspect and tighten the connections will help prevent any electrical problems or hazards in the future.
With the wire connections secured, you are ready to move on to the next step: installing grounding.
Read more: How To Run Electrical Wire From Breaker Box
Step 6: Install Grounding
Proper grounding is a critical aspect of electrical installations to ensure safety and protect against electrical faults. Follow these steps to install grounding in your shallow electrical box:
- Identify the grounding wire: The grounding wire is typically green or bare copper and connects the electrical system to the ground, providing a path for electrical fault currents.
- Locate the grounding screw: Inside the shallow electrical box, look for a grounding screw or terminal. This is where the grounding wire will be connected.
- Prepare the grounding wire: Strip the insulation from the end of the grounding wire, leaving enough bare wire to connect to the grounding screw securely.
- Secure the grounding wire: Wrap the exposed end of the grounding wire around the grounding screw in a clockwise direction. Ensure that it is tightly secured to the screw.
- Tighten the grounding screw: Using a screwdriver, tighten the grounding screw to firmly hold the grounding wire in place. Avoid over-tightening, as it may damage the wire or the screw.
- Double-check the connection: Give the grounding wire a gentle tug to ensure it is securely attached to the grounding screw. A secure connection ensures proper grounding of the electrical system.
Proper grounding is essential for electrical safety. It helps to prevent electrical shocks and reduces the risk of electrical fires. By following these steps to install grounding in your shallow electrical box, you are taking an important step towards ensuring the safety of your electrical installation.
With the grounding successfully installed, you can move on to the next step: attaching the cover plate.
Step 7: Attach the Cover Plate
Attaching the cover plate to the shallow electrical box provides a finished and secure enclosure for the electrical connections. Follow these steps to properly attach the cover plate:
- Select the appropriate cover plate: Choose a cover plate that matches the style and size of your shallow electrical box. Ensure that it is designed for the specific device or switch you are installing, such as an outlet cover or switch plate.
- Position the cover plate: Align the screw holes on the cover plate with the corresponding holes on the shallow electrical box. Ensure that the plate is positioned straight and centered over the box.
- Insert and tighten the screws: Insert the screws into the holes on the cover plate and align them with the holes on the box. Use a screwdriver to tighten the screws until the cover plate is securely fastened. Avoid over-tightening, as it may strip the screw holes or damage the cover plate.
- Double-check for proper alignment: Take a step back and verify that the cover plate is properly aligned and sitting flush against the wall or ceiling. Make any necessary adjustments to ensure a neat and finished appearance.
Attaching the cover plate completes the installation of the shallow electrical box. It not only provides a clean and professional look, but also serves as an extra layer of protection for the electrical connections inside the box.
With the cover plate securely attached, you are ready for the final step: testing the connections.
Step 8: Test the Connections
Testing the connections in your shallow electrical box is a crucial final step to ensure that everything is functioning properly and safely. Follow these steps to test the connections:
- Turn on the power: Before testing the connections, turn on the power at the circuit breaker or fuse box. This will restore electricity to the circuit and allow you to test the functionality of the electrical components.
- Check for power: Use a voltage tester to check for power at the outlets or switches connected to the shallow electrical box. Ensure that the tester indicates voltage and that the connected devices are receiving power.
- Test the switches and outlets: If you have installed switches or outlets in the shallow electrical box, test their functionality by plugging in a lamp or other device. Switch the devices on and off to verify that they are operating as expected.
- Check for any issues: As you test the connections, be vigilant for any signs of electrical issues, such as flickering lights, buzzing sounds, or overheating switches or outlets. If any problems are detected, turn off the power immediately and assess the connections for any loose or faulty wiring.
Testing the connections is crucial to ensure that everything is working as intended and to identify any potential problems or faulty connections. By being thorough in your testing, you can address any issues before they become safety hazards.
If you encounter any problems or are unsure about the results of your testing, it is recommended to consult a qualified electrician for further inspection and assistance.
With the connections successfully tested and confirmed, you have completed the process of wiring a shallow electrical box! Remember to turn off the power again before making any further adjustments or modifications to the electrical system.
Congratulations on a job well done, and enjoy the safe and reliable functionality of your newly installed shallow electrical box!
Conclusion
Wiring a shallow electrical box may seem daunting at first, but by following the step-by-step process and taking the necessary safety precautions, you can successfully complete the installation. A properly wired shallow electrical box ensures safe and reliable electrical connections for switches, outlets, or other devices.
Throughout this guide, we discussed the importance of understanding shallow electrical boxes, gathering the right tools and materials, and taking safety precautions. We explored each step of the installation process, including turning off the power, preparing the junction box, stripping the wires, connecting the wires, securing the connections, installing grounding, attaching the cover plate, and testing the connections.
Remember, if you ever feel uncertain or uncomfortable with any aspect of the wiring process, it’s always best to seek the assistance of a qualified electrician. Safety should always be the top priority when working with electricity.
By successfully wiring a shallow electrical box, you can enjoy the benefits of a clean and organized electrical system while ensuring the safety and reliability of your electrical connections.
We hope this guide was helpful in guiding you through the process of wiring a shallow electrical box. Now, armed with the knowledge and confidence to tackle this electrical installation, you can confidently embark on your next project!
Ready to tackle more DIY electrical projects? If wiring a shallow electrical box seemed like a breeze, you'll definitely want to check out our next challenge. Learn the ins and outs of electrical wiring as you extend power to your garage. This guide offers clear, step-by-step advice that will help you safely and effectively bring electricity to new areas of your home.
Frequently Asked Questions about How To Wire A Shallow Electrical Box
Was this page helpful?
At Storables.com, we guarantee accurate and reliable information. Our content, validated by Expert Board Contributors, is crafted following stringent Editorial Policies. We're committed to providing you with well-researched, expert-backed insights for all your informational needs.


0 thoughts on “How To Wire A Shallow Electrical Box”