
Articles
How To Make Basement Walls Look Better
Modified: October 28, 2024
Learn how to enhance the appearance of your basement walls with these insightful articles. Discover tips and tricks for a better-looking space.
(Many of the links in this article redirect to a specific reviewed product. Your purchase of these products through affiliate links helps to generate commission for Storables.com, at no extra cost. Learn more)
Introduction
Basements are often overlooked spaces in a home, used primarily for storage or as a laundry area. However, with a little creativity and effort, you can transform your basement walls from dull and dreary to beautiful and inviting. By making some strategic choices and incorporating the right elements, you can make your basement walls look better and transform the entire space.
When it comes to improving the appearance of your basement walls, there are several options to consider. From choosing the right color to adding decorative touches, the possibilities are endless. In this article, we will explore some effective ways to makeover your basement walls and create a more pleasant and appealing environment.
Key Takeaways:
- Transform your basement walls with light, neutral colors, wall panels, and decorative elements like wallpaper and wall decals. Incorporate lighting, mirrors, and shelves for a personalized and inviting space.
- Elevate your basement walls with textured coverings, creating depth and visual interest. From faux brick panels to stone veneer, unleash your creativity and transform your basement into a stylish and welcoming environment.
Read more: How To Make Siding Look Better
Choosing the Right Color
The first step in making your basement walls look better is selecting the right color. The color you choose will set the tone for the entire space. Opt for light and neutral colors to create an open and airy feel. Whites, creams, and pale grays are excellent choices that can brighten up the space and make it feel more welcoming. Avoid dark colors, as they can make the basement feel small and claustrophobic.
Additionally, consider using an accent color to add visual interest and create focal points. You can choose a bold hue, such as a vibrant blue or a rich green, for one wall or a specific area. This will add depth and personality to the space without overwhelming it.
Adding a Fresh Coat of Paint
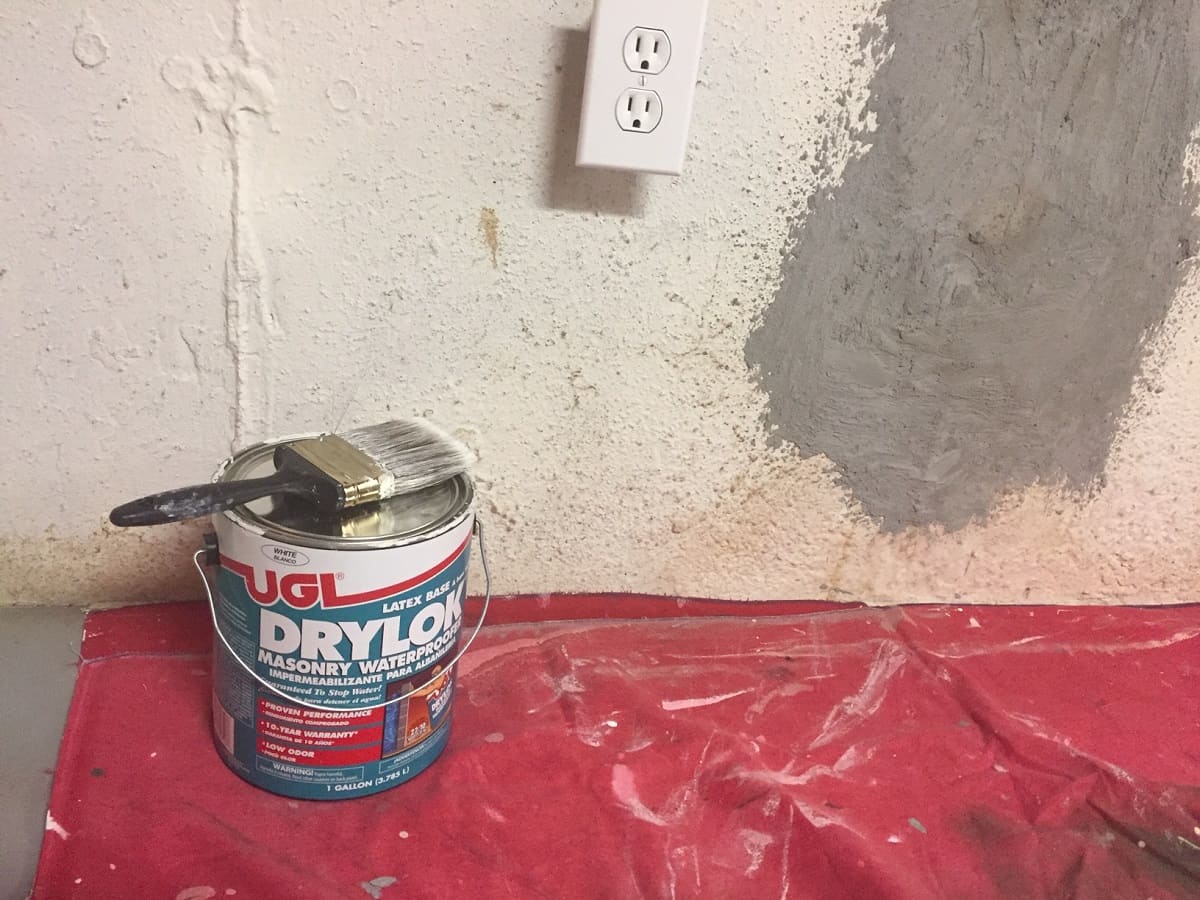
A fresh coat of paint can work wonders in transforming the appearance of your basement walls. Before applying the paint, make sure to properly prepare the surface by cleaning it and filling in any cracks or holes. Use a high-quality primer to ensure better adhesion and durability.
When choosing a paint finish, consider the purpose of the basement. If you plan to use it as a recreational or entertainment space, a semi-gloss or satin finish is ideal as it is easier to clean and more resistant to moisture. For a more sophisticated look, opt for a matte or eggshell finish.
Remember to use painters tape to protect adjoining surfaces, such as trim or baseboards, and use a paintbrush or roller to apply the paint evenly. Don’t rush the process, and allow sufficient drying time between coats.
Installing Wall Panels
If you want to completely change the look of your basement walls, consider installing wall panels. Wall panels come in a variety of materials, including wood, PVC, and fabric, and can instantly elevate the aesthetic appeal of your space.
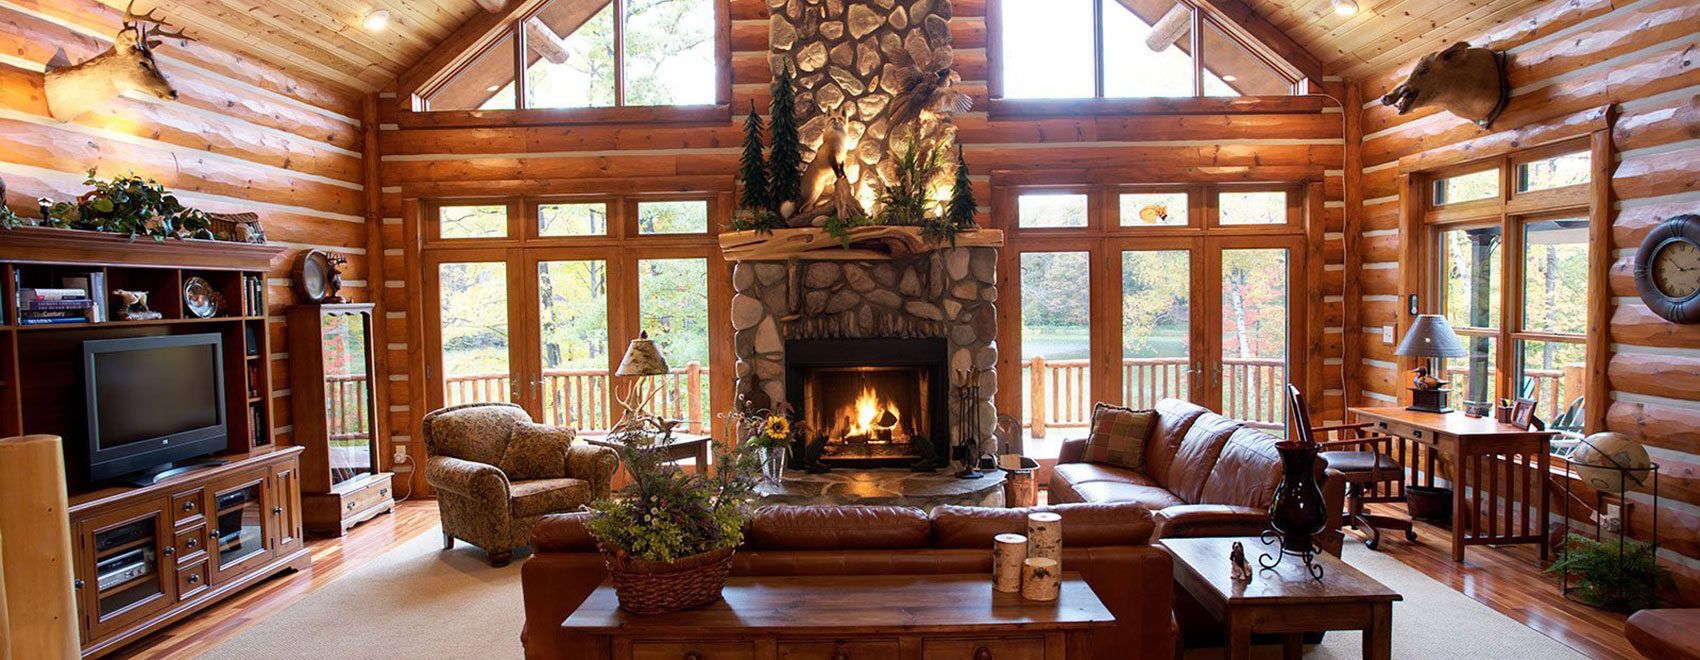
Wooden wall panels can add warmth and texture, creating a cozy and rustic ambiance. PVC panels are a cost-effective option that can mimic the look of wood or other materials. Fabric panels, on the other hand, add softness and can help with sound insulation.
Installation methods vary depending on the type of wall panel you choose, so be sure to follow the manufacturer’s instructions. Overall, wall panels are a great way to hide imperfections in the walls while adding style and sophistication to your basement.
Applying Wallpaper or Wall Decals
If you want to add a pop of color or pattern to your basement walls, consider using wallpaper or wall decals. Wallpaper comes in a wide range of designs and textures, allowing you to create a unique and personalized space. Wall decals are a more temporary option, perfect for those who want to experiment with different designs without a long-term commitment.
Before applying wallpaper or wall decals, make sure the walls are clean and smooth. If there are any imperfections, patch and sand them before starting. Follow the manufacturer’s instructions for application, ensuring proper alignment and minimizing air bubbles.
Both wallpaper and wall decals can instantly transform your basement walls, adding personality and charm to the space.
Key Takeaways:
- Transform your basement walls with light, neutral colors, wall panels, and decorative elements like wallpaper and wall decals. Incorporate lighting, mirrors, and shelves for a personalized and inviting space.
- Elevate your basement walls with textured coverings, creating depth and visual interest. From faux brick panels to stone veneer, unleash your creativity and transform your basement into a stylish and welcoming environment.
Read more: How To Make Siding Look Better
Choosing the Right Color
When it comes to enhancing the look of your basement walls, choosing the right color is crucial. The color you select will have a significant impact on the overall ambiance of the space. Here are some tips to help you choose the perfect color for your basement walls:
- Consider the purpose of the space: Think about how you plan to use your basement. Is it going to be a cozy family room, a home gym, or a home office? The function of the space will influence the color selection. If you want a calming and relaxing atmosphere, opt for light, cool colors like blues and greens. If you want a vibrant and energizing space, consider warmer colors like yellows or oranges.
- Take into account the amount of natural light: Basements typically have limited access to natural light, so it’s important to choose colors that can help brighten the space. Lighter shades like whites, creams, and pale grays can help reflect what little natural light there might be, making the basement feel more open and spacious. Avoid dark colors as they can make the space feel smaller and more enclosed.
- Coordinate with the rest of the house: Take the color scheme of the rest of your house into consideration. You want to choose a color for your basement walls that complements the overall aesthetic of your home. Consider the color palette of your main living areas and try to find a shade that harmonizes well with the existing colors.
- Consider the basement’s architectural features: Take note of any distinctive architectural features in your basement, such as exposed brick walls or wooden beams. These elements can provide inspiration for the color palette. You may choose to highlight these features by selecting a color that contrasts or complements them.
- Test paint samples: Before committing to a color, it’s a good idea to test paint samples on your basement walls. Lighting and other factors can significantly impact how the color appears in different spaces. Apply small sections of various colors and observe them at different times of the day to see how the light affects them. This will help you make an informed decision before painting the entire basement.
Remember that color can have a powerful influence on our emotions and mood. Choose a color that not only enhances the aesthetics but also creates a comfortable and welcoming atmosphere.
Once you’ve chosen the right color for your basement walls, it’s time to move on to the next step: adding a fresh coat of paint.
Adding a Fresh Coat of Paint
One of the most effective ways to transform the look of your basement walls is by applying a fresh coat of paint. A new paint color can completely revitalize the space and give it a fresh, updated feel. Here are some tips to consider when adding a fresh coat of paint to your basement walls:
- Prepare the walls: Before painting, it’s important to ensure that the walls are clean and free from any dirt, dust, or flaking paint. Use a mild detergent and water solution to wash the walls and let them dry completely. If there are any cracks or holes, fill them with spackle and sand the surface until it is smooth.
- Use a primer: Applying a primer is essential, especially if you’re painting over a darker or previously painted surface. A primer helps the paint adhere better and ensures a smoother, more durable finish. Choose a primer that is specifically designed for the type of walls you have, whether they are concrete, drywall, or another material.
- Choose the right paint type: Basements are susceptible to moisture and humidity, so it’s important to choose a paint that is suitable for these conditions. Look for paints that are labeled as moisture-resistant or formulated for use in basements. These paints typically have better durability and mold/mildew resistance.
- Select the finish: The finish of the paint can impact the overall look and feel of the basement. For a smooth and uniform appearance, choose a flat or eggshell finish. If you want a slightly more durable finish that is easier to clean, opt for a satin or semi-gloss finish. Keep in mind that glossier finishes may highlight any imperfections on the walls.
- Consider the lighting: Basements often have limited natural light, so it’s important to choose a paint color that can help brighten the space. Lighter shades like whites, creams, and pastels can reflect the available light and make the basement feel more open and airy. However, if you want to create a cozy and intimate atmosphere, you can also consider darker, richer colors.
- Get the right tools: Invest in high-quality painting tools to achieve the best results. Use a good-quality roller and brushes that are appropriate for the type of paint you’re using. A roller with a medium nap is typically best for most basement walls.
- Apply multiple coats: To ensure an even and vibrant finish, it’s usually necessary to apply multiple coats of paint. Follow the manufacturer’s instructions for the recommended number of coats and drying time between each coat. Be patient and allow sufficient time for the paint to dry before moving onto the next coat or carrying out any touch-ups.
Adding a fresh coat of paint to your basement walls can instantly transform the space and give it a whole new look and feel. It’s a relatively inexpensive and straightforward way to update the basement and make it a more pleasant and inviting area.
Next, let’s explore another method to improve the appearance of your basement walls: installing wall panels.
Installing Wall Panels
If you want to completely transform the look of your basement walls and add a touch of elegance and sophistication, consider installing wall panels. Wall panels are an excellent way to enhance the aesthetics of your space while also covering any imperfections in the walls. Here’s how you can go about installing wall panels in your basement:
- Select the type of wall panels: There are various types of wall panels available, including wood panels, PVC panels, and fabric panels. Each type offers a different look and feel, so choose one that aligns with your desired aesthetic. Wood panels provide warmth and texture, PVC panels are cost-effective and versatile, and fabric panels add softness and sound insulation.
- Measure and prepare the walls: Before installation, accurately measure the dimensions of your basement walls to determine how many panels you will need. Ensure that the walls are clean and free of any dirt or debris. If there are any cracks or holes, fill them in and sand the surface to create a smooth base for the panels.
- Prepare the panels: If you’re using wooden panels, it’s important to let them acclimate to the temperature and humidity of your basement for a few days before installation. This prevents the panels from warping or shrinking later on. PVC panels often come prefinished and ready to install. Fabric panels may require ironing or steaming to remove any wrinkles.
- Install the panels: Start by finding the center of each wall and marking it. This will help you align the panels evenly. Follow the manufacturer’s instructions for the specific type of wall panels you are using. Typically, you will need to apply adhesive to the back of the panels and press them firmly against the wall. Use a level to ensure that the panels are straight and even. Secure the panels in place with nails or screws, if necessary.
- Finishing touches: Once all the panels are installed, fill any gaps between the panels and the walls with caulk or putty. This will create a seamless look. If you’re using wooden panels, consider applying a protective coat of sealer or stain to enhance their durability and appearance.
Installing wall panels can completely transform the look and feel of your basement walls. They not only add visual interest but also provide insulation and soundproofing benefits. Whether you choose the warmth of wood, the versatility of PVC, or the softness of fabric, wall panels are a fantastic way to elevate the aesthetics of your basement.
Next, let’s explore another option for enhancing the appearance of your basement walls: applying wallpaper or wall decals.
Applying Wallpaper or Wall Decals
If you’re looking for a quick and cost-effective way to add color, pattern, or texture to your basement walls, consider applying wallpaper or wall decals. Both wallpaper and wall decals offer endless possibilities for customization and can dramatically transform the look of your space. Here’s how you can apply wallpaper or wall decals in your basement:
- Choose the right design: Start by selecting a design that complements the style and ambiance you want to create in your basement. Wallpaper comes in a wide variety of patterns, colors, and textures, allowing you to find the perfect fit for your space. Wall decals offer a more versatile and customizable option, with designs ranging from intricate patterns to scenic landscapes or even personalized quotes.
- Prepare the walls: Ensure that the walls are clean and smooth before applying wallpaper or wall decals. If necessary, fill any cracks or holes and sand the surface until it is even. Remove any dust or debris to ensure proper adhesion.
- Measure and cut: Measure the height and width of the walls to determine the amount of wallpaper or wall decals you will need. Cut the wallpaper or wall decals into appropriate lengths or sections, leaving a few extra inches at the top and bottom for adjustment.
- Apply adhesive: If using traditional wallpaper, follow the manufacturer’s instructions to mix the adhesive. Apply the adhesive to the back of the wallpaper with a roller or brush, making sure to cover the entire surface. If using peel-and-stick wallpaper or wall decals, simply peel off the backing to expose the adhesive side.
- Apply wallpaper or wall decals: Starting from one corner of the wall, gently press the wallpaper or wall decal against the wall, aligning it with the top and one side. Use a smoothing tool or a clean, damp cloth to eliminate any air bubbles or wrinkles. Continue applying the wallpaper or wall decals, working your way across the wall. Trim any excess material at the top and bottom with a sharp knife or scissors.
- Smooth and secure: Once the wallpaper or wall decals are in place, use a smoothing tool or a clean, damp cloth to ensure a smooth and even surface. Pay attention to the edges and corners to ensure they are securely adhered.
Remember that wallpaper and wall decals can be a temporary or permanent solution, depending on the type you choose. This gives you the flexibility to change the look of your basement whenever you desire. Whether you want to add a bold statement wall or a subtle accent, applying wallpaper or wall decals is a creative and effective way to transform your basement walls.
Now, let’s move on to another method to enhance the appearance of your basement walls: creating a gallery wall.
Read more: How To Make A Drop Ceiling Look Better
Creating a Gallery Wall
If you’re looking to add a personal touch and showcase your creativity, creating a gallery wall is a fantastic way to enhance the appearance of your basement walls. A gallery wall allows you to display a collection of artwork, photographs, or other meaningful pieces in a visually appealing and cohesive manner. Here’s how you can create a stunning gallery wall in your basement:
- Plan the layout: Start by planning the layout of your gallery wall. Consider the available wall space and the number of pieces you want to display. Lay out the artworks on the floor or use painter’s tape to temporarily adhere them to the wall. Experiment with different arrangements until you find a layout that you’re happy with.
- Choose a theme or color scheme: To create a cohesive look, consider choosing a theme or color scheme for your gallery wall. This could be based on a particular style, subject matter, or even a combination of colors that tie everything together. A consistent theme or color scheme will help create a visually pleasing and harmonious display.
- Mix and match frames: Select a variety of frames that complement your artwork and fit the overall aesthetic of your basement. Mix different frame colors, sizes, and shapes to add visual interest and variety to your gallery wall. Alternatively, you can choose a uniform frame style for a more unified and minimalist look.
- Consider additional elements: Don’t limit yourself to just frames and artwork. Include other elements such as mirrors, decorative objects, or even wall-mounted shelves to add depth and dimension to your gallery wall. These additional elements can help break up the layout and make it more visually engaging.
- Arrange and hang the artwork: Once you have finalized your layout, it’s time to hang the artwork. Start by measuring and marking the placement of each piece on the wall. Use a level to ensure that the artworks are straight. If you’re uncertain about the placement, create paper templates of each artwork and tape them on the wall to get a better visual representation before making any permanent marks. Begin hanging the pieces, starting from the center and working your way outwards.
- Balance and spacing: Pay attention to the balance and spacing between the artworks. Leave enough space between each piece to give them room to breathe and avoid a cluttered look. Step back and assess the arrangement from a distance to ensure that the overall composition is visually balanced.
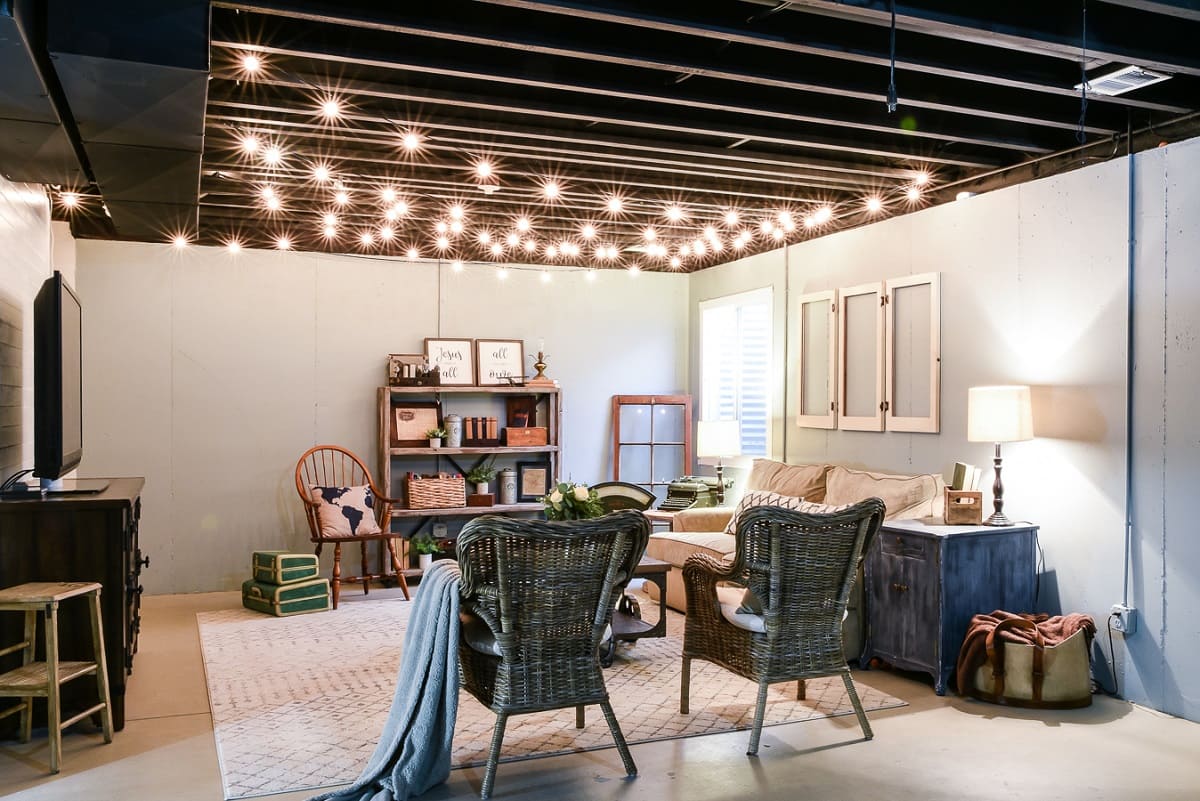
- Final touches: Once you’ve hung all the pieces, step back and make any necessary adjustments. Ensure that the frames are securely fixed to the wall and level. Consider adding additional decorative elements such as string lights or wall sconces to further enhance the gallery wall.
A gallery wall not only adds visual interest and personality to your basement walls but also serves as a focal point for the space. It allows you to display your favorite artworks, photographs, and cherished memories while creating a unique and personalized atmosphere.
Next, let’s explore another method to improve the appearance of your basement walls: installing wall sconces or accent lighting.
Installing Wall Sconces or Accent Lighting
Proper lighting can drastically change the ambiance of a space, including your basement walls. Installing wall sconces or accent lighting can not only brighten up the area but also create a warm and inviting atmosphere. Here are some tips for installing wall sconces or accent lighting in your basement:
- Assess your lighting needs: Consider the purpose of your basement and the specific areas you want to highlight. Do you need overall ambient lighting or task-specific lighting for certain activities? Understanding your lighting needs will help you determine the type and placement of wall sconces or accent lighting.
- Select the right fixtures: Choose wall sconces or accent lighting fixtures that complement the overall style and design of your basement. Consider the existing decor and the atmosphere you want to create. Wall sconces come in a variety of styles, including traditional, modern, industrial, or minimalist, allowing you to find the perfect match for your space.
- Plan the wiring: If you’re installing hardwired wall sconces, you’ll need to plan the wiring. Consult an electrician if you’re not experienced with electrical work. Determine the location of power sources and the routing of the electrical cables to the desired wall sconce locations. It’s important to ensure that the wiring is done safely and in compliance with local building codes.
- Consider battery-operated options: If the installation of hardwired sconces is impractical, consider battery-operated or wireless wall sconces. These can easily be mounted on the wall without the need for wiring. They provide a convenient and flexible lighting solution that still adds visual interest to your basement walls.
- Positioning and installation: Depending on the purpose of the lighting, consider the ideal positioning and height for the wall sconces or accent lighting. For overall ambient lighting, mount the fixtures higher on the wall to create a diffused and softer illumination. For task lighting, such as above a workstation or reading nook, position the sconces lower to provide more direct and focused light. Always follow the manufacturer’s instructions for proper installation.
- Choose suitable light bulbs: Select light bulbs that provide the desired brightness and color temperature for your basement. LED bulbs are a popular choice due to their energy efficiency and long lifespan. Consider dimmable options for added versatility, allowing you to adjust the lighting level to suit different occasions and moods.
- Coordinate with other lighting: If you already have other light sources in your basement, such as overhead lights or floor lamps, ensure that the wall sconces or accent lighting coordinate with the existing fixtures. This will create a cohesive and balanced lighting scheme throughout the space.
Installing wall sconces or accent lighting not only adds functionality but also enhances the aesthetic appeal of your basement walls. The right lighting can create a cozy and inviting atmosphere, making your basement a more enjoyable and versatile space.
Next, let’s explore another method to improve the appearance of your basement walls: using mirrors to create the illusion of space.
Using Mirrors to Create the Illusion of Space
If you have a small or cramped basement, using mirrors can be a game-changer in creating the illusion of space and light. Mirrors have the incredible ability to reflect light and visually expand a room, making it look larger and more open. Here are some tips on effectively using mirrors to enhance the appearance of your basement walls:
- Select the right size and shape: Choose mirrors that are proportionate to the size of your basement walls. Larger mirrors can make a significant impact by creating a sense of depth and spaciousness. Consider using full-length mirrors or large statement mirrors to maximize the effect. Additionally, different shapes, such as round or oval mirrors, can add visual interest and break up the rectangular shapes in the room.
- Strategic placement: The placement of mirrors is crucial for creating the desired effect. Position mirrors on walls opposite windows or sources of natural light to maximize the reflection. This will help bounce light around the room, brightening up the space and making it feel more expansive. Place mirrors near light fixtures or lamps to amplify their luminosity.
- Create a mirror wall: Consider creating a mirror wall by installing multiple mirrors side by side. This can be particularly effective if you have a long or narrow basement. The mirrored wall will create an illusion of extended space and provide an impressive visual impact.
- Reflect interesting elements: Use mirrors strategically to reflect visually appealing elements in your basement, such as artwork, architectural details, or a view of the garden. This adds depth and dimension to the space and draws the eye to different focal points. Be mindful of what the mirrors reflect to ensure that it enhances the overall aesthetic of the room.
- Consider mirrored furniture and decorations: In addition to wall mirrors, you can incorporate mirrored furniture or decorations into your basement design. Mirrored accent tables, console tables, or decorative objects can further enhance the illusion of space while adding a touch of elegance and style.
- Group mirrors together: Create an interesting display by grouping mirrors of different shapes and sizes together on a single wall. This can create an eye-catching focal point and add a dynamic and artistic element to your basement walls.
- Experiment with mirror placement: Don’t be afraid to experiment with different mirror placements to find the most visually appealing arrangement. Try hanging mirrors vertically, horizontally, or in a pattern to create a unique display. Play with angles and perspectives to find the arrangement that best suits your space.
Using mirrors strategically can transform your basement walls, making the space appear larger, brighter, and more inviting. By incorporating mirrors into your basement design, you can achieve a visually expansive and open environment that adds both functionality and aesthetic appeal.
Next, let’s explore another method for improving the appearance of your basement walls: adding decorative shelves or floating shelves.
Adding Decorative Shelves or Floating Shelves
Adding decorative shelves or floating shelves to your basement walls is a practical and stylish way to maximize the use of vertical space while adding a touch of sophistication. Shelves not only provide additional storage but also create an opportunity to display decorative items, books, and other personal belongings. Here are some tips on adding decorative shelves or floating shelves to enhance the appearance of your basement walls:
- Choose the right style: Consider the overall style of your basement and select shelves that complement the existing design. There are a variety of shelf styles available, including rustic, industrial, modern, or minimalist. Choose a style that aligns with your taste and enhances the overall aesthetic of the space.
- Determine the purpose: Decide how you want to use the shelves. Are they primarily for display purposes or for practical storage? This will help you determine the size, height, and spacing of the shelves.
- Consider floating shelves: Floating shelves are a popular choice for adding a modern and sleek look to your basement walls. These shelves are mounted directly onto the wall without visible brackets, giving the illusion of floating. Floating shelves work well in spaces with limited square footage as they create a streamlined and uncluttered appearance.
- Anchor them securely: Ensure that the shelves are anchored securely to the wall. Follow the manufacturer’s instructions for proper installation and use strong wall anchors or brackets to support the weight of the items you plan to place on the shelves.
- Arrange and style the shelves: Once the shelves are installed, it’s time to arrange and style them. Consider the balance and spacing of the items on the shelves. Mix and match decorative objects, books, plants, and personal mementos to create an appealing and visually balanced display. Play with different heights, textures, and colors to add interest and create a curated look.
- Use lighting: Incorporate lighting into your shelf design to highlight specific objects or create a warm ambiance. Install small LED strip lights underneath the shelves to create a subtle glow that illuminates the items on display.
- Take advantage of corners: Utilize corner shelves to optimize space and add a unique dimension to your basement walls. Corner shelves are an excellent way to display smaller items or create a mini gallery in a confined area.
- Change it up: Don’t be afraid to change the items displayed on your shelves occasionally. Swap out decorative pieces, rotate books, or add seasonal touches to keep the shelves fresh and interesting. This allows you to update the look of your basement walls without major renovations.
Adding decorative shelves or floating shelves to your basement walls not only provides additional storage and display space but also enhances the overall aesthetics of the room. They allow you to showcase your personal style and add a personalized touch to your basement design.
Next, let’s explore another method for improving the appearance of your basement walls: incorporating textured wall coverings.
Read more: How To Make My Driveway Look Better
Incorporating Textured Wall Coverings
When it comes to enhancing the appearance of your basement walls, incorporating textured wall coverings can add visual interest, depth, and sophistication. Textured wall coverings not only create a unique and stylish look but also help camouflage imperfections and create a sense of warmth and coziness. Here are some tips on incorporating textured wall coverings to enhance the look of your basement walls:
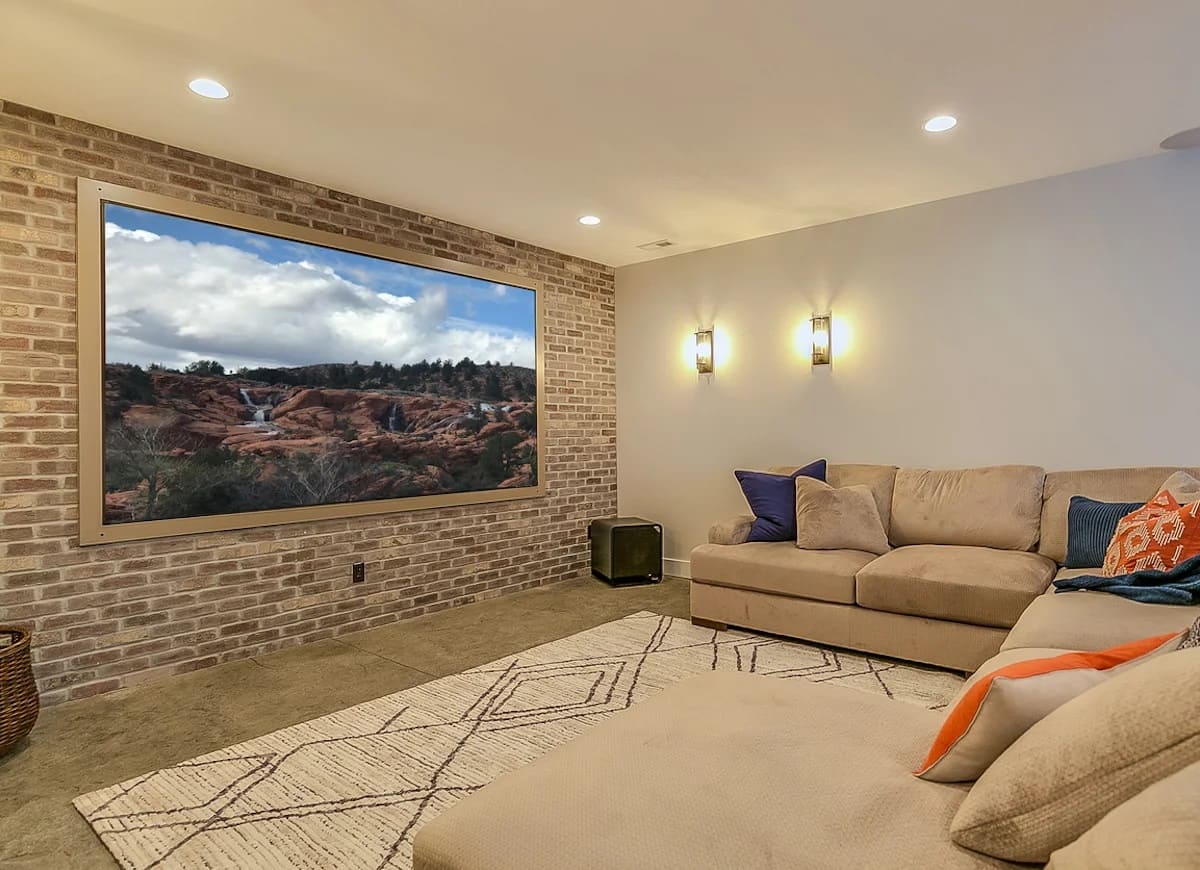
- Choose the right type of textured wall covering: There are various options available when it comes to textured wall coverings. Consider materials such as textured wallpaper, textured paint, faux brick panels, stone veneer, or reclaimed wood panels. Each material adds its own unique texture and character to the walls.
- Consider the existing décor and style: Select a textured wall covering that complements the existing décor and style of your basement. If your basement has a rustic theme, consider using reclaimed wood panels. For a more industrial look, faux brick panels can be an excellent choice. Make sure the textured wall covering integrates seamlessly with the overall design scheme.
- Decide on a focal wall or full coverage: Determine whether you want to apply the textured wall covering to a specific focal wall or throughout the entire basement. A focal wall allows you to create a striking feature and draw attention to a particular area. Full coverage can provide a consistent and cohesive look, as well as enhance the overall ambiance of the space.
- Preparation is key: Before applying the textured wall covering, ensure that the walls are properly cleaned and prepared. Fill in any cracks or holes, and sand the surface to create a smooth base. Follow the manufacturer’s instructions for any specific preparation steps required for the chosen textured wall covering.
- Apply with care: Depending on the type of textured wall covering you choose, the application process may vary. Pay attention to the manufacturer’s instructions and follow them carefully. Some textured wall coverings require adhesive or special tools for installation. Make sure to cut the material to the appropriate size before applying it to the wall.
- Consider lighting: Lighting can greatly impact the look and feel of textured wall coverings. Experiment with different lighting options, such as spotlights or wall sconces, to highlight the texture and create dramatic effects. Proper lighting can enhance the three-dimensional qualities of the textured walls and add depth to the space.
- Mix and match: Don’t be afraid to mix different types of textured wall coverings to create a unique and layered look. Combining different textures can add depth and visual interest to your basement walls. For example, you can pair a textured brick wall with a reclaimed wood panel wall for a dynamic and eclectic design.
- Consider maintenance: Keep in mind the maintenance requirements of the textured wall coverings you choose. Some may require regular cleaning or occasional touch-ups. Ensure that the materials are suitable for the basement environment and can withstand any moisture or humidity present.
Incorporating textured wall coverings in your basement can elevate the overall aesthetic and create a visually appealing and inviting space. Whether you prefer a rustic, industrial, or contemporary look, textured wall coverings provide endless possibilities for transforming your basement walls into a unique and stylish feature.
Next, let’s wrap up our exploration of methods to improve the appearance of your basement walls.
Conclusion
Transforming the look of your basement walls doesn’t have to be a daunting task. By implementing some creative and strategic techniques, you can enhance the appearance of your basement and create a more welcoming and appealing space. Whether you choose to paint the walls, install wall panels, add wallpaper, create a gallery wall, incorporate lighting, use mirrors, add shelves, or include textured wall coverings, each method offers its own unique benefits and can drastically change the ambiance of the room.
Choosing the right color for your basement walls sets the foundation for the entire space. Opt for light and neutral colors to create an open and airy feel, and consider adding an accent color for visual interest. A fresh coat of paint can also work wonders in transforming the walls and giving them a revamped and updated look.
Installing wall panels adds texture and style to your basement walls, instantly elevating the aesthetics of the space. Whether you opt for wooden panels, PVC panels, or fabric panels, they can hide imperfections while adding warmth and visual appeal.
Applying wallpaper or wall decals allows you to add color, pattern, and personality to your basement walls. The wide variety of designs and textures available can create a unique and personalized space that reflects your individual style.
Building a gallery wall on your basement walls showcases your favorite artwork and photographs while adding a striking visual element. By careful planning and arrangement, a gallery wall can become a focal point and bring life to your basement.
Installing wall sconces or accent lighting not only brightens up the basement but also adds a touch of elegance and ambiance. Proper lighting placement and selection can significantly impact the overall atmosphere and enhance the aesthetics of the walls.
Using mirrors strategically can create the illusion of space and amplify the natural light in your basement. By selecting the right size, shape, and placement, mirrors can visually expand the room and add depth and brightness.
Adding decorative shelves or floating shelves not only provides additional storage but also adds an element of style to your basement walls. They allow you to display decorative objects, books, and personal belongings, creating a personalized and aesthetically pleasing arrangement.
Lastly, incorporating textured wall coverings adds dimension and visual interest to your basement walls. Whether it’s textured wallpaper, faux brick panels, or stone veneer, these coverings add warmth, depth, and character to the space.
In conclusion, with a little creativity and effort, you can make your basement walls look better and transform the entire space. By choosing the right colors, applying a fresh coat of paint, installing wall panels, adding wallpaper or wall decals, creating a gallery wall, incorporating lighting and mirrors, adding shelves, or using textured wall coverings, you can enhance the aesthetics and create a basement that reflects your personal style and provides a pleasant and inviting environment.
Now it’s time to embark on your basement improvement journey and bring your vision to life!
Frequently Asked Questions about How To Make Basement Walls Look Better
Was this page helpful?
At Storables.com, we guarantee accurate and reliable information. Our content, validated by Expert Board Contributors, is crafted following stringent Editorial Policies. We're committed to providing you with well-researched, expert-backed insights for all your informational needs.



0 thoughts on “How To Make Basement Walls Look Better”