Articles
How To Drylok Basement Walls
Modified: December 7, 2023
Learn how to properly use Drylok to seal and waterproof your basement walls with our informative articles. Get step-by-step instructions and expert tips for a successful DIY project.
(Many of the links in this article redirect to a specific reviewed product. Your purchase of these products through affiliate links helps to generate commission for Storables.com, at no extra cost. Learn more)
Introduction
Drylok is a widely-used product for waterproofing basement walls. If you have a basement in your home, you know how important it is to keep it dry and free from moisture. Excessive moisture in the basement can lead to mold, mildew, and even structural damage to your home. By applying Drylok to your basement walls, you can effectively prevent water penetration and keep your basement dry and safe.
In this article, we will guide you through the process of dryloking your basement walls. We will explain what Drylok is, why it is important to use it, and provide you with step-by-step instructions on how to properly apply Drylok to your basement walls. By the end of this article, you will have all the information and knowledge needed to successfully protect your basement from water damage.
Key Takeaways:
- Properly applying Drylok to basement walls can prevent water damage, protect against mold and mildew, improve air quality, enhance energy efficiency, and increase usable living space, ultimately creating a safer and more comfortable home environment.
- To successfully Drylok basement walls, it’s crucial to follow step-by-step instructions, prepare the walls thoroughly, apply even coats, allow sufficient drying time, maintain proper ventilation, and regularly inspect for maintenance, ensuring long-lasting and effective waterproofing protection.
Read more: How To Repair Basement Walls
What is Drylok?
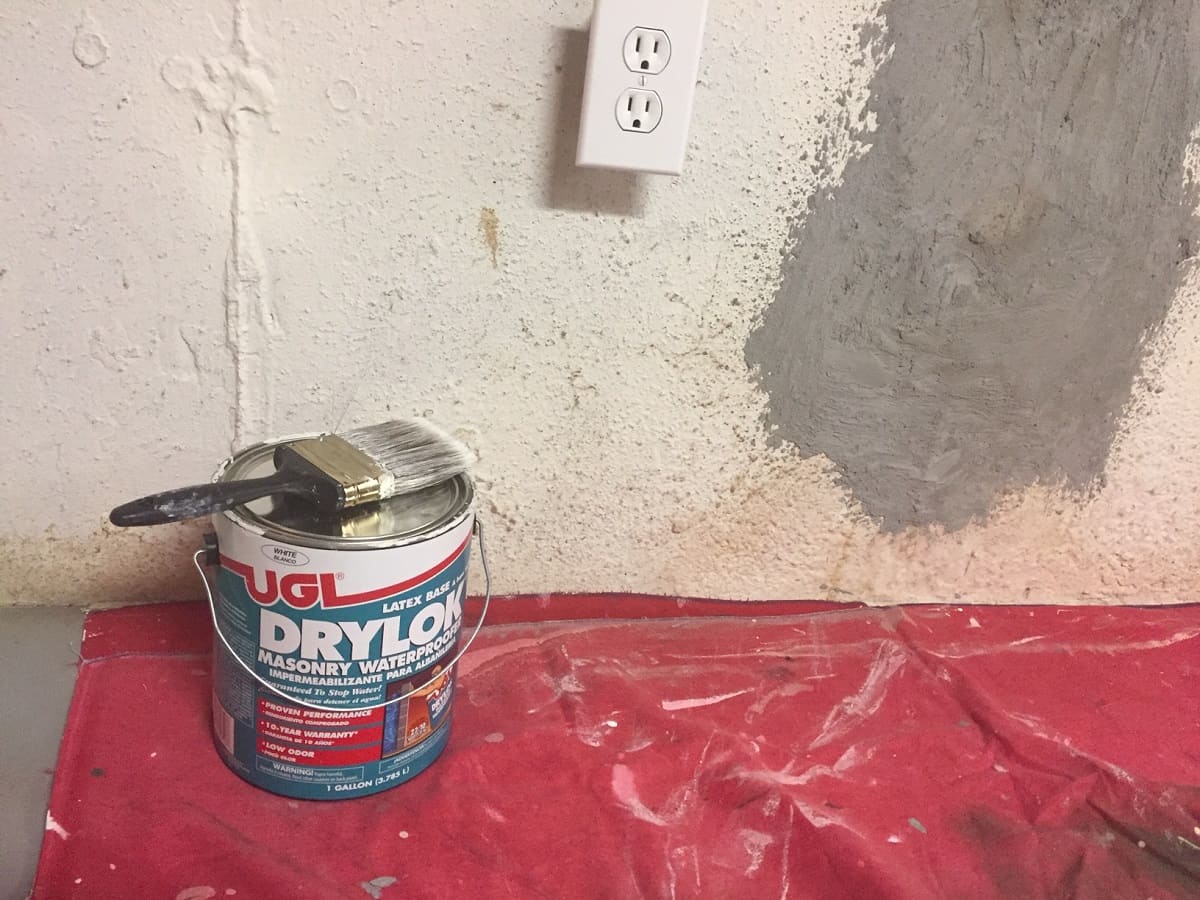
Drylok is a specialized waterproofing product that is designed to seal and protect basement walls from water penetration. It is a water-based acrylic formula that creates a barrier on the surface of the walls, preventing moisture from seeping through. Drylok is available in both paint and masonry form, allowing you to choose the type that best suits your specific needs.
Drylok is not just your ordinary paint. While regular paint can provide some level of protection, Drylok goes above and beyond by offering superior waterproofing properties. It is specifically formulated to withstand hydrostatic pressure, which is the pressure exerted by standing water against the walls. This makes Drylok extremely effective in preventing water leaks and dampness in your basement.
Aside from its waterproofing capabilities, Drylok also helps to reduce the growth of mold and mildew. By creating a moisture barrier on the walls, it prevents the conditions necessary for mold and mildew to thrive. This is crucial for maintaining a healthy and safe environment in your basement.
Furthermore, Drylok is available in a variety of colors, allowing you to choose a shade that matches your desired aesthetic. Whether you prefer a neutral tone or a vibrant hue, you can find a Drylok product that meets your design preferences.
Overall, Drylok is a versatile and effective solution for waterproofing basement walls. It not only provides a protective barrier against water, but also contributes to the overall aesthetics and cleanliness of your basement.
Why should you Drylok your basement walls?
There are several important reasons why you should consider Dryloking your basement walls:
- Prevent water damage: One of the main reasons to drylok your basement walls is to prevent water damage. Water leaks in the basement can cause significant damage to the structure and foundation of your home. By creating a waterproof barrier with Drylok, you can keep your basement dry and avoid costly repairs.
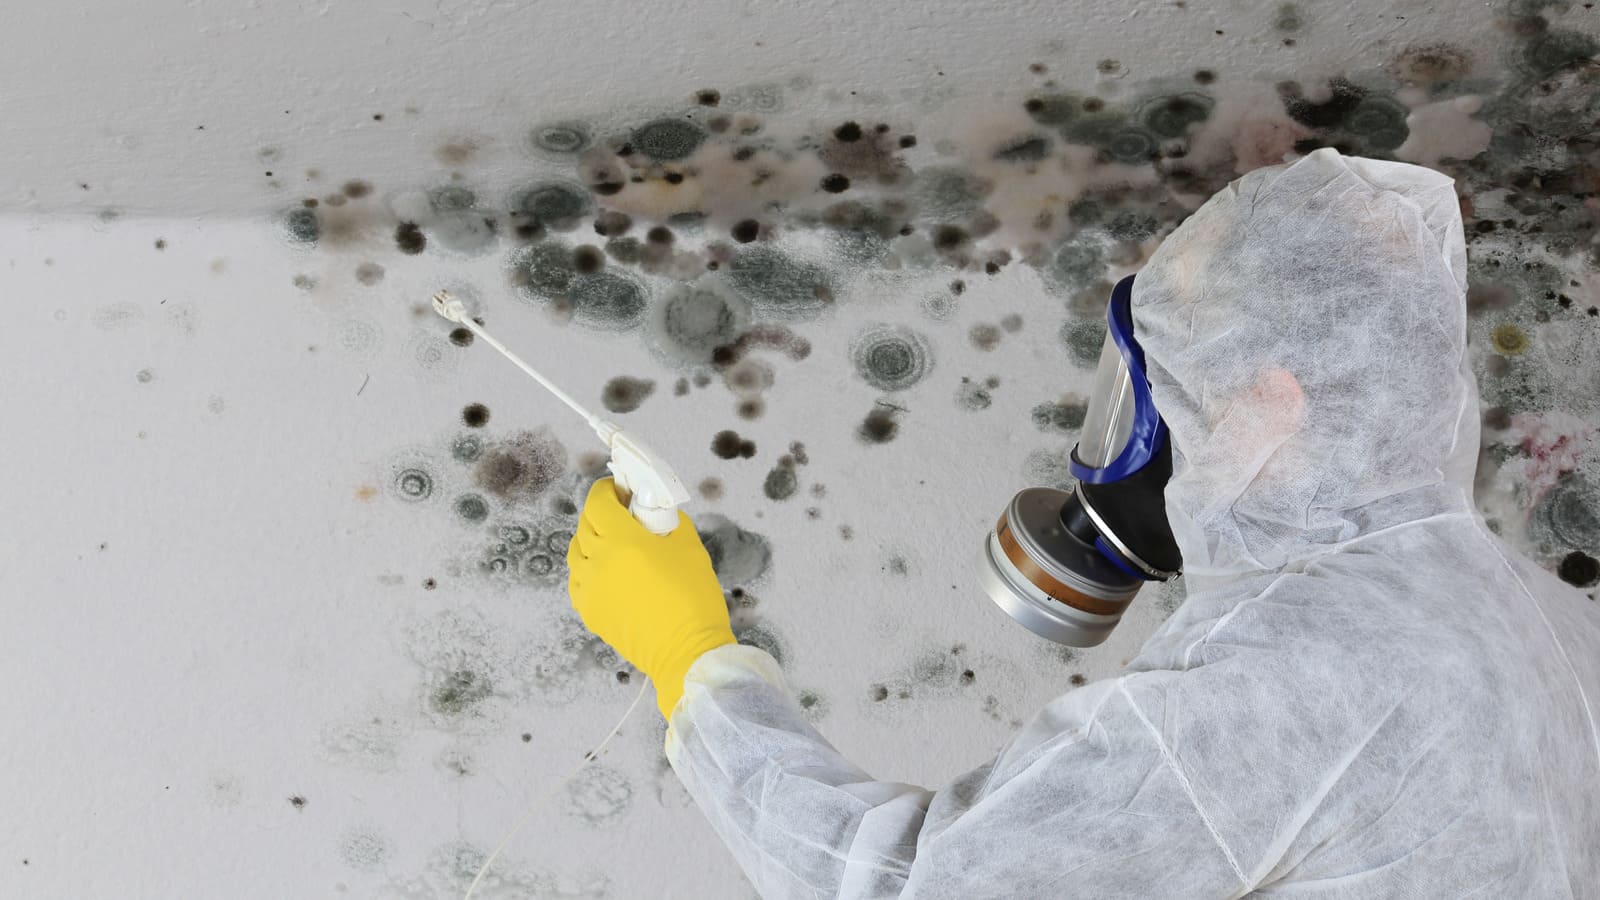
- Protect against mold and mildew: Excess moisture in the basement creates the perfect environment for mold and mildew to grow. Not only can mold and mildew cause health issues, but they can also damage your belongings and the integrity of your basement walls. Drylok helps to inhibit the growth of mold and mildew, keeping your basement clean and safe.
- Improved air quality: Dampness in the basement can lead to musty odors and poor air quality throughout your home. By using Drylok to seal your basement walls, you can improve the air quality by reducing the moisture and preventing the circulation of mold spores and allergens.
- Enhanced energy efficiency: Unsealed basement walls can contribute to energy loss in your home. By applying Drylok, you can create a thermal barrier that helps to insulate your basement, reducing heat loss and lowering your energy bills.
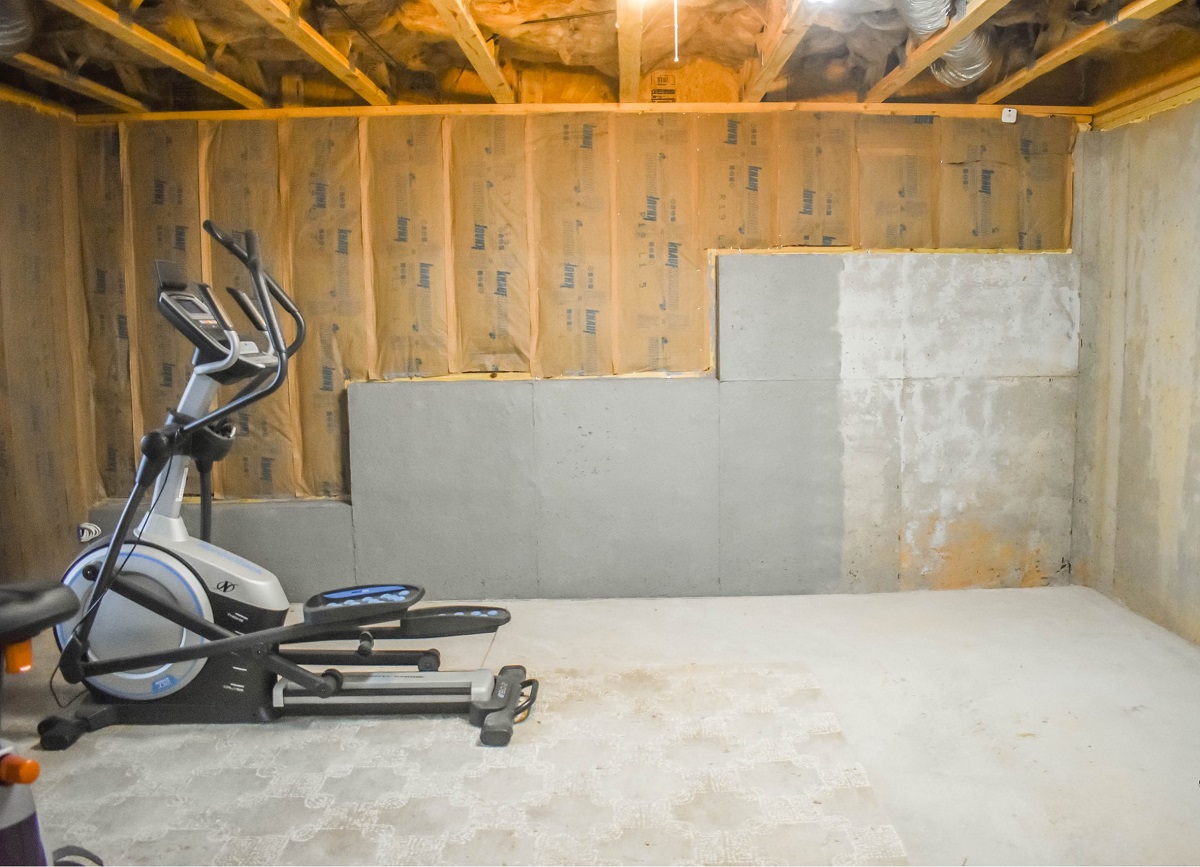
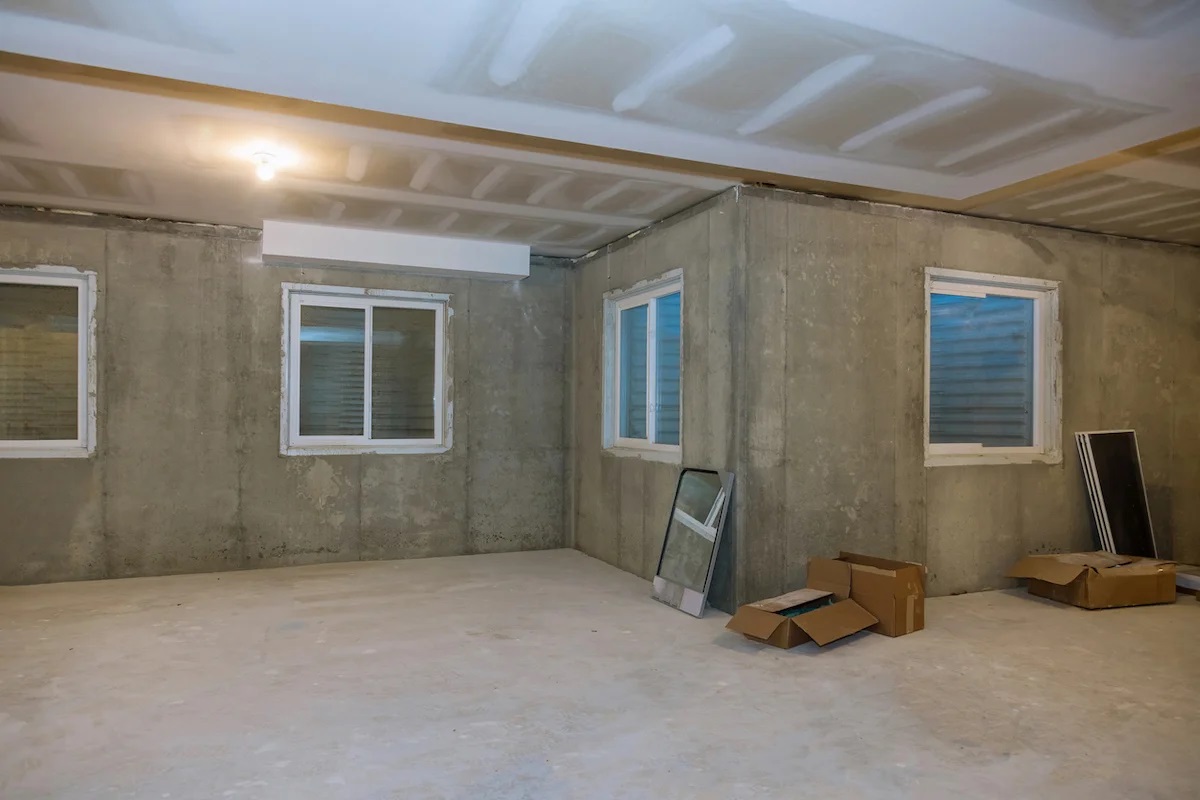
- Increased usable space: A dry and well-protected basement can provide valuable additional living space in your home. Whether you plan to use it as a recreational area, home office, or guest room, Dryloking your basement walls can make the space more comfortable and inviting.
Overall, Dryloking your basement walls is a proactive measure to safeguard your home against water damage, mold growth, and poor air quality. It not only protects your investment but also improves the livability of your home.
Materials needed for Drylok
Before you start the process of Dryloking your basement walls, you will need to gather the necessary materials. Here is a list of the materials you will need:
- Drylok product: Choose the appropriate Drylok product for your specific needs. Whether you opt for Drylok paint or Drylok masonry, make sure you have enough to cover the desired area.
- Clean water: You will need clean water to mix with the Drylok product if you are using the masonry version.
- Stir stick: A stir stick will be helpful for properly mixing the Drylok product and ensuring a smooth consistency.
- Paintbrush or roller: Depending on your personal preference, you can use a paintbrush or a roller to apply the Drylok product to your basement walls.
- Drop cloth or plastic sheeting: To protect your floors and any surrounding surfaces, use a drop cloth or plastic sheeting to catch any drips or spills during the application process.
- Clean cloth or sponge: Keep a clean cloth or sponge nearby to wipe off any excess Drylok product or to clean up any spills.
- Protective gear: Use protective gear such as gloves, goggles, and a face mask to safeguard yourself from any potential splatters or fumes from the Drylok product.
- Preparation tools: Depending on the condition of your basement walls, you may need additional preparation tools such as a wire brush or scraper to remove any loose paint, dirt, or debris.
- Ventilation: Ensure proper ventilation in your basement by opening windows or using fans to promote airflow during and after the application of Drylok.
Having these materials ready before you begin the Drylok process will help ensure a smooth and efficient application, and make the overall experience more manageable.
Step-by-step guide to Drylok basement walls
Dryloking your basement walls is a straightforward process that can be done by following these step-by-step instructions:
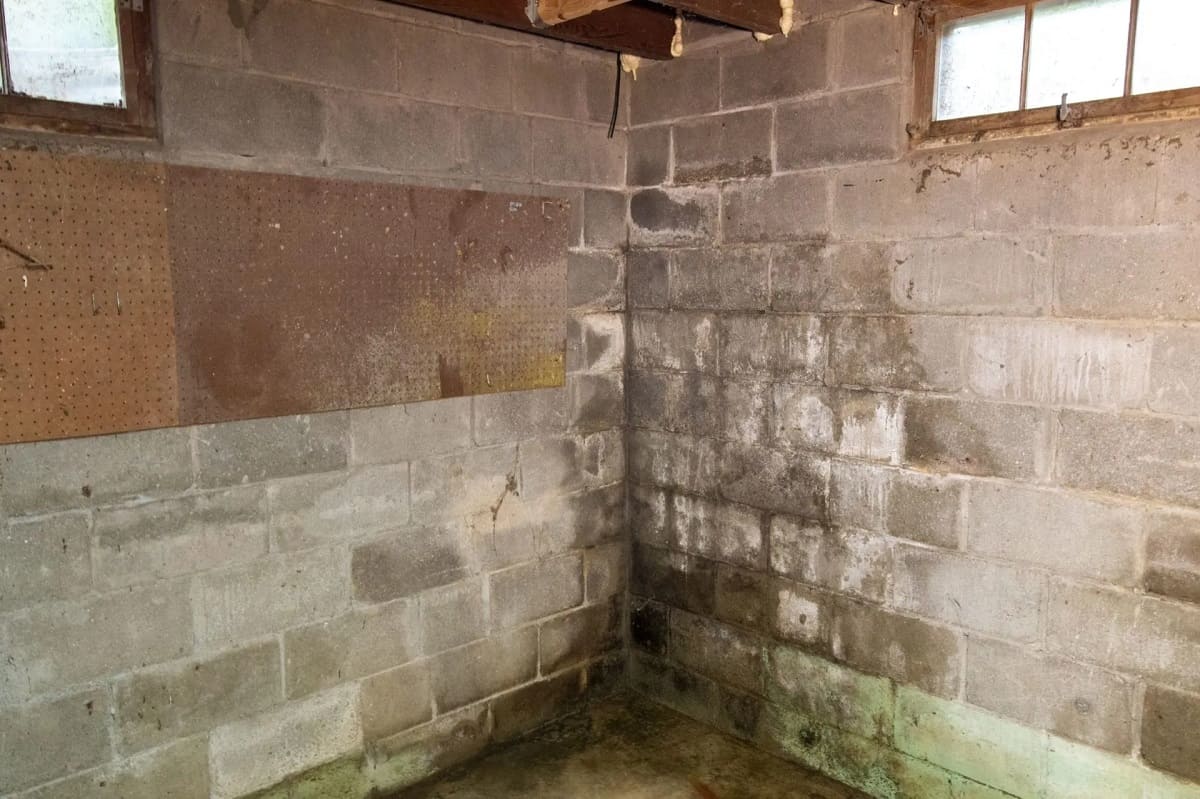
- Prepare the walls: Start by cleaning the basement walls to remove any dirt, dust, or debris. Use a wire brush or scraper to remove any loose paint or old finishes. Patch any cracks or holes in the walls using a suitable masonry patching compound. Allow the patching compound to dry completely.
- Mix the Drylok: If you are using Drylok masonry, mix the product according to the manufacturer’s instructions. Use clean water and a stir stick to achieve a smooth and consistent mixture. Do not mix more Drylok than you can use within the specified time frame, as it can start to thicken and become less effective.
- Test for moisture: Before applying Drylok, it is essential to ensure that the basement walls are not excessively damp. Perform a moisture test by taping a plastic sheet to the wall and leaving it for 24 hours. If there is condensation or moisture buildup on the plastic, it indicates high moisture content and the walls may need additional waterproofing measures.
- Apply the first coat: Using a paintbrush or roller, apply the first coat of Drylok to the basement walls. Start from the top and work your way down, applying an even coat. Pay attention to corners and hard-to-reach areas. Use a brush to fill in any cracks or crevices. Allow the first coat to dry for the recommended time specified by the manufacturer.
- Apply the second coat: Once the first coat is dry, apply a second coat of Drylok using the same technique as before. Apply the second coat in a perpendicular direction to the first coat for optimal coverage. Be thorough in your application, ensuring that every part of the wall is coated evenly.
- Allow the second coat to dry: After applying the second coat, allow it to dry completely. Follow the manufacturer’s instructions for drying time, which is typically around 24 hours. Ensure proper ventilation in the basement to aid in the drying process.
Once the second coat of Drylok is fully dry, your basement walls will be effectively protected against water penetration. It is important to note that Drylok is not intended for areas prone to significant water leaks or standing water. In such cases, it is advisable to consult a professional for alternative waterproofing solutions.
Read more: How To Parge Basement Walls
Preparing the walls
Before applying Drylok to your basement walls, it is crucial to properly prepare the surface. Preparing the walls ensures better adhesion and a longer-lasting waterproofing solution. Follow these steps to prepare your basement walls:
- Clean the walls: Start by removing any dirt, dust, or debris from the walls. Use a broom or vacuum to sweep the walls and remove loose particles. This will provide a clean surface for the Drylok to adhere to.
- Remove loose paint or finishes: If there is any loose or peeling paint on the walls, use a wire brush or scraper to remove it. It is essential to have a stable and even surface for the Drylok to adhere to.
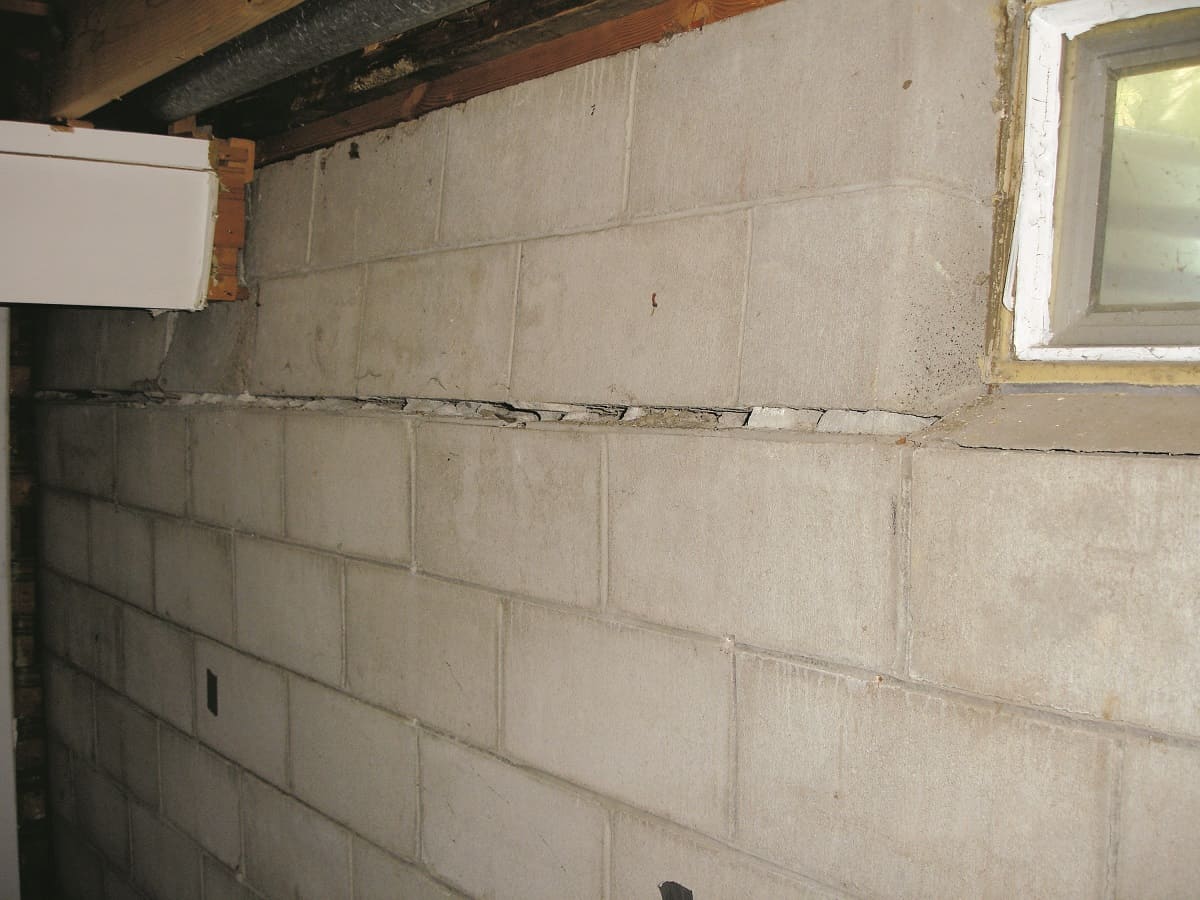
- Repair cracks and holes: Inspect the walls for any cracks or holes and patch them using a masonry patching compound. Follow the manufacturer’s instructions on how to properly apply the patching compound and allow it to dry thoroughly. Smooth out any patched areas using sandpaper or a sanding block.
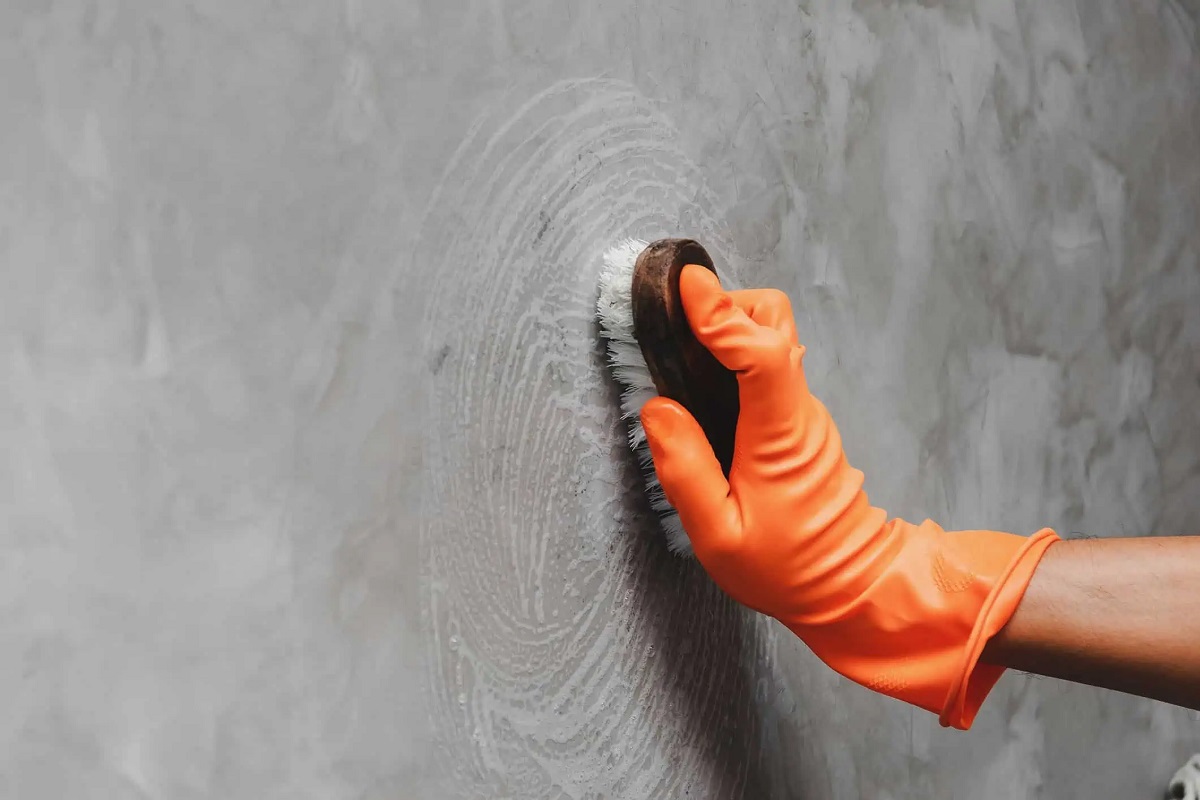
- Etch the walls: Etching the walls helps to create a rough surface, allowing better adhesion for the Drylok product. Mix a solution of muriatic acid and water according to the manufacturer’s instructions. Apply the solution to the walls using a brush or sprayer, wearing protective gear such as gloves and goggles. After applying the solution, scrub the walls with a stiff bristle brush to remove any remaining residue. Rinse the walls thoroughly with clean water to neutralize the acid and allow them to dry completely.
By properly preparing the walls, you ensure that the Drylok product adheres effectively and provides long-lasting protection against water penetration. Taking the time to prepare the walls will ultimately result in a more successful and durable waterproofing solution for your basement.
Applying the first coat of Drylok
Once you have prepared the basement walls, it’s time to apply the first coat of Drylok. Follow these steps to ensure proper application:
- Choose your application method: Decide whether you will use a paintbrush or a roller to apply the Drylok. A paintbrush allows for more control in corners and tight spaces, while a roller is more efficient for covering larger areas.
- Start from the top: Begin by applying the first coat of Drylok to the highest point of the wall. This ensures that any drips or excess product will be caught by the lower sections that haven’t been painted yet.
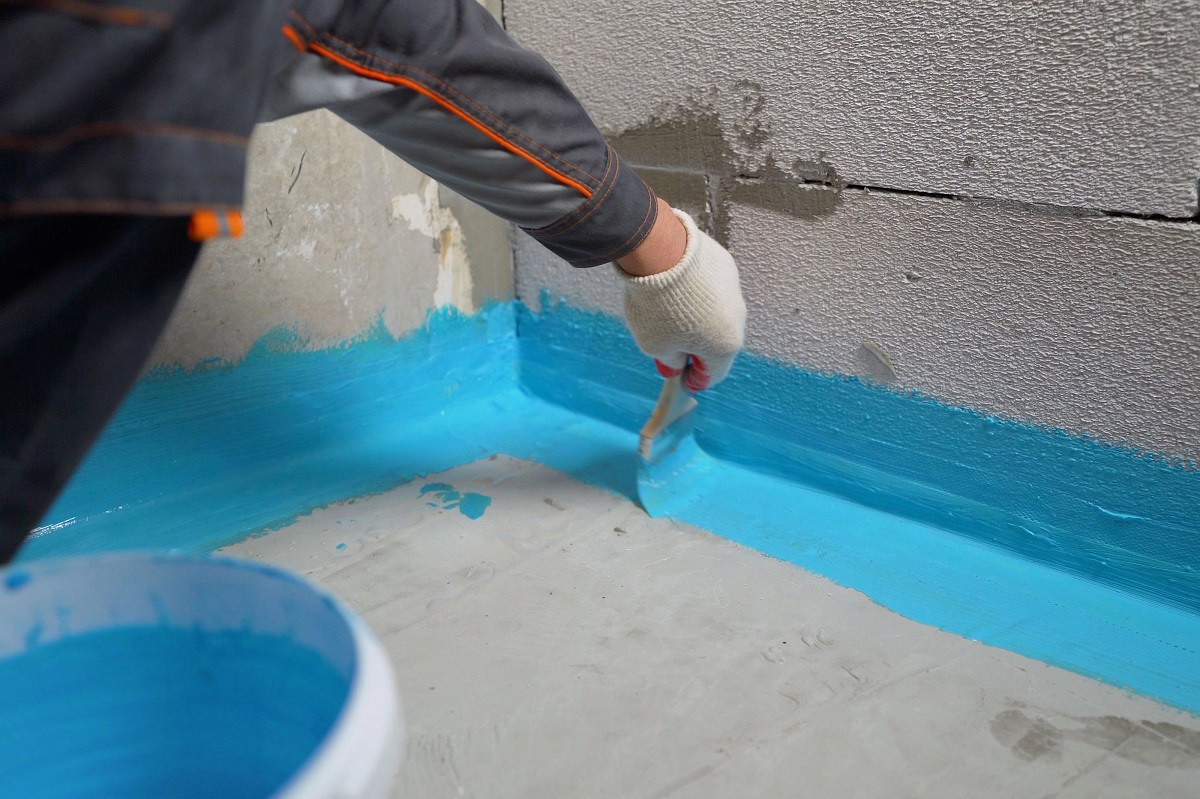
- Apply an even coat: Dip the paintbrush or roller into the Drylok and remove any excess product. Start applying the Drylok in smooth, even strokes. Avoid applying excessive pressure, as it can cause streaks or uneven coverage. Work in sections, covering the entire wall with an even coat of Drylok.
- Pay attention to corners and edges: Use a brush to reach corners, edges, and areas where the roller might not easily reach. Ensure that these areas are thoroughly coated with Drylok to provide complete waterproofing coverage.
- Fill in cracks and crevices: If you notice any cracks or crevices while applying the first coat, use the paintbrush to fill them in and ensure they are properly sealed. This will help prevent water penetration and strengthen the overall waterproofing effect.
It is important to follow the instructions provided by the manufacturer regarding the drying time for the first coat. The recommended drying time is typically around 24 hours, but it may vary depending on the specific Drylok product you are using.
After applying the first coat of Drylok, take a step back and inspect the walls for any missed spots or areas that need further attention. Once you are satisfied with the coverage and the first coat has dried completely, you can proceed to apply the second coat of Drylok for added protection and durability.
Make sure to thoroughly clean and prepare the basement walls before applying Drylok to ensure proper adhesion. Use a wire brush to remove any loose debris and dirt, and fill in any cracks or holes with hydraulic cement before applying the waterproofing paint.
Allowing the first coat to dry
After applying the first coat of Drylok to your basement walls, it’s crucial to allow sufficient time for it to dry. Proper drying time is essential for the product to bond effectively and provide optimal waterproofing protection. Here are some guidelines for allowing the first coat to dry:
- Refer to the manufacturer’s instructions: Different Drylok products may have varying drying times. It is essential to consult the instructions provided by the manufacturer to determine the specific drying time for the product you are using. Typically, the drying time for the first coat is around 24 hours.
- Adequate ventilation: Ensure that the basement is properly ventilated during the drying process. This helps to facilitate the evaporation of moisture and allows the Drylok to dry more effectively. Open windows, use fans, or turn on dehumidifiers to promote airflow.
- Avoid moisture exposure: While the first coat of Drylok is drying, it is crucial to prevent any moisture from coming into contact with the walls. Avoid any activities that may introduce excess moisture, such as cleaning or conducting plumbing work in the vicinity of the basement walls.
- Monitor the drying process: Keep a close eye on the progress of the drying process. If the basement is particularly humid or if there are any areas with poor airflow, it may take longer for the first coat to dry completely. Patience is key during this stage to ensure the best results.
- Perform a touch test: To check if the first coat is dry, lightly touch the surface of the Drylok with your fingertips. If it feels cool or damp, it is not yet fully dry. However, if it feels dry to the touch and no moisture is present, it is safe to proceed with the second coat.
Keep in mind that allowing the first coat to dry properly is crucial to ensure the effectiveness of the Drylok product. Rushing the process or applying the second coat before the first coat is fully dry may compromise the waterproofing capabilities and the durability of the overall application.
Once the first coat has dried completely, you can proceed with applying the second coat of Drylok for enhanced protection and a more robust waterproofing solution.
Applying the second coat of Drylok
After the first coat of Drylok has dried, it’s time to apply the second coat. The second coat adds an extra layer of protection, ensuring maximum waterproofing effectiveness. Follow these steps to apply the second coat of Drylok:
- Prepare the application tools: Use the same application method that you used for the first coat, whether it’s a paintbrush or a roller. Make sure the tools are clean and free from any dried Drylok residue.
- Start from a different direction: To ensure complete coverage, it’s best to apply the second coat in a perpendicular direction to the first coat. This helps to fill in any gaps or missed areas from the initial application.
- Apply an even coat: Dip your paintbrush or roller into the Drylok, removing any excess product. Apply the second coat in smooth, even strokes, working in sections to cover the entire wall. Pay special attention to corners, edges, and any spots that may have been missed during the first coat.
- Fill in cracks and crevices: While applying the second coat, check for any cracks or crevices that may require additional sealing. Use a brush to fill in these areas, ensuring they are properly covered with Drylok.
- Maintain consistency: Try to maintain a consistent thickness and texture throughout the second coat. This will provide an even and uniform appearance once the Drylok has dried.
Similar to the first coat, it’s essential to follow the manufacturer’s instructions for drying time. Typically, the second coat of Drylok also requires around 24 hours to dry completely.
Once the second coat of Drylok is dry, inspect the walls to ensure that they are thoroughly and evenly covered. Any missed spots or areas that require touch-ups can be addressed by applying additional Drylok as needed. The second coat provides an added layer of protection, reinforcing the waterproofing capabilities of your basement walls.
With the second coat applied, you are one step closer to achieving a properly Dryloked basement that is resistant to water penetration and moisture-related issues.
Read more: How To Frame Out Basement Walls
Allowing the second coat to dry
After applying the second coat of Drylok to your basement walls, it is crucial to allow ample time for it to dry. Proper drying is essential to ensure the effectiveness and durability of the waterproofing solution. Here are some guidelines for allowing the second coat to dry:
- Refer to the manufacturer’s instructions: Different Drylok products may have varying drying times. To determine the specific drying time for the product you are using, refer to the instructions provided by the manufacturer. Typically, the drying time for the second coat is also around 24 hours.
- Ensure proper ventilation: Proper airflow is crucial for the drying process. Open windows, use fans, or turn on dehumidifiers to promote air circulation in the basement. This will help expedite the drying time and remove any excess moisture.
- Minimize moisture exposure: While the second coat of Drylok is drying, it is important to avoid introducing any excess moisture to the basement walls. Keep the surrounding area clean and dry, and avoid any activities that may generate moisture, such as cleaning or using water near the walls.
- Monitor the drying progress: Keep a close eye on the drying process. Factors such as humidity levels, temperature, and airflow can affect the drying time. Patience is key during this stage to allow the Drylok to fully bond and create a strong and effective barrier against water penetration.
- Perform a touch test: To determine if the second coat is dry, lightly touch the surface of the Drylok with your fingertips. If it feels cool or damp, it is not yet fully dry. However, if it feels dry and no moisture is present, you can proceed with the remaining steps.
Properly allowing the second coat of Drylok to dry will ensure that the product cures and provides reliable waterproofing protection for your basement walls. Rushing the drying process can compromise the effectiveness of the Drylok and may lead to less desirable results.
Once the second coat has dried completely, you can proceed with the finishing touches and cleanup to complete the Drylok process and enjoy a waterproof and protected basement space.
Finishing touches and cleanup
Once the second coat of Drylok has fully dried, it’s time to complete the finishing touches and cleanup. Follow these steps to ensure a clean and polished result:
- Inspect the walls: Take a final inspection of the Dryloked walls to ensure that they are thoroughly coated and there are no missed spots or areas that require touch-ups. If you notice any areas that need additional Drylok, apply a small amount to those spots and allow it to dry.
- Remove any protective coverings: If you used drop cloths or plastic sheeting to protect the floor or surrounding areas, carefully remove them, ensuring that any debris or spills are contained and disposed of properly.
- Clean your tools: Clean your paintbrush or roller thoroughly with water and mild soap. Remove any traces of Drylok from the bristles or roller, and allow them to air dry before storing them for future use.
- Clean up the workspace: Sweep or vacuum the area, removing any dust or debris that may have accumulated during the application process. Wipe down any surfaces that came into contact with Drylok to remove any residue.
- Dispose of waste properly: Dispose of any unused Drylok or empty containers according to the manufacturer’s instructions or local regulations. Do not dispose of them in regular household waste or down the drain.
- Enjoy your Dryloked basement: With the finishing touches and cleanup complete, you can now enjoy the benefits of a dry and waterproofed basement. Whether you plan to utilize the space for storage, living, or recreational purposes, you can have peace of mind knowing that your basement is well-protected against water damage.
It is recommended to keep an eye on your Dryloked basement periodically and inspect for any signs of water intrusion or damage. If you notice any issues, such as cracks or peeling of the Drylok, it may be necessary to touch up or reapply the product to maintain its effectiveness.
By completing the finishing touches and cleanup, you have successfully finished the Dryloking process and can now enjoy a dry, protected, and functional basement.
Tips and precautions
When Dryloking your basement walls, it’s important to keep in mind the following tips and precautions to ensure a successful and safe application:
- Read and follow the manufacturer’s instructions: Before starting the Dryloking process, thoroughly read and understand the instructions provided by the manufacturer. Adhere to the recommended guidelines for preparation, application, and drying time.
- Take necessary safety precautions: Wear appropriate protective gear, including gloves, goggles, and a face mask, when working with Drylok. These precautions will protect you from any potential splatters or fumes during the application process.
- Prepare the walls properly: Ensure that the walls are clean, dry, and free from loose paint or debris before applying Drylok. Proper preparation is essential for the product to adhere effectively and provide maximum waterproofing protection.
- Mix the Drylok properly: If you are using Drylok masonry, follow the manufacturer’s instructions on how to properly mix the product. Achieving a smooth and consistent mixture is important for optimal performance.
- Apply even coats: Apply the Drylok in even coats to ensure consistent coverage. Avoid applying the product too thickly or too thinly, as this may affect its ability to fully waterproof the walls.
- Allow sufficient drying time: Patience is key when allowing the Drylok to dry between coats and after the final application. Rushing the drying process may compromise the effectiveness of the product, so wait the recommended time specified by the manufacturer.
- Maintain proper ventilation: During the drying process, ensure proper ventilation in the basement to aid in the evaporation of moisture. This will help expedite the drying time and ensure thorough bonding of the Drylok.
- Regularly inspect for maintenance: Periodically inspect the Dryloked walls for any signs of damage or water intrusion. Address any cracks, peeling, or areas that may require touch-ups promptly to maintain the effectiveness of the waterproofing barrier.
- Consider professional assistance if needed: If you are unsure or uncomfortable with the Dryloking process, or if your basement has significant water issues, it is advisable to seek professional assistance. A professional can provide guidance and recommend alternative waterproofing solutions if necessary.
Following these tips and precautions will help ensure that your Drylok application is successful and long-lasting, providing optimal waterproofing protection for your basement walls.
Conclusion
Dryloking your basement walls is a crucial step in preventing water damage, protecting against mold and mildew, and creating a dry and functional space. By following the step-by-step guide and considering the tips and precautions provided in this article, you can successfully apply Drylok and achieve effective waterproofing results.
Start by understanding what Drylok is and why it is essential for basement wall protection. Familiarize yourself with the materials needed for the application, including the Drylok product itself, application tools, and protective gear.
Take the time to properly prepare your basement walls by cleaning them, removing loose paint or finishes, repairing any cracks or holes, and etching the surfaces for better adhesion. Following this, apply the first coat of Drylok, ensuring even coverage and paying attention to corners and hard-to-reach areas.
Allow the first coat to dry fully before proceeding to apply the second coat in a perpendicular direction to ensure complete coverage. Once the second coat has dried, inspect the walls for any missed spots and address them accordingly.
Throughout the process, maintain proper ventilation to aid in the drying time and avoid introducing excess moisture. Take necessary safety precautions and consult the manufacturer’s instructions for specific guidelines on drying time and application recommendations.
After completing the Dryloking process, finish with a thorough cleanup, ensuring that your tools and the workspace are clean and tidy. Regularly inspect your Dryloked basement for any signs of damage or water intrusion, and address them promptly to maintain the protective barrier.
By following these guidelines and taking the necessary precautions, you can enjoy the benefits of a dry, waterproofed basement that is protected against water damage, mold growth, and other moisture-related issues.
Remember, if you are unsure or uncomfortable with the Dryloking process or if your basement has significant water issues, it is always advisable to seek professional assistance. Professionals can provide expert guidance and recommend alternative waterproofing solutions to meet your specific needs.
With the right knowledge, materials, and patience, you can successfully Drylok your basement walls and create a safe, dry, and inviting space in your home.
Frequently Asked Questions about How To Drylok Basement Walls
Was this page helpful?
At Storables.com, we guarantee accurate and reliable information. Our content, validated by Expert Board Contributors, is crafted following stringent Editorial Policies. We're committed to providing you with well-researched, expert-backed insights for all your informational needs.

0 thoughts on “How To Drylok Basement Walls”