Articles
How To Fix Efflorescence On Basement Walls
Modified: May 6, 2024
Learn effective methods to remove efflorescence on basement walls with these informative articles. Discover expert tips and tricks to fix and prevent this common issue.
(Many of the links in this article redirect to a specific reviewed product. Your purchase of these products through affiliate links helps to generate commission for Storables.com, at no extra cost. Learn more)
Introduction
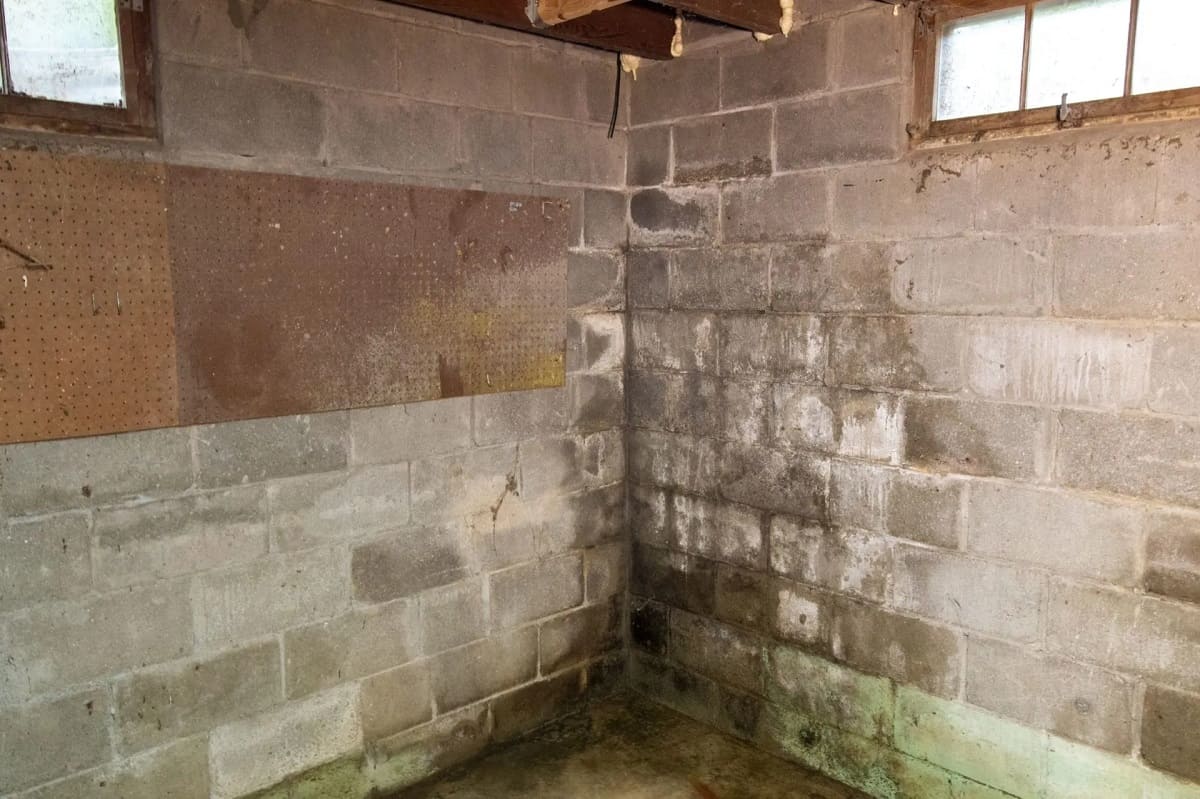
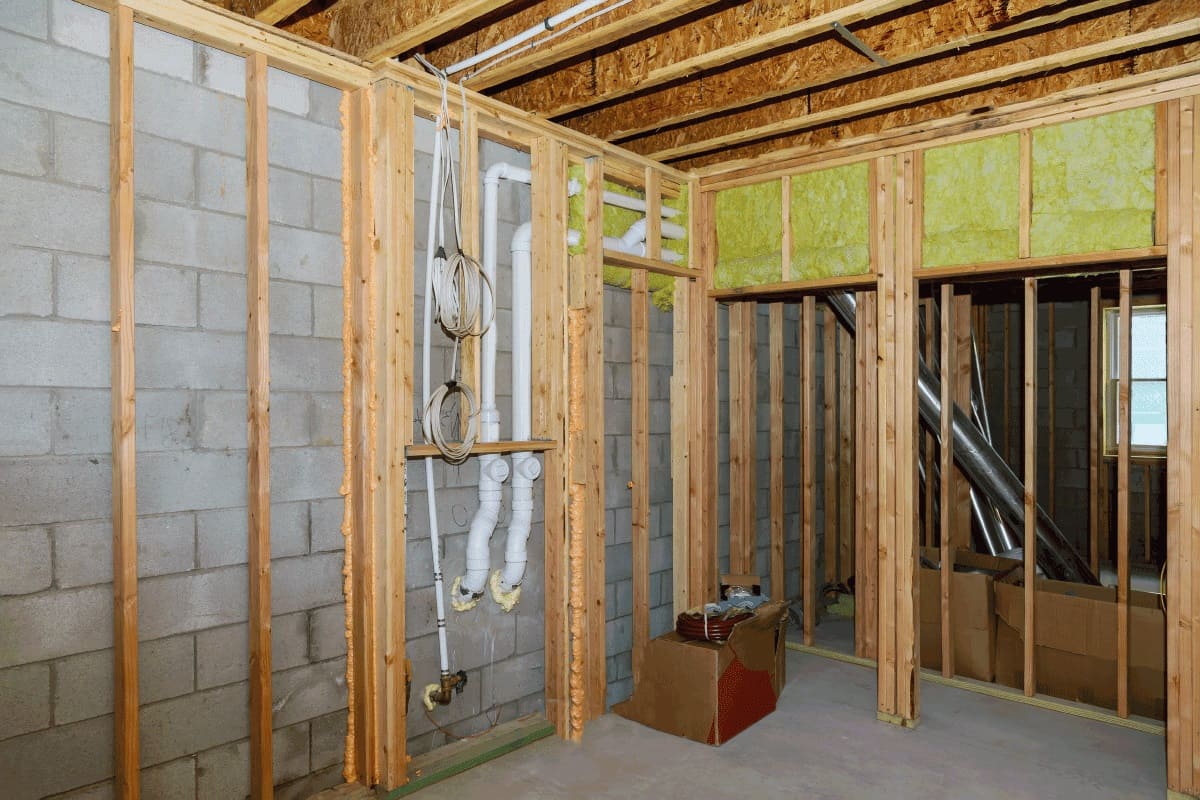
Efflorescence on basement walls can be a frustrating problem for homeowners. It not only affects the appearance of the walls but can also indicate underlying issues with moisture and water seepage. Understanding the causes of efflorescence and how to fix it is crucial to maintain a dry and healthy basement.
Efflorescence is the white, powdery substance that appears on the surface of walls, particularly concrete or masonry walls. It occurs when water-soluble salts, such as calcium, migrate through the pores in the wall and react with carbon dioxide in the air, forming insoluble compounds.
While efflorescence itself doesn’t cause any structural damage, it is an indication of excessive moisture in the basement. If left unchecked, the moisture can lead to further issues, such as mold and mildew growth or even damage to the overall integrity of the walls.
In this article, we will discuss the common causes of efflorescence, how to assess its severity, and provide a step-by-step guide on how to fix efflorescence on basement walls. By following these steps, you can effectively eliminate efflorescence and prevent its recurrence, ensuring a dry and healthy basement environment.
Key Takeaways:
- Efflorescence on basement walls is a common issue caused by moisture and water-soluble salts. Understanding its causes and taking proactive steps to fix it can lead to a dry, healthy, and visually appealing basement environment.
- Regular monitoring and maintenance are essential to prevent the reoccurrence of efflorescence. By staying vigilant and addressing any signs of moisture or water-related issues promptly, homeowners can ensure the long-term stability of their basement walls.
Read more: How To Fix A Bowing Basement Wall
Understanding Efflorescence on Basement Walls
Efflorescence is a common phenomenon that occurs on basement walls, especially those constructed with concrete or masonry materials. It is important to have a clear understanding of efflorescence to effectively tackle the issue.
As mentioned earlier, efflorescence is the white, powdery substance that appears on the surface of walls. It is caused by the migration of water-soluble salts, such as calcium, through the porous structure of the wall. Once the water reaches the surface and evaporates, it leaves behind the salts, resulting in the visible deposits.
The appearance of efflorescence is not limited to a specific timeframe. It can appear soon after the construction of the basement walls or even years later. The severity of efflorescence can vary, with some walls having only minimal deposits, while others may be heavily coated.
Efflorescence is often mistaken for mold or mildew due to its white, fuzzy appearance. However, unlike mold or mildew, efflorescence does not pose a health risk. It is primarily an aesthetic issue that indicates excess moisture in the walls.
Understanding the causes of efflorescence is essential to effectively address the problem. The most common cause of efflorescence is water intrusion. When water finds its way into the basement, it dissolves the salts present in the walls and brings them to the surface. The water can enter through various sources, such as cracks in the walls, faulty drainage systems, or high humidity levels in the basement.
Another factor that contributes to efflorescence is the presence of salts in the construction materials. If the materials used in building the basement contain high levels of water-soluble salts, the chances of efflorescence occurring are increased. It is important to note that even high-quality materials can contain some amount of salts, and their presence alone does not necessarily mean that efflorescence will occur.
Now that we have a better understanding of efflorescence and its causes, let’s dive deeper into how to assess the severity of the problem and determine the best course of action to fix efflorescence on basement walls.
Common Causes of Efflorescence
Efflorescence on basement walls can be attributed to several common causes. Identifying these causes is essential to effectively address the issue and prevent its recurrence. Let’s take a closer look at the main factors that contribute to the formation of efflorescence:
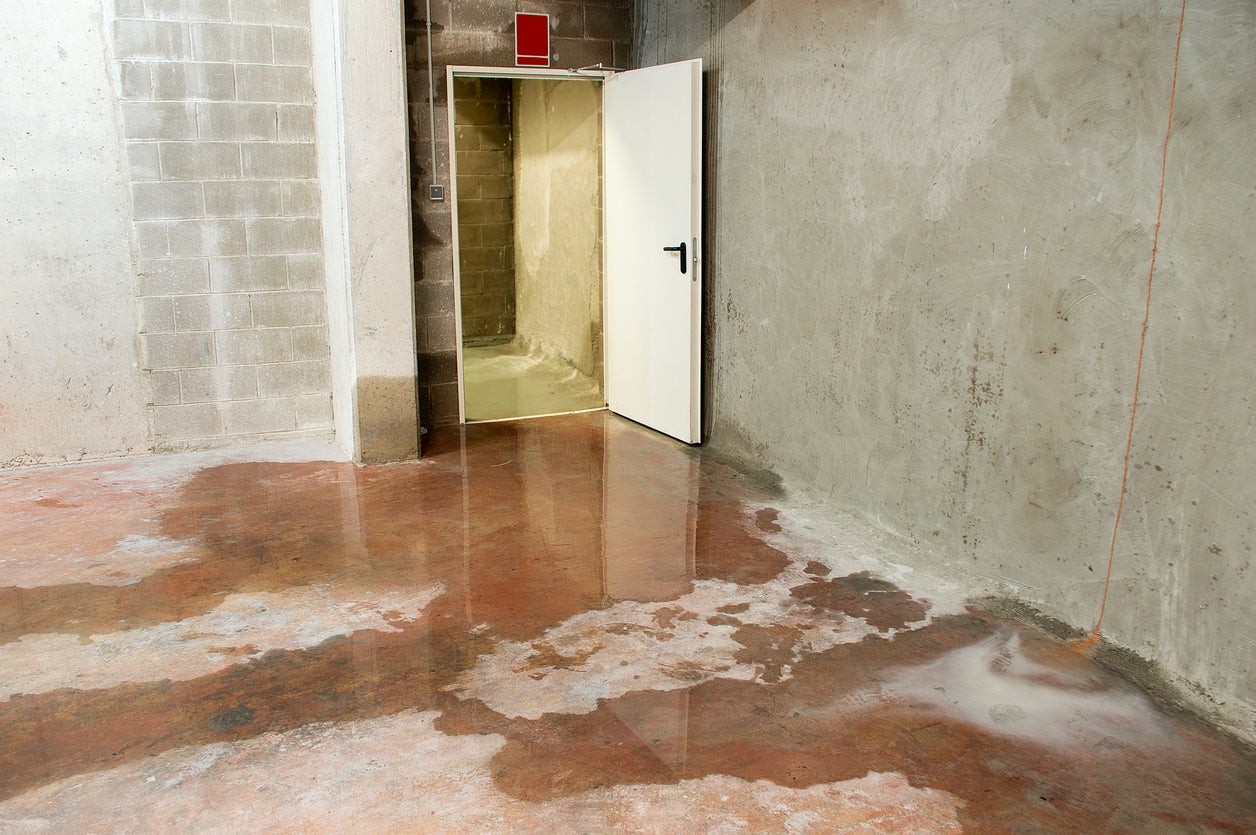
- Water Intrusion: The primary cause of efflorescence is the presence of moisture in the basement walls. Water can infiltrate the walls through various sources, such as leaks, cracks, or gaps in the foundation. When the water evaporates, it leaves behind the salts, resulting in the formation of efflorescence.
- Porous Construction Materials: Another common cause of efflorescence is the use of porous construction materials, such as concrete or masonry. These materials have microscopic pores that can absorb water. If the materials contain water-soluble salts, they are likely to contribute to efflorescence when exposed to moisture.
- High Humidity Levels: Excessive humidity in the basement can also lead to efflorescence. When the air in the basement is saturated with moisture, it can cause the salts within the walls to dissolve and subsequently deposit on the surface. Poor ventilation and lack of proper air circulation can contribute to high humidity levels.
- Lack of Proper Drainage: Inadequate or faulty drainage systems around the basement can result in water accumulation around the foundation. This excess water can seep into the walls, bringing along dissolved salts and causing efflorescence.
- Capillary Action: Capillary action occurs when water is drawn upward through porous materials, such as concrete, against the force of gravity. This action can transport water-soluble salts from deeper within the walls to the surface, leading to the formation of efflorescence.
- Improper Sealing or Waterproofing: If the basement walls were not properly sealed or waterproofed during construction, they are more susceptible to water intrusion. Over time, the accumulated moisture can result in the formation of efflorescence.
It is important to note that efflorescence is more likely to occur in older basements or in areas with a high water table. However, it can affect basements of any age or location if the underlying causes are present.
By understanding the common causes of efflorescence, homeowners can take appropriate measures to address the issue and prevent its recurrence. In the next section, we will discuss how to assess the severity of efflorescence on basement walls.
Assessing the Severity of Efflorescence
When dealing with efflorescence on basement walls, it is essential to assess the severity of the problem to determine the appropriate course of action. Here are some key factors to consider when evaluating the severity of efflorescence:
- Extent of Deposits: Take note of the amount of efflorescence present on the walls. Is it a light dusting or are the deposits more extensive? Heavy deposits may indicate a more severe problem.
- Color and Texture: Pay attention to the color and texture of the efflorescence. While it is typically white and powdery, efflorescence can sometimes appear in different shades or have a crystalline texture. Unusual colors or textures may indicate additional issues.
- Location: Identify the areas where efflorescence is occurring. Is it primarily concentrated in one area or spread across multiple sections of the walls? This can help determine the source of moisture and potential underlying problems.
- Timeframe: Consider how long the efflorescence has been present on the walls. Is it a recent occurrence or has it been there for a significant period of time? This can provide insights into the chronicity of the issue.
- Associated Related Problems: Assess whether there are any additional signs of moisture-related issues in the basement, such as dampness, musty odors, or visible water stains. These issues could indicate more significant problems that need to be addressed.
By carefully evaluating these factors, homeowners can gain a better understanding of the severity of efflorescence and the potential underlying issues. It is important to note that while efflorescence itself does not pose significant structural risks, it can serve as a warning sign of an unhealthy basement environment.
If the efflorescence is minimal and limited to a small area, it may be possible to address the issue with simple cleaning and preventive measures. However, if the efflorescence is extensive or accompanied by other problems, it may require more comprehensive solutions to effectively mitigate the underlying causes.
Now that we have assessed the severity of efflorescence on basement walls, let’s move on to the step-by-step guide on how to fix this issue and prevent its recurrence.
Step-by-Step Guide to Fix Efflorescence on Basement Walls
Fixing efflorescence on basement walls requires a systematic approach to address the underlying causes and prevent its recurrence. Here is a step-by-step guide to help you tackle this issue effectively:
- Identify the Source of Moisture: Before proceeding with any repairs, it is crucial to identify and address the source of moisture. Check for any visible cracks, leaks, or areas of water intrusion in the basement walls. Repairing these issues will help prevent further water infiltration.
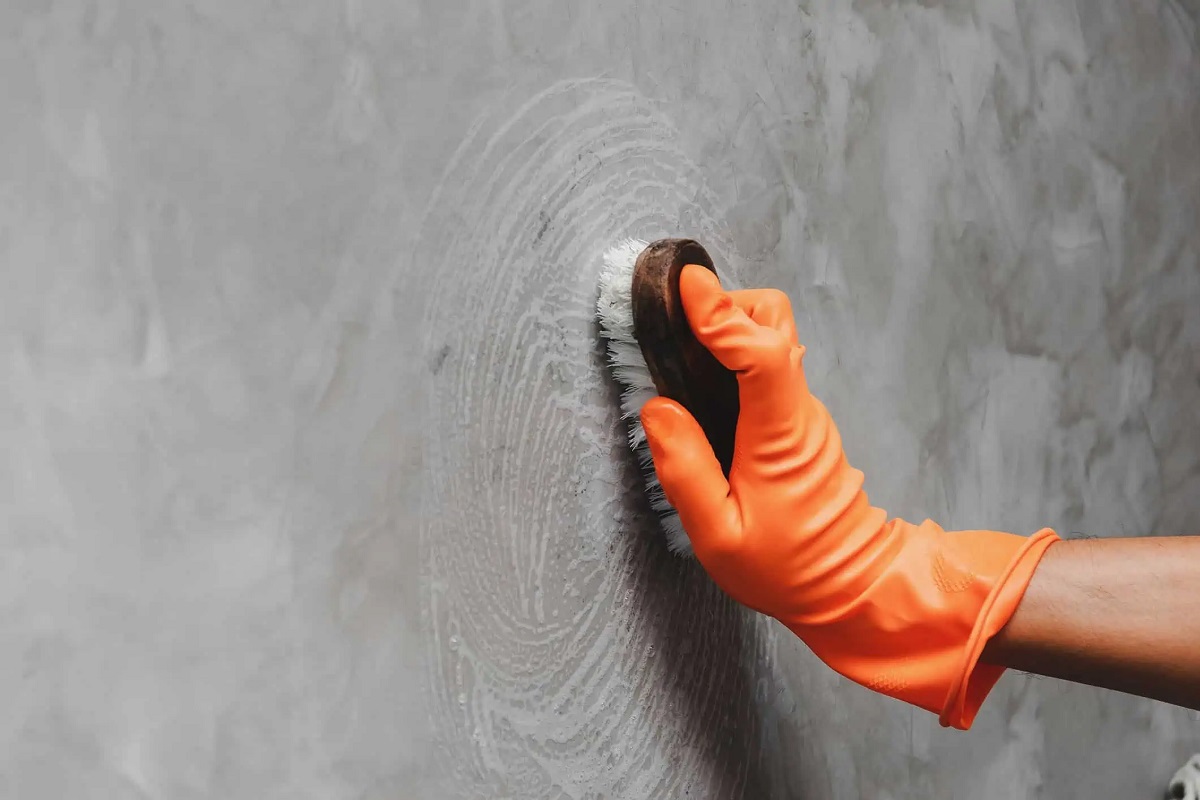
- Remove Existing Efflorescence: Begin by gently brushing or scraping off the existing efflorescence using a stiff brush or scraper. Be careful not to damage the surface of the walls. Wear protective gloves and a mask to avoid inhaling the dust.
- Clean the Basement Walls: After removing the efflorescence, thoroughly clean the basement walls using a mild detergent and clean water. Scrub the walls with a brush or sponge to remove any remaining salts or stains. Rinse the walls with clean water and allow them to dry completely.
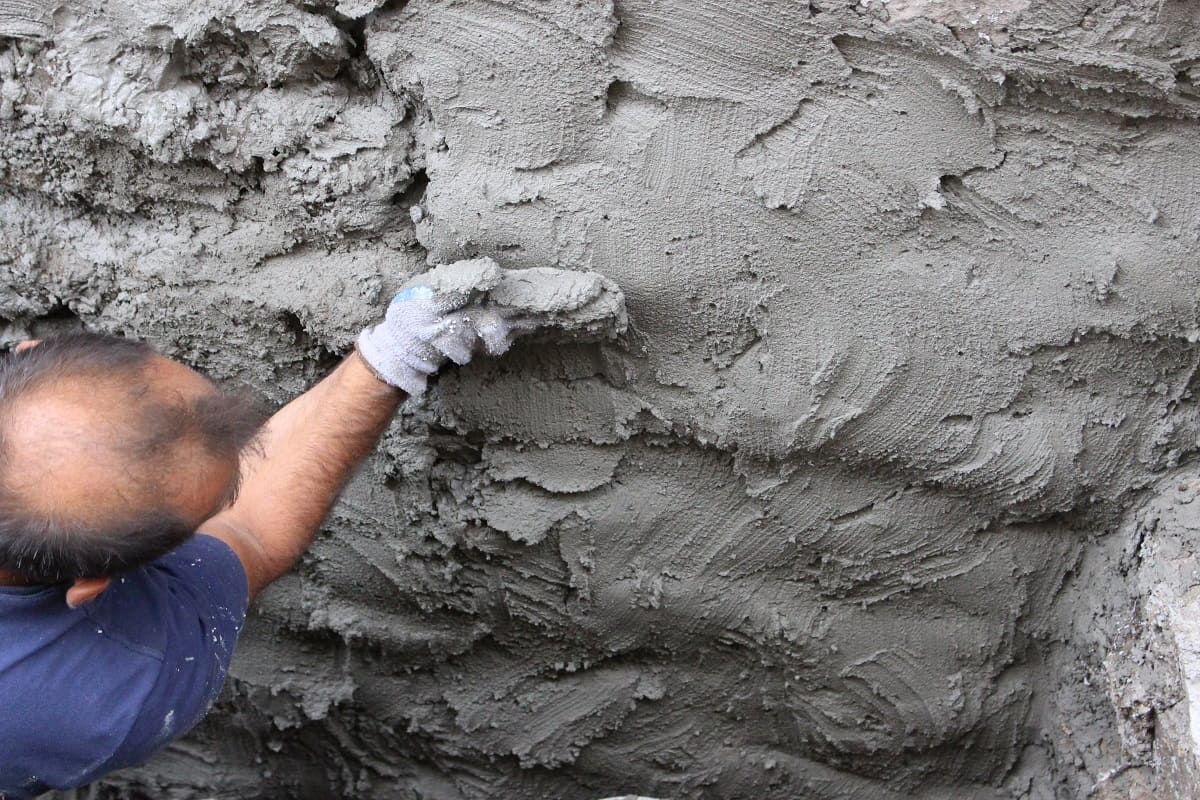
- Apply Waterproofing Treatment: To prevent future moisture penetration, apply a waterproofing treatment to the basement walls. There are various waterproofing products available, such as sealants or waterproofing paints. Follow the manufacturer’s instructions for application and ensure proper coverage of the entire wall surface.
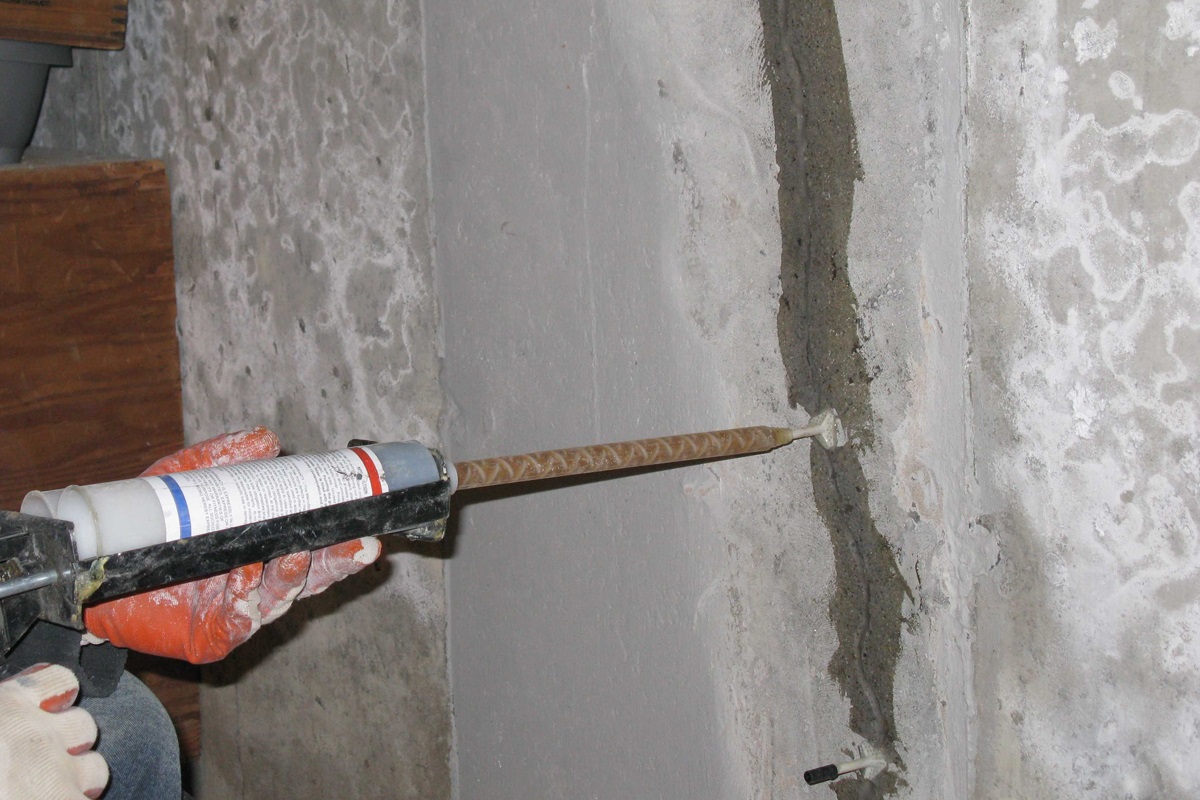
- Repair Cracks or Leaks: If you identified any cracks or leaks during the initial inspection, it is essential to address them to prevent further water intrusion. Fill cracks with an appropriate crack filler or use hydraulic cement for larger cracks. Seal any gaps or openings where water may seep through.
- Improve Ventilation and Air Circulation: Proper ventilation is crucial for maintaining a dry basement. Ensure that there is adequate airflow in the basement by opening windows, installing vents, or using fans or dehumidifiers to reduce moisture levels.
- Maintain Proper Drainage: Check your basement’s drainage system and ensure that it is functioning properly. Clear any clogged gutters or downspouts and redirect water away from the foundation to prevent excess moisture accumulation.
- Monitor the Basement for Future Signs of Efflorescence: Regularly inspect your basement walls for any signs of efflorescence in the future. Detecting and addressing the issue early on can prevent larger problems from developing. If efflorescence reappears, repeat the cleaning and preventive measures outlined above.
Following these steps will help eliminate the existing efflorescence and minimize the risk of its recurrence. However, it is important to note that if the underlying moisture issue persists or if you are unsure how to tackle the problem, it is advisable to consult a professional contractor or waterproofing specialist for further assistance.
By taking proactive steps to fix efflorescence and address the root causes, you can maintain a dry and healthy basement environment, free from unsightly white deposits on your walls.
Read more: How To Fix A Leaking Basement Wall
Identify the Source of Moisture
When dealing with efflorescence on basement walls, the first step is to identify and address the source of moisture. Without addressing the underlying cause, efflorescence is likely to reoccur even after cleaning and treatment. Here’s how to effectively identify the source of moisture:
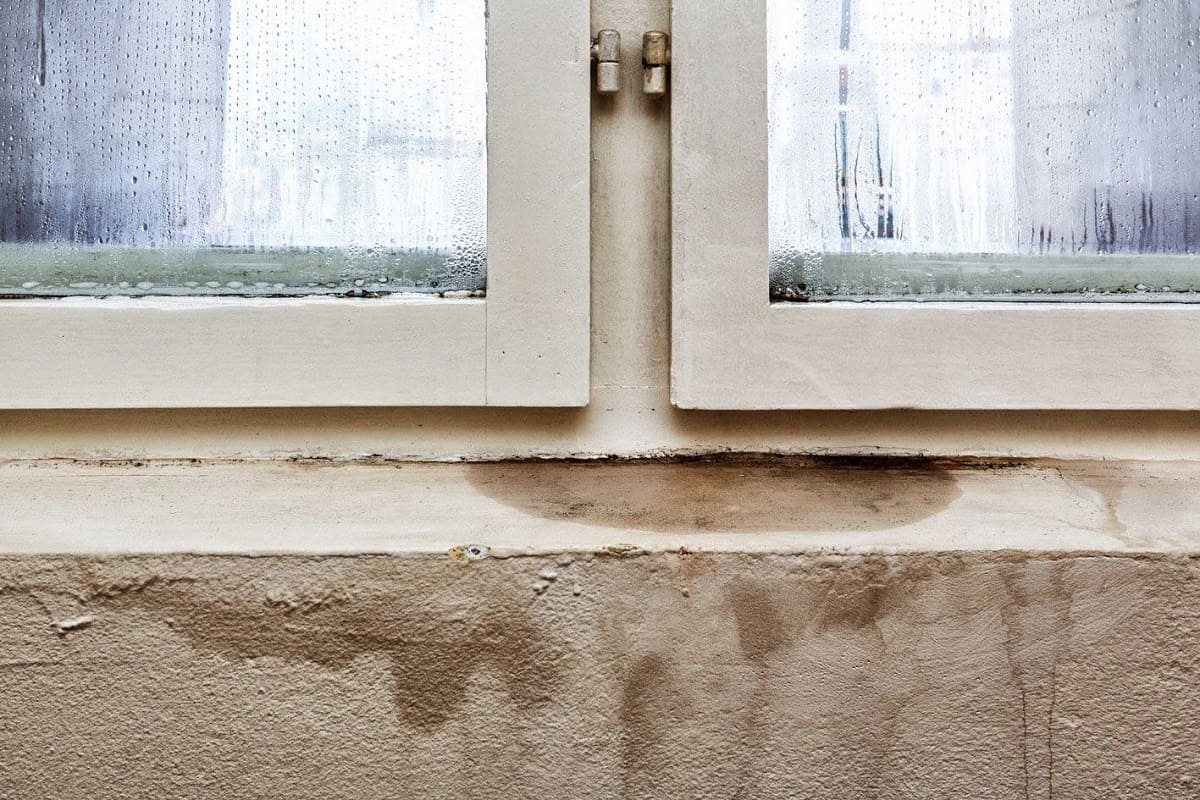
- Visual Inspection: Start by visually inspecting the basement walls for any visible signs of water intrusion. Look for cracks, gaps, or areas where water may be seeping through. Pay attention to areas near windows, doors, and utility penetrations.
- Check Exterior Drainage: Assess the exterior drainage system around your home. Ensure that gutters and downspouts are clean and free from debris. Make sure they are directing water away from the foundation. Look for signs of pooling water near the foundation, which could indicate problems with the grading or drainage system.
- Inspect Foundation Walls: Carefully examine the foundation walls inside and outside the basement. Look for any visible cracks, gaps, or areas of deterioration. Cracks can be potential pathways for water to enter the basement walls. Additionally, check the condition of any basement windows or vents, as they can sometimes be sources of water infiltration.
- Meter and Moisture Testing: Utilize a moisture meter to measure the moisture levels in the basement walls. Focus on areas that show signs of efflorescence or feel damp to the touch. Moisture meters provide quantitative measurements that can help identify areas of concern. Alternatively, you can use a moisture testing kit to determine if moisture is present in the walls.
- Observe During Rainfall: Monitor the basement walls during periods of rainfall. Look for signs of water dripping, wet spots, or areas with increased dampness. This can help pinpoint areas of active water intrusion.
- Consult with Professionals: If you are unable to identify the source of moisture or if the issue persists despite your best efforts, it may be necessary to consult with a professional waterproofing contractor or structural engineer. They have the expertise and tools to assess the situation thoroughly and provide appropriate solutions for addressing the moisture problem.
Identifying the source of moisture is crucial in effectively addressing efflorescence on basement walls. By taking the time to assess and remediate any issues with water intrusion, you can prevent further damage to the walls and ensure a dry and healthy basement environment.
Remove Existing Efflorescence
Once you have identified the source of moisture and taken steps to address it, the next step in fixing efflorescence on basement walls is to remove the existing deposits. Removing the efflorescence will improve the appearance of the walls and provide a clean surface for further treatment. Here’s how to remove efflorescence effectively:
- Gather the Necessary Tools: Before starting the removal process, gather the tools and materials you will need. These may include a stiff brush, scraper, gloves, mask, safety goggles, and a drop cloth or plastic sheet to protect the floor from dust and debris.
- Prepare the Area: Clear the area around the affected walls and ensure good ventilation. Open windows or use fans to minimize the inhalation of dust particles. Lay down the drop cloth or plastic sheet to catch any debris that falls during the cleaning process.
- Scrape off the Efflorescence: Begin by gently scraping off the efflorescence using a stiff brush or scraper. Be careful not to damage the surface of the walls or create any additional cracks. Work in small sections, applying light pressure to remove the white deposits. Wear gloves, a mask, and safety goggles for protection.
- Brush Away Loose Debris: Once you have scraped off the majority of the efflorescence, use a brush to sweep away any loose debris or remaining particles. Be thorough in your cleaning to ensure that all visible deposits are removed from the walls.
- Inspect for Stubborn Deposits: After the initial cleaning, closely inspect the walls for any stubborn or hard-to-remove efflorescence. If necessary, repeat the scraping process in these specific areas, using caution to avoid damaging the surface.
- Clean the Walls: After removing the efflorescence, clean the walls with a mild detergent and water solution. Use a sponge or brush to scrub the walls, focusing on areas where efflorescence was present. Rinse the walls thoroughly with clean water to remove any soap residue.
- Dry the Walls: Allow the basement walls to dry completely before proceeding with further treatment or repairs. Ensure that there is adequate airflow and ventilation in the basement to facilitate the drying process. This may involve using fans or dehumidifiers to expedite drying.
By following these steps, you can effectively remove the existing efflorescence and prepare the basement walls for further treatment. Removing the efflorescence is an essential step in fixing the problem, as it allows for a clean surface on which to apply waterproofing treatments or repair any underlying issues that caused the moisture intrusion.
To fix efflorescence on basement walls, start by identifying and fixing any sources of water infiltration. Then, clean the walls with a wire brush and apply a waterproofing sealer to prevent future moisture penetration.
Clean the Basement Walls
After removing the efflorescence from the basement walls, the next step is to thoroughly clean them. Cleaning the walls serves two purposes: it removes any remaining salts or debris and provides a clean surface for subsequent treatments. Here are the steps to effectively clean the basement walls:
- Gather the Necessary Supplies: Collect the supplies you will need for cleaning, including a mild detergent, a bucket of warm water, a sponge or brush, and clean towels or rags.
- Prepare the Cleaning Solution: In a bucket, dilute the mild detergent with warm water according to the manufacturer’s instructions. Avoid using harsh chemicals that can potentially damage the walls.
- Dampen the Sponge or Brush: Immerse the sponge or brush into the cleaning solution and allow it to soak. Squeeze out any excess liquid, leaving the sponge or brush slightly damp.
- Clean the Walls: Starting from the top of the wall, gently scrub the surface using the damp sponge or brush. Work in small sections, applying light pressure to remove any remaining dirt, stains, or residue. Pay particular attention to areas that were affected by efflorescence.
- Rinse the Walls: After scrubbing the walls, rinse the sponge or brush with clean water and go over the walls again to remove any soapy residue. Rinse the walls thoroughly with clean water, ensuring that all detergent is removed.
- Dry the Walls: Once the walls are clean, use clean towels or rags to dry them. If possible, promote air circulation in the basement by using fans, opening windows, or using a dehumidifier to expedite the drying process.
- Inspect for Remaining Deposits: Once the walls are dry, inspect them closely for any remaining efflorescence deposits. In some cases, stubborn or deeply ingrained deposits may require additional cleaning or treatment. If necessary, repeat the cleaning process in these specific areas.
Cleaning the basement walls not only removes dirt and residue but also ensures that the subsequent treatments, such as waterproofing or repairs, can adhere properly. It provides a clean and smooth surface on which to work and helps improve the overall appearance of the walls.
By following these steps, you can effectively clean the basement walls and prepare them for further treatments or repairs. A clean and well-maintained basement will not only prevent the recurrence of efflorescence but also contribute to a healthier living environment for you and your family.
Apply Waterproofing Treatment
After removing efflorescence and cleaning the basement walls, the next step in fixing efflorescence on basement walls is to apply a waterproofing treatment. Waterproofing helps to prevent moisture infiltration and future occurrences of efflorescence. Here’s how to effectively apply a waterproofing treatment:
- Select the Right Waterproofing Product: There are various waterproofing products available, such as sealants, waterproof coatings, or crystalline waterproofing compounds. Consider factors such as the type of basement walls, the severity of the moisture problem, and any specific manufacturer’s recommendations when choosing the product.
- Read and Follow the Manufacturer’s Instructions: Carefully read the manufacturer’s instructions and guidelines for application. Understand the recommended surface preparation, safety precautions, and drying time for the specific product you have chosen.
- Prepare the Walls: Ensure that the basement walls are clean, dry, and free from any remaining efflorescence or debris. If necessary, use a brush or vacuum to remove any loose particles that may affect the adhesion of the waterproofing product.
- Apply the Waterproofing Treatment: Follow the manufacturer’s instructions for applying the waterproofing product. This may involve using a brush, roller, or sprayer to evenly coat the walls. Be thorough and ensure that all exposed surfaces are covered with the waterproofing treatment.
- Allow Sufficient Drying Time: Once the waterproofing treatment is applied, allow it to dry completely according to the manufacturer’s instructions. Ensure proper ventilation in the basement to facilitate the drying process and avoid any moisture that could compromise the effectiveness of the treatment.
- Consider Multiple Coats: Depending on the product used, it may be necessary to apply multiple coats of the waterproofing treatment. Follow the manufacturer’s recommendations for the number of coats required for optimal protection.
- Monitor Effectiveness: After the waterproofing treatment has dried, regularly monitor the basement walls for any signs of moisture or efflorescence in the future. A successful waterproofing treatment should prevent further water intrusion and minimize the recurrence of efflorescence. If any issues persist, consult a professional for further evaluation.
Applying a waterproofing treatment to the basement walls is a crucial step in preventing the reoccurrence of efflorescence. It creates a barrier against moisture infiltration, helping to maintain a dry and healthy basement environment. Remember to follow the manufacturer’s instructions and take necessary safety precautions when applying the waterproofing product.
By following these steps, you can effectively apply a waterproofing treatment to your basement walls and minimize the risk of future efflorescence or water-related issues. A properly waterproofed basement will provide peace of mind and protect your property from potential damage.
Read more: How To Repair Basement Walls
Repair Cracks or Leaks
As part of fixing efflorescence on basement walls, it is essential to address any cracks or leaks that may contribute to water intrusion. Repairing these issues will prevent further moisture infiltration and help eliminate the underlying cause of efflorescence. Here’s how to effectively repair cracks or leaks in the basement walls:
- Inspect and Identify Cracks or Leaks: Carefully examine the basement walls for any visible cracks, gaps, or areas of deterioration. Look for signs of active leaks, such as dampness, water stains, or mold growth.
- Clean the Cracked Area: Clean the cracked area thoroughly using a brush or vacuum cleaner to remove any loose debris or particles. This will ensure proper adhesion of the repair material.
- Select the Appropriate Repair Method: Depending on the size and severity of the cracks or leaks, choose the most suitable repair method. This can range from simple crack fillers to more extensive methods, such as injecting epoxy or polyurethane compounds into the cracks.
- Follow the Manufacturer’s Instructions: Read and follow the manufacturer’s instructions for the chosen repair material. Different products may have varying application techniques, mixing ratios, and drying times. Adhere to these instructions for optimal results.
- Apply the Repair Material: Use a trowel, putty knife, or caulking gun to apply the repair material into the cracks or leaks. Ensure that the material fills the entire void and creates a strong bond with the surrounding wall surfaces. Smooth and level the repaired area as necessary.
- Allow Sufficient Drying and Curing Time: Depending on the repair material used, allow it to dry and cure according to the manufacturer’s instructions. Avoid exposing the repaired area to excessive moisture or stress until the material has fully cured.
- Inspect the Repaired Area: Once the repair material has dried and cured, inspect the repaired area for any signs of further cracks, leaks, or damage. If any issues persist, consider consulting a professional for further evaluation and remediation.
Repairing cracks or leaks in the basement walls is crucial to preventing water intrusion and the subsequent formation of efflorescence. It ensures the structural integrity of the walls and helps maintain a dry and healthy basement environment.
By following these steps and using the proper repair methods, you can effectively address cracks or leaks in the basement walls and minimize the risk of water-related issues. Remember to read and follow the manufacturer’s instructions for the repair materials, and consider seeking professional assistance for complex or extensive repairs.
Improve Ventilation and Air Circulation
Improving ventilation and air circulation in the basement is an essential step in fixing efflorescence on basement walls. Proper airflow helps to reduce humidity levels, eliminate stagnant air, and prevent moisture buildup. Here’s how to effectively improve ventilation and air circulation:
- Keep Windows and Doors Open: When weather permits, open windows and doors in the basement to allow fresh air to circulate. This will help to remove stagnant air and promote ventilation.
- Use Exhaust Fans: Install or utilize exhaust fans in the basement to remove humid air and odors. Place the fans in strategic locations to ensure proper air exchange and circulation.
- Utilize Ceiling Fans: If there are ceiling fans in the basement, set them to run in a counterclockwise direction to create a cooling breeze. This can assist in moisture evaporation and enhance air circulation.
- Position Portable Fans: If ceiling fans are not present, use portable fans to improve air movement. Place them strategically to direct airflow towards damp areas or corners of the basement.
- Dehumidify the Basement: Use a dehumidifier to control humidity levels in the basement. Set the dehumidifier to maintain a relative humidity between 30-50%. Empty or drain the dehumidifier regularly to ensure proper functioning.
- Maintain HVAC System: Ensure that the heating, ventilation, and air conditioning (HVAC) system in the basement is clean and in proper working condition. Regularly service and clean the filters to improve airflow, reduce humidity, and prevent the spread of contaminants.
- Remove Obstructions: Clear any obstructions or clutter that may impede air circulation in the basement. Ensure that furniture, storage items, and other objects are arranged to allow for efficient airflow.
- Seal Air Leaks: Identify and seal any air leaks in the basement, especially around windows, doors, and utility penetrations. Use weatherstripping or caulking to prevent outside air from seeping in and affecting the indoor air quality.
- Maintain Cleanliness: Regularly clean the basement to minimize dust, dirt, and allergens that can affect air quality. Vacuum or sweep the floors, wipe down surfaces, and remove any mold or mildew promptly.
By implementing these measures, you can significantly improve ventilation and air circulation in the basement. Proper airflow helps to reduce moisture levels, mitigate the formation of efflorescence, and create a healthier environment.
Remember to continually monitor and maintain good ventilation practices, especially in humid climates or during periods of increased moisture. Adequate ventilation and air circulation are key to preventing moisture-related issues and promoting a dry and comfortable basement.
Maintain Proper Drainage
Maintaining proper drainage around the basement is crucial for preventing the accumulation of water and minimizing the risk of efflorescence on basement walls. Here are some steps to ensure effective drainage:
- Inspect Gutters and Downspouts: Regularly check and clean gutters and downspouts to ensure they are free from debris and functioning properly. Clogged gutters can cause water to overflow and pool near the foundation, leading to moisture seepage into the basement walls.
- Redirect Downspouts: Ensure that downspouts are directed away from the foundation. Use downspout extensions or splash blocks to carry water at least 6 feet away from the walls or into a proper drainage system that diverts water away from the house.
- Grade the Landscape: Make sure the terrain around the house is properly graded to slope away from the foundation. This enables water to flow away from the basement walls instead of pooling around them. Aim for a downward slope of at least 6 inches over a distance of 10 feet.
- Install French Drains: Consider installing French drains, which are trenches filled with gravel and perforated pipes that redirect water away from the foundation. These drains help to collect and channel water to a proper drainage system, preventing it from seeping into the basement walls.
- Install a Sump Pump: In cases where water intrusion is persistent, installing a sump pump can be beneficial. A sump pump collects water that has accumulated in a sump pit and pumps it away from the basement, ensuring that the surrounding area remains dry.
- Inspect and Maintain Foundation Seals: Check the foundation walls for any gaps, cracks, or deteriorating seals. Seal these areas using appropriate materials, such as hydraulic cement or waterproofing sealants, to prevent water penetration into the basement.
- Monitor Drainage Systems: Regularly monitor the performance of your drainage systems, including gutters, downspouts, French drains, and sump pumps. Clean and maintain them as needed to ensure proper functioning.
- Consider Landscaping Options: Utilize landscaping features such as swales, berms, or retaining walls to direct water away from the foundation. These natural elements can help manage water flow and reduce the risk of moisture intrusion.
- Seek Professional Assistance: If you encounter persistent or severe drainage issues, it may be necessary to consult with a professional contractor or drainage specialist. They can assess your specific situation and recommend appropriate solutions tailored to your needs.
Maintaining proper drainage is essential for preventing water from seeping into the basement walls and causing efflorescence. By implementing effective drainage systems and regularly monitoring their performance, you can significantly reduce the risk of water-related issues and ensure a dry and healthy basement environment.
Remember to inspect and address any drainage issues promptly to prevent further damage to the foundation and minimize the potential for efflorescence and other moisture-related problems.
Monitor the Basement for Future Signs of Efflorescence
After taking the necessary steps to fix efflorescence on basement walls, it is important to monitor the basement regularly for any signs of its recurrence. By staying vigilant and proactive, you can catch potential issues early on and prevent them from developing into larger problems. Here’s how to effectively monitor the basement for future signs of efflorescence:
- Regular Visual Inspections: Conduct visual inspections of the basement walls on a regular basis. Look for any signs of white, powdery deposits or discoloration on the surface. Pay attention to areas where efflorescence was previously present or where moisture issues were identified.
- Check for Damp Spots or Stains: Keep an eye out for any damp spots, moisture stains, or watermarks on the basement walls. These can indicate ongoing or recurring moisture intrusion, which could lead to efflorescence.
- Monitor Humidity Levels: Use a hygrometer or humidity monitor to keep track of the humidity levels in the basement. Ideally, indoor relative humidity should be maintained between 30-50%. High humidity levels can contribute to the formation of efflorescence.
- Be Alert to Musty Odors: Pay attention to any musty or damp odors in the basement. These odors can be indicative of excess moisture or the presence of mold or mildew, which may accompany efflorescence.
- Check for Water Leaks or Seepage: Regularly inspect the basement for any signs of water leaks, seepage, or standing water. Look for water stains, wet spots, or active water drips, as these can be indications of ongoing water intrusion.
- Monitor Basement Environment: Maintain a comfortable and healthy basement environment by ensuring proper ventilation, controlling humidity levels, and preventing excess moisture accumulation. This can help minimize the conditions that contribute to efflorescence.
- Address Issues Promptly: If you notice any signs of efflorescence, moisture, or water-related problems during your monitoring, take immediate action. Investigate the source of the issue and address it promptly to prevent further damage.
- Seek Professional Help if Needed: If efflorescence persists despite your efforts or if you are uncertain about the cause of the issue, consider consulting with a professional contractor, waterproofing specialist, or structural engineer. They can provide expert advice and recommendations tailored to your specific situation.
Regular monitoring is vital to maintaining a dry and healthy basement and preventing the reoccurrence of efflorescence. By identifying potential issues at an early stage, you can take the necessary steps to address them and ensure the long-term stability of your basement walls.
Remember to be proactive in your monitoring efforts and to take appropriate measures if you detect any signs of efflorescence or related problems. With proper vigilance, you can enjoy a dry and well-maintained basement for years to come.
Read more: How To Drylok Basement Walls
Conclusion
Efflorescence on basement walls is a common problem faced by homeowners, but with proper understanding and proactive measures, it can be effectively fixed and prevented. By following the step-by-step guide outlined in this article, you can address the underlying causes of efflorescence and maintain a dry, healthy, and visually pleasing basement environment.
We began by understanding efflorescence and its causes. It is essential to recognize that efflorescence is a result of water-soluble salts migrating through porous walls and subsequently depositing on the surface. While it does not pose significant structural risks, it indicates excessive moisture in the walls and the potential for further issues if left unaddressed.
Assessing the severity of efflorescence allows for a targeted approach to its resolution. By evaluating factors such as the extent of deposits, color and texture, location, timeframe, and associated problems, you can determine the appropriate measures to be taken.
The step-by-step guide provided valuable instructions for fixing efflorescence on basement walls. From identifying the source of moisture and removing existing efflorescence to cleaning the walls, applying a waterproofing treatment, repairing cracks or leaks, improving ventilation and air circulation, maintaining proper drainage, and monitoring the basement for future signs of efflorescence, each step is crucial in achieving a long-lasting solution.
Remember to stay vigilant and proactive in monitoring the basement for any signs of efflorescence or related issues. Regular inspections, humidity checks, and prompt action will help maintain a dry and healthy basement environment.
In cases where efflorescence persists despite your efforts or in complex situations, it is advisable to seek the assistance of professionals. They possess the expertise and knowledge required to address specific problems and provide tailored solutions.
By taking the necessary steps to fix efflorescence on basement walls, you can not only enhance the aesthetics of your basement but also protect the structural integrity of your home. A dry and well-maintained basement contributes to a healthier living environment and ensures the longevity of your property.
So, don’t let efflorescence dampen your spirits. Take action now and enjoy a clean, dry, and beautiful basement for years to come.
Now that you've tackled efflorescence on your basement walls, why stop there? Dive deeper into safeguarding your space with our next feature on ensuring your basement remains dry and secure. Our detailed guide on basement waterproofing covers all you need to know to protect your home from unwanted moisture and the complications it brings. Don’t hesitate to check out this essential read for maintaining a healthy, robust foundation.
Frequently Asked Questions about How To Fix Efflorescence On Basement Walls
Was this page helpful?
At Storables.com, we guarantee accurate and reliable information. Our content, validated by Expert Board Contributors, is crafted following stringent Editorial Policies. We're committed to providing you with well-researched, expert-backed insights for all your informational needs.


0 thoughts on “How To Fix Efflorescence On Basement Walls”