Articles
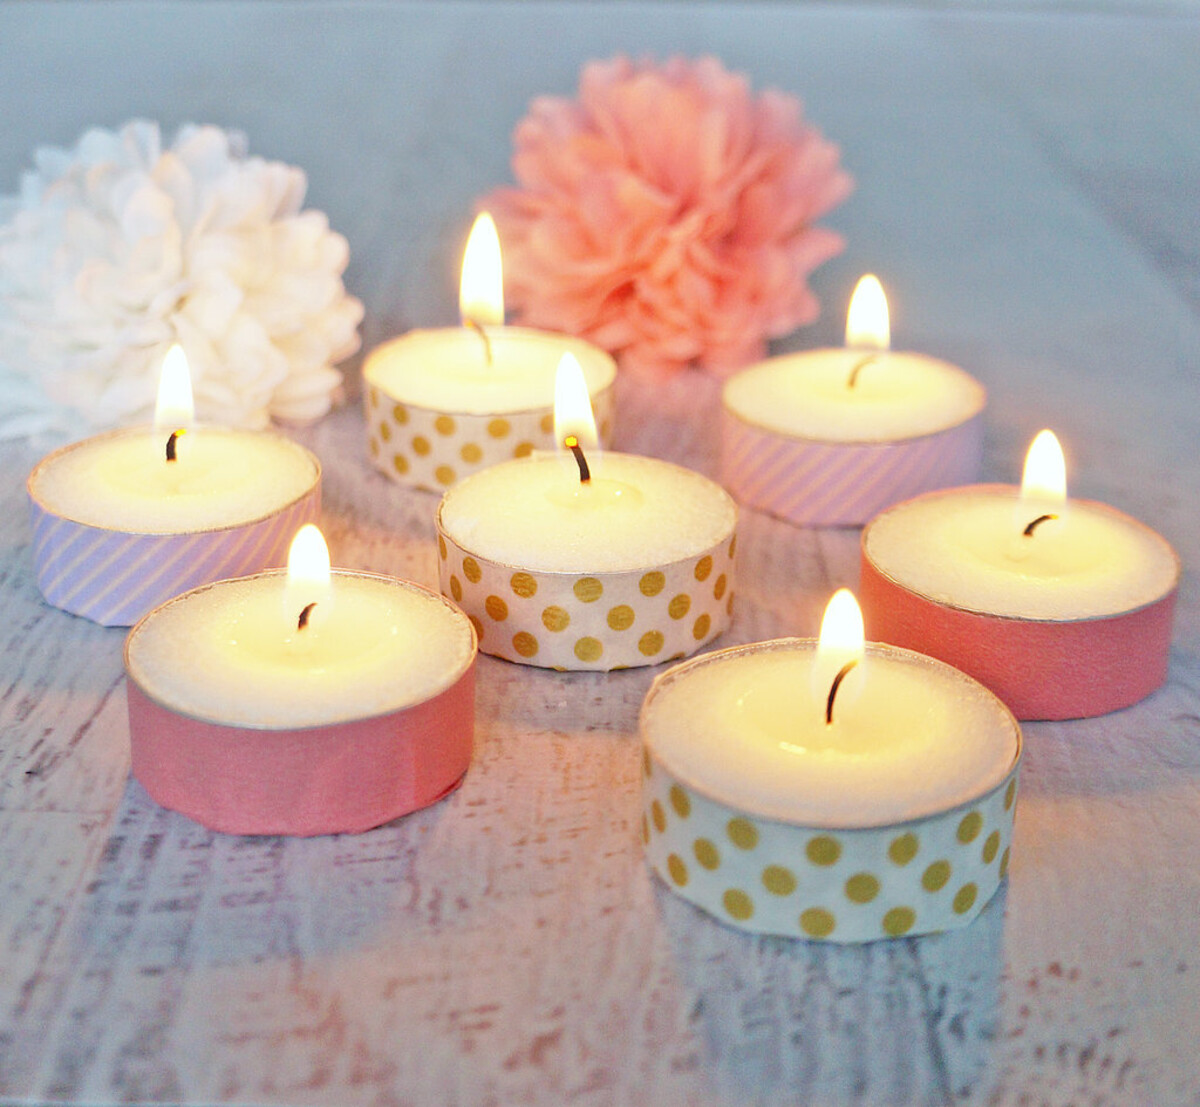
How To Make Tea Light Candles
Modified: December 7, 2023
Learn how to make tea light candles with our informative articles. Discover the step-by-step process to create beautiful and relaxing candlelight ambiance.
(Many of the links in this article redirect to a specific reviewed product. Your purchase of these products through affiliate links helps to generate commission for Storables.com, at no extra cost. Learn more)
Introduction
If you’re looking for a fun and creative way to decorate your home or add a touch of ambiance to your space, making tea light candles is a fantastic DIY project to embark on. Tea light candles are small, versatile, and can be customized to suit your personal style and preferences. In this article, we will guide you through the step-by-step process of making your very own tea light candles.
Tea light candles are ideal for a variety of occasions and purposes. Whether you want to set a cozy atmosphere for a romantic dinner, create a warm and inviting ambiance for a party, or simply enjoy the soft flickering glow during a soothing bath, tea light candles are the perfect choice. Plus, they also make great handmade gifts that are sure to impress your friends and loved ones.
To get started with making tea light candles, you will need a few basic materials. Don’t worry, though – most of these materials can be easily found at your local craft store or online. Once you have gathered your supplies, you’ll be on your way to creating beautiful tea light candles that will enhance any space.
Key Takeaways:
- Create a Cozy Atmosphere: Making tea light candles is a fun and rewarding DIY project that allows you to customize scents, colors, and containers to set the perfect mood for any occasion.
- Personalized Ambiance: Handmade tea light candles are not only a delightful addition to your space but also make thoughtful and unique gifts for loved ones, adding a touch of warmth and tranquility to their homes.
Read more: What Are Tea Light Candles Used For
Materials Needed
Before you begin making your tea light candles, it’s important to gather all the necessary materials. Here’s what you’ll need:
- Wax: Choose a wax that is specifically designed for candle making, such as soy wax or beeswax. These types of wax are easy to work with and result in high-quality candles.
- Wick: Select a wick that is appropriate for tea light candles. Pre-tabbed wicks are recommended as they come with a metal base that can easily be attached to the bottom of the tea light container.
- Fragrance oils (optional): If you want to add a pleasant scent to your tea light candles, consider purchasing fragrance oils. There is a wide variety of options available, from floral and fruity scents to warm and cozy aromas.
- Container: Tea light containers come in different shapes and sizes. You can choose to use metal or clear plastic cups specifically designed for tea lights. Alternatively, you can also repurpose small heat-resistant glass containers or silicone molds.
- Double boiler or a heat-resistant container: To melt the wax, you will need a double boiler or a heat-resistant container that can withstand high temperatures. Avoid using direct heat to prevent the wax from burning.
- Color dye (optional): If you prefer colored tea light candles, you can use color dye specifically formulated for candle making. Make sure to choose colors that are non-toxic and won’t stain the wax.
- Thermometer: A candle thermometer is essential to monitor the temperature of the wax. This will help ensure that the wax is melted at the correct temperature to achieve the best results.
- Mixing utensils: Prepare a set of heat-resistant utensils dedicated to candle making, such as a stirring spoon, a pouring pitcher, or a ladle. Avoid using regular kitchen utensils as they may get damaged.
- Protective gear: To ensure your safety, it is recommended to wear a heat-resistant apron, gloves, and safety goggles when working with hot wax.
- Work area: Set up a clean and well-ventilated work area where you can safely create your tea light candles. Cover the surface with newspaper or a heat-resistant mat to protect it from spills and drips.
Once you have gathered all the necessary materials, you’re ready to start making your tea light candles. In the following steps, we will guide you through the process of creating your own beautiful tea light candles that will add a warm and inviting glow to any space.
Step 1: Choosing the Wax
Choosing the right wax is crucial for creating high-quality and long-lasting tea light candles. There are several types of wax available, but for tea lights, soy wax and beeswax are the most commonly used options. Here’s what you need to consider when choosing the wax:
- Soy Wax: Soy wax is a popular choice for candle making due to its natural and eco-friendly properties. It is derived from soybean oil and burns cleaner than other types of wax. Soy wax also has a lower melting point, which makes it easier to work with and speeds up the melting process.
- Beeswax: Beeswax is another excellent option for tea light candles. It is a natural wax produced by bees and has a lovely natural scent. Beeswax candles burn longer and emit a warm, golden glow. However, keep in mind that beeswax can be a bit more expensive compared to other types of wax.
When selecting the wax, consider factors such as personal preference, budget, and the desired outcome of your tea light candles. Both soy wax and beeswax are excellent choices and will result in high-quality candles. Experiment with different types of wax to discover your favorite and find the perfect blend for your creations.
Additionally, if you prefer to make colored tea light candles, choose a wax that easily accepts color dye. Soy wax and beeswax are both known to hold color well, allowing you to achieve vibrant and beautiful results.
Now that you have chosen the wax for your tea light candles, you’re ready to move on to the next step: selecting the wick.
Step 2: Selecting the Wick
Choosing the right wick is crucial for the successful burning of your tea light candles. The wick determines how the flame will burn and how well the wax will be consumed. Here are some factors to consider when selecting the wick:
- Size: The size of the wick is determined by the diameter of your tea light container. You want to choose a wick that is appropriate for the size of your candle to ensure proper burning. If the wick is too small, it may result in a weak flame that struggles to burn the wax efficiently. If the wick is too large, it may produce a flame that is too big and can cause excessive dripping or sooting.
- Type: There are different types of wicks available, such as cotton wicks, braided wicks, and wooden wicks. Cotton wicks are the most commonly used and provide a consistent flame. Braided wicks are known for their stability and are often used for larger candles. Wooden wicks offer a unique crackling sound and are great for creating a cozy atmosphere.
- Pre-tabbed or untabbed: Pre-tabbed wicks are wicks that come with a metal base attached to them. These wicks are convenient to use for tea light candles as the metal base can easily be secured to the bottom of the candle container. Untabbed wicks require additional steps to attach them to the container, such as using glue or a wick sticker.
When selecting the wick, it’s best to refer to the manufacturer’s guidelines or consult candle-making resources to determine the appropriate wick size for your specific tea light container. You can also conduct a burn test by lighting the wick to observe how it performs before using it in your tea light candles.
Once you have chosen the appropriate wick for your tea light candles, you’re ready to move on to the next step: adding fragrance (optional).
Step 3: Adding Fragrance (Optional)
Adding fragrance to your tea light candles can elevate the ambiance and create a delightful sensory experience. The scent of the candles can help set the mood and make your space even more inviting. Here’s how you can add fragrance to your tea light candles:
- Choose the Right Fragrance: Select a fragrance oil that suits your preferences and complements the atmosphere you want to create. There are countless options available, ranging from floral and fruity scents to warm and cozy notes. Make sure to choose fragrance oils that are specifically formulated for candle making to ensure the best results.
- Calculate the Fragrance Load: Each fragrance oil has a recommended maximum fragrance load, which is the percentage of fragrance oil based on the weight of the wax. Consult the manufacturer’s guidelines or candle-making resources to determine the appropriate fragrance load for your chosen oil. It’s important not to exceed this limit, as it may affect the burning performance of your candles.
- Add the Fragrance Oil: Measure the desired amount of fragrance oil according to the recommended fragrance load and add it to the melted wax. Stir the wax and fragrance oil mixture gently but thoroughly to ensure even distribution of the scent. Take caution not to over-stir, as it may introduce air bubbles into the wax.
- Allow the Wax to Cool: After adding the fragrance oil, allow the wax to cool slightly before pouring it into the tea light containers. This helps prevent the fragrance from dissipating too quickly and ensures that the scent is infused properly into the candles.
Adding fragrance to your tea light candles is an optional step. If you prefer unscented candles, you can choose to skip this step and proceed directly to the next one.
With the fragrant wax prepared, it’s time to move on to the next step: selecting a container for your tea light candles.
Read more: How Long Do Tea Light Candles Burn
Step 4: Selecting a Container
Choosing the right container for your tea light candles is important for both aesthetic and practical reasons. The container holds the wax and contributes to the overall look and feel of the candles. Here are some factors to consider when selecting a container:
- Size: The size of the container will determine the burn time of your tea light candles. If you want shorter burn times, choose smaller containers. If you prefer longer burn times, opt for larger containers. Consider the intended use of the candles and how long you want them to last.
- Material: Tea light containers come in various materials, such as metal, clear plastic, heat-resistant glass, or silicone. Metal containers are popular for their durability and sleek appearance. Clear plastic cups are simple and cost-effective. Heat-resistant glass containers add an elegant touch and allow the soft glow of the flame to be visible. Silicone molds provide flexibility and ease of removal.
- Design: Consider the design or shape of the container that appeals to you. From classic circular shapes to unique geometrical designs, choose a container that reflects your personal style and enhances the ambiance you want to create.
It’s important to ensure that the selected container is safe for candle use, heat-resistant, and stable enough to hold the melting wax. If repurposing a container, make sure it is suitable for candle-making and won’t crack or break under heat.
When selecting a container, take into account the compatibility with your chosen wax and wick size. The container should allow for the appropriate amount of wax and provide space for the wick to burn properly without obstruction.
Once you have chosen the perfect container for your tea light candles, you’re ready to move on to the next step: melting the wax.
Step 5: Melting the Wax
Now that you have selected your wax, wick, fragrance (optional), and container, it’s time to melt the wax to prepare it for pouring into the tea light containers. Follow these steps to melt the wax:
- Prepare a Double Boiler: Fill a large pot with a few inches of water and place it on the stove. Place a heat-resistant container or a smaller pot inside the larger pot, creating a double boiler setup. The water in the larger pot will indirectly heat the wax in the smaller pot, preventing it from burning.
- Measure the Wax: Carefully measure the amount of wax you will need based on the volume of your tea light containers. It’s recommended to measure by weight using a kitchen scale for accuracy.
- Place the Wax into the Double Boiler: Add the measured wax into the heat-resistant container or smaller pot in the double boiler setup. Make sure the water level in the larger pot is not touching the bottom of the smaller pot.
- Heat the Wax: Turn on the stove to a medium-low heat setting and allow the wax to melt slowly. Stir the wax occasionally with a heat-resistant utensil to ensure even melting and prevent any clumps or air bubbles from forming.
- Monitor the Temperature: Use a candle thermometer to monitor the temperature of the melted wax. Different types of wax have specific melting points, so refer to the manufacturer’s guidelines for the recommended temperature range. It’s important not to exceed the melting point to avoid damaging the wax.
- Remove from Heat: Once the wax has completely melted and reached the desired temperature, carefully remove the heat-resistant container or smaller pot from the double boiler setup. Place it on a heat-resistant surface or a trivet to prevent any heat damage.
It’s important to handle melted wax with care and take necessary safety precautions to avoid accidents. Remember to wear protective gear, such as gloves and safety goggles, and keep a fire extinguisher or baking soda nearby in case of any emergencies.
Now that your wax is melted, you’re ready to move on to the next step: preparing the wicks.
When making tea light candles, use high-quality wax and wicks for a clean and long-lasting burn. Be sure to melt the wax to the correct temperature and pour carefully to avoid air bubbles.
Step 6: Preparing the Wick
Now that you have melted the wax, it’s time to prepare the wicks for your tea light candles. Properly preparing the wicks ensures that they burn efficiently and evenly. Here’s how to prepare the wicks:
- Cut the Wick: Measure and cut the wick to match the height of your tea light container. Leave a little extra length to allow for attaching the wick to the bottom of the container.
- Attach the Wick to the Bottom of the Container: If using pre-tabbed wicks, place a small dot of hot glue or a wick sticker on the metal base and press it firmly onto the center bottom of the container. If using untabbed wicks, dip the tip of the wick into the melted wax, then attach it to the bottom of the container and hold it in place until the wax sets.
- Secure the Wick in Place: To ensure that the wick stays centered and upright during the pouring process, you can use various methods to hold it in place. One common method is to use a wick holder, which is a small metal or plastic device that sits on top of the container and keeps the wick in position. Alternatively, you can use a pencil or a clothespin to hold the wick tightly in the center of the container.
Properly securing the wick at the bottom of the container and keeping it centered is essential for the candle to burn evenly and prevent any tunneling or leaning flames. Taking these steps ensures that your tea light candles will burn beautifully and last longer.
Once the wicks are prepared, it’s time to move on to the next step: pouring the melted wax into the tea light containers.
Step 7: Pouring the Wax
With the wicks prepared and securely attached to the tea light containers, it’s time to pour the melted wax into the containers. Follow these steps to ensure a smooth and successful pouring process:
- Prepare the Pouring Area: Place your tea light containers on a heat-resistant surface, such as a baking sheet or a tray lined with aluminum foil or parchment paper. This will catch any potential spills or drips and make for easier cleanup.
- Stir the Melted Wax: Give the melted wax a gentle stir to ensure it is well-mixed and any fragrance oil incorporated is evenly dispersed throughout the wax.
- Pour the Wax: Slowly pour the melted wax into each tea light container, taking care not to spill or overflow. Aim for a steady pour to maintain control over the amount of wax being poured.
- Leave Some Space: Leave a small gap at the top of each container, about ¼ inch or so, to allow room for the wax to expand as it cools and solidifies. This helps prevent the wax from overflowing or causing any pressure build-up.
- Allow the Wax to Settle: Let the poured wax settle for a few minutes. This will help any air bubbles rise to the surface and ensure a smooth and even finish on the top of your tea light candles.
Be cautious while pouring the hot wax and avoid any sudden movements or spills. If you accidentally spill wax, clean it up immediately with paper towels or cloth before it solidifies.
Now that you have successfully poured the wax into the tea light containers, it’s time to move on to the next step: adding color (optional).
Read more: How To Make Tea With A Tea Kettle
Step 8: Adding Color (Optional)
If you want to add a pop of color to your tea light candles, you can incorporate color dye into the melted wax. Adding color can enhance the visual appeal of your candles and complement your home decor or event theme. Follow these steps to add color to your tea light candles:
- Select the Right Color Dye: Choose color dye specifically formulated for candle making. Select colors that are non-toxic and won’t stain the wax. Liquid dyes or dye chips are commonly used for coloring candles and offer a wide range of color options.
- Calculate the Dye Amount: Refer to the manufacturer’s guidelines or guidelines provided with the color dye to determine the recommended amount of dye to add. The recommended dosage may differ depending on the intensity of color you desire and the type of dye you’re using.
- Add Color Dye: As the wax is melting, add the desired amount of color dye to the melted wax. Stir the wax gently to mix the dye thoroughly. Continue stirring until the color is evenly distributed throughout the wax. Be mindful not to introduce air bubbles while stirring.
- Monitor the Color Intensity: While adding the color dye, periodically check the color intensity by taking a small sample of the wax and allowing it to solidify. This will give you an idea of how the color will appear when the candles are fully cooled and solidified. Adjust the dye amount if necessary to achieve the desired color.
Remember that a little goes a long way with color dyes, so start with a small amount and gradually add more if needed. It’s easier to add more color if the desired shade is not achieved rather than trying to dilute an overly intense color.
Adding color to your tea light candles is an optional step, and you can choose to skip it if you prefer white or unscented candles. Once you’ve finished adding color (or decided to create white tea light candles), you’re ready to move on to the next step: allowing the wax to cool.
Step 9: Allowing the Wax to Cool
After pouring the wax into the tea light containers and potentially adding color, it’s important to allow the wax to cool and solidify properly before proceeding to the next step. Proper cooling ensures that your tea light candles set correctly and are ready for use. Follow these steps to cool the wax:
- Patience is Key: When it comes to cooling the wax, patience is crucial. Avoid the temptation to touch or disturb the candles as they cool, as this can disrupt the solidification process and affect the quality of the finished candles. Let the candles cool naturally and undisturbed.
- Choose an Optimal Cooling Area: Select a cool and well-ventilated area of your home to allow the candles to cool. Avoid placing them in direct sunlight or near a source of heat, as this can cause uneven cooling and potential melting.
- Monitor the Cooling Process: Keep an eye on the tea light candles as they cool. The cooling time will vary depending on factors such as the size of the candles, the type of wax, and the room temperature. As a general guideline, allow the candles to cool for at least 2 to 3 hours, or until the wax has completely solidified.
- Avoid Disturbance: Refrain from moving or touching the candles until they have fully cooled and hardened. Any disturbance during the cooling process can lead to uneven surfaces, air pockets, or wax cracking.
Keep in mind that the cooling time may vary, so it’s best to rely on visual cues to determine when the wax has completely solidified. The surface of the candles should appear firm and smooth to the touch, with no signs of liquid or soft spots.
Once the wax has thoroughly cooled and solidified, you’re ready to move on to the final step: trimming the wick.
Step 10: Trimming the Wick
After the wax has fully cooled and the tea light candles have solidified, it’s time to trim the wick before lighting them. Trimming the wick not only helps ensure a clean and even burn but also promotes the longevity of your candles. Follow these steps to trim the wick:
- Inspect the Wick Length: Take a close look at the wick protruding from the solidified wax. If it appears too long or has a significant mushrooming at the top, it’s time to trim it.
- Prepare Trimming Tools: Grab a pair of sharp scissors, wick trimmers, or a wick cutter specifically designed for candle wicks. These tools make trimming easier and more precise.
- Trim to the Desired Length: Trim the wick to a length of approximately 1/4 inch (6mm) above the surface of the wax. This ensures a proper flame height and prevents excessive flickering or smoke.
- Dispose of Wick Trimmings: Collect and discard the trimmed wick remnants in a safe manner, such as in a trash bin or by wrapping them in tissue or paper for easy disposal.
It’s important to trim the wick before each lighting to maintain optimal burning conditions and prevent any uneven burning or excess sooting. By keeping the wick at the correct length, you’ll enjoy a clean, steady flame and prolong the life of your tea light candles.
With the wicks trimmed and ready, it’s time for the final step: enjoying your beautifully crafted tea light candles!
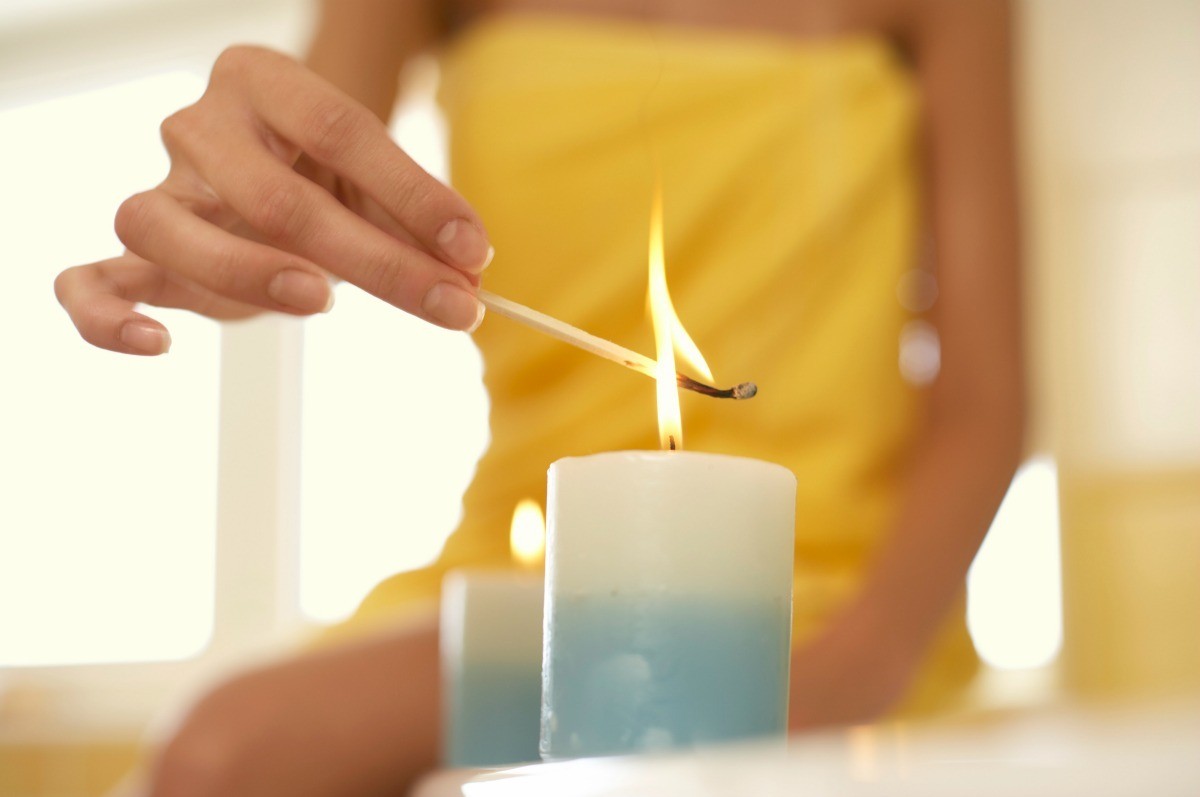
Step 11: Enjoying Your Tea Light Candles
Congratulations! You have successfully completed all the steps to make your own tea light candles. Now it’s time to sit back, relax, and enjoy the warm and inviting glow of your creations. Here are a few tips for getting the most out of your tea light candles:
- Choose the Perfect Setting: Place your tea light candles in a safe and suitable location. They can be used to create a cozy atmosphere in your living room, bedroom, or bathroom. You can also use them outdoors for a charming and intimate ambiance.
- Set the Mood: Light up your tea light candles to set the mood for a romantic dinner, a soothing bath, or a relaxing evening. Alternatively, use them to add a touch of ambiance to a special occasion or gathering with family and friends.
- Exercise Caution: Always remember to exercise caution when handling lit candles. Keep them away from flammable objects, children, and pets. Never leave them unattended and ensure they are placed on heat-resistant surfaces or candle holders designed for tea lights.
- Experiment with Scents: If you added fragrance to your tea light candles, take the time to appreciate the delightful aromas that fill the air. Experiment with different scents to create a mood-enhancing experience that suits your preferences and the occasion.
- Maintain Safety: Regularly check the candles to ensure the wicks are trimmed and free from debris. Avoid burning the candles for an extended period to prevent overheating. If needed, extinguish the candles by snuffing them gently with a candle snuffer or using a metal lid to suffocate the flame.
- Rekindle the Magic: Once you have enjoyed your tea light candles, consider making more to continue enjoying the soothing glow and scent. You can create custom tea light candles for different seasons, occasions, or as thoughtful handmade gifts for your loved ones.
By following these tips, you can make the most of your tea light candles and create a beautiful and cozy environment in any space.
As you enjoy your handmade tea light candles, take a moment to appreciate your creativity and the effort you put into making them. Whether you use them for relaxation, decoration, or as a focal point during special moments, they are sure to enhance the ambiance and leave a lasting impression.
So sit back, relax, and indulge in the enchanting glow of your tea light candles. Let the gentle flicker of the flames create a serene and comforting atmosphere that fills your space with warmth and tranquility.
Happy candle burning!
Read more: How To Make Tea With An Electric Kettle
Conclusion
Making tea light candles is a rewarding and creative DIY project that allows you to add a personal touch to your home decor and create a warm and inviting ambiance. By following the step-by-step process outlined in this guide, you have learned how to choose the right wax, select the appropriate wick, add fragrance and color (optional), pour the wax into containers, allow it to cool, trim the wick, and finally, enjoy the fruits of your labor.
Through this journey, you have discovered the importance of selecting high-quality materials, such as soy wax or beeswax, and the right size and type of wick for tea light candles. You have learned how to add fragrance oils to create delightful scents and how to incorporate color dyes to express your creativity. You have mastered the art of pouring the wax into containers, allowing it to cool, and trimming the wick for optimal burning conditions.
With your handmade tea light candles, you can now create a cozy and enchanting atmosphere for yourself, your family, and your friends. Whether it’s for a romantic dinner, a relaxing bath, or a special celebration, these candles will infuse your space with a soft, soothing glow and a pleasant fragrance.
Remember to always prioritize safety when working with candles. Keep the candles away from flammable objects and out of reach of children and pets. Ensure they are placed on suitable surfaces and never leave them unattended when lit.
Now that you have learned the art of making tea light candles, feel free to explore different scents, colors, and containers to express your creativity. You can experiment with new fragrance combinations, try unique container styles, or even make seasonal-themed tea light candles to embrace different moods throughout the year.
Enjoy the process of creating your own tea light candles and take pride in the unique ambiance you’ve created. Whether you choose to keep them for yourself or give them as heartfelt gifts, these handmade candles are sure to bring joy and serenity to any space they grace.
So go ahead, light up your tea light candles, and bask in the tranquil glow as you relax and unwind in a world of peace and warmth that you have created.
Frequently Asked Questions about How To Make Tea Light Candles
Was this page helpful?
At Storables.com, we guarantee accurate and reliable information. Our content, validated by Expert Board Contributors, is crafted following stringent Editorial Policies. We're committed to providing you with well-researched, expert-backed insights for all your informational needs.


0 thoughts on “How To Make Tea Light Candles”