
Articles
How To Raise Ceiling Height
Modified: December 7, 2023
Discover articles on how to raise ceiling height in your home. Learn effective techniques and tips to create a more spacious and open atmosphere.
(Many of the links in this article redirect to a specific reviewed product. Your purchase of these products through affiliate links helps to generate commission for Storables.com, at no extra cost. Learn more)
Introduction
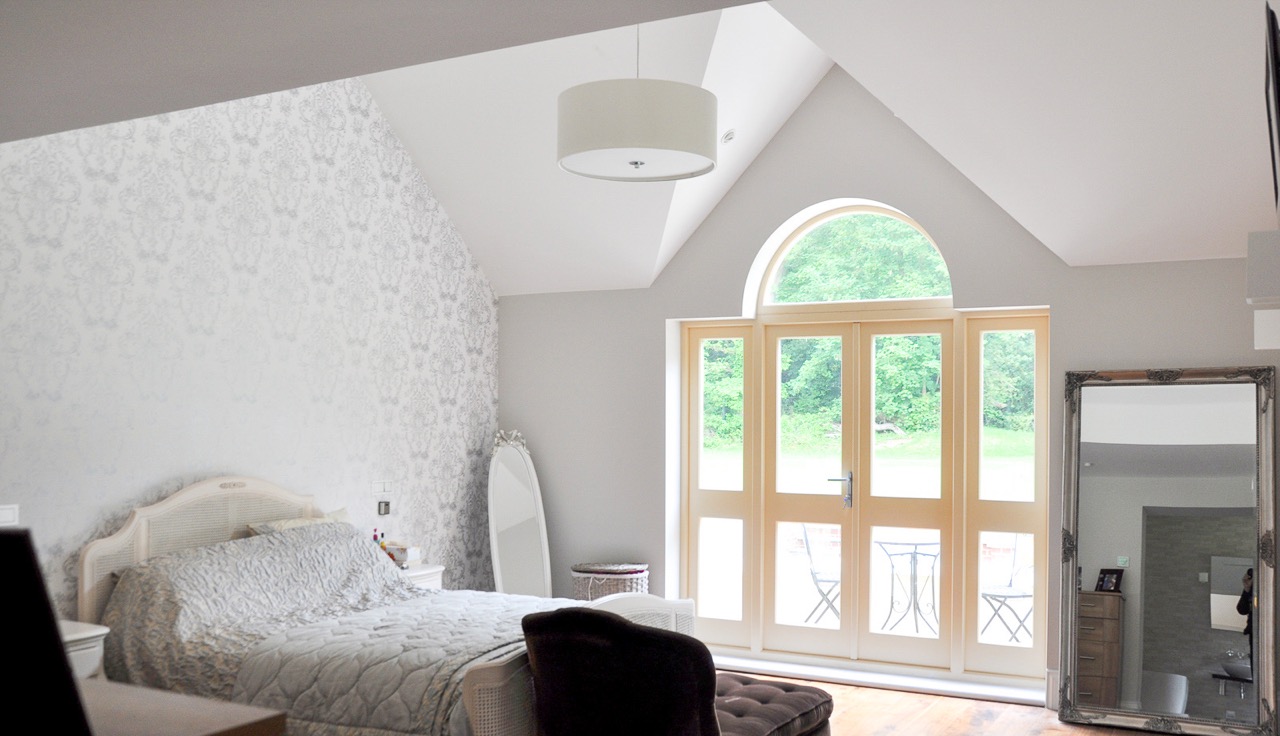
Having a high ceiling in a room can create an impressive and spacious atmosphere. It allows for better air circulation, more natural light, and can make the space appear larger. However, if you have a room with a low ceiling height, you may feel closed in and limited in terms of design and functionality.
The good news is that it is possible to raise the ceiling height of a room, transforming it into a more open and inviting space. This article will guide you through the process of raising ceiling height, including evaluating the structural feasibility, clearing out the space, removing existing ceilings, raising the ceiling height, reinforcing the structure, installing new ceilings, and enhancing lighting and ventilation.
Before you embark on this project, it is important to consult with a professional contractor or structural engineer to ensure the feasibility and safety of the changes you want to make. They will be able to assess your current structure and provide guidance on the best approach for raising the ceiling height. Once you have determined the feasibility, you can proceed with the following steps to raise the ceiling height of your room.
Key Takeaways:
- Raising the ceiling height of a room can create a more open and spacious environment, but it’s crucial to consult with professionals to ensure structural feasibility and safety before embarking on this complex renovation project.
- Enhancing lighting and ventilation during the process of raising the ceiling height can significantly improve the overall ambiance and functionality of the room, creating a bright, airy, and comfortable space.
Read more: How To Raise Vanity Height
Evaluating the Structural Feasibility
Before embarking on any modifications to raise the ceiling height, it’s crucial to assess the structural feasibility of the project. This step is essential for ensuring the safety and stability of the building.
Start by consulting with a qualified structural engineer or contractor who specializes in structural modifications. They will evaluate the existing walls, floor joists, beams, and any other structural elements to determine if they can handle the increased load from raising the ceiling height.
The structural evaluation will typically involve a thorough examination of the building’s blueprints, on-site inspections, and calculations to determine if any additional reinforcements are required. These reinforcements might include adding new beams or reinforcing existing ones, reinforcing walls, or modifying the floor joists.
It’s crucial to remember that altering the structural components of a building is a complex task that requires professional expertise. Attempting to raise the ceiling height without adequate knowledge or consultation can lead to severe structural issues and compromise the safety of the building.
By consulting a professional, you can have peace of mind knowing that the modifications will be done correctly and ensure the long-term integrity of the structure.
Clearing out the Space
Once you’ve confirmed the structural feasibility of raising the ceiling height, the next step is to clear out the space. This involves removing all furniture, decor, and other belongings from the room.
Start by emptying the room completely, ensuring that you have enough space to work efficiently. Remove any wall hangings, curtains, and light fixtures that may be in the way. If there are any built-in shelving units or cabinets, take the time to dismantle and remove them.
During this process, it’s essential to be mindful of safety. Wear protective gear such as gloves and goggles to prevent any injuries. If there are any electrical or plumbing fixtures that need to be disconnected, it’s advisable to hire a professional to handle these tasks to ensure they are done safely and according to code.
As you clear out the space, consider organizing your belongings and finding a safe storage area where they can be temporarily kept during the renovation process.
Additionally, if there are any valuables or fragile items in the room, it’s best to pack them carefully and store them in a secure location to prevent any damage.
Clearing out the room not only provides a blank canvas for the renovation but also ensures a safe and clutter-free environment for the work to be completed smoothly.
Removing Existing Ceilings
With the space cleared out, the next step in raising the ceiling height is to remove the existing ceilings. This involves carefully taking down the current ceiling materials, such as drywall, plaster, or tiles.
Before starting this process, it’s crucial to ensure your safety by wearing protective gear, including gloves, safety goggles, and a dust mask. Additionally, make sure to turn off any electricity or water supply that may be connected to the existing ceiling fixtures.
Begin by locating the ceiling joists, which are the horizontal wooden beams that support the ceiling. Using a stud finder or tapping on the ceiling can help you identify their location. Mark these joists with a pencil or masking tape to ensure you are aware of their position during the demolition process.
Once you have marked the ceiling joists, use a pry bar or a crowbar to carefully remove the trim or molding around the edges of the ceiling. This will expose the edges of the ceiling materials, making it easier to start removing them.
Next, start at one corner of the room and use a utility knife or a reciprocating saw to cut along the edges of the ceiling materials. Carefully peel away the material layer by layer, being cautious not to damage the underlying structure or wiring. If there are any light fixtures or fans attached to the ceiling, disconnect them and remove them carefully.
If the ceiling is made of plaster, it may require a bit more effort to remove. Consider using a hammer and chisel to break the plaster into manageable pieces for removal. Be mindful of any potential electrical wires or plumbing pipes that may be hidden within the walls or ceilings.
As you remove the existing ceilings, take the opportunity to inspect the underlying structure for any signs of damage, such as water leaks, mold, or pest infestations. Address any issues promptly before proceeding with the next stages of the project.
Properly disposing of the removed ceiling materials is important. Confirm the local regulations for disposal or hire a waste management company to ensure proper handling and disposal of the materials.
By carefully and methodically removing the existing ceilings, you are preparing the space for the next step of raising the ceiling height.
Raising the Ceiling Height
Once the existing ceilings have been removed, the next step in the process of raising the ceiling height is to actually increase the vertical space within the room. This can be achieved through various methods, depending on the specific structural considerations and design preferences.
One common method is to raise the roofline or upper floor level of the building. This involves extending the walls upward to create additional headroom. It may require adding new framing, such as wall studs and headers, to support the higher walls. This method is typically more extensive and may require professional assistance to ensure the structural integrity of the building.
Another approach is to remove a portion of the existing floor and create a double-height space. This can be accomplished by carefully demolishing a section of the floor and using new framing to create a taller ceiling in that area. This method provides a dramatic effect and can be visually striking, but it may not be suitable for all types of buildings or room layouts.
In some cases, it may be possible to raise the ceiling height by removing or modifying trusses or rafters in the ceiling structure. This method requires careful calculation and coordination with a structural engineer to ensure that the roof and overall structure remain stable and safe.
When raising the ceiling height, it’s essential to consider other factors such as wiring, plumbing, and HVAC systems that may need to be adjusted or relocated to accommodate the new ceiling height. Consult with professionals to ensure all necessary modifications are made correctly and in compliance with building codes.
Keep in mind that raising the ceiling height will likely involve significant construction work, such as framing, installation of support beams, and possibly even temporary structural supports. It is crucial to hire skilled professionals who have experience in this type of renovation to ensure the safety and integrity of the building.
Make sure to take into account any permits or approvals that may be required by local building authorities before proceeding with the ceiling height modifications.
By carefully planning and executing the process of raising the ceiling height, you can create a more spacious and visually appealing room.
Consider using vertical stripes on walls and curtains to create the illusion of a higher ceiling. This visual trick can make the room feel more spacious and open.
Read more: How To Raise The Dresser Height
Reinforcing the Structure
When raising the ceiling height of a room, it is essential to reinforce the structure to ensure stability and safety. This step is crucial in maintaining the integrity of the building and preventing any structural issues that may arise from the modifications.
Consulting with a structural engineer or a contractor experienced in structural modifications is highly recommended at this stage. They will assess the existing structure and recommend the necessary reinforcements based on the specific requirements of your project.
One common method of reinforcing the structure is to add additional support beams or columns. These new elements can help redistribute the load bearing on the walls and distribute it to the foundation or other load-bearing elements of the building. The size and placement of these support beams will be determined by the structural engineer’s calculations.
Reinforcing the walls is another essential aspect of raising the ceiling height. This can involve adding additional studs, headers, or bracing to increase their strength and stability. It may also involve tying the walls into the foundation more securely to ensure they can handle the additional weight and stress from the raised ceiling.
In some cases, it may be necessary to reinforce the floor system as well. This can involve adding additional floor joists or modifying the existing ones to ensure they can support the increased load from the raised ceiling height. It’s crucial to consider factors such as the span of the joists and the spacing between them to meet building code requirements.
During the reinforcement process, it’s essential to ensure that all modifications are done correctly and in compliance with local building codes. This may include obtaining the necessary permits and inspections to ensure the work meets safety standards.
Working with professionals who have experience in structural modifications will help ensure that the reinforcements are done accurately and that the building remains stable throughout the process. They will also be able to address any potential issues or challenges that may arise during the reinforcement stage.
By reinforcing the structure, you can create a solid foundation to support the raised ceiling height and ensure the long-term stability and safety of the building.
Installing New Ceilings
Once the structural reinforcements have been completed, it’s time to install the new ceilings that will give your room a fresh and elevated look. The choice of ceiling materials will depend on your personal style preferences, budget, and the overall design aesthetic you want to achieve.
Drywall is a popular choice for ceiling construction due to its affordability and availability. It’s relatively easy to work with and can be finished with various textures and paint colors. When installing drywall, it’s important to ensure that it is properly secured to the ceiling joists or new framing using screws or nails.
If you want to add a touch of elegance and uniqueness to your space, consider using ceiling tiles. They come in a variety of materials, such as tin, polystyrene, or even wood, and can add a decorative element to the room. Ceiling tiles are typically mounted directly onto the ceiling surface using adhesive or nailed onto furring strips.
Tongue-and-groove wood planks can also create a stunning, rustic look for your new ceiling. These planks are installed by interlocking the edges, creating a seamless and visually appealing finish. It’s essential to acclimate the wood planks to the room’s humidity level before installation to prevent warping.
Fiberglass reinforced panels, also known as FRP, are moisture-resistant and durable, making them suitable for areas that require high humidity tolerance, such as bathrooms or kitchens. These panels can be easily installed by attaching them to the ceiling structure using adhesive or mechanical fasteners.
During the installation process, it’s essential to take the necessary precautions for safety. Wear protective equipment, such as safety goggles and gloves, when handling and installing the ceiling materials. If you’re unsure or uncomfortable with the installation process, it’s wise to consult with a professional contractor or installer.
Once the new ceilings are installed, you can proceed with finishing touches, such as applying joint compound or filler to the seams of the drywall, sanding the surface for a smooth finish, and painting or adding decorative elements like crown molding or recessed lighting.
Remember, the choice of ceiling materials and the installation process should align with your overall vision for the space. Consider factors such as maintenance, acoustics, and aesthetics when selecting the materials for your new ceilings.
By carefully selecting and installing the new ceilings, you can transform the room into a visually appealing and inviting environment.
Enhancing Lighting and Ventilation
As you raise the ceiling height in your room, it’s an ideal time to enhance the lighting and ventilation to create a more comfortable and well-lit space. Adequate lighting and ventilation play a significant role in improving the overall ambiance and functionality of any room.
Here are some key considerations for enhancing lighting and ventilation:
1. Natural Light: Increasing the ceiling height allows for larger windows or the addition of skylights, allowing more natural light to fill the room. Natural light not only brightens up the space but also creates a sense of openness and connection with the outdoors. Consider the positioning and size of windows or skylights to maximize the amount of natural light entering the room.
2. Artificial Lighting: Adding or modifying the lighting fixtures in the room can greatly enhance the overall ambiance and functionality. Consider installing recessed lighting, pendant lights, or track lighting to provide adequate illumination throughout the space. Utilize a combination of ambient, task, and accent lighting for versatility and to create a layered lighting effect.
3. Ventilation: With the increased ceiling height, it’s important to ensure proper ventilation in the room. This can be achieved by installing or updating ventilation systems, such as ceiling fans or HVAC vents, to promote air circulation and maintain a comfortable temperature. Proper ventilation helps to remove stale air, control humidity levels, and improve indoor air quality.
4. Light Color Paint: The choice of paint color can also have a significant impact on the overall brightness of the room. Opt for light-colored paints that reflect more natural and artificial light, making the room feel more spacious and airy. White or pastel shades are popular choices for raising the ceiling height as they create a visual illusion of higher ceilings.
5. Strategic Placement of Mirrors: Mirrors can be used strategically to reflect light and create the illusion of a larger space. Consider placing mirrors across from windows or near light sources to bounce light around the room and create a more open and expansive feel.
6. Smart Lighting Controls: Installing smart lighting controls allows for increased flexibility and functionality. Dimmer switches, timers, and programmable settings can help create different lighting moods and accommodate varying lighting needs throughout the day.
Remember to consult with professionals when making any electrical or ventilation modifications to ensure compliance with building codes and safety standards.
Enhancing lighting and ventilation during the process of raising the ceiling height can transform the room into a bright, airy, and comfortable space.
Conclusion
Raising the ceiling height of a room can dramatically transform its appearance and functionality, creating a more open and spacious environment. However, it is a complex project that requires careful planning, professional guidance, and adherence to building codes and safety standards.
Before embarking on the process, it’s crucial to evaluate the structural feasibility and consult with a structural engineer or contractor experienced in structural modifications. They will assess the existing structure and determine the necessary reinforcements to ensure stability and safety.
Once the structural feasibility has been confirmed, the process begins with clearing out the space and removing the existing ceilings. This allows for a blank canvas and prepares the room for the upcoming modifications.
Raising the ceiling height can be achieved through various methods, such as raising the roofline, creating a double-height space, or modifying the ceiling structure. Each method has its own considerations and may require professional assistance to ensure proper execution.
Reinforcing the structure is a crucial step to ensure that the building can safely support the raised ceiling height. This often involves adding support beams, reinforcing walls, and addressing the floor system to distribute the increased load.
Once the structure has been reinforced, new ceilings can be installed using materials such as drywall, ceiling tiles, wood planks, or fiberglass reinforced panels. The choice of material depends on personal style preferences and the desired aesthetic of the room.
To complete the transformation, enhancing lighting and ventilation is essential. Incorporate natural light through larger windows or skylights, update artificial lighting fixtures, ensure proper ventilation, and utilize light-colored paint and strategically placed mirrors to create a bright and airy atmosphere.
In conclusion, raising the ceiling height of a room is an exciting renovation project that can significantly improve the overall look and feel of the space. By evaluating the structural feasibility, making necessary reinforcements, and carefully selecting and installing new ceilings, you can create a more spacious and visually appealing room.
Remember to consult with professionals throughout the process to ensure the project is done safely and in compliance with building codes. With the right planning and execution, your newly raised ceiling height will transform your room into a stunning and inviting space.
Frequently Asked Questions about How To Raise Ceiling Height
Was this page helpful?
At Storables.com, we guarantee accurate and reliable information. Our content, validated by Expert Board Contributors, is crafted following stringent Editorial Policies. We're committed to providing you with well-researched, expert-backed insights for all your informational needs.


0 thoughts on “How To Raise Ceiling Height”