Articles
How To Raise A Roof
Modified: October 21, 2024
Learn how to raise a roof with our informative articles, packed with expert tips and step-by-step instructions for a successful project.
(Many of the links in this article redirect to a specific reviewed product. Your purchase of these products through affiliate links helps to generate commission for Storables.com, at no extra cost. Learn more)
Introduction
Welcome to the beginners’ guide on how to raise a roof. Whether you are a homeowner looking to add extra space to your house or a construction enthusiast looking to take on a challenging project, raising a roof can be a daunting yet rewarding endeavor. By following the proper steps and guidelines, you can successfully elevate the structure of your roof and create additional living or storage space.
Raising a roof is not a decision to be taken lightly. It requires careful planning, proper permits, and an understanding of the underlying structural implications. In this article, we will walk you through the essential steps involved in raising a roof, from assessing the existing structure to ensuring safety and appropriate finishing touches.
Before we dive into the step-by-step process, it is crucial to emphasize the importance of consulting with professionals, such as structural engineers or experienced contractors, to ensure the structural integrity of your building. Every project is unique, and it is essential to tailor the process to your specific circumstances.
Now, let’s embark on this exciting journey and explore the steps involved in raising a roof!
Key Takeaways:
- Raising a roof involves a meticulous process, from assessing the existing structure to securing the raised roof in place. It requires careful planning, professional assistance, and adherence to safety standards to create additional space and value for your property.
- The roof raising journey culminates in a thorough inspection to ensure safety and compliance with regulations. By following this comprehensive guide, you can confidently transform your existing roof into a raised structure, unlocking endless possibilities for your home.
Read more: How To Raise Sagging Front Porch Roof
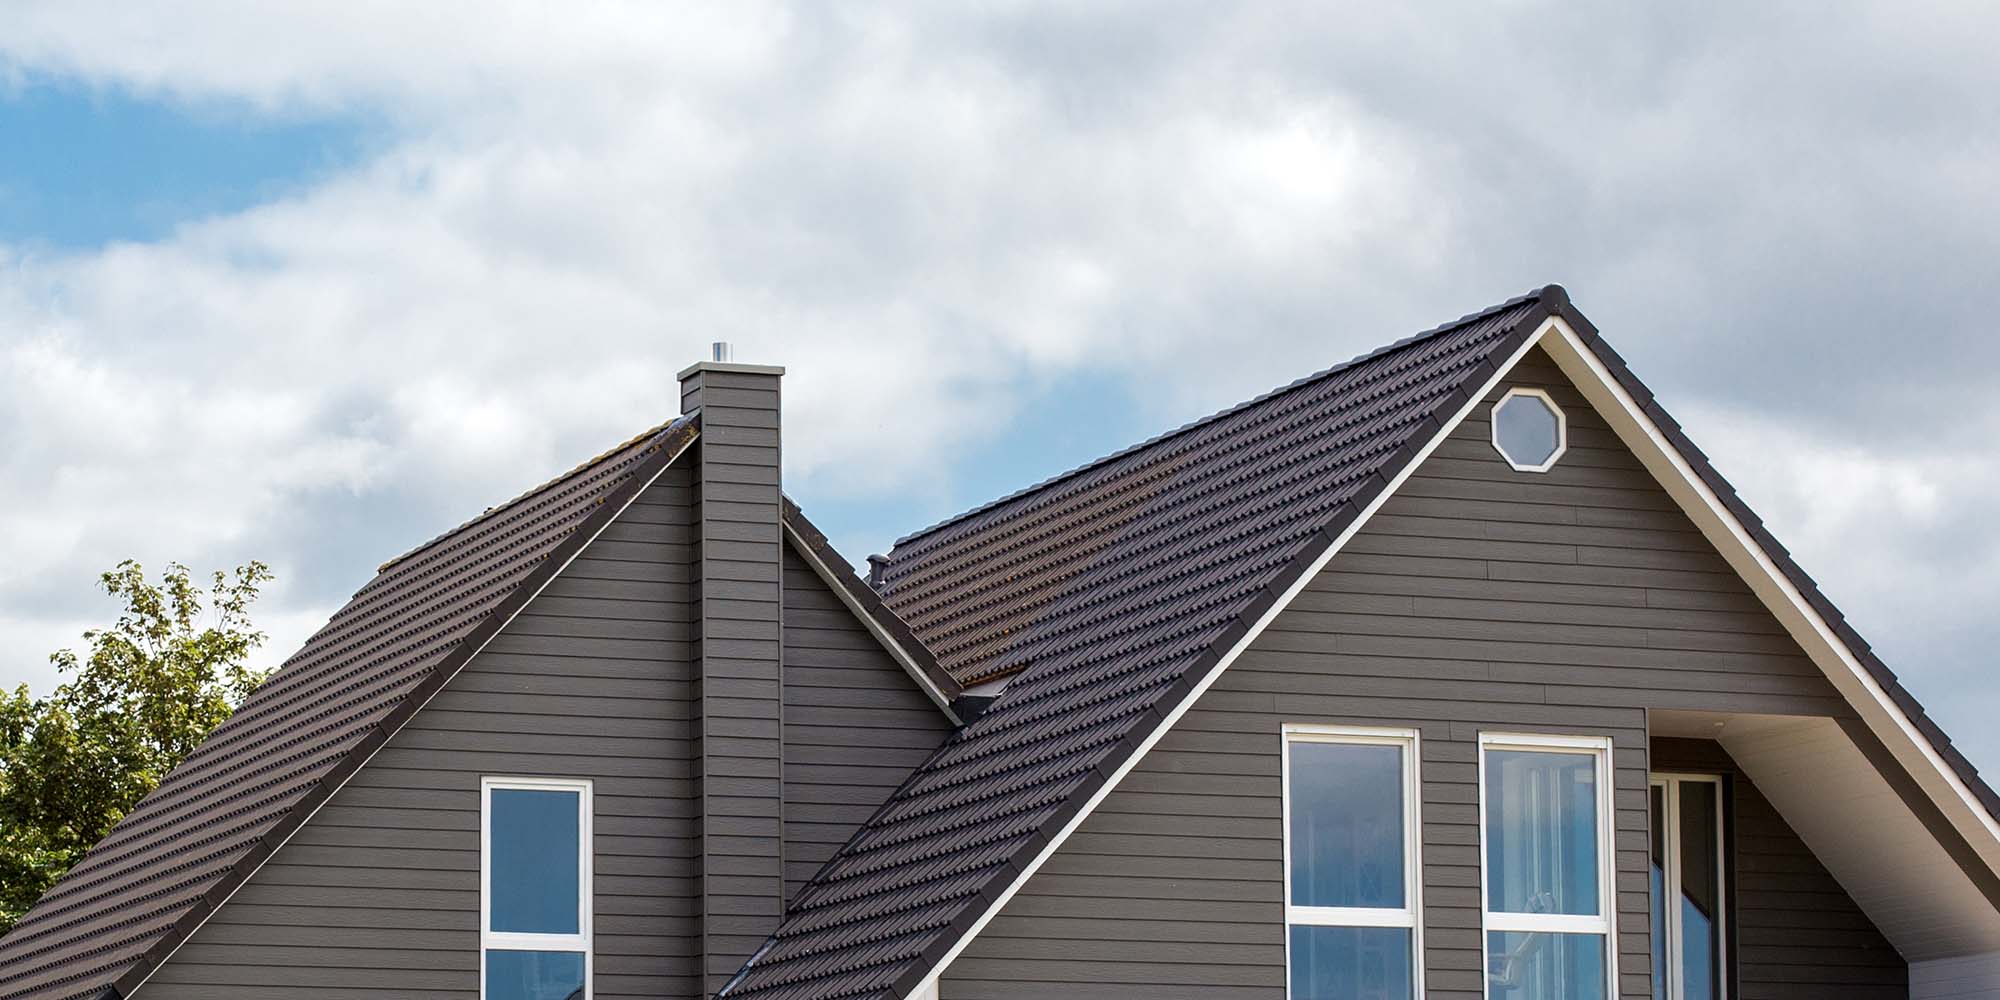
Step 1: Assessing the Existing Roof Structure
The first and most crucial step in raising a roof is to assess the existing roof structure. This assessment will help you determine if your current roof can support the additional weight of a raised roof and identify any potential challenges or modifications that need to be made.
Start by examining the current roof’s condition. Look for signs of damage, such as sagging or weakened areas, rotting wood, or water leaks. It is essential to rectify these issues before proceeding with the roof raising project.
Next, you will need to evaluate the suitability of the existing roof for expansion. Consider factors like the roof’s pitch, the materials used, and the age of the roof. If the roof is nearing the end of its lifespan, it may be more cost-effective to replace it entirely rather than raise it.
Consulting with a structural engineer or a professional contractor is highly recommended during this phase. They will assess the load-bearing capacity of the current roof structure and provide valuable insights into whether it can handle the additional weight of a raised roof. They might also suggest reinforcing or modifying certain areas to ensure structural stability.
In some cases, the existing roof structure may require significant modifications or may not be suitable for raising. In such instances, it may be necessary to explore alternative options, such as building a new structure on top of the existing one or expanding the lower levels instead.
Once you have fully assessed the existing roof structure and received professional opinions, you will have a clearer understanding of the feasibility and potential challenges of raising your roof. This step ensures that you have a solid foundation to proceed with the project and helps mitigate any unforeseen issues down the line.
In the next step, we will delve into the essential permits and permissions required before commencing a roof raising project.
Step 2: Obtain the Necessary Permits and Permissions
Before embarking on any construction project, including raising a roof, it is vital to obtain the necessary permits and permissions. These permits ensure that your project complies with local building codes and regulations and that it is conducted safely and within legal boundaries.
Start by contacting your local building department or relevant governing body to inquire about the required permits for your specific project. They will provide you with the necessary information and guide you through the application process.
The permits you may need can vary depending on factors such as the location, the size of the project, and local regulations. Generally, roof raising projects may require permits for structural changes, electrical work, plumbing modifications, and occupancy changes.
Along with permit applications, you may also need to submit detailed plans and drawings that illustrate the changes you intend to make to the existing roof structure. These plans should include information on dimensions, load calculations, and any necessary structural modifications.
It is important to note that obtaining permits and permissions can take time, so it is advisable to start this process well in advance of your desired construction start date. Failure to acquire the required permits can result in legal issues, fines, or even having to reverse the construction.
In addition to permits, it is essential to inform your neighbors about your planned roof raising project, especially if it involves work that may cause disruptions or impact their properties. Open communication and consideration can help maintain good relationships and minimize any potential conflicts.
By obtaining the necessary permits and permissions, you ensure that your roof raising project is conducted in compliance with local regulations and that the structural integrity and safety of your home are maintained. It also provides you with peace of mind knowing that your project has official approval from the local authorities.
In the next step, we will discuss the crucial planning and design phase of the roof raising project.
Step 3: Plan and Design the Roof Raising Project
Once you have assessed the existing roof structure and obtained the necessary permits, it is time to move on to the planning and design phase of your roof raising project. Proper planning and design are crucial to ensure that the project runs smoothly and achieves your desired outcome.
Begin by outlining your objectives for the roof raising project. Determine the purpose of the raised roof, whether it is to create additional living space, add a loft, or increase storage capacity. Having a clear vision of your goals will guide the design process.
Next, consult with an architect, designer, or experienced contractor to develop a comprehensive plan and design for your raised roof. They will consider factors such as the overall aesthetic, functionality, structural requirements, and any specific needs or preferences you may have.
During the planning phase, it is important to take into account the architectural style and existing features of your home. The goal is to create a cohesive design that seamlessly integrates the raised roof with the rest of the structure, enhancing its overall appearance.
The design should also address important elements such as roof slope, insulation, ventilation, windows, and access points. These factors will contribute to the comfort and energy efficiency of the new space while ensuring compliance with building codes and regulations.
Incorporating sustainable and eco-friendly practices into the design is also worth considering. This may include using energy-efficient materials, installing solar panels, or implementing rainwater harvesting systems.
Once the design is finalized, create detailed construction drawings that accurately convey the specifications and dimensions of the new roof structure. These drawings will serve as a reference for the construction team and ensure that the project stays on track.
Remember to remain flexible during the planning and design phase, as adjustments may be necessary based on structural constraints or unexpected challenges that arise during construction. Communicate openly with your design team and be prepared to adapt the plan as needed.
By meticulously planning and designing your roof raising project, you lay the foundation for a successful and visually appealing outcome. The next step will guide you through gathering the required materials and equipment for construction.
Step 4: Gather Required Materials and Equipment
With the planning and design phase complete, it’s time to gather all the necessary materials and equipment for your roof raising project. Having everything you need at hand will help streamline the construction process and avoid delays.
Start by creating a comprehensive list of all the materials required for the project, including lumber, roofing materials, insulation, windows, doors, and any specialized components needed for the raised roof structure. Consult your construction plans and specifications to ensure the accuracy of the materials list.
Research suppliers and contact them to obtain price quotes for the materials. It is recommended to seek multiple quotes to compare prices and ensure you are getting the best value for your money. Consider factors such as material quality, availability, and delivery options when making your final purchasing decisions.
In addition to materials, you will also need to gather the necessary construction equipment and tools. This may include power tools, scaffolding, safety gear, ladders, and any specialized equipment required for the specific tasks involved in the roof raising process.
If you prefer not to purchase equipment that you may not use frequently, consider renting the necessary tools from a reputable rental company. Be sure to inquire about their rental policies, equipment maintenance, and any safety guidelines associated with the tools being rented.
Once you have finalized your material and equipment list, make arrangements for delivery or pickup. Ensure that you have sufficient storage space to keep the materials safe and protected from the elements until they are ready to be used in the construction.
It is crucial to double-check your materials and equipment list before the start of the construction to avoid any delays or interruptions during the project. Keep in mind that unexpected situations may arise, requiring additional or alternative materials and equipment. Stay flexible and be prepared to make adjustments as needed.
By diligently gathering all the required materials and equipment, you set yourself up for a smooth and efficient construction process. The next step will guide you through preparing the work area for the roof raising project.
Read more: How Much Does It Cost To Raise An Attic Roof
Step 5: Prepare the Work Area
Before you can begin the roof raising construction, it is essential to properly prepare the work area. Taking the time to prepare and organize the site will ensure a safe and efficient construction process, minimizing potential hazards and disruptions.
Start by clearing the area around the house where the roof raising project will take place. Remove any obstacles such as outdoor furniture, plants, or debris that may hinder the construction process or pose safety risks. Clearing the work area will provide a clean and spacious environment for the construction team to work in.
Next, establish a designated area to store the construction materials and equipment. This could be a secure spot in your backyard or a designated storage area on-site. Organize the materials and equipment in a systematic way to facilitate easy access and minimize the risk of accidents or damage to the supplies.
Ensure that the work area is secure and safe for workers by marking any potential hazards, such as uneven terrain or electrical installations. Clearly identify areas where construction activities are taking place and restrict access to unauthorized individuals, including children and pets.
Proper safety measures should be in place at the work site. This includes providing necessary personal protective equipment (PPE) to all workers and enforcing safety protocols to prevent accidents or injuries. These protocols may include guidelines for working at heights, operating machinery, and handling materials.
If necessary, erect temporary fencing or barricades around the work area to further enhance safety and prevent unauthorized entry.
Another important aspect of preparing the work area is to establish a temporary alternative living arrangement if the roof raising project will render your home temporarily uninhabitable. This could involve arranging temporary accommodations for yourself and your family or staying with friends or relatives during the construction period.
Lastly, ensure that utilities such as electricity, water, and gas are safely disconnected or rerouted according to the construction plan. Coordinate with utility providers to carry out these adjustments to avoid any disruptions during the roof raising process.
By properly preparing the work area, you create a safe and organized environment for the construction team to carry out the roof raising project. This sets the stage for a streamlined and efficient construction process. In the next step, we will discuss the importance of disconnecting utilities and removing obstacles.
Step 6: Disconnect Utilities and Remove Obstacles
Before the roof raising construction can begin, it is crucial to disconnect utilities and remove any obstacles that may hinder the process. This step ensures the safety of the construction team and facilitates a smooth and uninterrupted workflow.
Start by contacting the relevant utility companies to arrange the disconnection or rerouting of services such as electricity, water, gas, and telecommunications. It is essential to follow their guidelines and recommendations to ensure a proper and safe disconnection. This typically requires scheduling appointments and coordinating with the utility providers to minimize any interruptions in service.
Disconnecting utilities involves shutting off the main power supply, turning off water valves, and capping or shutting off gas lines. It is crucial to seek the assistance of trained professionals or authorized personnel to handle these tasks, as they require specialized knowledge and expertise.
Clearance from utility companies is also necessary to ensure that no active lines or cables are disturbed during the roof raising process. This prevents accidents, damage to utility infrastructure, and potential disruption of services for you and your neighbors.
In addition to utility disconnection, it is important to identify and remove any physical obstacles that may interfere with the roof raising construction. This includes removing objects such as satellite dishes, antennas, or air conditioning units from the roof or any other location where they may obstruct construction activities.
If there are trees or branches in close proximity to the work area, consider trimming or removing them to provide enough space and to minimize the risk of falling debris during construction. Consult an arborist or professional tree removal service to ensure that this is done safely and responsibly.
Obstacles within the house, such as furniture, appliances, or personal belongings, should also be relocated to a safe and accessible area. This helps prevent damage to your belongings and allows for a more efficient construction process.
By disconnecting utilities and removing obstacles, you create a safe and unimpeded environment for the roof raising construction. This step sets the stage for smoother progress and minimizes potential hazards or disruptions. In the next step, we will discuss the process of actually raising the roof structure.
Make sure to check the local building codes and regulations before raising a roof. It’s important to obtain the necessary permits and ensure the structural integrity of the building.
Step 7: Raise the Roof Structure
Now that the necessary preparations have been made, it’s time to move on to the exciting phase of raising the roof structure. This step involves physically lifting the existing roof to create additional height and space.
Before proceeding, ensure that you have a qualified and experienced team of professionals or contractors to execute this critical task. Raising a roof requires specialized skills and equipment to ensure the safety and stability of the structure.
The process of raising the roof typically involves the following steps:
- Temporarily support the existing roof: Before any lifting begins, the current roof must be securely supported using jacks or temporary beams. This ensures that the roof remains stable during the lifting process.
- Create a lifting mechanism: Depending on the design and scale of the project, a variety of lifting mechanisms can be used, such as hydraulic jacks, cranes, or specialized roof raising equipment. The lifting mechanism should be carefully positioned to evenly distribute the weight of the roof.
- Gradually raise the roof: Begin the lifting process gradually, ensuring that the entire structure is being lifted evenly. This requires coordinated efforts and close monitoring to maintain balance and prevent any shifting or tilting.
- Monitor and adjust as needed: Throughout the lifting process, closely monitor the roof structure for any signs of stress or imbalance. If necessary, make adjustments to the lifting mechanism or supports to maintain stability.
- Reach the desired height: Continue to raise the roof until the desired height is achieved. This will vary depending on the specific project requirements and local building codes.
It is crucial to exercise caution and follow proper safety protocols during the roof lifting process. Ensure that all workers are wearing appropriate personal protective equipment (PPE) and coordinate their movements to avoid accidents or injuries.
Once the roof is raised to the desired height, ensure that it is properly supported and secured before proceeding to the next step. This may involve reinforcing the newly created structural elements, such as adding additional beams or supports, to ensure the stability and integrity of the raised roof.
By successfully raising the roof structure, you are one step closer to creating additional space and adding value to your home. In the next step, we will discuss securing the raised roof in place.
Step 8: Secure the Raised Roof in Place
After the roof structure has been successfully raised to the desired height, the next step is to secure it in place. This is a critical phase of the roof raising project to ensure the stability and structural integrity of the newly elevated roof.
Securing the raised roof typically involves the following steps:
- Establish a firm foundation: Ensure that the existing walls and supports are structurally sound and capable of bearing the increased load of the raised roof. If necessary, reinforce the foundation with additional beams or braces to provide proper support.
- Install permanent supports: Replace temporary supports with permanent supports to hold the raised roof in its elevated position. This may involve installing new load-bearing walls, posts, or beams to provide the necessary stability and strength.
- Connect and anchor the roof: Securely connect the raised roof to the existing structure using appropriate fasteners and connectors. This may include using bolts, screws, or metal plates to ensure a secure and stable connection between the raised roof and the supporting structures.
- Ensure proper alignment and levelness: Check that the raised roof is aligned correctly and level with the existing structure. This will ensure that the roof sits evenly and prevents any potential issues such as water pooling or structural imbalances.
- Inspect for structural integrity: Thoroughly inspect the entire roof structure to ensure that it is structurally sound and free from any visible defects or weaknesses. Address any issues discovered during the inspection, such as cracks, gaps, or compromised materials, to reinforce the roof’s stability.
Securing the raised roof requires precision and attention to detail to ensure that all connections and supports are properly installed. It is highly recommended to seek the assistance of a qualified contractor or structural engineer to carry out this step.
Throughout the process, prioritize safety by adhering to all relevant building codes and regulations. Utilize appropriate safety equipment and work practices to minimize the risk of accidents or injuries during this critical phase of the roof raising project.
By securely anchoring and stabilizing the raised roof, you provide a strong and durable structure that will last for years to come. In the next step, we will discuss reinforcing the raised roof for enhanced structural integrity.
Read more: How To Raise A Recliner
Step 9: Reinforce the Raised Roof for Structural Integrity
Once the raised roof is securely in place, it is essential to reinforce it to ensure its structural integrity and long-term stability. Reinforcement measures help to strengthen the raised roof, enhancing its ability to withstand various forces and maintain its structural integrity over time.
Reinforcing the raised roof may involve the following steps:
- Consult with a structural engineer: It is highly recommended to consult with a qualified structural engineer during this phase. They can assess the load-bearing capacity of the raised roof and provide specific recommendations for reinforcement measures based on the project’s requirements.
- Add additional framing elements: Assess the existing framing of the raised roof and determine if additional elements, such as beams, joists, or trusses, need to be added to enhance its strength and stability. Install these reinforcements according to the engineer’s recommendations.
- Strengthen connections: Examine the connections between the raised roof and the supporting structure. Reinforce these connections by using appropriate hardware, such as brackets, fasteners, or additional lumber, to ensure a secure and rigid connection.
- Improve load distribution: Evaluate the load distribution across the raised roof to ensure that it is evenly distributed and does not put excessive stress on any specific areas. Adjust the supporting structures, such as posts or walls, as needed to achieve proper load distribution.
- Apply additional bracing: Install additional bracing elements, such as diagonal braces or cross-bracing, to enhance the rigidity and stability of the raised roof. This can help prevent lateral movement and improve its overall structural performance.
- Consider insulation and ventilation: Evaluate the insulation and ventilation needs of the raised roof to ensure energy efficiency and a comfortable living environment. Install appropriate insulation materials and ventilation systems according to local building codes and energy efficiency guidelines.
Implementing these reinforcement measures may require the expertise of construction professionals or experienced contractors. They will have the knowledge and skills to ensure that all necessary reinforcements are properly installed and meet the required standards.
Throughout the reinforcement process, prioritize safety by adhering to building codes and regulations. Regularly inspect the work and address any issues or deficiencies promptly to maintain the structural integrity of the raised roof.
By reinforcing the raised roof, you ensure its stability and durability. This step ensures that the roof can withstand various loads and external forces while providing a safe and reliable structure. In the next step, we will discuss connecting utilities and replacing any obstacles that were removed earlier.
Step 10: Connect Utilities and Replace Obstacles
With the raised roof structure now reinforced, it’s time to reconnect utilities and replace any obstacles that were removed during the preparation phase. This step ensures that your home is fully functional and restores any amenities that were temporarily disrupted or removed.
Start by contacting the utility providers to schedule the reconnection of services such as electricity, water, gas, and telecommunications. Coordinate with them to ensure a smooth and prompt restoration of utilities to your home.
Electricity: Work with a licensed electrician to reconnect electrical lines and safely restore power to your raised roof. This includes connecting electrical wiring, switches, outlets, and any additional systems or appliances specific to the raised roof area.
Water: If water lines were disconnected during the roof raising project, enlist the help of a professional plumber to reconnect water supply lines. Ensure that these connections are properly installed, leak-free, and comply with local plumbing codes and regulations.
Gas: To restore gas supply, contact your gas utility provider and follow their guidance on reconnecting gas lines. It is important to have a qualified professional inspect the connections and ensure they are secure and in compliance with safety standards.
Telecommunications: If telecommunications lines, such as phone or internet lines, were impacted during the construction process, coordinate with your service provider to restore these services. They will guide you through the necessary steps to reconnect any disconnected lines or replace any damaged equipment.
Additionally, this step involves replacing any obstacles or features that were temporarily removed in preparation for the roof raising project. This may include items such as satellite dishes, air conditioning units, or other fixtures that were relocated to allow for the construction process.
Consult with the appropriate professionals or contractors to safely reinstall these features and ensure that they are properly positioned and connected according to manufacturer’s guidelines and local regulations.
Throughout the process, prioritize safety and compliance with building codes. Conduct inspections or hire professionals, such as electricians or plumbers, to ensure that all utility connections and replacements meet the necessary safety standards.
By reconnecting utilities and replacing any temporary obstacles, you restore the functionality and convenience of your home. This step ensures that your raised roof area is fully operational and ready for use. In the next step, we will discuss addressing interior and exterior finishing touches.
Step 11: Address Interior and Exterior Finishing
Now that the raised roof structure is secure and utilities have been connected, it’s time to address the interior and exterior finishing touches. This step focuses on transforming the raised roof area into a functional and aesthetically pleasing space.
Interior Finishing:
1. Insulation and Moisture Barrier: Properly insulate the raised roof area to ensure energy efficiency and comfort. Install insulation materials, such as fiberglass or foam insulation, in between the roof framing and seal any gaps or joints. Additionally, consider installing a moisture barrier to protect against condensation or leaks.
2. Walls and Ceilings: Install drywall or other preferred wall materials to create partitions and define the interior space. Finish the walls with paint, wallpaper, or other desired wall treatments. Install ceiling materials, such as drywall or ceiling tiles, and add appropriate finishes, such as paint or texture, to create a polished look.
3. Flooring: Choose and install flooring materials that suit the intended use of the raised roof area, such as hardwood, laminate, tile, carpet, or vinyl. Ensure the flooring is properly installed, level, and aligned with the surrounding areas for a seamless transition.
4. Lighting and Electrical: Install appropriate lighting fixtures, switches, and outlets to illuminate the raised roof area. Consider the desired functionality and ambiance, and consult with a licensed electrician to ensure proper electrical installation and compliance with safety standards.
5. HVAC and Ventilation: Evaluate the heating, ventilation, and air conditioning (HVAC) needs of the raised roof area. Install appropriate HVAC systems or extend existing ones to ensure proper climate control and air circulation. Consider adding vents or fans for effective ventilation.
Exterior Finishing:
1. Roofing: Select and install the roofing material that best suits your aesthetic preferences and climate considerations. Ensure proper installation and consider adding insulation under the roof to enhance energy efficiency.
2. Siding and Exterior Cladding: Choose and install exterior cladding materials, such as siding or stucco, to enhance the appearance and protect the raised roof area from the elements. Ensure proper installation and consider insulation boards beneath the cladding for added energy efficiency.
3. Windows and Doors: Install appropriate windows and doors to provide natural light, ventilation, and access to the raised roof area. Consider energy-efficient options and ensure proper installation for a secure and weatherproof seal.
4. Exterior Finishes: Apply exterior finishes, such as paint or stain, to the siding, doors, and trim to enhance the overall appearance and protection of the raised roof area. Follow the manufacturer’s guidance to ensure proper application and longevity.
Throughout the interior and exterior finishing process, pay attention to detail, quality of workmanship, and adherence to safety standards. Consider consulting with professionals, such as interior designers or contractors, to help guide your decisions and ensure a cohesive and well-executed final result.
Remember, the finishing touches will greatly contribute to the functionality, aesthetics, and overall appeal of your raised roof area. In the final step, we will discuss the importance of inspecting the completed project and ensuring it meets safety standards and regulations.
Step 12: Inspect and Ensure Safety Standards
The final step in the roof raising project is to thoroughly inspect the completed work and ensure that it meets the necessary safety standards and regulations. This crucial step helps to ensure the long-term safety and functionality of the raised roof area.
Perform a comprehensive inspection of the entire raised roof structure, both inside and outside. Check for any signs of structural issues, leaks, or other defects that may compromise the safety and integrity of the raised roof area.
Ensure that all electrical, plumbing, and HVAC systems have been properly installed and are in working order. Test switches, outlets, and fixtures to verify their functionality. Confirm that all plumbing connections are secure and leak-free.
Check the overall ventilation and airflow in the raised roof area to ensure proper air circulation and prevent moisture buildup. Verify that all ventilation systems, such as exhaust fans or vents, are functioning effectively.
Inspect the insulation to ensure that it has been installed correctly and is providing the desired thermal and acoustic properties. Look for any gaps or areas of insufficient coverage and address them to improve energy efficiency and comfort.
Review the interior and exterior finishes to ensure they have been installed properly and meet your expectations. Check for any visible defects, such as imperfections in paint or flooring, and address them accordingly.
During the inspection, pay close attention to safety features such as handrails, guardrails, and staircases. Ensure that these elements are sturdy, properly installed, and comply with applicable building codes and regulations. Verify that there are no tripping hazards or safety risks in the raised roof area.
If necessary, engage the services of a professional inspector or structural engineer to perform a thorough assessment of the raised roof area. They can provide expert insights and recommendations to further ensure the safety and compliance of the completed project.
Address any deficiencies or issues identified during the inspection promptly. It is essential to rectify these problems to maintain the long-term safety, functionality, and value of the raised roof area.
By conducting a thorough inspection and ensuring that safety standards and regulations are met, you can have peace of mind knowing that your raised roof area is safe, well-built, and ready for use. Congratulations on completing your roof raising project!
Read more: How To Raise A Bed
Conclusion
Congratulations on completing your roof raising project! By following the comprehensive steps outlined in this guide, you have successfully transformed your existing roof into a raised structure, creating additional space and potentially increasing the value of your property. The process may have been challenging, but the end result is well worth the effort.
Throughout the journey, you carefully assessed the existing roof structure, obtained the necessary permits, meticulously planned and designed the project, gathered the required materials and equipment, and prepared the work area. You successfully disconnected utilities, raised the roof structure, secured it in place, reinforced it for structural integrity, and connected utilities once again.
With the utilities reconnected, you focused on addressing the interior and exterior finishing touches, including insulation, walls, ceilings, flooring, lighting, roofing, siding, windows, and doors. Finally, you completed a thorough inspection to ensure that safety standards and regulations are met, providing confidence in the long-term functionality and safety of the raised roof area.
Undertaking a roof raising project is a significant endeavor that requires careful planning, professional assistance when needed, and a commitment to ensuring the safety and structural integrity of your home. It is important to follow local building codes and regulations throughout the entire process and consult with experts to make informed decisions.
By raising your roof, you have expanded the possibilities for your home and created additional space that can be utilized for various purposes. Whether it be an extra living area, a home office, or a hobby room, the raised roof adds value and flexibility to your property.
Remember, safety should always be a top priority. Prioritize working with professionals, following safety protocols, and adhering to building codes during each step of the project.
Thank you for taking the time to read this comprehensive guide on how to raise a roof. We hope that it has provided you with valuable insights and guidance throughout your roof raising journey. May your newly raised roof bring you joy, functionality, and endless possibilities for years to come!
Frequently Asked Questions about How To Raise A Roof
Was this page helpful?
At Storables.com, we guarantee accurate and reliable information. Our content, validated by Expert Board Contributors, is crafted following stringent Editorial Policies. We're committed to providing you with well-researched, expert-backed insights for all your informational needs.


0 thoughts on “How To Raise A Roof”