Articles
How To Extend The Height Of A Fence
Modified: August 27, 2024
Learn effective ways to extend the height of your fence with informative articles. Enhance privacy and security effortlessly.
(Many of the links in this article redirect to a specific reviewed product. Your purchase of these products through affiliate links helps to generate commission for Storables.com, at no extra cost. Learn more)
Introduction
When it comes to privacy and security, a fence plays a crucial role in providing the necessary barriers. However, there are times when the height of a standard fence might not be sufficient to meet your specific needs. Whether you are looking to add extra privacy to your backyard, block out noise from the surrounding area, or prevent pets from jumping over, extending the height of your fence can be the perfect solution.
This comprehensive guide will walk you through various methods to extend the height of a fence, offering practical and creative options to suit your preferences and requirements. From simple techniques to more complex installations, you’ll find a range of approaches to achieve the desired increase in fence height.
Before you begin, it’s important to consider any legal limitations or restrictions that may apply in your area. Some local zoning regulations or homeowners’ associations may have specific rules regarding fence height. Make sure you check with the relevant authorities and obtain any necessary permits before proceeding.
Planning and preparation are key when it comes to extending your fence height. Take some time to assess your current fence and identify the most suitable method for your situation. Consider factors such as your budget, desired aesthetic, level of privacy, and long-term maintenance requirements.
Depending on the method you choose, you may need a variety of tools and materials to complete the project. These can range from basic hand tools, such as a saw and drill, to more specialized equipment like fence post extensions or trellis panels. Having all the necessary items on hand will make the process smoother and save you time and frustration.
Now, let’s dive into the different methods you can use to extend the height of your fence. Each method offers its own unique benefits, so feel free to choose the one that best suits your needs and preferences.
Key Takeaways:
- Extending the height of a fence offers benefits such as increased privacy, security, and aesthetic appeal. It’s crucial to consider legal regulations, plan and prepare, and choose the right method for a successful and compliant project.
- From using fence post extensions to growing tall plants or attaching privacy screens, there are various creative methods to extend fence height. Each method requires careful planning, preparation, and compliance with local regulations for a satisfying outcome.
Read more: How To Extend Fence Posts
Reasons for Extending Fence Height
There are several reasons why you might consider extending the height of your fence. Understanding these reasons will help you determine the best method to achieve your desired outcome. Here are some common motivations for increasing the height of a fence:
- Privacy: Privacy is one of the primary concerns for many homeowners. Extending the height of your fence can create a secluded and intimate outdoor space, shielding you from prying eyes and reducing noise from neighboring properties.
- Security: A higher fence can act as a deterrent to intruders, increasing the security of your property. It makes it more difficult for potential trespassers to scale the fence and gain access to your home or yard.
- Pet Containment: If you have pets, especially dogs that are prone to jumping, extending the fence height can help ensure their safety by preventing them from escaping. It allows them to enjoy the outdoor space without the risk of running away.
- Noise Reduction: If you live in a noisy area, such as near a busy road or construction site, extending your fence can provide an additional barrier to help reduce the noise levels in your yard. This can make your outdoor living space more peaceful and enjoyable.
- Aesthetics: Sometimes, homeowners simply want to change the look of their existing fence. By adding height, you can give your fence a new and refreshed appearance, enhancing the overall aesthetics of your property.
- Compliance with Regulations: In some cases, local regulations or homeowners’ association guidelines may require a certain fence height for safety or aesthetic purposes. Extending your fence can help you comply with these regulations and avoid any potential penalties.
Regardless of the reason behind wanting to extend your fence height, it’s important to consider both the practical and aesthetic aspects before deciding on the best method. By taking the time to understand your specific needs and goals, you can choose the appropriate technique to achieve the desired outcome.
Legal Considerations
Before you begin extending the height of your fence, it’s important to be aware of any legal considerations that may apply in your area. Local zoning regulations, homeowners’ association rules, and building codes can dictate the maximum allowable fence height and any restrictions or requirements you need to follow. Ignoring these regulations could result in fines, legal issues, or having to remove the extended portion of your fence.
Here are some key legal considerations to keep in mind when extending your fence height:
- Zoning Regulations: Each municipality or city may have specific rules regarding fence height, setback distances, and materials. Check with your local government authorities to determine the permissible height for residential fences in your area. Some areas may require you to obtain a permit for fence modifications.
- Homeowners’ Association (HOA) Guidelines: If you live in a neighborhood with a homeowners’ association, they may have their own set of rules and regulations concerning fence height and appearance. Review the HOA guidelines and obtain approval for any modifications to ensure compliance.
- Boundary Disputes: If your fence is near the property line, it’s crucial to clearly define and respect the boundaries. Consult a surveyor or property lawyer to ensure that your fence extension does not encroach onto neighboring properties.
- Visibility: In some cases, local regulations may require fences to not obstruct the visibility of drivers or pedestrians. Make sure the height of your fence extension does not impede sightlines or create any safety hazards.
- Shared or Party Fences: If your fence is shared with a neighbor, it’s essential to communicate and seek their consent before making any modifications. Discuss your plans with them and respect their opinions and concerns.
- Historical Districts or Conservation Areas: If your property is located within a historical district or conservation area, there may be additional restrictions on fence modifications. Consult with the local preservation board or planning department to understand any specific guidelines.
By understanding and respecting the legal considerations in your area, you can ensure that your fence extension project is compliant and problem-free. Remember to obtain any necessary permits or approvals before starting the work. It’s always better to address any potential legal issues upfront rather than dealing with consequences later on.
Planning and Preparation
Proper planning and preparation are essential when it comes to extending the height of your fence. Taking the time to assess your current fence, consider your goals, and gather the necessary tools and materials will ensure a smoother and more successful project. Here are some key steps to help you plan and prepare:
- Evaluate Your Fence: Start by examining your existing fence to determine its condition, stability, and suitability for extension. Assess the type of material, post spacing, and overall strength. This will help you choose the most appropriate method for increasing the fence height.
- Set Your Goals: Define your objectives for extending the fence height. Are you looking for additional privacy, increased security, noise reduction, or a combination of factors? Understanding your goals will guide you in selecting the right method and materials.
- Budget Considerations: Determine your budget for the project. Some methods may require more extensive materials and labor, while others may be more cost-effective. Consider your financial constraints and choose the option that best fits your budget.
- Consider Aesthetics: Think about how the extended fence will look and blend with the overall aesthetics of your property. Consider the style, design, and color options available for the chosen method. You may want to consult with a professional or gather inspiration from photos to ensure a cohesive and visually pleasing outcome.
- Maintenance: Take into account the maintenance requirements of the desired method. Some options may require regular upkeep, such as painting or treating the materials, while others may be relatively low maintenance. Choose a solution that aligns with your time and maintenance capabilities.
- Tools and Materials: Identify the tools and materials you will need for the chosen method. This may include items such as saws, drills, extension posts, trellis panels, bamboo screens, or fasteners. Ensure you have all the necessary tools and materials on hand before starting the project.
- Timeline: Assess how much time you can dedicate to the fence extension project. Some methods may require more time and effort than others. Consider your availability and schedule the project accordingly to avoid any unnecessary delays.
- Consult Professionals: If you are unsure about the best method or if you have any concerns about the structural integrity of your fence, it’s always a good idea to consult with a professional. They can provide guidance, recommendations, and ensure that your fence extension is done correctly and safely.
By carefully planning and preparing for your fence extension project, you can set yourself up for success. Taking these steps will help you choose the right method, gather the necessary tools and materials, and achieve the desired outcome while staying within your budget and timeline. Remember, proper planning and preparation are crucial for a successful and satisfying project.
Tools and Materials Needed
Depending on the method you choose to extend the height of your fence, you may require a variety of tools and materials. Having the right tools and materials on hand will make the project easier and more efficient. Here is a list of commonly used tools and materials for different fence height extension methods:
- Fence Post Extensions:
- Measuring tape
- Saw (hand saw or circular saw)
- Drill
- Screws or nails
- Fence post extensions (wood or metal)
- Post extenders or connectors
- Level
- Trellis or Lattice Panels:
- Measuring tape
- Saw (hand saw or circular saw)
- Drill
- Screws or nails
- Trellis or lattice panels
- Support brackets or posts
- Level
- Taller Fence Posts:
- Measuring tape
- Saw (hand saw or circular saw)
- Drill
- Screws or nails
- Taller fence posts (wood or metal)
- Concrete mix (if necessary)
- Post hole digger or auger
- Level
- Bamboo or Reed Screens:
- Measuring tape
- Saw (hand saw or circular saw)
- Drill
- Screws or nails
- Bamboo or reed screens
- Support brackets or posts
- Zip ties or wire for securing screens
- Level
- Tall Plants or Climbing Vines:
- Measuring tape
- Shovel
- Garden stakes
- Twine
- Trellis or support structure
- Plants or climbing vines
- Watering can or hose
- Privacy Screens or Windbreakers:
- Measuring tape
- Shovel
- Garden stakes
- Twine or wire
- Privacy screens or panels
- Support brackets or posts
- Zip ties or wire for securing screens
- Level
Keep in mind that the specific tools and materials required may vary depending on the size and complexity of your fence extension project. It’s always a good idea to double-check the manufacturer’s instructions or consult with a professional if you are unsure about the exact tools and materials needed.
Having all the necessary tools and materials ready before starting the project will save you time and ensure a smooth installation process. It’s also important to prioritize safety by wearing appropriate protective gear, such as gloves and safety glasses, when working with tools and materials.
By being well-prepared with the right tools and materials, you’ll be ready to tackle your fence height extension project and achieve the desired results with confidence.
Read more: What Is The Ideal Fence Height For Dogs
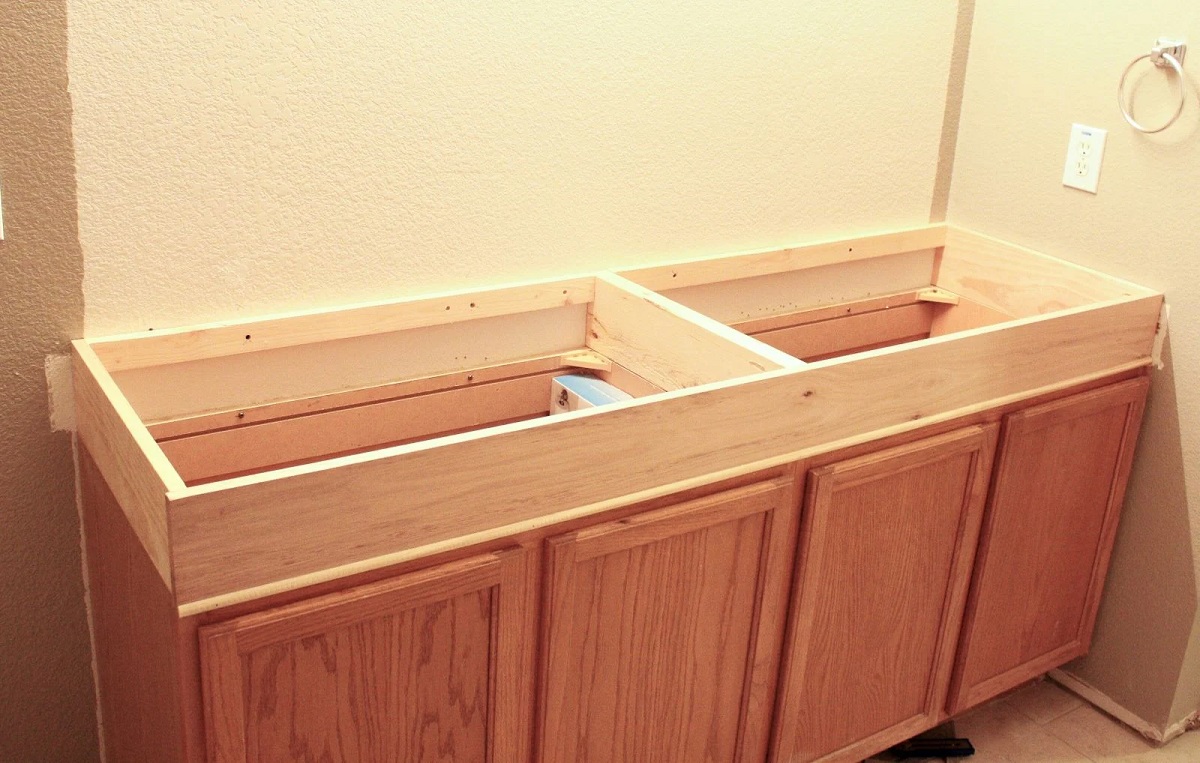
Method 1: Using Fence Post Extensions
If you have existing fence posts that are in good condition and structurally sound, using fence post extensions can be a simple and effective method to increase the height of your fence. This method involves attaching additional sections of post to the top of your existing posts to achieve the desired height. Here’s a step-by-step guide on how to extend your fence using post extensions:
- Measure and Purchase: Measure the height you want to add to your fence and purchase fence post extensions of the appropriate height. Make sure to choose extensions that are compatible with the material and size of your existing fence posts.
- Cut Extensions: Use a saw to cut your fence post extensions to the desired length. The cut edges should be level and clean for a secure and aesthetically pleasing fit.
- Prepare Existing Posts: Remove any dirt or debris from the top of your existing fence posts. Ensure they are clean and free of any obstructions that may hinder the attachment of the extensions.
- Fit and Attach Extensions: Place the fence post extensions onto the top of your existing posts, making sure they are accurately aligned and level. Use screws or nails to firmly attach the extensions to the existing posts. Ensure a secure and stable connection.
- Check for Stability: Once all the extensions are attached, check the stability of your fence. Ensure that the extended posts are firmly secured and that the overall structure is sturdy and level. Make any necessary adjustments or reinforcements for added stability.
- Finishing Touches: If desired, paint or stain the fence post extensions to match the color and finish of your existing fence. This will help create a cohesive look and enhance the visual appeal.
Using fence post extensions is a relatively simple and cost-effective method to extend the height of your fence. It allows you to maintain the existing structure while adding extra height to meet your specific needs. However, it’s important to ensure that your existing fence posts are strong enough to support the additional weight and height. If in doubt, consult a professional for guidance and reinforcement recommendations.
Remember to always prioritize safety during the installation process. Use appropriate safety equipment, such as gloves and safety glasses, and take necessary precautions when working with tools and materials. By following this method, you can easily achieve a taller fence that provides increased privacy, security, and visual impact.
Consider adding fence post extensions to increase the height of your fence. These can be easily attached to the top of existing fence posts to provide additional height and privacy.
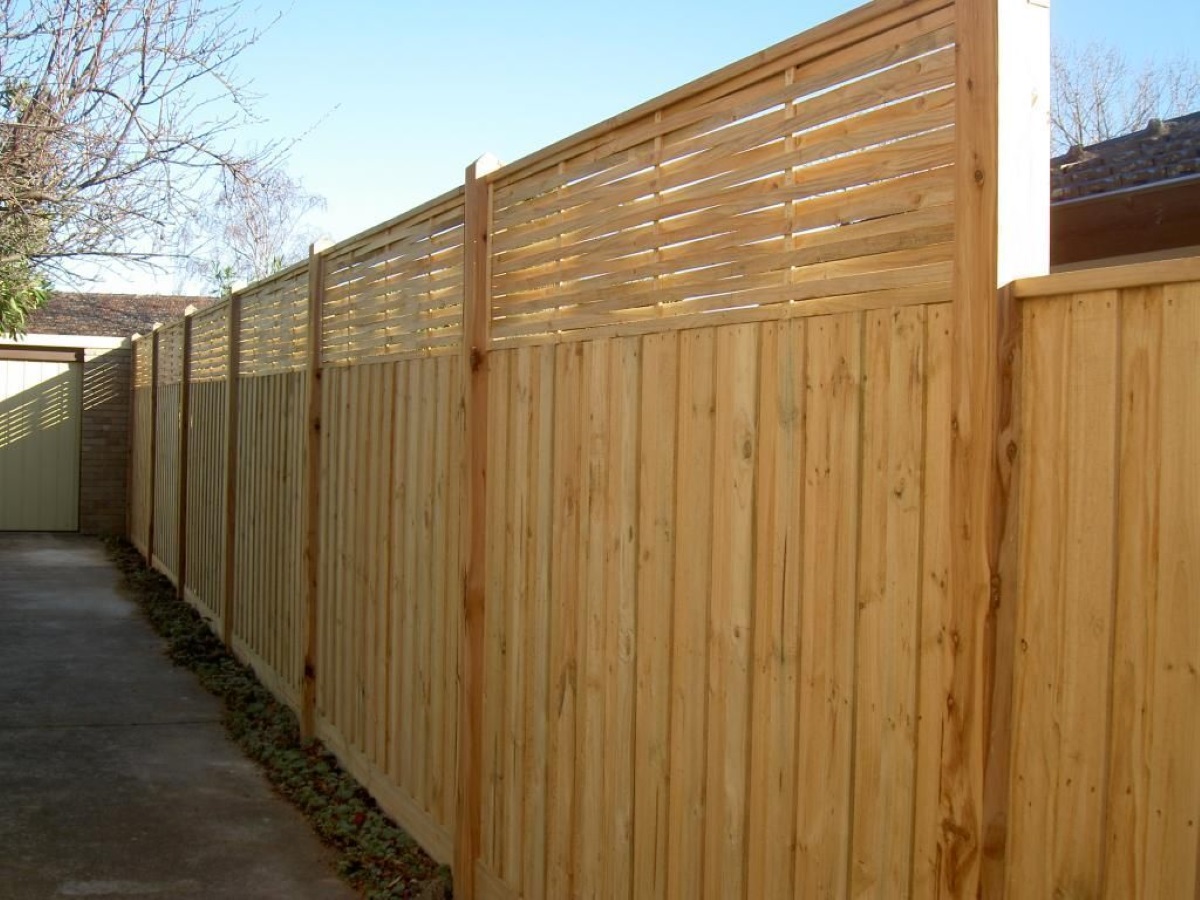
Method 2: Adding Trellis or Lattice Panels
If you are looking for a method that not only increases the height of your fence but also adds a decorative element, adding trellis or lattice panels is an excellent option. This method allows you to combine functionality with aesthetics, creating a visually appealing fence extension. Here’s a step-by-step guide on how to add trellis or lattice panels to extend the height of your fence:
- Measure and Purchase: Measure the length and height of the area where you want to add the trellis or lattice panels. Purchase panels of the appropriate size and material that match your desired aesthetic.
- Cut Panels (if necessary): If the purchased panels are wider than your fence, use a saw to cut them to the desired width. Ensure clean and straight cuts for a professional-looking finish.
- Prepare Fence: Clean and prep the existing fence by removing any dirt or debris from the surface. This will help ensure a secure attachment of the trellis or lattice panels.
- Attach Support Brackets or Posts: Install vertical support brackets or posts along the length of your fence. These will serve as anchor points for attaching the trellis or lattice panels. Make sure they are level and securely attached to the existing fence.
- Attach Panels: Position the trellis or lattice panels in place, aligning them with the support brackets or posts. Use screws or nails to attach the panels to the brackets or posts, ensuring a secure connection. Repeat this step for each panel, making sure they are evenly spaced and level.
- Finishing Touches: Paint or stain the panels to match the color and finish of your existing fence, or leave them as is for a natural look. This will help create a cohesive and visually pleasing appearance. Consider adding climbing plants or vines to the panels for added beauty and privacy.
Adding trellis or lattice panels to your fence not only increases the height but also provides a unique and decorative element. This method allows for improved privacy, enhanced aesthetic appeal, and the opportunity to create a beautiful vertical garden. It’s a versatile option that works well with various fence styles and materials.
Remember to follow any local regulations or homeowners’ association guidelines regarding the use of trellis or lattice panels. Some areas may have restrictions on the size, material, and height of these additions. Consult with the appropriate authorities or your HOA before proceeding.
By incorporating trellis or lattice panels into your fence extension, you can achieve a stylish and functional addition that enhances both the height and the overall appearance of your fence.
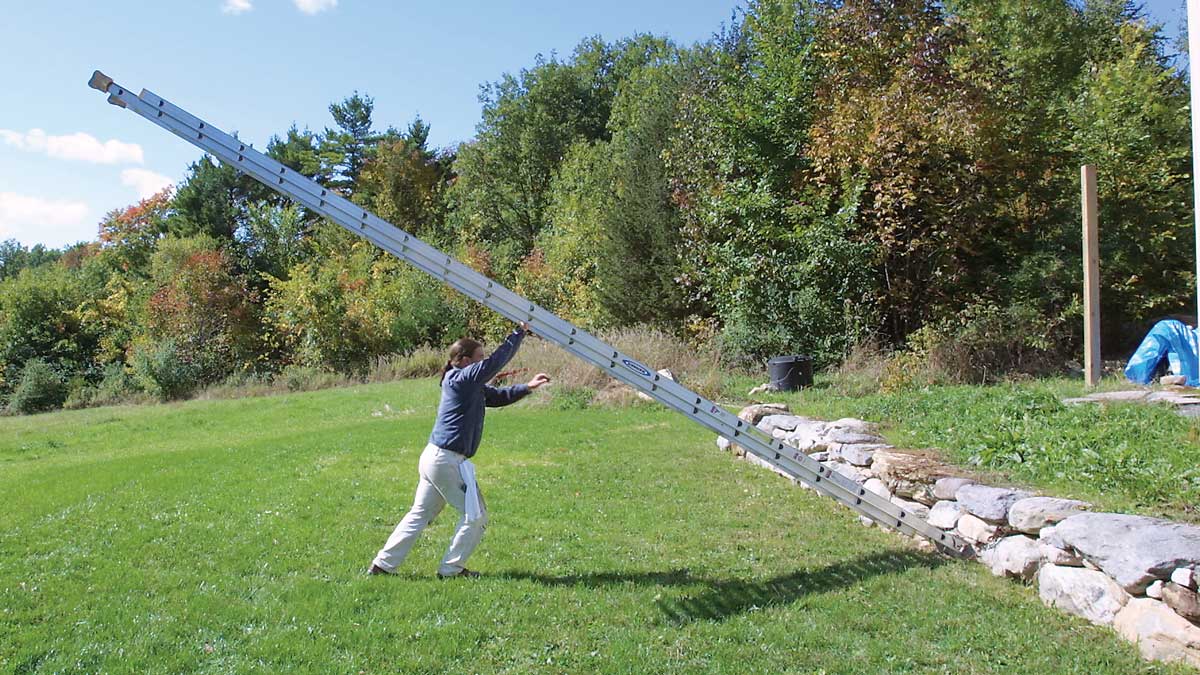
Method 3: Installing Taller Fence Posts
If your existing fence posts are not strong enough to support additional height or if you prefer a more substantial and seamless look, installing taller fence posts is a suitable method. This method involves replacing the existing fence posts with longer ones, allowing you to achieve the desired height while maintaining the structural integrity of the fence. Follow these steps to install taller fence posts:
- Determine the Height: Measure the height you want to add to your fence and select fence posts that are long enough to accommodate the desired increase. Ensure that the new posts match the material, style, and dimensions of your existing fence.
- Remove Existing Posts: Carefully remove the existing fence posts from the ground. Use a post hole digger or auger to extract the posts and any concrete foundation. If the posts are set in concrete, break up the concrete and remove it from the holes.
- Prepare the Holes: Dig new holes for the taller fence posts. The depth and width of the holes should be sufficient to ensure proper stability and support for the fence. Follow local regulations or industry standards for hole depth and diameter.
- Place New Posts: Position the new, taller fence posts in the freshly dug holes. Ensure they are straight and level by using a level or plumb line. If necessary, fill the bottom of the holes with gravel for improved drainage.
- Secure the Posts: Once the new posts are in place, pour concrete into the holes around the posts. Ensure that the posts are firmly set and constrained by the concrete. Use a level to make sure the posts remain straight and plumb while the concrete dries.
- Attach Fence Panels: Once the concrete has set, attach the fence panels to the new, taller posts using screws or nails. Ensure that each panel is securely fastened to the posts and is level and aligned with the rest of the fence.
- Final Checks: Conduct a thorough inspection of the newly installed fence to ensure that it is stable, level, and properly aligned. Make any necessary adjustments or reinforce any weak areas for improved sturdiness.
Installing taller fence posts provides a solid and aesthetically appealing solution for extending the height of your fence. It ensures the integrity and strength of the overall structure while achieving the desired height increase. While this method requires more labor and materials, it offers a seamless and durable option for enhancing your fence.
Before proceeding with this method, check local regulations or consult with appropriate authorities to ensure compliance. Some areas may have specific guidelines regarding fence installation, including post depth, setback distance, or allowable materials.
By following these steps and taking proper precautions, you can successfully install taller fence posts and achieve the desired height increase for your fence, providing increased privacy, security, and an attractive addition to your property.
Method 4: Attaching Bamboo or Reed Screens
If you’re looking for a natural and environmentally friendly way to extend the height of your fence, attaching bamboo or reed screens is an excellent choice. These screens offer privacy, a unique aesthetic, and can easily be installed on existing fence panels. Here’s a step-by-step guide on how to attach bamboo or reed screens to extend the height of your fence:
- Measure and Purchase: Measure the length and height of your fence to determine the amount of bamboo or reed screen material you’ll need. Purchase screens that are of the appropriate height and match the desired aesthetic.
- Prepare the Fence: Clean the surface of your existing fence to ensure a good attachment for the bamboo or reed screens. Remove any dirt or debris that might hinder the installation process.
- Attach Support Brackets or Posts: Install vertical support brackets or posts along the length of your fence. These will serve as attachment points for securing the bamboo or reed screens. Make sure they are level and securely fastened to the existing fence.
- Unroll the Screens: Unroll the bamboo or reed screens along the desired section of your fence. Secure one end of the screens to the support brackets or posts using zip ties or wire. Ensure that the screens are taut and properly aligned.
- Continue Attaching the Screens: Working from one end to the other, continue attaching the screens to the support brackets or posts, securing them tightly with zip ties or wire. Space the ties or wire approximately every 12 to 18 inches for a secure and uniform installation.
- Trim the Excess: Once you’ve attached all the screens, trim off any excess material using pruning shears or a saw. Cut the screens to the desired height, ensuring a neat and clean finish.
- Finishing Touches: Optional: Apply a weather-resistant sealant or preservative to the bamboo or reed screens to prolong their lifespan and maintain their appearance. This step is particularly important if the screens are exposed to the elements.
Attaching bamboo or reed screens to your fence is an eco-friendly and visually appealing way to extend its height. These screens provide a natural aesthetic, increase privacy, and can also act as a windbreak. Additionally, the bamboo or reed material is durable and can withstand various weather conditions.
Ensure that you follow any local regulations or homeowners’ association guidelines regarding the installation of bamboo or reed screens. Some areas may have restrictions on the use of specific materials or the maximum height allowed for fence extensions.
By following these steps, you can easily attach bamboo or reed screens to extend the height of your fence, creating a beautiful and functional addition to your outdoor space.
Read more: How To Extend A Patio
Method 5: Growing Tall Plants or Climbing Vines
If you prefer a natural and green approach to extending the height of your fence, growing tall plants or climbing vines can be an excellent option. This method not only adds privacy and height but also brings beauty and a touch of nature to your fence. Here’s a step-by-step guide on how to use tall plants or climbing vines to extend the height of your fence:
- Select Suitable Plants: Choose tall plants or climbing vines that are suitable for your climate, soil type, and growing conditions. Look for plants that are known for their vertical growth and have strong support systems, such as bamboo, clematis, trumpet vine, or morning glory.
- Prepare the Area: Clear the area along your fence of any debris, weeds, or existing vegetation. Loosen the soil and remove any rocks or unwanted vegetation that may impede the growth of your chosen plants.
- Planting: Dig holes along the fence line, spacing them according to the recommended distance for the selected plants. Place the plants or seedlings into the holes, ensuring they are positioned securely and at the desired height.
- Install Support Structures: Depending on the plants you’ve chosen, you may need to install support structures such as trellises, arbors, or posts with wires. These will provide a framework for the plants to climb and grow vertically.
- Water and Maintain: Water the newly planted plants thoroughly, ensuring that they receive adequate moisture. Follow the recommended watering schedule for the specific plants and continue to care for them by pruning, fertilizing, and providing any necessary support as they grow.
- Train the Plants: Guide the plants or vines to grow upward by gently tying them to the support structures. As they grow, continue to train them in the desired direction, ensuring they cover the desired fence area and provide the desired height and privacy.
- Monitor and Prune: Regularly monitor the growth of your plants or vines. Prune any excessive growth or unwanted branches to maintain the desired shape and height. This will promote healthier growth and help prevent the plants from overpowering your fence or encroaching on neighboring properties.
Growing tall plants or climbing vines to extend the height of your fence is a natural and aesthetically pleasing method. It allows you to create a green and vibrant screen while also providing privacy and a habitat for beneficial wildlife.
Before planting, consider any local regulations or guidelines that may apply to the species of plants you want to grow. Some areas may have restrictions on invasive plant species or specific regulations for fence vegetation height.
By following these steps and providing proper care, you can transform your fence into a lush and vertical garden, adding beauty, height, and nature to your outdoor space.
Method 6: Using Privacy Screens or Windbreakers
If you’re looking for a quick and versatile method to extend the height of your fence while maintaining flexibility, using privacy screens or windbreakers is an ideal solution. These screens are specifically designed to provide additional privacy, block wind, and increase the height of your fence. Here’s a step-by-step guide on how to use privacy screens or windbreakers to extend the height of your fence:
- Measure and Purchase: Measure the length and height of your fence to determine the dimensions of the privacy screens or windbreakers you’ll need. Purchase screens made from weather-resistant materials that match your desired aesthetic.
- Prepare the Fence: Ensure that the existing fence is clean and free from any dirt or debris. This will allow for secure attachment of the privacy screens or windbreakers.
- Attach Support Brackets or Posts: Install support brackets or posts along the length of your fence, making sure they are securely fastened and level. These will serve as anchor points for attaching the privacy screens or windbreakers.
- Unroll the Screens: Unroll the privacy screens or windbreakers along the fence line, aligning them with the support brackets or posts. Ensure that they are evenly spaced and extend to the desired height.
- Attach the Screens: Use zip ties or wire to securely attach the privacy screens or windbreakers to the support brackets or posts. Space the ties or wire approximately every 12 to 18 inches for a strong and uniform installation.
- Trim or Adjust: If necessary, trim any excess material from the privacy screens or windbreakers using pruning shears or a saw. This will give them a neater appearance and ensure a proper fit. Adjust the screens as needed to maintain a consistent height and alignment.
- Secure the Bottom: To prevent the privacy screens or windbreakers from moving or flapping in the wind, secure the bottom portion by attaching weights, using ground stakes, or burying them slightly in the soil.
Using privacy screens or windbreakers to extend the height of your fence offers a customizable and temporary solution. These screens are easy to install and provide an immediate increase in privacy and blockage from wind and other elements.
Before proceeding, it’s important to check local regulations or homeowners’ association guidelines regarding the use of privacy screens or windbreakers. Some areas may have restrictions on the height, material, or placement of these extensions.
By following these steps, you can quickly and easily extend the height of your fence using privacy screens or windbreakers. This method offers versatility, allowing you to adjust or remove the screens as needed for different seasons or changing preferences.
Conclusion
Extending the height of your fence can provide numerous benefits, such as increased privacy, security, and aesthetic appeal. Depending on your specific needs and preferences, there are various methods to achieve this extension. From using fence post extensions to attaching trellis panels or bamboo screens, each method offers its own advantages and allows you to customize the look and functionality of your fence.
Prior to starting any fence height extension project, it’s essential to consider legal considerations, such as zoning regulations or homeowners’ association guidelines, to ensure compliance. Planning and preparation are key, as they enable you to make informed decisions about the best method, gather the necessary tools and materials, and set realistic expectations for the project.
The chosen method will determine the tools and materials required. From basic hand tools like a saw and drill to specialized items like trellis panels or privacy screens, having the necessary equipment and supplies on hand will make the installation process more efficient and streamlined.
Each method has its own step-by-step process, and it’s important to carefully follow the instructions to ensure a successful outcome. Whether you choose fence post extensions, trellis panels, taller fence posts, bamboo screens, growing tall plants or vines, or using privacy screens or windbreakers, taking the time to properly install and maintain the extensions will lead to a durable and visually appealing result.
Before embarking on any fence extension project, it’s crucial to be aware of and adhere to any local regulations or homeowners’ association guidelines. These regulations may dictate the maximum allowable fence height or specific materials to be used. By being compliant, you can avoid potential legal issues or having to undo any modifications.
In conclusion, extending the height of your fence is a practical and creative way to enhance privacy, security, and the overall look of your property. The method you choose will depend on your preferences, budget, and the existing structure of your fence. By carefully planning, preparing, and executing the chosen method, you can achieve the desired increase in height while ensuring a seamless and visually appealing result. Take the time to explore the various options available and select the method that best suits your needs and enhances your outdoor space.
After mastering how to raise your fence's height, consider delving into another crucial aspect of home management: security. Understanding why robust home protection measures are necessary could be your next step towards ensuring a safer living environment. From preventing unauthorized entry to safeguarding your privacy, the benefits are extensive and vital for any homeowner. Don't wait until safety concerns arise; start fortifying your home today.
Frequently Asked Questions about How To Extend The Height Of A Fence
Was this page helpful?
At Storables.com, we guarantee accurate and reliable information. Our content, validated by Expert Board Contributors, is crafted following stringent Editorial Policies. We're committed to providing you with well-researched, expert-backed insights for all your informational needs.


0 thoughts on “How To Extend The Height Of A Fence”