Articles
How To Remove Adapter From Tesla
Modified: December 7, 2023
Learn how to remove the adapter from your Tesla car in this informative article. Explore step-by-step instructions and tips for a hassle-free experience.
(Many of the links in this article redirect to a specific reviewed product. Your purchase of these products through affiliate links helps to generate commission for Storables.com, at no extra cost. Learn more)
Introduction
Welcome to this step-by-step guide on how to remove the adapter from a Tesla. If you own a Tesla electric vehicle, you know how convenient it is to charge your car using a charging station equipped with an adapter. However, at times, you may encounter situations where you need to remove the adapter from the charging port. Whether you’re planning to switch to a different adapter or you simply need to disconnect the charging cable, this guide will walk you through the process.
Removing the adapter from a Tesla is a straightforward task that can be easily accomplished with a few simple steps. In this article, we will take you through the process, ensuring you have a clear understanding of each step to successfully remove the adapter without any damage to your vehicle.
Before we begin, it’s important to note that safety and caution should always be a priority when working with electric vehicles. Ensure that you are familiar with the operations of your Tesla and take necessary precautions while following this guide.
Now, let’s dive into the step-by-step process of removing the adapter from your Tesla.
Key Takeaways:
- Safely remove the adapter from your Tesla by following simple steps: park and turn off the vehicle, open the charging port, remove the cable, and detach the adapter. Prioritize safety and caution throughout the process.
- With careful steps, you can confidently disconnect the adapter from your Tesla, whether for switching adapters or cable disconnection. Always prioritize safety and refer to the owner’s manual for guidance.
Read more: How To Use Tesla Charger Adapter
Step 1: Park the Tesla
The first step in removing the adapter from your Tesla is to park the vehicle in a safe and secure location. It is crucial to choose a flat surface or a driveway where the car remains stationary during the process.
Ensure that the parking brake is engaged to prevent any accidental movement of the vehicle. This is especially important if you are working on an incline or uneven surface.
Additionally, make sure that the Tesla is turned off before proceeding to the next step. This ensures the safety of both you and the vehicle during the adapter removal process.
Once you have parked the Tesla and ensured the parking brake is engaged, you are ready to move on to the next step.
Step 2: Turn off the Tesla
Before removing the adapter from your Tesla, it is crucial to turn off the vehicle to ensure your safety and prevent any electrical mishaps. To turn off the Tesla, follow these simple steps:
- Ensure that the vehicle is in park mode by shifting the gear to the park position.
- Press the brake pedal firmly to bring the Tesla to a complete stop.
- Locate the power button, usually found on the center console, dashboard, or steering wheel.
- Press and hold the power button for a few seconds until the vehicle powers down completely.
It is important to note that turning off the Tesla will also disable the charging system, ensuring there is no electrical current flowing through the adapter and charging cable. This step is essential for your safety and will prevent any potential electrical hazards during the adapter removal process.
Once you have successfully turned off the Tesla, you are now ready to move on to the next step of removing the adapter.
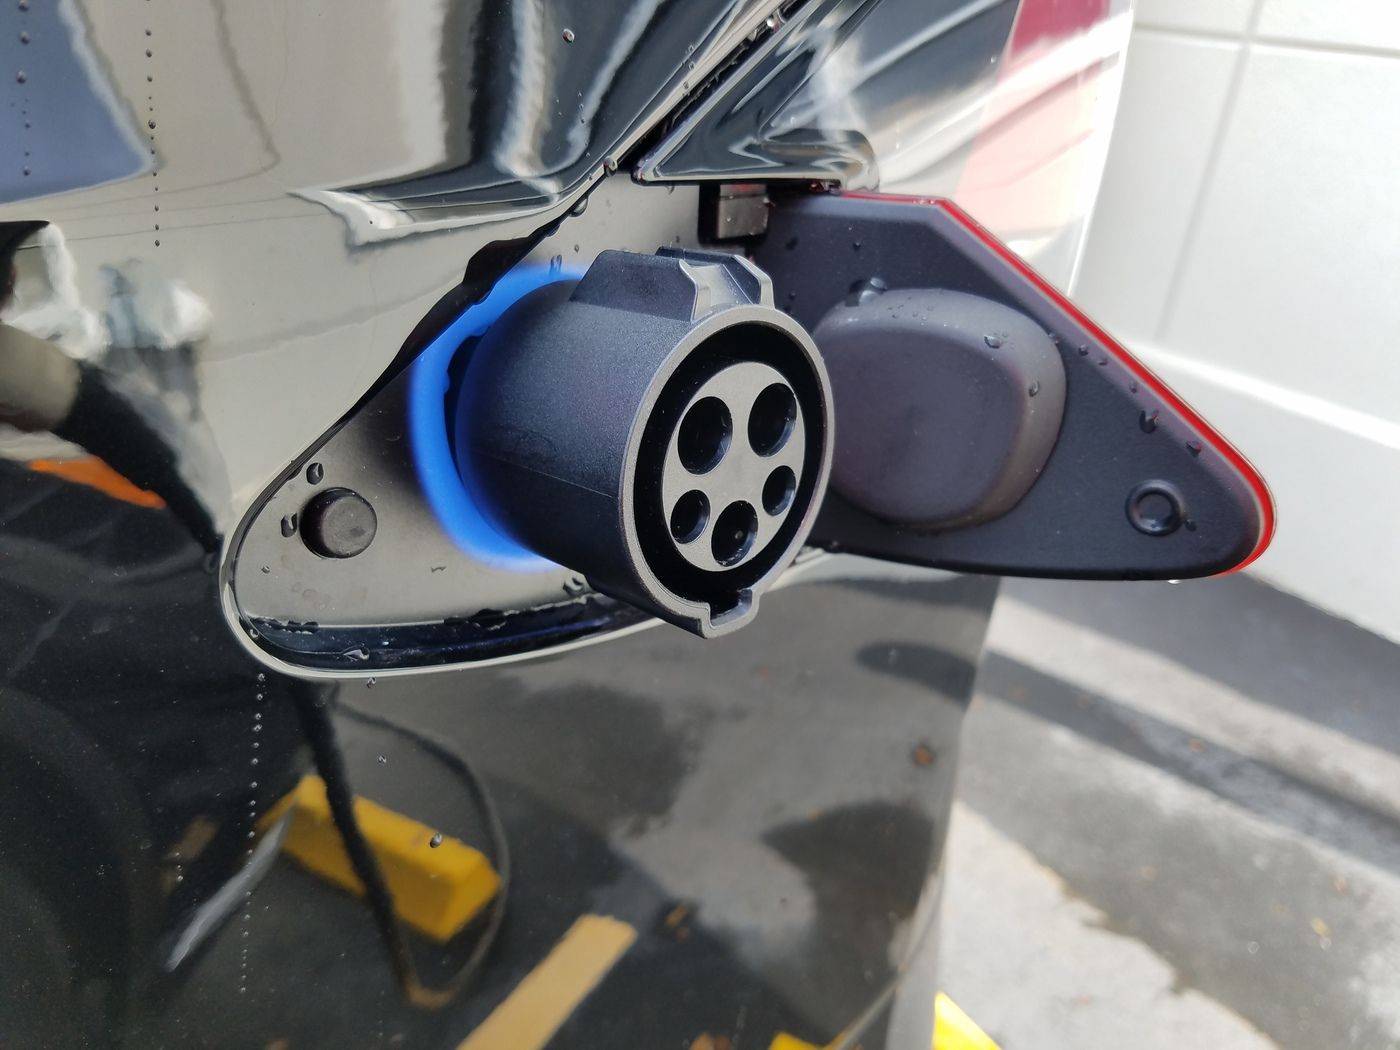
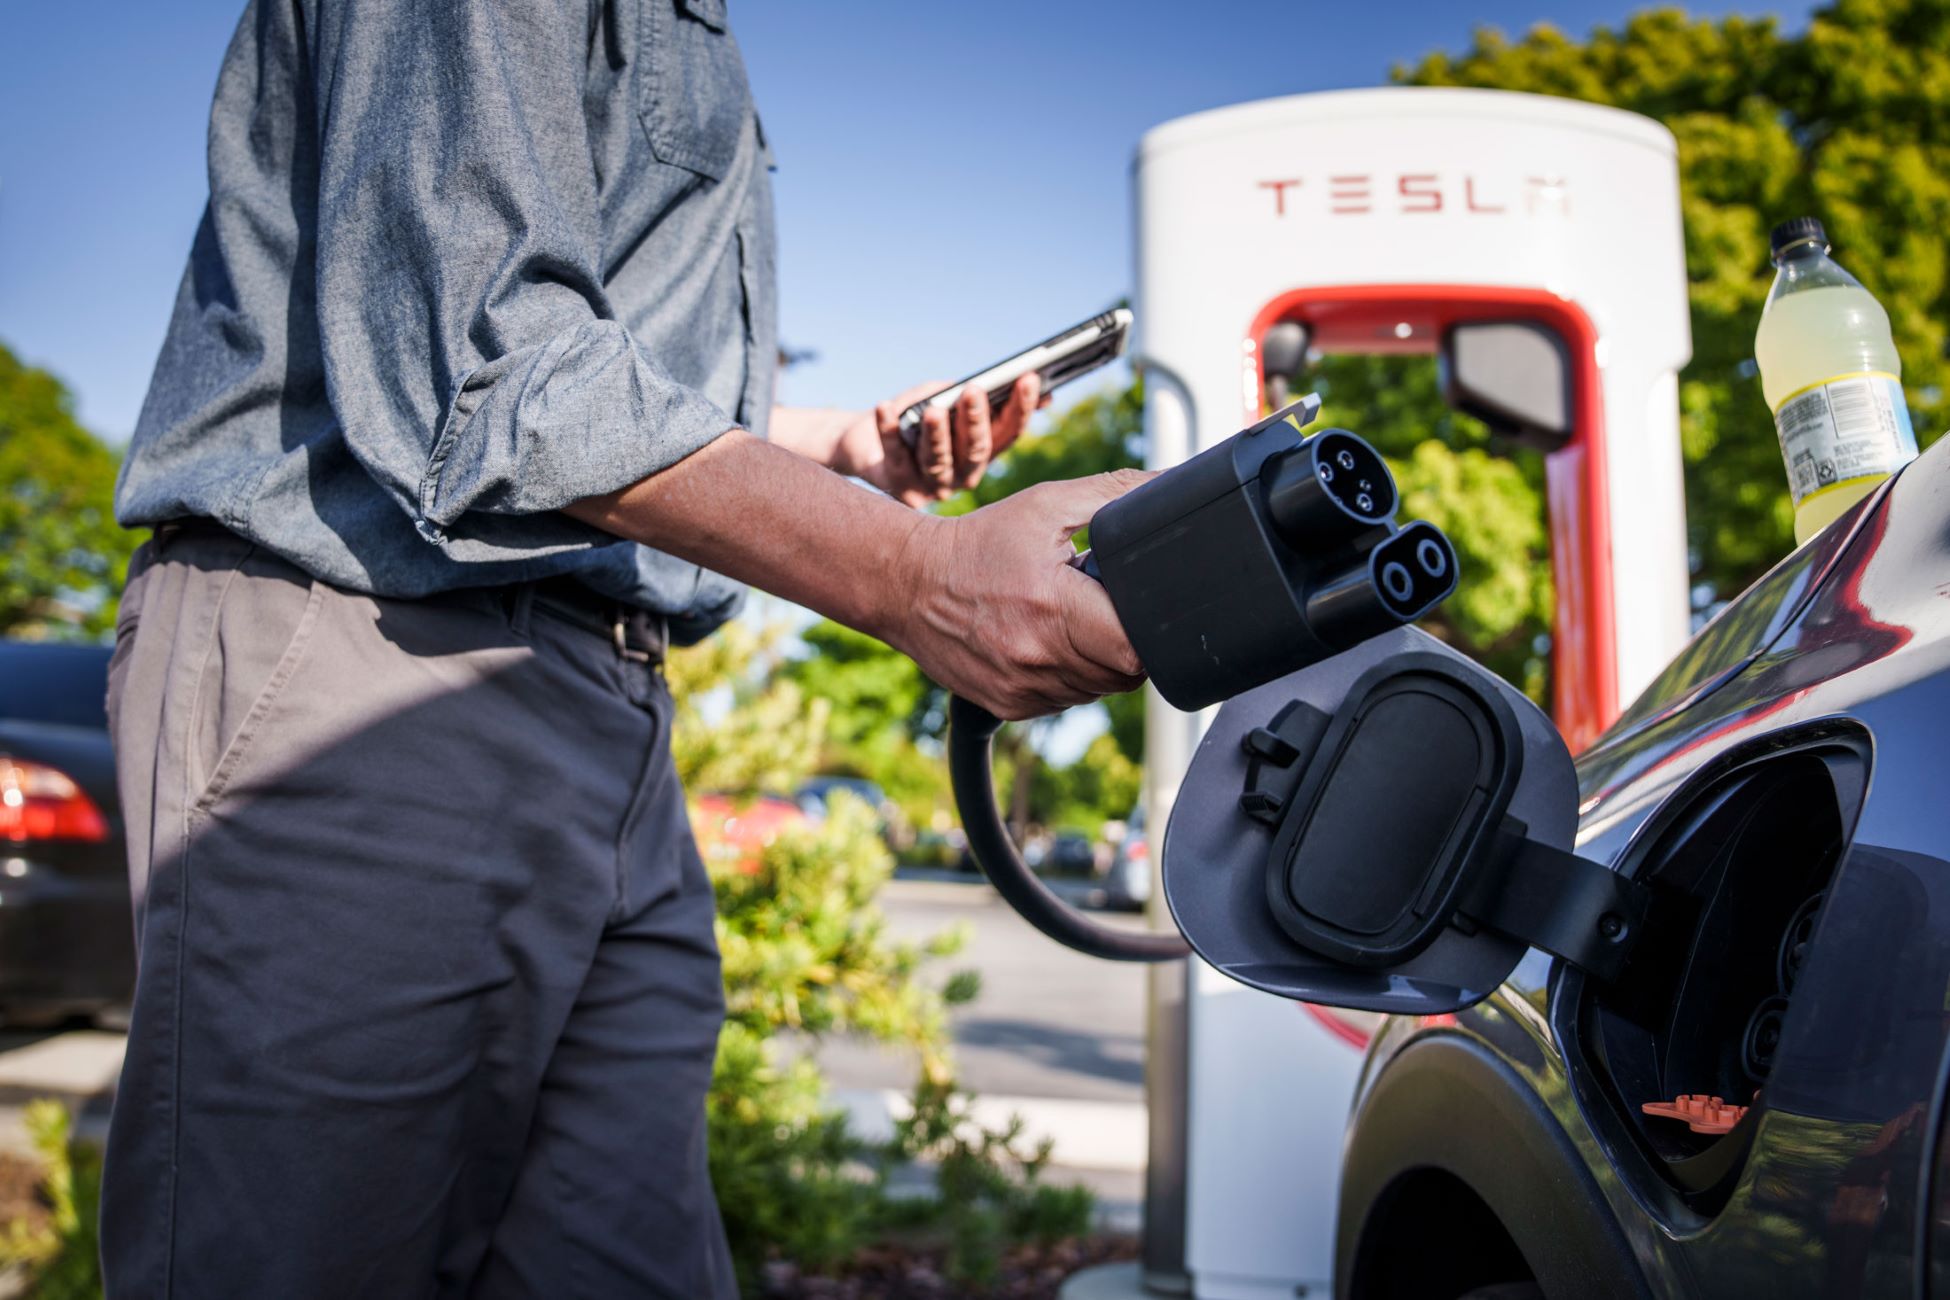
Step 3: Open the Charging Port
Now that your Tesla is safely parked and turned off, it’s time to open the charging port. The charging port is located on the side or rear of the vehicle, depending on the model.
To open the charging port, follow these steps:
- Locate the charging port door on the exterior of the vehicle.
- Press the door release button or lever to unlatch the charging port door. This button is typically located near the driver’s side door, on the key fob, or on the charging cable itself.
- Once the door is unlatched, gently push the door open to reveal the charging port.
It is important to be cautious when opening the charging port door to avoid any damage to the door or the vehicle’s paintwork. Use gentle pressure and avoid forcing the door open.
With the charging port door open, you are now ready to proceed to the next step of removing the charging cable.
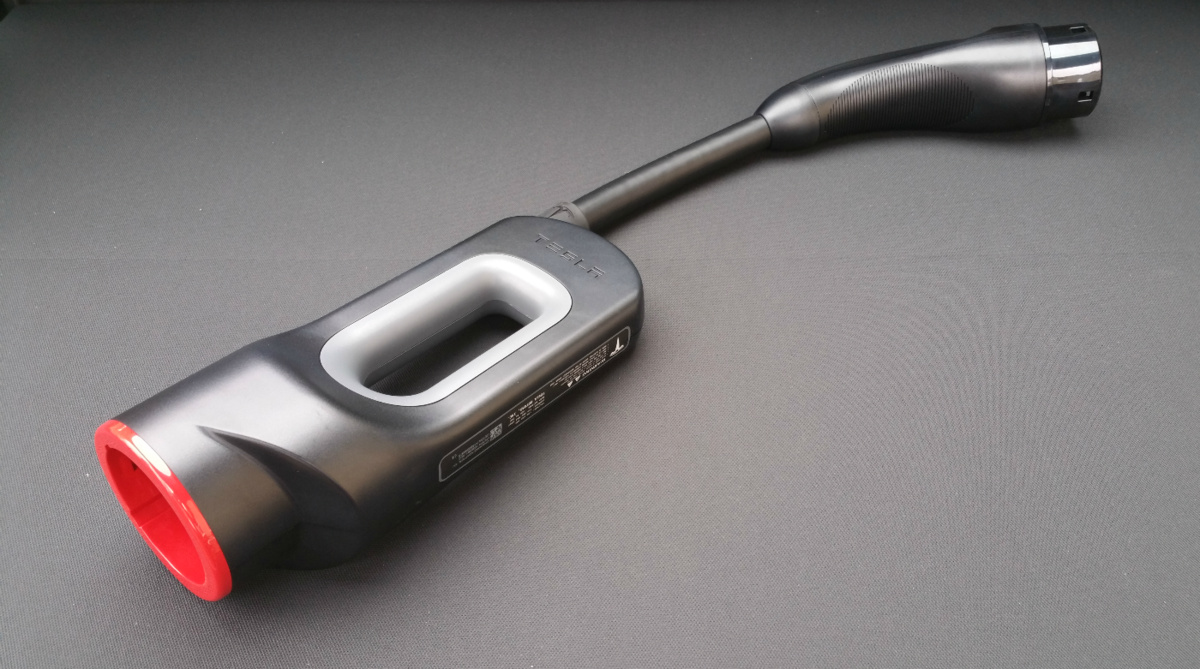
To remove the adapter from a Tesla, press the release button located on the adapter and pull it straight out from the charging port. Make sure to store the adapter in a safe place for future use.
Step 4: Remove the Charging Cable
With the charging port door open, it’s time to remove the charging cable from your Tesla. Follow these steps:
- Locate the charging cable connector attached to the adapter.
- Gently grasp the connector and depress the release button or lever, if applicable. This will disengage the connector from the adapter.
- While firmly holding the connector, slowly pull it out of the charging port. Be careful not to pull on the cable itself, as it may damage the cable or the connector.
- Once the connector is fully removed from the charging port, place it in a safe location away from the vehicle.
It’s important to handle the charging cable with care to avoid any strain or damage to the cable or the connector. Take your time to ensure a smooth and controlled removal process.
By now, you have successfully removed the charging cable from your Tesla. Next, let’s move on to the final step of removing the adapter itself.
Read more: What Is A Ccs Adapter Tesla
Step 5: Remove the Adapter from the Charging Port
After removing the charging cable, the final step is to detach the adapter from the charging port. Follow these instructions:
- Inspect the adapter to locate the release button or lever.
- Press the release button or lift the lever to disengage the adapter from the charging port.
- While holding the adapter, gently pull it out of the charging port.
- Once the adapter is fully detached, set it aside in a secure location.
It’s important to handle the adapter with care to prevent any damage or accidental dropping. Be mindful of any surrounding objects or surfaces that may come in contact with the adapter.
With the adapter removed, you have successfully completed the process of removing the adapter from your Tesla charging port.
It is worth noting that if you plan to switch to a different adapter, use caution when inserting the new adapter to ensure a proper fit. Always consult your Tesla owner’s manual or seek professional guidance if you have any uncertainties or questions.
Congratulations! You have successfully learned how to remove the adapter from your Tesla. This knowledge will come in handy whenever you need to disconnect the charging cable or switch between adapters.
Remember, safety always comes first. Always follow the manufacturer’s guidelines and take the necessary precautions when working with your Tesla vehicle.
Thank you for reading this guide, and we hope it has been helpful in assisting you with removing the adapter from your Tesla.
Conclusion
Removing the adapter from your Tesla’s charging port is a simple process that can be accomplished by following a few straightforward steps. By parking the Tesla, turning off the vehicle, opening the charging port, removing the charging cable, and detaching the adapter, you can safely and easily disconnect the adapter from your Tesla.
It is crucial to prioritize safety and caution when working with electric vehicles. Always ensure that the vehicle is parked on a flat surface, the parking brake is engaged, and the Tesla is turned off before attempting to remove the adapter. Handle the charging cable and adapter with care to avoid any damage and injury.
By following this step-by-step guide, you can confidently and successfully remove the adapter from your Tesla, whether you need to switch to a different adapter or simply disconnect the charging cable. However, always consult your Tesla owner’s manual or seek professional assistance if you have any doubts or concerns.
We hope this guide has provided you with the information you need to safely remove the adapter from your Tesla. With this knowledge, you can easily manage your Tesla’s charging system and adapt to different charging scenarios with ease.
Thank you for reading, and we wish you smooth journeys and efficient charging with your Tesla!
Frequently Asked Questions about How To Remove Adapter From Tesla
Was this page helpful?
At Storables.com, we guarantee accurate and reliable information. Our content, validated by Expert Board Contributors, is crafted following stringent Editorial Policies. We're committed to providing you with well-researched, expert-backed insights for all your informational needs.


0 thoughts on “How To Remove Adapter From Tesla”