Home>Technology>Smart Home Devices>How To Remove Printer From Computer
Smart Home Devices
How To Remove Printer From Computer
Published: January 20, 2024
Learn how to remove a printer from your computer to optimize your smart home devices. Follow these simple steps to declutter your device list and improve your home automation setup.
(Many of the links in this article redirect to a specific reviewed product. Your purchase of these products through affiliate links helps to generate commission for Storables.com, at no extra cost. Learn more)
Introduction
Welcome to our comprehensive guide on how to remove a printer from your computer. Whether you're upgrading to a new printer, troubleshooting issues, or simply decluttering your list of devices, knowing how to properly remove a printer is a valuable skill. In this guide, we'll walk you through the steps to uninstall printer software, remove the printer from Devices and Printers, and delete the printer driver. By following these steps, you can ensure a smooth and efficient removal process without leaving behind any remnants of the printer on your computer.
Let's dive into the details of each step, ensuring that you have a clear understanding of the entire process. Whether you're using a Windows or Mac computer, this guide will provide you with the necessary insights to remove a printer seamlessly. So, let's get started and declutter your list of printers with ease!
Key Takeaways:
- Say goodbye to old printers by following these simple steps: uninstall printer software, remove from Devices and Printers, and delete the printer driver for a tidy computer experience.
- Master the art of removing printers for a seamless computing experience. Uninstall software, remove from Devices and Printers, and delete the printer driver for a clutter-free system.
Uninstalling the Printer Software
Before removing the physical printer from your computer, it's essential to uninstall the printer software. This software includes the drivers and any additional programs that were installed to facilitate printer functionality. Here's a step-by-step guide to uninstalling the printer software:
- Accessing Control Panel: On a Windows computer, navigate to the Control Panel. You can do this by searching for “Control Panel” in the Windows search bar. Once in the Control Panel, locate the “Programs” or “Programs and Features” option.
- Finding the Printer Software: In the list of installed programs, locate the software associated with your printer. This may be listed under the printer's brand or model name. Select the software to initiate the uninstallation process.
- Initiating Uninstallation: Click on the uninstall option and follow the on-screen prompts to proceed with the removal of the printer software. You may be asked to confirm the action, and the uninstaller may prompt you to restart your computer once the process is complete.
- Completing the Uninstallation: Once the uninstallation process is finished, restart your computer if prompted. This step ensures that any lingering components of the printer software are completely removed from your system.
By following these steps, you can effectively uninstall the printer software from your computer, paving the way for the next phase of removing the printer from Devices and Printers.
Removing the Printer from Devices and Printers
After uninstalling the printer software, the next step is to remove the printer from the Devices and Printers list on your computer. This process ensures that the printer is no longer recognized as an active device. Here's a detailed guide on how to accomplish this:
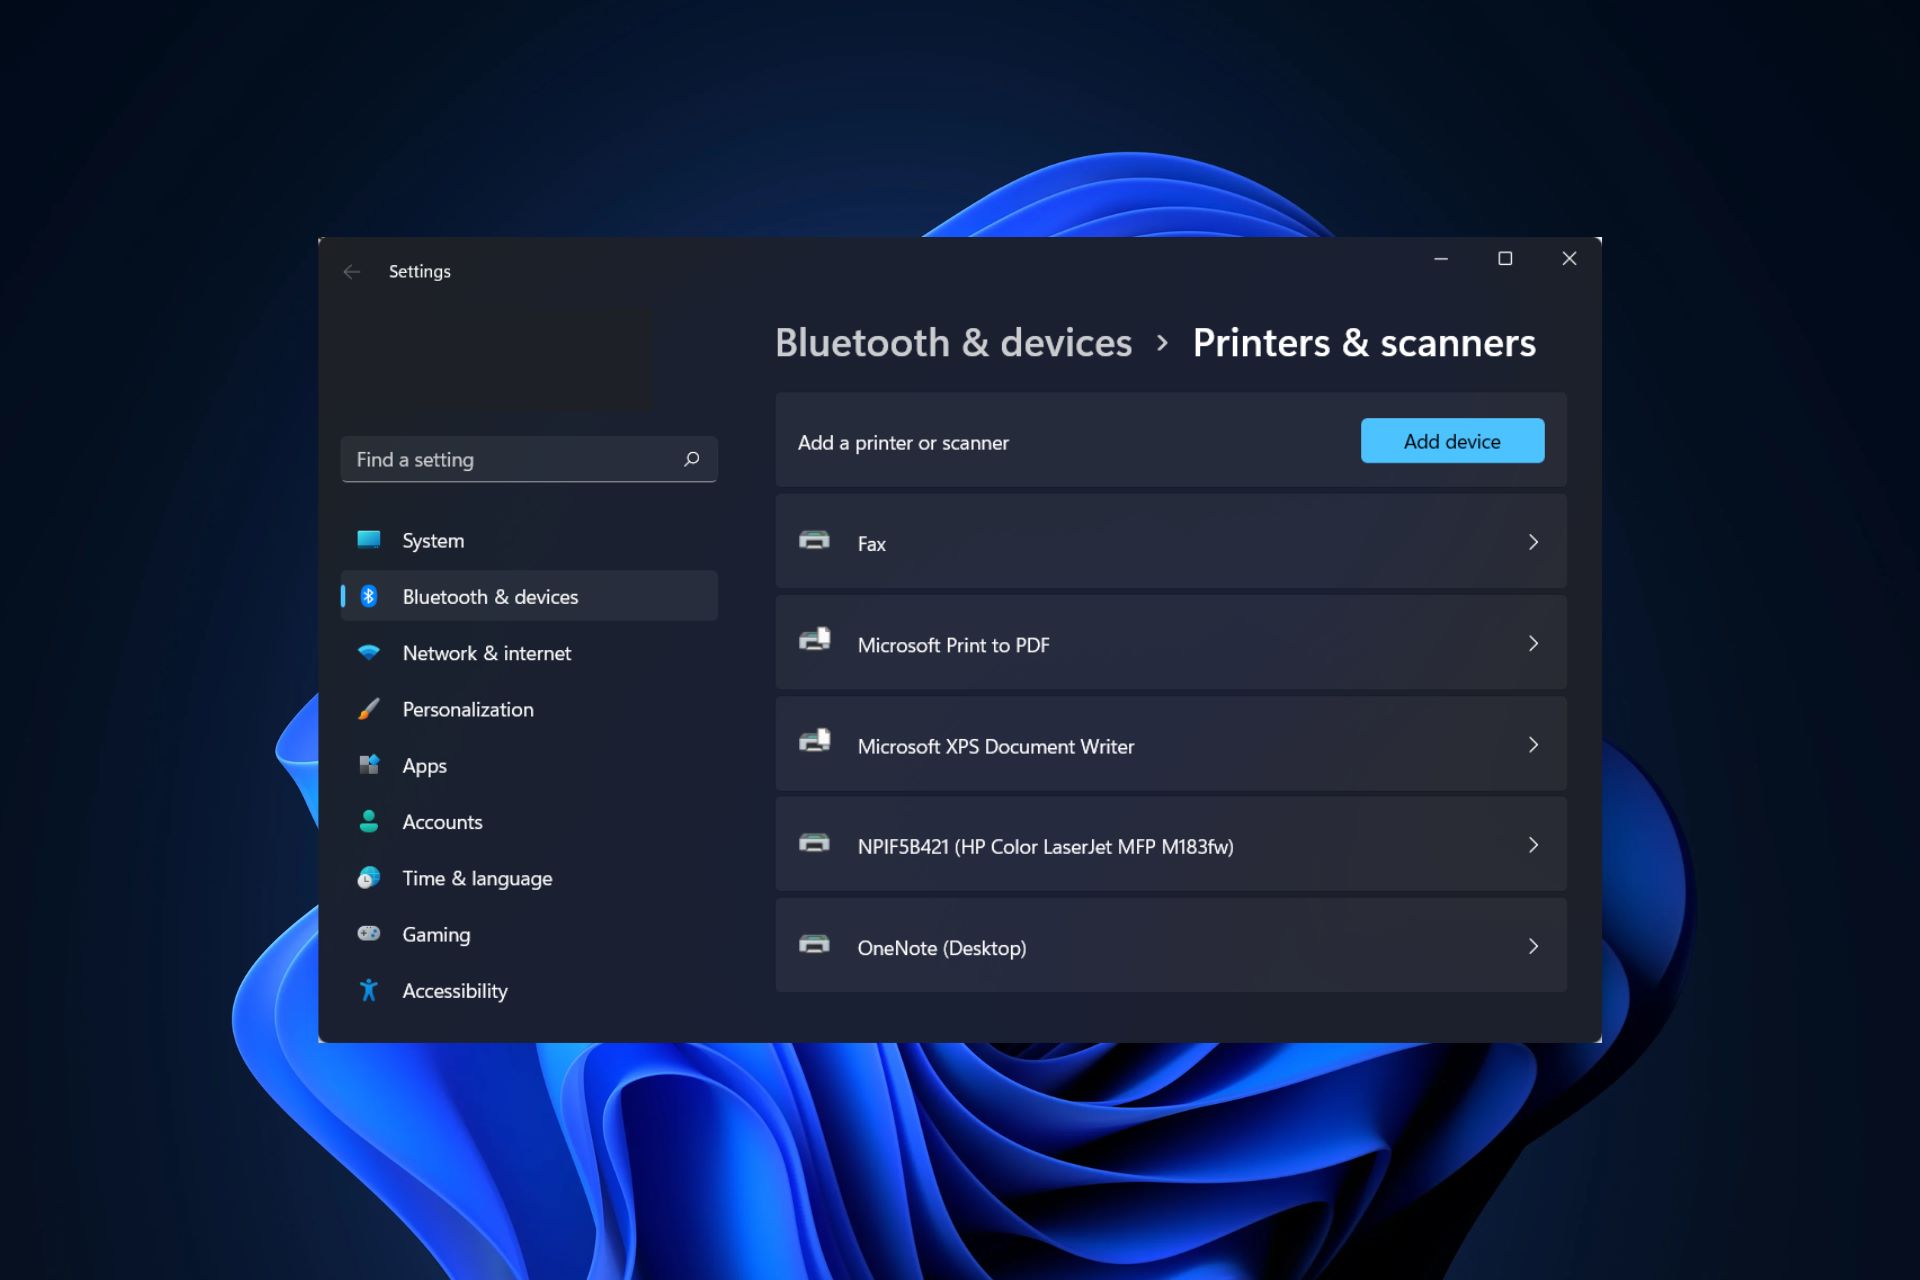
- Accessing Devices and Printers: On a Windows computer, navigate to the Control Panel and select “Devices and Printers.” This will display a list of all connected devices, including printers.
- Locating the Printer: In the Devices and Printers window, identify the printer you want to remove. It should be listed with its respective manufacturer and model name.
- Removing the Printer: Right-click on the printer icon and select “Remove device” from the context menu. Confirm the action if prompted. This will initiate the removal process, and the printer will be deleted from the Devices and Printers list.
- Verifying the Removal: After removing the printer, take a moment to ensure that it is no longer listed in Devices and Printers. This step confirms that the printer has been successfully removed from your computer.
By following these steps, you can effectively remove the printer from the Devices and Printers list, decluttering your system and ensuring that the printer is no longer recognized as an active device.
To remove a printer from your computer, go to the Control Panel, select Devices and Printers, right-click on the printer you want to remove, and choose “Remove device” from the menu. This will uninstall the printer from your computer.
Deleting the Printer Driver
When removing a printer from your computer, it’s crucial to delete the associated printer driver to ensure a thorough cleanup of all printer-related components. Here’s a step-by-step guide on how to delete the printer driver:
- Accessing Device Manager: On a Windows computer, right-click on the Start button and select “Device Manager” from the context menu. This will open the Device Manager window, which provides an overview of all installed hardware devices and their respective drivers.
- Locating the Printer Driver: In the Device Manager window, locate the “Print queues” category. Expand this category to reveal the installed printer drivers.
- Removing the Printer Driver: Right-click on the printer driver you want to delete and select “Uninstall device” from the context menu. Follow any on-screen prompts to confirm the removal of the printer driver. This action will initiate the uninstallation process for the selected driver.
- Verifying the Removal: After uninstalling the printer driver, it’s essential to verify that the driver has been successfully removed. Check the “Print queues” category in Device Manager to ensure that the printer driver is no longer listed.
By following these steps, you can effectively delete the printer driver from your computer, completing the comprehensive removal process for the printer and its associated components.
Conclusion
Congratulations! You’ve successfully navigated the process of removing a printer from your computer. By following the steps outlined in this guide, you’ve ensured a thorough cleanup of the printer and its associated software and drivers. Whether you were troubleshooting printer issues, upgrading to a new printer, or simply decluttering your list of devices, knowing how to remove a printer is a valuable skill that can streamline your computing experience.
By uninstalling the printer software, removing the printer from Devices and Printers, and deleting the printer driver, you’ve taken proactive steps to maintain a tidy and efficient computing environment. This not only declutters your system but also helps prevent any conflicts or confusion related to outdated printer configurations.
Remember, the process of removing a printer may vary slightly depending on your operating system and the specific printer model. However, the fundamental principles outlined in this guide can be applied across various Windows and Mac computers, providing a universal approach to printer removal.
As you continue to manage your devices and optimize your computing environment, the knowledge gained from this guide will serve you well. Whether you’re a seasoned computer user or just beginning to explore the intricacies of device management, mastering the art of removing printers is a valuable skill that contributes to a seamless and organized computing experience.
Thank you for joining us on this journey to declutter and optimize your computer. Stay tuned for more insightful guides and tips to enhance your technological prowess!
Frequently Asked Questions about How To Remove Printer From Computer
Was this page helpful?
At Storables.com, we guarantee accurate and reliable information. Our content, validated by Expert Board Contributors, is crafted following stringent Editorial Policies. We're committed to providing you with well-researched, expert-backed insights for all your informational needs.


0 thoughts on “How To Remove Printer From Computer”