Articles
How To Use Tesla Charger Adapter
Modified: December 7, 2023
Learn how to effectively use the Tesla charger adapter in this informative article. Gain valuable insights and tips to optimize your charging experience.
(Many of the links in this article redirect to a specific reviewed product. Your purchase of these products through affiliate links helps to generate commission for Storables.com, at no extra cost. Learn more)
Introduction
Welcome to the world of electric vehicles! If you are the proud owner of a Tesla or are considering purchasing one, you may have come across something called a Tesla Charger Adapter. But what exactly is it and how can it help you charge your Tesla vehicle? In this article, we will provide a comprehensive guide on how to use the Tesla Charger Adapter to conveniently charge your electric vehicle.
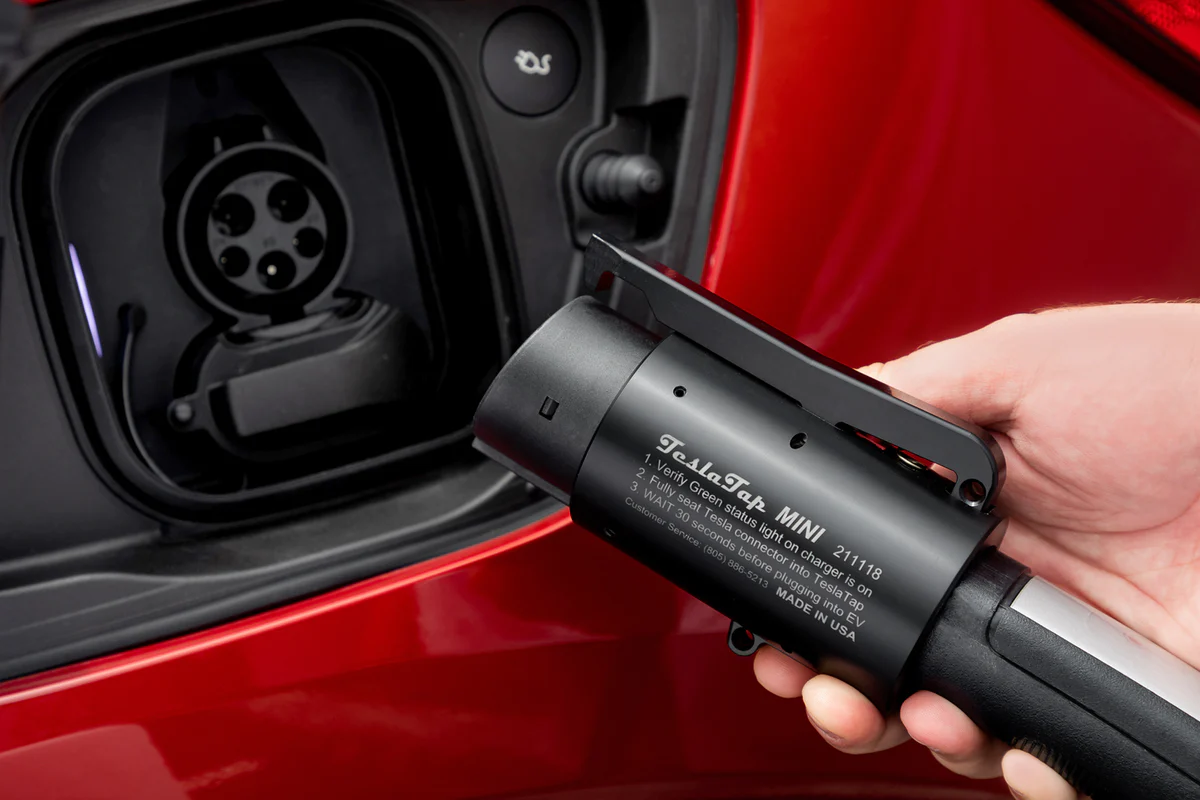
The Tesla Charger Adapter is a crucial component that allows you to connect your Tesla vehicle to different types of charging outlets. As Tesla vehicles come with a proprietary charging connector, the Tesla Charger Adapter bridges the gap between your vehicle and different charging networks, ensuring compatibility and ease of use.
Using the Tesla Charger Adapter, you can charge your Tesla vehicle at various locations, including public charging stations, RV parks, and even regular household outlets. This versatility provides you with the freedom to charge your vehicle wherever you are, giving you peace of mind and eliminating any range anxiety.
In this guide, we will take you through the step-by-step process of using the Tesla Charger Adapter, from gathering the necessary items to safely disconnecting it after charging. By following these instructions, you will be able to charge your Tesla vehicle efficiently and with confidence.
So, let’s dive in and learn how to make the most of your Tesla Charger Adapter!
Key Takeaways:
- Embrace the freedom of electric vehicle ownership with the Tesla Charger Adapter, allowing convenient charging at various locations and contributing to a sustainable future.
- Ensure safety and efficiency by following the step-by-step process of using the Tesla Charger Adapter, from inspection to proper connection and safe disconnection after charging.
Read more: What Is A Ccs Adapter Tesla
Understanding the Tesla Charger Adapter
Before we delve into the details of using the Tesla Charger Adapter, let’s first gain a better understanding of how this device works.
The Tesla Charger Adapter serves as an intermediary between your Tesla vehicle’s charging port and the various charging outlets you might encounter. It allows you to convert the different types of connectors found on charging stations into the Tesla-specific charging connector.
One of the key benefits of the Tesla Charger Adapter is its versatility. Tesla offers a range of charging adapters that cater to different types of outlets, ensuring compatibility with a wide array of charging networks. These adapters include the NEMA 5-15, NEMA 14-50, and the Tesla Wall Connector Adapter.
The NEMA 5-15 adapter is designed for standard 120-volt outlets commonly found in households, while the NEMA 14-50 adapter is suitable for 240-volt outlets, typically found in RV parks and certain public charging stations. The Tesla Wall Connector Adapter allows you to connect your vehicle to Tesla’s very own Wall Connector charging station, which delivers faster charging speeds.
It’s important to note that the Tesla Charger Adapter is designed specifically for Tesla vehicles. While other electric vehicles may have their own charging adapters, they are not compatible with Tesla vehicles. Therefore, it is crucial to ensure you have the correct Tesla Charger Adapter for your vehicle model.
Now that we have a better understanding of the Tesla Charger Adapter, let’s move on to the step-by-step process of using it to charge your Tesla vehicle.
Step 1: Gather the Necessary Items
Before you begin using the Tesla Charger Adapter, it’s important to gather all the necessary items to ensure a smooth and successful charging experience.
- Tesla Charger Adapter: Make sure you have the correct Tesla Charger Adapter for your vehicle model. The adapter should match the charging outlet you plan to use.
- Tesla Charging Cable: This is the cable that connects the Tesla Charger Adapter to your vehicle’s charging port. Ensure that the cable is in good condition and free from any damages or fraying.
- Charging Outlet: Identify the type of charging outlet you will be using. Whether it’s a standard household outlet, a 240-volt RV park outlet, or a Tesla Wall Connector charging station, make sure you have access to the appropriate outlet.
- Power Source: Ensure that there is a power source available at the charging location. For example, if you’re using a standard household outlet, make sure it’s connected to a functioning electrical circuit.
- Safety Equipment: It’s always a good practice to have safety equipment on hand, such as safety goggles and gloves, in case any unexpected incidents occur during the charging process.
By gathering these necessary items before starting the charging process, you can avoid any delays or setbacks and ensure a smooth and efficient charging experience for your Tesla vehicle.
Now that you have all the necessary items, let’s move on to the next step: inspecting the Tesla Charger Adapter to ensure it’s in good condition.
Step 2: Inspect the Tesla Charger Adapter
Before connecting the Tesla Charger Adapter to your Tesla vehicle, it’s important to thoroughly inspect the adapter to ensure it’s in good working condition. This step is crucial for your safety and the proper functioning of the charging process.
Start by visually inspecting the Tesla Charger Adapter for any visible damage, such as cracks, dents, or frayed cables. If you notice any damage, do not attempt to use the adapter, as it may pose a safety risk. Instead, contact Tesla or a certified service center to obtain a replacement adapter.
Next, check the connectors on the adapter to ensure they are clean and free from any debris or corrosion. Use a soft cloth or brush to gently clean the connectors if necessary.
Inspect the Tesla Charger Adapter’s cable for any signs of wear and tear. Pay close attention to the cable near the connectors, as this area is prone to damage due to frequent plug-in and removal. If you notice any exposed wires or fraying, it’s essential to replace the adapter before use.
Once you have inspected the Tesla Charger Adapter and are satisfied that it’s in good condition, you can proceed to the next step of identifying the appropriate outlet for charging your Tesla vehicle.
Remember, safety should always be a top priority when using any charging equipment, so never hesitate to seek professional assistance if you have concerns about the condition of your Tesla Charger Adapter.
Now that we have inspected the Tesla Charger Adapter, let’s move on to the next step: identifying the appropriate outlet for charging your Tesla vehicle.
Step 3: Identifying the Appropriate Outlet
Identifying the appropriate outlet is a crucial step in the charging process as it ensures compatibility between the Tesla Charger Adapter and the charging network. Different outlets provide varying charging speeds, so choosing the right outlet is essential to optimize the charging time for your Tesla vehicle.
Here are some commonly encountered outlets and their charging capabilities:
- Standard Household Outlet (NEMA 5-15): This outlet is typically found in homes and delivers a standard 120-volt charging speed. While it is the slowest option, it is widely available and can provide a convenient charging solution when other options are not accessible.
- RV Park Outlet (NEMA 14-50): RV parks commonly have 240-volt outlets, known as NEMA 14-50 outlets. These outlets provide faster charging compared to standard household outlets and are more commonly found at public charging stations.
- Tesla Wall Connector: The Tesla Wall Connector is a dedicated charging station designed specifically for Tesla vehicles. It offers the fastest charging speeds and is most commonly installed in garages or other designated charging areas. The Tesla Wall Connector is available as a separate accessory and may require professional installation.
Once you have identified the right outlet for your charging needs, ensure that you have access to it at your desired charging location. If you plan to charge at a public location, it’s a good idea to check in advance if the desired outlet is available and compatible with your Tesla Charger Adapter.
It’s important to note that different outlets require specific Tesla Charger Adapters. Ensure that you have the correct adapter that matches the type of outlet you plan to use. Using the wrong adapter can result in improper charging and may damage the charger or your vehicle.
Now that you have identified the appropriate outlet, let’s move on to the next step: connecting the Tesla Charger Adapter to the outlet.
When using a Tesla charger adapter, make sure to check the compatibility of the adapter with your specific Tesla model. Always follow the manufacturer’s instructions for proper use and safety precautions.
Read more: Where Is Tesla Charging Adapter
Step 4: Connecting the Tesla Charger Adapter
Now that you have identified the appropriate outlet for charging your Tesla vehicle, it’s time to connect the Tesla Charger Adapter and prepare it for charging.
Follow these steps to ensure a proper and secure connection:
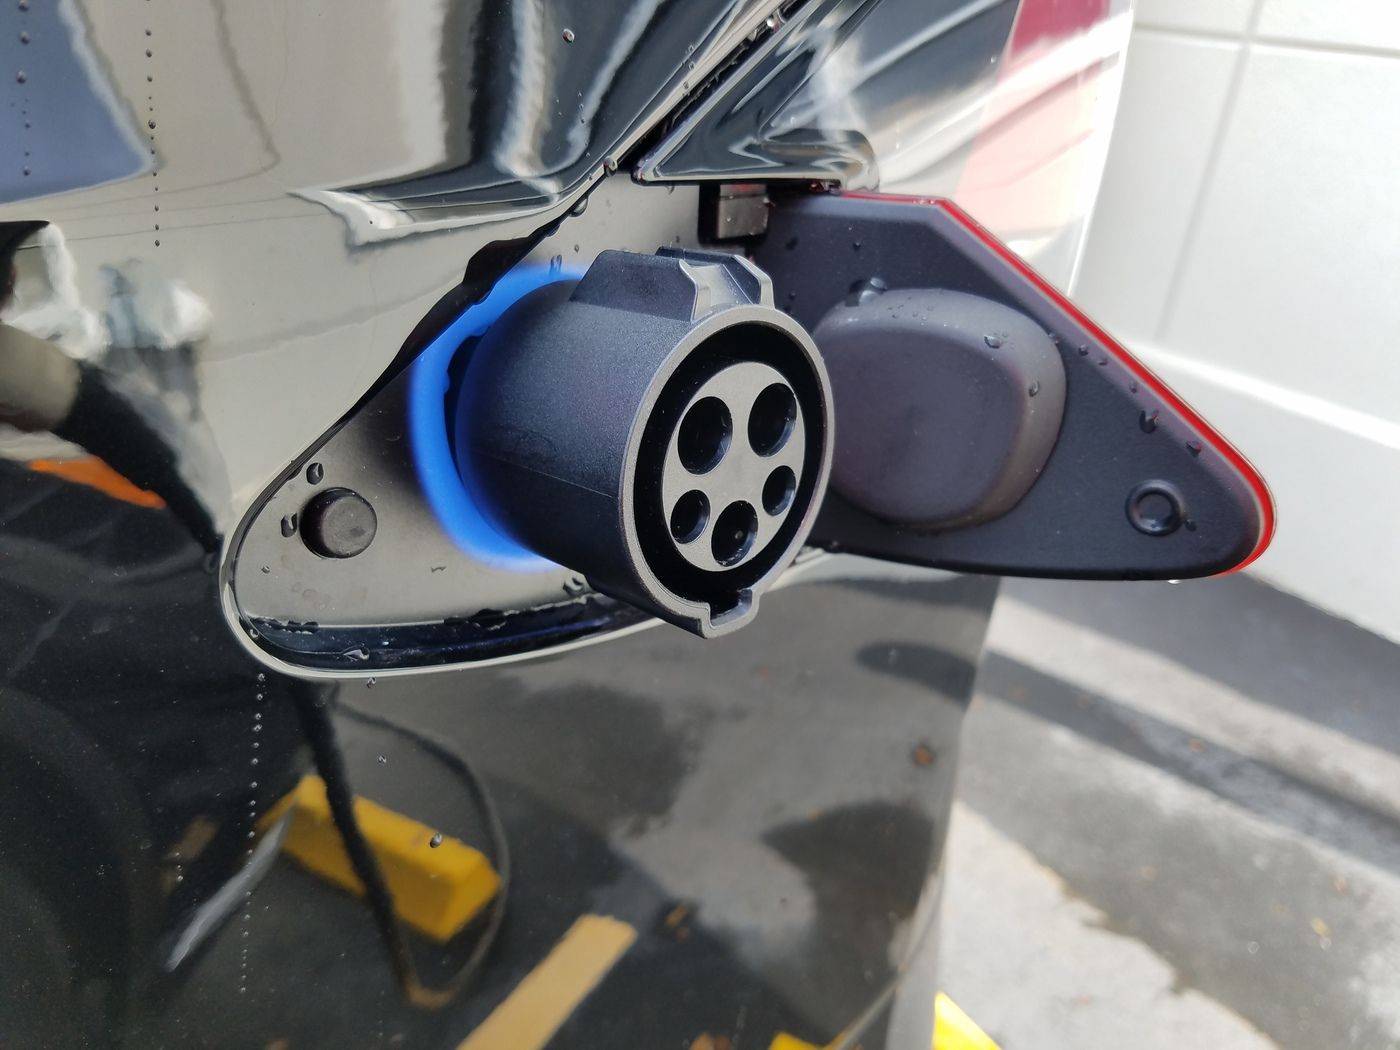
- Locate the charging port on your Tesla vehicle. The charging port is usually located on the rear or side of the vehicle, depending on the model.
- Take the Tesla Charger Adapter and align it with the charging port. Make sure the connectors on the adapter match the shape and size of the charging port.
- Insert the Tesla Charger Adapter firmly into the charging port. Ensure that the connectors are fully engaged and that the adapter is securely attached.
- If you are using a Tesla Wall Connector, follow the specific instructions provided with the charger for proper installation and connection.
- Once the Tesla Charger Adapter is securely connected, verify that the charging cable is not tangled or twisted. This helps to ensure efficient charging and avoids strain on the cable.
- Double-check that the outlet is providing power by confirming that it is properly connected and turned on.
It’s important to note that during the charging process, the Tesla Charger Adapter may emit a small amount of heat. This is normal and should not be cause for concern. However, if you notice excessive heat or any unusual behavior, immediately disconnect the adapter and seek professional assistance.
Now that you have successfully connected the Tesla Charger Adapter, let’s move on to the next step: charging your Tesla vehicle!
Step 5: Charging Your Tesla Vehicle
Now that the Tesla Charger Adapter is securely connected to your Tesla vehicle, it’s time to start charging your electric vehicle. Follow these steps to initiate the charging process:
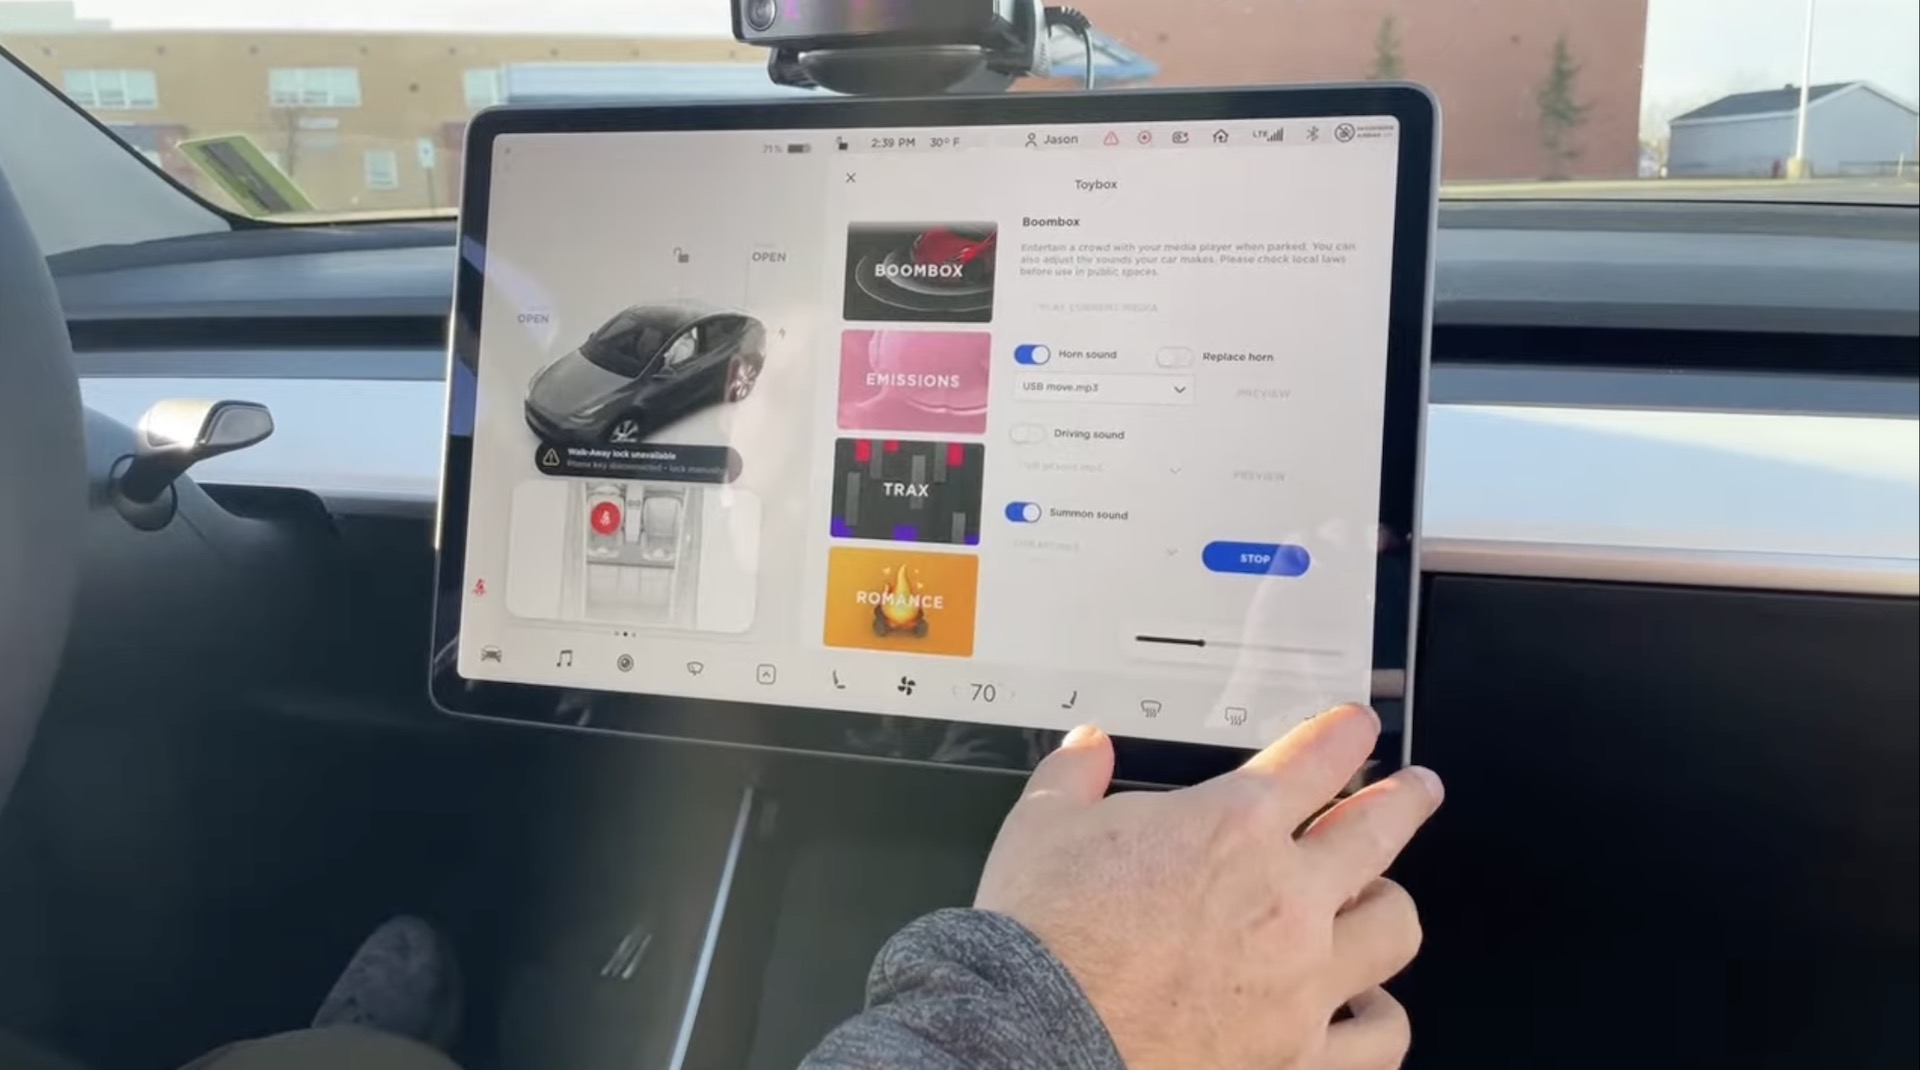
- Check the charging status on your Tesla vehicle’s display. This will give you an indication of the current battery level and whether charging is needed.
- On the charging screen, select your desired charging limit. This allows you to specify how much you want to charge your vehicle. You can choose to charge to a specific percentage or set a “Max Range” charge.
- Once you have selected the desired charging limit, ensure that the vehicle is in “PARK” mode and that all doors are closed.
- On the charging port door, press the release button to open it. This will expose the charging port and indicate that the vehicle is ready to charge.
- On the Tesla Charger Adapter, there may be an indicator light that shows the charging status. This light will typically turn solid or blink to indicate that charging has started.
- Monitor the charging progress on the vehicle’s display. It will show the estimated time remaining and the charging rate.
- During the charging process, you can choose to remain nearby or leave the vehicle to charge unattended. However, it’s important to ensure that the charging location is safe and secure.
- Once the charging is complete or you have reached your desired charging limit, disconnect the Tesla Charger Adapter by firmly pulling it out of the charging port.
- Close the charging port door to protect it from dust and debris.
It’s important to note that the charging time may vary depending on factors such as the charging outlet’s power level, the vehicle’s battery level, and the selected charging limit. Be sure to refer to your vehicle’s documentation for specific charging time estimates.
Now that you have successfully initiated the charging process, let’s move on to the final step: safely disconnecting the Tesla Charger Adapter.
Step 6: Safely Disconnecting the Tesla Charger Adapter
After charging your Tesla vehicle, it’s important to follow the proper procedure to safely disconnect the Tesla Charger Adapter. This ensures the safety of both you and the charging equipment. Follow these steps to safely disconnect the adapter:
- Ensure that the vehicle is in “PARK” mode and that the doors are closed. This ensures that the charging system is turned off and ready for disconnection.
- On the charging port door, press the release button to open it. This will expose the charging port.
- Grab the Tesla Charger Adapter firmly and gently pull it out of the charging port. Avoid exerting excessive force or yanking the adapter out, as this could potentially damage the charging port or the adapter itself.
- Inspect the Tesla Charger Adapter and cable for any damage or wear. If you notice any issues, it’s important to address them before your next charging session.
- Carefully coil the charging cable and store it in a safe and organized manner. This helps prevent any tripping hazards and protects the cable from damage.
- Close the charging port door to protect it from dust and debris.
It’s important to note that the Tesla Charger Adapter should not be left plugged into the charging port when not in use. To prolong the lifespan of the adapter and prevent any potential damage, it’s recommended to store it in a safe and dry location.
By following these steps, you can safely disconnect the Tesla Charger Adapter without risk of damage or injury.
With that, you have successfully completed the process of using the Tesla Charger Adapter to charge your Tesla vehicle. Congratulations on taking steps towards eco-friendly transportation!
Remember to always refer to your vehicle’s documentation for specific instructions and safety guidelines related to charging. Now you can enjoy the convenience and freedom of charging your Tesla vehicle at various locations using the Tesla Charger Adapter.
Safe travels!
Conclusion
Using the Tesla Charger Adapter is a simple and efficient way to charge your Tesla vehicle at various locations. Whether you’re charging at home using a standard household outlet or utilizing public charging stations, the Tesla Charger Adapter provides the necessary compatibility and convenience.
In this comprehensive guide, we have explored the step-by-step process of using the Tesla Charger Adapter, from gathering the necessary items to safely disconnecting the adapter after charging. By following these instructions, you can confidently charge your Tesla vehicle and enjoy the benefits of electric vehicle ownership.
Remember to always select the appropriate Tesla Charger Adapter for the type of outlet you plan to use and to inspect the adapter for any damage before connecting it to your vehicle. Safety should be a top priority throughout the charging process.
With your Tesla Charger Adapter, you have the freedom to charge your vehicle wherever you are. Whether you’re on a road trip, visiting family and friends, or simply running errands, the Tesla Charger Adapter enables you to stay charged and on the go.
Electric vehicles play a crucial role in reducing carbon emissions and creating a more sustainable future. By utilizing the Tesla Charger Adapter, you contribute to the growing network of EV charging infrastructure and help pave the way towards greener transportation.
So, embrace the world of electric vehicles and make the most of your Tesla Charger Adapter. With its versatility and ease of use, you can navigate the roads with confidence, knowing that a charging solution is always within reach.
Happy charging!
Frequently Asked Questions about How To Use Tesla Charger Adapter
Was this page helpful?
At Storables.com, we guarantee accurate and reliable information. Our content, validated by Expert Board Contributors, is crafted following stringent Editorial Policies. We're committed to providing you with well-researched, expert-backed insights for all your informational needs.


0 thoughts on “How To Use Tesla Charger Adapter”