
Articles
How To Remove Doorbell Chime Box
Modified: August 31, 2024
Learn how to remove a doorbell chime box with our informative articles. Find step-by-step instructions and expert tips for a successful removal.
(Many of the links in this article redirect to a specific reviewed product. Your purchase of these products through affiliate links helps to generate commission for Storables.com, at no extra cost. Learn more)
Introduction
Welcome to our guide on how to remove a doorbell chime box. Whether you’re upgrading your doorbell system, replacing a faulty chime box, or simply want to remove it temporarily for renovations, we’ve got you covered. The doorbell chime box is an essential component of any doorbell system, responsible for producing the familiar chime sound when someone presses the doorbell button. While the process may seem daunting at first, with the right tools and a little know-how, you can safely and easily remove the chime box without any hassle.
In this article, we will provide you with step-by-step instructions on how to remove a doorbell chime box. We will guide you through each stage of the process, from powering off the doorbell system to safely disconnecting the wires and removing the chime box from the wall. So, let’s get started and learn how to remove a doorbell chime box like a pro!
Key Takeaways:
- Safely and easily remove a doorbell chime box by following step-by-step instructions, prioritizing safety, and using the right tools and materials. Upgrade, replace, or remove the chime box for renovations with confidence.
- Whether you’re a seasoned DIY enthusiast or a first-time remover, this guide provides the knowledge and skills needed to successfully remove a doorbell chime box. Prioritize safety, locate the chime box, disconnect and reconnect wires, and test the system for functionality.
Read more: How To Replace A Doorbell Chime
Tools and Materials Needed
Before you begin the process of removing the doorbell chime box, there are a few essential tools and materials you will need. Gathering these items beforehand will ensure a smooth and efficient removal process. Here’s what you’ll need:
- Screwdriver – You will need a screwdriver to remove the screws holding the chime box in place. The type of screwdriver required may vary depending on the screws used in your specific chime box. Check the screw heads to determine if you need a Phillips head or a flathead screwdriver.
- Voltage tester – This tool is crucial for ensuring your safety during the removal process. A voltage tester will help you determine if the power is still active to the doorbell system, helping you avoid any electrical shocks.
- Wire strippers – If you plan on installing a new chime box later, you may need wire strippers to remove the insulation from the ends of the wires for proper connection.
- Electrical tape – Electrical tape is useful for securing and insulating the wires during the removal process. It helps prevent any accidental contact between the bare wires and avoids potential short circuits.
- Optional: New chime box – If you are replacing the existing chime box, make sure to have the new one ready for installation. Ensure that the new chime box is compatible with your doorbell system before purchasing.
With these tools and materials at hand, you’ll be well-prepared to complete the doorbell chime box removal process. Now that we’ve covered the necessary supplies, let’s move on to the step-by-step guide for removing the chime box.
Step 1: Turn off the Power
Before starting any electrical work, it is crucial to ensure your safety by turning off the power to the doorbell system. Follow these steps to turn off the power:
- Locate the circuit breaker or fuse box in your home. This is usually found in the basement, garage, or utility room.
- Identify the circuit or fuse that supplies power to the doorbell system. If you’re unsure, you can turn off the main power to the house to be extra cautious.
- Turn off the circuit breaker or remove the fuse that controls the doorbell system. This will ensure that no electrical current is running through the wires while you work on removing the chime box.
- Once the power is turned off, test it using a voltage tester to verify that there is no power running to the doorbell system. Place the voltage tester on the chime box and ensure that it does not detect any live electricity.
Remember, safety should always be your top priority when working with electricity. Taking the time to turn off the power and verify that it is off will help protect you from any potential accidents.
Now that you’ve turned off the power to the doorbell system, you can proceed to the next step of removing the chime box.
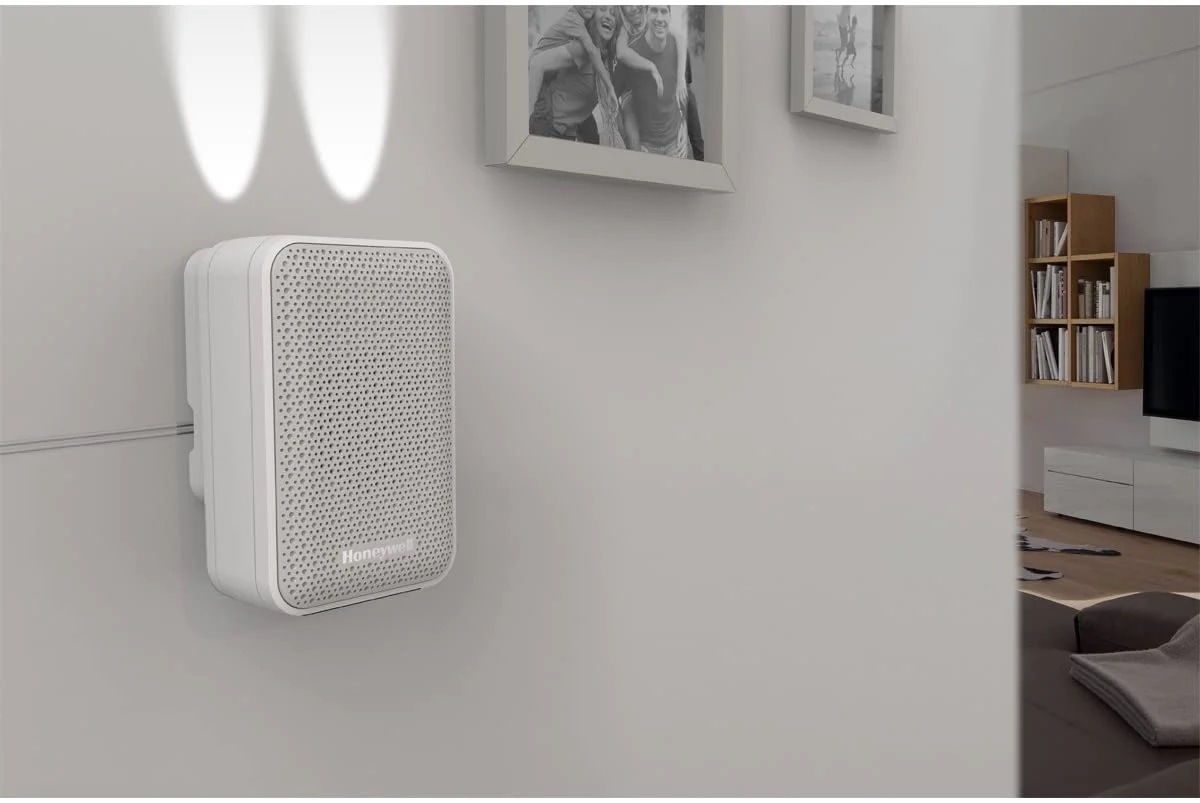
Step 2: Locate the Doorbell Chime Box
Once you have turned off the power to the doorbell system, the next step is to locate the doorbell chime box. The chime box is typically mounted on a wall, near the front entrance of your home. Follow these steps to find the chime box:
- Start by visually inspecting the walls in the vicinity of the front entrance. Look for any noticeable rectangular or box-shaped objects.
- Check common locations where chime boxes are often installed, such as near the front door, the hallway, or the foyer.
- If you still can’t locate the chime box, follow the sound of the doorbell chime when the button is pressed. This can help you pinpoint the general area where the chime box is installed.
- Inspect the area for any visible wiring that may lead to the chime box. Trace the wires from the doorbell button towards the chime box to further confirm its location.
Keep in mind that chime boxes can be mounted at varying heights and in different orientations, depending on the specific installation. Take your time to thoroughly search the area and make sure you have identified the correct chime box before proceeding to remove it.
Once you have successfully located the doorbell chime box, you are ready to move on to the next step of removing the cover.
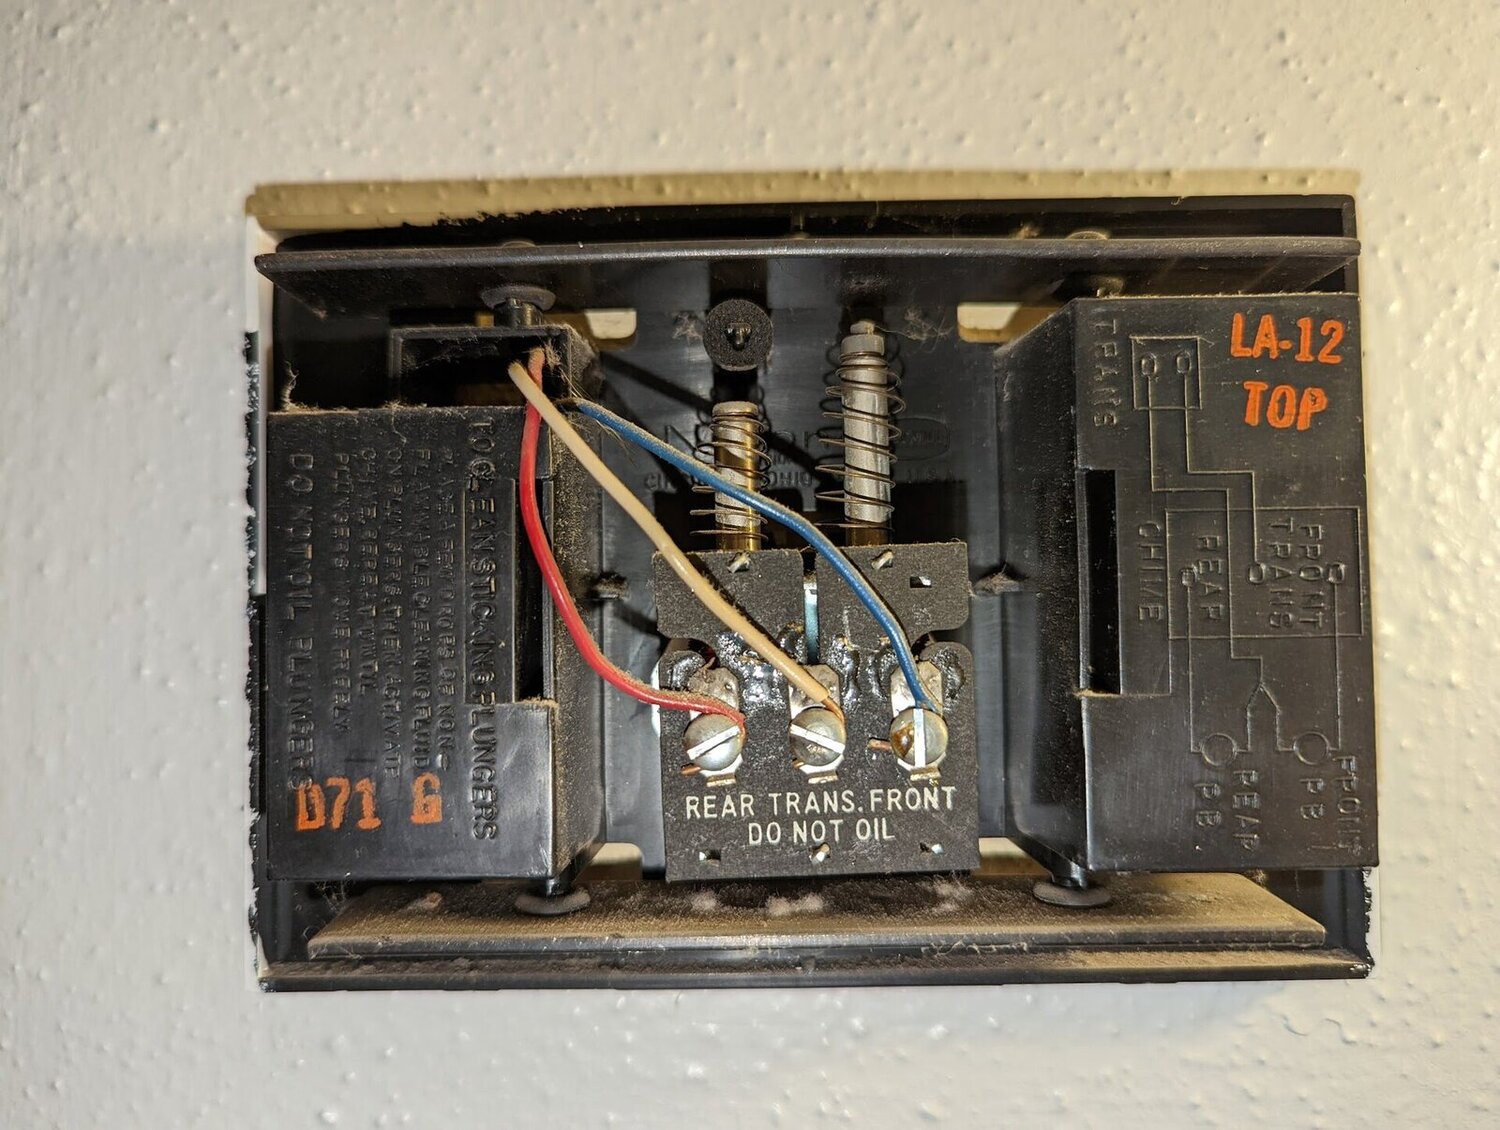
Step 3: Remove the Cover
With the doorbell chime box located, the next step is to remove the cover. The cover protects the internal components of the chime box and is typically held in place by screws or clips. Follow these steps to remove the cover:
- Using a screwdriver, carefully remove the screws that secure the cover in place. The number and placement of the screws may vary depending on the make and model of the chime box. Set the screws aside in a safe place.
- If your chime box does not have visible screws, it may have clips instead. Gently pry the cover off using a flathead screwdriver or your fingers. Be cautious not to apply excessive force to avoid damaging the cover or the chime box.
- As you remove the cover, be mindful of any wires that may be connected to the chime box. Take note of their position and how they are attached, as you will need this information when disconnecting the wires in the next step.
Once the cover is removed, you will have access to the internal components of the chime box. Take a moment to familiarize yourself with the wiring setup before proceeding to the next step.
Removing the cover is an important step in accessing the wires and disconnecting them properly. It is essential to exercise caution to avoid any damage to the chime box or the wiring.
Now that the cover is removed, we can move on to the next step of disconnecting the wires from the chime box.
Read more: What Is Chime Doorbell
Step 4: Disconnect the Wires
Now that you have removed the cover of the doorbell chime box, it’s time to disconnect the wires. The wires connect the chime box to the doorbell button and the power supply. Follow these steps to safely disconnect the wires:
- Take a moment to examine how the wires are connected to the chime box. They may be attached with screws, terminal blocks, or connectors.
- Using a screwdriver or appropriate tool, carefully loosen the screws or release the connectors that secure the wires in place. If there are terminal blocks, you may need to unscrew them using a small flathead screwdriver.
- Once the screws are loosened or the connectors are released, gently pull the wires out of the chime box. Take care not to tug on the wires too forcefully to avoid damaging them or the connectors.
- If the wires are tightly connected or difficult to remove, you can use wire strippers to trim the ends of the wires. This will provide fresh, clean ends for reconnection in case you plan to install a new chime box.
- As you disconnect each wire, it can be helpful to label or take note of their respective locations or colors. This will make it easier to reconnect them correctly later on.
By carefully following these steps, you can safely disconnect the wires from the chime box. Remember to handle the wires with care to prevent any damage, and keep track of their positioning or color-coding for reinstallation purposes if needed.
With the wires disconnected, you are one step closer to removing the chime box from the wall. Continue to the next step for the removal process.
Before removing the doorbell chime box, make sure to turn off the power to the doorbell at the circuit breaker to avoid any electrical accidents. Always use a voltage tester to double-check that the power is off before starting the removal process.
Step 5: Remove the Chime Box from the Wall
Now that the wires are disconnected, it’s time to remove the doorbell chime box from the wall. Follow these steps to safely remove the chime box:
- If your chime box is attached to the wall with screws, use a screwdriver to carefully remove them. Place the screws aside in a safe place.
- Once the screws are removed, gently pull the chime box away from the wall. Take care not to pull too forcefully, as there may still be wires attached to the chime box.
- If there are any adhesive strips or mounting brackets holding the chime box in place, carefully detach them by sliding or lifting them off the wall.
- Continue to pull the chime box away from the wall, guiding any remaining wires through the mounting hole or opening in the wall.
- Set the chime box aside in a safe location, ensuring that it is protected from any damage or dust.
Once the chime box is safely removed from the wall, you have completed the process of removing the chime box. Take a moment to inspect the wall for any damage or marks left behind. If necessary, you can patch any holes or touch up the paint to restore the wall’s appearance.
With the chime box successfully removed, you can now choose to either install a new chime box or leave the wiring disconnected temporarily. If you plan on installing a new chime box, make sure to follow the manufacturer’s instructions for proper installation.
Our guide concludes here with the successful removal of the doorbell chime box. Congratulations on completing this task! Remember to exercise caution and prioritize safety throughout the process. Now you can proceed to either install a new chime box or continue with your renovations or upgrades without the chime box in place.
Step 6: Install the New Doorbell Chime Box (Optional)
If you have chosen to install a new doorbell chime box, follow these steps to properly install it:
- Start by ensuring that the power to the doorbell system is still turned off.
- Refer to the manufacturer’s instructions for your specific chime box to determine the proper wiring connections and installation process.
- If necessary, use wire strippers to remove a small portion of insulation from the ends of the wires that were disconnected from the old chime box.
- Follow the wiring diagram provided by the manufacturer to connect the wires to the appropriate terminals or connectors on the new chime box. Ensure that the connections are secure.
- Once the wiring is complete, carefully position the new chime box against the wall, aligning it with the mounting holes or brackets.
- Secure the chime box to the wall by inserting and tightening the screws or attaching it to the mounting brackets as directed by the manufacturer.
- Double-check the wiring connections to ensure they are properly seated and secure.
- If applicable, attach the cover to the new chime box using screws or clips.
After the new chime box is securely installed, you can proceed to test the doorbell system by turning on the power and pressing the doorbell button. Verify that the chime sounds correctly and that all connections are functioning as expected.
Remember to always follow the manufacturer’s instructions when installing a new chime box to ensure proper functionality and safety. If you encounter any difficulties during the installation process, consult a professional electrician for assistance.
Note: If you are not installing a new chime box and are keeping the wiring disconnected temporarily, you can skip this step and proceed to the next one.
With the new chime box installed or the wiring disconnected, you are ready to move on to the next step of reconnecting the wires (if applicable) and replacing the cover.
Step 7: Reconnect the Wires
If you have installed a new chime box or temporarily disconnected the wiring, it’s time to reconnect the wires. Follow these steps to properly reconnect the wires:
- Ensure that the power to the doorbell system is still turned off before proceeding.
- If you had labeled or noted the positions or colors of the wires during the removal process, use that information as a guide for reconnection.
- Take each wire and align it with the appropriate terminal or connector on the chime box.
- If needed, strip a small portion of insulation from the ends of the wires to ensure a clean and secure connection.
- Secure the wires to the terminals or connectors by tightening the screws or firmly attaching them, following the manufacturer’s instructions.
- Double-check each wire connection to ensure it is properly seated and secure.
Once all the wires are reconnected, you can proceed to the final steps of replacing the cover and turning on the power.
Note: If you have chosen to leave the wiring disconnected temporarily, there is no need to reconnect the wires at this point. You can skip this step and move on to the next one.
With the wires reconnected, you are one step closer to completing the removal process. Proceed to the next step for replacing the cover of the chime box.
Read more: How To Connect Chime To Ring Doorbell
Step 8: Replace the Cover
Now that the wiring is reconnected (if applicable), it’s time to replace the cover of the chime box to protect the internal components. Follow these steps to properly replace the cover:
- Hold the cover in your hands and position it over the chime box, aligning it with the screw holes or clips.
- If the cover is held in place by screws, insert and tighten the screws using a screwdriver. Ensure that the cover is securely fastened, but avoid overtightening to prevent any damage.
- If the cover is held in place by clips, gently press or slide the cover onto the chime box until it snaps into place.
- Give the chime box a gentle shake or tap to ensure that the cover is secure and properly positioned.
With the cover replaced, the chime box is now protected, and its internal components are shielded. The cover also enhances the appearance of the chime box, giving it a finished and polished look.
Continue to the final step to complete the removal process by turning on the power to the doorbell system.
Step 9: Turn on the Power
After completing all the previous steps, it’s time to turn the power back on to the doorbell system. Follow these steps to safely restore power:
- Locate the circuit breaker or fuse box in your home.
- Identify the circuit or fuse that controls the doorbell system.
- Turn on the circuit breaker or reinsert the fuse that supplies power to the doorbell system.
- Allow a few moments for the doorbell system to initialize and power up.
Once the power is restored, test the doorbell system by pressing the doorbell button. Listen for the familiar chime sound to ensure that the system is functioning correctly. If the doorbell does not chime or you experience any issues, double-check all connections and consult a professional if necessary.
With the power back on and the doorbell system operational, the removal process is complete. You have successfully removed the doorbell chime box or replaced it with a new one. Congratulations!
Remember, if you are leaving the wiring disconnected temporarily, take the necessary precautions to ensure the loose wires are safely secured and protected.
Thank you for following our step-by-step guide on how to remove a doorbell chime box. We hope this information has been helpful, and you have successfully completed the removal process.
Happy DIY-ing!
Conclusion
Removing a doorbell chime box may seem like a daunting task, but by following the steps outlined in this guide, you can safely and easily accomplish it. Whether you’re upgrading your doorbell system, experiencing issues with the chime box, or simply want to remove it temporarily for renovations, this guide has provided you with the knowledge and guidance needed for a successful removal process.
Throughout the process, we emphasized the importance of safety and attention to detail. Always remember to turn off the power to the doorbell system before starting any work, and use tools and materials in the recommended manner. Take your time to locate the chime box, properly disconnect the wires, and remove the chime box from the wall. If you choose to install a new chime box, follow the manufacturer’s instructions carefully to ensure proper installation.
By following this step-by-step guide, you have gained the skills and confidence to remove a doorbell chime box like a pro. You have also learned about the tools and materials needed for the task, how to locate the chime box, remove the cover, disconnect and reconnect the wires, and replace the cover. Lastly, we reminded you to turn on the power to the doorbell system and test its functionality.
Whether you’re a DIY enthusiast or someone tackling this project for the first time, we hope this guide has been informative and helpful. Remember, if you ever feel unsure or uncomfortable, it’s always best to consult a professional electrician to assist you with the removal or installation process.
Thank you for following along and happy doorbell chime box removal!
Just removed your doorbell chime box and looking for more handy tips? Whether you're keen on enhancing your skills with some DIY Home Improvement projects, need a hand installing a new doorbell transformer, or are curious about the latest home automation trends for 2024, we've got detailed guides ready for you. Each article is packed with easy-to-follow instructions and helpful tips to make your home tech-savvy and stylish. Don’t miss out; dive into these reads for more exciting home improvement adventures!
Frequently Asked Questions about How To Remove Doorbell Chime Box
Was this page helpful?
At Storables.com, we guarantee accurate and reliable information. Our content, validated by Expert Board Contributors, is crafted following stringent Editorial Policies. We're committed to providing you with well-researched, expert-backed insights for all your informational needs.


0 thoughts on “How To Remove Doorbell Chime Box”