Home>Articles>How To Round Off A Large Dowel With Hand Tools
Articles
How To Round Off A Large Dowel With Hand Tools
Modified: December 7, 2023
Learn how to round off a large dowel with hand tools in this informative article. Enhance your woodworking skills and create professional-looking projects.
(Many of the links in this article redirect to a specific reviewed product. Your purchase of these products through affiliate links helps to generate commission for Storables.com, at no extra cost. Learn more)
Introduction
Working with dowels is a common practice in woodworking projects. Dowels are cylindrical rods that are used for joining pieces of wood together. While many dowels come pre-rounded and ready to use, there may be instances when you need to round off a large dowel yourself. This could be due to the specific size or shape requirements of your project, or simply because you enjoy the hands-on aspect of woodworking.
Rounding off a large dowel with hand tools requires patience and precision. It is important to use the right tools and follow the correct techniques to achieve a smooth and rounded finish. In this article, we will guide you through the step-by-step process of rounding off a large dowel using only hand tools. Whether you are a seasoned woodworker or a beginner, we hope that this article will provide you with the knowledge and confidence to tackle this task.
Before we dive into the steps, let’s take a look at the tools and materials you will need.
Key Takeaways:
- Precision and Patience: Rounding off a large dowel with hand tools requires meticulous attention to detail and a steady hand. From marking and cutting to shaping and sanding, each step demands precision for a smooth and professional finish.
- Craftsmanship and Creativity: Embrace the artistry of woodworking and infuse your unique creativity into rounding off large dowels. With the right tools and techniques, you can create beautifully shaped and polished dowels that elevate your woodworking projects.
Tools and Materials Needed
To round off a large dowel with hand tools, you will need the following tools and materials:
- Large dowel
- Measuring tape
- Marking pencil or pen
- Saw
- Vise or clamp
- Rasp or file
- Sandpaper (various grits)
- Sanding block or sanding pad
- Optional: Finish (such as varnish or oil)
The size of the dowel you need will depend on your project requirements. Ensure that you have a dowel that is larger than the desired final size, as you will be removing material during the shaping process.
It is important to have a measuring tape or ruler on hand to mark the dowel for cutting and shaping. A marking pencil or pen will allow you to make accurate and visible marks.
A saw is necessary for cutting the dowel to the desired length. Choose a saw that is appropriate for the size of your dowel and ensures clean and straight cuts.
In order to securely hold the dowel during shaping, you will need a vise or clamp. This will prevent the dowel from moving or rotating while you work.
For shaping the dowel, a rasp or file is ideal for removing larger amounts of material. It is recommended to use a rasp with a medium grit for efficient shaping.
Sandpaper of various grits is necessary for refining the shape and achieving a smooth finish on the dowel. You will need a range of grits, starting from coarse to fine, for gradual sanding.
A sanding block or sanding pad can be used to hold the sandpaper securely and provide even pressure during sanding.
Finally, if desired, you can apply a finish to the rounded dowel to enhance its appearance and protect it from wear and tear.
Now that you are equipped with the necessary tools and materials, let’s move on to the step-by-step process of rounding off a large dowel with hand tools.
Step 1: Marking the Dowel
The first step in rounding off a large dowel is to mark it for cutting and shaping.
Start by measuring and marking the desired length of the dowel on its surface using a measuring tape and a marking pencil or pen. Ensure that the mark is clear and visible.
If you need multiple pieces of dowel of the same length, it is helpful to mark them all at once to maintain consistency.
Once you have marked the length, you can also mark any other reference points or shapes that you want to achieve on the dowel’s surface. These marks will guide you during the shaping process.
Take your time to measure and mark accurately, as these marks will dictate the final shape and size of the rounded dowel.
After marking the dowel, move on to the next step, which is cutting it to length.
Step 2: Cutting the Dowel to Length
Once you have marked the dowel for the desired length, it’s time to cut it to size.
Secure the dowel in a vise or clamp to prevent it from moving during the cutting process. Make sure the dowel is held tightly and securely.
Use a saw that is suitable for cutting wood, such as a coping saw or a pull saw. Place the saw blade on the mark you made on the dowel.
Start cutting the dowel by applying gentle pressure and using smooth, even strokes. Take your time to ensure accurate and clean cuts. It’s better to go slowly and make precise cuts than to rush and end up with jagged edges.
Continue cutting until you have separated the dowel into the desired length. Be cautious when approaching the end of the cut to avoid any damage to the remaining dowel.
Once you have completed the cut, remove the dowel from the vise or clamp and inspect the cut end. If there are any rough edges, use sandpaper to smooth them out. This will make the shaping process easier and prevent any splinters.
With the dowel now cut to the desired length, you are ready to move on to the next step, which is clamping the dowel securely.
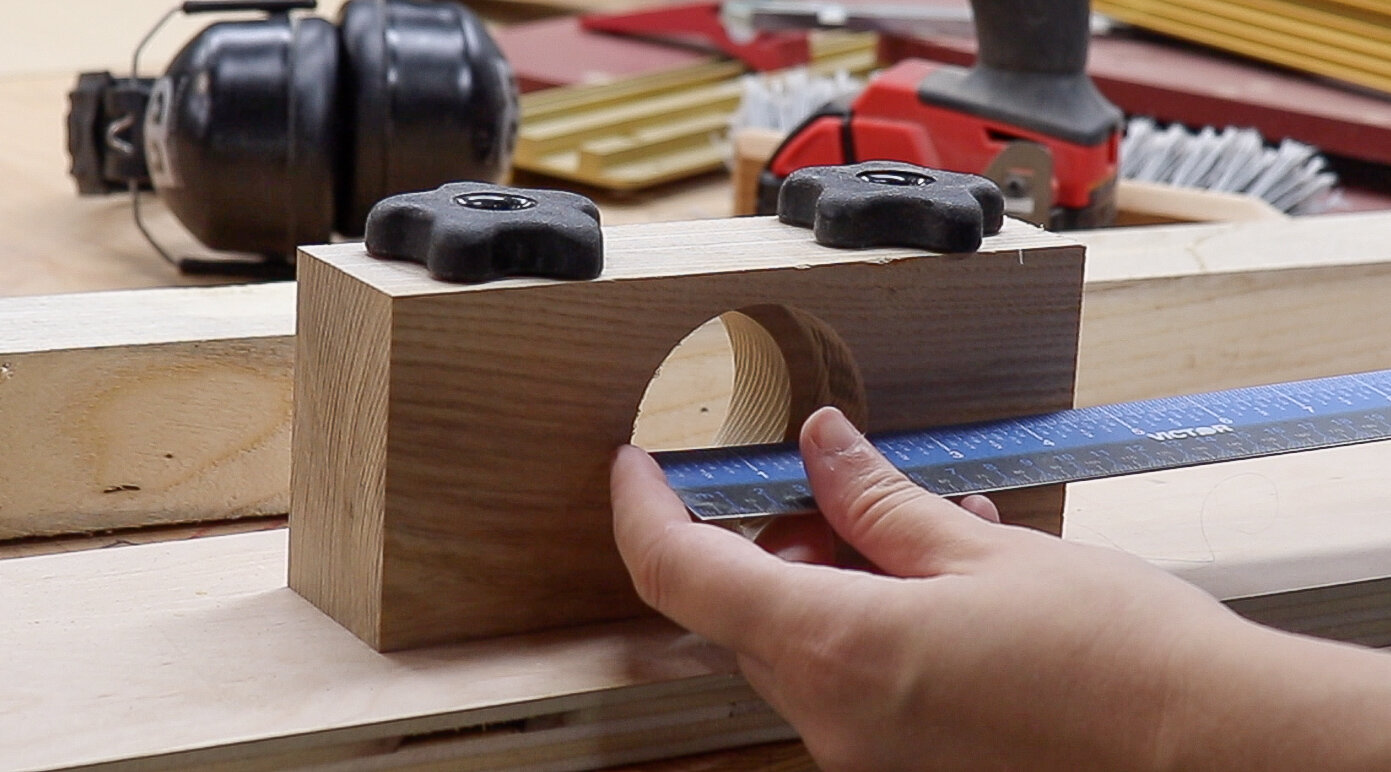
Step 3: Clamping the Dowel Securely
After cutting the dowel to the desired length, it’s important to clamp it securely before moving on to the shaping process.
Using a vise or clamp, secure the dowel tightly, ensuring that it is held in place and does not move while you work on it. This will provide stability and prevent any unwanted rotation or shifting.
Position the clamp or vise in a way that allows you easy access to the entire length of the dowel. Check that the dowel is held firmly and does not wobble or slide.
If the dowel is too large for your clamp or vise, you can use alternative methods to secure it, such as using bench dogs or wooden supports to hold it in place.
Take a moment to make sure the dowel is securely clamped before proceeding to the next step. This will ensure that you have full control over the shaping process and minimize the risk of accidents or mistakes.
With the dowel securely clamped, you’re ready to move on to roughing out the shape in the next step.
Use a spokeshave to round off a large dowel by working from the ends towards the middle. This will help you achieve a smooth and even finish.
Read more: Creating A Year-Round Container Garden
Step 4: Roughing out the Shape
With the dowel securely clamped, it’s time to start roughing out the shape. This step involves removing excess material to create a general shape of the rounded dowel.
The tool of choice for this step is a rasp or a file. A rasp with a medium grit is ideal for efficiently removing larger amounts of material.
Hold the rasp firmly in your hand and begin shaping the dowel by moving the rasp across its surface. Apply even pressure and work in long, smooth strokes to remove material. Start from one end of the dowel and gradually work your way towards the other end.
Be mindful of the shape and contours that you want to achieve, referencing the marks you made earlier. Take your time and make frequent checks to ensure that you are progressing towards the desired shape.
As you rough out the shape, periodically check the dowel for any uneven areas or high spots. Use the rasp to carefully remove these inconsistencies and create a uniform shape.
Remember to take breaks periodically and step back to assess the progress. This will help you identify any areas that need further attention and ensure that you are staying on track.
Once you have roughed out the shape of the dowel, move on to the next step, which is refining the shape through shaping.
Step 5: Shaping the Dowel
After roughing out the shape in the previous step, it’s time to move on to shaping the dowel and refining its form.
To shape the dowel, continue using the rasp or file, but this time with lighter pressure and smaller, more controlled strokes. This will allow for more precision and control over the shaping process.
Focus on the details and contours that you want to achieve, using the marks you made earlier as a guide. Work slowly and intentionally, shaping the dowel to match your vision.
It can be helpful to rotate the dowel as you shape it, examining it from different angles to ensure a consistent and symmetrical form. Take your time and remove material gradually, checking the progress frequently.
Pay special attention to any curves or transitions in the shape of the dowel, as these areas require careful shaping to achieve a smooth and pleasing result. Use the rasp or file to blend any rough edges and create a seamless flow.
As you shape the dowel, periodically run your hand along its surface to feel for any roughness or inconsistencies. The goal is to create a smooth and uniform shape that feels comfortable to the touch.
Continue shaping the dowel until you are satisfied with its overall form. Remember, this is a process that requires patience and attention to detail. Don’t be afraid to make adjustments and refine the shape as needed.
Once you have shaped the dowel to your liking, it’s time to move on to the next step: sanding.
Step 6: Sanding the Dowel
With the dowel shaped to your desired form, it’s time to move on to the sanding process. Sanding will help refine the shape further and create a smooth and polished surface on the dowel.
Start by using coarse-grit sandpaper (around 80 to 120 grit) to remove any rough areas or tool marks on the dowel’s surface. Use long, even strokes and apply consistent pressure as you sand.
Continue sanding the dowel, gradually transitioning to finer-grit sandpaper as you go. Move through the grits, such as 180, 220, and eventually 320, to achieve a progressively smoother finish.
When sanding, it’s important to keep the dowel moving to ensure that you achieve an even and consistent sanding pattern. Avoid applying excessive pressure, as this can flatten or distort the shape of the dowel.
Periodically check the surface of the dowel during sanding to assess the progress. As you work through the finer grits of sandpaper, you should begin to see a smoother and more polished appearance.
For small or intricate areas that are difficult to reach with sandpaper alone, you can wrap a small piece of sandpaper around a wooden dowel or use sanding pads to access those areas more effectively.
Once you are satisfied with the smoothness of the dowel’s surface, give it a final sanding using a very fine-grit sandpaper, such as 600 or 800 grit, for an extra level of refinement.
After sanding, wipe down the dowel with a clean cloth to remove any dust or debris. At this stage, you can also apply a finish to enhance the appearance and protect the wood, if desired.
Sanding the dowel provides the finishing touch that will bring out the natural beauty of the wood and create a professional-looking result.
With the sanding complete, you’re almost finished! The final step is optional but can add a nice touch to your rounded dowel.
Step 7: Applying Finish (optional)
The final step in rounding off a large dowel is applying a finish to enhance its appearance and protect the wood. While this step is optional, it can add a professional and polished look to your finished project.
Before applying any finish, ensure that the dowel is clean and free from any dust or debris. You can use a tack cloth or a soft, lint-free cloth to wipe the dowel’s surface.
There are various finishes you can choose from, such as varnish, oil, or wax, depending on the desired look and level of protection. Follow the manufacturer’s instructions for the specific finish you select.
If using a brush-on finish, apply a thin and even coat to the dowel’s surface, working with the grain. Allow the finish to dry according to the recommended drying time mentioned on the product label.
If using an oil or wax finish, apply a small amount to a clean cloth and rub it onto the dowel, again working with the grain. Allow the oil or wax to penetrate the wood and then buff the surface to a smooth and shiny finish.
Repeat the application process if multiple coats are desired, making sure to follow the recommended drying time between each coat.
Once the finish has fully dried, give the dowel a final inspection and make any necessary touch-ups if needed. You can use a fine-grit sandpaper to smooth out any imperfections before applying an additional coat of finish if desired.
Remember to allow the finish to completely cure before handling or incorporating the rounded dowel into your woodworking project.
By applying a finish, you not only protect the wood but also enhance its natural beauty, giving your rounded dowel a polished and professional appearance.
With the finish applied and fully dried, your rounded dowel is now ready to be incorporated into your woodworking project!
Read more: How To Hand Form Body Panels With Hand Tools
Conclusion
Rounding off a large dowel with hand tools is a rewarding and fulfilling woodworking task. With patience, precision, and the right techniques, you can achieve a beautifully shaped and smooth dowel that is ready to be used in your woodworking projects.
Throughout this article, we have outlined the step-by-step process of rounding off a large dowel. From marking the dowel and cutting it to length, to clamping it securely and shaping it with hand tools, we have covered each stage of the process in detail.
Remember to take your time at each step, ensuring accuracy and precision as you work. Use the appropriate tools and materials, such as saws, rasps, sandpaper, and clamps, to achieve the best results.
Sanding the dowel is a crucial step in creating a smooth and polished finish. Gradually transitioning through different grits of sandpaper will refine the shape and provide a pleasing tactile experience.
Applying a finish is optional but can add a professional touch to your rounded dowel. Choose a finish that suits your preferences and follow the manufacturer’s instructions for proper application.
By following these steps and infusing your own craftsmanship and creativity, you can create rounded dowels that perfectly complement your woodworking projects.
Whether you are a seasoned woodworker or a beginner, we hope that this article has provided you with the necessary knowledge and guidance to round off large dowels with hand tools. Enjoy the process, embrace the artistry of woodworking, and let your unique creations flourish!
Frequently Asked Questions about How To Round Off A Large Dowel With Hand Tools
Was this page helpful?
At Storables.com, we guarantee accurate and reliable information. Our content, validated by Expert Board Contributors, is crafted following stringent Editorial Policies. We're committed to providing you with well-researched, expert-backed insights for all your informational needs.


0 thoughts on “How To Round Off A Large Dowel With Hand Tools”