

Articles
How To Store A Bicycle For Winter
Modified: January 18, 2024
Learn the best techniques for storing your bicycle during the winter months with these helpful articles. Keep your bike safe and protected until spring!
(Many of the links in this article redirect to a specific reviewed product. Your purchase of these products through affiliate links helps to generate commission for Storables.com, at no extra cost. Learn more)
Introduction
As the winter approaches, it’s time to prepare for the cold weather and store your bicycle properly. Whether you’re an avid cyclist or just enjoy occasional rides, taking the necessary steps to store your bike during the winter months is crucial to keeping it in top condition.
Storing a bicycle for winter involves more than just placing it in the garage or basement. It requires a proper cleaning, preparation, and storage method to ensure that your bike is protected from the elements and remains in good working order when spring arrives.
In this article, we will guide you through the process of how to store a bicycle for winter. By following these steps, you can preserve the longevity of your bike and be ready to hit the road again once the weather warms up.
Key Takeaways:
- Properly storing your bicycle for winter involves thorough cleaning, removing accessories, inflating tires, choosing the right storage location and method, and covering the bike for added protection. These steps ensure your bike remains in top condition for the next cycling season.
- For long-term storage, additional precautions such as battery removal, fuel draining, frame protection, and indoor climate control are essential to preserve your bike’s integrity. Following these steps will help you enjoy a well-maintained bicycle when it’s time to hit the road again.
Read more: How To Store Bicycles
Step 1: Clean and Lubricate the Bicycle
The first step in storing your bicycle for winter is to give it a thorough cleaning. This not only helps to remove dirt and grime but also prevents corrosion and rusting during the winter months. Here’s how to do it:
- Start by rinsing the bike with water to remove any loose dirt and debris. Use a hose or a bucket of water, and avoid using high-pressure water as it could damage the bike’s components.
- Next, use a mild detergent or bike-specific cleaner to wash the frame, fork, and wheels. Use a soft brush or sponge to scrub gently and remove any stubborn dirt.
- Pay special attention to hard-to-reach areas like the drivetrain, chain, and cassette. Use a degreaser and a brush to clean these parts thoroughly.
- Once the bike is clean, rinse it again with water to remove any remaining soap or cleaner.
- Dry the bicycle completely with a soft cloth or towel. Make sure to dry all the components, including the chain, cables, and brake calipers, to prevent any moisture from causing corrosion.
- After cleaning, it’s important to lubricate the bike’s moving parts to protect them from rust and ensure smooth operation. Apply a few drops of lubricant to the chain, derailleur pivots, and brake pivots.
- Spin the pedals and shift through the gears to help distribute the lubricant evenly. Wipe off any excess lubricant with a clean cloth.
By cleaning and lubricating your bicycle before storing it, you are taking important steps to prevent rust and keep the components in good working order. A clean and well-lubricated bike will be easier to maintain and get back on the road when the warmer weather returns.
Step 2: Remove Accessories and Store Properly
Before storing your bicycle for winter, it’s important to remove any accessories and store them properly. This will help protect the accessories and prevent any damage to your bike. Follow these steps to ensure a safe and organized storage:
- Start by removing any removable accessories such as lights, bells, water bottle cages, and bike computers. These accessories can be easily damaged if left on the bike during storage.
- Clean and dry the accessories thoroughly before storing them. Use a mild detergent and a soft cloth to clean the accessories, and make sure they are completely dry to prevent any moisture-related damage.
- Find a suitable storage container or bag for the accessories. This will help keep them organized and reduce the chances of misplacing or damaging them.
- Label the storage container or bag with the name of each accessory to easily identify them when you need them again.
- Store the accessories in a cool, dry place away from direct sunlight. Extreme temperatures and exposure to sunlight can accelerate the deterioration of some accessories.
- If you have any accessories that require batteries, remove the batteries before storage to prevent leakage and damage to the accessory.
By removing accessories and storing them properly, you can ensure that they remain in good condition and are ready to use when you take your bike out again. This will also help declutter your bike and prevent any accessories from getting damaged or lost during the winter months.
Step 3: Inflate the Tires
Properly inflated tires are essential for storing your bicycle during the winter months. Inflating the tires to the correct pressure helps prevent damage and maintains the shape of the tires. Here’s what you need to do:
- Start by checking the recommended pressure range for your bike’s tires. The tire pressure may be imprinted on the sidewall of the tire or mentioned in the bike’s user manual.
- Use a floor pump or a bike pump with a pressure gauge to inflate the tires. Make sure the pump’s nozzle is securely attached to the valve.
- Pump air into the tires gradually and check the pressure using the gauge. Inflate the tires to the recommended pressure within the specified range.
- Once the tires are inflated, give them a gentle squeeze with your hands to ensure they feel firm but not overly rigid.
- Inspect the tires for any cuts or damage. If you notice any significant damage, it is best to replace the tire before storing the bike.
Properly inflated tires will help maintain their shape, reduce the risk of damage, and prevent flats during storage. It is recommended to check the tire pressure periodically during the winter months to ensure they remain properly inflated.
Step 4: Choose a Suitable Storage Location
When it comes to storing your bicycle for winter, selecting the right storage location is crucial. An appropriate storage location will protect your bike from the elements and minimize the risk of damage. Here are some factors to consider when choosing a storage location:
- Indoor vs. Outdoor: Whenever possible, it’s best to store your bike indoors to provide maximum protection. Indoor storage helps shield your bicycle from rain, snow, and extreme temperature changes, which can lead to rust and component damage.
- Temperature and Humidity: Aim for a storage location that has a controlled temperature and humidity level. Avoid areas that are prone to excessive moisture, as this can promote rust formation. Extreme temperatures can also negatively affect the integrity of certain bike components.
- Space Availability: Ensure that the storage location has enough space to accommodate your bicycle comfortably. It should allow you to store the bike upright or hang it vertically, depending on the available options.
- Accessibility: Consider how easily you can access your bike during the winter months. If you anticipate needing to use it sporadically, choose a storage location that offers convenience and ease of retrieval.
- Security: Opt for a secure storage location to protect your bike from theft or vandalism. If storing your bike in a shared space, make sure it is locked or stored in a secure area.
By choosing a suitable storage location, you can ensure that your bike remains protected throughout the winter months. Remember to consider factors such as indoor vs. outdoor storage, temperature and humidity levels, available space, accessibility, and security to make an informed decision.
Read more: How To Store A Bicycle
Step 5: Choose the Right Storage Method
Once you have selected a suitable storage location for your bicycle, it’s important to choose the right storage method to ensure its safety and preservation. Here are a few popular options:
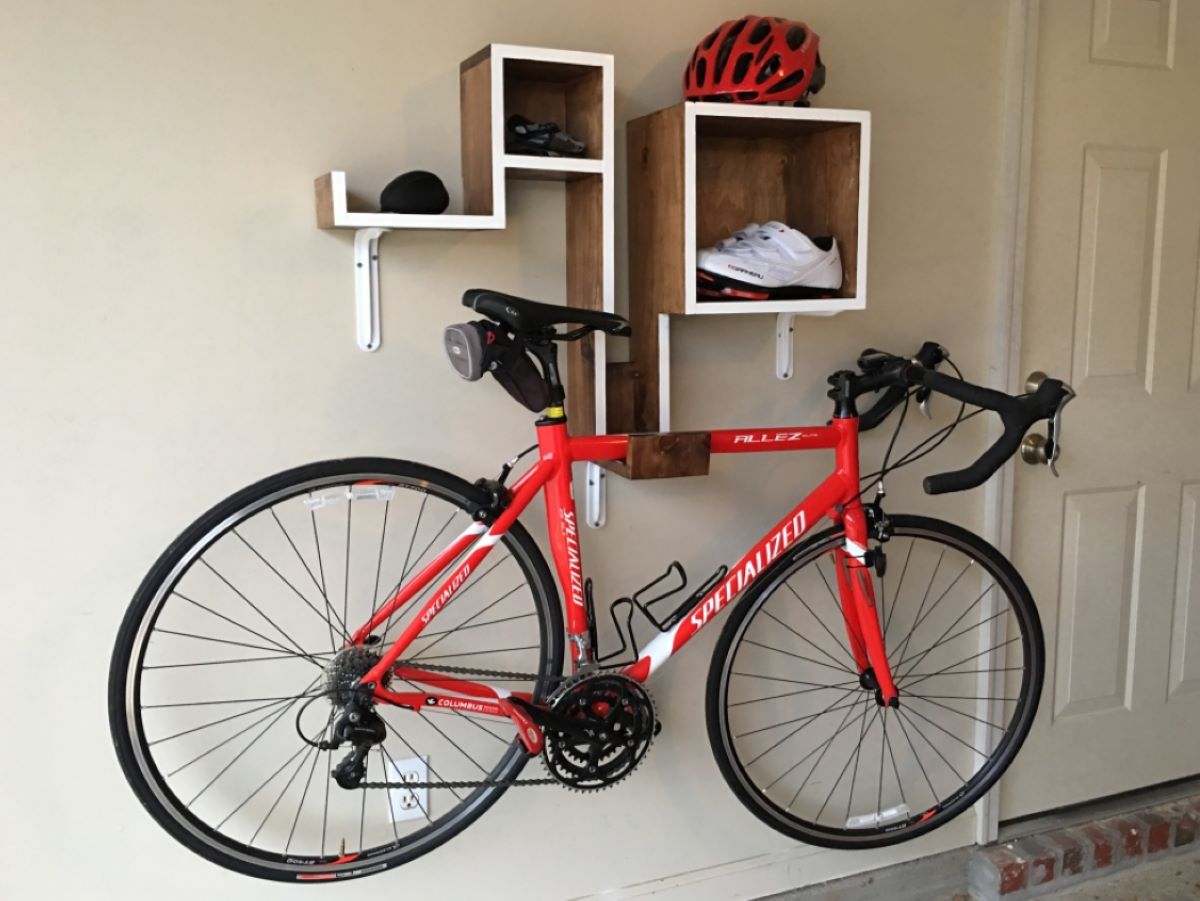
- Hanging Storage: Hanging your bicycle vertically is an effective way to save space and prevent any damage to the tires. You can use a wall-mounted bike rack or hooks to hang the bike by its frame. Make sure to use appropriate padding or protective coverings to avoid scratching the frame.
- Freestanding Storage: If you have enough floor space, a freestanding bike rack or stand can be an excellent storage option. These racks or stands keep your bike upright and stable, preventing it from leaning against other objects or falling over.
- Bike Storage Shed or Garage: If you have a dedicated shed or garage, storing your bike inside these structures can provide additional protection from the elements. Ensure proper ventilation and keep the area dry to prevent mold or mildew from forming.
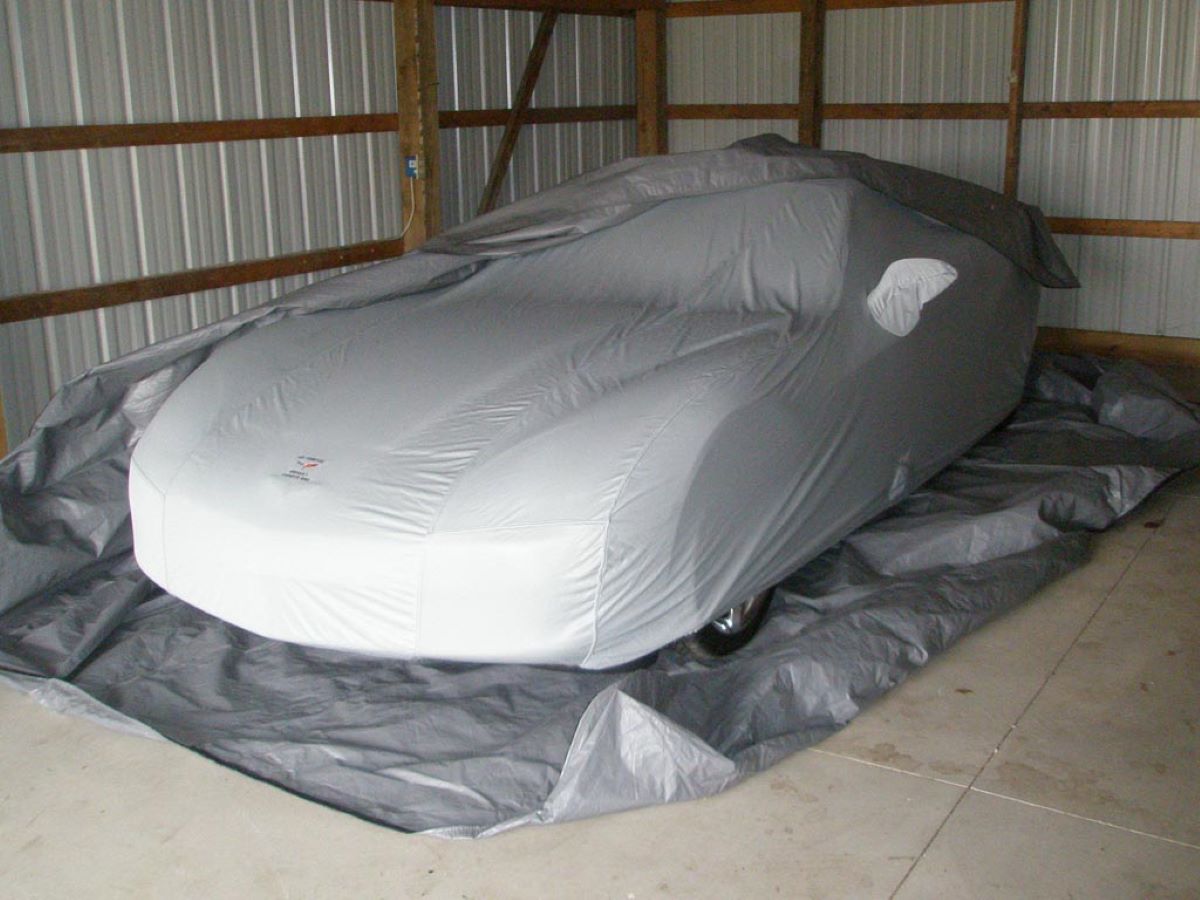
- Bike Storage Cover: Using a bike storage cover can offer an extra layer of protection for your bicycle. These covers are designed to shield your bike from dust, moisture, and UV rays. Choose a cover that fits your bike properly and is made from breathable material to prevent condensation.
When selecting a storage method, consider factors such as available space, ease of access, and the level of protection required. Assess your specific needs and preferences to choose a storage method that best suits your bike and storage space.
It’s important to note that regardless of the storage method you choose, always ensure that the bike is stable and secure to prevent any accidental falls or damage. Taking the time to select the right storage method can go a long way in preserving the condition of your bicycle during the winter months.
To store a bicycle for winter, clean and lubricate the chain, inflate the tires to the recommended pressure, and store it in a dry, indoor location to prevent rust and damage from the cold weather.
Step 6: Hang the Bicycle or Use a Stand
Now that you have chosen the right storage method for your bicycle, it’s time to hang it or use a stand to keep it off the ground. This step not only helps save space but also prevents any potential damage to your bike. Here’s what you need to do:
- Hanging Method: If you have opted for hanging storage, use a wall-mounted bike rack or hooks to hang your bicycle by its frame. Make sure the hooks or rack are securely installed and can bear the weight of the bike. Place the hooks or rack at an appropriate height, allowing the wheels to clear the ground.
- Using a Stand: If you prefer to use a stand, choose a stable and sturdy bike stand that can support the weight of your bicycle. Place the bike in the stand, ensuring it is properly aligned and balanced. The stand should prevent the bike from tipping over or leaning against other objects.
When hanging the bicycle or using a stand, consider the accessibility of the bike and the available space. Make sure there is enough clearance for the handlebars and pedals to avoid any accidental damage. It is also a good idea to secure the bike using straps or bungee cords to prevent it from swinging or moving excessively.
Hanging the bicycle or using a stand not only keeps your bike off the ground but also helps protect its tires, frame, and components. This method also allows for better air circulation and reduces the risk of moisture accumulating on the contact points.
Choose the method that suits your storage space and preferences, ensuring that the bike is securely positioned and protected from any potential damage throughout the winter months.
Step 7: Cover the Bicycle for Protection
Once you have hung the bicycle or placed it in a stand, it’s important to cover it for added protection during winter storage. A cover acts as a barrier against dust, moisture, and other potential sources of damage. Follow these steps to properly cover your bike:
- Choose a cover specifically designed for bicycles. Look for a cover made from waterproof and breathable material to prevent moisture buildup.
- Make sure your bicycle is clean and dry before covering it. Any dirt or moisture trapped under the cover can cause damage over time.
- Start by draping the cover over the handlebars and gradually pull it down over the frame, wheels, and other components of the bike.
- Adjust the cover so that it fits snugly over the bicycle. Ensure that it covers the entire bike, leaving no exposed areas.
- Double-check the cover’s fit to ensure it is properly secured and won’t be blown off by wind or other elements.
Covering your bicycle provides an extra layer of protection against dust, moisture, and potential scratches. It helps preserve the bike’s paint, components, and overall condition during winter storage.
Remember to periodically inspect the cover for any signs of damage or wear. If you notice any tears or weaknesses, consider replacing the cover to maintain optimal protection for your bike throughout the winter.
Step 8: Check on the Bicycle Periodically
While your bicycle is in winter storage, it’s important to periodically check on it to ensure its condition and address any potential issues that may arise. Checking on your bike periodically allows you to catch any problems early and take necessary actions. Here’s what you should do:
- Inspect for Damage: Regularly inspect the bike for any signs of damage, such as scratches, dents, or corrosion. Address any damage promptly to prevent further deterioration.
- Check Tire Pressure: Verify the tire pressure and inflate as needed. Changes in temperature can affect the tire pressure, so it’s essential to maintain the recommended pressure range.
- Inspect for Moisture: Check for any signs of moisture accumulation, especially in areas prone to condensation. If you find any moisture or dampness, wipe it dry and investigate the source to prevent further damage.
- Ensure Proper Lubrication: Reapply lubricant to the bike’s moving parts if necessary. Components such as the chain, derailleur pivots, and brake pivots may require additional lubrication due to prolonged storage.
- Verify Security: Check that the bicycle is securely hung or stored in a stand and that any straps or bungee cords are still firmly in place. This ensures that the bike remains stable and reduces the risk of it falling or getting damaged.
Performing these periodic checks allows you to address any issues promptly and ensure that your bike remains in good condition throughout the winter storage period. By giving your bicycle the attention it needs, you can prevent further damage and be ready to ride when the warm weather returns.
Read more: How To Store Bicycle In Apartment
Step 9: Precautions for Long-Term Storage
If you plan to store your bicycle for an extended period, such as several months, there are additional precautions you should consider taking to ensure its optimal condition. Here are some important precautions for long-term storage:
- Battery Removal: If your bicycle has an electric drivetrain or any electronic components, it’s essential to remove the batteries before storage. This helps prevent battery drainage and potential damage to the electrical system.
- Fuel Draining: If you have a motorized bicycle, drain the fuel tank and run the engine until it stalls to remove any remaining fuel. Storing a gasoline-powered bike with a full tank can lead to fuel degradation and potential engine damage.
- Frame Protection: Apply a protective coating or wax on the frame to prevent any moisture or rust buildup. This helps maintain the integrity and appearance of the frame during long-term storage.
- Bike Positioning: Periodically rotate the position of the bike in storage to prevent any excess pressure on one specific area. This helps prevent flat spots on the tires or excessive stress on certain components.
- Bike Security: Ensure that your storage location is secure, especially for long-term storage. Consider additional security measures such as installing a lock on the storage area or keeping the bike in a locked shed or garage to prevent theft.
- Indoor Climate Control: If storing your bike indoors, consider using a dehumidifier or moisture absorbers to maintain a dry environment. Excessive moisture can lead to rust and damage, especially during long-term storage.
By taking these additional precautions, you can ensure that your bike remains in optimal condition throughout an extended period of storage. Remember to follow the manufacturer’s recommendations for specific maintenance and storage instructions, as they may vary depending on the type of bicycle you own.
When the time comes to retrieve your bicycle from long-term storage, perform a thorough inspection and any necessary maintenance before venturing out for a ride. By taking proper precautions during long-term storage, you can minimize any potential damage and enjoy a well-preserved bike in the future.
Conclusion
Storing your bicycle for winter is an important process that helps protect your bike and ensure its longevity. By following the steps outlined in this article, you can effectively prepare your bicycle for winter storage and prevent any potential damage.
First, clean and lubricate your bike to remove dirt and grime while protecting it from rust. Remove any accessories and store them properly to prevent damage and keep them organized. Inflate the tires to the recommended pressure to maintain their shape and prevent flats.
Choose a suitable storage location that offers protection from the elements, and select the right storage method such as hanging the bicycle or using a stand. Cover the bike with a suitable cover to shield it from dust and moisture, and periodically check on the bicycle to address any issues that may arise.
If you plan on long-term storage, take additional precautions such as removing batteries, draining fuel, applying frame protection, and maintaining a secure and controlled environment.
By following these steps and taking the necessary precautions, you can ensure that your bicycle remains in excellent condition throughout the winter months and beyond. When spring arrives, you’ll be ready to hit the road again with a well-maintained and preserved bike.
Remember, proper storage not only protects your investment but also ensures that you can enjoy many more cycling adventures in the future. So, take the time to prepare your bicycle for winter storage – your bike will thank you!
Frequently Asked Questions about How To Store A Bicycle For Winter
Was this page helpful?
At Storables.com, we guarantee accurate and reliable information. Our content, validated by Expert Board Contributors, is crafted following stringent Editorial Policies. We're committed to providing you with well-researched, expert-backed insights for all your informational needs.






0 thoughts on “How To Store A Bicycle For Winter”