Articles
How To Store Apples For Winter
Modified: February 27, 2024
Learn how to store apples for the winter in this comprehensive article. Find helpful tips and tricks to keep your apples fresh and flavorful throughout the season.
(Many of the links in this article redirect to a specific reviewed product. Your purchase of these products through affiliate links helps to generate commission for Storables.com, at no extra cost. Learn more)
Introduction
As the leaves begin to turn vibrant shades of orange and crimson, there’s a sense of anticipation in the air. Fall is here, and with it comes an abundance of fresh, crisp apples. Whether you’ve harvested them from your own orchard or picked them up at a local farmer’s market, one thing is for certain – you want to savor the taste of autumn throughout the cold winter months.
Proper apple storage is essential to ensure that you can enjoy the delicious flavor and texture of apples long after the harvest season has ended. It’s all about preserving their freshness and extending their shelf life, so you can enjoy these delightful fruits for months to come.
In this article, we will explore the importance of proper apple storage and guide you on how to store apples for winter. We’ll discuss the types of apples that are best suited for long-term storage, as well as the various methods you can use to keep them fresh. So let’s dive in and discover how you can enjoy the taste of fall all year round!
Key Takeaways:
- Proper apple storage is essential for enjoying the taste of fall throughout winter. Choose the right apples, prepare them carefully, and create suitable storage conditions to savor the flavors of autumn all season long.
- Regular monitoring, maintaining optimal conditions, and creative use of stored apples are key to successful apple storage. Enjoy the delightful flavors and textures of your stored apples, and relish the taste of autumn preserved during the winter months.
Read more: How To Store Apple
Importance of Proper Apple Storage
Proper apple storage is crucial for several reasons. Firstly, it allows you to enjoy the taste and nutritional benefits of apples throughout the winter season, even when fresh apples are not readily available in the market. Additionally, it can help reduce food waste by preserving the apples that you have harvested or purchased.
When apples are stored correctly, they retain their flavor, texture, and nutritional value for an extended period. The cool and controlled environment helps slow down the ripening process and inhibits the growth of bacteria, mold, and fungi that can cause spoilage.
Moreover, storing apples properly can introduce you to a world of culinary possibilities during the winter months. Whether you’re baking a pie, making applesauce, or simply enjoying a crisp apple as a healthy snack, having readily available and well-preserved apples opens up a range of options in the kitchen.
Proper storage also allows for better planning and flexibility in your meal preparation. You won’t have to rush to consume all your apples before they go bad; instead, you can enjoy them at your own pace, knowing they’ll stay fresh and delicious.
By storing apples correctly, you can also save money. Buying apples in bulk during the harvest season when they are abundant and more affordable allows you to take advantage of lower prices. Storing them properly ensures that you can enjoy these cost-effective fruits for an extended period, even when they are no longer in season.
Lastly, proper apple storage is not only about preserving the fruit but also about preserving memories. If you’ve had a wonderful apple-picking experience or received apples as a gift from a loved one, being able to keep them fresh and enjoy them long after the occasion is a way to hold onto those cherished moments.
Now that we understand the importance of proper apple storage, let’s delve into the factors to consider when selecting the right apples for winter storage.
Choosing the Right Apples for Winter Storage
Not all apples are created equal when it comes to long-term storage. Some varieties are better suited for storing than others. When selecting apples for winter storage, consider the following factors:
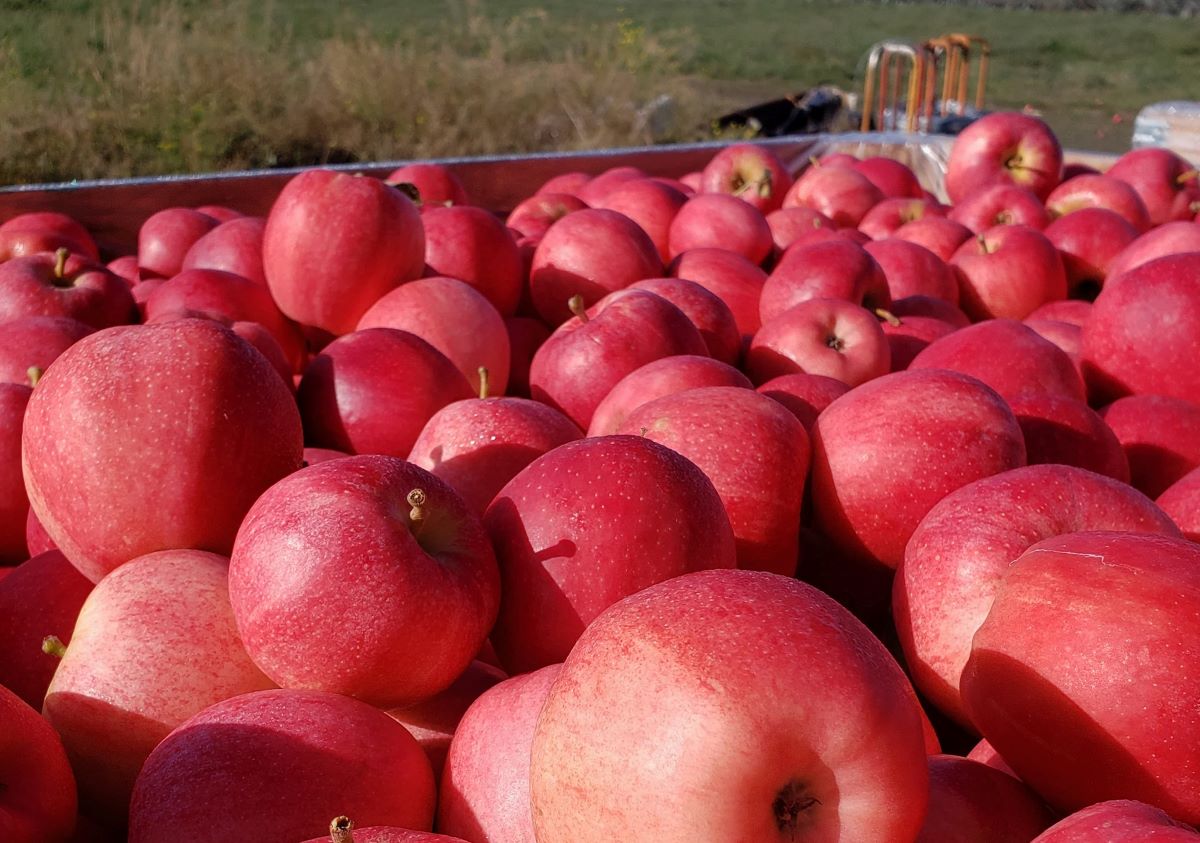
Variety: Choose apple varieties that are known for their storage qualities. Good options include varieties like Granny Smith, Fuji, Rome Beauty, Northern Spy, and Braeburn. These apples have a thick skin and dense flesh, which helps them retain their flavor and texture over an extended period.
Ripeness: Select apples that are ripe but not overripe. Apples that are too ripe will not store well and are more prone to rotting. Look for apples that are firm and have a vibrant color.
Condition: Inspect the apples for any signs of bruising, cuts, or disease. Damaged apples are more likely to spoil quickly, so it’s best to choose apples that are free from any noticeable imperfections.
Size: While the size of the apple doesn’t impact its storage quality, it’s essential to select apples that are uniform in size. This helps ensure even ripening and prevents smaller apples from shriveling or dehydrating during storage.
Storage Life: Some apple varieties have longer storage life than others. If you’re planning for long-term storage, look for apples that are known to stay fresh for several months. This can be especially important if you’re planning to enjoy apples well into the winter season when fresh apples are less readily available.
Taste Preference: Lastly, consider your personal taste preferences. Different apple varieties offer a range of flavors, from sweet to tart. Choose apples that you enjoy eating, as the flavor will intensify over time during storage.
By considering these factors, you can select the right apples that are suitable for long-term storage. Now that you have chosen the apples, let’s move on to the preparation steps before storing them.
Preparation Before Storing Apples
Before you store your apples for the winter, it’s important to prepare them properly to ensure optimal shelf life and freshness. Follow these steps to prepare your apples for storage:
1. Clean the Apples: Start by gently rinsing the apples under cool running water. Use a soft brush or your hands to remove any dirt or debris on the surface. Avoid using soap or harsh chemicals, as these may leave a residue on the apples.
2. Sort and Remove Damaged Apples: Examine each apple carefully and remove any that show signs of bruising, cuts, or disease. Damaged apples can release ethylene gas, which speeds up the ripening process and can cause nearby apples to spoil more quickly.
3. Let Them Dry: Allow the cleaned apples to air dry completely before storing. You can place them on a clean towel or a wire rack to promote airflow and drying. Moisture on the surface of the apples can lead to rot or mold, so it’s important to ensure they are thoroughly dry.
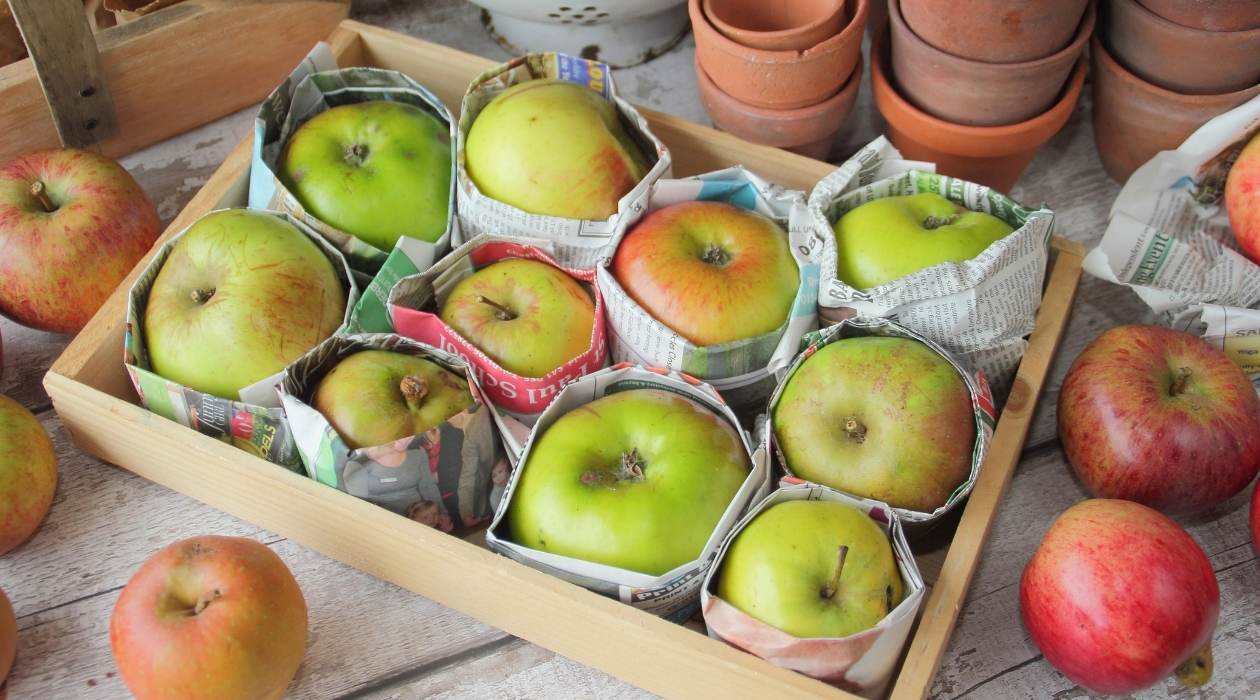
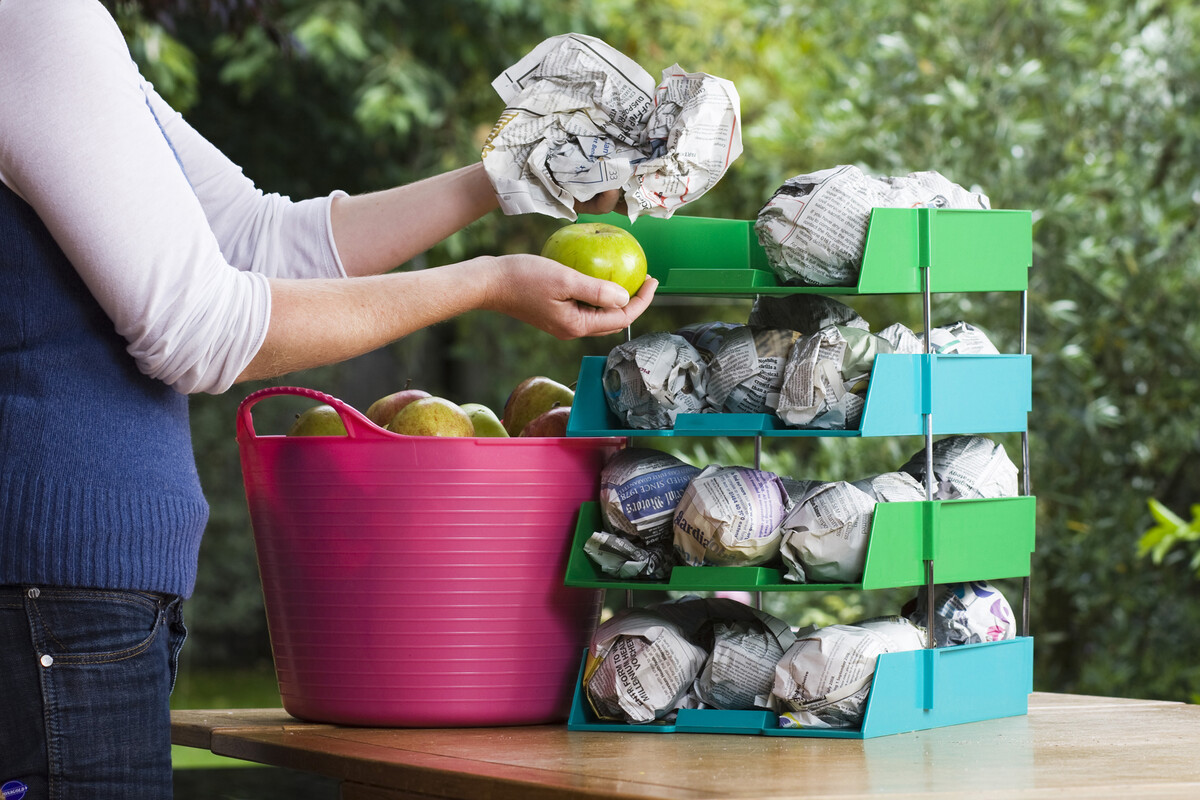
4. Wrap Individually (optional): If you want to take an extra step to prevent the spread of ethylene gas and potential rot, you can wrap each apple individually in a piece of tissue paper or newspaper. This can help create a barrier between the apples and reduce the risk of spoilage.
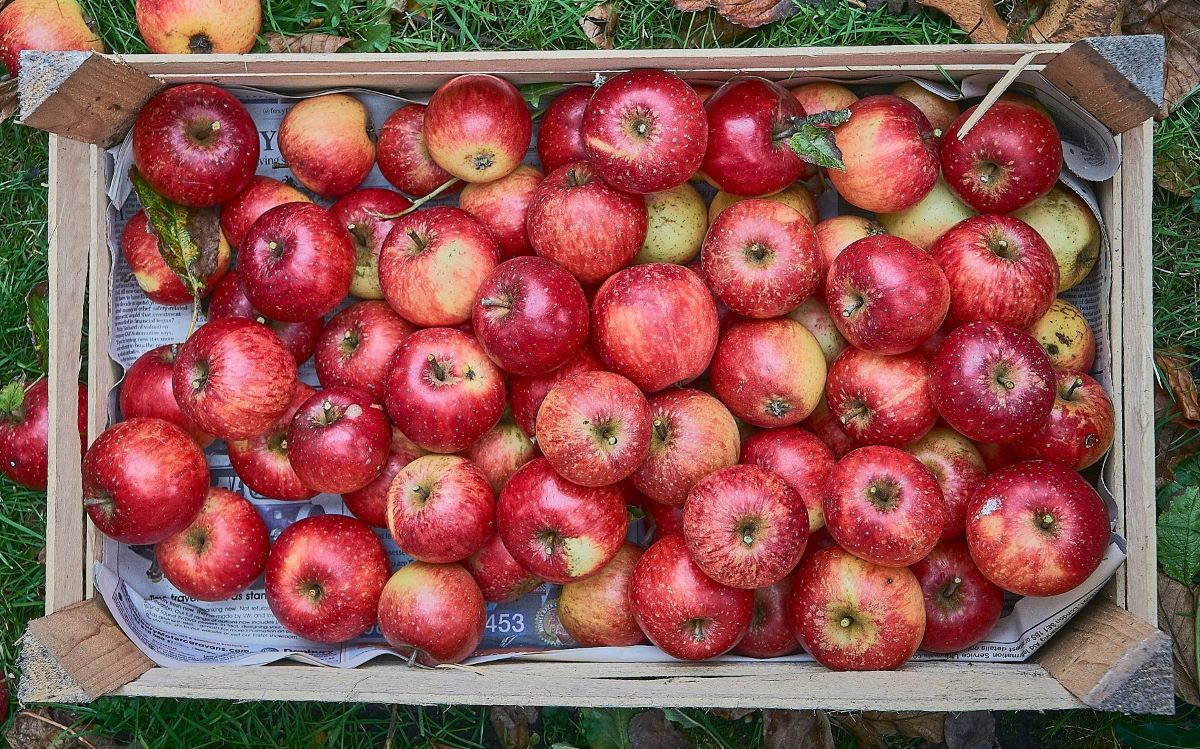
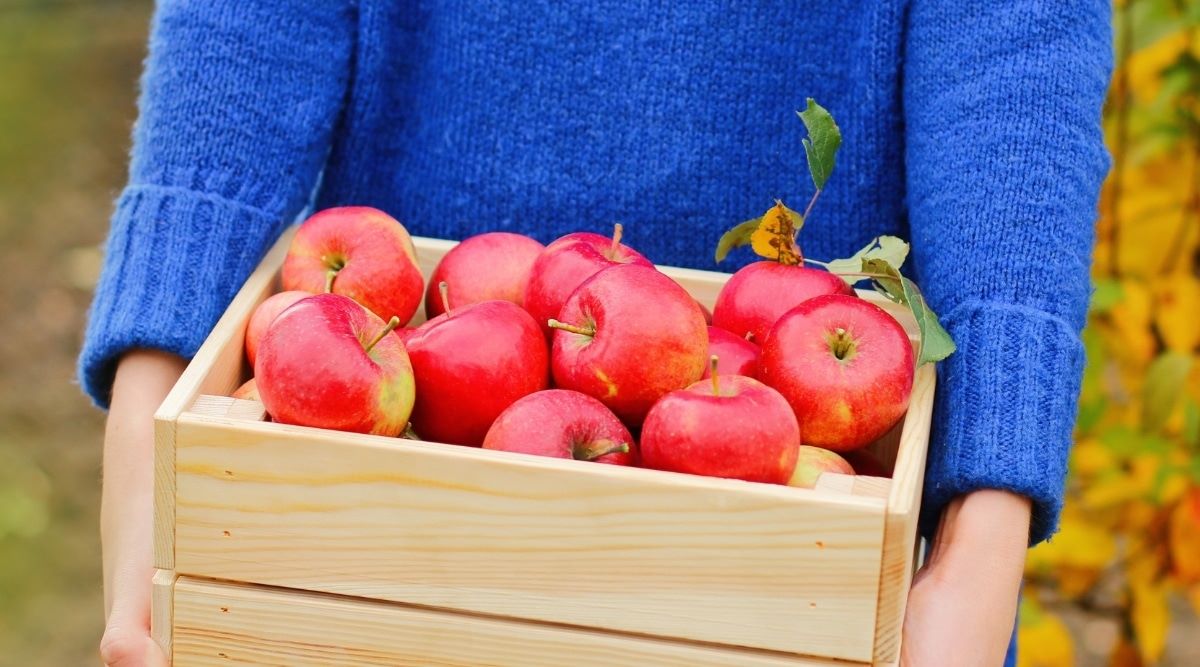
5. Choose Appropriate Storage Containers: Select the right containers for storing your apples. You can use baskets, wooden crates, or even cardboard boxes lined with newspaper. Make sure the containers allow for proper airflow to prevent excessive moisture buildup.
6. Label and Date: If you have different apple varieties or batches, it’s helpful to label and date them. This way, you can easily identify and track the age of the stored apples, allowing you to prioritize them for consumption accordingly.
7. Store in a Cool, Dark, and Humidity-Controlled Location: Find a suitable location for storing your apples. A cool and dark area, such as a root cellar, basement, or garage, is ideal. The temperature should be between 30 to 40 degrees Fahrenheit (-1 to 4 degrees Celsius), with a humidity level of around 90%. Avoid storing apples near fruits or vegetables that release ethylene gas, as this can accelerate the ripening process.
By taking the time to properly prepare your apples before storage, you can maximize their shelf life and ensure that they stay fresh and delicious throughout the winter months. In the next sections, we will explore different storage methods for storing apples, depending on the available options you have.
Storing Apples in a Root Cellar
A root cellar is an excellent option for storing apples, providing a cool, dark, and humidity-controlled environment. Follow these steps to store your apples in a root cellar:
1. Clean and Prepare the Root Cellar: Ensure that your root cellar is clean and free from any moisture or pests. Remove any rotten or spoiled produce from the area to prevent the spread of bacteria or mold.
2. Arrange Apples in Single Layers: Place the apples in a single layer in wooden crates or on shelves. Avoid stacking apples on top of each other, as this can lead to bruising and increase the risk of spoilage.
3. Maintain Humidity: Apples require a high humidity level to prevent dehydration. You can maintain humidity in the root cellar by covering the floor with damp sand or placing a bucket of water in the cellar. This helps create a humid environment and prevents the apples from drying out.
4. Check Regularly: Regularly inspect the stored apples for any signs of rot, mold, or disease. Remove any apples that are showing signs of spoilage immediately to prevent the spread of decay to other apples.
5. Circulate Air: Ensure there is proper airflow in the root cellar to prevent the buildup of ethylene gas released by the apples. This can be achieved by leaving a small opening or vent in the cellar or using a fan to circulate the air.
6. Monitor Temperature and Humidity: Keep an eye on the temperature and humidity levels in the root cellar. Aim for a temperature between 30 to 40 degrees Fahrenheit (-1 to 4 degrees Celsius) and a humidity level of around 90%. Adjust as needed to maintain optimal storage conditions.
7. Rotate and Use Apples: Periodically rotate the apples to ensure even ripening and consumption. Use the ripest apples first and continue to enjoy them throughout the winter season.
Storing apples in a root cellar can provide an ideal environment for long-term storage. The cool temperature and controlled humidity help preserve the flavor, texture, and freshness of the apples. However, if you don’t have access to a root cellar, there are other storage options.
In the next sections, we will explore how to store apples in a refrigerator and in a garage or shed.
Read more: How To Store Apples In Fridge
Storing Apples in a Refrigerator
If you don’t have access to a root cellar, storing apples in a refrigerator is an effective alternative. The cool temperature helps slow down the ripening process and extends the shelf life of the apples. Here’s how to store apples in a refrigerator:
1. Clean and Dry the Apples: Before storing the apples in the refrigerator, ensure they are clean and dry. Follow the steps mentioned earlier to clean and dry the apples thoroughly.
2. Choose a Crisper Drawer: Use the crisper drawer in your refrigerator to store the apples. The crisper drawer provides a slightly more humid environment compared to the rest of the fridge, which helps maintain the freshness of the apples.
3. Place the Apples in a Paper Bag: To prevent excessive moisture buildup, place the cleaned and dried apples in a paper bag before storing them in the crisper drawer. The paper bag helps absorb excess moisture and prevents condensation on the apples.
4. Adjust the Humidity Setting: Many refrigerators have humidity control settings for the crisper drawers. Set the humidity level to high or adjust it according to the recommendations of your refrigerator’s manual. This helps maintain the ideal humidity level for storing apples.
5. Check and Rotate Apples: Periodically check the apples in the crisper drawer and remove any that show signs of spoilage. Rotate the apples to ensure even ripening and consumption. Use the ripest apples first and continue to enjoy them as needed.
6. Separate Apples from Other Produce: Apples release ethylene gas, which can accelerate the ripening process of other fruits and vegetables. To prevent this, store apples separately from other produce items in the refrigerator.
7. Monitor Temperature: Keep the refrigerator temperature between 30 to 40 degrees Fahrenheit (-1 to 4 degrees Celsius). It’s essential to maintain a cool environment but not excessively cold to avoid freezing the apples.
Storing apples in the refrigerator can help prolong their shelf life and keep them fresh for weeks or even months. Remember to periodically check and remove any apples that show signs of spoilage to prevent the spread of decay to other apples.
In the next section, we will explore another storage option for apples – storing them in a garage or shed.
Store apples in a cool, dark place with good air circulation, such as a root cellar or refrigerator. Keep them away from other fruits and vegetables to prevent premature ripening.
Storing Apples in a Garage or Shed
If you don’t have access to a root cellar or a refrigerator, storing apples in a garage or shed can be a viable option. While the conditions may not be as controlled as in a root cellar or refrigerator, with proper care, you can still successfully store your apples. Here’s how to store apples in a garage or shed:
1. Clean and Sort the Apples: Ensure that the apples are clean and free from any dirt or debris. Remove any damaged or spoiled apples to prevent the spread of rot.
2. Choose Proper Containers: Select sturdy containers, such as wooden crates or cardboard boxes, to store the apples. Line the containers with layers of newspaper or straw to provide cushioning and absorb excess moisture.
3. Arrange the Apples: Place the apples in a single layer in the containers, ensuring that they do not touch each other. This helps prevent bruising and keeps the air circulating around each apple.
4. Find a Cool and Dark Spot: Locate a cool and dark area in your garage or shed for apple storage. Look for a spot away from direct sunlight and with consistent temperatures. The ideal temperature range for storing apples is between 30 to 40 degrees Fahrenheit (-1 to 4 degrees Celsius).
5. Monitor for Temperature Fluctuations: Keep an eye on temperature fluctuations in the storage area. Extreme temperature changes or prolonged exposure to high temperatures can cause the apples to spoil more quickly. Insulate the containers if needed to help maintain a more stable temperature.
6. Check and Rotate Apples: Regularly inspect the stored apples for any signs of spoilage. Remove any apples that show signs of rot or disease immediately to prevent the spread to other apples. Rotate the apples occasionally to ensure even ripening and consumption.
7. Control Humidity: While it may be challenging to control humidity in a garage or shed, you can place a damp cloth or a tray of water near the apple storage area. This can help increase humidity levels slightly and prevent excessive drying of the apples.
8. Avoid Exposure to Ethylene: Keep the apples away from other fruits or vegetables, as apples release ethylene gas, which can speed up the ripening and spoilage of neighboring produce.
Storing apples in a garage or shed can be a suitable option if you don’t have alternative storage solutions. However, it’s important to regularly monitor the apples and be mindful of temperature fluctuations and humidity changes in the storage area.
In the next section, we will share some additional tips for successful apple storage, regardless of the storage method you choose.
Tips for Successful Apple Storage
Whether you’re storing your apples in a root cellar, refrigerator, garage, or shed, these tips will help ensure successful apple storage and prolong their shelf life:
1. Select the Best Apples: Choose apples that are suited for long-term storage. Opt for varieties known for their storage qualities, such as Granny Smith, Fuji, Rome Beauty, Northern Spy, and Braeburn.
2. Handle with Care: Handle the apples gently to avoid bruising. Apples with bruises or cuts are more prone to spoilage, so be mindful when sorting and storing them.
3. Separate Damaged Apples: Remove any apples showing signs of rot, disease, or damage. A single spoiled apple can quickly spoil the whole batch, so it’s essential to promptly discard any compromised fruit.
4. Regularly Check and Rotate: Regularly inspect the stored apples for any signs of spoilage. Rotate the apples to ensure even ripening and consumption. Use the ripest apples first to make the most of your storage.
5. Control Temperature and Humidity: Maintain the recommended storage temperature and humidity levels for the specific storage method you are using. This helps slow down the ripening process and keeps the apples in optimal condition.
6. Avoid Exposure to Ethylene: Keep apples away from other fruits and vegetables, as apples release ethylene gas, which can accelerate ripening and spoilage in neighboring produce.
7. Store Apples Separately: If possible, store different apple varieties separately. This helps prevent cross-contamination of flavors and ensures that the unique characteristics of each variety are preserved.
8. Inspect Regularly for Pests: Keep an eye out for any signs of pests, such as fruit flies or insects. Remove any affected apples and take necessary measures to control and prevent infestations.
9. Use Apples in Different Ways: As the stored apples ripen, find creative ways to incorporate them into your meals and recipes. From baking pies and making applesauce to enjoying fresh slices or using them in savory dishes, there are endless possibilities to enjoy your stored apples.
10. Enjoy Your Apples throughout the Season: Lastly, take pleasure in the fact that you can savor the taste of fall long after the harvest season. Enjoy the flavor, texture, and nutritional benefits of apples in various dishes and relish the satisfaction of preserving these delightful fruits.
By following these tips, you can increase the longevity of your stored apples and enjoy their deliciousness throughout the winter months.
In the next section, we will discuss how to monitor and maintain your stored apples to ensure their quality remains intact.
Monitoring and Maintaining Stored Apples
Proper monitoring and maintenance of stored apples are essential to ensure their quality and prevent spoilage. Here are some tips to help you effectively monitor and maintain your stored apples:
1. Regularly Check for Spoilage: Check your stored apples regularly for any signs of spoilage, such as mold, softness, or an off-putting odor. Remove any spoiled apples immediately to prevent the spread of decay to the rest of the batch.
2. Rotate Apples: Rotate the stored apples occasionally to promote even ripening. This helps ensure that all the apples have a chance to be used and consumed before they spoil.
3. Maintain Proper Temperature and Humidity: Keep a close eye on the temperature and humidity levels in the storage area. For root cellars or refrigerators, ensure that the temperature remains between 30 to 40 degrees Fahrenheit (-1 to 4 degrees Celsius) and the humidity is around 90%. For garages or sheds, maintain a stable temperature as much as possible and provide some humidity control measures if feasible.
4. Address Temperature and Humidity Fluctuations: Fluctuations in temperature and humidity can affect the condition of the stored apples. Make necessary adjustments to mitigate extreme fluctuations by insulating the storage area or using additional humidity control methods like damp cloths or trays of water.
5. Ventilate the Storage Area: Ensure proper airflow in the storage area to prevent the buildup of ethylene gas released by the stored apples. This can be achieved by leaving a small opening or using a fan to circulate the air.
6. Keep Away from Ethylene-Producing Produce: Apples release ethylene gas, which can accelerate the ripening of nearby fruits and vegetables. Store apples separately from other produce items to avoid unwanted ripening or spoilage.
7. Respond to Changes Promptly: If you notice any issues with the stored apples, such as increased spoilage or changes in texture or flavor, take immediate action. This may involve removing affected apples, adjusting storage conditions, or adjusting your consumption plan accordingly.
8. Plan your Consumption: Be mindful of the quantity of stored apples and plan your consumption accordingly. Use the ripest apples first and gradually work through the remaining ones to ensure they are enjoyed before they deteriorate.
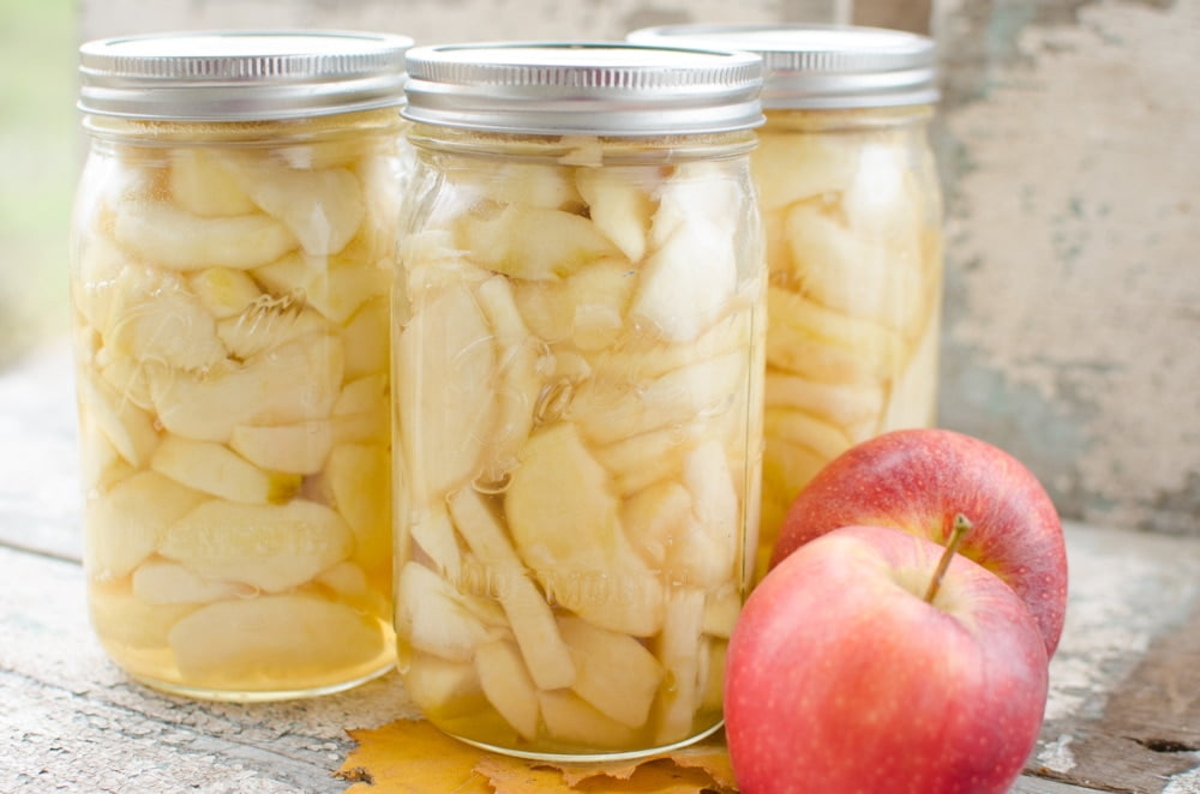
9. Utilize Preservation Methods: If you find yourself with a surplus of apples nearing the end of their storage life, consider preserving them through methods such as canning, freezing, or making apple-based products like jams or sauces. This allows you to enjoy the apples for an extended period even after their storage life has ended.
By regularly monitoring the condition of your stored apples and maintaining optimal storage conditions, you can ensure that they stay fresh and enjoyable throughout the winter season.
In the next section, we will discuss how to check and use the stored apples once you’re ready to enjoy their flavors.
Read more: How To Store Apples At Home
Checking and Using Stored Apples
When the time comes to enjoy the apples you’ve stored, it’s important to check their condition and ensure they are still suitable for consumption. Here’s a step-by-step guide on how to check and use your stored apples:
1. Inspect the Apples: Take a close look at each apple, examining its appearance, firmness, and smell. Discard any apples that show signs of rot, mold, or significant decay. Pay attention to any soft spots, shriveled skin, or unpleasant odors.
2. Conduct a Taste Test: Cut a small slice from a representative sample apple and taste it. Evaluate the flavor and texture. If the apple tastes off or has a mealy texture, it may be past its prime and not suitable for consumption. Use your judgment and personal preference to determine if the apples are still enjoyable.
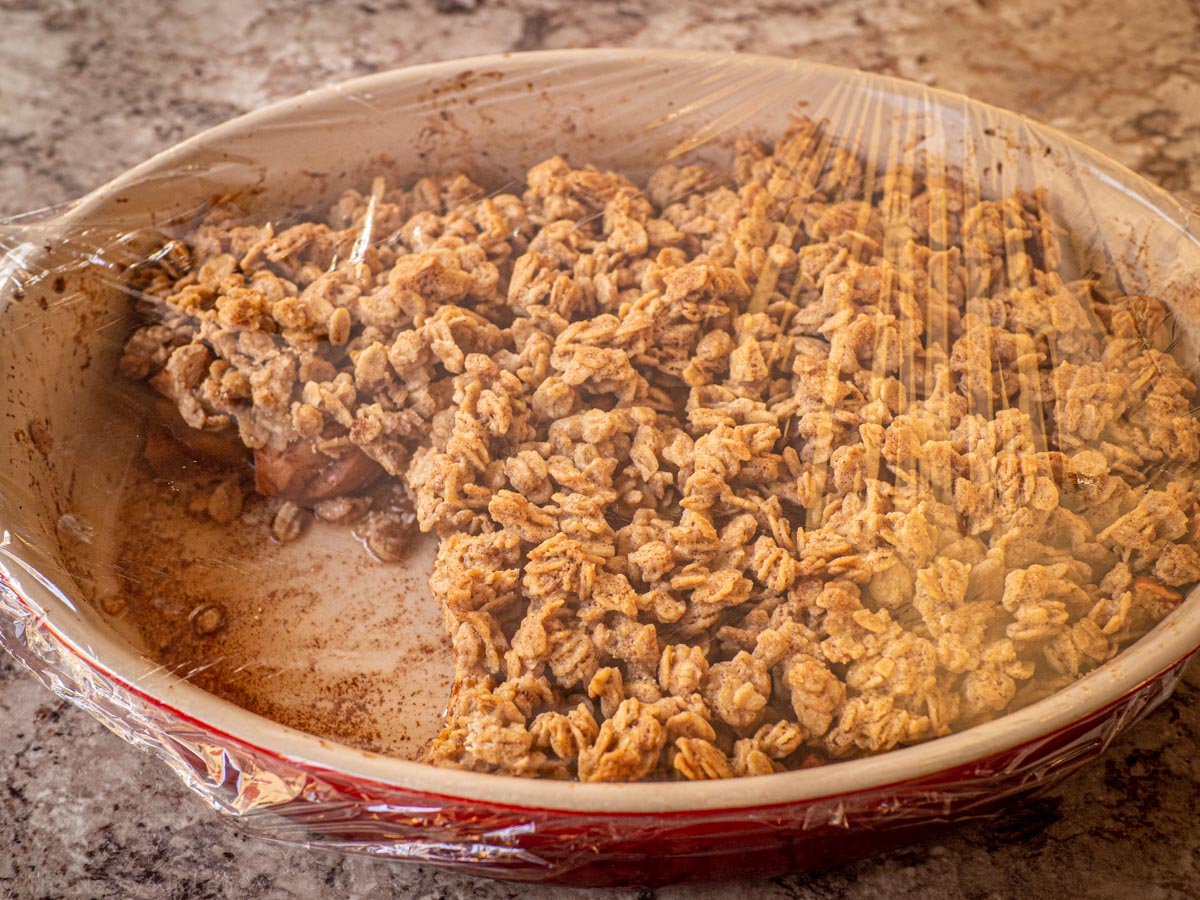
3. Utilize Apples with Minor Imperfections: Even if some apples may not be perfect for eating fresh, you can still make use of them. Consider using slightly bruised or less visually appealing apples for cooking purposes, such as baking pies, making applesauce, or creating apple crisps. Cooking can often mask minor imperfections.
4. Store Apples for Immediate Use: If you have a large quantity of apples that you’re unable to consume within a reasonable time frame, consider sharing them with friends, family, or neighbors. Alternatively, donate them to local food banks or community organizations to ensure they do not go to waste.
5. Preserve the Apples: If you have an abundance of stored apples nearing the end of their storage life, explore preservation methods to extend their usability. Options include canning, making apple butter, dehydrating slices, or even creating homemade apple cider. These preservation techniques allow you to enjoy the flavors of your stored apples for an extended period of time.
6. Enjoy the Freshness: Finally, savor the delicious flavors and textures of your stored apples. Whether you’re biting into a crisp apple, creating a delectable apple pie, or enjoying a bowl of comforting applesauce, relish the taste of autumn preserved during the winter months.
Remember to continue monitoring the remaining stored apples for any signs of spoilage as you consume them. Promptly remove any apples that show signs of decay to prevent spoilage from spreading to the rest of your stored batch.
By following these steps, you can make the most of your stored apples and enjoy their delightful taste even after the harvest season has ended.
Now that we’ve covered how to check and use your stored apples, let’s conclude our article with a brief summary.
Conclusion
Proper apple storage is the key to enjoying the flavors of fall throughout the winter months. Whether you store your apples in a root cellar, refrigerator, garage, or shed, following the appropriate methods can help extend their shelf life and maintain their freshness.
By choosing the right apples for storage, preparing them properly, and creating suitable storage conditions, you can ensure that your apples stay crisp, flavorful, and nutritious. Regular monitoring, maintaining optimal temperature and humidity levels, and taking prompt action if any issues arise are vital for successful apple storage.
Remember to check the condition of your stored apples before consuming them and make use of any apples that may not meet the criteria for fresh eating in cooking or preservation. Consider sharing extra apples or donating them to prevent waste.
With a little care and attention, you can enjoy the taste of autumn throughout the winter season. Whether you’re biting into a fresh apple or indulging in a homemade apple pie, the flavors will transport you back to the orchard as you relish the pleasures of the crisp, sweet, and tangy apple harvest.
So, as the leaves fall and winter approaches, take the time to store your apples properly. Embrace the warmth and happiness that these brightly colored fruits bring into your home. Savor the memories of apple-picking adventures and the joy of preserving a piece of the season for months to come.
Enjoy the delicious taste of fall, even when snow blankets the ground, and let the stored apples keep your taste buds delighted until the next apple season arrives.
Frequently Asked Questions about How To Store Apples For Winter
Was this page helpful?
At Storables.com, we guarantee accurate and reliable information. Our content, validated by Expert Board Contributors, is crafted following stringent Editorial Policies. We're committed to providing you with well-researched, expert-backed insights for all your informational needs.


0 thoughts on “How To Store Apples For Winter”