Articles
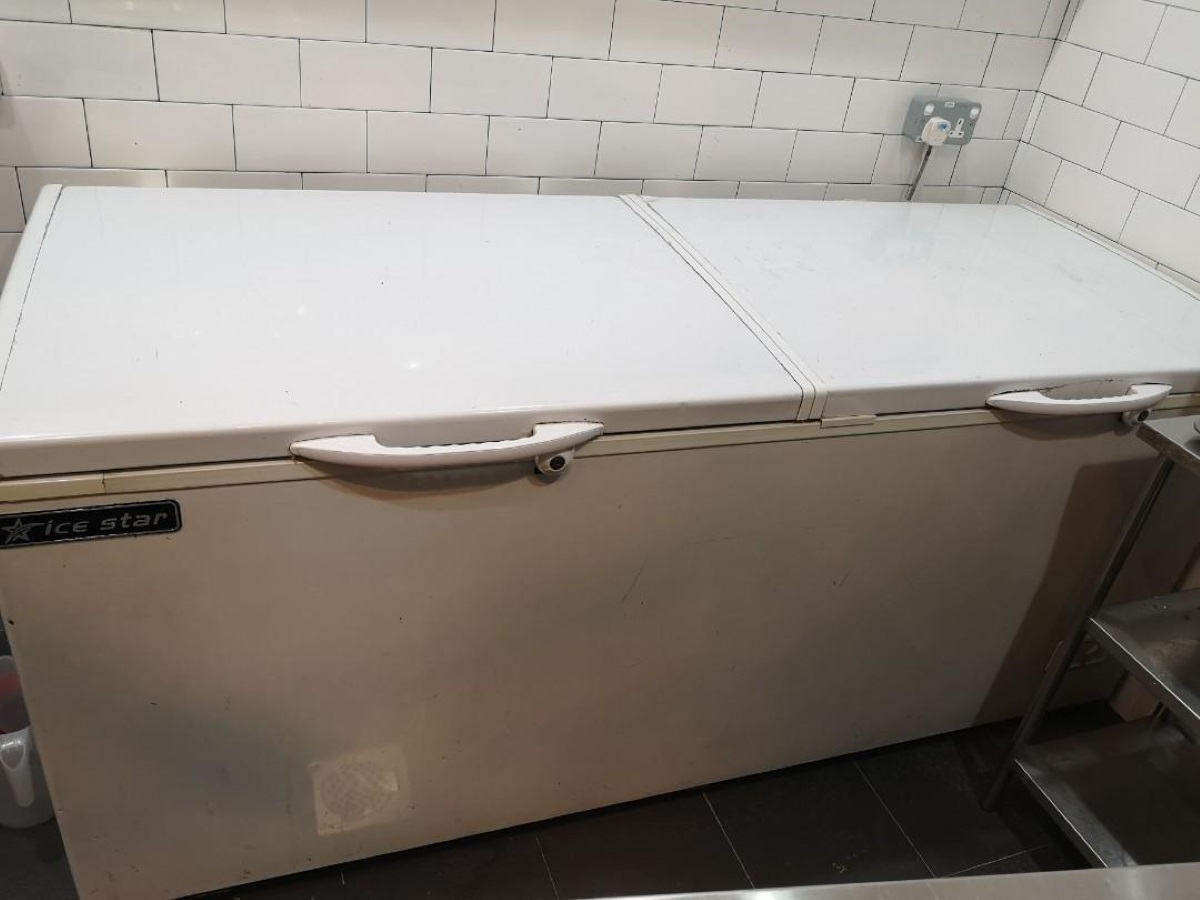
How To Store A Chest Freezer When Not In Use
Modified: August 27, 2024
Learn the best practices for storing a chest freezer when not in use. Check out our informative articles packed with helpful tips and tricks.
(Many of the links in this article redirect to a specific reviewed product. Your purchase of these products through affiliate links helps to generate commission for Storables.com, at no extra cost. Learn more)
Introduction
Having a chest freezer is a convenient and practical way to store food and keep it fresh for extended periods. However, there may come a time when you need to store your chest freezer when it’s not in use. Whether you’re moving to a new home, going on an extended vacation, or simply need to free up some space, properly storing your chest freezer is essential to maintain its functionality and ensure it’s in good condition when you need it again.
In this article, we will guide you through the process of properly storing a chest freezer. From the preparation and cleaning steps to choosing the right storage location and protecting the freezer, we will cover everything you need to know to ensure that your chest freezer stays in optimal condition during its period of non-use.
By following these steps, you can rest assured that when you are ready to use your freezer again, it will be clean, organized, and ready to store your food efficiently. So, let’s get started and learn how to store a chest freezer when it’s not in use.
Key Takeaways:
- Properly storing a chest freezer involves thorough cleaning, defrosting, and organizing to maintain its functionality and protect the stored food. Choosing an appropriate storage location and monitoring conditions are crucial for long-term preservation.
- Reassembling the chest freezer after storage requires careful inspection, temperature adjustment, and organized loading of food items. Regular maintenance and cleaning are essential for maximizing efficiency and longevity.
Read more: How To Store A Freezer When Not In Use
Preparing the Chest Freezer for Storage
Before you can begin the process of storing your chest freezer, it’s essential to prepare it properly. This includes taking certain precautions to ensure that it remains in good condition throughout its period of non-use. Here are some steps to follow:
- Unplug the freezer: The first step is to disconnect the power supply. Unplug the chest freezer from the electrical outlet to prevent any accidents or power surges.
- Remove all items: Take out all the food items from the freezer. Check each item for expiration dates and discard anything that has expired or shows signs of spoilage. It’s also a good idea to use up any perishable items or transfer them to your main refrigerator before storing the freezer.
- Empty the ice trays: If your freezer has built-in ice trays, empty them and dispose of any ice cubes. Leaving the ice inside the trays can cause them to stick together or create a mess during the storage period.
- Defrost the freezer: If your chest freezer is not frost-free, you’ll need to defrost it before storing it. This prevents ice buildup and potential damage to the interior. Refer to the manufacturer’s instructions for the specific defrosting process.
- Clean the interior: Thoroughly clean the interior of the chest freezer. Remove any food particles, spills, or ice residue with a mild detergent and warm water. Avoid using abrasive cleaners or sharp objects that could damage the surface.
- Clean the exterior: Give the exterior of the freezer a good wipe-down as well. Use a damp cloth to remove any dust or dirt that may have accumulated. Pay special attention to the handles and hinges, as these areas tend to collect grime over time.
- Leave the lid open: After cleaning the chest freezer, leave the lid open for a few hours to allow any residual moisture to evaporate. This will help prevent mold or mildew from forming during storage.
By taking these preparatory steps, you’ll ensure that your chest freezer is clean, free of food, and ready to be safely stored until its next use. In the next section, we’ll discuss the process of defrosting the chest freezer in more detail.
Cleaning the Chest Freezer
Properly cleaning your chest freezer before storing it is crucial to maintain its cleanliness and prevent any odors or contamination. Here are some steps to follow when cleaning your chest freezer:
- Gather cleaning supplies: Before you begin, gather all the necessary cleaning supplies. This may include a mild detergent, warm water, a sponge or soft cloth, and a bucket.
- Empty the freezer: Remove all the items from the freezer, including food, ice trays, and any removable shelves or dividers. Dispose of any expired or spoiled food items.
- Turn off and unplug the freezer: Ensure that you disconnect the power supply by turning off and unplugging the freezer. This will prevent any accidents while cleaning.
- Defrost the freezer: If your chest freezer is not frost-free, you’ll need to defrost it before cleaning. Follow the manufacturer’s instructions for defrosting, which may involve turning off the freezer and allowing the ice to melt naturally.
- Remove ice buildup: Once the freezer is defrosted, remove any residual ice buildup. You can use a plastic scraper or spatula to gently remove the ice without scratching the surface.
- Prepare the cleaning solution: In a bucket, mix a small amount of mild detergent with warm water. Avoid using harsh chemicals or abrasive cleaners, as they can damage the interior of the freezer.
- Clean the interior: Dip a sponge or soft cloth into the cleaning solution and thoroughly clean the interior of the freezer. Pay attention to the walls, floor, and lid. Remove any food stains, spills, or residue. Rinse the sponge or cloth with clean water as needed.
- Wipe down the removable parts: If your chest freezer has removable shelves or dividers, clean them separately. Use the same cleaning solution and cloth to wipe down these parts. Ensure they are completely dry before placing them back in the freezer.
- Clean the exterior: Use a damp cloth and the cleaning solution to wipe down the exterior of the freezer. Remove any dust or dirt that may have accumulated. Pay special attention to areas such as handles and hinges.
- Allow it to dry: After cleaning, leave the chest freezer open for a while to allow any moisture to evaporate. This will prevent the growth of mold or mildew during storage.
By following these cleaning steps, you’ll ensure that your chest freezer is spotless and ready for storage. In the next section, we’ll discuss the importance of defrosting the chest freezer before storing it.
Defrosting the Chest Freezer
Defrosting your chest freezer is an important step in preparing it for storage. This process removes any built-up ice or frost, ensuring that the freezer remains efficient and prevents damage. Follow these steps to defrost your chest freezer:
- Turn off and unplug the freezer: Before you can begin defrosting, make sure to turn off and unplug the chest freezer. This will prevent any accidents or electric shocks during the process.
- Empty the freezer: Remove all the food and any removable shelves or dividers from the freezer. Place them in a cool location or transfer them to another freezer.
- Prepare for melting: To speed up the defrosting process, place towels or absorbent materials inside the chest freezer to catch the melting ice. This will help prevent water from puddling at the bottom.
- Keep the freezer door open: Leave the freezer door open to allow the ice to melt naturally. You can place a fan near the freezer to circulate the air and hasten the process.
- Avoid using sharp objects: It may be tempting to try and remove the ice using sharp objects or tools. However, this can damage the interior of the freezer. It’s best to let the ice melt on its own.
- Empty the water tray: Most chest freezers have a water tray located at the bottom. Check and empty the water tray periodically as the ice melts to prevent overflow.
- Clean up: Once all the ice has melted and the freezer is completely defrosted, use a sponge or cloth to wipe away any remaining moisture or water droplets. Ensure that the interior is dry before proceeding with the next steps.
Defrosting your chest freezer is essential to prevent ice buildup and maintain its efficiency. It’s recommended to defrost the freezer at least once a year, even if you don’t plan on storing it. In the next section, we’ll discuss the importance of removing all contents from the freezer before storage.
Removing All Contents from the Freezer
Before storing your chest freezer, it’s crucial to remove all contents from the freezer. This includes food, ice, and any other items you may have stored inside. Here are some steps to follow when removing all contents from the freezer:
- Check for expiration dates: Take the time to go through all the food items in your chest freezer and check for expiration dates. If any items have expired or are nearing their expiration date, discard them properly to avoid any foodborne illnesses.
- Transfer items to another freezer or use them up: If you have another freezer available, consider transferring the food items to that freezer. This will ensure that your food remains frozen and doesn’t spoil during the storage period. Alternatively, you can plan your meals and use up the items before storing the freezer.
- Dispose of perishable items: If you have perishable items that cannot be stored in another freezer or used up, it’s best to dispose of them properly. This includes items like fresh produce, dairy products, and meats.
- Empty the ice trays: If your chest freezer has built-in ice trays, empty them and dispose of any remaining ice cubes. Leaving the ice cubes inside the trays can cause them to stick together or create a mess during the storage period.
- Remove any non-food items: Check if there are any non-food items stored in the freezer, such as ice packs, containers, or utensils. Remove these items and find suitable storage for them outside of the freezer.
By removing all contents from your chest freezer, you ensure that it’s completely empty and ready for storage. This not only prevents any food from spoiling but also makes the cleaning and organizing process easier. In the next section, we’ll discuss how to organize and pack your freezer efficiently before storage.
Read more: How To Store A Printer When Not In Use
Organizing and Packing the Freezer
Once you have cleaned and emptied your chest freezer, it’s time to organize and pack it efficiently for storage. By following these steps, you can maximize space utilization and protect your freezer and its contents:
- Group similar items together: Categorize your items and group similar foods together. This will help you locate specific items easily when you need them in the future.
- Use airtight containers and bags: Transfer any open packages of food into airtight containers or resealable bags. This prevents spills and helps maintain the quality of the food during storage.
- Label containers and bags: Label the containers or bags with the contents and date. This will help you identify items quickly and maintain organization during storage.
- Stack items efficiently: Stack the containers or bags in a way that maximizes the use of space. Place heavier items at the bottom and lighter items on top. Try to create stable stacks to prevent them from falling over.
- Leave space for air circulation: Allow for some space between the containers to promote air circulation and prevent condensation. This helps maintain a more balanced temperature throughout the storage period.
- Utilize any removable dividers or baskets: If your chest freezer has removable dividers or baskets, make use of them to further organize small or delicate items. This will help keep them separate from larger items and prevent damage.
- Avoid overpacking: While it’s important to maximize space, avoid overpacking the freezer. Overpacking can restrict airflow and affect the freezer’s cooling performance. Leave some room for the cold air to circulate.
- Secure loose items: If you have any loose items or small containers, secure them by using rubber bands or zip ties to keep them in place. This prevents them from moving or falling out when you open the freezer in the future.
By following these organization and packing tips, you can optimize the storage space and protect your freezer and its contents during the storage period. In the next section, we’ll discuss the importance of choosing an appropriate storage location for your chest freezer.
When storing a chest freezer, make sure it is completely defrosted and cleaned. Leave the lid slightly open to prevent mildew, and store it in a dry, well-ventilated area.
Choosing an Appropriate Storage Location
When it comes to storing your chest freezer, selecting the right location is crucial for maintaining its integrity and functionality. Here are some factors to consider when choosing an appropriate storage location:
- Avoid extreme temperatures: It’s essential to keep your chest freezer in a location with a stable temperature. Extreme heat or cold can affect the freezer’s performance and potentially cause damage. Aim for a storage space with a temperature range of 50°F to 85°F (10°C to 29°C).
- Avoid direct sunlight: Direct exposure to sunlight can lead to increased temperature fluctuations inside the freezer, causing inefficiency and potential damage. Choose a storage location away from windows or areas with direct sunlight.
- Ensure proper ventilation: The storage area should have adequate ventilation to prevent stagnant air and moisture buildup. Good airflow helps maintain a consistent temperature and prevents the growth of mold or mildew inside the freezer.
- Consider humidity levels: High humidity can lead to condensation and moisture accumulation, which can be detrimental to the freezer. Choose a storage location with moderate humidity levels to reduce the risk of damage.
- Avoid areas prone to water leaks or flooding: Ensure that the chosen storage location is free from water leaks, plumbing issues, or flooding. Water damage can severely impact the functionality and lifespan of your chest freezer.
- Keep it away from chemicals and hazardous substances: Store your freezer away from any potential sources of chemical fumes or hazardous substances. These can interfere with the freezer’s components and compromise the safety of your food.
- Consider accessibility: Choose a location that allows for easy access to your chest freezer when you need it again. Avoid placing it in an area where it may be difficult to retrieve or maneuver.
- Protect it from pests: Take precautions to protect your chest freezer from pests, such as insects or rodents. Ensure there are no openings or gaps that could allow pests to enter and potentially damage the freezer or contaminate the stored food.
- Consider security: If you are storing your chest freezer in a shared space or storage facility, consider the security arrangements. Ensure that the area is well-maintained and has appropriate security measures in place to protect your freezer from theft or vandalism.
By taking these factors into account, you can choose an appropriate storage location that ensures the longevity and functionality of your chest freezer. In the next section, we’ll discuss how to cover and protect the freezer during storage.
Covering and Protecting the Chest Freezer
Once you have chosen the appropriate storage location for your chest freezer, it’s essential to cover and protect it to prevent any damage or deterioration during the storage period. Here are some steps to follow when covering and protecting your chest freezer:
- Use a protective cover: Invest in a quality protective cover or tarp specifically designed for chest freezers. The cover will shield the freezer from dust, dirt, and potential scratches, keeping it in pristine condition.
- Measure the freezer: Ensure that you have accurate measurements of your chest freezer before purchasing a cover. It should be large enough to fully cover the freezer and provide a snug fit without being too tight.
- Secure the cover: Once you’ve placed the cover over the freezer, secure it properly with straps or bungee cords. This will prevent it from coming loose or being blown off in case of drafts or strong winds.
- Avoid plastic covers: While plastic is waterproof, it can trap moisture inside, leading to mold or mildew growth. It’s best to choose a cover made from breathable materials that allow for proper ventilation.
- Protect the lid: Place a layer of cardboard or foam padding over the lid of the freezer before covering it. This adds an extra layer of protection and helps prevent any accidental damage or dents.
- Elevate the freezer: If possible, consider elevating your chest freezer off the ground. This helps prevent moisture buildup and potential damage caused by flooding or water leaks.
- Avoid stacking heavy items on top: To prevent any additional pressure on the chest freezer, avoid stacking heavy items or placing any objects on top of it. This can lead to damage or deformity of the freezer lid.
- Regularly inspect the cover: Periodically check the cover for any signs of wear, tear, or damage. Repair or replace the cover as needed to maintain optimal protection for your chest freezer.
- Keep the storage area clean: Ensure that the storage area remains clean and free from debris. Regularly sweep or vacuum the area to prevent dust accumulation and potential damage to your freezer.
By properly covering and protecting your chest freezer, you can safeguard it from dust, scratches, and other potential hazards during the storage period. In the next section, we’ll discuss the importance of monitoring the storage conditions of your freezer.
Monitoring the Storage Conditions
Monitoring the storage conditions of your chest freezer is vital to ensure that it remains in optimal condition throughout its period of non-use. By regularly checking and maintaining the storage conditions, you can prevent any potential problems and address them promptly. Here are some steps to follow when monitoring the storage conditions of your chest freezer:
- Check the temperature: Use a thermometer to monitor the temperature inside the storage area. Ensure that it remains within the recommended range of 50°F to 85°F (10°C to 29°C). Fluctuations outside this range can affect the performance of the freezer and the quality of the stored food.
- Inspect for leaks or moisture: Regularly inspect the storage area for any signs of leaks, water damage, or moisture accumulation. Address any issues promptly to prevent damage to your chest freezer and its contents.
- Examine the cover: Check the condition of the protective cover on a regular basis. Look for any damage or wear and tear that could potentially compromise its effectiveness. Repair or replace the cover as needed.
- Ensure proper ventilation: Verify that the storage area maintains proper ventilation. Good airflow helps prevent the buildup of stale air, excess moisture, or condensation. It also helps to regulate the temperature inside the storage space.
- Inspect for pests: Regularly check for any signs of pests, such as insects or rodents, inside the storage area. Take appropriate measures, such as placing traps or using deterrents, to prevent any damage to your chest freezer or contamination of the stored food.
- Keep the surroundings clean: Maintain cleanliness in the storage area by regularly cleaning and removing any debris or dust. This helps prevent the buildup of dirt and potential damage to the freezer.
- Address any issues promptly: If you notice any problems or abnormalities in the storage conditions, address them promptly. This includes fixing leaks, adjusting temperature settings, or seeking professional assistance if necessary.
- Monitor the storage duration: Keep track of how long your chest freezer has been in storage. Consider checking it periodically to ensure that it remains in good condition and to prevent any potential issues from going unnoticed for an extended period.
- Follow manufacturer guidelines: Refer to the manufacturer’s guidelines and recommendations for the storage of your specific chest freezer model. They may provide specific instructions or precautions to follow to maintain the integrity of the freezer.
By regularly monitoring the storage conditions of your chest freezer, you can identify and address any issues before they escalate. This ensures that your freezer remains in excellent condition, ready to be used again when needed. In the next section, we’ll discuss the final steps of reassembling the chest freezer before it’s ready for use.
Read more: How To Store A Cooler When Not In Use
Reassembling the Chest Freezer
When the time comes to use your chest freezer again after a period of storage, reassembling it properly is crucial to ensure its optimal functionality. Follow these steps to reassemble your chest freezer:
- Remove the cover: Carefully remove the protective cover from the chest freezer, ensuring that there is no debris or moisture on the cover that could fall into the freezer.
- Inspect the interior: Take a moment to inspect the interior of the chest freezer. Look for any signs of damage or wear that may have occurred during storage. If you notice any issues, address them before proceeding with reassembly.
- Replace shelves and dividers: If you removed any shelves or dividers during the storage process, carefully place them back into their respective slots. Ensure that they fit securely and evenly to maximize storage space.
- Plug in the freezer: Reconnect the chest freezer to the power supply by plugging it back into the electrical outlet. Ensure that the outlet is in good working condition and properly grounded.
- Set the temperature: Adjust the temperature settings on the chest freezer according to your preferences. Refer to the manufacturer’s guidelines for the recommended temperature range, and allow the freezer to reach the desired temperature before loading it with food.
- Organize the contents: Begin organizing your food items inside the chest freezer. Group similar items together and arrange them in a way that makes them easily accessible. Consider using baskets or bins for better organization if desired.
- Avoid overloading: While it may be tempting to fill the freezer to its maximum capacity, avoid overloading it. Leave some breathing room to allow for proper airflow and circulation, which helps maintain consistent temperatures and optimal performance.
- Keep a freezer inventory: Consider keeping an inventory list or using labels to track the items stored in the chest freezer. This will help you keep track of what you have and easily locate specific items when needed.
- Regularly clean and maintain: Make it a habit to periodically clean and maintain your chest freezer to ensure its longevity and optimal performance. Follow the manufacturer’s instructions for cleaning and servicing your specific model.
By following these steps, you can properly reassemble your chest freezer and ensure that it is ready for use again. Regularly maintaining and organizing the contents will help maximize its efficiency and longevity. Congratulations on successfully storing and reassembling your chest freezer!
Conclusion
Properly storing a chest freezer when it’s not in use is essential to maintain its functionality, protect the stored food, and prolong its lifespan. By following the steps outlined in this article, you can ensure that your chest freezer remains in optimal condition during the storage period and is ready for use when you need it again.
From preparing the freezer and cleaning its interior to defrosting and removing all contents, each step plays a crucial role in ensuring that your freezer remains clean, organized, and damage-free. Choosing an appropriate storage location, covering and protecting the freezer, and regularly monitoring the storage conditions further contribute to its well-being.
Remember to reassemble the chest freezer carefully and follow proper maintenance practices to maximize its efficiency and longevity. Regularly cleaning, organizing, and maintaining the freezer will help you make the most of its storage capacity and keep your food fresh and accessible.
By following these guidelines and investing a little extra effort in storing your chest freezer, you can enjoy the convenience and benefits it provides for years to come. Proper storage not only preserves the freezer’s functionality but also ensures that your food remains safe and of high quality.
So, the next time you need to store your chest freezer, refer back to this comprehensive guide to help you through the process. By taking the necessary steps and precautions, you can rest assured that your chest freezer will be well-cared for during the storage period and ready to serve you whenever you need it again.
Frequently Asked Questions about How To Store A Chest Freezer When Not In Use
Was this page helpful?
At Storables.com, we guarantee accurate and reliable information. Our content, validated by Expert Board Contributors, is crafted following stringent Editorial Policies. We're committed to providing you with well-researched, expert-backed insights for all your informational needs.


0 thoughts on “How To Store A Chest Freezer When Not In Use”