Articles
How To Store A Christmas Tree In An Apartment
Modified: October 28, 2024
Looking for articles on how to store a Christmas tree in an apartment? Discover space-saving tips and tricks to keep your holiday decor organized and protected.
(Many of the links in this article redirect to a specific reviewed product. Your purchase of these products through affiliate links helps to generate commission for Storables.com, at no extra cost. Learn more)
Introduction
Christmas trees are a beloved symbol of the holiday season, bringing warmth and joy to homes around the world. However, for those living in apartments or limited spaces, storing a Christmas tree can be a challenge. The bulky size and delicate nature of artificial or real trees can make it difficult to find suitable storage in a small living space.
But fear not! With a little planning and creativity, you can successfully store your Christmas tree in an apartment, ensuring its longevity and keeping it in excellent condition for future holiday seasons.
In this article, we will guide you through the step-by-step process of storing a Christmas tree in an apartment. From choosing the right storage container to safely disassembling and preserving the tree, we will provide you with valuable tips and strategies to make the storage process as smooth as possible.
So, if you’re ready to reclaim some storage space while keeping the holiday spirit alive, let’s get started with our comprehensive guide on how to store a Christmas tree in an apartment.
Key Takeaways:
- Preserve the magic of the holiday season in your apartment by carefully storing your Christmas tree. From choosing the right container to unwrapping and assembling, these steps ensure a festive tree for years to come.
- With thoughtful planning and execution, it’s entirely possible to store a Christmas tree in an apartment. Follow the step-by-step guide to ensure your tree remains in excellent condition and ready to bring joy to your home each year.
Step 1: Choosing the Right Storage Container
The first step in storing a Christmas tree in an apartment is to choose the right container for storage. The container you select should be sturdy, protective, and large enough to accommodate your tree.
Here are a few options to consider:
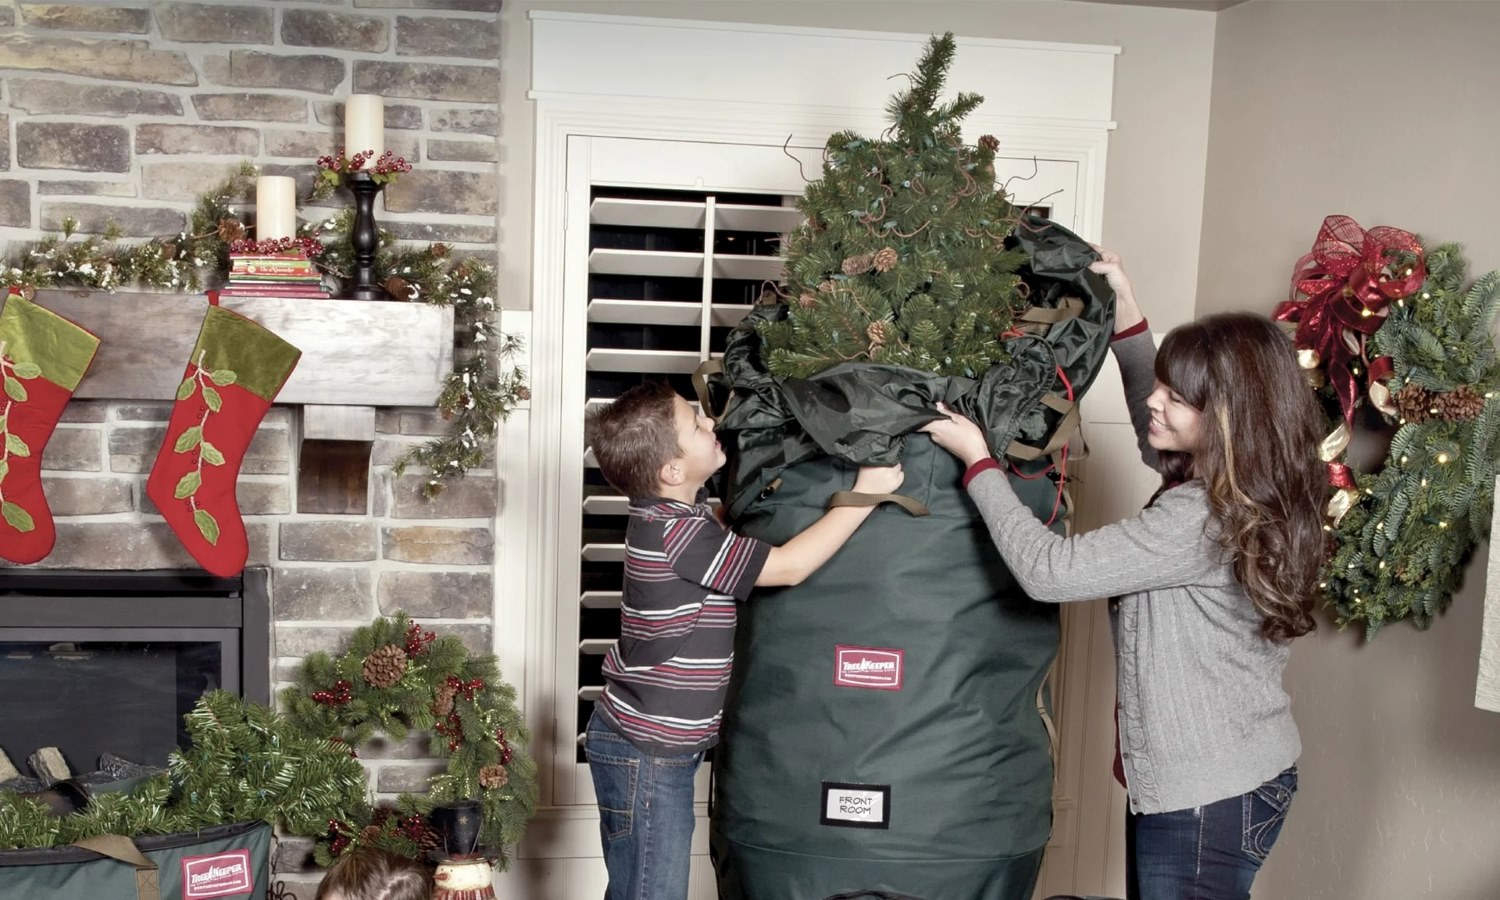
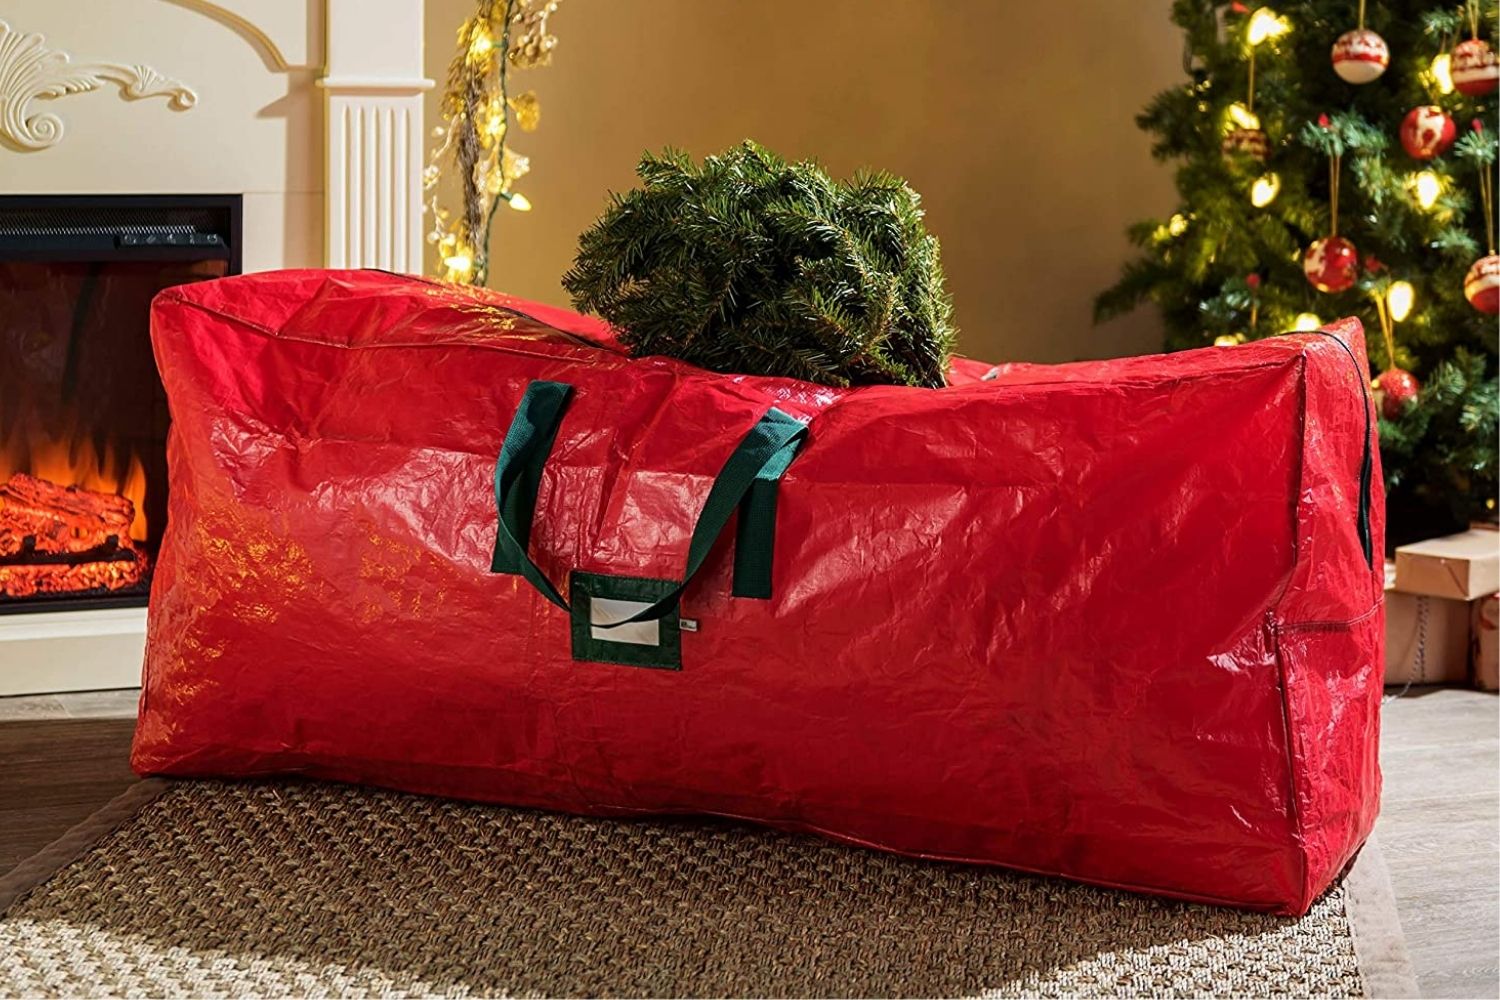
- Tree Bags: Tree bags are specifically designed for storing Christmas trees. They are made of durable materials such as polyester or canvas and come in various sizes to fit different tree heights. Tree bags often have handles for easy transportation and some even have wheels for added convenience.
- Cardboard Boxes: If you’re looking for a more budget-friendly option, cardboard boxes can be a suitable choice. Choose a box that is long and wide enough to hold the disassembled tree sections. Reinforce the bottom of the box with extra tape to ensure it can support the weight of the tree.
- Plastic Bins: Plastic storage bins with lids provide excellent protection against moisture and pests. Look for bins that are tall enough to accommodate the tree and have a secure lid. Clear bins are great for easily identifying the contents.
Before storing your tree, ensure that the chosen container is clean and free of any debris that could potentially damage the tree. You can wipe the inside of the container with a damp cloth or use a vacuum cleaner to remove any dust or dirt.
Remember, the goal is to find a storage container that provides adequate protection from dust, pests, and moisture, ensuring that your Christmas tree remains in perfect condition until the next holiday season.
Step 2: Disassembling the Christmas Tree
Disassembling the Christmas tree is an important step in preparing it for storage in an apartment. By carefully taking apart the tree, you can ensure that it fits easily into your chosen storage container and is protected during the storage period.
Here’s how to disassemble your Christmas tree:
- Remove the decorations: Start by taking off all the ornaments, lights, and any other decorative items from the tree. Gently place them in a separate box or container, ensuring they are well protected and organized for next year’s use.
- Remove the tree topper: If your tree has a tree topper, carefully remove it and set it aside in a safe place.
- Separate the tree sections: Most artificial trees come in multiple sections that stack on top of each other. Begin by removing each section starting from the top. As you remove each section, be mindful of any connecting wires or screws that may be holding them together.
- Fold or collapse branches: If your tree has hinged branches, fold them inward towards the center pole. This helps reduce the overall width of the tree and makes it easier to store. If your tree has detachable branches, remove them and stack them neatly.
As you disassemble the tree, make sure to handle the branches with care to prevent any damage. If possible, refer to the manufacturer’s instructions for disassembly to ensure you’re following the recommended procedure.
Once the tree is fully disassembled, take a moment to inspect each section for any signs of wear or damage. If you notice any issues, such as broken branches or broken lights, consider repairing or replacing them before storing the tree.
By disassembling the tree properly, you’ll not only make it easier to store but also minimize the risk of any damage occurring during the storage period.
Step 3: Removing Decorations and Lights
Before storing your Christmas tree in an apartment, it’s essential to remove all decorations and lights. This ensures that your tree remains in good condition and prevents any damage that may occur during storage.
Here’s how to properly remove decorations and lights from your Christmas tree:
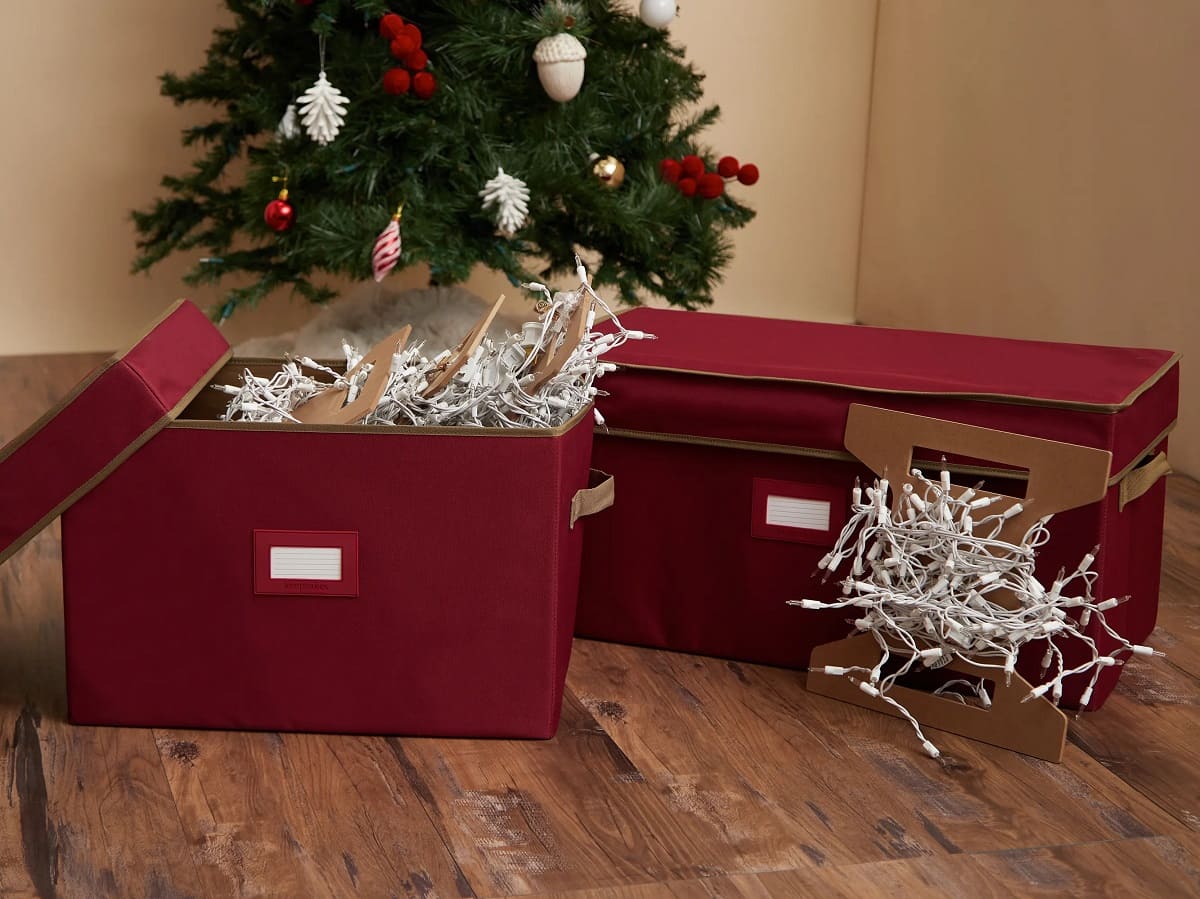
- Remove fragile ornaments first: Begin by carefully taking off any fragile ornaments or decorations from the tree. Place them in a separate container lined with tissue paper or bubble wrap to protect them from breakage.
- Wrap lights around a cord reel: If your tree is adorned with string lights, remove them by gently unraveling them from the branches. To prevent tangling, wrap the lights around a cord reel or a piece of cardboard. This will make it easier to unravel and set up next year.
- Label and organize: As you remove the decorations and lights, make sure to label and organize them. Use small plastic bags or dividers within storage containers to separate different types of ornaments or lights. This will make it easier and more enjoyable to decorate the tree next year.
- Inspect and clean decorations: While removing decorations, take the opportunity to inspect each item for any damage or signs of wear. Clean the decorations if needed before storing them to ensure they remain in good condition for future use.
By carefully removing decorations and lights, you’ll not only protect your cherished items but also make it easier to store and set up your tree in the future. Proper organization and labelling will save you time and effort during the next holiday season.
Step 4: Cleaning the Tree Before Storage
Before storing your Christmas tree in an apartment, it’s important to give it a thorough cleaning. This helps remove any dust, dirt, or debris that may have accumulated during the holiday season and ensures that your tree stays in good condition while in storage.
Here’s how to clean your Christmas tree before storage:
- Dust the branches: Use a soft-bristle brush or a microfiber cloth to gently dust the branches of the tree. Start from the top and work your way down, making sure to get in between the branches and remove any visible dust.
- Use a vacuum cleaner: If you have a vacuum cleaner with a brush attachment, you can use it to further remove dust and debris from the tree. Use a low or medium suction setting to prevent any damage to the branches.
- Spot-clean with mild soap: If there are any stubborn stains or spots on the branches, you can spot-clean them with a mild soap solution. Mix a small amount of gentle liquid soap with water, dip a cloth in the solution, and gently blot the affected areas. Be sure to wring out the cloth well and avoid saturating the branches with too much liquid.
- Allow the tree to dry: After cleaning, allow the tree to air dry completely before storing it. Placing a fan near the tree can help speed up the drying process, but make sure the tree is not exposed to direct heat or sunlight.
By cleaning your Christmas tree before storage, you’ll not only maintain its appearance but also prevent any potential damage caused by dirt or debris. A clean and well-maintained tree will be ready to impress next holiday season!
When storing a Christmas tree in an apartment, consider using a tree storage bag to keep it protected and contained. This will help prevent damage and keep the tree from shedding needles.
Read more: How To Store Christmas Tree
Step 5: Wrapping the Tree Sections
Once you have disassembled and cleaned your Christmas tree, the next step is to wrap each section securely before storing them. Proper wrapping provides an extra layer of protection against dust, moisture, and potential damage during the storage period.
Here’s how to wrap the tree sections effectively:
- Use plastic wrap or stretch film: Start by unrolling a length of plastic wrap or stretch film. Begin at the top of each tree section and wrap it tightly, maintaining a consistent tension as you go. Continue wrapping until you reach the bottom of the section.
- Secure with tape or bungee cords: Once the section is completely wrapped, secure the plastic wrap in place by using tape or bungee cords. This will prevent the wrapping from unraveling and keep the branches compact.
- Label the wrapped sections: To make it easier to identify each section when it’s time to set up the tree again, label the wrapped sections. Use a permanent marker or label maker to indicate which section corresponds to the top, middle, or bottom of the tree.
- Repeat for each tree section: Repeat the wrapping process for each disassembled section of the tree. Ensure that each section is individually wrapped and secure.
By wrapping the tree sections, you not only protect them from dust and dirt but also prevent any potential damage that may occur during handling or storage. The tight wrapping will keep the branches compressed and maintain the shape of the tree until the next holiday season.
Step 6: Storing the Tree in a Safe Place
Now that you have wrapped the tree sections, it’s time to store them in a safe place within your apartment. Finding the right storage location is crucial to maintain the integrity of the tree and ensure it remains in excellent condition until the next holiday season.
Here are some factors to consider when storing your Christmas tree:
- Avoid extreme temperatures: The ideal storage environment for a Christmas tree is a cool, dry place. Avoid areas that are subject to extreme temperatures or fluctuations, such as attics or basements, as this can cause the tree to deteriorate.
- Maximize vertical space: If your apartment has limited storage space, consider utilizing vertical space for storing the tree. This can be done by placing the containers or bins containing the tree sections on shelves or stacked on top of each other.
- Keep away from moisture: Moisture can lead to mold or mildew growth, which can damage your tree. Make sure the storage area is free from any moisture sources, such as leaky pipes or dampness.
- Avoid exposure to sunlight: Direct sunlight can fade the color of your tree and weaken the branches. Store the tree sections in an area that is shielded from sunlight to preserve their appearance.
- Create a barrier: To provide an additional layer of protection, consider placing a sheet or tarp between the tree sections and the storage area floor or wall. This can help prevent any potential damage from dust or scratches.
Remember to consider the size and weight of the tree sections when selecting the storage area. Make sure they are positioned in a way that prevents them from falling or getting damaged. Additionally, keep the sections away from any potential hazards or heavy items that could cause them to be crushed or bent.
By storing your Christmas tree in a safe and suitable location, you’ll ensure its preservation and make it easier to retrieve and assemble for the next festive season.
Step 7: Preventing Damage and Preserving the Tree
Once your Christmas tree is safely stored in your apartment, it’s important to take additional measures to prevent any damage and preserve its condition. By incorporating these precautions, you can ensure that your tree remains in excellent shape for the next holiday season.
Here are some tips to prevent damage and preserve your tree while in storage:
- Avoid pressure or weight: Do not place heavy objects on top of the tree sections or apply excessive pressure. This can cause the branches to bend or flatten, resulting in an uneven appearance when you set up the tree again.
- Check for pests: Periodically inspect the storage area for signs of pests, such as rodents or insects. These creatures can damage the tree or nest in it, so it’s crucial to address any infestations promptly.
- Monitor humidity levels: Extreme humidity levels can affect the condition of your tree. Invest in a dehumidifier or use moisture-absorbing products like silica gel packs to maintain an optimal environment.
- Keep away from chemicals: Avoid storing the tree near any chemicals or cleaning products. Chemical fumes can damage the artificial branches or cause discoloration.
- Inspect the storage container: Regularly inspect the storage container for any signs of damage or deterioration. If necessary, replace the container to ensure it continues to provide adequate protection.
Additionally, it’s a good idea to keep a record of the storage location and any necessary instructions to make it easier to retrieve the tree when the time comes. Labeling the container or noting the storage area in a holiday organization system can help you stay organized year after year.
By taking these precautions, you can prevent potential damage and preserve the quality of your Christmas tree, allowing it to bring joy and cheer for many holiday seasons to come.
Step 8: Unwrapping and Assembling the Tree Next Year
After a year of careful storage, it’s finally time to unwrap and assemble your Christmas tree for the next holiday season. Proper handling and assembly ensure that your tree maintains its beauty and becomes the centerpiece of your festive decorations once again.
Here’s how to unwrap and assemble your tree:
- Retrieve the storage container: Locate the container or bin where you stored the tree sections. Carefully remove it from its storage location and bring it to the designated area for assembly.
- Inspect the tree sections: Before unwrapping, take a moment to inspect each tree section for any signs of damage or wear. If you notice any issues, address them promptly to ensure a smooth assembly.
- Unwrap the tree sections: Start by removing the tape or bungee cords that secured the plastic wrap around each section. Unwrap the plastic wrap carefully, ensuring not to disturb or damage the branches in the process.
- Assemble the tree sections: Begin by assembling the bottom section of the tree, following the manufacturer’s instructions if available. As you connect each section, make sure they fit securely and align properly. Continue stacking and connecting the sections until the entire tree is assembled.
- Fluff and shape the branches: Once the tree is fully assembled, take some time to fluff and shape the branches. Gently separate and arrange the branches to create a full and natural-looking tree. This step brings your tree to life and enhances its overall appearance.
- Add lights and decorations: Finally, it’s time to add the lights and decorations back onto the tree. Start with the lights, carefully wrapping them around the branches from top to bottom. Then, adorn the tree with your favorite ornaments and decorations, creating a festive and personalized display.
By following these steps, you’ll be able to effectively unwrap, assemble, and decorate your Christmas tree for another joyful holiday season. Take your time to ensure that each section is properly connected and that the branches are arranged to your liking.
Now you can bask in the warm glow of a beautifully assembled Christmas tree, bringing the magic of the holidays into your apartment once again.
Read more: How To Store A Decorated Christmas Tree
Conclusion
Storing a Christmas tree in an apartment may seem daunting, but with careful planning and execution, it’s entirely possible to preserve the beauty and charm of your tree for many holiday seasons to come. By following the step-by-step guide outlined in this article, you can ensure that your Christmas tree remains in excellent condition and is ready to bring joy to your home each year.
From choosing the right storage container and disassembling the tree to properly removing decorations and lights, cleaning the tree, wrapping the sections, storing in a safe place, and taking precautions to prevent damage, each step plays a vital role in maintaining the integrity of your tree. Finally, unwrapping and assembling the tree with care and attention to detail completes the preservation process and allows you to enjoy the festive spirit in your apartment.
Remember, the key to successful tree storage is thoughtful organization, protection from environmental factors, and periodic inspections to ensure the tree’s condition remains intact. With these practices in place, you can look forward to many future holiday seasons filled with the magic and splendor of a well-preserved Christmas tree.
So go ahead, tackle the challenge of storing your Christmas tree in your apartment with confidence. With the knowledge and tips provided in this article, you’ll be able to reclaim storage space while keeping the holiday spirit alive, savoring the joy that the Christmas season brings.
Frequently Asked Questions about How To Store A Christmas Tree In An Apartment
Was this page helpful?
At Storables.com, we guarantee accurate and reliable information. Our content, validated by Expert Board Contributors, is crafted following stringent Editorial Policies. We're committed to providing you with well-researched, expert-backed insights for all your informational needs.


0 thoughts on “How To Store A Christmas Tree In An Apartment”