
Articles
How To Store A Flocked Christmas Tree
Modified: August 16, 2024
Looking for tips on storing a flocked Christmas tree? Read our articles and discover the best methods to ensure your tree stays in pristine condition until next year!
(Many of the links in this article redirect to a specific reviewed product. Your purchase of these products through affiliate links helps to generate commission for Storables.com, at no extra cost. Learn more)
Introduction
As the holiday season comes to an end, it’s time to start thinking about packing away your Christmas decorations, including your flocked Christmas tree. Flocked trees, with their snowy appearance, add a touch of elegance and charm to any holiday display. However, storing them properly is essential to ensure their longevity and keep them looking beautiful for years to come.
In this article, we will guide you through the process of storing your flocked Christmas tree. From cleaning and preparing the tree to selecting the right storage container, we will cover all the necessary steps to ensure your tree is safely stored and ready to be unpacked and enjoyed next holiday season.
Before we dive into the details, it’s important to note that flocked Christmas trees require a bit more care and attention compared to regular artificial trees. The flocked material can be delicate and easily damaged if not handled properly. By following our step-by-step guide, you can ensure that your tree remains in pristine condition and can be enjoyed for many more festive seasons.
So, let’s get started with the first step: cleaning and preparing the tree for storage.
Key Takeaways:
- Preserve the snowy charm of your flocked Christmas tree by cleaning, disassembling, and packaging it with care. Choose the right storage container and location to ensure its longevity and festive beauty.
- Safely store your flocked Christmas tree in a dry, cool area, labeled for easy retrieval. Regularly check for damage and mold, and enjoy its snowy elegance for many joyful holiday seasons to come.
Read more: How To Store Christmas Tree
Step 1: Cleaning and Preparing the Tree
Before storing your flocked Christmas tree, it’s important to give it a thorough cleaning to remove any dust, dirt, or debris that may have accumulated during the holiday season. Here’s how you can clean and prepare your tree for storage:
- Start by gently removing any ornaments, lights, and other decorations from the tree. Take your time to avoid pulling on the branches or causing any damage.
- Once all the decorations are removed, use a soft brush or a handheld vacuum cleaner with a brush attachment to remove any loose debris, such as loose flocking or dust, from the branches. Be gentle to avoid pulling off any flocking.
- If there are any stubborn stains or spots on the flocking, you can try using a damp cloth or sponge with mild soap and water to gently dab and clean the affected areas. Avoid rubbing or scrubbing vigorously, as this can cause the flocking to come off.
- After cleaning, allow the tree to air dry completely. Make sure there is no moisture left on the branches or flocking, as this can lead to mold or mildew growth during storage.
- Inspect the tree for any loose or damaged flocking. If you notice any areas where the flocking has come off, you can use a special flocking adhesive or spray to touch up those spots. Follow the manufacturer’s instructions for application and drying time.
Once you’ve cleaned and inspected the tree, it’s time to move on to the next step: disassembling the tree.
Step 2: Disassembling the Tree
Disassembling your flocked Christmas tree properly is crucial for its safe storage and easy setup next year. Follow these steps to disassemble your tree:
- Start by unplugging any lights if your tree has built-in lighting. Carefully remove the lights from the tree without pulling on the wires.
- Next, remove the tree topper, if you have one, and set it aside in a safe place.
- Gently separate the tree sections by following the manufacturer’s instructions. Most artificial trees consist of multiple sections that are assembled using connectors or hinges.
- As you disassemble each section, be cautious not to pull or tug on the flocked branches, as this can cause damage to the flocking.
- If your tree has detachable branches, remove them one by one, being careful not to bend or twist them excessively.
- Once all the sections and branches are separated, label them to make reassembly easier next year. You can use colored tape or numbered labels to identify which section or branch goes where.
By disassembling your flocked Christmas tree with care and labeling the sections, you will save time and effort when setting it up again in the future.
Now that your tree is disassembled, it’s time to move on to the next step: safely packaging the tree for storage.
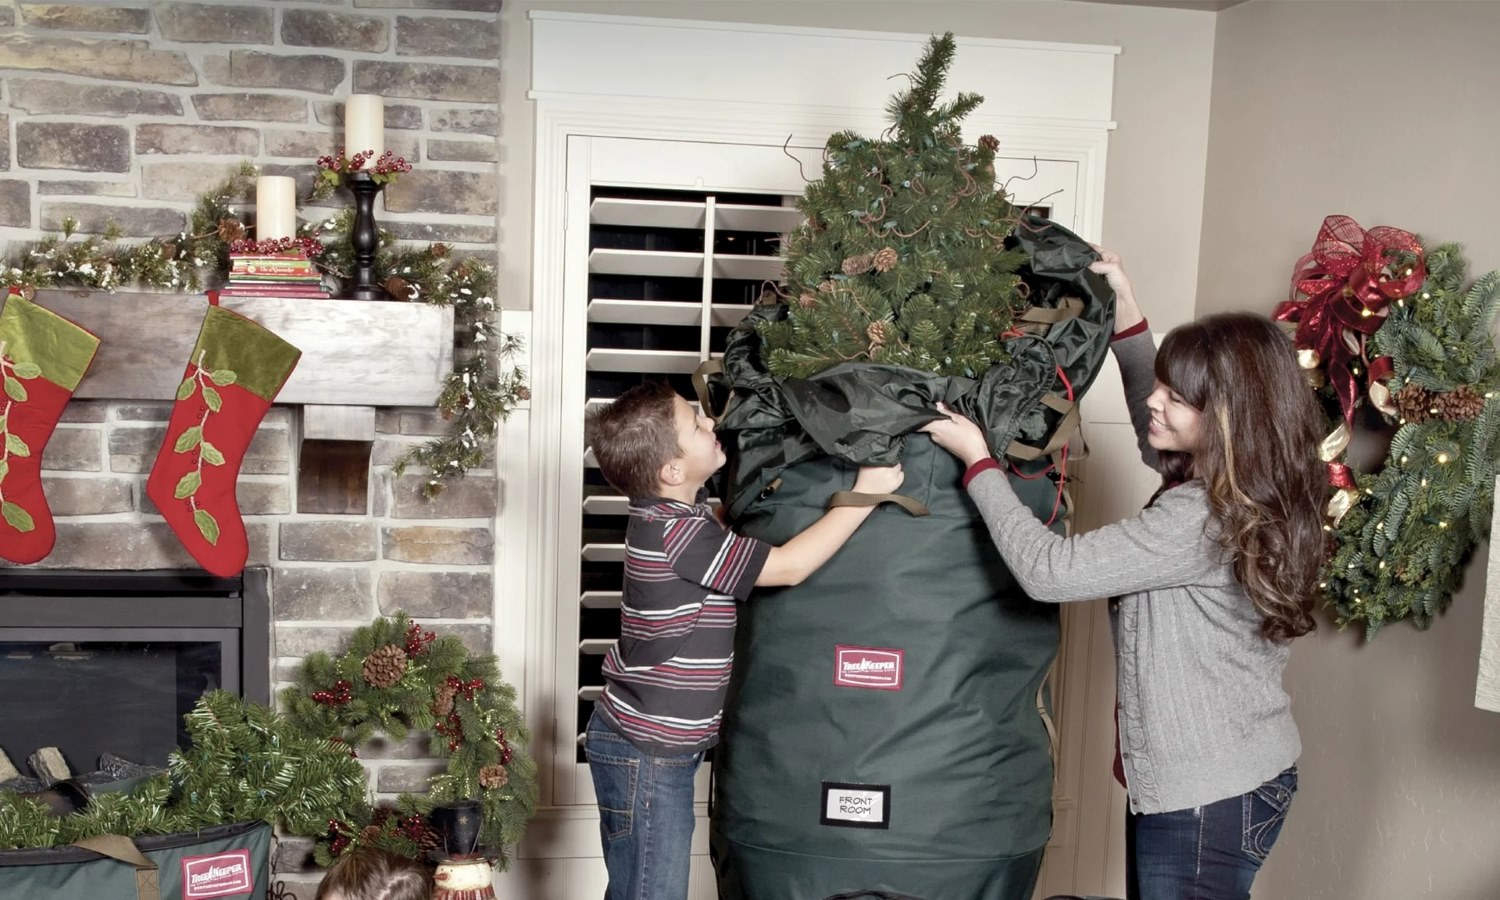
Step 3: Safely Packaging the Tree
Properly packaging your flocked Christmas tree is essential to safeguard it from damage during storage. Follow these steps to ensure your tree is safely packed:
- Start by gathering all the tree sections and branches together, making sure they are clean and dry.
- Wrap each section and branch individually with soft blankets, sheets, or tree storage bags to protect them from dust and scratches. Avoid using plastic bags, as they can trap moisture and promote mold growth.
- For added protection, you can secure the wrapped sections and branches with a bungee cord or rope to prevent them from shifting or getting damaged.
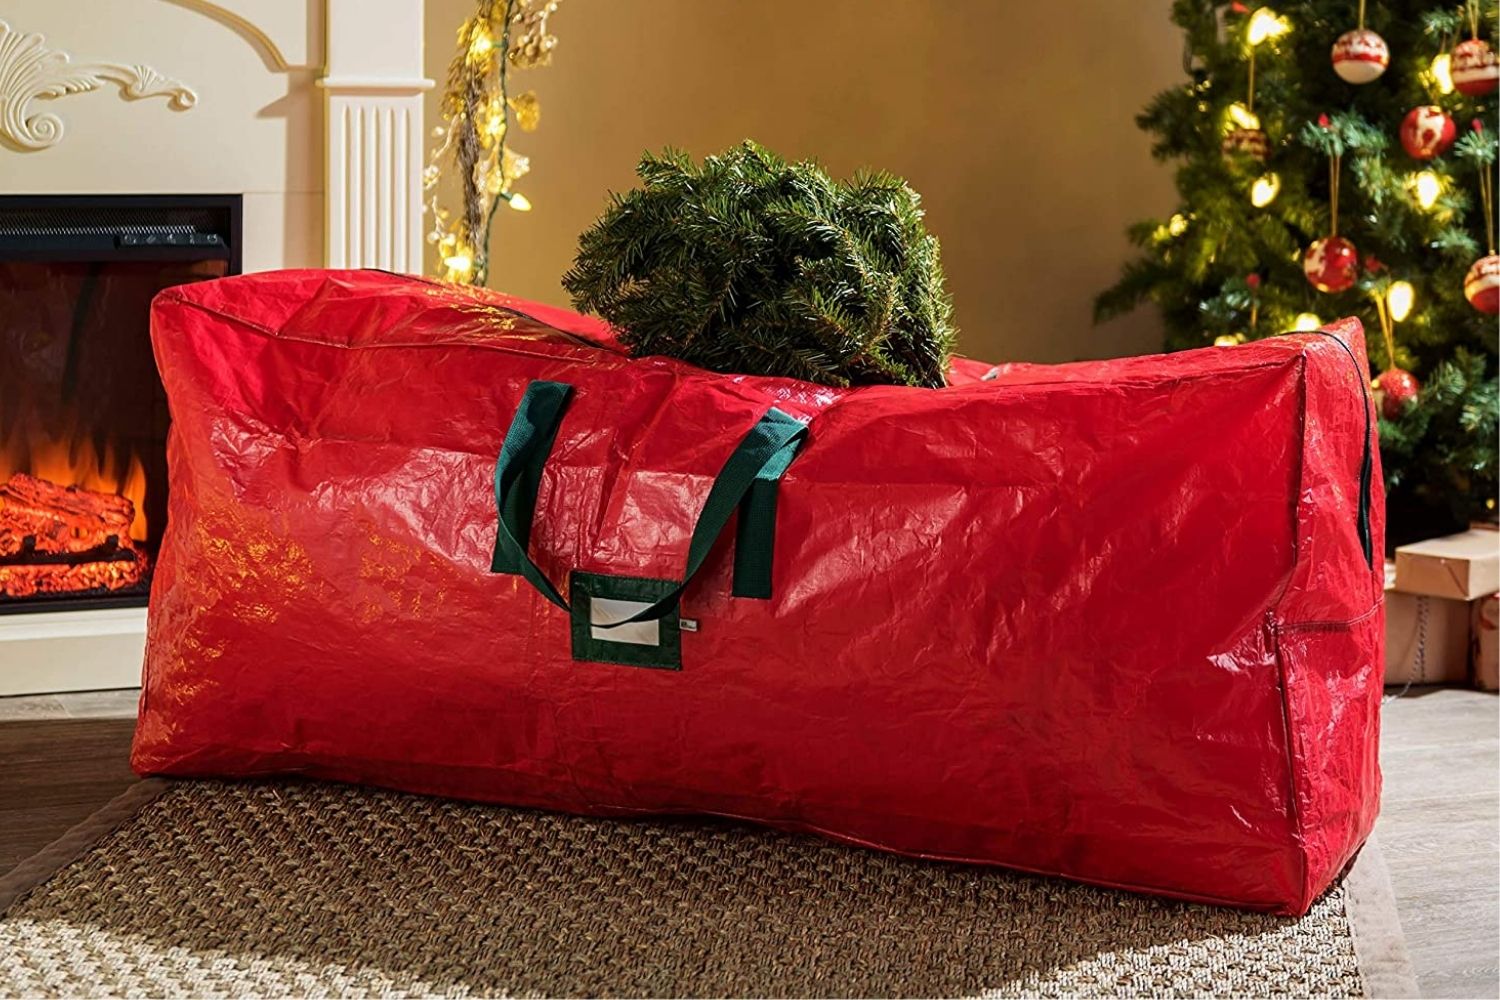
- If your tree came with a storage bag or box, place the wrapped sections inside and ensure they fit securely. If not, you can use a large, sturdy cardboard box or a specialized Christmas tree storage bag that accommodates the size of your tree.
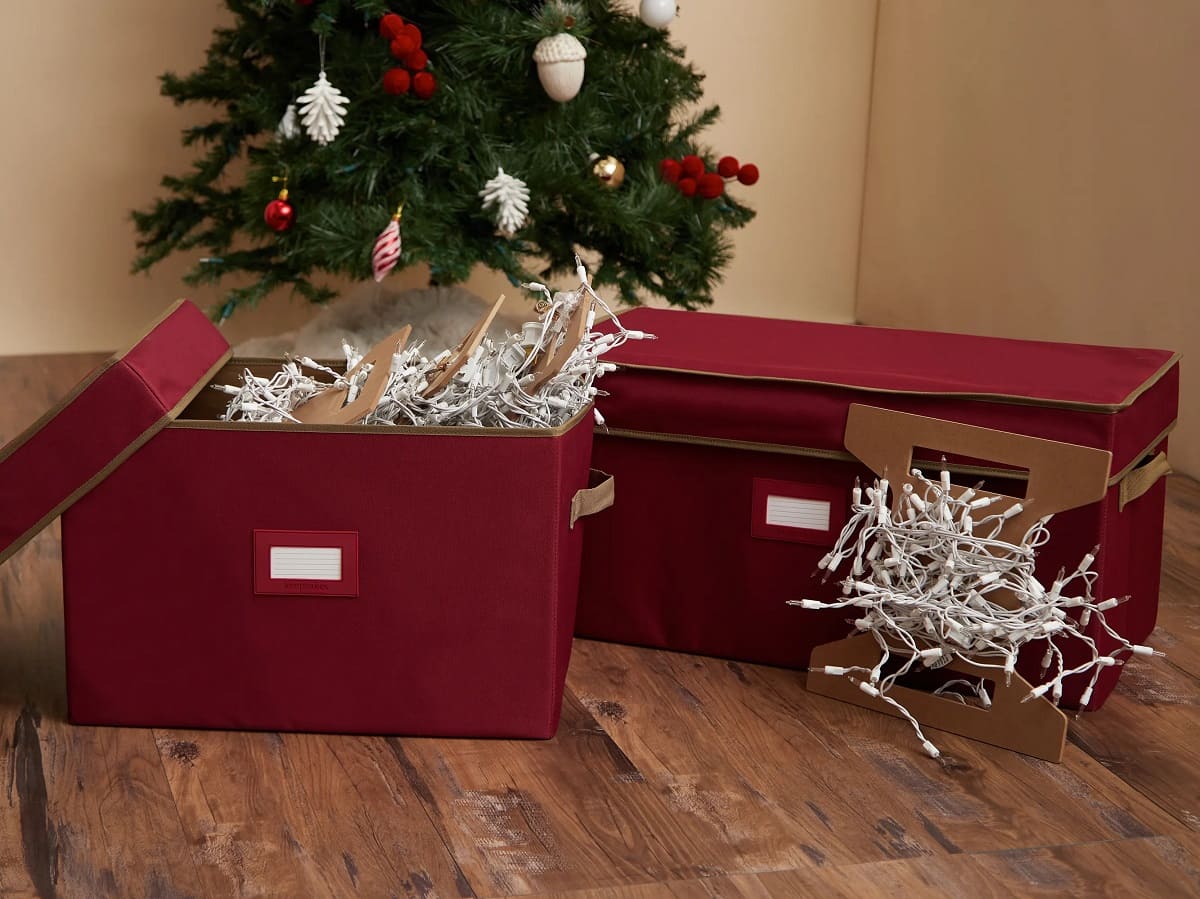
- Before sealing the storage container, add some moisture-absorbing packets or silica gel packets to help control humidity and prevent moisture buildup. This will help protect your tree from mold and mildew.
- Close and seal the storage container tightly, ensuring it is properly secured.
Remember to store your flocked Christmas tree in a dry, cool, and climate-controlled area to maintain its integrity. Avoid storing it in areas prone to extreme temperature fluctuations or high humidity, such as basements or attics.
With your tree carefully packaged and ready for storage, let’s move on to the next step: choosing the right storage container.
When storing a flocked Christmas tree, disassemble it carefully to avoid damaging the flocking. Use a tree storage bag or box to protect it from dust and moisture. Store it in a cool, dry place to preserve the flocking.
Step 4: Choosing the Right Storage Container
Choosing the right storage container for your flocked Christmas tree is crucial to ensure its protection and longevity. Here are some factors to consider when selecting the ideal storage container:
- Size: The storage container should be large enough to accommodate all the sections and branches of your tree without excessive bending or squeezing. Measure the dimensions of your disassembled tree to ensure a proper fit.
- Durable and Sturdy: Opt for a storage container that is made of durable materials that can withstand the weight and shape of the tree. Strong plastic bins or specialized Christmas tree storage bags are excellent options.
- Protection from Dust and Moisture: Look for a container with a tight-fitting lid or zipper closure to keep out dust and moisture. This will help prevent damage to the flocking and ensure the tree remains in pristine condition.
- Handles or Wheels: Consider a storage container with built-in handles or wheels for easy transportation. This will make it more convenient to move the tree in and out of storage.
- Labeling: Choose a storage container that allows for clear labeling. This will help you easily identify the contents and locate your flocked tree when it’s time to set it up again.
While storing your flocked Christmas tree in its original packaging may be an option, it’s important to assess its condition and durability. If the original packaging is worn out or insufficient, investing in a sturdy storage container specifically designed for Christmas trees is a wise choice.
Now that you’ve chosen the right storage container, let’s move on to the next step: storing the tree properly.
Read more: How To Store A Decorated Christmas Tree
Step 5: Storing the Tree Properly
Properly storing your flocked Christmas tree is essential to maintain its shape and flocking. Follow these steps to ensure your tree is stored correctly:
- Find a suitable storage location that is dry, cool, and away from direct sunlight. Extreme temperatures and sunlight exposure can cause the flocking to fade or deteriorate.
- If possible, store the tree in an upright position to preserve its shape. If space is limited, you can carefully lay the tree sections flat, ensuring they are supported and not under any excessive weight.
- If you have an upright storage space, use ropes or bungee cords to secure the tree sections to a wall or storage rack. This will prevent them from tipping over or getting damaged.
- Avoid placing heavy items on top of the stored tree, as this can flatten the branches and cause damage to the flocking.
- Do not stack additional items on the storage container that contains the tree. This can potentially deform the tree or cause it to lose its shape.
- Regularly check on the stored tree throughout the year to ensure there are no signs of mold, pests, or other damage. If any issues arise, address them promptly.
By following these steps, you can ensure that your flocked Christmas tree remains in excellent condition while in storage, ready to be enjoyed again during the next holiday season.
Now that your tree is safely stored, let’s move on to the final step: labeling the storage container.
Step 6: Labeling the Storage Container
Labeling the storage container that holds your flocked Christmas tree is a simple yet crucial step to make your tree easily identifiable for future use. Here’s how you can label the container:
- Use a permanent marker or label maker to clearly write or print the words “Flocked Christmas Tree” on the outside of the storage container. This will help distinguish it from other holiday decorations.
- If you have multiple Christmas trees or storage containers, consider numbering them or using color-coded labels to easily identify which container holds the flocked tree.
- Include any relevant information on the label, such as the size or height of the tree, to make it easier to select the correct container when it’s time to set up the tree again.
- Attach a tag or note that indicates the year of storage, especially if you have multiple trees or regularly rotate decorations. This will help you keep track of how long the tree has been in storage.
- Place the label or tag in a visible and easily accessible location on the container. Avoid covering it with tape or other adhesive materials that can make it challenging to read.
- Store the labeled container in an organized manner, ideally in a dedicated section of your storage area for Christmas decorations. This will make it easier to locate the tree when the next holiday season arrives.
By labeling the storage container, you will save time and effort when retrieving your flocked tree for future holiday celebrations. It also helps protect the tree by ensuring it is handled with care throughout its storage period.
Congratulations! You have completed all the necessary steps to store your flocked Christmas tree properly. By following these guidelines, you can preserve the beauty and integrity of your tree, allowing it to bring joy and festive cheer for many years to come.
Happy storing and happy holidays!
Conclusion
Storing your flocked Christmas tree properly is essential to preserve its beauty and ensure its longevity. By following the steps outlined in this guide, you can safely pack and store your tree, allowing it to be enjoyed in all its snowy brilliance for many more holiday seasons to come.
From cleaning and preparing the tree to disassembling it with care, each step plays a crucial role in maintaining the condition of the flocking and the overall structure of the tree. Proper cleaning techniques help remove any dirt or debris, while gentle disassembly ensures that the tree sections and branches remain intact.
Choosing the right storage container is also vital. It should be strong, durable, and able to protect the tree from dust, moisture, and damage during storage. Labeling the container further facilitates easy identification and retrieval when the time comes.
Remember to store your flocked tree in a cool, dry, and climate-controlled area to maintain its integrity and prevent any damage. Regularly checking on the stored tree and addressing any issues promptly will help ensure its long-term preservation.
By following these steps, you can store your flocked Christmas tree with confidence, knowing that it will be in excellent condition when the next holiday season arrives. Proper storage not only saves you time and effort but also allows you to continue creating beautiful memories with your cherished tree.
So, take the time to clean, disassemble, pack, and label your flocked tree for storage. With a little care and attention, your tree will continue to bring festive joy and wonder to your home year after year.
Happy storing and happy holidays!
Frequently Asked Questions about How To Store A Flocked Christmas Tree
Was this page helpful?
At Storables.com, we guarantee accurate and reliable information. Our content, validated by Expert Board Contributors, is crafted following stringent Editorial Policies. We're committed to providing you with well-researched, expert-backed insights for all your informational needs.


0 thoughts on “How To Store A Flocked Christmas Tree”