Home>Articles>How To Store Christmas Village Houses Without Boxes
Articles
How To Store Christmas Village Houses Without Boxes
Modified: January 7, 2024
Learn how to store your Christmas village houses safely and without boxes in this informative article. Find creative and space-saving solutions for organizing and protecting your precious holiday decorations.
(Many of the links in this article redirect to a specific reviewed product. Your purchase of these products through affiliate links helps to generate commission for Storables.com, at no extra cost. Learn more)
Introduction
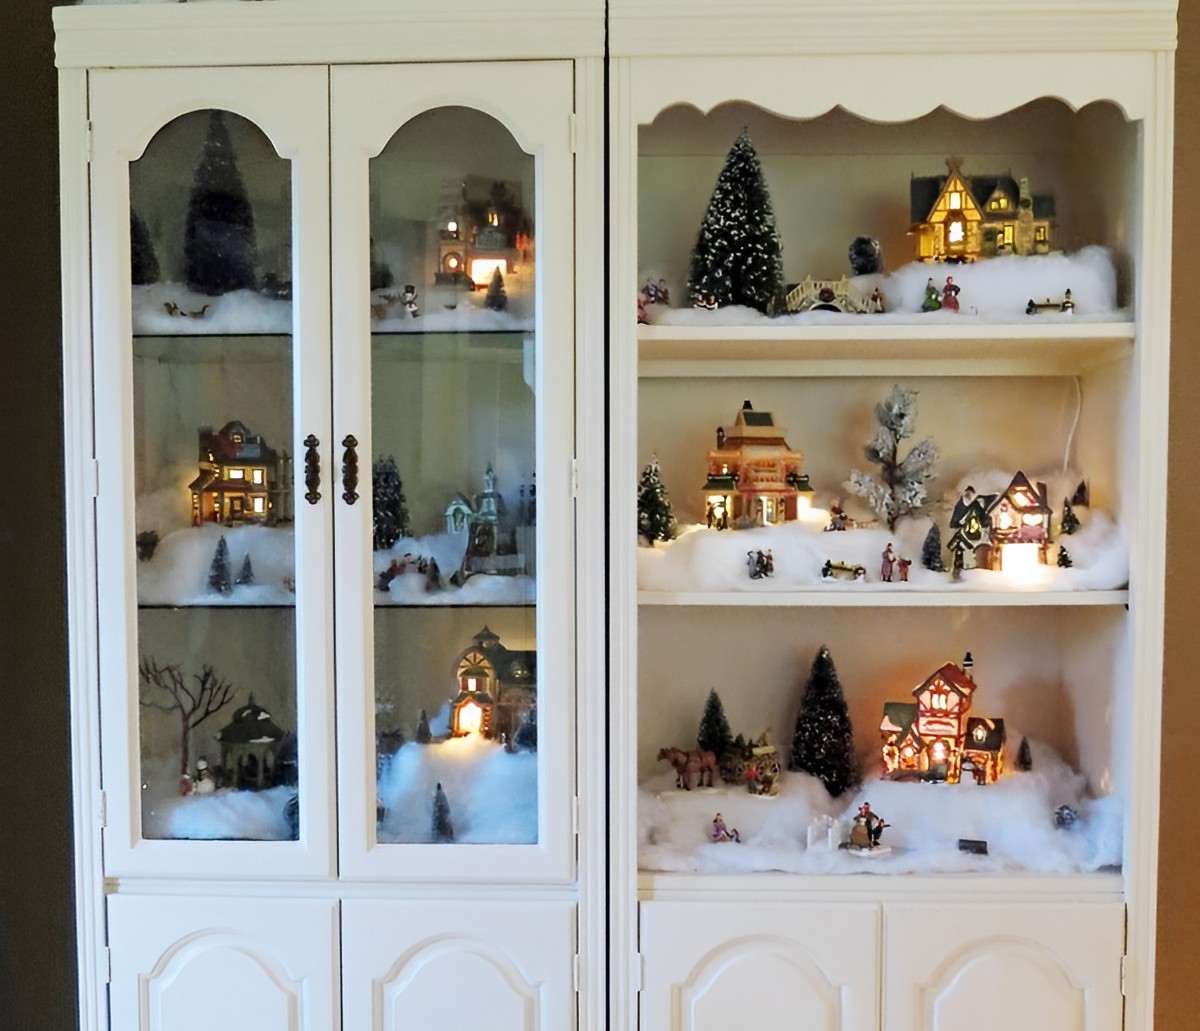
Storing Christmas village houses after the festive season can be a challenge, especially if you don’t have the original boxes they came in. These delicate and often intricate decorations require proper protection to ensure they stay in pristine condition for years to come. But don’t worry, we’ve got you covered!
In this article, we will explore various methods for storing Christmas village houses without boxes. Whether you have a small collection or an extensive village display, these practical and creative storage solutions will help keep your cherished holiday decorations safe and organized.
Let’s dive into the different methods and find the perfect option for your unique collection!
Key Takeaways:
- Protect and Preserve: Creative and practical methods like bubble wrap, storage bins, and repurposed items offer effective ways to store Christmas village houses without original boxes, ensuring their safety and longevity for future festive seasons.
- Organization and Convenience: From Ziploc bags to custom foam inserts, utilizing various storage solutions like suitcases, pegboards, and cardboard tubes provides organized and accessible options for storing delicate Christmas village houses, catering to different preferences and needs.
Method 1: Wrapping in Bubble Wrap
One of the simplest and most effective ways to store Christmas village houses without boxes is to wrap them in bubble wrap. Bubble wrap provides excellent cushioning and protection, keeping your delicate houses safe from any potential damage during storage.
To begin, gather your Christmas village houses and some sheets of bubble wrap. Start by placing a house in the center of a sheet of bubble wrap. Wrap the bubble wrap around the house, making sure to cover all sides and corners. Secure the wrap with tape or rubber bands to keep it in place.
If your village houses have fragile parts or delicate features, you can use extra layers of bubble wrap or cut smaller pieces to wrap specific areas separately. This will provide an additional layer of protection for the most vulnerable parts of the houses.
Once you have wrapped each house individually, place them in a storage bin or cardboard box, making sure to fill any empty spaces with packing peanuts or crumpled newspaper to prevent movement. Label the container to easily identify the contents later.
It’s important to note that bubble wrap is not only useful for individual house wrapping but also for separating houses when storing multiple pieces in one container. Place a layer of bubble wrap between each house to prevent them from scratching or rubbing against each other.
Using bubble wrap to store your Christmas village houses is not only a practical solution but also allows for easy visibility of your decorations as you can see through the wrap. Plus, when the next holiday season arrives, it’ll be a breeze to unwrap and set up your village once again!
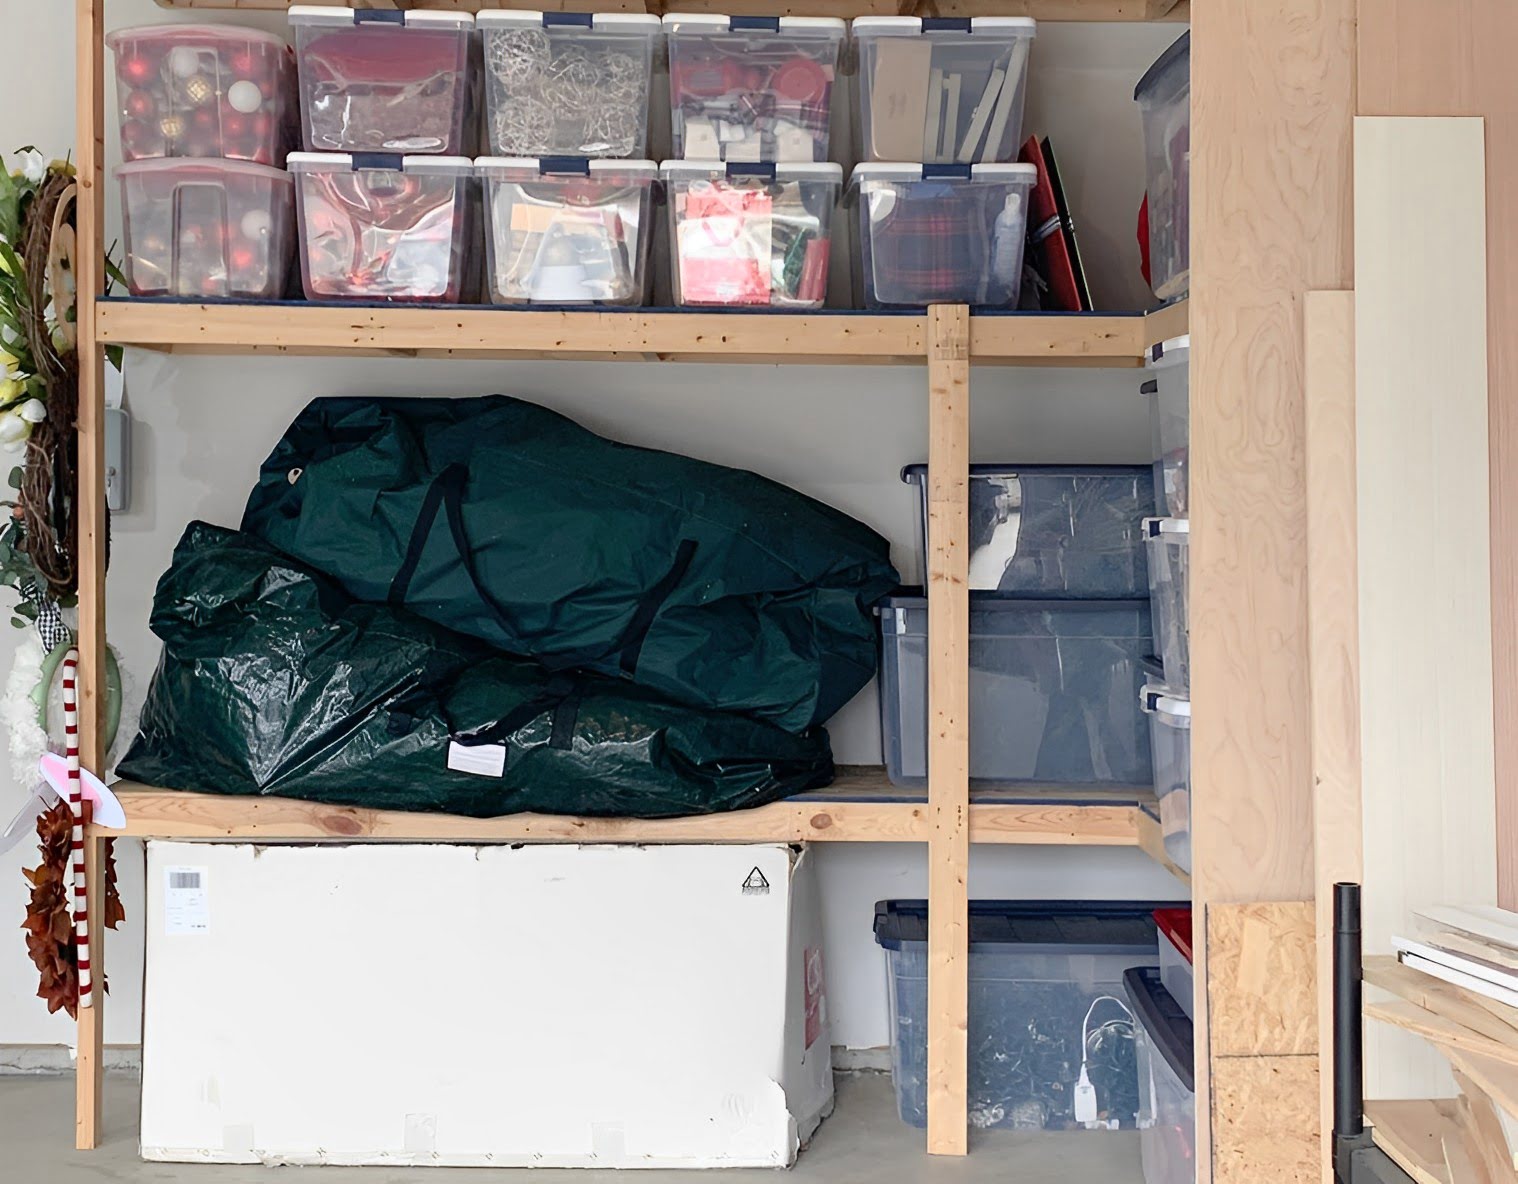
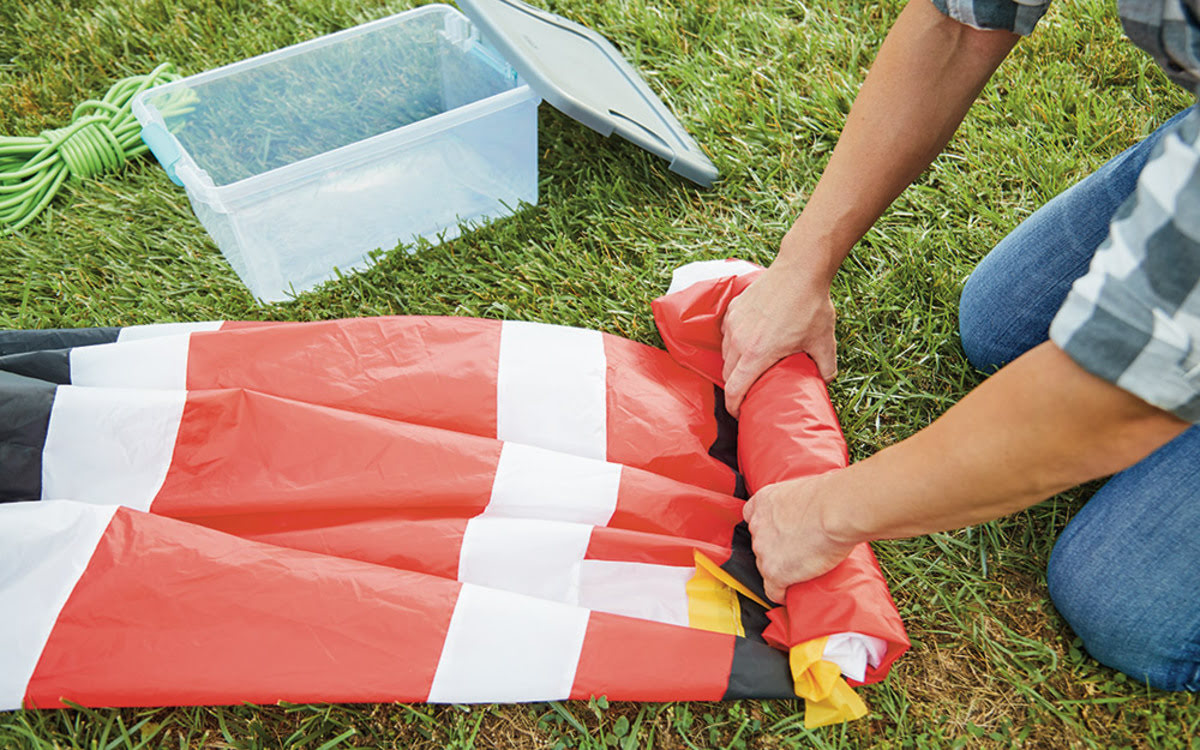
Method 2: Use Storage Bins with Dividers
If you’re looking for a more organized and efficient way to store your Christmas village houses, using storage bins with dividers is an excellent option. These bins offer compartments that allow you to separate and protect each house individually, preventing them from bumping into each other and potentially getting damaged.
To get started, find a storage bin that is large enough to accommodate your village houses. Ideally, choose a bin with adjustable dividers or one specifically designed for storing collectibles. These dividers come in various sizes and can be rearranged to create custom compartments that fit your specific house dimensions.
Before placing your village houses in the storage bin, wrap each one in bubble wrap to provide an additional layer of protection. Arrange the wrapped houses inside each compartment, making sure to leave enough space between them to avoid any potential damage during transportation or storage.
Once all the houses are securely placed in their respective compartments, close the lid tightly. It’s a good idea to label the outside of the bin with the contents, making it easy to locate specific houses when you need them next year.
If you have larger or more fragile village houses, consider using a storage bin that has cushioned compartments or adding some extra padding, such as foam sheets or fabric, to the dividers to provide even more protection.
Using storage bins with dividers not only keeps your Christmas village houses organized but also makes it convenient to transport or relocate them. The sturdy construction of these bins ensures that your precious decorations are kept safe and secure until the next holiday season.
Method 3: Repurpose Egg Crates for Storage
Looking for an inexpensive and eco-friendly option to store your Christmas village houses without boxes? Look no further than your pantry! Repurposing egg crates for storage is a creative and practical solution that provides individual compartments for your delicate decorations.
To begin, gather clean and dry cardboard egg crates. These crates typically have individual sections that are just the right size to hold small Christmas village houses. If your houses are too large to fit in a single section, you can remove the divider between two sections to create a larger space.
Before placing your village houses in the egg crates, it’s a good idea to wrap each one in tissue paper or bubble wrap for added protection. This will help cushion them and prevent any potential scratching or damage.
Once you have wrapped your houses, place each one in its designated section or modified section of the egg crate. Make sure they are positioned securely and do not move around within the compartments. If needed, you can use additional tissue paper or bubble wrap to fill any empty spaces and provide extra padding.
Stack the egg crates carefully, making sure not to put too much weight on top to avoid any potential damage to the houses. Remember to label the outside of the crates or use colored tape to differentiate between different sets or themes of village houses.
One of the advantages of using egg crates for storage is that they are lightweight and easy to transport. They can easily fit into larger storage bins or boxes, making it convenient to keep your Christmas village houses organized and protected.
By repurposing egg crates for storage, you are not only saving money but also giving a second life to an item that would have otherwise been discarded. So, give it a try, and you’ll be amazed at how effective and efficient this storage solution can be!
Method 4: Utilize Plastic Wrap and Towels
If you’re looking for a budget-friendly and readily available option to store your Christmas village houses without boxes, utilizing plastic wrap and towels is a great solution. This method provides both cushioning and protection for your delicate decorations.
Start by gathering your village houses and some plastic wrap. Begin by wrapping each house individually in a layer of plastic wrap. Make sure to cover all sides and corners to prevent any potential scratches or damage during storage.
Once each house is wrapped in plastic wrap, take a soft towel and fold it to create a protective layer. Place the towel-wrapped house in a storage bin or cardboard box and repeat the process for the rest of your village houses.
When placing the wrapped houses in the storage container, make sure to leave some space between each one to avoid any potential contact or pressure. This will help reduce the risk of damage during transportation or storage.
If you have larger or more fragile houses, you can add additional towels or blankets around them for extra cushioning. This will provide an extra layer of protection and prevent any movement or shifting during storage.
Label the outside of the container with the contents or use colored tape to differentiate between different sets or themes of village houses. This will make it easier to locate specific houses when you’re ready to display them again.
Utilizing plastic wrap and towels not only provides a protective barrier for your Christmas village houses but also allows for easy visibility of your decorations. You can see through the plastic wrap to easily identify each house without unwrapping them all.
This simple and cost-effective storage method will keep your village houses safe and secure until the next holiday season, ensuring that they continue to bring joy and festive spirit to your home.
Method 5: Store in Suitcases or Duffle Bags
If you’re looking for a storage method that provides both protection and portability, storing your Christmas village houses in suitcases or duffle bags can be an excellent option. These travel essentials offer a convenient and secure way to store and transport your delicate decorations.
Start by selecting a suitcase or duffle bag that is large enough to accommodate your village houses. Opt for a sturdy suitcase or a bag with a reinforced bottom to provide additional protection against any potential impacts or accidents.
Before placing your village houses in the suitcase or duffle bag, wrap each house individually in tissue paper or bubble wrap. This will help cushion them and prevent any potential scratching or damage during storage and transport.
Once wrapped, carefully place the houses inside the suitcase or duffle bag. Make sure to position them in a way that minimizes movement and prevents them from banging into each other. You can use towels or blankets to create partitions between the houses if needed.
If you have multiple layers of village houses, consider placing a layer of bubble wrap or towels between them to provide extra protection. This will help prevent any potential damage that could occur due to friction or pressure.
Once all the houses are securely placed in the suitcase or duffle bag, zip it closed or secure the bag tightly. It’s a good idea to label the outside of the container or attach a luggage tag with information about the contents inside. This will make it easier to identify and locate your village houses when you’re ready to unpack them.
Storing your Christmas village houses in suitcases or duffle bags not only keeps them safe and protected but also allows for easy transportation. You can easily take your decorations with you if you’re visiting family or friends during the holiday season or if you’re moving homes.
By using suitcases or duffle bags for storage, you’re making practical use of these travel essentials and ensuring that your Christmas village houses remain in pristine condition until the next festive season.
Consider using large plastic storage bins with lids to store Christmas village houses without boxes. Wrap delicate pieces in bubble wrap or tissue paper to prevent damage. Label the bins for easy identification.
Method 6: Hang Houses on Pegboard
If you’re limited on storage space or prefer a more unique display method, hanging your Christmas village houses on a pegboard is a creative and efficient solution. This method not only saves space but also allows you to showcase your village houses even when they’re not in use.
To get started, you’ll need a pegboard, hooks, and some additional tools. Choose a pegboard that is large enough to accommodate your village houses and sturdy enough to hold the weight of the decorations. Measure the available wall space to ensure a proper fit.
Before hanging the houses, make sure to clean and dust them off to remove any dirt or debris. This will help preserve their condition during storage.
Next, attach the pegboard securely to the wall using screws or wall anchors. Ensure that it is level and can support the weight of the houses without sagging or falling.
Now it’s time to hang the houses. Attach hooks to the pegboard, placing them at appropriate intervals to accommodate the size and arrangement of your village houses. Hooks with adjustable heights or lengths can be useful for hanging houses of different sizes.
Gently hang each house on a hook, taking care not to damage any delicate features. Arrange them in a visually pleasing manner, considering factors such as the size, theme, and design of each house. You can create a village street scene by grouping houses together or create a more scattered arrangement for a whimsical effect.
When hanging the houses, ensure that they are not too close to each other to prevent any potential damage caused by contact or friction. Leave enough space between the houses to allow for easy removal and replacement.
Not only does hanging your Christmas village houses on a pegboard save space, but it also allows you to enjoy them as decorative elements throughout the year. You can easily admire your collection and make adjustments or additions as desired.
This storage method works well for smaller village houses, but it’s advisable to exercise caution with larger or more fragile pieces to ensure their stability and protection.
By hanging your village houses on a pegboard, you’re taking advantage of vertical space and transforming your decorations into a unique and eye-catching display.
Method 7: Create Custom Foam Inserts
To provide ultimate protection for your Christmas village houses, creating custom foam inserts is a fantastic solution. This method allows you to tailor-fit individual compartments for each house, ensuring maximum cushioning and preventing any potential damage during storage and transportation.
Start by gathering foam sheets or foam blocks of varying thicknesses. You can find these materials at craft stores or online. Measure the dimensions of each village house, including height, width, and depth.
Using the measurements, mark and cut out pieces of foam that correspond to the size of each house. Make sure to leave some extra space around the edges to provide a snug fit within the foam insert.
Using a knife or specialized foam cutting tool, carefully carve out a recessed area in each foam piece to accommodate the shape of the house. Take your time and proceed with caution to avoid cutting too deep or damaging the foam.
Once you have created the recessed area, test the fit by placing the corresponding house inside. The foam should securely support the house and prevent any movement or shifting.
If needed, you can add additional layers of foam to create extra height or provide cushioning for more delicate parts of the houses. Simply cut and shape the foam pieces accordingly and layer them as required.
After creating the custom foam inserts for each house, place them in a suitable storage bin or container. Arrange the foam inserts in a way that minimizes movement and provides protection for the houses.
If you have multiple layers of houses, you can stack the foam inserts with houses in between or use dividers to separate them. This will prevent any potential contact or pressure that could cause damage.
Using custom foam inserts not only ensures the safety of your Christmas village houses but also makes it easy to organize and locate specific houses when it’s time to set up your display again.
Remember to label the container or use colored tape to differentiate between different sets or themes of village houses. This will save you time and effort in finding the houses you want next year.
Creating custom foam inserts may require some time and effort, but the peace of mind in knowing that your beloved Christmas village houses are well-protected and preserved will make it all worthwhile.
Method 8: Store Houses in Ziploc Bags
If you’re looking for a simple and cost-effective way to store your Christmas village houses without boxes, using Ziploc bags is a practical solution. These airtight bags provide protection from dust, moisture, and potential damage while keeping your decorations organized.
Start by gathering the appropriate sizes of Ziploc bags based on the dimensions of your village houses. You may need multiple sizes, as some houses might be larger or have protruding features that require more space.
Before placing a house in a Ziploc bag, ensure that it is clean and free from any dust or debris. This will help maintain its condition during storage.
Next, gently place a house inside a Ziploc bag, making sure it fits comfortably. If the house has fragile parts or delicate features, consider wrapping it in tissue paper or bubble wrap before placing it inside the bag for additional protection.
Once the house is inside the bag, press out any excess air and seal the bag tightly. Make sure the seal is secure to prevent any air or moisture from entering the bag. You can also double-bag the houses for added protection.
If you have multiple houses, label each Ziploc bag with the contents, so it’s easy to identify specific houses when you need them next year. Additionally, consider using colored tape to denote different sets or themes of village houses for quick reference.
After sealing the bags, store them in a suitable storage bin or container. Make sure the container is sturdy and provides enough space to accommodate all the Ziploc bags without causing any pressure on the houses.
Using Ziploc bags for storage not only keeps your Christmas village houses protected but also allows for easy visibility and identification. The clear plastic allows you to see the contents of each bag without needing to open them.
Keep in mind that this method is most suitable for smaller village houses. Larger or more fragile pieces may require additional cushioning or alternative storage solutions to ensure their safety.
Storing your Christmas village houses in Ziploc bags is a convenient and affordable method that keeps them organized and protected until the next holiday season. It’s a simple yet effective way to preserve your decorations for years to come.
Read more: How To Design Your House For Christmas
Method 9: Utilize Cardboard Tubes for Storage
If you’re looking for a creative and economical method to store your Christmas village houses without boxes, utilizing cardboard tubes can be a clever solution. These tubes provide a protective and organized way to store your delicate decorations, especially those with taller structures or delicate spires.
To get started, gather sturdy cardboard tubes of various sizes. You can collect tubes from paper towel rolls, wrapping paper tubes, or purchase longer mailing tubes for larger houses.
Before placing a house in a cardboard tube, ensure that it is clean and free from any dust or debris. This will help maintain its condition during storage.
Start by wrapping the house in tissue paper or bubble wrap to provide an extra layer of protection. This will help cushion the house and prevent any scratches or damage.
Once wrapped, carefully slide the house into an appropriately-sized cardboard tube. Make sure the tube is tall enough to fully cover the house and sturdy enough to provide protection. If needed, cut the tube to a shorter length if the house is smaller or doesn’t require the full height of the tube.
If you have multiple houses, label each cardboard tube with the contents. You can also use colored tape or markers to differentiate between different sets or themes of village houses.
After inserting the house into the cardboard tube, you can add some additional padding if desired. Consider using tissue paper or foam peanuts around the house to provide extra cushioning and prevent any movement within the tube.
Once all the houses are safely stored in their individual cardboard tubes, you can stack them horizontally in a storage bin or vertically in a larger container. This will help keep them organized and prevent any potential damage during storage.
Using cardboard tubes for storage is not only a practical solution but also an eco-friendly one. It allows you to repurpose items that would otherwise be discarded and provides a safe haven for your Christmas village houses.
By utilizing cardboard tubes, you can efficiently store and protect your decorations, ensuring they remain in excellent condition until the next holiday season.
Method 10: Use Shoeboxes or Gift Boxes
If you’re looking for a readily available and affordable storage solution for your Christmas village houses without boxes, utilizing shoeboxes or gift boxes is a practical and convenient option. These boxes provide a protective and organized way to store your delicate decorations.
Start by gathering shoeboxes or gift boxes of various sizes. Look for boxes that are sturdy and have enough depth to accommodate the height of your village houses.
Before placing a house in a box, ensure that it is clean and free from any dust or debris. Wipe down the house gently, or use a soft brush to remove any dirt, ensuring it’s ready for storage.
Depending on the fragility of the house, you may want to wrap it in tissue paper or bubble wrap for added protection. This will help cushion the house and prevent any potential scratches or damage.
Once wrapped, carefully place the house inside a shoebox or gift box. Make sure the box is appropriately sized to hold the house without any excess space that could cause it to move around.
If you have multiple houses, consider using dividers or compartments within the box to separate them and prevent any potential contact or damage. You can use cardboard dividers, foam, or even folded tissue paper to create partitions as needed.
Label the outside of each box with the contents or use colored tape to differentiate between different sets or themes of village houses. This will make it easier to locate specific houses when you’re ready to set up your display next year.
Once all the houses are packed securely, you can stack the shoeboxes or gift boxes in a storage bin or place them on a shelf. Ensure that they are stored in a cool, dry place to minimize the risk of damage from moisture or temperature fluctuations.
Using shoeboxes or gift boxes for storage not only keeps your Christmas village houses protected but also allows for easy storage and organization. You can easily stack and store the boxes, keeping your decorations tidy and accessible.
By utilizing shoeboxes or gift boxes, you can repurpose everyday items and provide a safe home for your cherished Christmas village houses until the next holiday season.
Conclusion
Storing your Christmas village houses without boxes may seem challenging at first, but with these creative and practical methods, you can keep your delicate decorations safe and organized until the next holiday season.
From wrapping them in bubble wrap to using storage bins with dividers, there are various options to choose from based on your storage space, budget, and personal preference.
Consider utilizing plastic wrap and towels for a cost-effective storage solution or repurposing egg crates for an eco-friendly option. If space is limited, hanging your village houses on a pegboard or creating custom foam inserts can be efficient ways to store and display your decorations.
Ziploc bags offer a simple and visible storage solution, while utilizing cardboard tubes or shoeboxes and gift boxes provides protection and organization. Each method has its own benefits, allowing you to find the perfect fit for your unique collection of Christmas village houses.
Remember to clean your houses before storage, label the containers for easy identification, and store them in a cool, dry place to preserve their condition. Proper storage will ensure that your village houses remain in pristine condition, ready to bring joy and holiday cheer year after year.
So, choose the method that suits your needs best, and enjoy a stress-free and organized storage experience for your beloved Christmas village houses.
Frequently Asked Questions about How To Store Christmas Village Houses Without Boxes
Was this page helpful?
At Storables.com, we guarantee accurate and reliable information. Our content, validated by Expert Board Contributors, is crafted following stringent Editorial Policies. We're committed to providing you with well-researched, expert-backed insights for all your informational needs.


0 thoughts on “How To Store Christmas Village Houses Without Boxes”