Articles
How To Store Garlic Before Planting
Modified: August 17, 2024
Learn the best methods to store garlic before planting in this informative article. Discover tips and techniques to keep your garlic fresh and ready for spring planting.
(Many of the links in this article redirect to a specific reviewed product. Your purchase of these products through affiliate links helps to generate commission for Storables.com, at no extra cost. Learn more)
Introduction
Welcome to our guide on how to store garlic before planting. Garlic is a versatile and popular herb that adds a distinct flavor to a wide variety of dishes. Whether you’re growing your own garlic or simply looking to make your store-bought bulbs last longer, proper storage is key to preserving their freshness and flavor.
Storing garlic before planting is an essential step in preparing the bulbs for optimum growth and development. By following a few simple steps, you can ensure that your garlic bulbs remain in optimal condition, ready to be planted when the time is right.
In this article, we will discuss the reasons why it’s important to store garlic before planting and explore the different methods and factors to consider when storing garlic bulbs. We’ll also provide you with the best storage methods to keep your garlic fresh and healthy until planting season arrives.
So, whether you’re a seasoned gardener or a garlic enthusiast, let’s dive in and learn how to properly store garlic before planting!
Key Takeaways:
- Properly storing garlic before planting is essential for vernalization, controlling planting time, and preventing premature sprouting. Follow curing, cleaning, and trimming steps for optimal storage.
- Choose the right storage method for garlic, such as a cool and dry place, mesh bags, braiding, or paper bags. Regularly check for spoilage to maintain freshness and flavor.
Read more: How To Store Garlic For Planting
Why store garlic before planting?
Storing garlic before planting is crucial for several reasons. Firstly, it allows the garlic bulbs to undergo a process known as vernalization, which is essential for their proper growth and development. Vernalization is the exposure of the garlic bulbs to a period of cold temperature, typically around 32-50°F (0-10°C), for a specific duration of time.
This cold treatment triggers biochemical changes within the bulbs, stimulating the development of cloves and promoting root growth. Without vernalization, garlic bulbs may produce small, underdeveloped cloves or fail to produce cloves at all.
By storing garlic bulbs before planting, you can ensure that they receive the required vernalization period, even if you missed the opportunity to plant them in the fall.
Secondly, storing garlic before planting allows you to control the planting time. Garlic is typically planted in the fall, a few weeks before the ground freezes. However, not everyone has the chance to plant their garlic bulbs at the ideal time due to weather conditions or other constraints.
By storing garlic bulbs, you can delay planting until conditions are more favorable or until you have the necessary time and resources to prepare your garden beds. This flexibility ensures that your garlic has the best chance of success and allows you to maximize its growth potential.
Lastly, storing garlic before planting helps to prevent premature sprouting. If garlic bulbs are stored improperly or left in unfavorable conditions, they may start sprouting prematurely. Premature sprouting can weaken the cloves, reduce their size, and affect their overall quality.
By storing garlic in the proper environment, you can prevent premature sprouting and ensure that the bulbs remain dormant until you are ready to plant them. This will give you healthier and stronger plants when they are eventually planted.
Now that we understand the reasons behind storing garlic before planting, let’s move on to the process of harvesting garlic bulbs and preparing them for storage.
Harvesting Garlic Bulbs
Harvesting garlic bulbs is an exciting and rewarding process that marks the culmination of your efforts in growing garlic. Knowing when to harvest garlic is crucial to ensure that the bulbs are at their peak flavor and quality. Here are some indicators to look for when determining if your garlic is ready to be harvested:
- Foliage: The foliage of garlic plants will begin to turn yellow or brown, indicating that the bulbs are maturing.
- Cloves: Gently dig around the base of a garlic plant to check the size and development of the cloves. They should be plump and fully formed.
- Scapes: Garlic scapes, curly stalks that emerge from the garlic plant, can be harvested and enjoyed as a culinary treat. Their removal can redirect the plant’s energy towards bulb growth.
Once you have determined that your garlic is ready for harvesting, follow these steps to ensure a successful harvest:
- Carefully dig: Use a garden fork or trowel to gently loosen the soil and lift the garlic bulbs out of the ground. Be careful not to damage or bruise the bulbs during this process.
- Brush off excess soil: Remove any clumps of soil from the garlic bulbs using a soft brush or your hands. Avoid washing the bulbs, as moisture can promote rot.
- Leave the foliage intact: Keep the foliage attached to the bulbs, as it helps to protect and preserve the quality of the garlic during the curing process.
Now that you have harvested your garlic bulbs, it’s time to prepare them for storage to ensure their long-term freshness and quality. In the next section, we will discuss the steps involved in preparing garlic bulbs for storage.
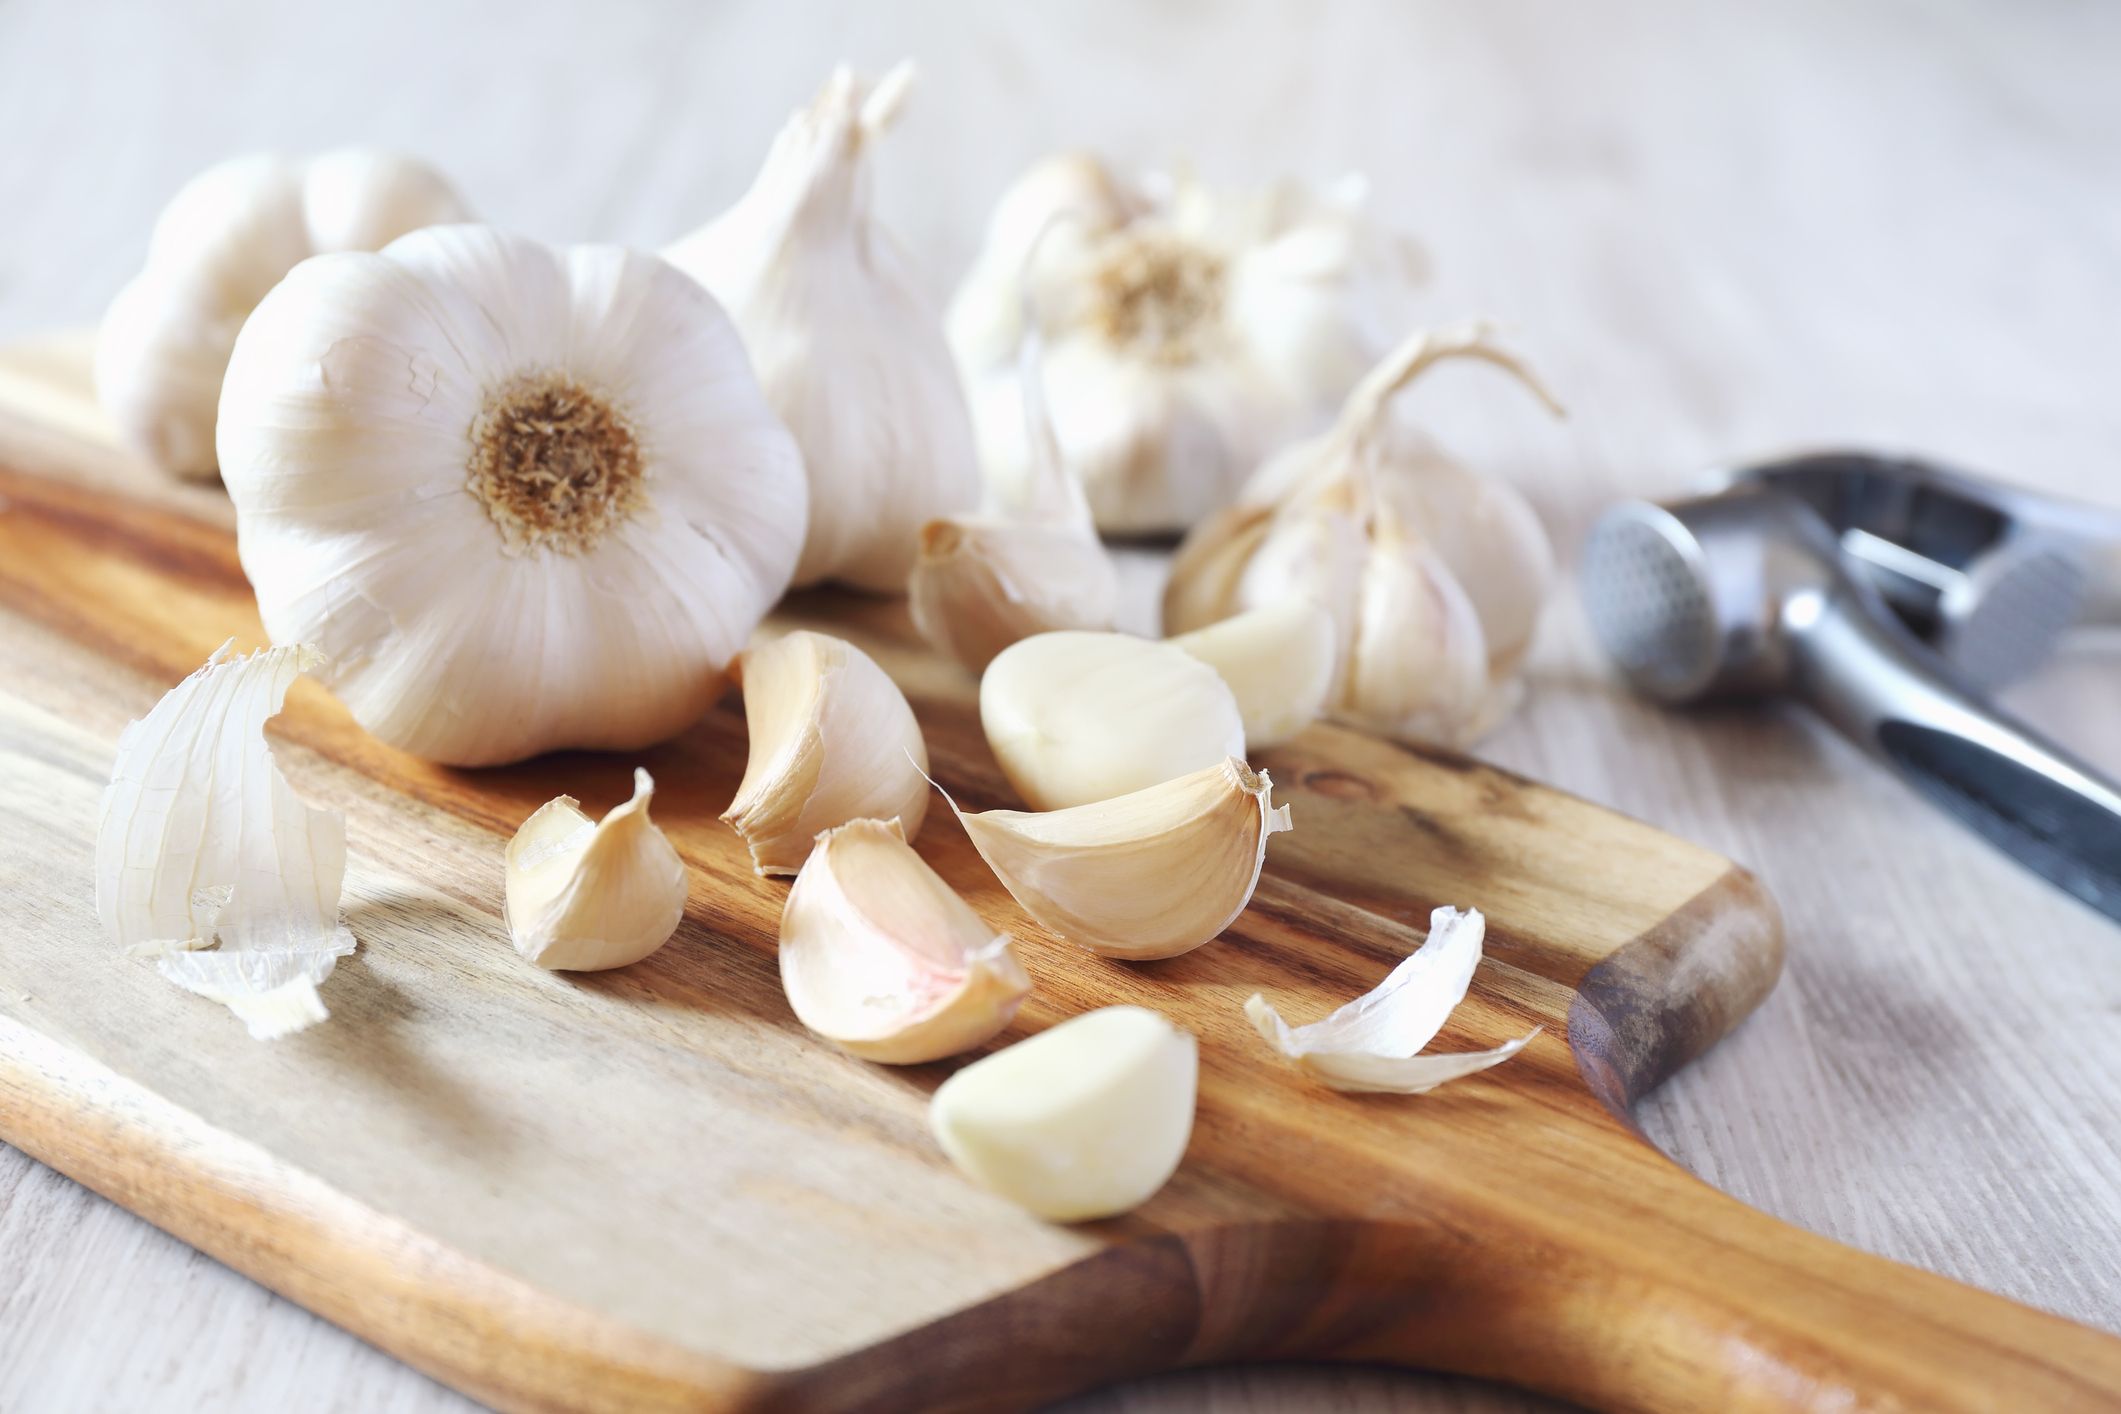
Preparing Garlic for Storage
Properly preparing garlic bulbs for storage is essential to prolong their shelf life and maintain their flavor and quality. Here are the steps to follow when preparing garlic for storage:
- Curing: Garlic bulbs need to go through a curing process to toughen the outer layers and allow the flavors to fully develop. Lay the harvested garlic bulbs in a single layer in a well-ventilated and dry area, away from direct sunlight. Leave the foliage intact and allow the bulbs to cure for about 2-3 weeks.
- Cleaning: Once the garlic bulbs have completed the curing process, gently brush off any remaining dirt or loose outer layers. Avoid removing too many layers, as this can expose the cloves and make them more susceptible to spoilage.
- Trimming: Trim the roots and foliage of the garlic bulbs, leaving about an inch of stem attached. This will help prevent moisture loss and protect the cloves during storage.
After preparing your garlic bulbs, it’s important to consider several factors that can affect the storage quality and longevity of your garlic. Let’s explore these factors in the next section.
Factors to Consider When Storing Garlic
When it comes to storing garlic, there are several important factors to take into consideration to ensure that your bulbs remain fresh and flavorful for as long as possible. Here are the key factors to keep in mind:
- Temperature: Garlic bulbs should be stored in a cool environment, ideally between 50-60°F (10-15°C). Avoid storing garlic in areas that are too warm, as this can cause the bulbs to sprout prematurely.
- Humidity: Garlic bulbs prefer low humidity levels when in storage. High humidity can promote mold and rot, so it’s essential to keep the storage area dry and well-ventilated.
- Airflow: Good airflow is crucial for preventing moisture buildup and maintaining the quality of stored garlic bulbs. Ensure that the storage area has adequate ventilation to allow for proper air circulation.
- Light: Garlic bulbs should be stored in a dark environment to prevent them from sprouting. Exposure to light can trigger the sprouting process and lead to smaller, less flavorful cloves.
- Disease and Damage: Before storing garlic bulbs, carefully inspect them for any signs of disease or damage. Discard any bulbs that appear bruised, soft, or moldy, as they can affect the surrounding bulbs and compromise their quality.
By considering these factors and implementing the appropriate storage methods, you can ensure that your garlic bulbs remain fresh and flavorful for an extended period. In the next section, we will explore the best storage methods for garlic bulbs.
Read more: How To Store Onion Plants Before Planting
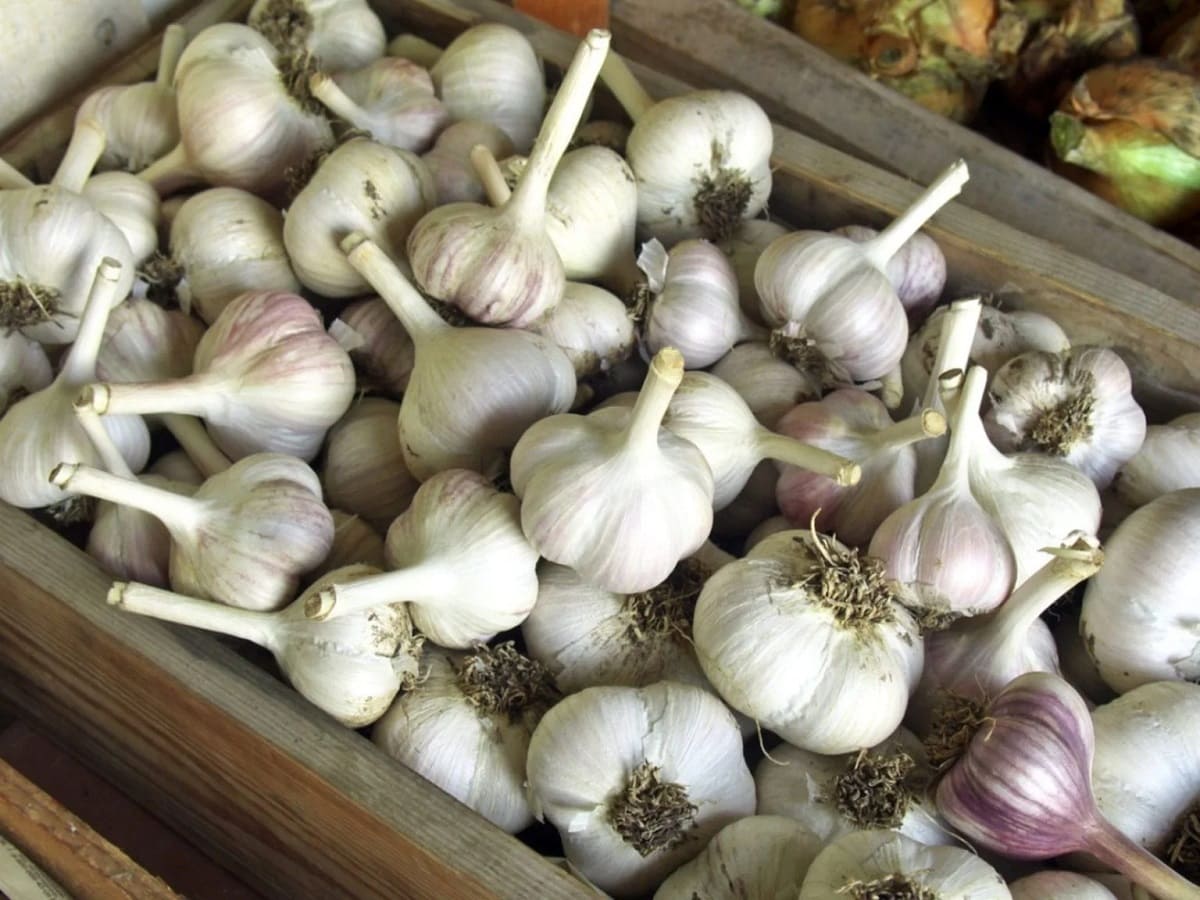
Best Storage Methods for Garlic Bulbs
To maximize the shelf life and quality of your garlic bulbs, it’s important to choose the right storage method. Here are some of the best storage methods for garlic:
- Storing garlic bulbs in a cool and dry place: One of the simplest and most effective ways to store garlic is by keeping it in a cool and dry location. This could be a pantry, cellar, or any area with consistent temperatures between 50-60°F (10-15°C) and low humidity. Place the garlic bulbs in a single layer in a well-ventilated container or basket, ensuring they are not exposed to direct sunlight.
- Using mesh bags for garlic storage: Mesh bags or breathable containers are ideal for storing garlic. These bags allow for airflow while protecting the bulbs from light and potential damage. Place the garlic bulbs inside a mesh bag and hang it in a cool and dry area.
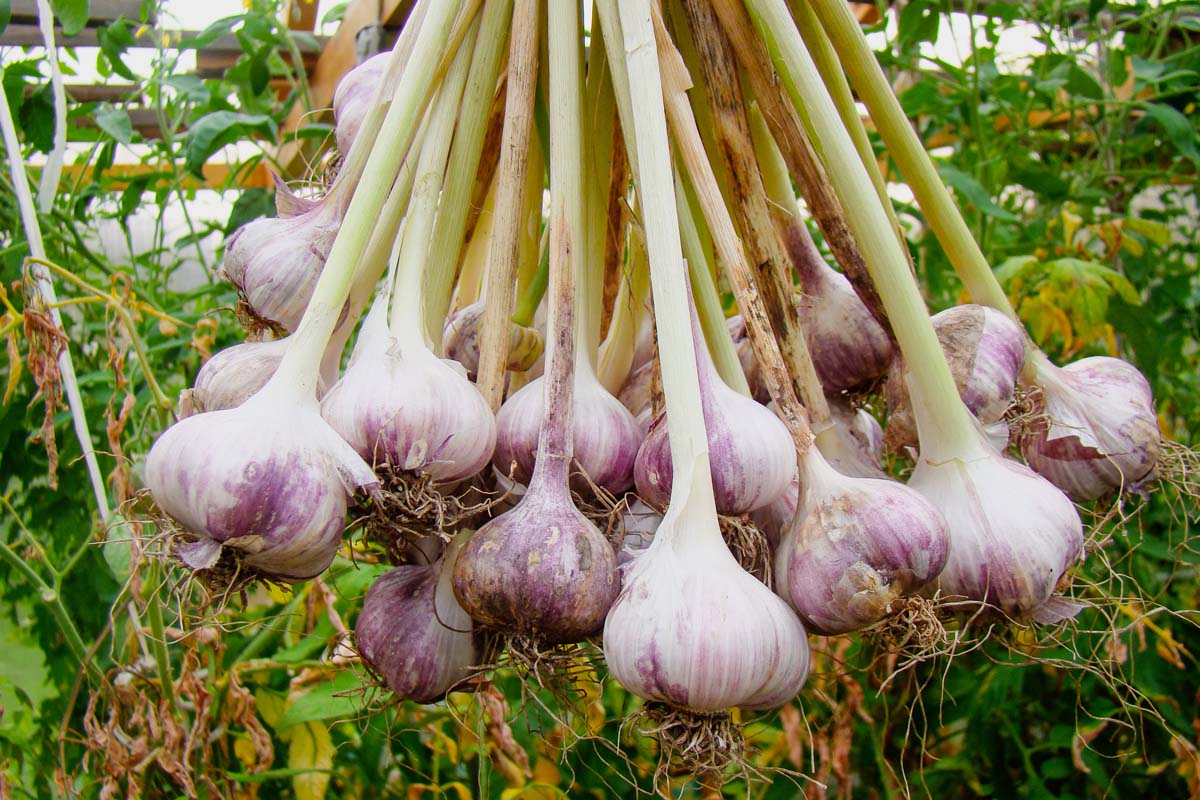
- Storing garlic bulbs in a braided form: An aesthetically pleasing storage method is to braid garlic bulbs together. This not only provides proper air circulation but also creates a decorative display. To braid garlic bulbs, tie the stems together and braid them, leaving a loop at the top for hanging. Hang the garlic braid in a cool and dark place.
- Storing garlic bulbs in a paper bag: If you prefer a simpler approach, you can store garlic bulbs in a paper bag. Place the bulbs in a single layer inside the bag, fold the top to close it, and store it in a cool and dry location. The paper bag helps absorb excess moisture while still allowing for air circulation.
Remember to regularly check your stored garlic bulbs for any signs of spoilage or sprouting. Remove any bulbs that show signs of deterioration to prevent them from affecting the surrounding bulbs.
With the proper storage methods and a little maintenance, your garlic bulbs can stay fresh and flavorful for several months, providing you with a steady supply of this versatile and aromatic herb.
Now that you know the best storage methods for garlic bulbs, it’s crucial to be able to identify signs of spoilage in stored garlic. We will discuss this in the next section.
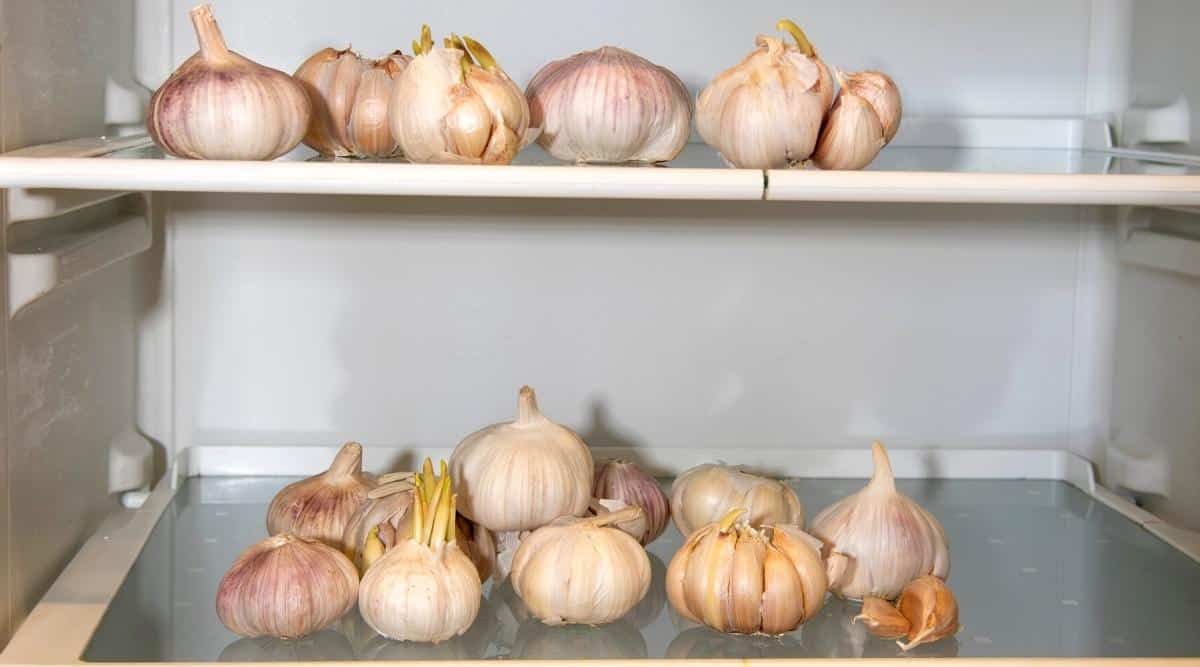
Store garlic bulbs in a cool, dry place with good air circulation, such as a mesh bag or basket. Avoid storing in the refrigerator or in plastic bags, as this can cause mold and sprouting.
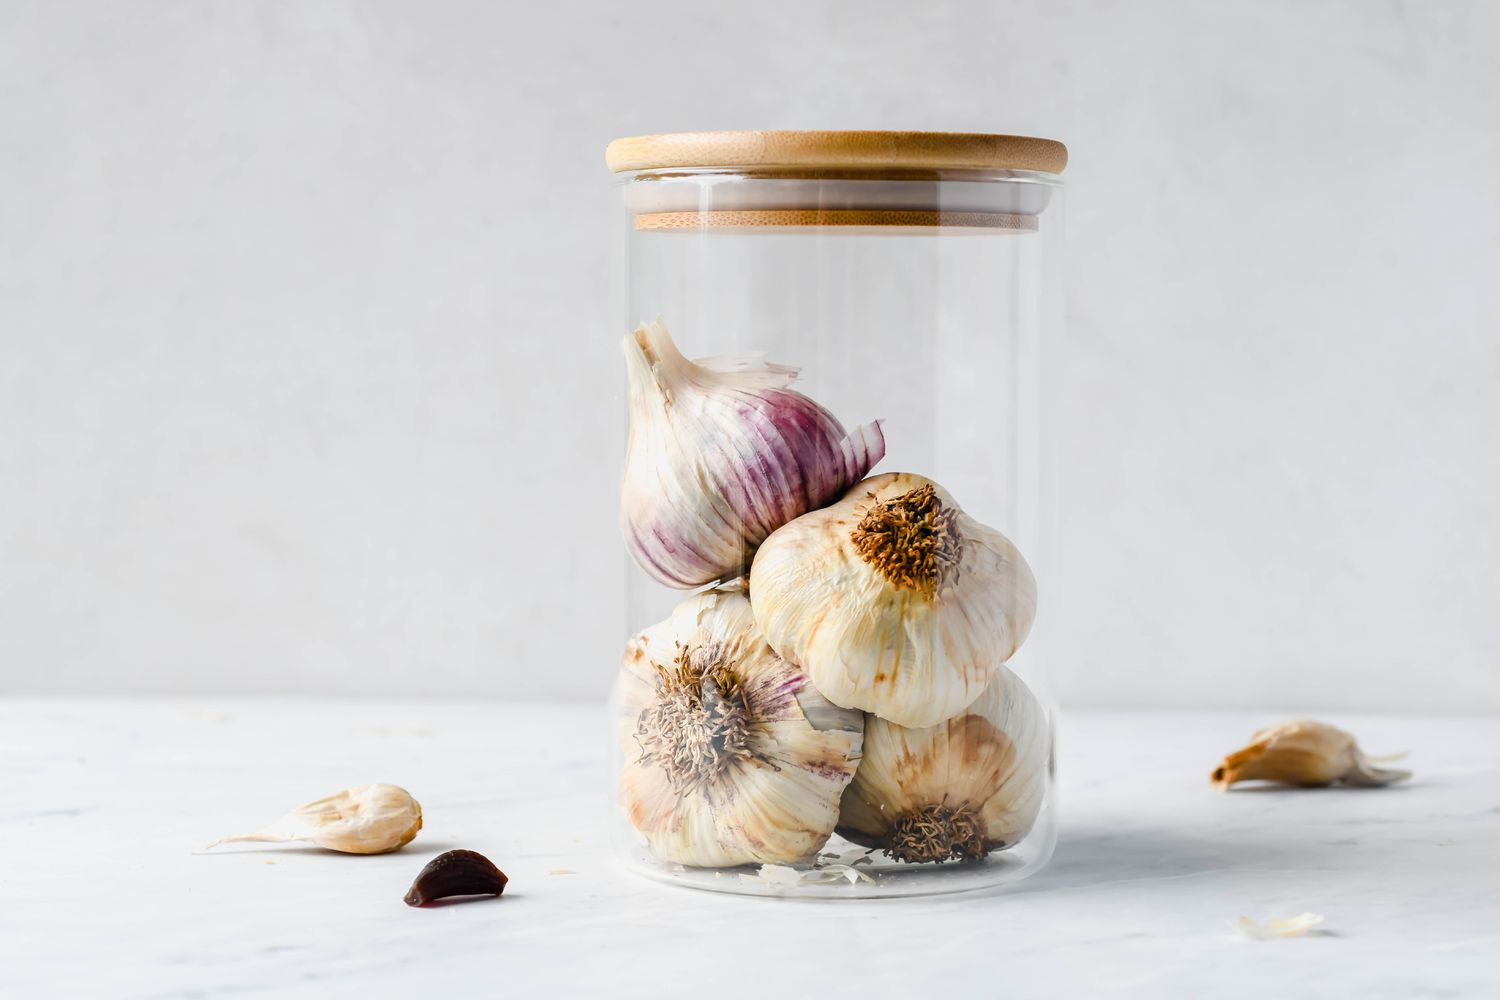
Storing Garlic Bulbs in a Cool and Dry Place
One of the simplest and most effective methods of storing garlic bulbs is by keeping them in a cool and dry environment. This storage method helps preserve the freshness and flavor of the garlic for an extended period. Here’s how to store garlic bulbs in a cool and dry place:
- Select a suitable location: Choose a cool and dry place in your home for storing the garlic bulbs. This could be a pantry, cellar, basement, or any other area where the temperature remains relatively constant and low.
- Ensure proper ventilation: Good air circulation is crucial when storing garlic bulbs. Make sure the storage area is well-ventilated to prevent the buildup of moisture, which can lead to mold or rot. Avoid storing garlic in plastic bags or airtight containers that can trap moisture.
- Prepare the garlic bulbs: Before storing the garlic bulbs, make sure they are properly cured and cleaned. Allow the bulbs to dry and remove any excess soil or loose outer layers. It’s best to leave the protective skin intact to preserve the bulbs’ quality and prevent moisture loss.
- Arrange the garlic bulbs: Place the garlic bulbs in a single layer in a well-ventilated container or basket. Ensure that there is enough space between the bulbs to allow for proper air circulation. You can also use a mesh bag or hang the garlic bulbs individually.
- Store away from sunlight: Exposure to light can trigger sprouting in garlic bulbs and affect their quality. Store the garlic in a dark area or use a container that provides adequate darkness to prevent premature sprouting.
- Monitor regularly: Regularly check on the stored garlic to ensure there are no signs of spoilage or sprouting. Remove any bulbs that show signs of deterioration to prevent them from affecting the rest of the batch.
By storing your garlic bulbs in a cool and dry place, you can extend their shelf life and maintain their flavor for several months. Remember to use the oldest bulbs first to ensure that none go to waste.
Now that you know how to store garlic in a cool and dry place, there are other storage methods you can explore. Let’s learn about using mesh bags for garlic storage in the next section.
Using Mesh Bags for Garlic Storage
Using mesh bags for storing garlic bulbs is a popular and effective method that provides proper airflow and protection while preserving the freshness and quality of the garlic. Mesh bags allow for ventilation, preventing moisture buildup and reducing the risk of mold or rot. Here’s how to store garlic bulbs using mesh bags:
- Choose the right mesh bag: Select a mesh bag that has small enough openings to prevent the garlic bulbs from falling through, but large enough to allow for adequate airflow. You can find mesh bags specifically designed for produce storage at gardening or kitchen supply stores.
- Prepare the garlic bulbs: Ensure that the garlic bulbs have gone through the curing process and are fully dry. Remove excess soil or loose outer layers, taking care not to damage the cloves or remove too many layers that can expose them to moisture.
- Place the garlic bulbs in the mesh bag: Gently place the garlic bulbs inside the mesh bag, ensuring that they are not overcrowded. Leave some space between each bulb to promote air circulation. You can also tie the top of the bag to secure the garlic bulbs.
- Hang the mesh bag in a cool and dry area: Find a cool and dry location where you can hang the mesh bag of garlic bulbs. This can be a pantry, cellar, or any other suitable storage area. Ensure that the area has proper ventilation to prevent moisture buildup.
- Check regularly for signs of spoilage: Periodically inspect the garlic bulbs stored in the mesh bag for any signs of spoilage or sprouting. Remove any bulbs that show signs of deterioration to prevent them from affecting the rest of the batch.
Storing garlic bulbs in mesh bags allows for proper airflow and helps maintain the quality of the bulbs for an extended period. The mesh bags also provide protection from light and physical damage, prolonging the shelf life of the garlic.
Now that you know how to use mesh bags for garlic storage, another storage method you can explore is braiding the garlic bulbs. We’ll discuss this method in the next section.
Storing Garlic Bulbs in a Braided Form
Storing garlic bulbs in a braided form not only provides a functional storage method but also adds a touch of charm to your kitchen or pantry. Braiding garlic bulbs allows for proper air circulation while creating a visually appealing display. Here’s how to store garlic bulbs in a braided form:
- Prepare the garlic bulbs: Ensure that the garlic bulbs have gone through the curing process and are completely dry. Remove any excess soil or loose outer layers, taking care not to damage the cloves or remove too many layers that can expose them to moisture.
- Group the garlic bulbs: Group together three or four garlic bulbs with similar stem lengths. This will make the braiding process easier and ensure a balanced braid.
- Tie the tops of the garlic bulbs: Gather the stems of the garlic bulbs and tie them tightly at the top, leaving a length of stem to work with. The tied tops will serve as the starting point for the braid.
- Begin the braiding process: Separate the garlic stems into three sections and begin braiding them, just as you would braid hair. Cross the right section over the middle section, then cross the left section over the new middle section. Repeat this process, adding new garlic bulbs to each side as you go.
- Continue braiding: As you keep braiding, add additional garlic bulbs by crossing their stems into the braid. Alternate between left and right sides to ensure an even distribution and a balanced appearance.
- Secure the end of the braid: Once all the garlic bulbs have been braided, secure the end of the braid by tying it tightly with a string or twine. Leave a loop at the top for hanging the braid if desired.
- Hang the garlic braid in a cool and dry area: Find a suitable location, such as a cool pantry or dry storage room, to hang the garlic braid. Ensure that the area has proper ventilation to prevent moisture buildup.
- Monitor regularly for signs of spoilage: Regularly check the garlic bulbs in the braided form for any signs of mold, rot, or sprouting. Remove any bulbs that show signs of deterioration to prevent them from affecting the rest of the braid.
Storing garlic bulbs in a braided form not only keeps them organized and easily accessible but also adds a rustic and decorative touch to your storage area. Enjoy the convenience and aesthetic appeal of a beautifully braided garlic display in your kitchen.
In the next section, we will explore another storage method using paper bags for storing garlic bulbs.
Storing Garlic Bulbs in a Paper Bag
Using a paper bag is a simple and cost-effective method for storing garlic bulbs. Paper bags provide a breathable environment for the bulbs while protecting them from light and excess moisture. Here’s how to store garlic bulbs in a paper bag:
- Choose a paper bag: Select a paper bag that is sturdy and free from any coatings or prints. It should be big enough to hold the garlic bulbs comfortably while allowing some air circulation.
- Prepare the garlic bulbs: Make sure the garlic bulbs have been properly cured and are fully dry. Brush off any loose dirt or outer layers, being careful not to damage the cloves or expose them to moisture.
- Place the garlic bulbs in the bag: Put the garlic bulbs in a single layer inside the paper bag. Avoid overcrowding to ensure proper air circulation and minimize the risk of spoilage. Fold the top of the bag to close it, leaving some room for air movement.
- Store in a cool and dry area: Find a cool and dry location to store the paper bag of garlic bulbs. This can be a pantry, cupboard, or any area away from direct sunlight and excessive moisture. The area should have good ventilation to prevent the garlic from becoming damp.
- Regularly check for signs of spoilage: Periodically inspect the garlic bulbs stored in the paper bag for any signs of mold, sprouting, or softening. Remove any bulbs that show signs of deterioration promptly to avoid spoilage spreading to the rest of the batch.
Storing garlic bulbs in a paper bag is a budget-friendly option that offers protection from light and certain amount of air circulation. Just ensure that the paper bag is stored in a suitable environment to maintain the garlic’s freshness and flavor.
Now that you know how to store garlic bulbs in a paper bag, let’s move on to the next section and learn how to check stored garlic for signs of spoilage.
Checking Stored Garlic for Signs of Spoilage
Regularly checking stored garlic for signs of spoilage is essential to ensure that the rest of the batch remains fresh and of high quality. Here are some key indicators to look for when checking your stored garlic for spoilage:
- Mold or discoloration: Inspect the garlic bulbs for any visible signs of mold, such as fuzzy patches or a greenish tinge. Discoloration, especially soft or dark spots, can also indicate spoilage.
- Sprouting: Check for any green shoots or sprouts emerging from the garlic bulbs. Sprouting indicates that the bulbs are no longer suitable for long-term storage and should be used promptly.
- Foul odor: Pay attention to any unusual or offensive odors coming from the stored garlic bulbs. A strong, rotten smell is a clear sign of spoilage.
- Softness or shriveling: Gently squeeze the garlic bulbs to check for any signs of softness or shriveling. Healthy garlic bulbs should feel firm and plump.
If you notice any of these signs of spoilage in your stored garlic, it’s important to take immediate action to prevent further spoilage from affecting the rest of your garlic supply. Discard any garlic bulbs that show signs of mold, sprouting, or deterioration.
Regularly checking your stored garlic for spoilage allows you to identify and address any issues early on, ensuring that you can enjoy fresh and flavorful garlic for as long as possible.
Now that we have covered the steps for checking stored garlic for spoilage, let’s conclude our guide on storing garlic before planting.
Conclusion
Properly storing garlic before planting is crucial for preserving its freshness, flavor, and quality. By following the right storage methods, you can extend the shelf life of your garlic bulbs and ensure they remain in optimal condition for planting or culinary use.
From harvesting the bulbs to preparing them for storage, there are key steps to follow. Harvest garlic bulbs when the foliage turns yellow or brown and the cloves are fully formed. Cure the bulbs in a well-ventilated and dry area to toughen the outer layers and develop their flavors. Clean and trim the bulbs before storing them to protect them from moisture loss and damage.
Consider important factors such as temperature, humidity, airflow, and light when choosing a storage location for your garlic. Storing garlic in a cool and dry place, such as a pantry or cellar, is ideal. Alternatively, you can use mesh bags to allow for proper airflow, or braid the garlic bulbs for a decorative and functional storage solution. Paper bags are also a simple and effective option for storing garlic bulbs.
Regularly checking stored garlic for signs of spoilage, such as mold, sprouting, or softness, is crucial. Removing any spoiled bulbs promptly helps prevent the spoilage from spreading to the rest of the batch.
By following these guidelines and taking the necessary steps, you can ensure your garlic bulbs remain fresh and of high quality until they are ready for planting or culinary use.
Whether you’re a garlic lover or a keen gardener, practicing proper storage techniques will enhance your garlic-growing experience and allow you to savor the delightful flavors of fresh garlic throughout the year.
Now you have all the information you need to store garlic before planting. So go ahead, harvest those bulbs, prepare them for storage, and enjoy the delights of plump and flavorful garlic from your own garden or from the store-bought bulbs that last longer.
Frequently Asked Questions about How To Store Garlic Before Planting
Was this page helpful?
At Storables.com, we guarantee accurate and reliable information. Our content, validated by Expert Board Contributors, is crafted following stringent Editorial Policies. We're committed to providing you with well-researched, expert-backed insights for all your informational needs.


0 thoughts on “How To Store Garlic Before Planting”