Articles
How To Store Bulbs Before Planting
Modified: December 7, 2023
Learn how to properly store bulbs before planting in this informative articles. Get expert tips and tricks to ensure successful growth and blooming.
(Many of the links in this article redirect to a specific reviewed product. Your purchase of these products through affiliate links helps to generate commission for Storables.com, at no extra cost. Learn more)
Introduction
Welcome to the world of bulb gardening! Whether you’re a seasoned gardener or a novice with a green thumb, learning how to store bulbs before planting is an important skill to master. Bulbs are fascinating plants that store nutrients and energy underground, allowing them to survive winter dormancy and bloom beautifully in the spring. By properly storing bulbs, you can ensure their health and vitality, paving the way for a successful growing season.
In this article, we will guide you through the process of storing bulbs before planting. From choosing the right bulbs to preparing them for storage and selecting an ideal storage location, we will cover every aspect of bulb storage. Additionally, we will share tips on monitoring and caring for your stored bulbs, as well as preparing them for planting when the time is right.
So, let’s dig in and discover how to store bulbs effectively to ensure a spectacular display of color in your garden!
Key Takeaways:
- Mastering the art of storing bulbs before planting is crucial for preserving their health and ensuring a vibrant garden display. From choosing the right bulbs to preparing them for storage, each step plays a vital role in their successful growth.
- Properly preparing and caring for stored bulbs, whether in containers or in the ground, is essential for their long-term viability. Monitoring their health, selecting ideal storage conditions, and preparing them for planting are key to a successful transition from storage to the garden.
Read more: How To Store Tulip Bulbs Before Planting
Choosing the Right Bulbs
When it comes to choosing bulbs for your garden, there are a few factors to consider. First and foremost, you should select bulbs that are appropriate for your hardiness zone. Different bulbs have different temperature requirements, so it’s important to choose ones that will thrive in your specific climate. You can consult a hardiness zone map to determine which bulbs are best suited for your area.
Another important consideration is the type of bulb. There are various types to choose from, including tulips, daffodils, hyacinths, crocuses, and many more. Each type has its own unique characteristics and blooming times, so you can create a vibrant and diverse garden by selecting a variety of bulbs. Take into account their colors, shapes, and sizes to create an aesthetically pleasing display.
Additionally, it’s essential to choose bulbs that are healthy and disease-free. Inspect bulbs for any signs of damage, rot, or mold. Ensure that they are firm and free from soft spots or blemishes. Healthy bulbs will have a firm and plump texture, indicating that they are packed with nutrients and ready to bloom.
Furthermore, consider the bloom time of the bulbs. Some bulbs bloom in the spring, while others bloom in the summer or fall. By selecting a combination of early, mid, and late-blooming bulbs, you can enjoy a continuous display of flowers throughout the gardening season.
Lastly, take into account the specific growing conditions required by each type of bulb. Some bulbs prefer full sun, while others thrive in partial shade. Consider the soil type and drainage requirements as well. By choosing bulbs that are compatible with your garden’s conditions, you can ensure their success when it’s time to plant them.
By carefully selecting the right bulbs for your garden, you will set the stage for a beautiful and thriving display of colors. Taking the time to choose healthy, suitable bulbs will pay off when it’s time to store and plant them.
Preparing Bulbs for Storage
Before you store your bulbs, it’s important to prepare them properly to ensure their long-term viability. The following steps will help you get your bulbs ready for storage:
- Trimming: Start by removing any foliage or flower stalks from the bulbs. Trim them back to about an inch above the bulb itself. This helps conserve energy and prevents moisture loss during storage.
- Cleaning: Gently brush off any loose dirt or debris from the bulbs. If there are stubborn soil clumps, you can rinse the bulbs in water and let them dry completely before storing.
- Drying: Place the bulbs in a well-ventilated area to dry for a few days. This step is crucial as it helps prevent rot and mold formation during storage.
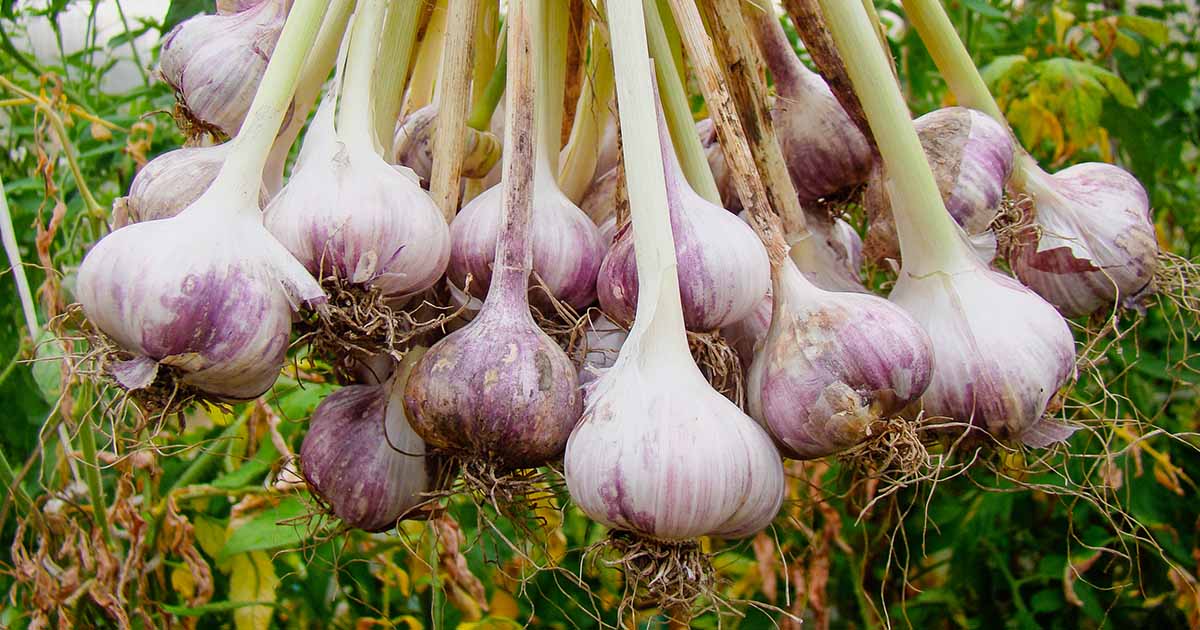
- Curing: Some bulbs, like garlic bulbs, benefit from a curing period. This involves storing the bulbs in a dry, cool, and dark place for several weeks to allow them to develop their flavors and textures before long-term storage.
- Inspecting: Take a close look at each bulb to ensure there are no signs of damage or disease. Discard any bulbs that appear soft, mushy, or infected. This will help prevent the spread of diseases and keep your stored bulbs healthy.
By following these steps, you will ensure that your bulbs are clean, dry, and disease-free before they go into storage. Properly preparing the bulbs sets the stage for successful long-term storage and healthy growth when you plant them in the future.
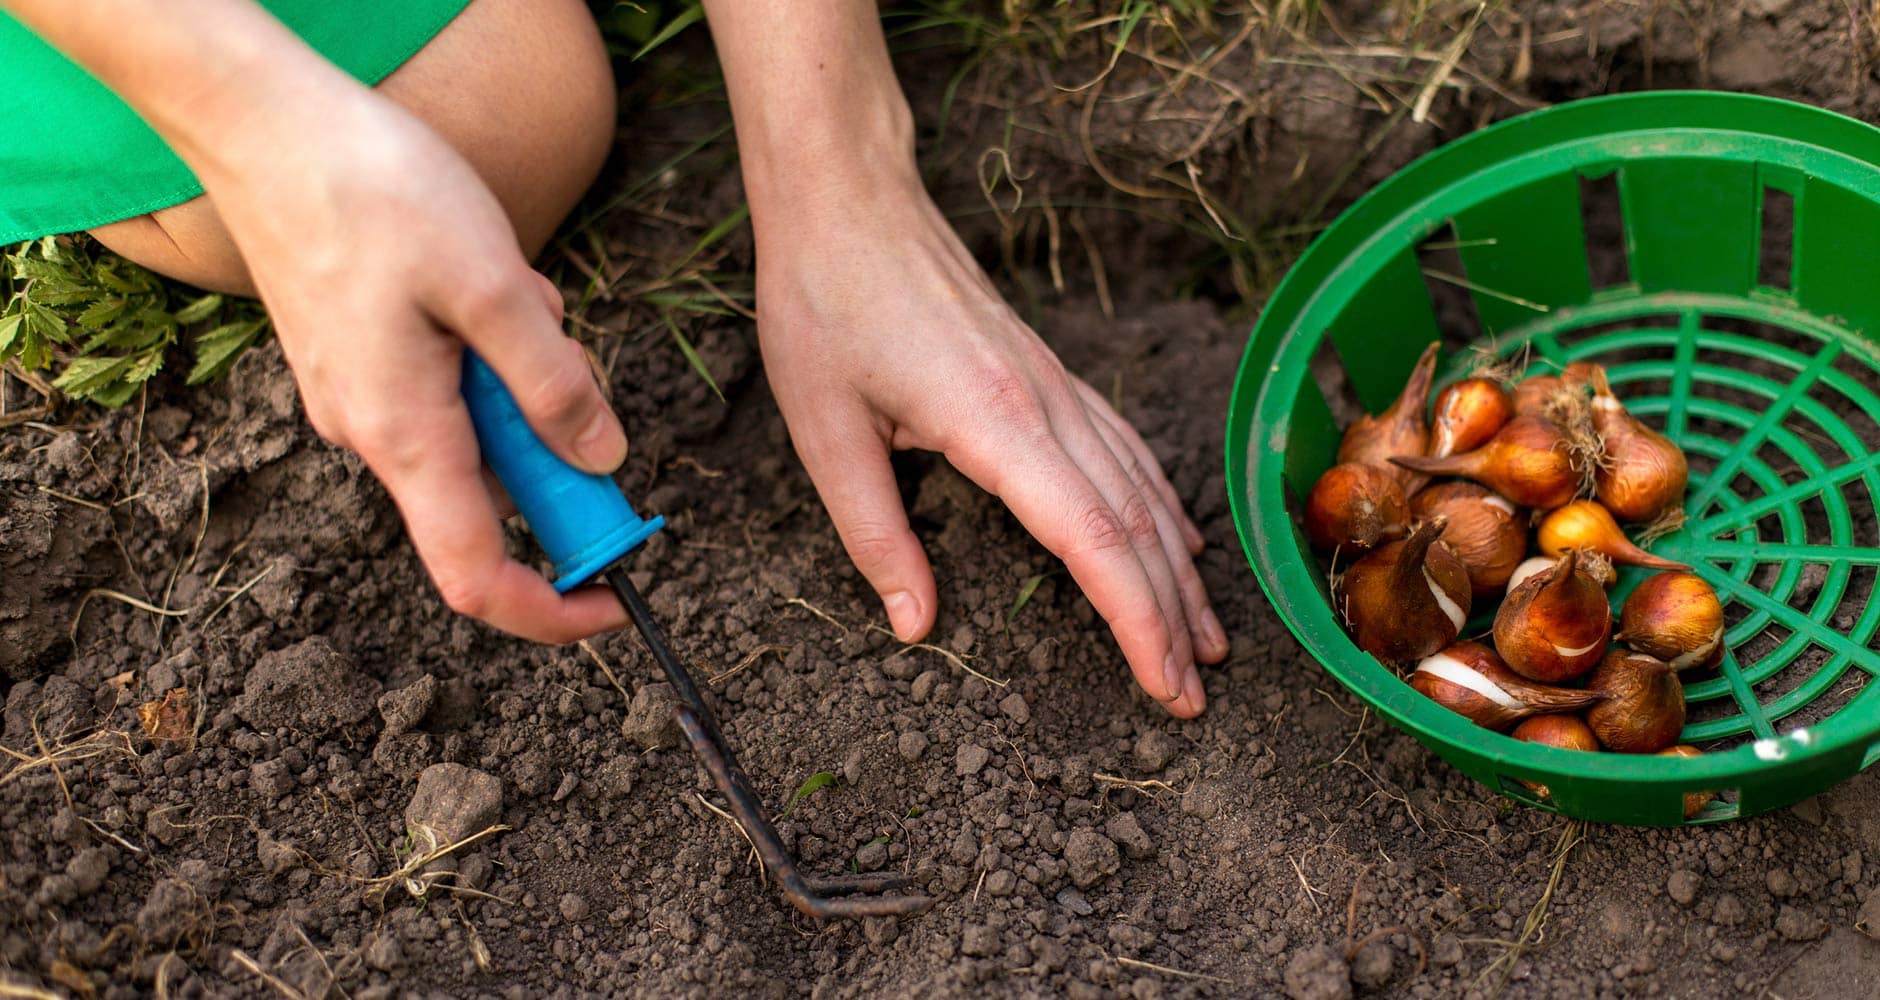
Assessing Bulb Health
Before storing your bulbs, it’s important to assess their health to ensure that you are only storing the best specimens. Healthy bulbs have a higher chance of surviving the dormant period and thriving when it’s time to plant them. Here are some key factors to consider when assessing bulb health:
- Firmness: Healthy bulbs should feel firm and solid to the touch. Avoid bulbs that are soft, mushy, or have any signs of decay. Soft bulbs are likely diseased and may infect other bulbs in storage.
- No signs of rot or mold: Inspect the bulbs carefully for any signs of rot or mold. This can manifest as dark, mushy areas or fuzzy growth on the surface of the bulb. Rot and mold can spread and damage other bulbs, so it’s important to discard any bulbs that show these symptoms.
- No visible damage: Healthy bulbs should be free from any physical damage, such as cuts, bruises, or punctures. Damaged bulbs are more prone to infection and may not produce healthy growth in the future.
- No signs of pests: Check the bulbs for any signs of insect or pest damage. Look for holes, tunnels, or chewed areas on the bulbs. If you notice any pests, discard the affected bulbs to prevent the infestation from spreading to other stored bulbs.
- Uniform size and shape: Select bulbs that are uniform in size and shape for storage. Bulbs that are overly small or misshapen may not have enough energy reserves to survive the dormant period and produce healthy growth.
By carefully assessing the health of your bulbs before storing them, you can ensure that you are only storing the best specimens. This will increase the chances of successful storage and vibrant growth when planting time arrives. Remember, it’s better to discard unhealthy bulbs to prevent any potential spread of diseases or pests.
Selecting an Ideal Storage Location
Choosing the right storage location for your bulbs is crucial to their long-term survival and health. The ideal storage conditions will vary depending on the type of bulbs you are storing, but there are some general guidelines to keep in mind:
- Temperature: Most bulbs require cool, dry storage conditions. Aim for a storage temperature between 40 to 50 degrees Fahrenheit (4 to 10 degrees Celsius). Avoid storing bulbs in areas that are susceptible to extreme temperature fluctuations or excessive heat, as this can damage the bulbs.
- Humidity: Bulbs prefer low humidity levels to prevent mold and rot. Choose a storage area that is dry and well-ventilated. Avoid storing bulbs in damp basements or areas prone to high humidity, as this can cause the bulbs to rot.
- Light: Bulbs should be stored in a cool and dark location. Exposure to light can trigger premature sprouting and reduce the energy reserves of the bulbs. Use opaque containers or paper bags to keep the bulbs in darkness, and avoid storing them in areas with direct sunlight.
- Air circulation: Proper air circulation is essential to prevent the buildup of moisture and maintain bulb health. Make sure the storage location has good ventilation, allowing air to circulate around the bulbs and minimize the risk of mold or disease.
- Container choice: If storing bulbs in containers, choose breathable containers such as mesh bags or wooden crates. This allows for air circulation and helps prevent the buildup of excess moisture. Avoid using airtight plastic bags, as they can trap moisture and lead to rot.
When selecting a storage location, consider these factors along with the specific requirements of the bulbs you are storing. Different types of bulbs may have slightly different preferences for storage conditions, so it’s important to research their specific needs. By providing an ideal storage environment, you can ensure the long-term health and viability of your stored bulbs.
Store bulbs in a cool, dry place with good air circulation before planting. Avoid storing them in airtight containers or in areas with high humidity to prevent mold or rot.
Read more: How To Store Onion Plants Before Planting
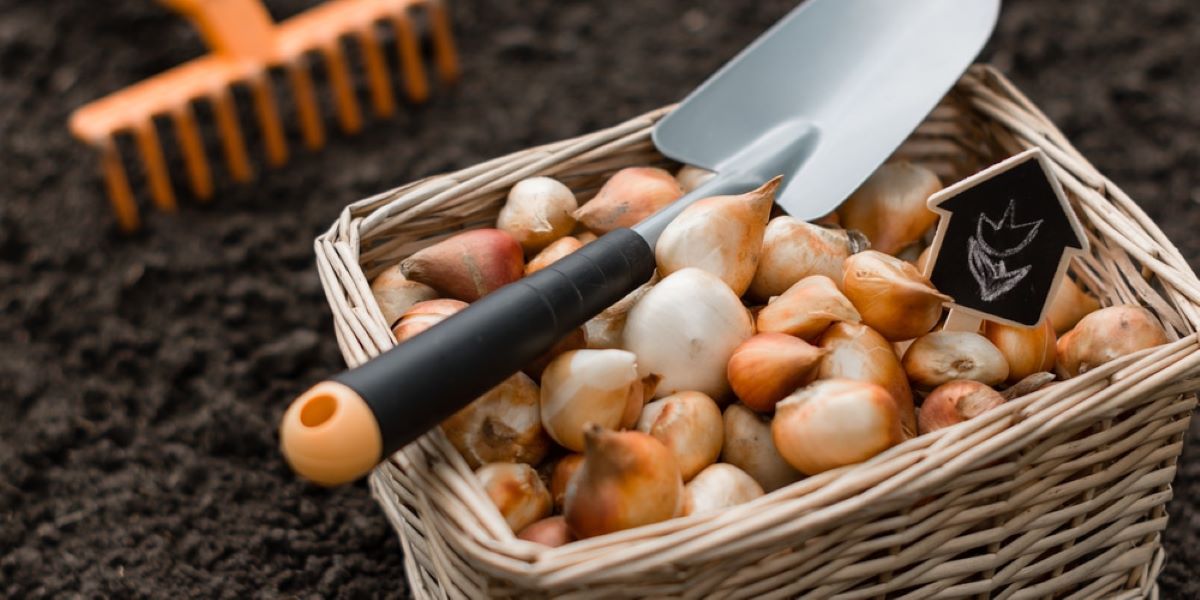
Storing Bulbs in Containers
If you prefer to store your bulbs in containers rather than in the ground, there are a few important considerations to keep in mind. Storing bulbs in containers can be a convenient option, especially if you have limited space or if you want to move the bulbs around easily. Here’s a step-by-step guide on how to store bulbs in containers:
- Choose the right containers: Opt for breathable containers such as mesh bags or wooden crates. Avoid airtight plastic bags or containers as they can trap moisture and promote rot.
- Prepare the containers: Clean the containers thoroughly before use to ensure they are free of any contaminants. Line the bottom with a layer of perlite or vermiculite to provide aeration and help absorb excess moisture.
- Layer the bulbs: Place a layer of bulbs in the container, making sure they are not touching each other. Bulbs that are in direct contact may transfer diseases or rot to one another.
- Add additional layers: If you have more bulbs to store, add additional layers, ensuring there is enough space between each bulb. You can place a layer of newspaper or paper towels between layers to prevent bulbs from rubbing against each other.
- Label the containers: It’s important to label each container with the type of bulbs stored and the date of storage. This will help you keep track of your bulbs and ensure you use them in the correct planting season.
- Store in a suitable location: Place the containers in a cool, dry, and dark area with good air circulation. Ideally, the temperature should be between 40 to 50 degrees Fahrenheit (4 to 10 degrees Celsius). Avoid storing the containers in areas prone to extreme temperature fluctuations or high humidity.
- Regularly inspect and monitor: Check on your stored bulbs periodically to ensure they are not showing signs of rot or mold. If any bulbs are deteriorating, remove them immediately to prevent further damage to the other bulbs.
Storing bulbs in containers provides a convenient and organized way to keep your bulbs safe and easily accessible. By following these steps and providing the ideal storage conditions, you can ensure the health and longevity of your stored bulbs until planting time arrives.
Storing Bulbs in the Ground
If you prefer to store your bulbs directly in the ground during their dormant period, you can provide them with natural insulation and protection against fluctuating temperatures. Here’s how to store bulbs in the ground:
- Choose the right location: Select an area in your garden that has good drainage and is least likely to collect excessive moisture. Avoid low-lying areas or spots prone to flooding.
- Prepare the ground: Clear the area of any weeds or debris. Loosen the soil to a depth of about 8 to 10 inches (20 to 25 cm) to create a loose and well-draining bed for the bulbs.
- Space the bulbs: Dig individual holes or trenches based on the recommended planting depth and spacing for each type of bulb. Make sure to follow the specific instructions provided with the bulbs.
- Position the bulbs: Place the bulbs in their respective holes or trench, making sure they are positioned upright and at the correct depth. Cover them with soil, gently firming it around the bulbs to eliminate air pockets.
- Protect the bulbs: To provide some additional protection against extreme temperatures and potential damage from rodents, cover the area with a layer of mulch. This will help insulate the bulbs and keep them secure in the ground.
- Monitor the soil moisture: While the bulbs are in storage, it’s important to monitor the soil moisture levels. Ensure that the soil remains moist but not overly saturated. Avoid overwatering, as this can lead to rotting.
- Inspect regularly: Periodically check on your stored bulbs to ensure they are not showing signs of disease or pest damage. Remove any bulbs that are deteriorating to prevent the spread of diseases to other bulbs.
Storing bulbs in the ground provides them with natural protection and insulation, mimicking their natural environment. However, it’s important to note that not all bulb varieties are suitable for in-ground storage, so be sure to check the specific requirements of the bulbs you are planting. By giving your bulbs the right conditions and monitoring their well-being, you can successfully store them in the ground until the springtime blooming season.
Monitoring and Caring for Stored Bulbs
Once your bulbs are stored, it’s important to periodically check on them and provide the necessary care to ensure their health and viability. Here are some essential tips for monitoring and caring for stored bulbs:
- Regularly inspect the bulbs: Check on your stored bulbs every few weeks to assess their condition. Look for any signs of rot, mold, or pest infestation. Remove any bulbs that are deteriorating to prevent the spread of diseases or pests to the healthy bulbs.
- Adjust storage conditions if needed: Monitor the temperature and humidity levels in the storage area. Make adjustments if necessary to maintain the optimal storage conditions. Remember to aim for a temperature between 40 to 50 degrees Fahrenheit (4 to 10 degrees Celsius) and low humidity levels.
- Prevent moisture buildup: Excess moisture can lead to rot and mold formation. Ensure that the storage area is well-ventilated to promote air circulation. Avoid watering the bulbs during storage unless absolutely necessary.
- Protect from extreme temperatures: If the storage area is susceptible to extreme temperature fluctuations, consider insulating the bulbs further with an additional layer of mulch or covering them with burlap or other protective materials.
- Label and organize: Keep your stored bulbs well-organized and labeled. This will help you easily identify the different types of bulbs and their planting times. Proper organization ensures that the bulbs are used in the correct season.
- Monitor storage containers: If you choose to store bulbs in containers, check the condition of the containers regularly. Ensure that they are clean, intact, and free from any signs of damage or pests.
- Maintain records: Keep track of the storage duration and any observations you make about the stored bulbs. This information will help you make informed decisions regarding the plant’s health and future care.
By actively monitoring your stored bulbs and providing the necessary care, you can increase their chances of survival and successful growth when it’s time to plant them. Attend to any issues promptly to prevent the spread of diseases or damage to other bulbs. With proper care, your stored bulbs will be ready for a vibrant and beautiful display in the garden.
Preparing Bulbs for Planting
When the time comes to plant your stored bulbs, it’s important to properly prepare them to ensure optimal growth and blooming. Tending to a few key steps before planting can greatly improve their chances of success. Here’s how to prepare bulbs for planting:
- Remove from storage: Take the bulbs out of their storage containers or the ground. Handle them carefully to avoid damaging or bruising them.
- Inspect the bulbs: Examine each bulb closely for any signs of damage, disease, or pest infestation. Discard any bulbs that are soft, mushy, or showing signs of rot or mold. This ensures that only healthy bulbs are planted.
- Soak the bulbs: Some types of bulbs, such as lilies, benefit from a pre-planting soak. Fill a bucket with lukewarm water and place the bulbs in it for a couple of hours or as directed by the specific bulb’s instructions. This hydrates the bulbs and helps stimulate growth.
- Prepare the planting area: Clear the planting area of any weeds or debris. Loosen the soil and amend it with compost or well-rotted organic matter to improve nutrient content and drainage, if necessary.
- Plant at the appropriate depth: Refer to the specific instructions for each type of bulb regarding the recommended planting depth. Generally, most bulbs should be planted at a depth of two to three times their own height.
- Position bulbs correctly: Place the bulbs in the ground with the pointed side facing upwards. If the bulbs don’t have a distinct shape, plant them horizontally.
- Space bulbs appropriately: Follow the spacing guidelines provided for each type of bulb to allow sufficient room for growth. Overcrowding can hinder bulb development and lead to diminished blooms.
- Backfill and water: Once the bulbs are positioned at the correct depth and spacing, cover them with soil and gently firm it around them. Give the newly planted bulbs a thorough watering to settle the soil and provide moisture.
- Apply mulch: To help conserve moisture and suppress weeds, apply a layer of organic mulch around the planted bulbs. This helps maintain a consistent soil temperature and protects the bulbs.
- Monitor and provide care: Keep an eye on the newly planted bulbs and provide appropriate care, such as regular watering, as needed. Follow specific care instructions for each type of bulb to ensure optimal growth.
By properly preparing your bulbs for planting and giving them the attention they need, you’ll set them up for healthy growth and stunning blooms. Following these steps will help ensure that your stored bulbs transition smoothly from storage to the garden, rewarding you with a beautiful display of colors and fragrances.
Read more: How To Store Garlic Before Planting
Conclusion
Learning how to store bulbs before planting is a valuable skill for every gardener. By following the proper steps and providing the ideal conditions, you can preserve the health and vitality of your bulbs, ensuring a spectacular and vibrant display in your garden. From choosing the right bulbs to assessing their health, selecting a suitable storage location, and preparing them for planting, each step plays a vital role in the success of your bulbs’ growth.
By carefully selecting healthy bulbs and preparing them for storage, you are laying the foundation for success. Trimming, cleaning, and drying the bulbs ensure their readiness for the dormant period. Assessing their health and discarding any damaged or diseased bulbs helps prevent the spread of issues to the remaining bulbs.
Whether you choose to store your bulbs in containers or in the ground, selecting an appropriate storage location is essential. Proper temperature, humidity, light, and air circulation are crucial factors in maintaining bulb health. Storing bulbs in containers allows for easy organization and mobility, while storing them in the ground provides natural insulation and protection during the dormant period.
Throughout the storage period, it is important to monitor and care for the stored bulbs. Regular inspection helps identify any issues early on, allowing for prompt action. Checking the storage conditions, preventing moisture buildup, and protecting the bulbs from extreme temperatures are key aspects of caring for stored bulbs.
When the time comes to plant your stored bulbs, taking the necessary preparation steps ensures their successful transition from storage to the garden. Inspecting the bulbs, soaking them if required, preparing the planting area, and planting at the appropriate depth and spacing are vital for their growth and development.
In conclusion, mastering the art of storing bulbs before planting allows you to preserve and nurture the potential of these fascinating plants. By following the guidelines outlined in this article, you can embark on a successful journey as a bulb gardener, savoring the joy of watching your stored bulbs bloom into stunning displays of color and beauty.
Frequently Asked Questions about How To Store Bulbs Before Planting
Was this page helpful?
At Storables.com, we guarantee accurate and reliable information. Our content, validated by Expert Board Contributors, is crafted following stringent Editorial Policies. We're committed to providing you with well-researched, expert-backed insights for all your informational needs.


0 thoughts on “How To Store Bulbs Before Planting”